Blog

  • Creative Ways to Style Your TV Stand and Console Table for a Chic Living Room Makeover

    A TV stand or console table often serves as the centerpiece of a living room, yet it’s frequently overlooked when it comes to styling. These pieces offer a wonderful opportunity to blend functionality with personal expression, transforming what might seem like just a spot for electronics into a carefully curated display that elevates your entire space. Whether your style leans toward modern minimalism, cozy boho, or timeless elegance, thoughtfully styling your TV stand can instantly refresh your living room and make it feel more inviting and polished.

    In this post, we’ll explore creative ways to enhance your TV stand or console table by combining practical storage solutions with chic decorative touches. From layering textures and mixing materials to incorporating artful accessories and greenery, you’ll discover simple yet impactful ideas that can bring harmony and charm to your entertainment area. With a little intention and inspiration, your TV stand can become much more than a piece of furniture—it can be a beautiful focal point that reflects your unique style and makes your living room feel truly like home.

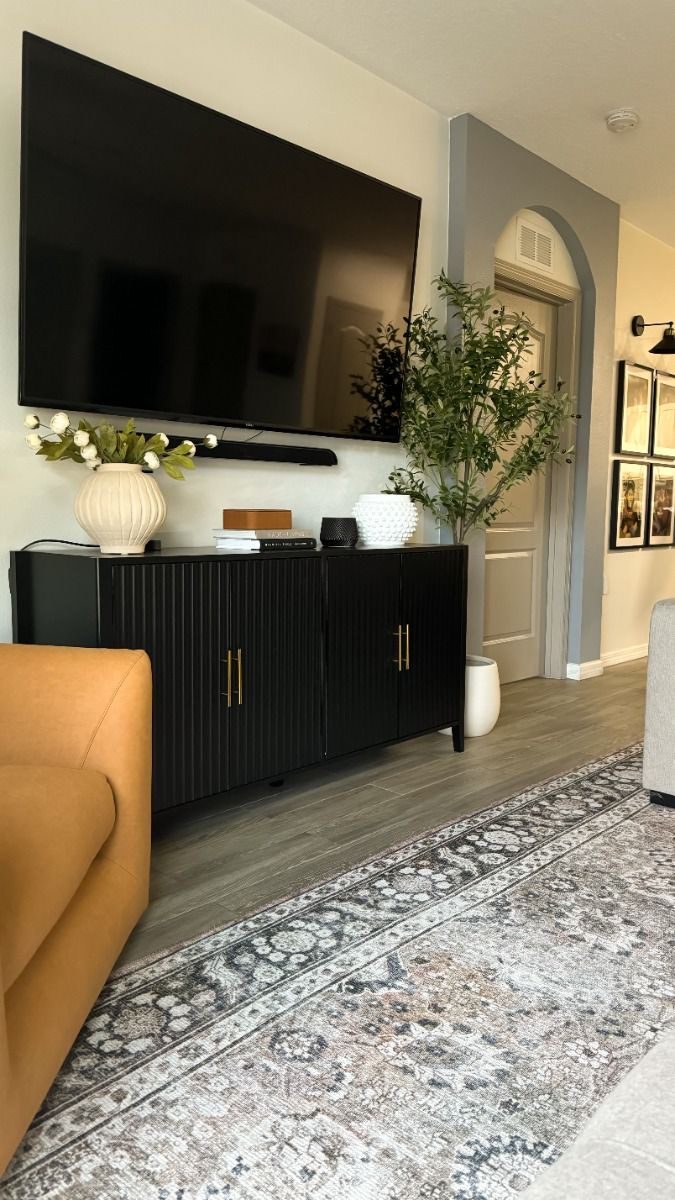
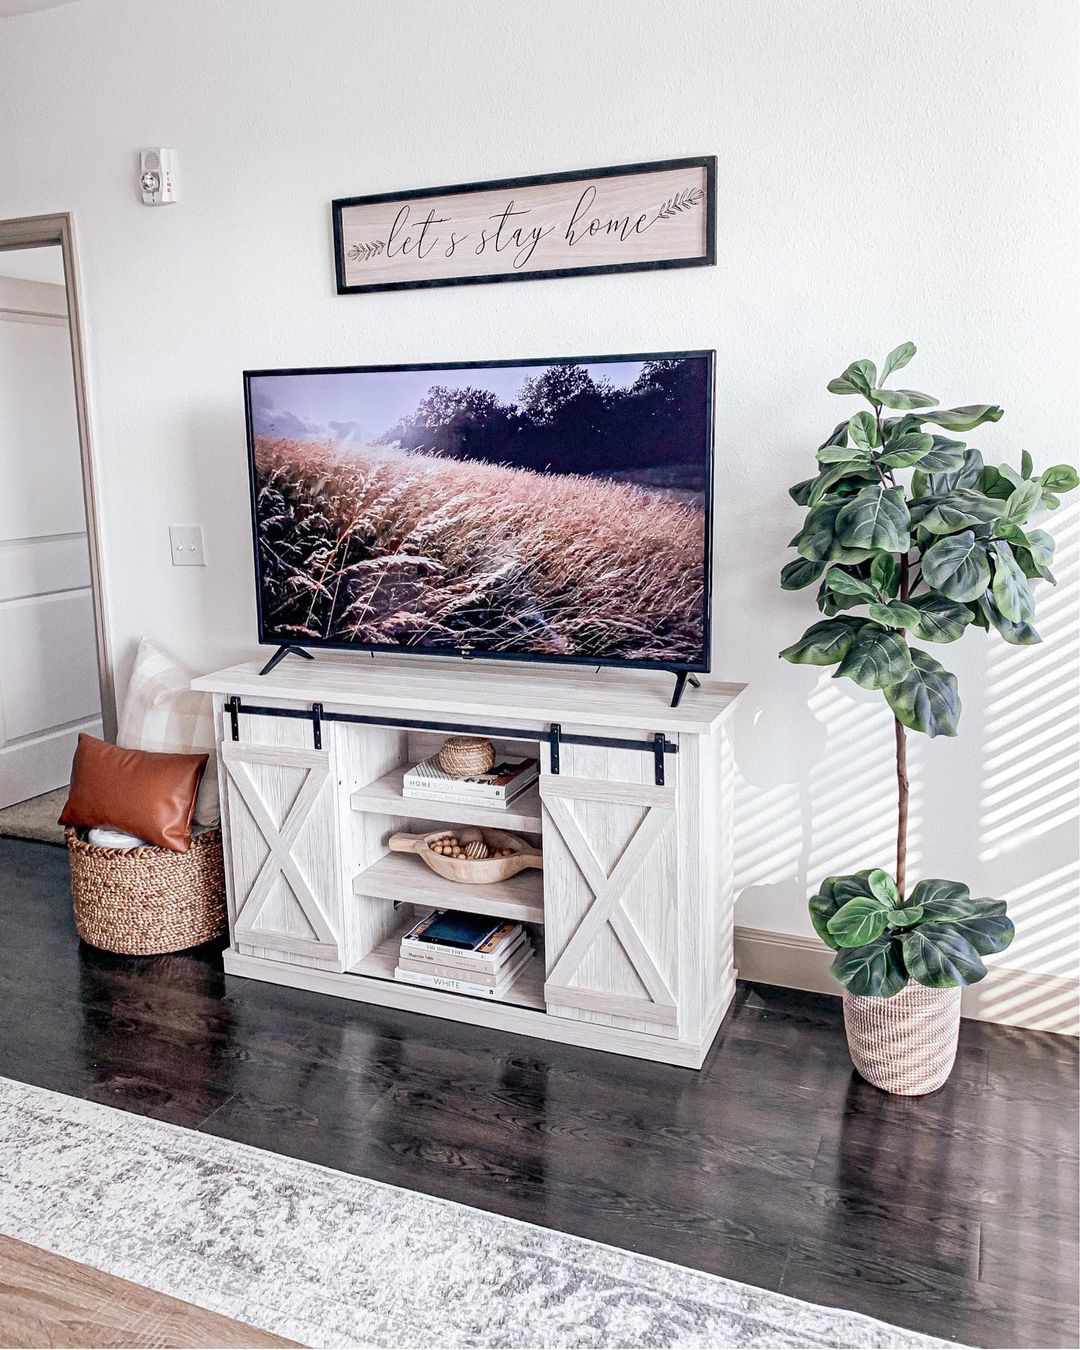
    1. Position Decorations Low Around Your TV Stand

    Position Decorations Low Around Your TV Stand

    Arranging decor pieces at a lower height and away from the television helps maintain a tidy setup while ensuring the screen remains the main attraction. Opt for smaller accents like candles or decorative bowls to enhance the space without overwhelming it.

    Key Design Elements

    • Reduces distractions near the TV
    • Ideal for petite items like candles and bowls
    • Keeps the TV screen unobstructed and prominent

    Pro Tip: Place decor below the TV stand’s halfway point to keep attention focused on the screen.

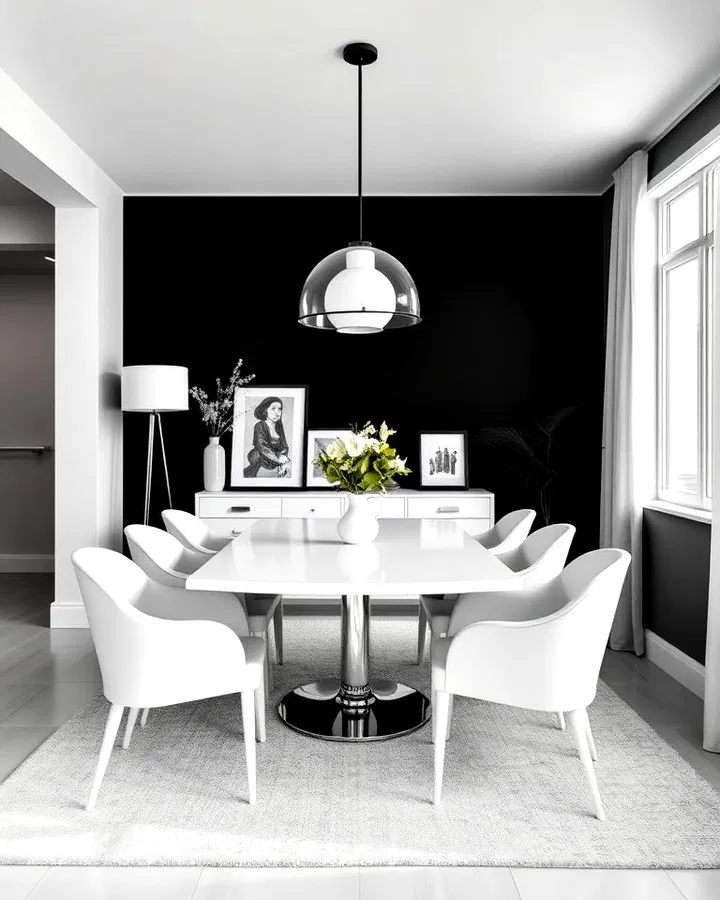
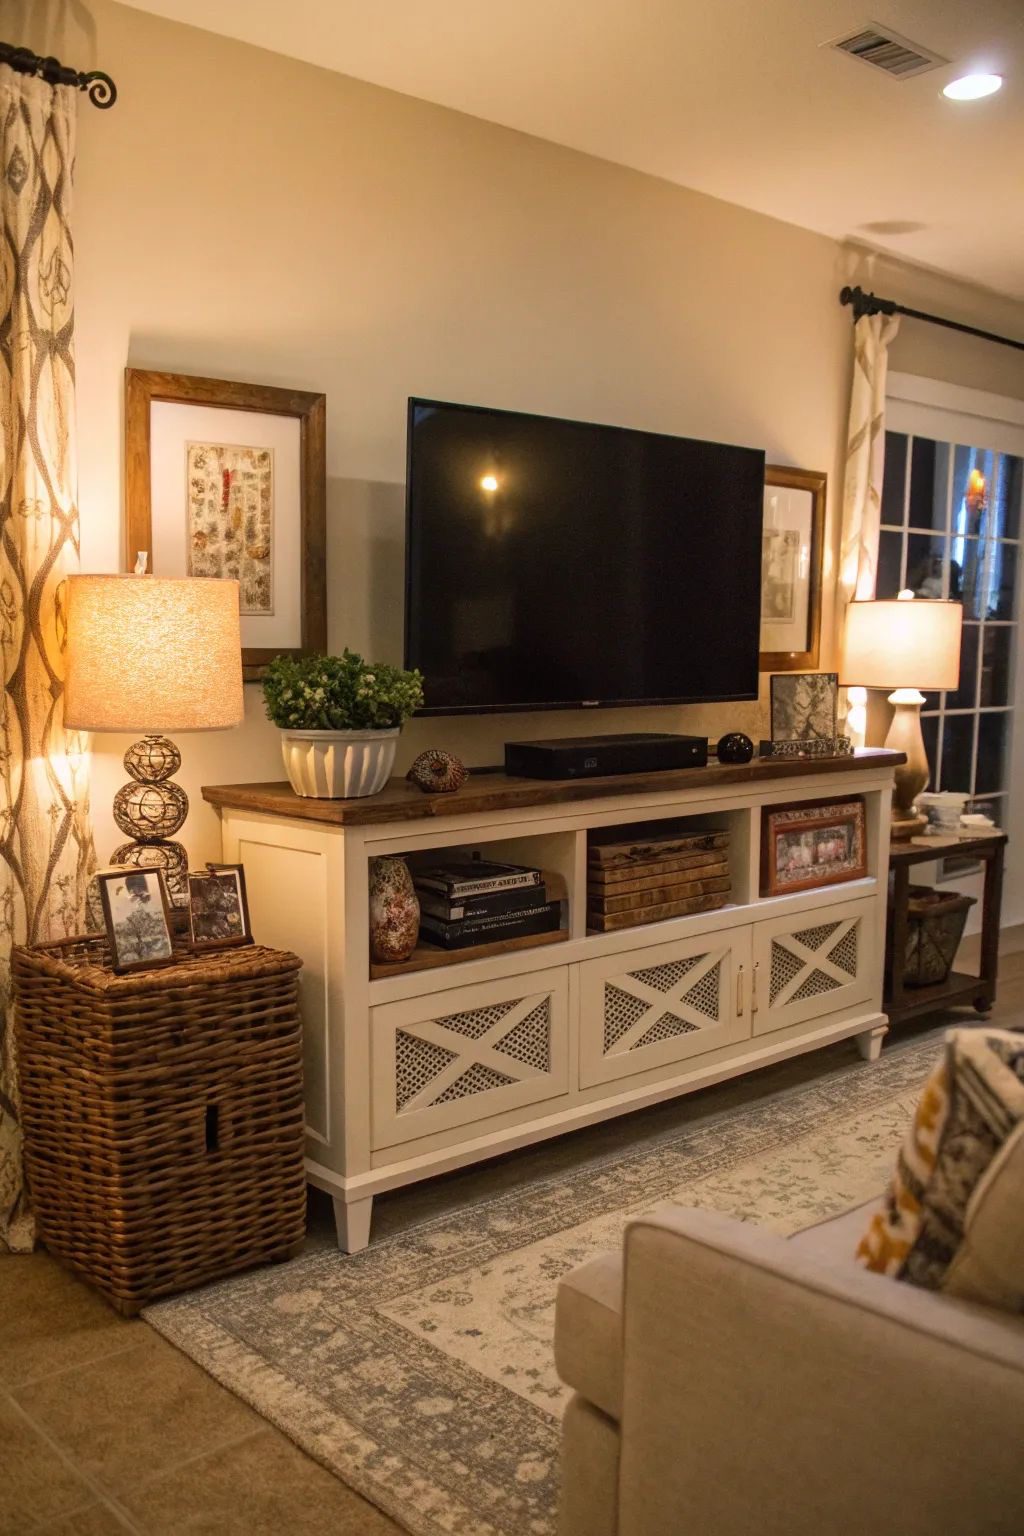
    2. Create Balance with Symmetry

    Create Balance with Symmetry

    Arranging decor symmetrically around your TV creates a tidy and harmonious space. Placing similar accents on either side helps maintain an orderly and visually pleasing setup.

    Key Design Elements

    • Place matching objects flanking the TV
    • Choose pieces that are either the same or complement each other
    • Ideal for enhancing elegance in formal living areas

    Pro Tip: If exact matches aren’t available, align items by height and visual bulk to maintain a balanced appearance.

    3. Conceal Wires for a Sleek Look

    Conceal Wires for a Sleek Look

    Achieving a polished and stylish TV setup is much simpler when cables are out of sight. Exposed wires can take away from the overall aesthetic of your space. Taming the mess of cords helps your room feel more organized and visually appealing.

    Key Design Elements

    • Employ cable organizers or clips to keep wires bundled
    • Guide cords along the back of the furniture or inside the wall
    • Select cord covers that blend seamlessly with your wall paint

    Pro Tip: Tucking a cable management box behind your TV stand can discreetly corral multiple cords, keeping your entertainment area clean and clutter-free.

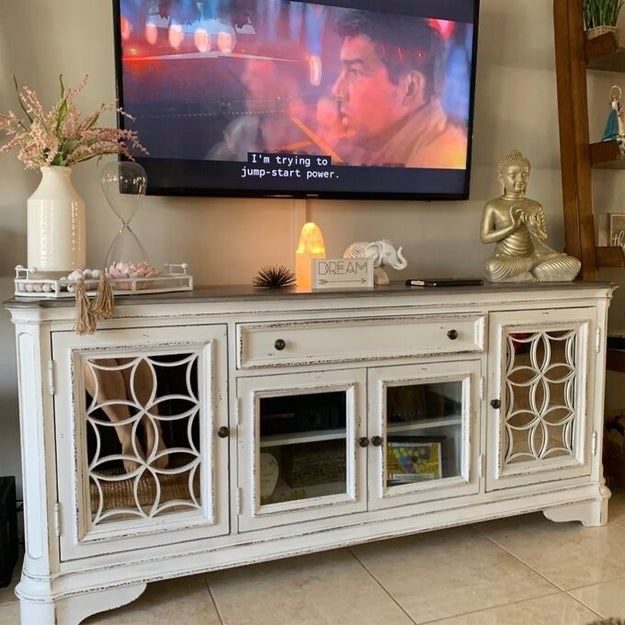
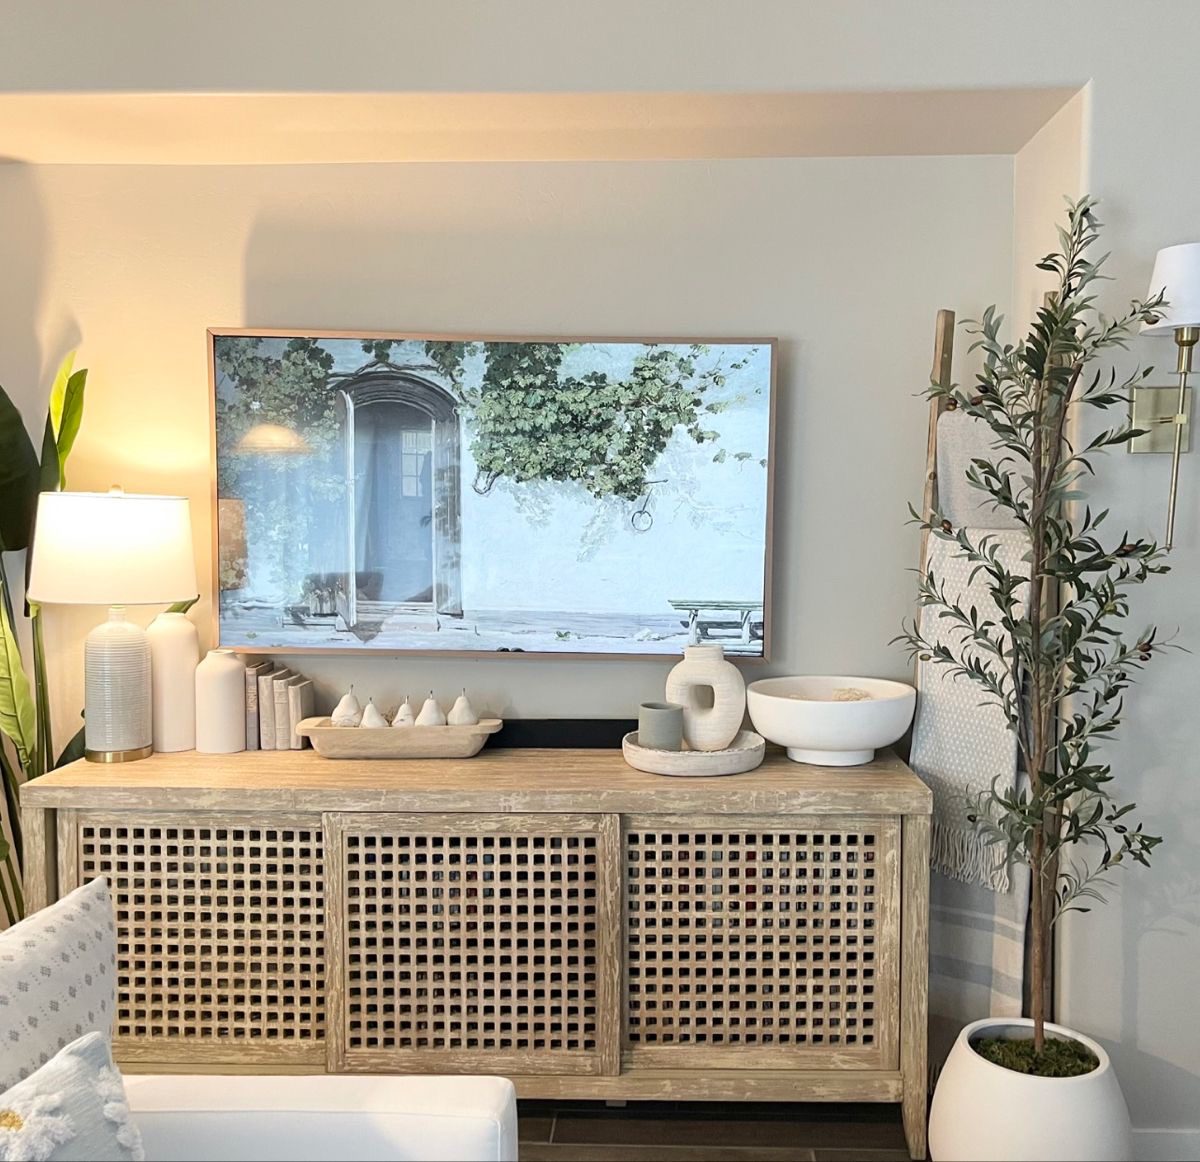
    4. Enhance Your TV Stand with Textured Accents

    Enhance Your TV Stand with Textured Accents

    Incorporating tactile elements such as patterned vases, ornamental beads, or metal chains adds depth and intrigue to your TV stand setup. These textures break up flat surfaces, bringing a dynamic and engaging feel to the space.

    Key Design Elements

    • Patterned or woven vessels instantly introduce texture
    • Ornamental bead strands create graceful draping effects
    • Combine smooth finishes with rough materials for striking contrast

    Pro Tip: Place a sleek ceramic vase beside a woven basket to achieve an appealing mix of textures.

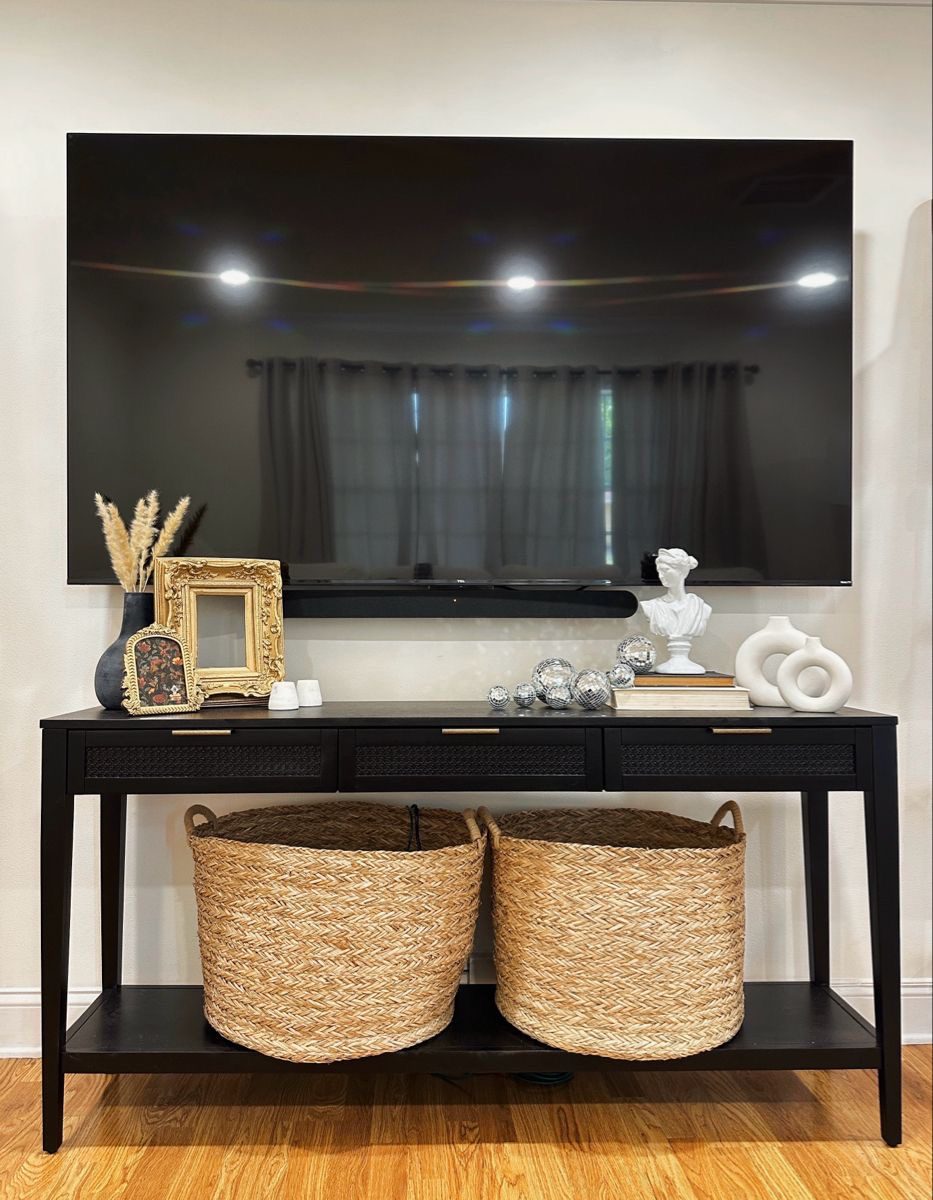
    5. Incorporate Shimmering Metallic Details

    Incorporate Shimmering Metallic Details

    Enhance your TV stand by weaving in metallic elements that bring a sleek and sophisticated vibe. Whether it’s gold, brass, silver, or copper, these shiny accents reflect light and add a luxurious feel to your entertainment area.

    Key Design Elements

    • Place metallic candle holders or decorative trays for subtle shine
    • Combine different metal finishes to create a trendy, layered effect
    • Use even tiny metallic touches to instantly uplift the display

    Pro Tip: Warm tones like brass and gold complement neutral color schemes beautifully, adding warmth and depth to your living space.

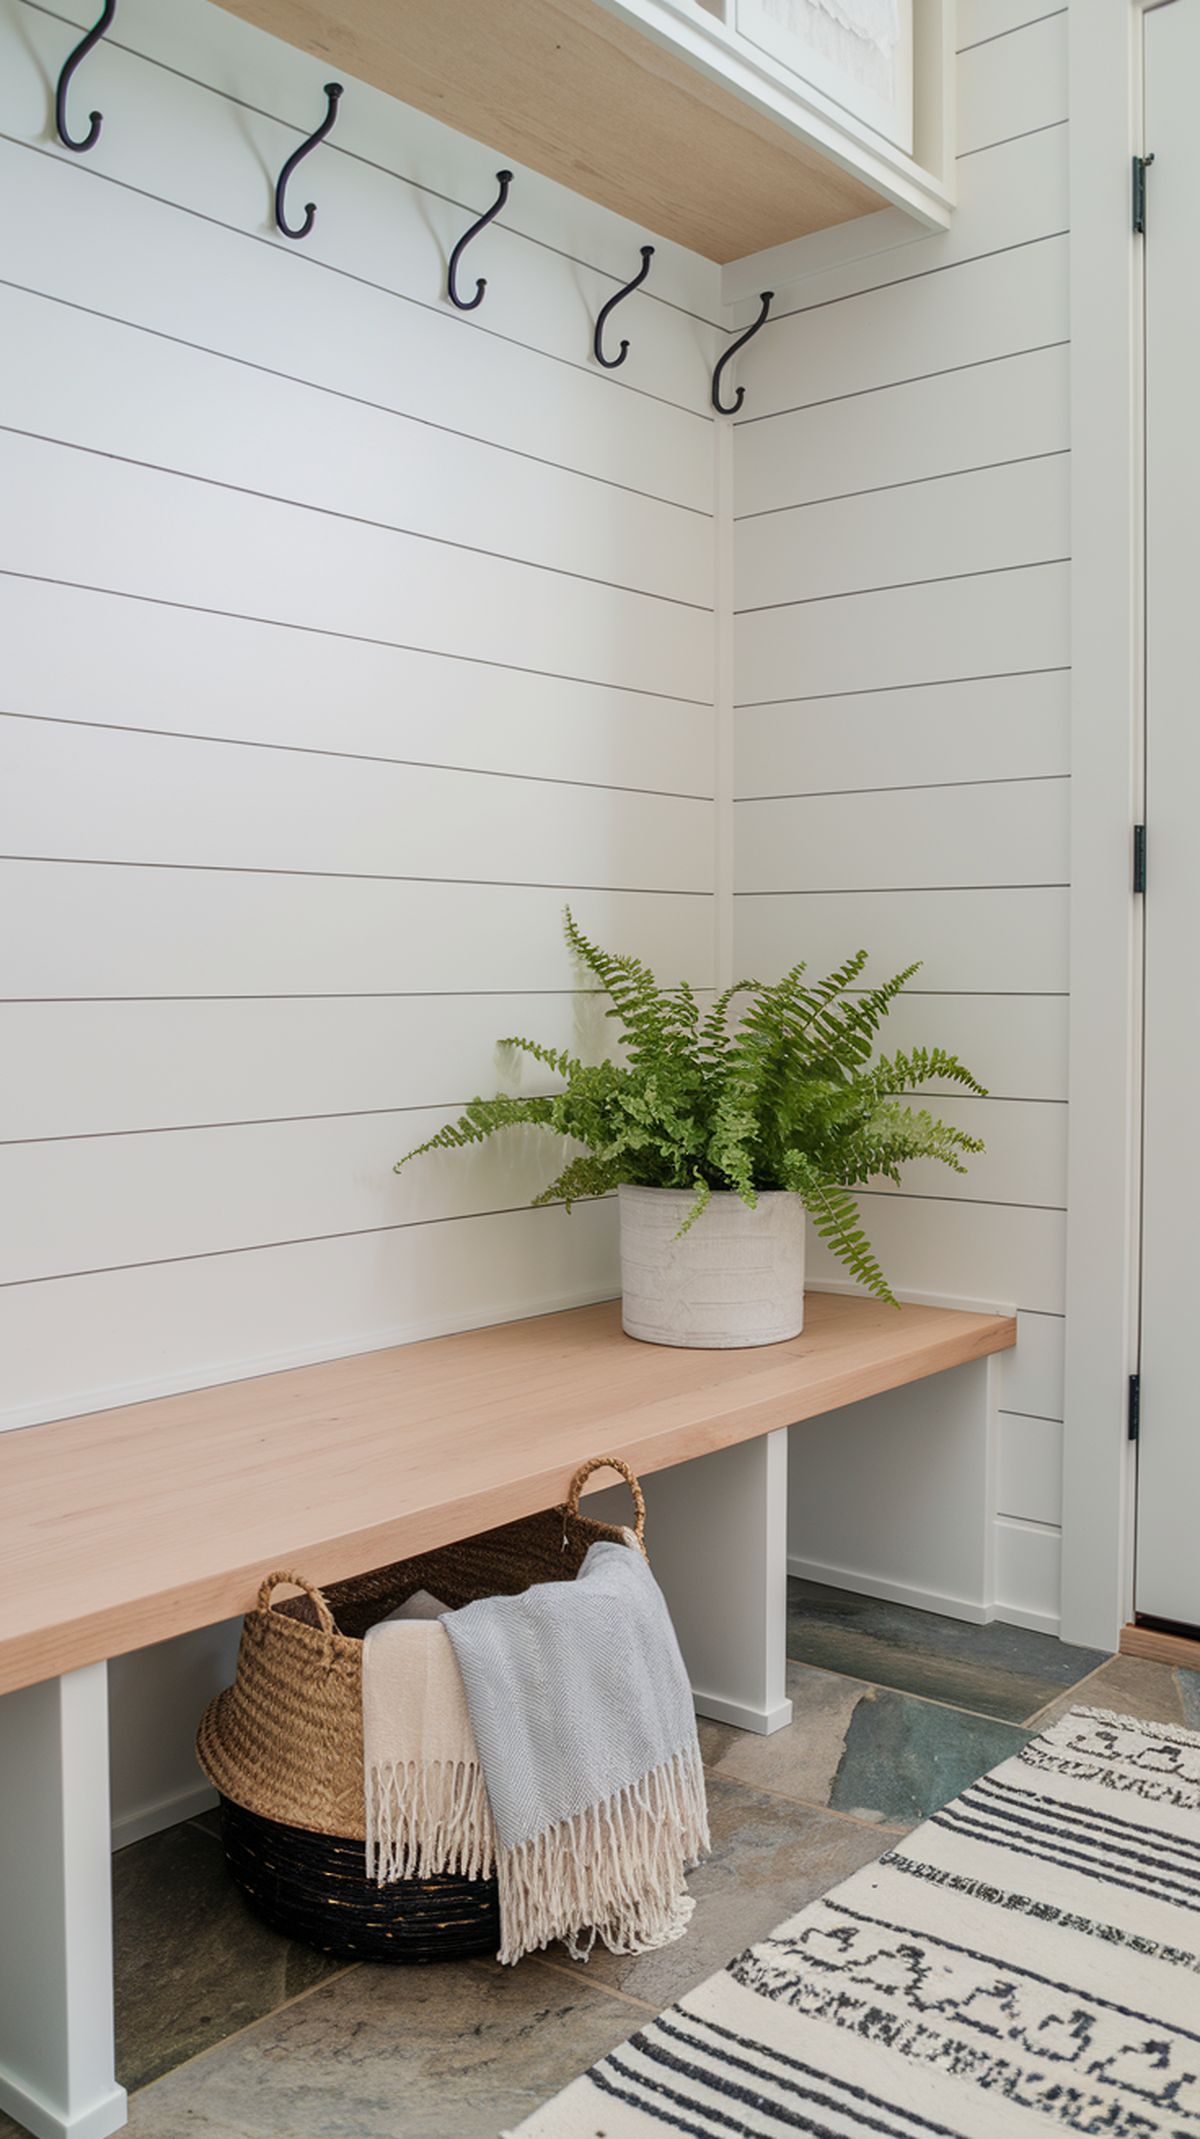
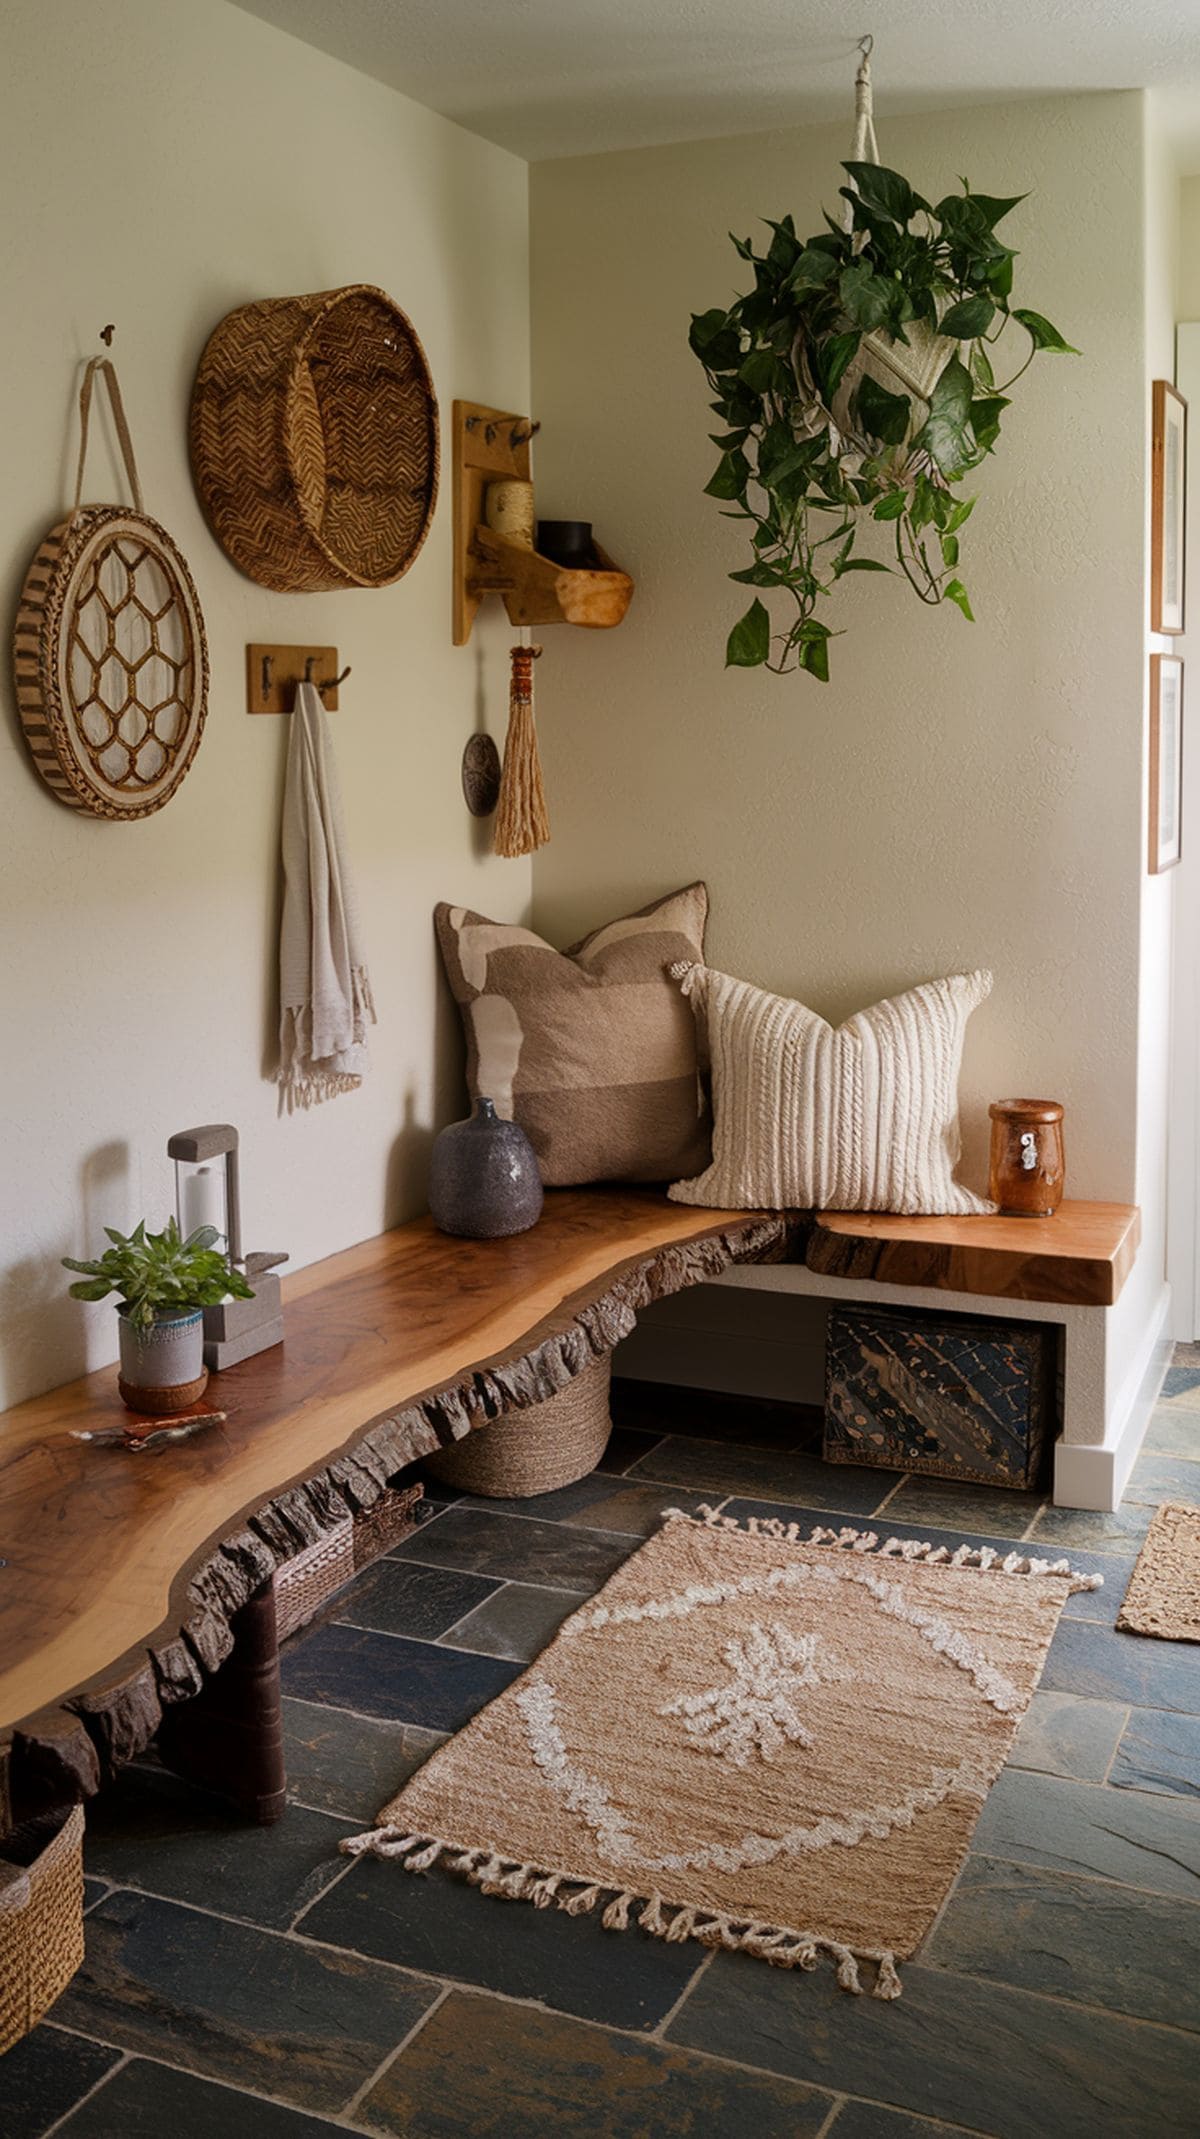
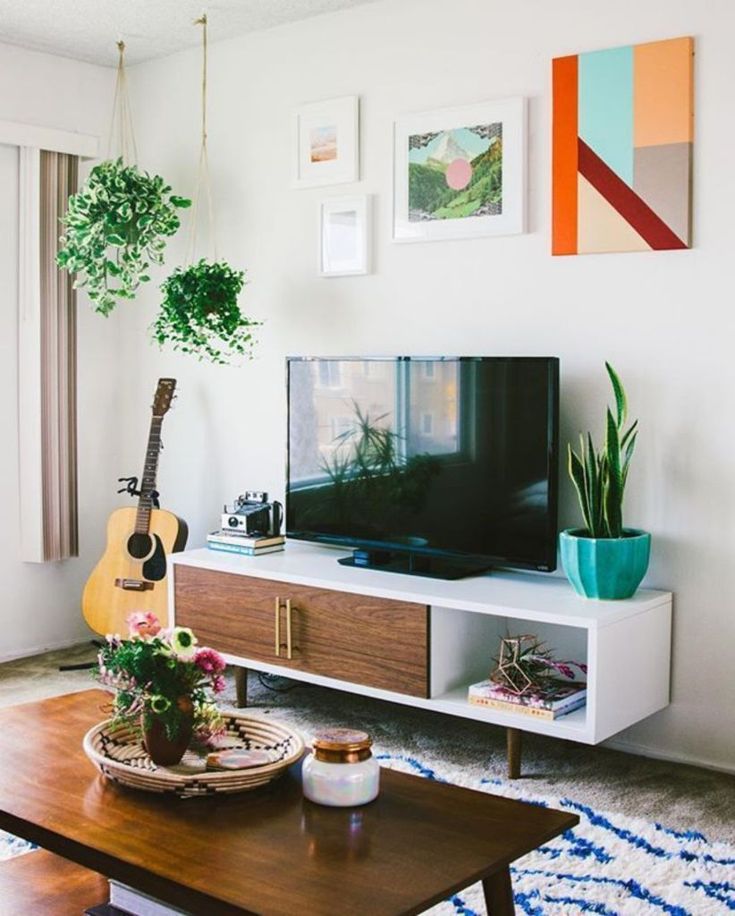
    6. Incorporate Lush Greenery

    Incorporate Lush Greenery

    Introducing plants to your TV stand instantly infuses the area with vibrant hues and a sense of vitality. Even compact plants can break up the rigid feel of electronic devices, creating a more harmonious and inviting atmosphere.

    Key Design Elements

    • Adds natural color and freshness
    • Balances the sharp edges of gadgets
    • Easy-care varieties fit any schedule

    Pro Tip: Consider placing a trailing pothos or a petite snake plant, both of which flourish in the dim lighting typical of living rooms.

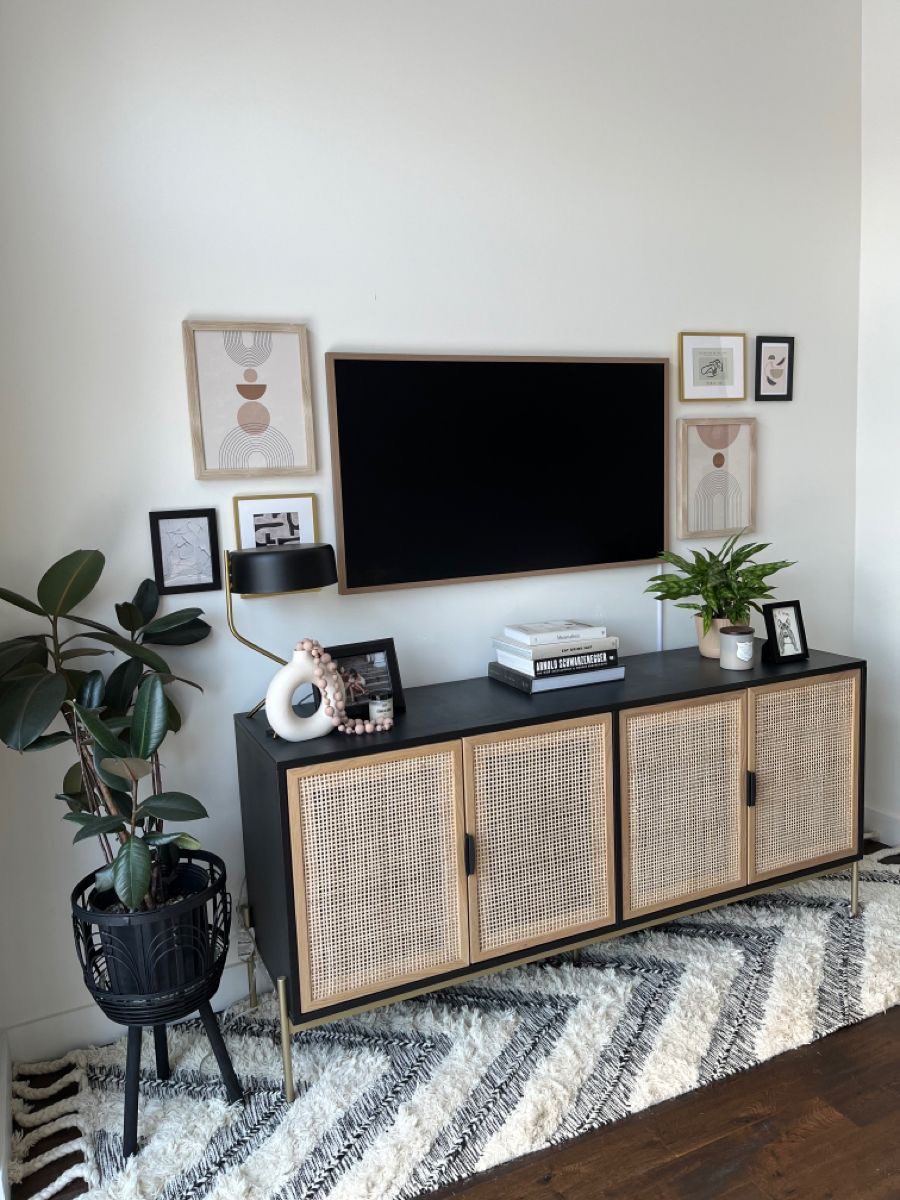
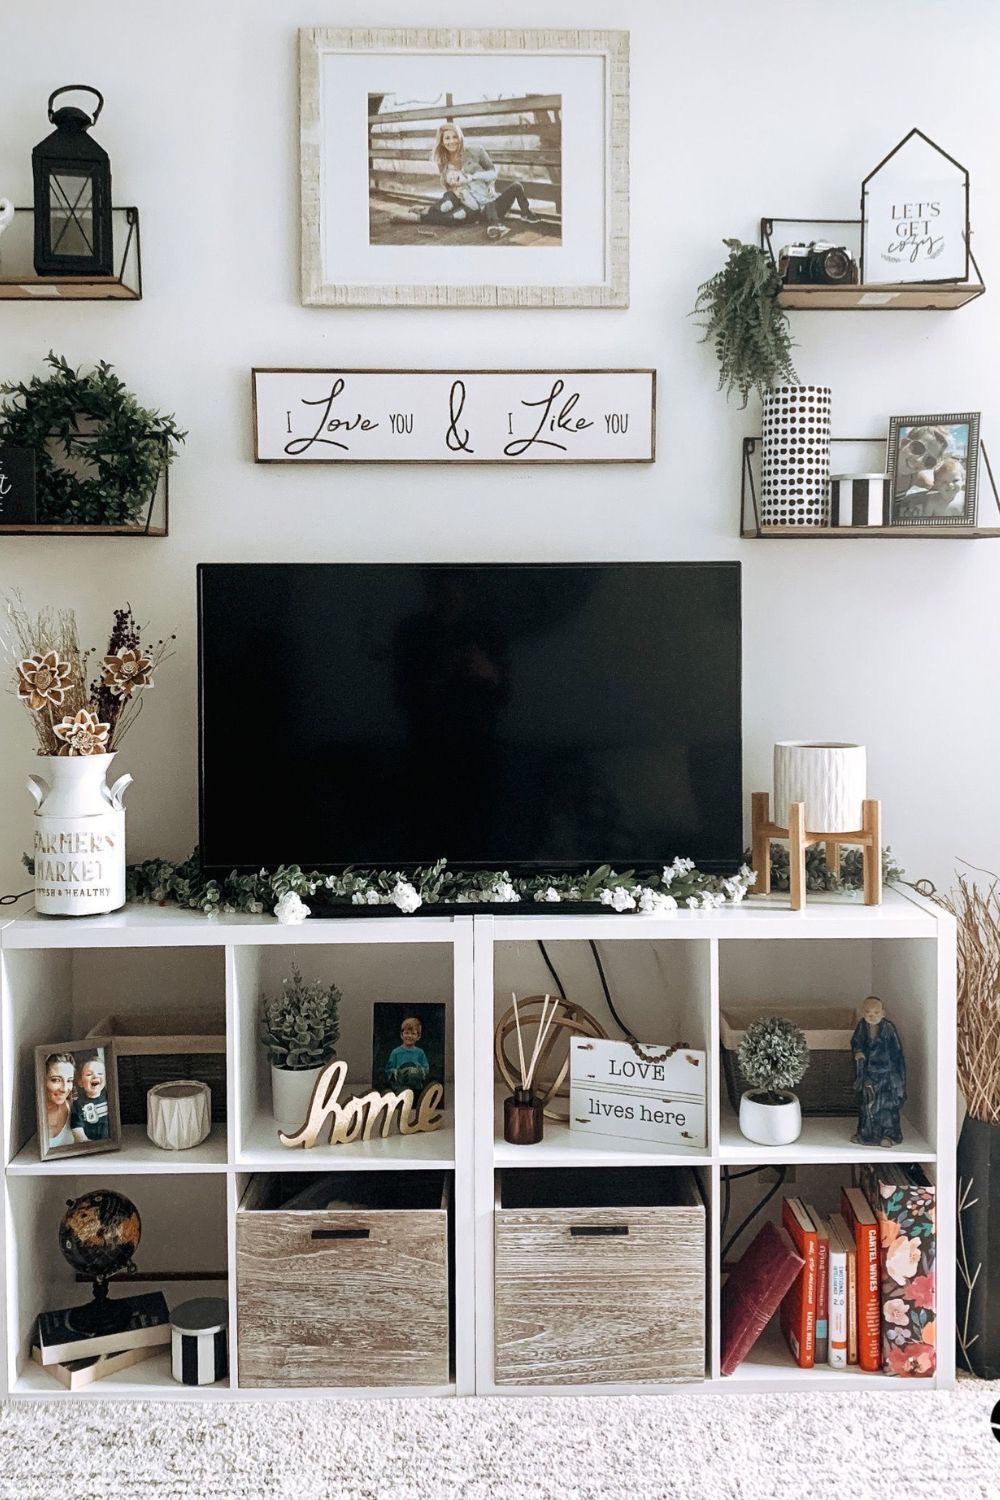
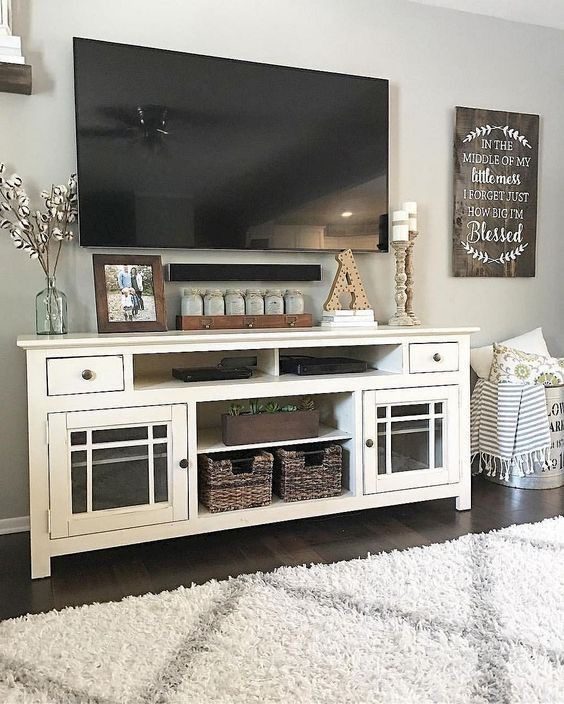
    7. Showcase Cherished Memories

    Showcase Cherished Memories

    Display a few framed snapshots or meaningful photos near your TV stand to bring a cozy, personalized vibe to your setup. Choose frame styles that complement your overall interior design to maintain a harmonious look throughout the room.

    Key Design Elements

    • Brings warmth and individuality to the space
    • Easily switch out photos to keep the display fresh
    • Blends seamlessly with other decorative elements

    Pro Tip: Opt for frames with a uniform finish—such as matte black, metallic gold, or natural wood tones—to achieve a polished, gallery-inspired arrangement.

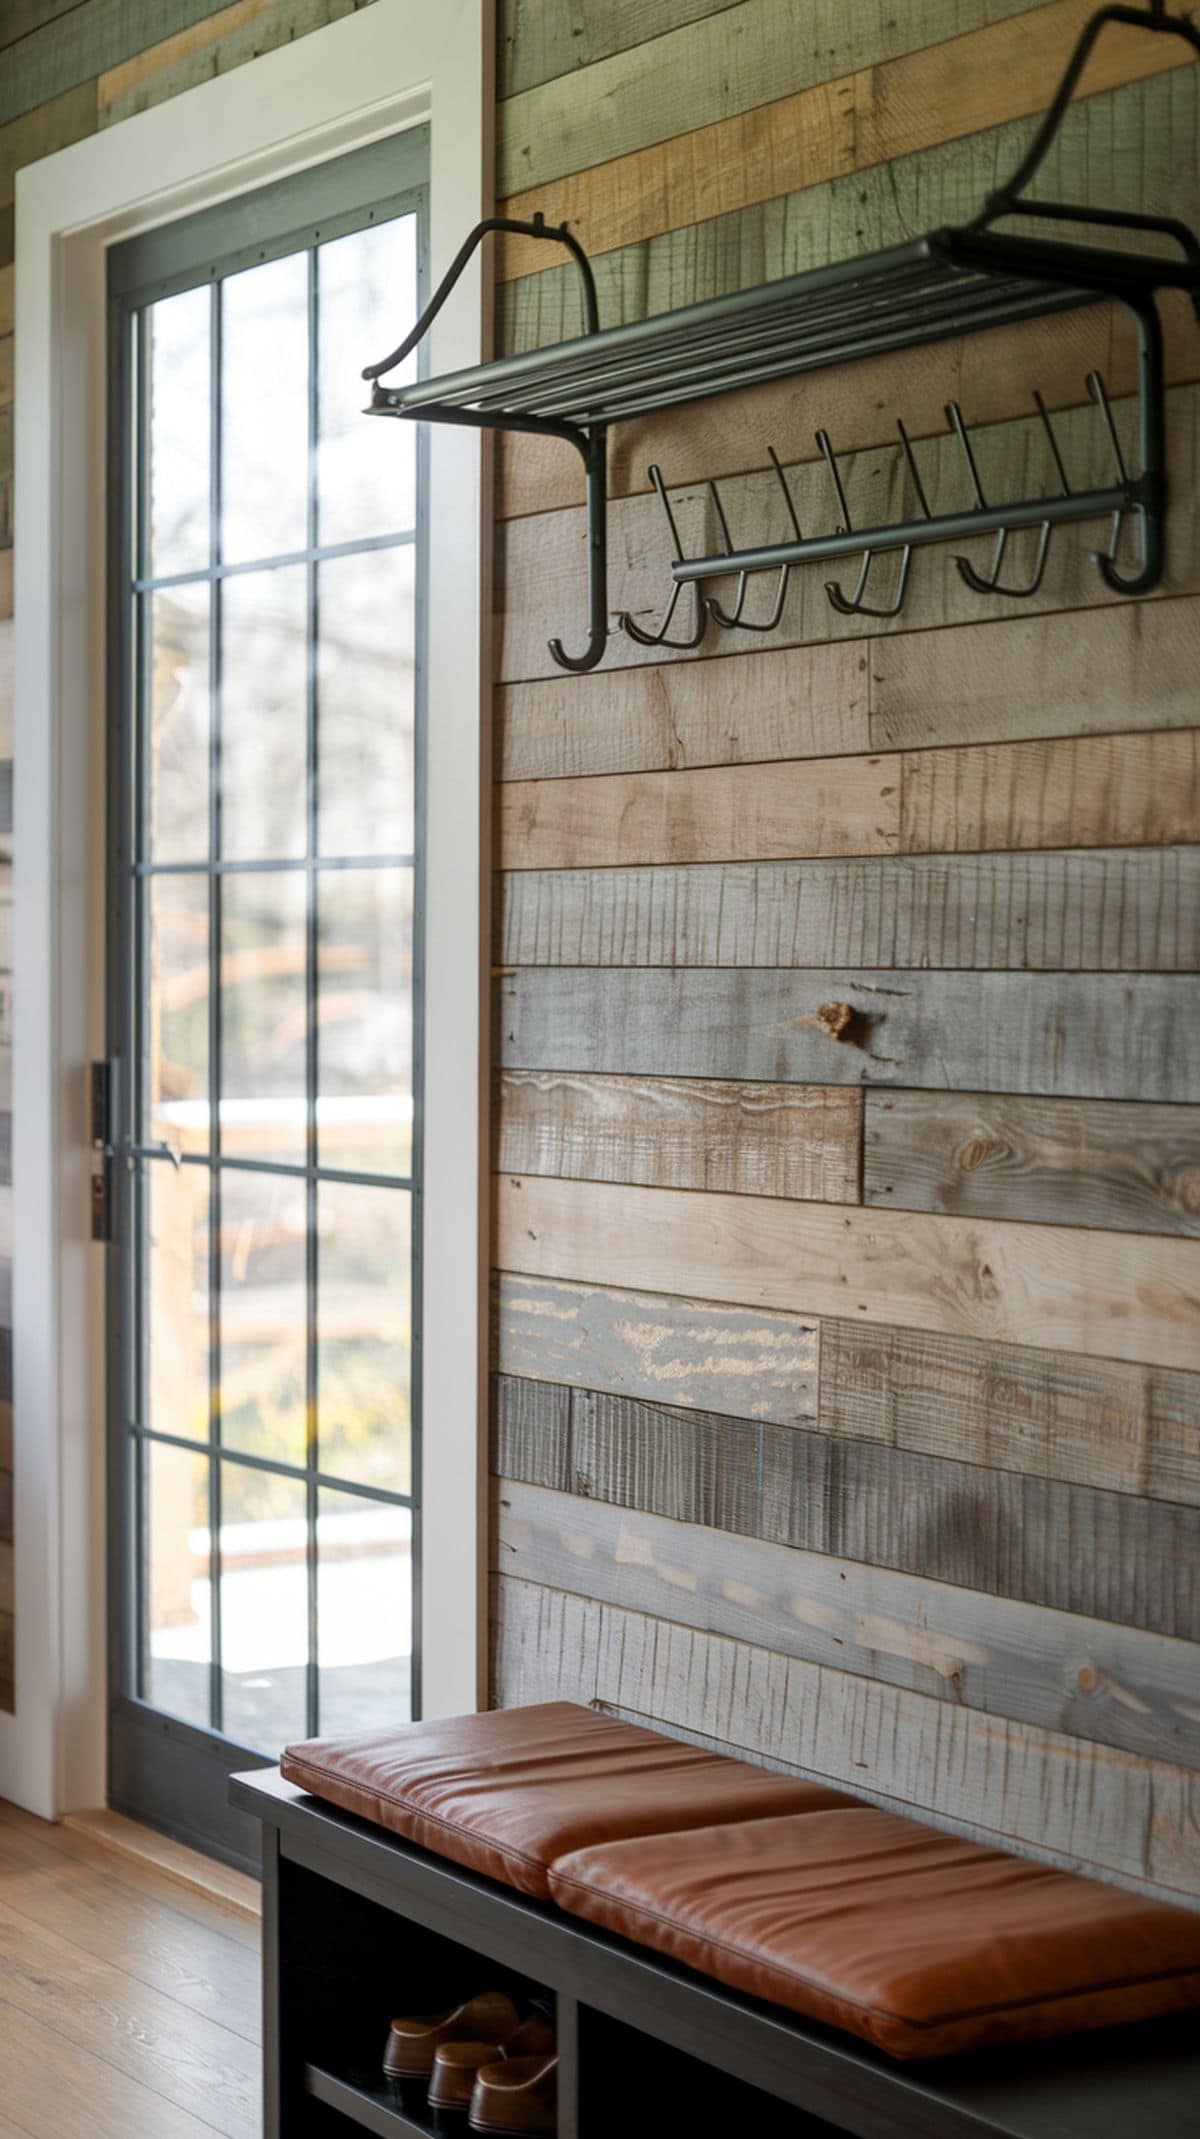
    8. Create a Cozy Rustic Vibe

    Create a Cozy Rustic Vibe

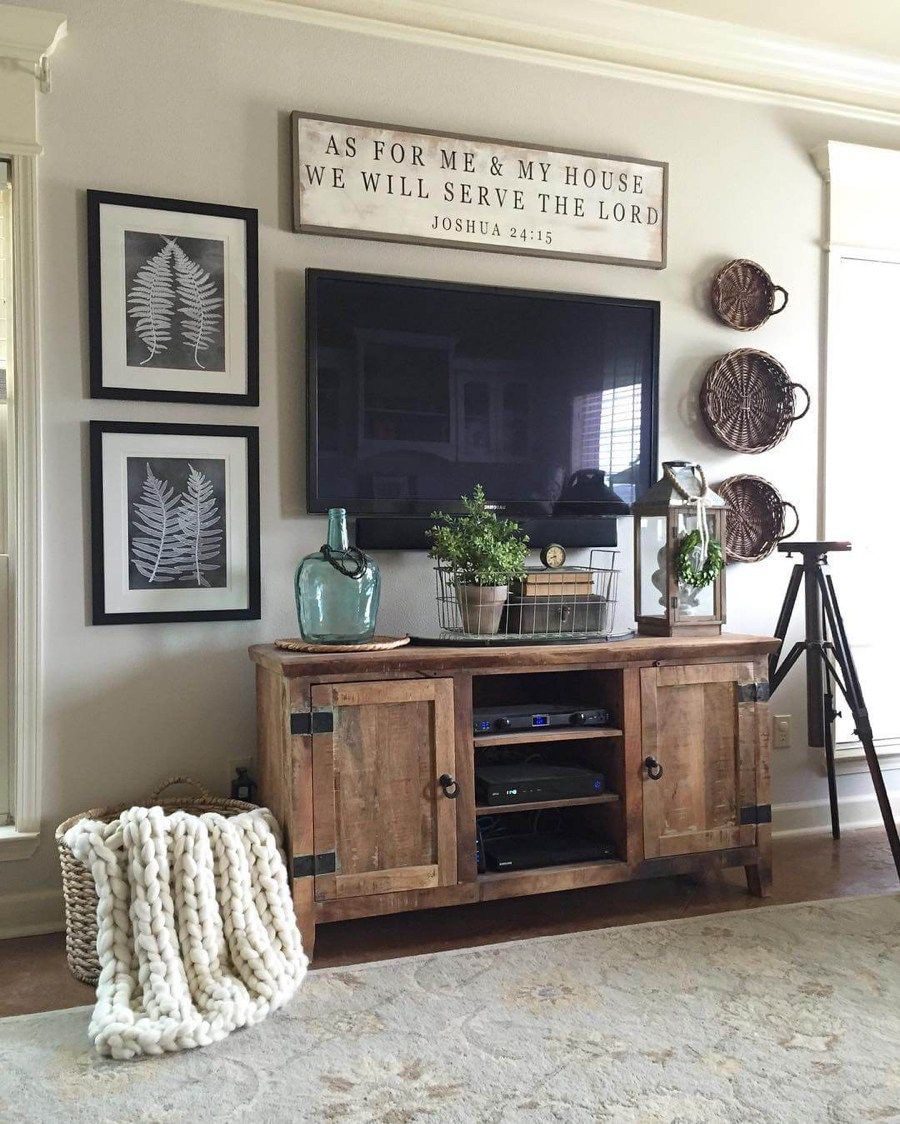
    Incorporating rustic design elements brings a welcoming warmth and timeless character to your TV stand. This style pairs perfectly with a laid-back, inviting living space.

    Key Design Elements

    • Feature accents made from reclaimed wood
    • Include decor with galvanized metal finishes
    • Display items with a vintage or antique aesthetic

    Pro Tip: Placing a petite wooden crate or an old-fashioned lantern can effortlessly infuse rustic charm into your TV area.

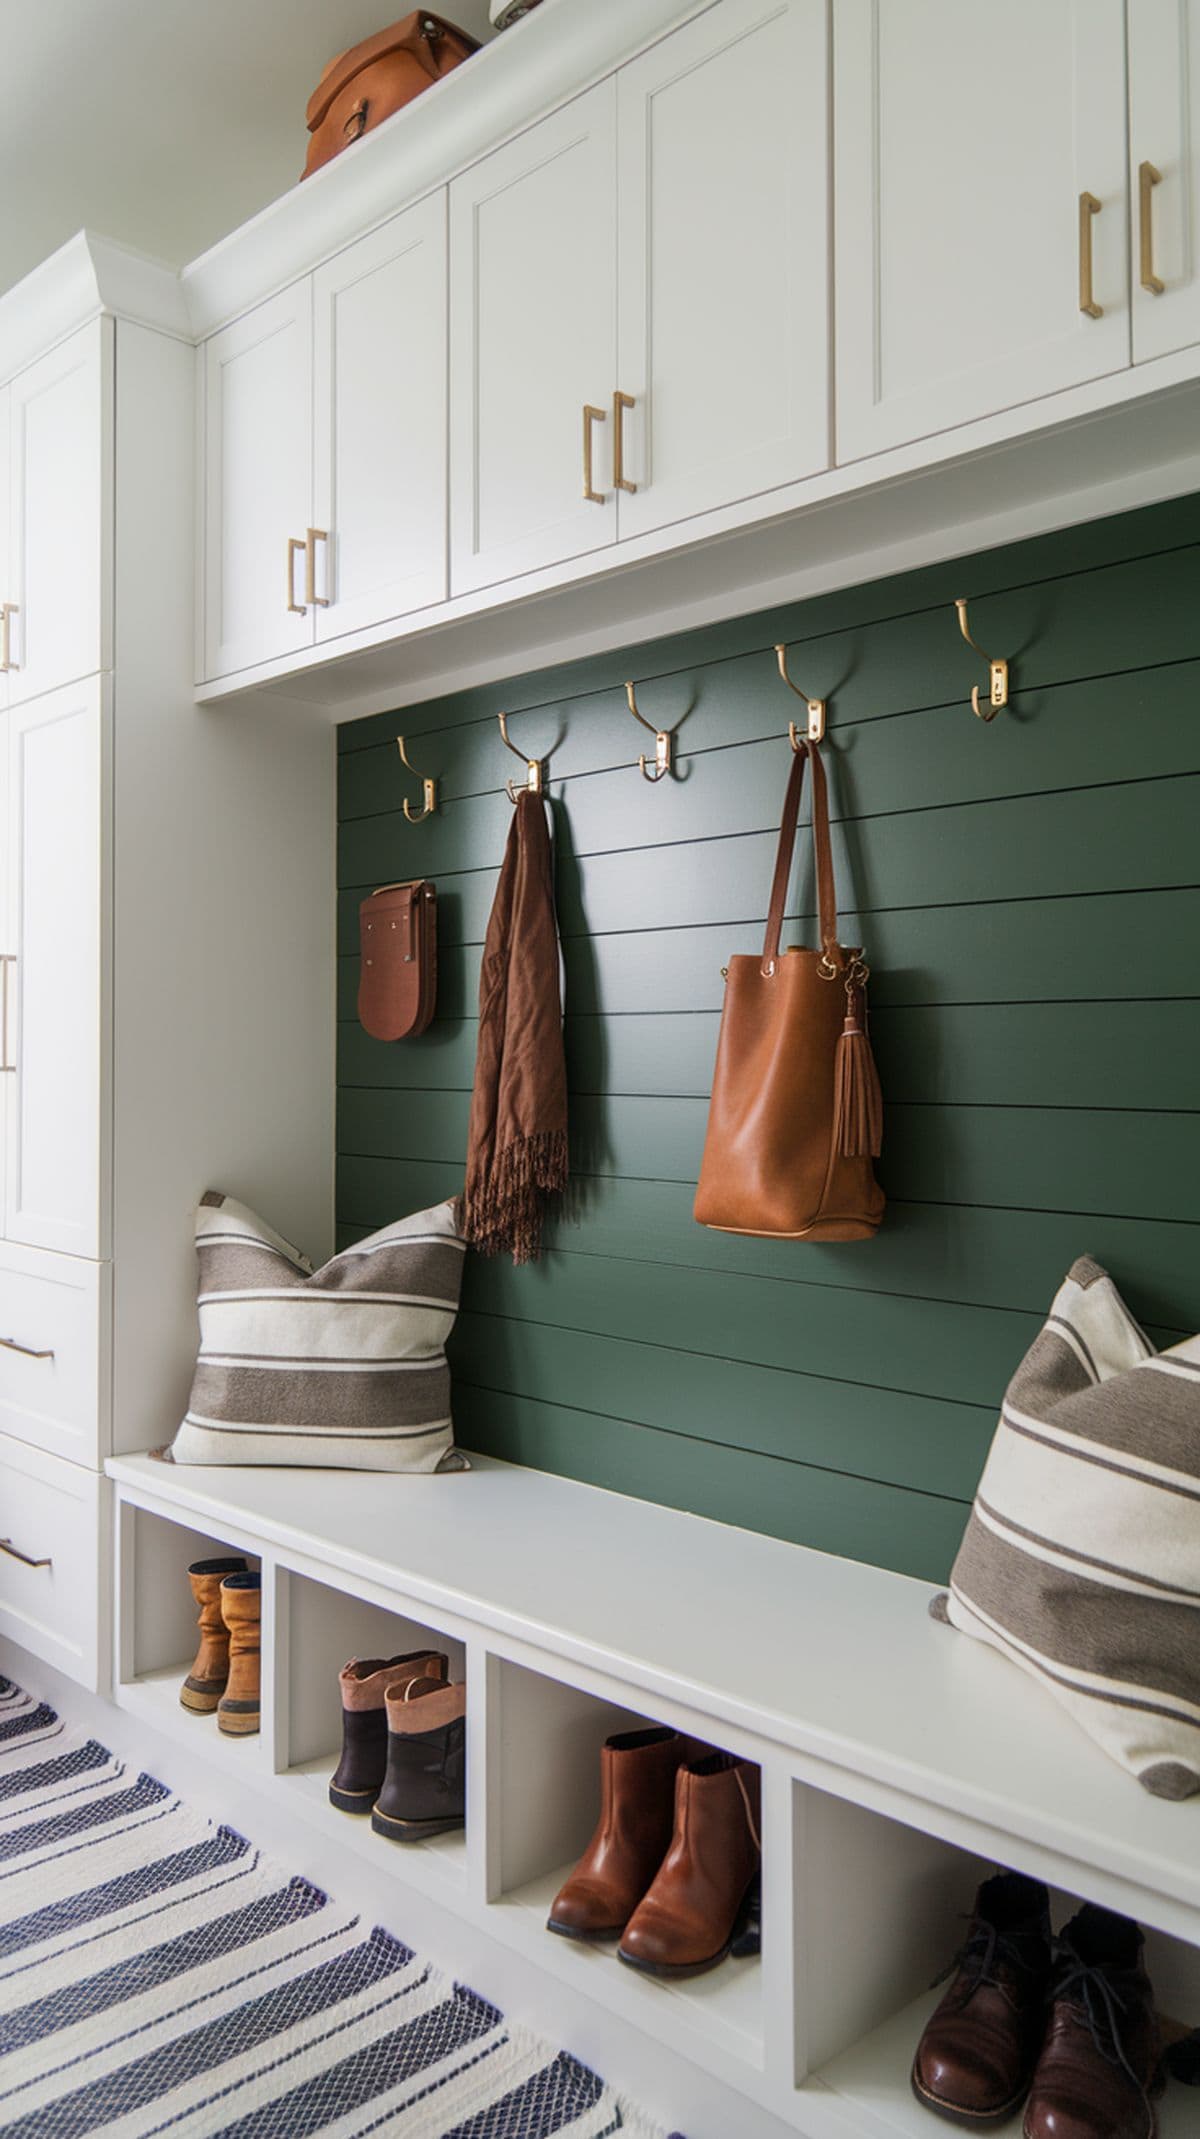
    9. Use a Rug to Anchor Your TV Stand

    Use a Rug to Anchor Your TV Stand

    Laying a rug beneath your TV stand helps carve out a distinct area for your entertainment setup, bringing a sense of comfort and cohesiveness to the space. It cushions the look of the furniture while harmonizing the room’s overall design.

    Key Design Elements

    • Creates a dedicated zone for the TV setup
    • Introduces softness and visual warmth to the floor
    • Unifies the room’s design elements and colors

    Pro Tip: Opt for a rug that stretches at least half a foot beyond each edge of the TV stand to ensure balanced proportions.

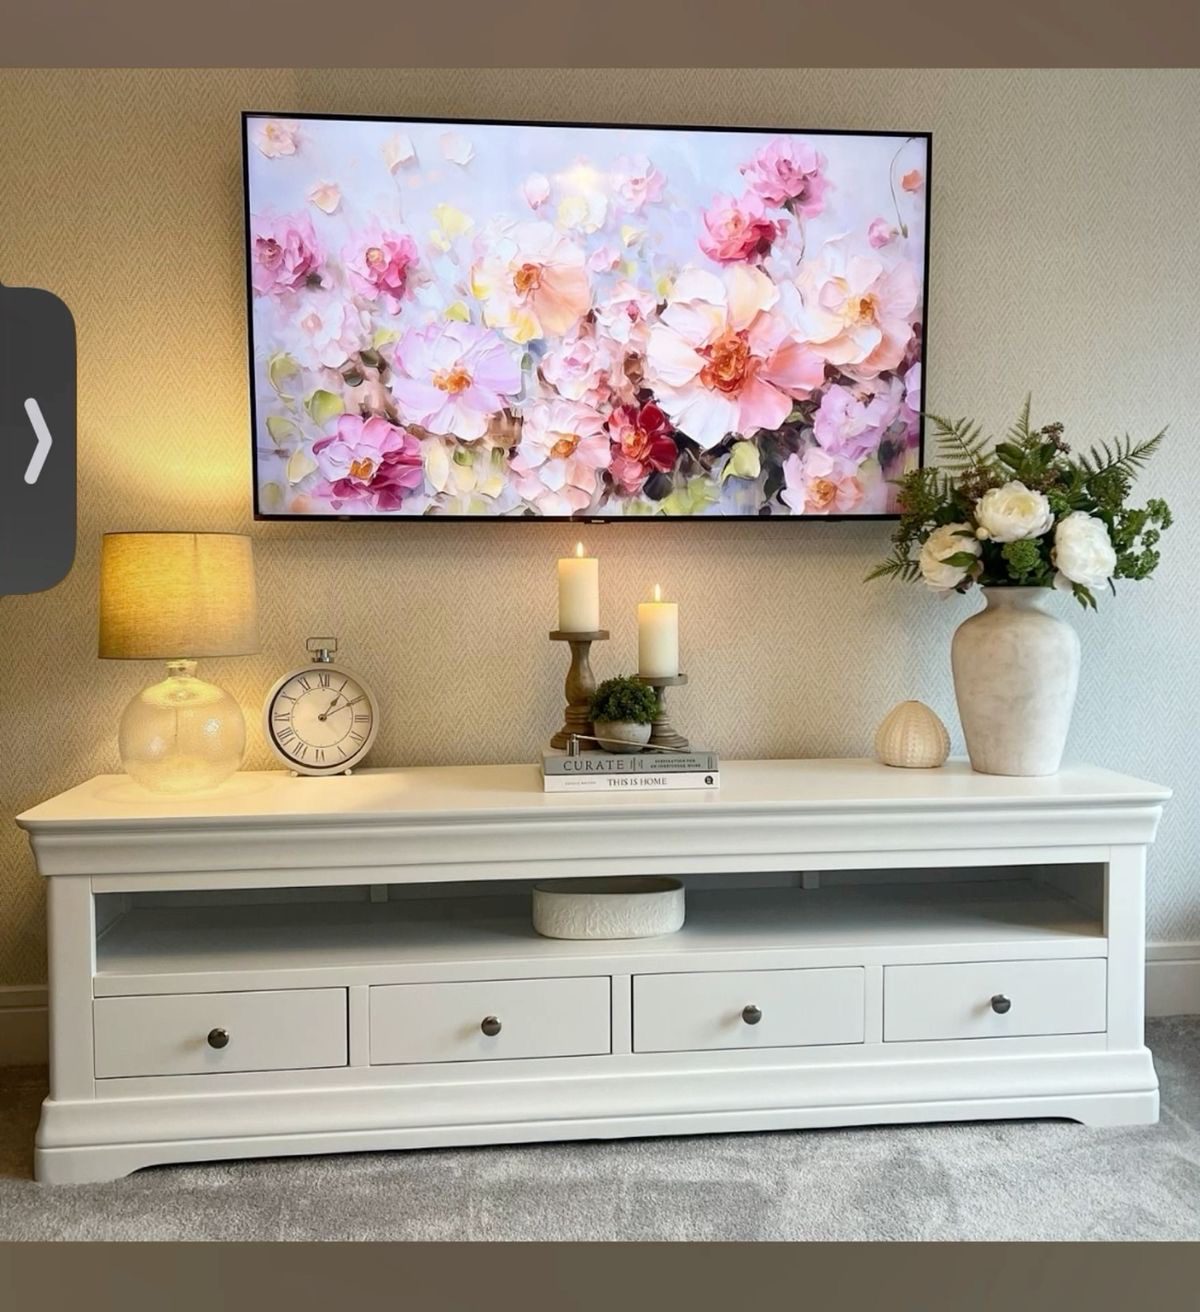
    10. Incorporate Aromatic Candles

    Incorporate Aromatic Candles

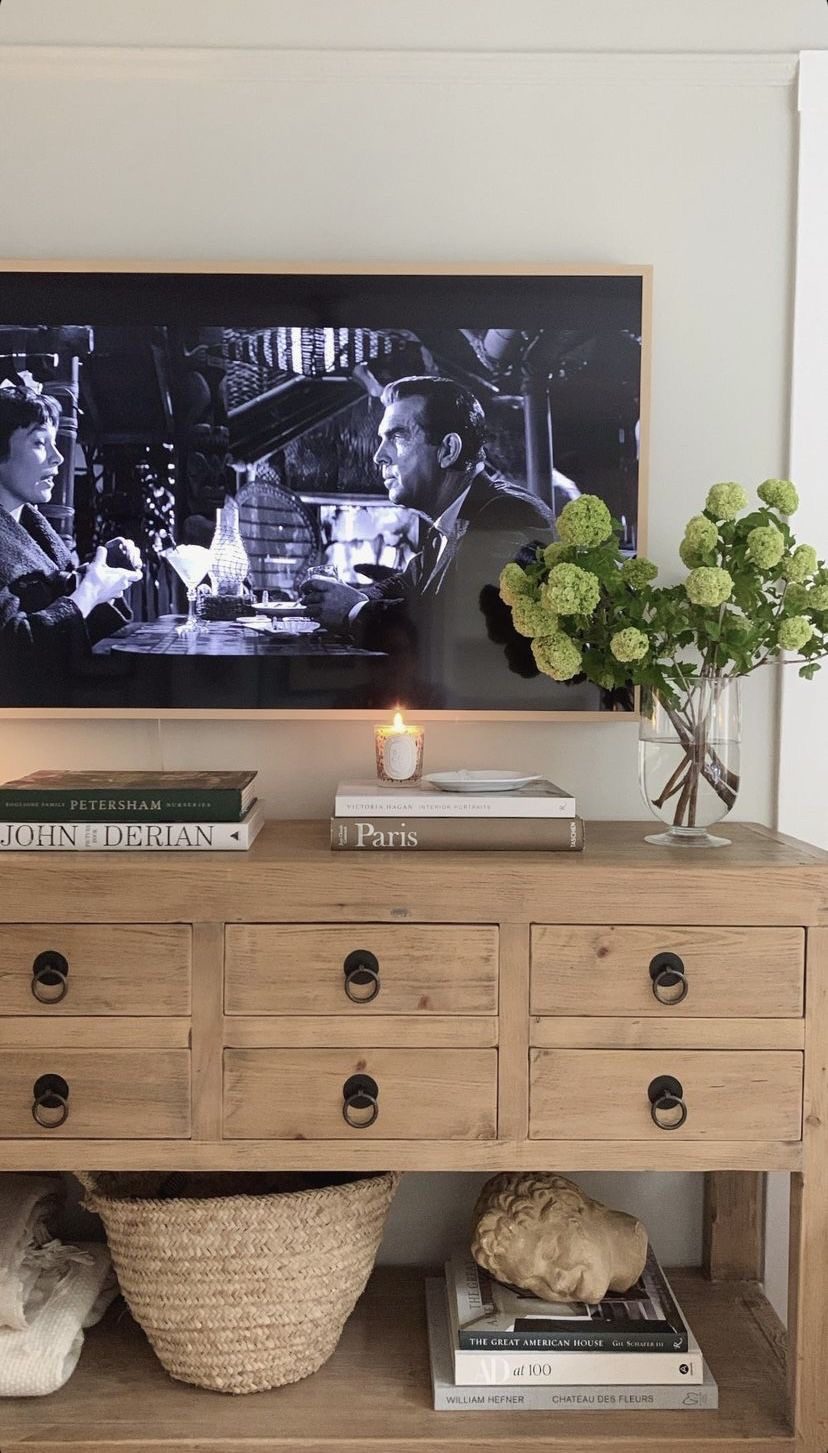
    Aromatic candles serve as both decorative accents and mood enhancers, adding warmth and inviting aromas to your TV area. Arranged at different levels, they contribute to a snug and charming ambiance.

    Key Design Elements

    • Arrange candles in groups with an odd number for balanced aesthetics
    • Select fragrances that match the current season’s vibe
    • Use stylish candle holders to add dimension and elegance

    Pro Tip: For a subtle, fragrance-free look, opt for unscented pillar candles in neutral shades that blend seamlessly with your decor.

    11. Embrace Minimalism

    Embrace Minimalism

    Maintaining a clean and uncluttered surface on your TV stand helps it stand out as the centerpiece of your space. Opt for a select handful of standout items to elevate the look without overwhelming it.

    Key Design Elements

    • Select 3 to 5 standout accessories
    • Focus on well-crafted, meaningful pieces
    • Ensure ample space between each item

    Pro Tip: Grouping objects in odd numbers, like three, creates a visually appealing and balanced display.

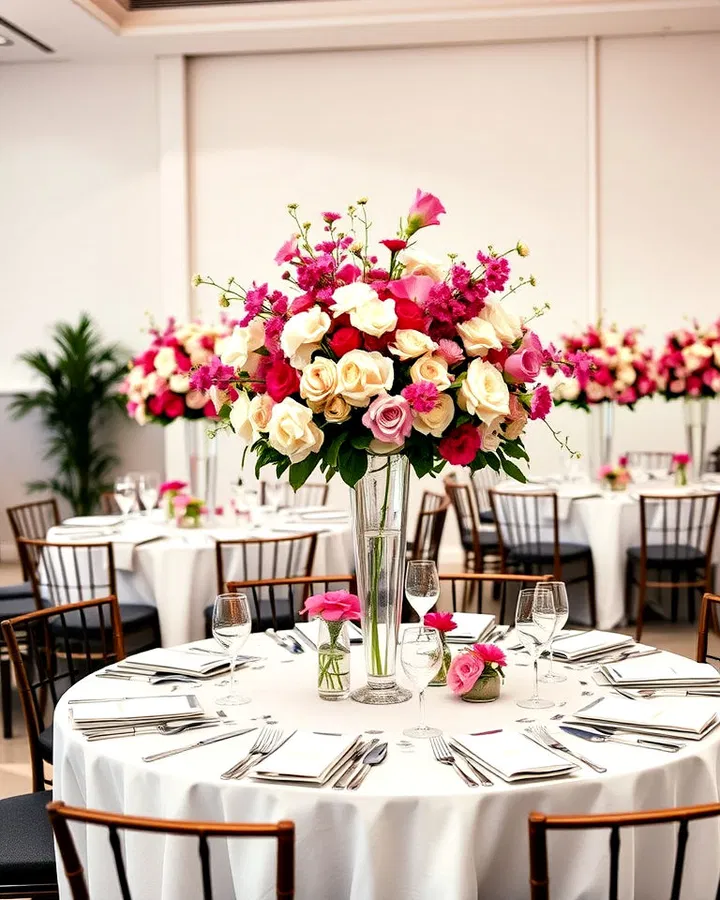
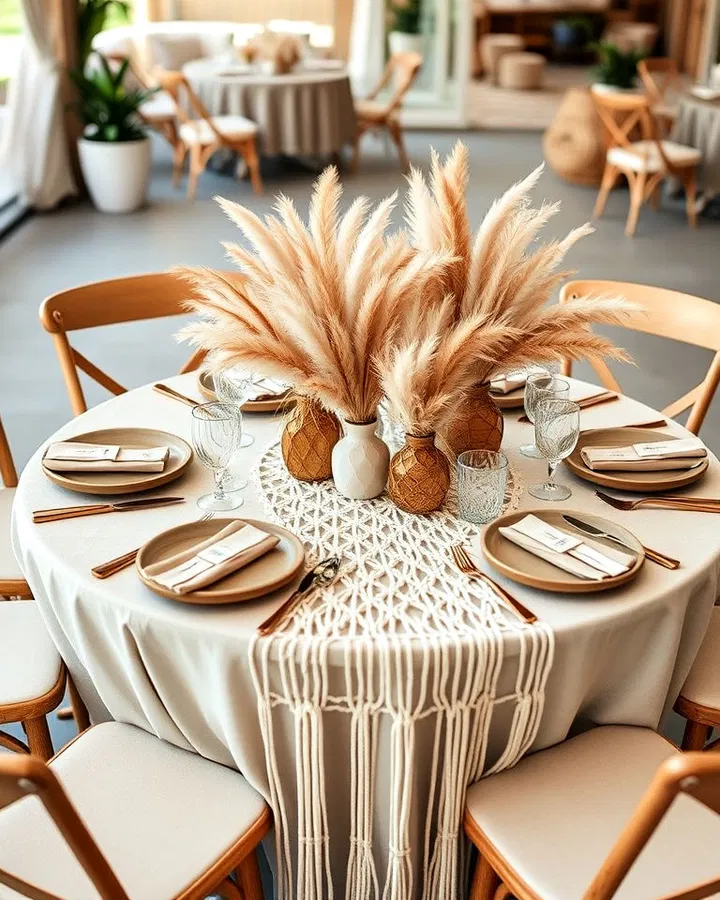
    12. Incorporate a Bold Vase

    Incorporate a Bold Vase

    A bold vase instantly elevates your TV stand by introducing height, vibrant color, and character. Whether adorned with fresh blooms, dried foliage, or left empty, it draws the eye and anchors your decor.

    Key Design Elements

    • Opt for a vase with a unique silhouette or tactile surface
    • Try filling it with dried pampas or eucalyptus for a natural touch
    • One large vase creates a stronger visual statement than multiple smaller ones

    Pro Tip: Selecting a large matte ceramic vase lends an artistic, gallery-inspired vibe to your arrangement.

    13. Incorporate a Decorative Tray for Stylish Organization

    A decorative tray helps keep your décor tidy while showcasing your favorite accents like candles and remotes in a cohesive and attractive arrangement. It adds both structure and charm to your TV stand setup.

    Key Design Elements

    • Keeps small items neatly contained
    • Establishes a central visual anchor
    • Allows for effortless updates and changes

    Pro Tip: Choose a tray with a mirrored or metallic finish to instantly enhance elegance and bounce light around the space.

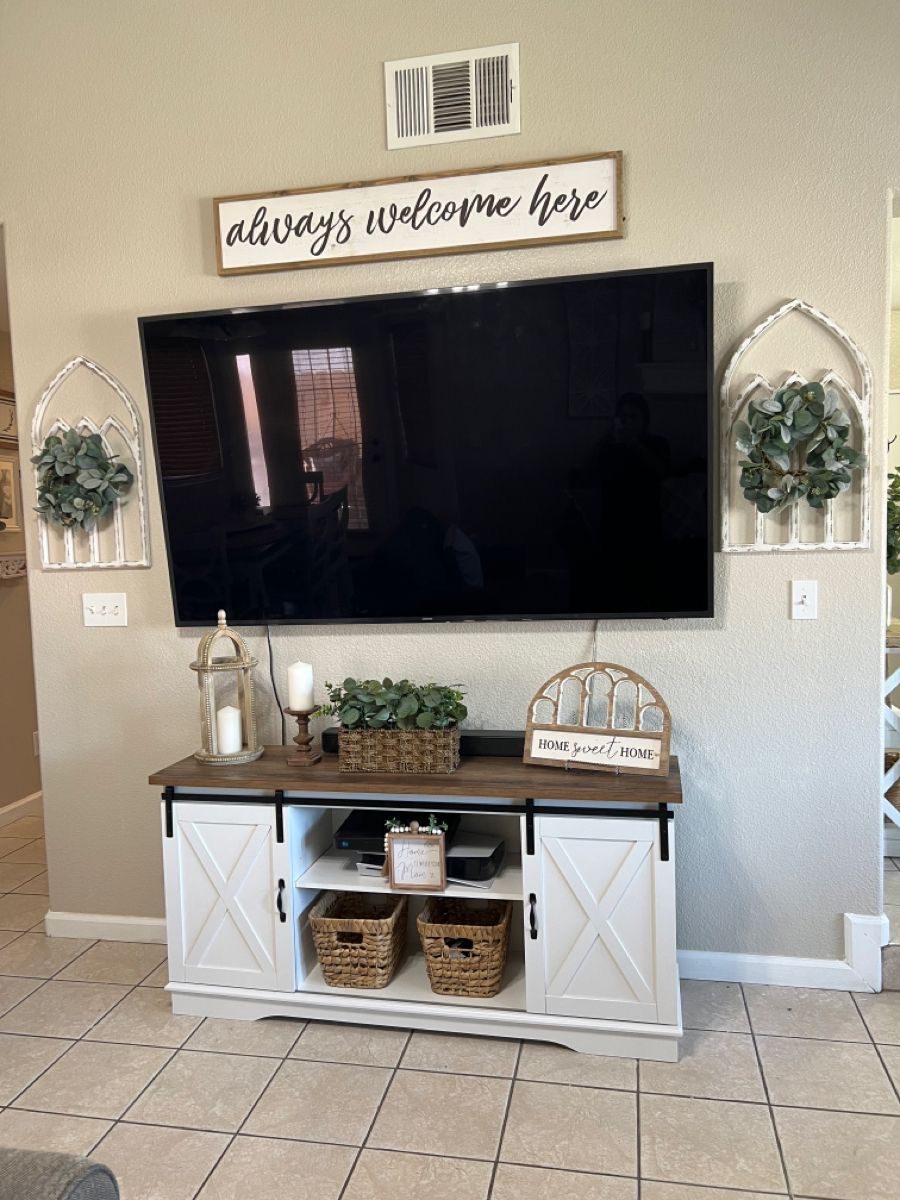
    14. Frame Your TV with Thoughtful Side Accents

    Frame Your TV with Thoughtful Side Accents

    Arranging your decorative items exclusively on either side of your television ensures the screen remains the main attraction, free from clutter. This approach not only preserves an unobstructed viewing experience but also elegantly outlines the TV, giving your entertainment area a polished and balanced appearance.

    Key Design Elements

    • Maintains the TV as the central feature
    • Enhances a sleek and tidy aesthetic
    • Perfect for modern and minimalist interiors

    Pro Tip: Choose tall, narrow pieces like floor urns or slender lamps to flank your TV, adding interest without overwhelming the space.

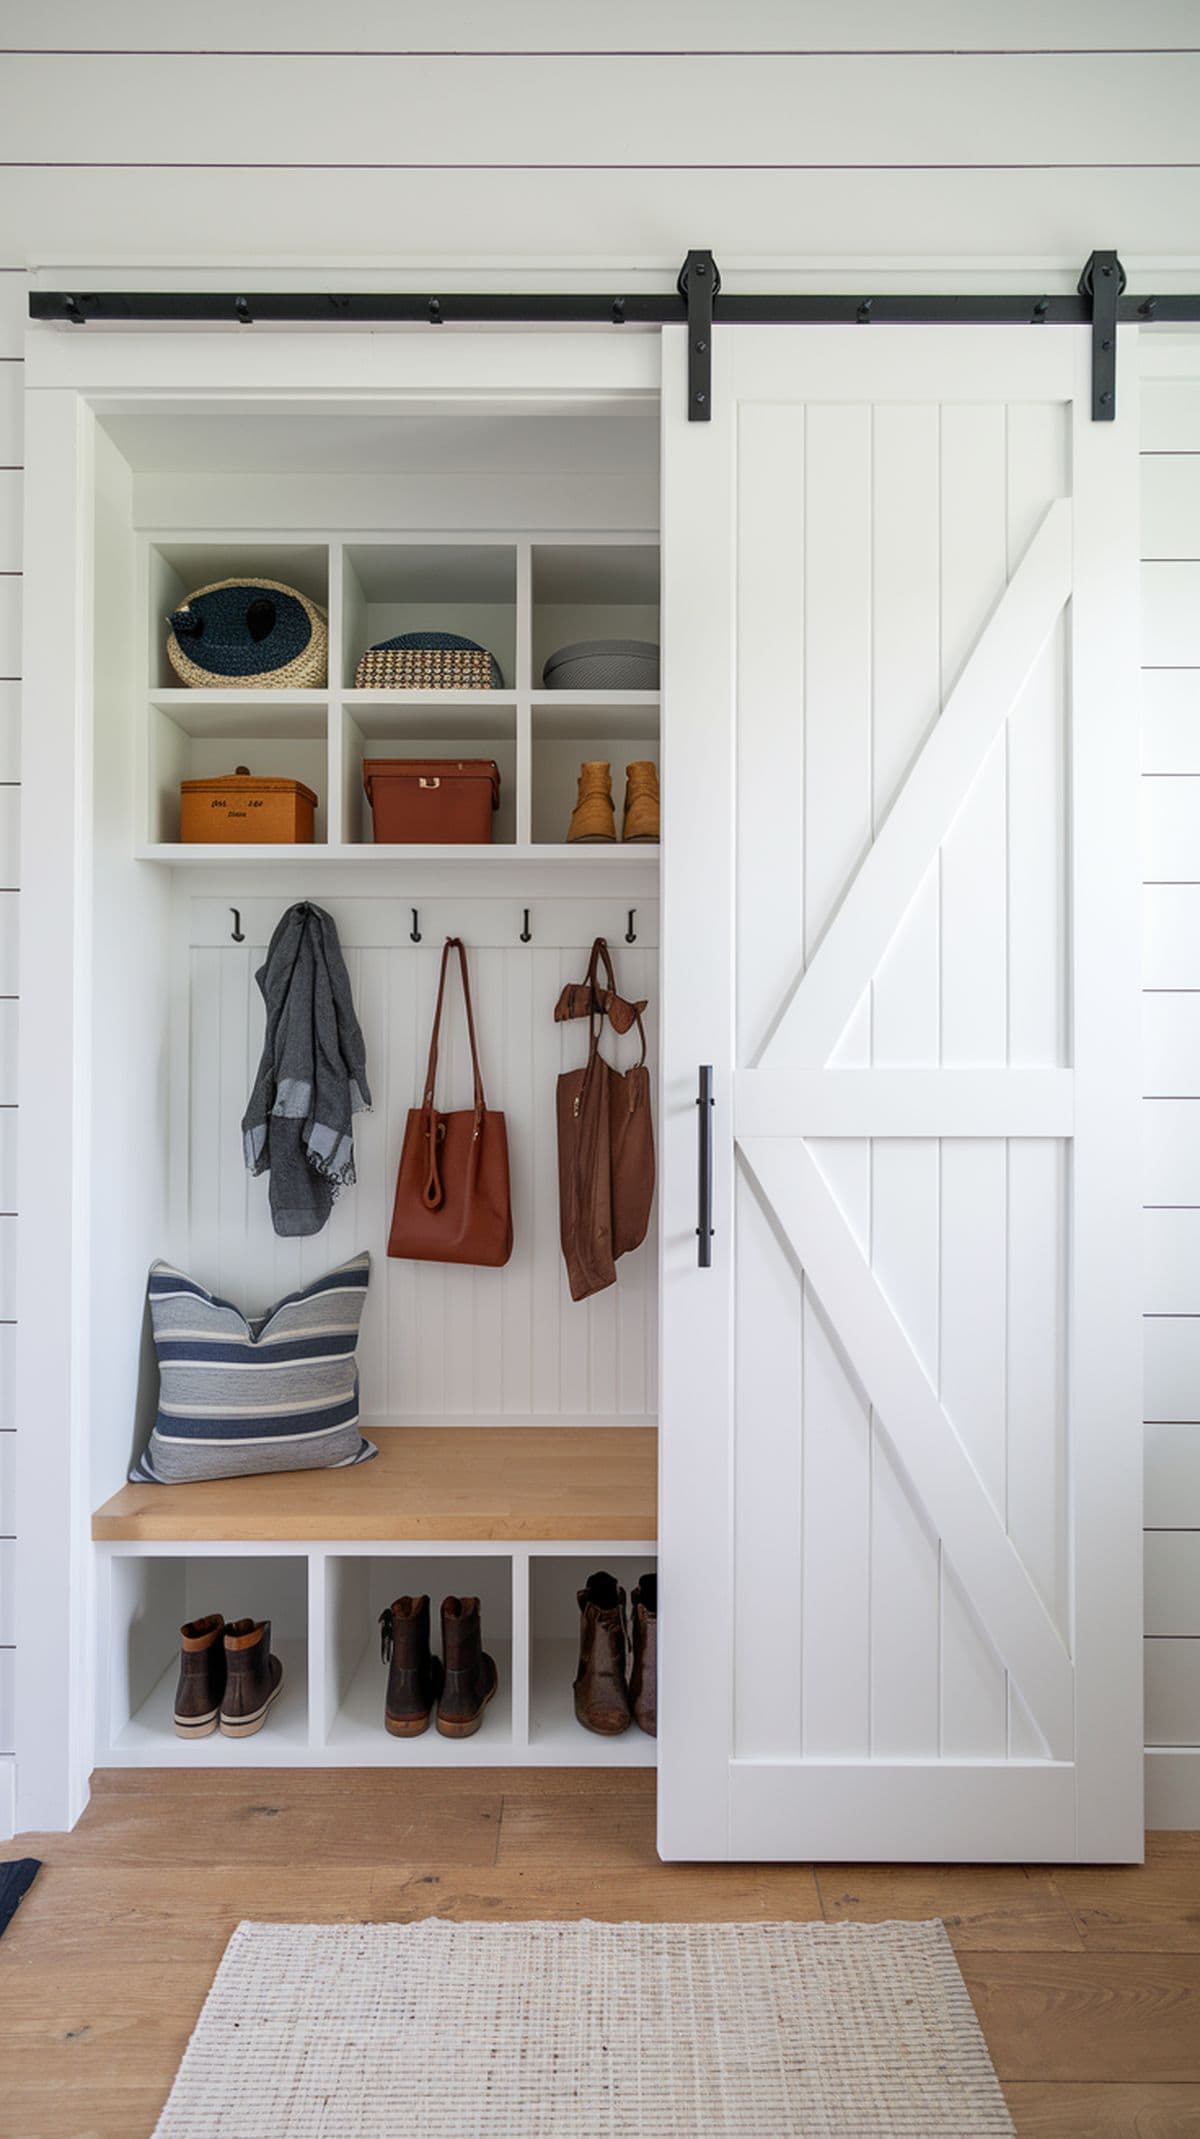
    15. Incorporate a Decorative Storage Box

    Incorporate a Decorative Storage Box

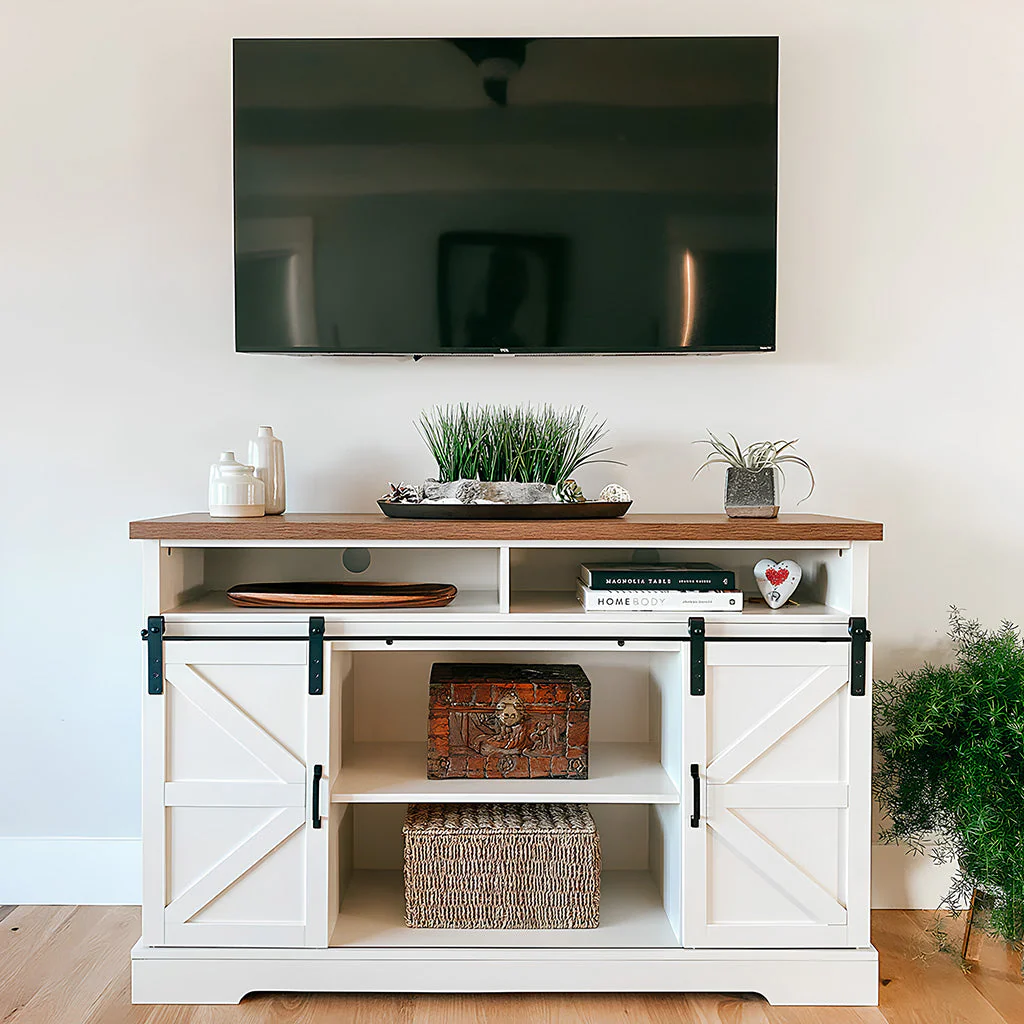
    Using a decorative storage box on your TV stand not only enhances visual appeal but also offers a practical solution for tucking away remotes, chargers, and other small essentials, keeping your space tidy.

    Key Design Elements

    • Keeps everyday items organized and out of sight
    • Comes in various textures and finishes to match your decor
    • Can be layered or grouped to create visual interest

    Pro Tip: Choose a box with a sleek lacquer or soft fabric covering in a coordinating shade to elevate the sophistication of your display.

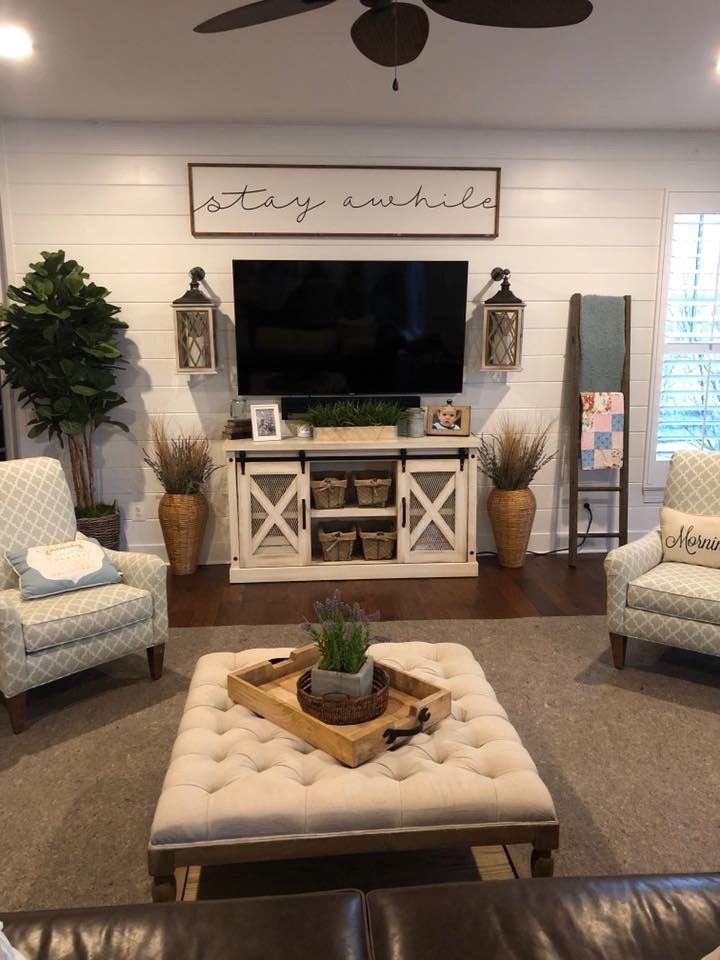
    16. Incorporate Varied Heights for Visual Appeal

    Incorporate Varied Heights for Visual Appeal

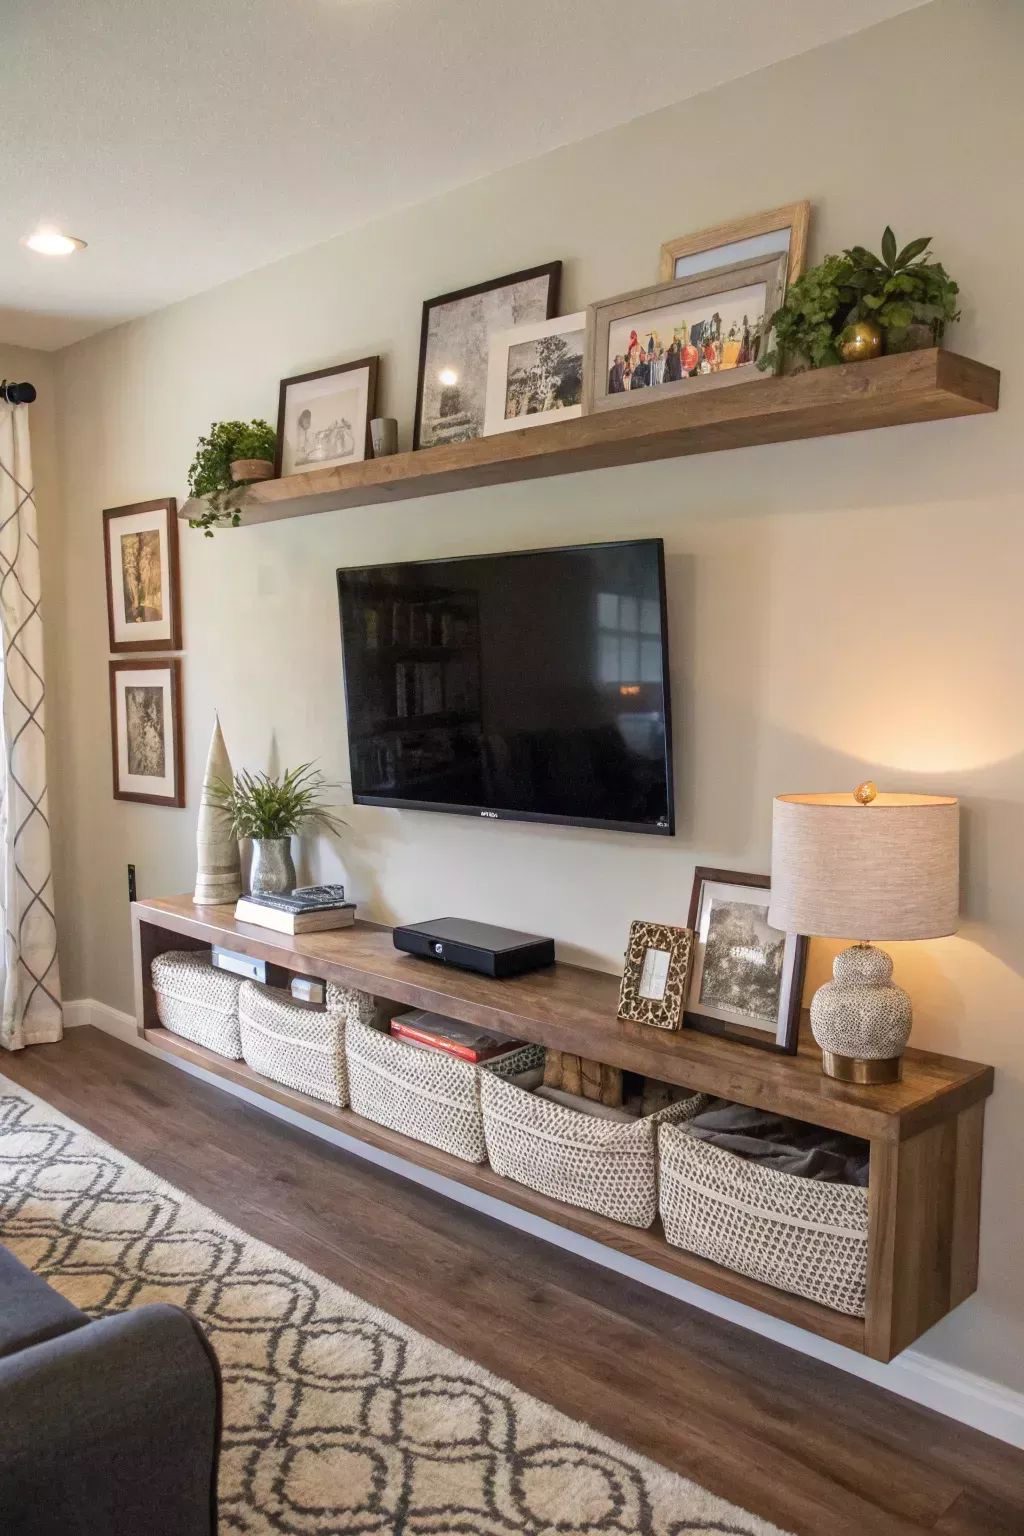
    Arranging decor pieces of differing heights on your TV stand enhances its visual texture and dimension. Placing taller objects beside shorter ones guides the eye smoothly across the display, preventing it from looking flat or monotonous.

    Key Design Elements

    • Mix tall, medium, and short items
    • Combine a lamp, decorative vase, and a small accent piece
    • Promotes engaging and dynamic visual flow

    Pro Tip: Layer your decor by positioning the tallest elements at the back, mid-sized pieces in the center, and smallest items upfront for depth.

    17. Incorporate a Cozy Lamp

    Incorporate a Cozy Lamp

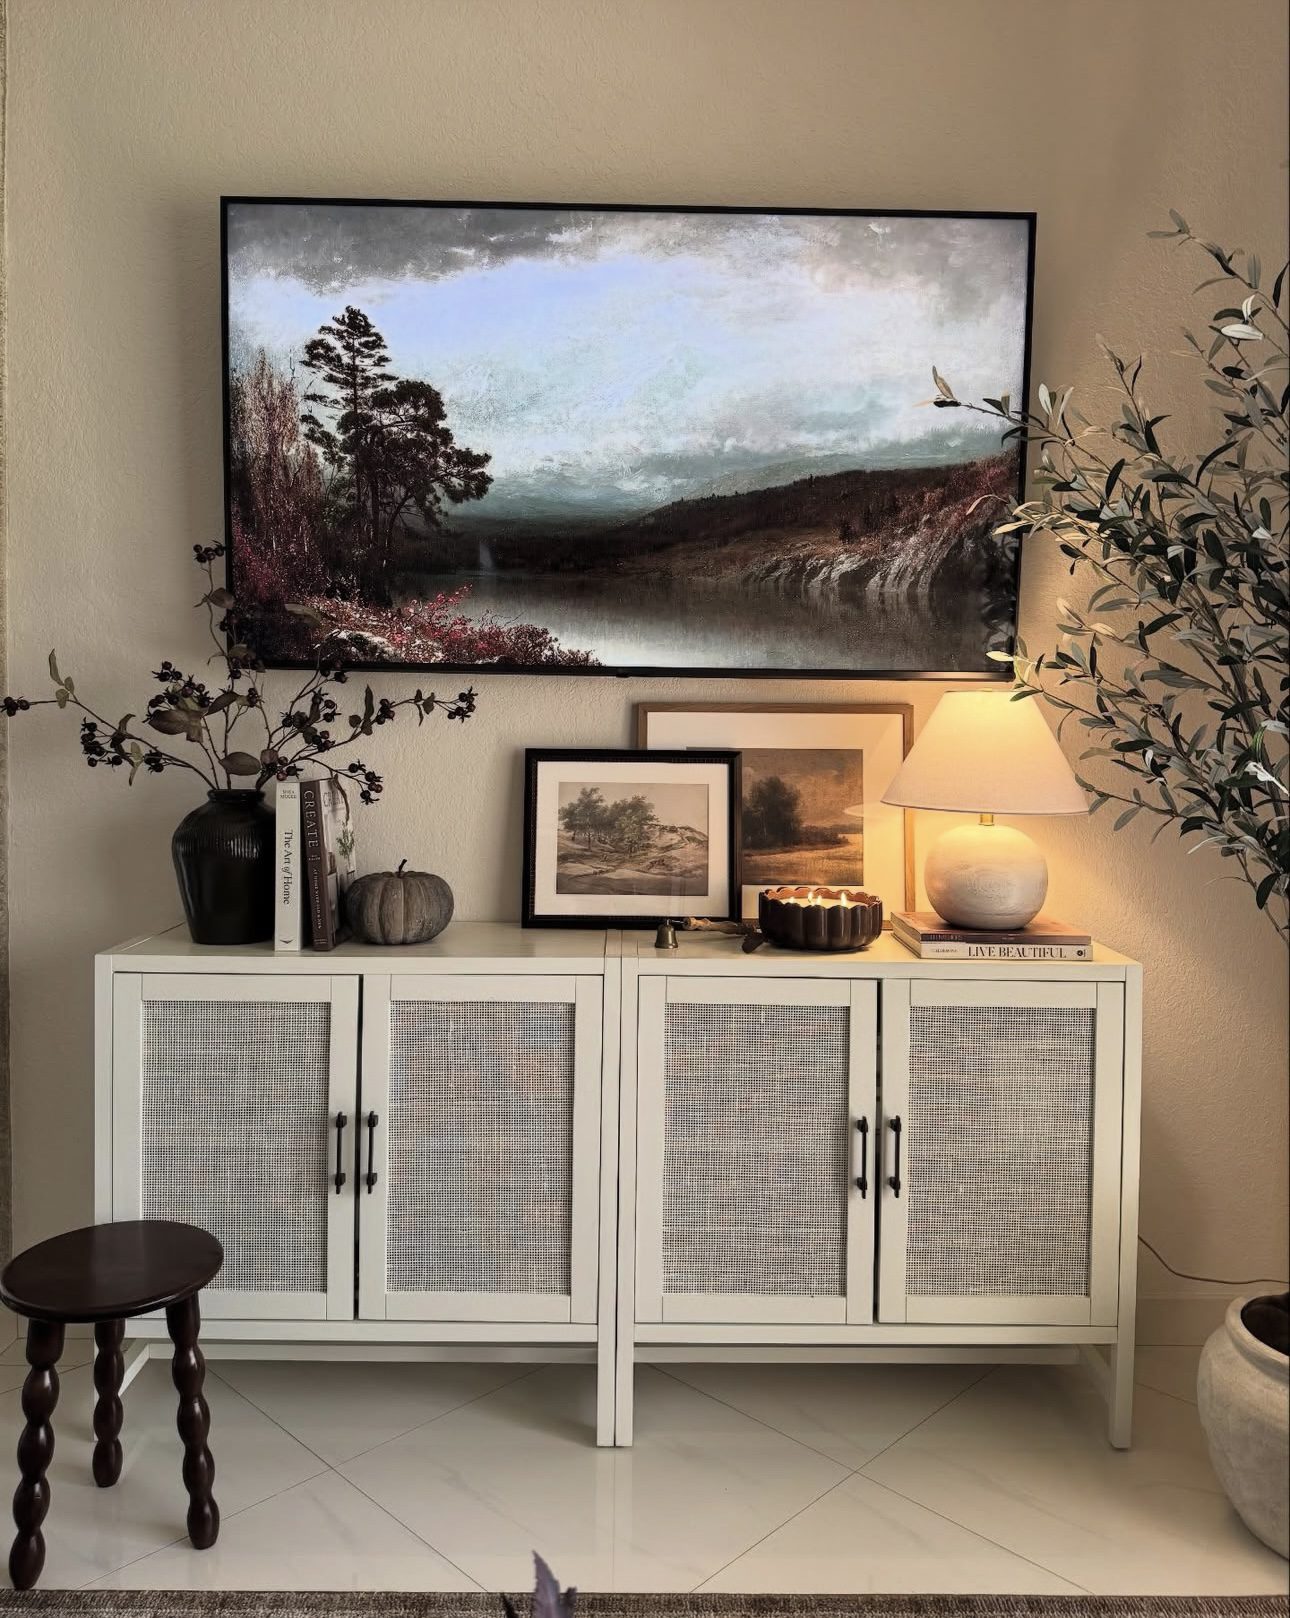
    Placing a compact lamp on your TV stand introduces a gentle, inviting illumination that transforms the space into a comfortable retreat. This subtle lighting helps to counterbalance the harshness often emitted by the television screen.

    Key Design Elements

    • Enhances ambient atmosphere
    • Balances the visual intensity of the TV
    • Adds dimension and elevates decor

    Pro Tip: Choose a lamp with a soft white bulb around 2700K to achieve a warm and welcoming ambiance.

    18. Incorporate a Compact Wooden Dish

    Incorporate a Compact Wooden Dish

    A compact wooden dish serves as an understated yet charming addition to your TV stand decor. It can showcase decorative spheres, dried botanicals, or be displayed solo as an artistic element.

    Key Design Elements

    • Multi-functional — perfect for storing small decor items
    • Brings a touch of natural texture and warmth
    • Complements greenery and candle arrangements beautifully

    Pro Tip: Enhance the wooden dish by filling it with polished river rocks or fragrant dried moss to achieve a calming, nature-inspired vibe.

    19. Create Harmony with Coordinated Decor

    Create Harmony with Coordinated Decor

    Arranging similar decorative items on both ends of your TV stand helps maintain a tidy and unified vibe. This balanced setup enhances the visual appeal of your entertainment area, giving your TV wall a refined and intentional style.

    Key Design Elements

    • Establishes an even and polished aesthetic
    • Simple to implement using pairs of accessories
    • Works well with a variety of design themes

    Pro Tip: Pairing matching elements like vases, lanterns, or bookends can effortlessly bring symmetry to your display.

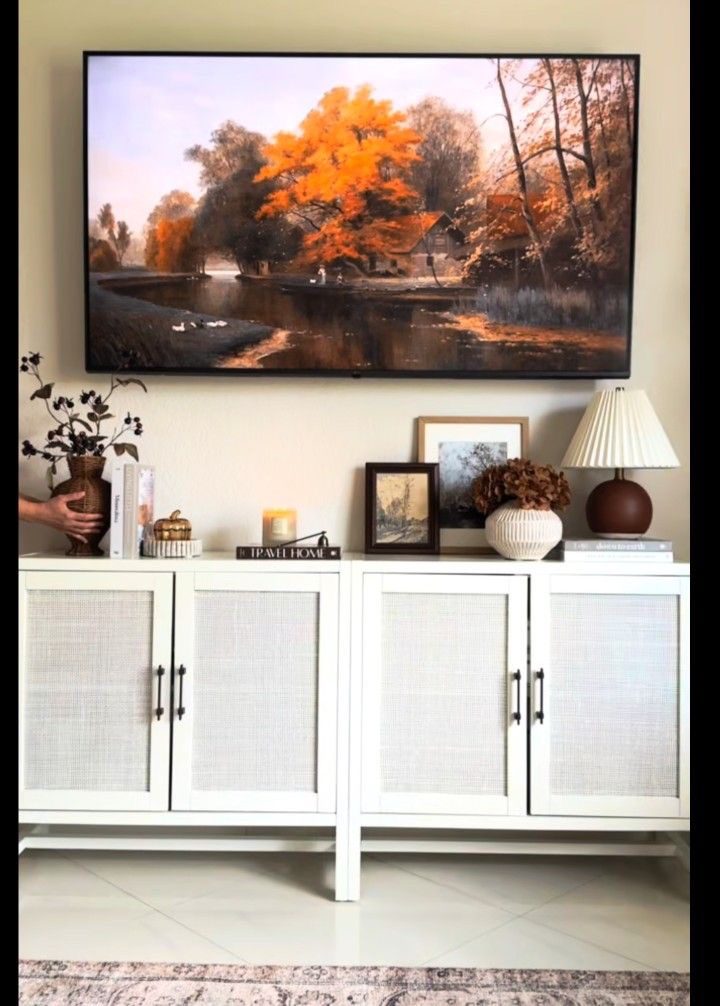
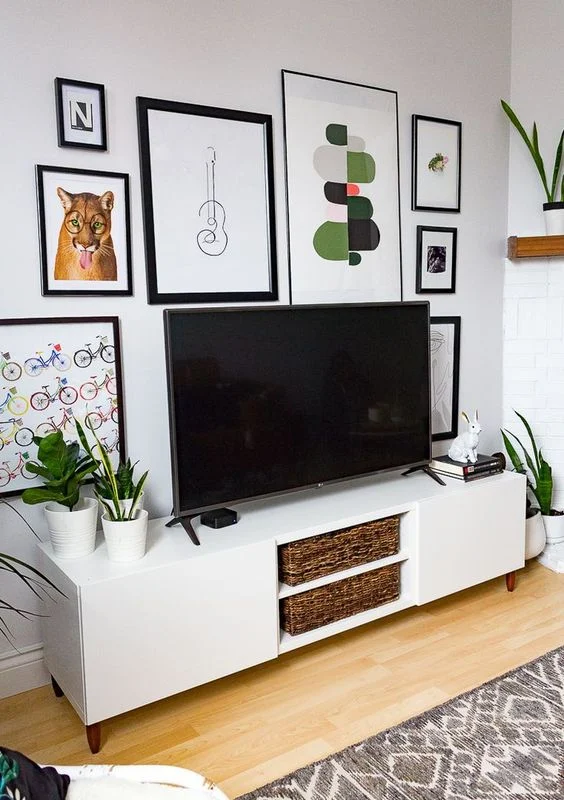
    20. Display Wall Art Next to Your Television

    Display Wall Art Next to Your Television

    Placing art pieces on the walls adjacent to your TV enhances the overall aesthetic, making the TV space feel more like part of a curated gallery. This technique is particularly effective in spacious living areas where there’s ample wall room.

    Key Design Elements

    • Select artwork that harmonizes with your room’s color scheme
    • Combine various frame dimensions to create a dynamic gallery vibe
    • Position art at eye height to draw attention and balance the space

    Pro Tip: Opting for monochrome photos or abstract artwork offers flexibility and complements nearly any interior design.

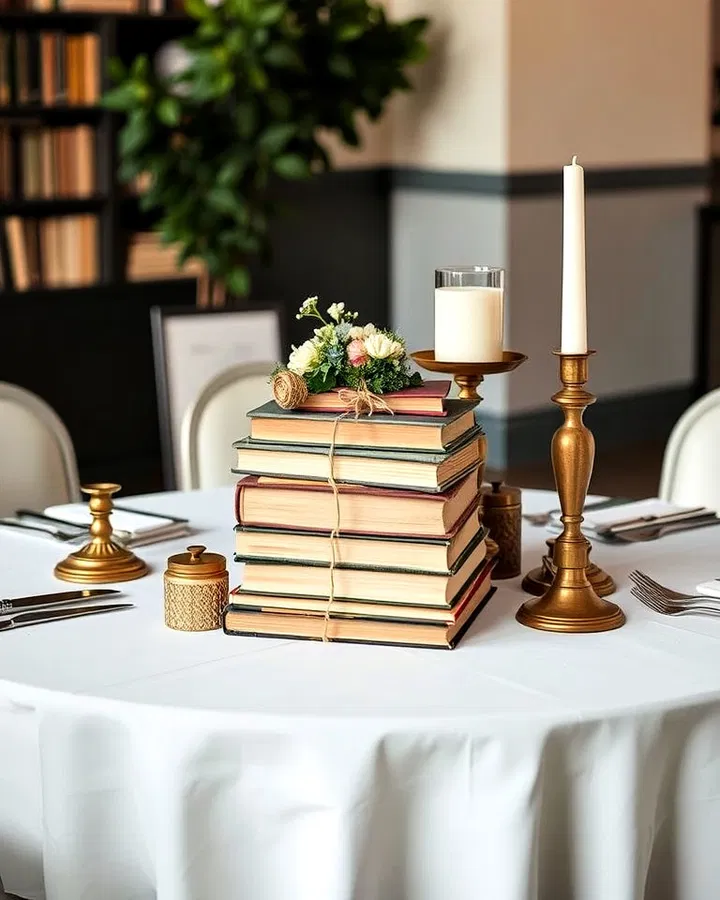
    21. Incorporate Books for Style and Dimension

    Incorporate Books for Style and Dimension

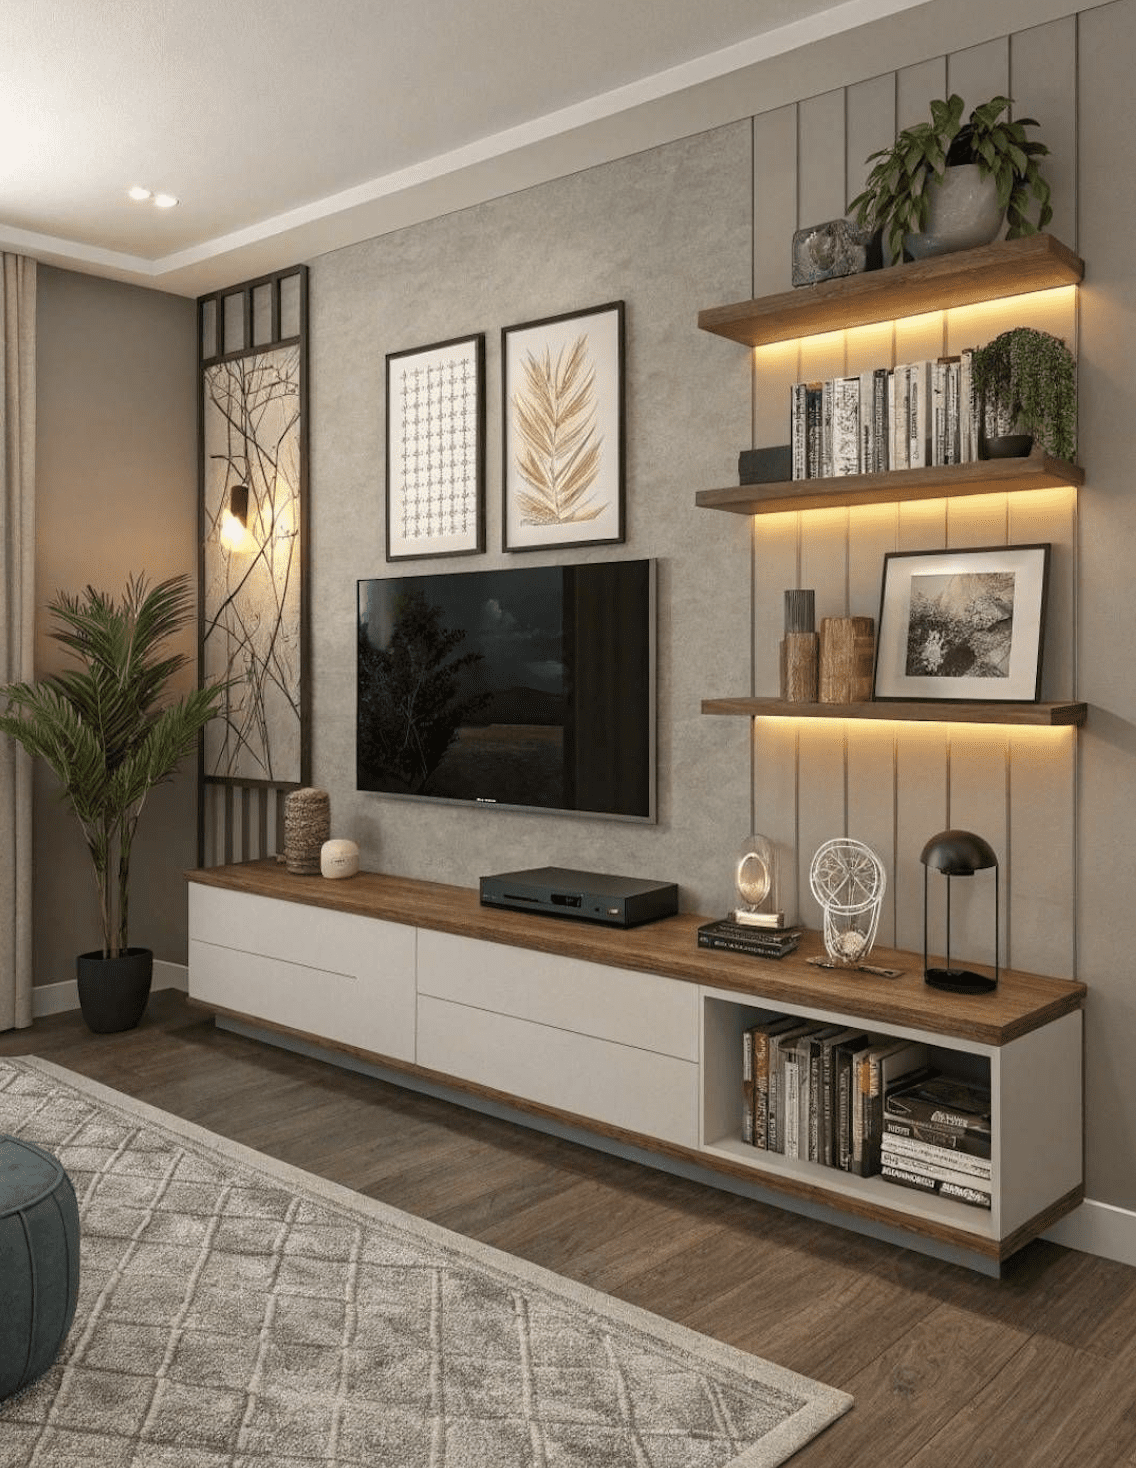
    Books bring an effortless touch of height, vibrancy, and personality to your TV stand. Whether you pile them up or place them upright, they serve as a simple yet effective way to occupy empty spots and enhance the overall aesthetic.

    Key Design Elements

    • Introduces varying heights and lively colors
    • Can be displayed stacked or vertically
    • Showcases your unique tastes and stories

    Pro Tip: Organize your books by color to create a bold and eye-catching arrangement perfect for social media.

    22. Incorporate Wooden Art Pieces

    Incorporate Wooden Art Pieces

    Wooden art pieces bring a cozy, organic vibe that balances out the sleek or contemporary look of your TV stand. They introduce both texture and character, making it simple to personalize the space with distinctive elements.

    Key Design Elements

    • Introduces warmth and tactile interest
    • Balances modern tech aesthetics with natural charm
    • Comes in a variety of designs and dimensions

    Pro Tip: Combine a wooden art piece with a small potted plant to create a harmonious, nature-inspired display.

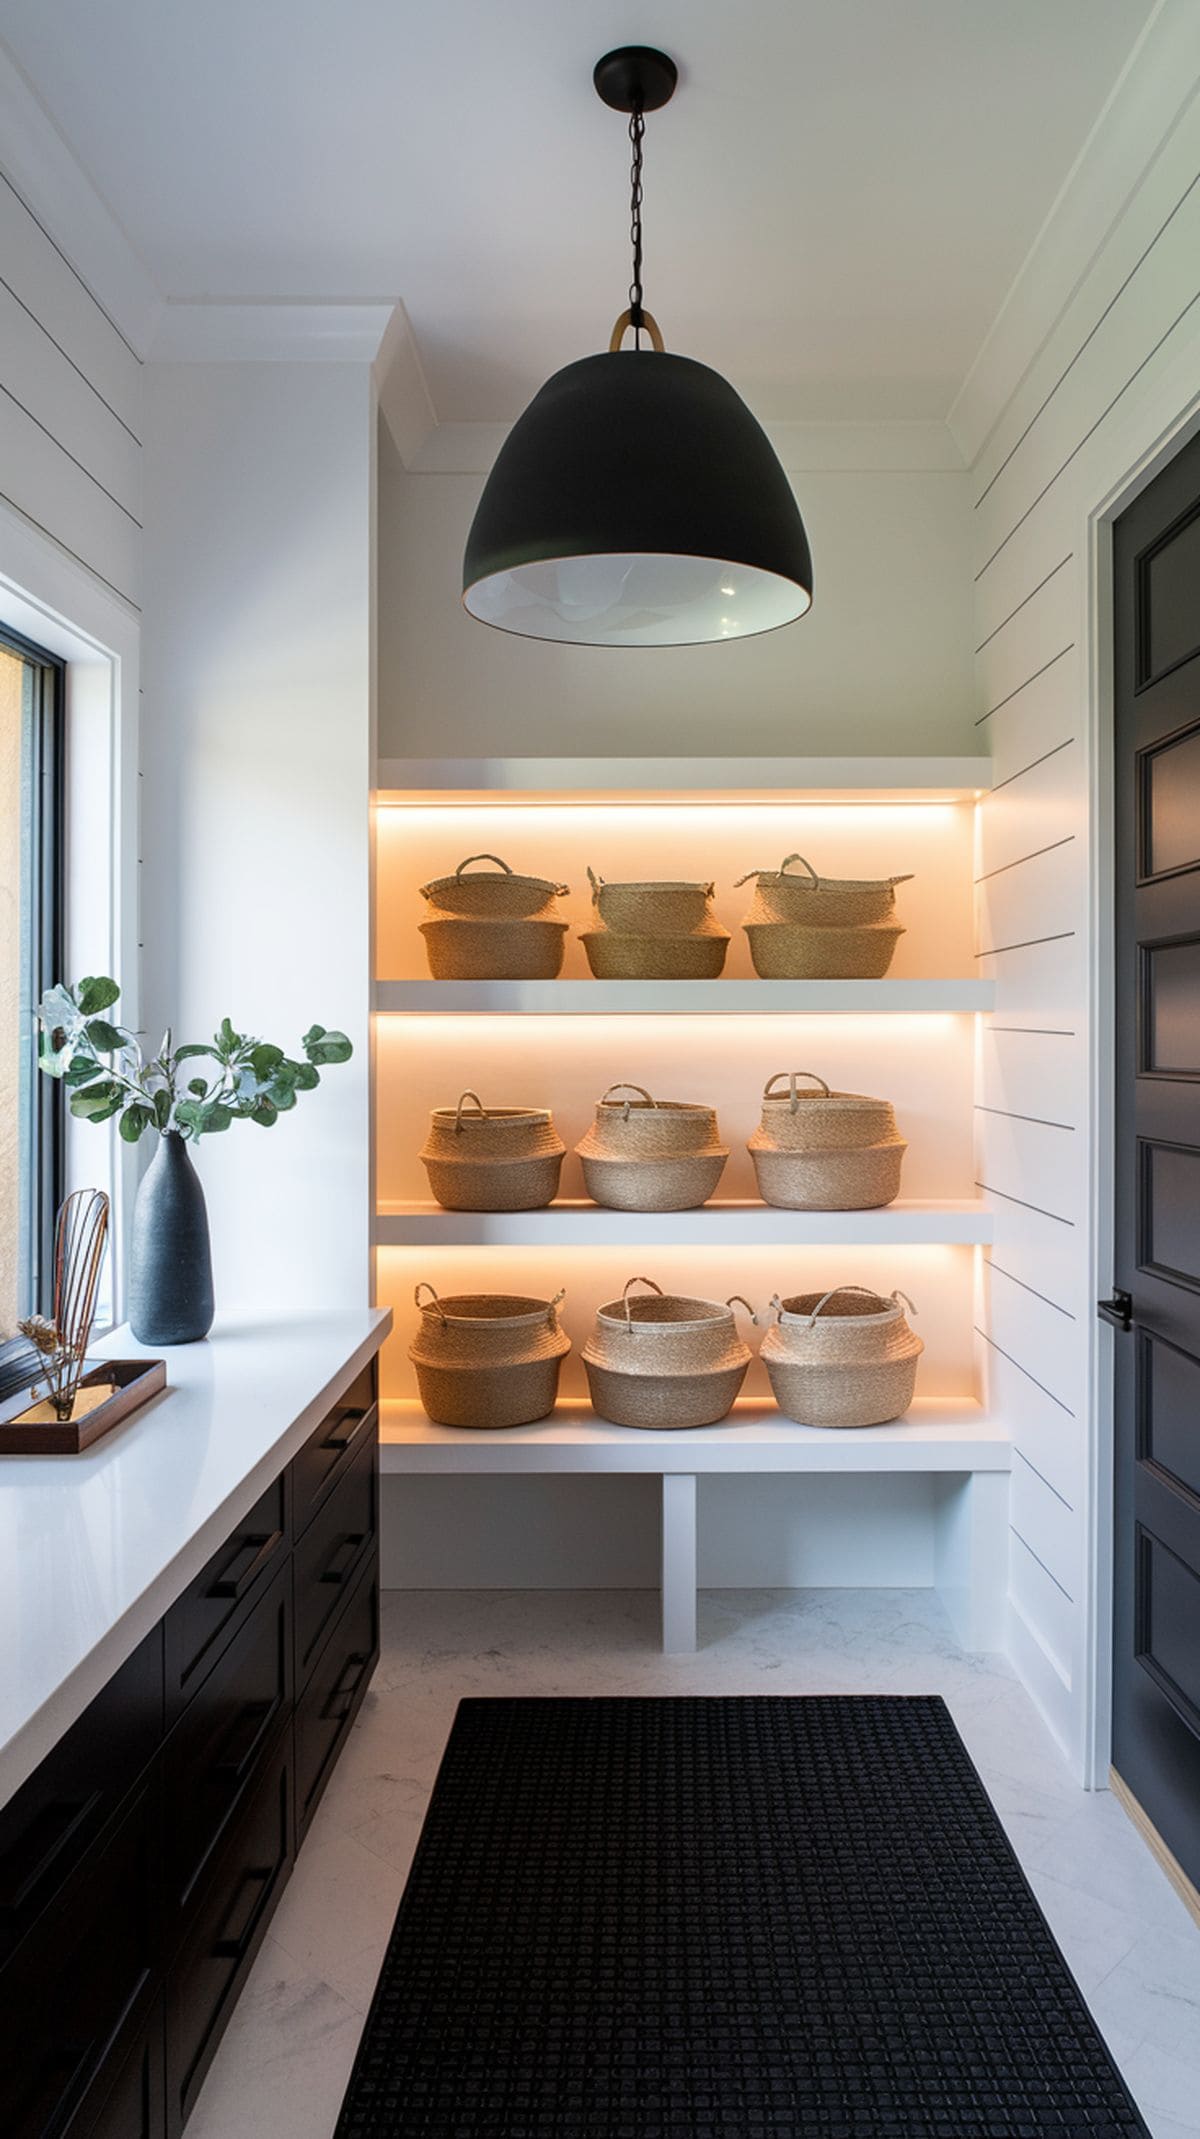
    23. Incorporate Woven Baskets for Stylish Storage

    Incorporate Woven Baskets for Stylish Storage

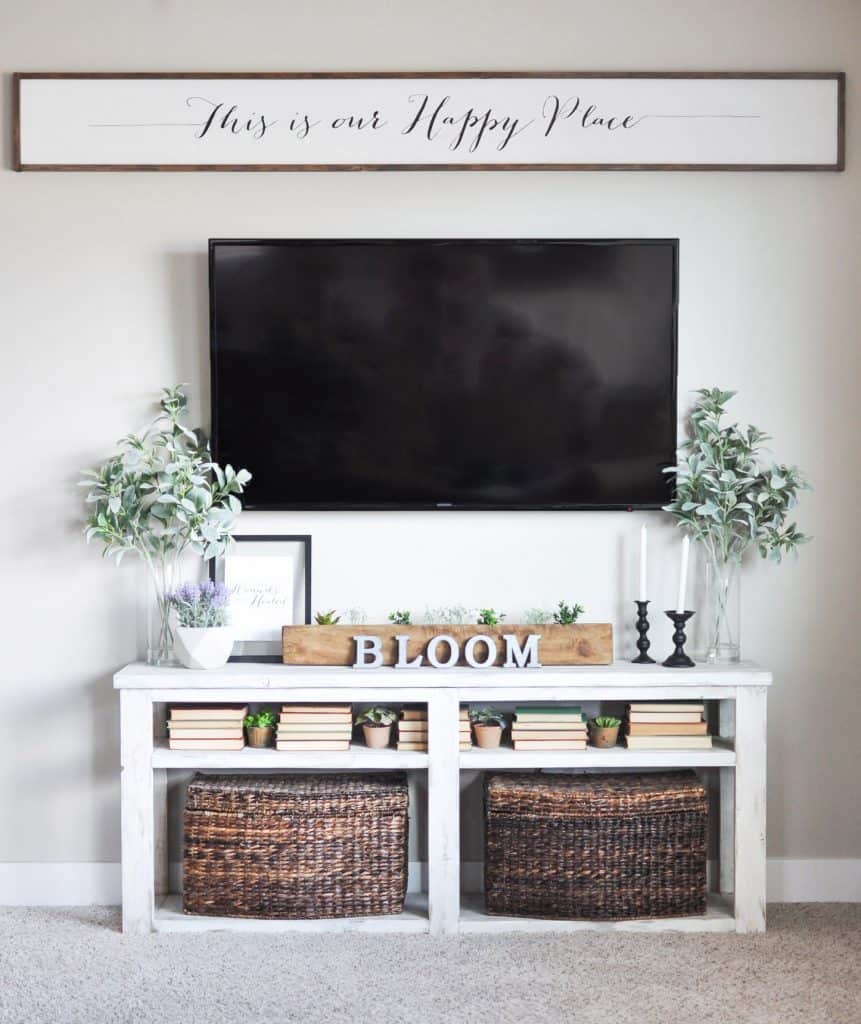
    Incorporate woven baskets to tuck away belongings you prefer not to showcase on your TV stand. These baskets introduce a cozy, natural element that enhances the ambiance. Utilizing baskets for storage keeps your space organized and visually appealing without sacrificing practicality.

    Key Design Elements

    • Conceals clutter while keeping essentials within reach
    • Brings a touch of organic texture and warmth to the decor
    • Fits seamlessly into TV stands of all dimensions

    Pro Tip: Opt for baskets crafted from materials like seagrass or rattan to harmonize with a neutral-toned interior.

    24. Incorporate Subtle Neutral Shades

    Incorporate Subtle Neutral Shades

    Choosing items in subtle neutral shades helps establish a calm and harmonious atmosphere around your TV setup. These colors seamlessly complement both your television and surrounding decor, providing a versatile backdrop that easily accommodates pops of seasonal or vibrant hues without overwhelming the space.

    Key Design Elements

    • Achieves a classic and unified aesthetic
    • Allows effortless seasonal refreshes
    • Complements a variety of interior design styles

    Pro Tip: Mix varying tones of ivory, taupe, and soft gray to build a layered and elegant neutral palette.

    25. Incorporate Natural Wood Elements

    Incorporate Natural Wood Elements

    Introducing wooden details to your TV stand creates a cozy and earthy vibe. Whether you choose a petite wooden dish, an intricately carved ornament, or a strand of wooden beads, these features infuse warmth and a touch of nature.

    Key Design Elements

    • Place wooden trays to organize smaller decor pieces
    • Display carved wooden bowls as striking focal points
    • Complements a variety of design aesthetics, from contemporary to classic

    Pro Tip: Opt for lighter woods like maple or ash to maintain an open and bright atmosphere, or select darker woods such as walnut to bring depth and sophistication.

    Conclusion

    Transforming your TV stand and console table is an easy yet impactful way to elevate the style of your living room. By thoughtfully incorporating elements like decorative trays, stylish storage baskets, greenery, and curated personal accents, you can create a space that feels both chic and uniquely yours. Don’t be afraid to experiment with textures, colors, and layouts until you find the perfect balance that reflects your personality and enhances your living area’s ambiance.

    Remember, your home is a canvas for creativity and comfort—these ideas are just starting points to inspire your own vision. So go ahead, have fun styling your TV stand and console table, and watch your living room transform into a welcoming, stylish haven that truly feels like home. Your perfect space is just a few decorative touches away!

  • Transform Your Entryway: Top Contemporary Mudroom Designs for Style and Function

    The mudroom has evolved far beyond its humble beginnings as a simple drop zone for muddy boots and wet coats. Today’s modern mudroom designs blend functionality with style, transforming these transitional spaces into organized, inviting areas that set the tone for the entire home. Whether you’re looking to maximize storage, introduce eye-catching details, or create a seamless flow between indoors and out, there’s a wealth of innovative ideas that can elevate your mudroom from overlooked to outstanding.

    In this post, we’ll explore 15 creative mudroom design concepts that embody today’s top trends—from sleek minimalism and bold accent walls to cozy farmhouse charm and industrial touches. Whether you prefer the clean lines of Scandinavian style or the practicality of built-in storage and laundry combos, these ideas offer inspiring ways to tailor your mudroom to your lifestyle. Get ready to reimagine this essential space with clever solutions like floating benches, statement lighting, sliding doors, and family zones that keep everyone organized and ready for whatever the day brings.

    1. Sleek Steel and Glass Accents for Urban Sophistication

    Sleek Steel and Glass Accents for Urban Sophistication

    Elevate your mudroom with a chic industrial flair by blending transparent glass features with matte black metal details and visible hardware. This approach creates a stylish, metropolitan space that balances raw edge with refined design.

    Key Design Elements

    • Install matte black metal hooks or an industrial-style coat rack to provide functional storage with attitude.
    • Incorporate a glass partition or door to visually connect the mudroom while maintaining distinct zones.
    • Highlight authentic character by leaving bolts and fasteners exposed as part of the décor.

    Pro Tip: Imagine a mudroom where a sleek black metal rack is mounted against warm reclaimed timber walls, complemented by a clear glass door that floods the space with daylight. Nearby, a minimalist black bench topped with soft leather cushions invites you to sit and enjoy the urban-inspired ambiance.

    2. Unified Hue Harmony

    Unified Hue Harmony

    Create a striking and cohesive look by embracing a single color throughout your mudroom. Selecting one hue and exploring its different tones can produce a sophisticated and contemporary vibe. This approach allows for a sleek yet inviting space that feels thoughtfully curated.

    Key Design Elements

    • Pick a primary color palette and apply it consistently on walls, cabinetry, and furniture.
    • Incorporate a range of tints and shades of your chosen color to add depth and interest.
    • Introduce elements with varied textures or subtle metallic finishes to enliven the overall design.

    Pro Tip: Imagine a serene mudroom bathed in shades of charcoal gray, where the cabinetry, walls, and seating blend seamlessly. Matte black hooks and soft brass fixtures punctuate the space, while natural oak details infuse warmth and balance.

    3. Effortless Organization with Slide-Out Storage

    Effortless Organization with Slide-Out Storage

    Maximize your mudroom’s functionality by integrating slide-out drawers into benches or cabinets. These clever compartments offer concealed storage that helps maintain a neat and streamlined space. Keep daily essentials organized and within easy reach without sacrificing style.

    Key Design Elements

    • Select cabinetry designed with smooth slide-out drawers perfect for storing shoes and backpacks.
    • Incorporate dividers or trays inside drawers to neatly separate smaller accessories.
    • Add subtle labels to drawers to quickly identify contents without cluttering the design.

    Pro Tip: Picture a contemporary mudroom featuring wide slide-out drawers beneath a cushioned bench, each drawer perfectly lined with shoes and boots arranged in neat rows. A soft, neutral-toned cushion tops the bench, inviting you to sit while providing a clean, modern aesthetic.

    4. Nordic Tranquility

    Nordic Tranquility

    Embrace the serene charm of Nordic design by incorporating light timber elements and minimalist forms that create a peaceful, airy atmosphere. Prioritize natural textures and a muted color palette to cultivate a welcoming and harmonious entryway.

    Key Design Elements

    • Choose a pale wood storage bench or open shelving unit to maintain an airy feel.
    • Paint walls and accessories in soft neutrals such as cream, taupe, and gentle slate tones.
    • Incorporate inviting accents like a woven throw blanket or a delicate green succulent.

    Pro Tip: Imagine a mudroom framed by soft birch wood seating and crisp white paneled walls. A braided jute basket holds plush beige throws, while a small leafy plant in a minimalist pot brings a fresh burst of life to the corner.

    5. Rustic Elegance Reimagined

    Rustic Elegance Reimagined

    Create a welcoming mudroom that marries the timeless charm of farmhouse style with contemporary design touches. This space combines clean lines and natural textures to achieve a balanced and inviting atmosphere. Embrace simplicity while adding subtle industrial elements for a fresh, updated feel.

    Key Design Elements

    • Install crisp white painted shiplap to evoke classic farmhouse walls with a modern finish.
    • Incorporate matte black fixtures and warm wooden details to introduce contrast and sophistication.
    • Use metal mesh baskets or vintage-inspired galvanized containers for functional and stylish storage.

    Pro Tip: Picture a bright mudroom featuring gleaming white shiplap walls framing a sturdy wooden bench with a smooth, honey-toned surface. Matte black hooks display woven sun hats and leather totes, while a galvanized metal basket nearby holds a lively arrangement of seasonal blooms, adding a splash of natural color.

    6. Sleek Wall-Mounted Seating for Space Efficiency

    Sleek Wall-Mounted Seating for Space Efficiency

    Installing a wall-mounted bench offers a minimalist solution that maximizes floor area and enhances the mudroom’s modern aesthetic. This design creates an airy, uncluttered environment while providing a functional spot to sit and store essentials.

    Key Design Elements

    • Secure a sturdy bench made from wood or metal directly onto the wall, ensuring the area beneath remains open.
    • Complement the bench with wall hooks or a slim shelf overhead to keep belongings organized and accessible.
    • Add plush cushions or fabric accents to introduce warmth and comfort to the crisp design.

    Pro Tip: Imagine a streamlined mudroom featuring a wall-hung bench crafted from warm maple wood, its underside revealing clean, white-painted walls that amplify the spacious feel. Bright, patterned pillows rest atop the bench, inviting a cozy yet modern atmosphere.

    7. Seamless Mudroom and Laundry Fusion

    Seamless Mudroom and Laundry Fusion

    Maximize your home’s efficiency by blending your mudroom with a laundry zone. This clever layout is ideal for limited spaces, offering a streamlined area that handles both entryway storage and laundry tasks with ease.

    Key Design Elements

    • Install side-by-side front-load laundry machines topped with a durable surface for sorting and folding clothes.
    • Integrate overhead storage units or open shelving to keep laundry essentials and cleaning products organized.
    • Designate separate wall-mounted hooks and built-in compartments to keep everyday outerwear distinct from laundry duties.

    Pro Tip: Imagine a contemporary laundry-mudroom hybrid featuring crisp white cabinets paired with a rich wooden countertop. Below, the washer and dryer sit flush side-by-side, while sleek black hooks above display neatly hung coats and freshly folded linens.

    8. Seamless Storage: Tailored Lockers and Cabinetry

    Seamless Storage: Tailored Lockers and Cabinetry

    Elevate your mudroom with custom-built storage solutions that blend style and function effortlessly. Designed to fit your space perfectly, these units offer organized compartments for each family member while maintaining a sleek, contemporary vibe.

    Key Design Elements

    • Carefully assess your mudroom dimensions to design cabinetry that maximizes every inch.
    • Opt for minimalist flat-front doors to enhance the clean, modern look of the space.
    • Incorporate unique elements like engraved nameplates or distinctive handles for a personal flair.

    Pro Tip: Picture a line of built-in storage painted in a tranquil navy hue, featuring smooth flat-panel doors accented by subtle matte black pulls. Hidden compartments keep clutter at bay, while an open alcove proudly displays a vibrant potted plant, adding a refreshing natural touch.

    9. Personalized Family Stations

    Personalized Family Stations

    Design a mudroom tailored to your family’s daily rhythm by creating specific areas for everyone. Personalized labels and designated storage keep belongings neat and add a welcoming touch. This approach helps streamline the morning rush with ease and style.

    Key Design Elements

    • Set up separate hooks or cubbies assigned to each family member for their coats and bags.
    • Incorporate vibrant baskets or containers to neatly hold shoes, gloves, and hats.
    • Mount a message board or small whiteboard to share notes, schedules, and important reminders.

    Pro Tip: Picture a lively mudroom where each family member’s name brightens their colorful storage bins, jackets hang neatly on allocated hooks, and a corkboard displays cheerful notes alongside the week’s plans, creating a space that’s both functional and full of personality.

    10. Vibrant Vibes: Eye-Catching Feature Walls

    Vibrant Vibes: Eye-Catching Feature Walls

    Inject life into your mudroom by introducing a striking feature wall that captures attention. Opt for rich hues like deep teal, emerald, or an artistic wallpaper pattern to elevate the space’s character while maintaining its functionality.

    Key Design Elements

    • Select a vivid paint shade or an intricate wallpaper pattern that resonates with your style.
    • Designate a single wall to showcase this statement element, making it the room’s centerpiece.
    • Balance the bold wall with subtle, muted tones in your furnishings and décor to keep the look cohesive.

    Pro Tip: Imagine a sleek mudroom where a deep emerald shiplap wall serves as a lush backdrop against crisp white storage benches. Matte black hooks adorn the wall, accented by soft leather totes that add richness and tactile appeal.

    11. Seamless Entry Nook Design

    Seamless Entry Nook Design

    Transform an unused spot near your doorway into a chic, functional entry nook without enclosing it with walls. Utilize furnishings and floor coverings to subtly set the area apart while maintaining an open flow.

    Key Design Elements

    • Select a nearby alcove by the door and place a sturdy, easy-to-clean mat to visually anchor the zone.
    • Incorporate a sleek bench featuring concealed compartments to keep clutter out of sight.
    • Install a series of wall-mounted hooks or a customizable pegboard to efficiently organize coats and accessories vertically.

    Pro Tip: Imagine a cozy corner highlighted by a textured sisal rug beneath a minimalist wooden bench with a hidden drawer. Above, matte black hooks punctuate the crisp white wall, while a woven basket tucked under the bench holds extra footwear neatly.

    12. Earthy Touches for a Serene Entryway

    Earthy Touches for a Serene Entryway

    Infuse your mudroom with a calming, natural vibe by blending organic materials and muted shades inspired by the outdoors. Elements like rugged stone flooring, warm wood features, and lively greenery create a welcoming sanctuary that reconnects you with nature.

    Key Design Elements

    • Select resilient stone or ceramic flooring in soft, natural hues for longevity and style.
    • Incorporate a wooden bench featuring raw edges to introduce a handcrafted, organic aesthetic.
    • Place potted plants or clusters of succulents to bring fresh life and color indoors.

    Pro Tip: Imagine a mudroom grounded by textured flagstone floors beneath a handcrafted bench with unpolished wood grains. Cascading hanging plants soften the space, while woven baskets add earthy charm and practical storage.

    13. Sleek Simplicity: Subtle Hues and Streamlined Storage

    Sleek Simplicity: Subtle Hues and Streamlined Storage

    Transform your mudroom into a serene space by focusing on simplicity and soft shades. Opt for muted tones like cream, taupe, or pale gray, and select furnishings that prioritize function without excess detail. Integrate a compact bench with coordinated wall-mounted hooks and floating shelves to maintain an airy, organized environment.

    Key Design Elements

    • Choose a soft, neutral wall color to create a calming backdrop.
    • Mount floating shelves above a minimalist bench to neatly hold everyday essentials.
    • Incorporate matching storage containers to discreetly organize smaller belongings.

    Pro Tip: Imagine stepping into a tranquil mudroom painted in gentle taupe, where slender floating shelves display uniform fabric bins. A narrow wooden bench topped with a cozy cushion offers a welcoming spot to pause, while a row of neatly arranged hooks showcases jackets and bags in perfect order.

    14. Illuminate with Impact

    Illuminate with Impact

    Transform your mudroom by exchanging standard lighting for an eye-catching fixture that doubles as art. Opt for sleek, contemporary designs that blend style with warmth to create an inviting atmosphere instantly.

    Key Design Elements

    • Select a bold lighting piece in finishes like matte black, brushed brass, or crisp white to serve as a focal point.
    • Prioritize bulbs that emit a cozy, amber glow to enhance the welcoming feel of the space.
    • Incorporate subtle accent lights, such as LED strips beneath shelving, to add both charm and functional illumination.

    Pro Tip: Picture a striking matte black pendant casting a gentle glow over a crisp white mudroom adorned with contrasting black hardware. Warm light seeps from hidden LEDs beneath floating shelves, softly illuminating an array of woven baskets that bring texture and natural warmth to the scene.

    15. Contemporary Sliding Door Solutions

    Contemporary Sliding Door Solutions

    Incorporating sliding doors into mudroom designs maximizes space while introducing a chic, modern aesthetic. Opt for streamlined barn doors or discreet pocket doors to create a functional and elegant entryway. These choices blend practicality with stylish sophistication.

    Key Design Elements

    • Choose a barn door painted in matte black or soft white to complement modern interiors.
    • Select minimalist sliding hardware featuring smooth, linear designs to enhance the contemporary vibe.
    • Coordinate the door with muted color palettes in the mudroom to maintain a calm and inviting atmosphere.

    Pro Tip: Imagine a matte white barn door gliding effortlessly on slender black tracks, unveiling a serene mudroom outfitted with light oak shelves and subtle brass hooks that bring warmth and order to the space.

    Conclusion

    Transforming your mudroom into a stylish and functional space is more than just a design upgrade — it’s an investment in everyday ease and elegance. By incorporating thoughtful storage solutions, durable materials, and personalized touches, you can turn this often-overlooked area into a welcoming gateway that sets the tone for your entire home. Whether you prefer sleek minimalism or cozy rustic charm, the right mudroom design not only organizes clutter but also enhances your lifestyle, making daily routines smoother and more enjoyable.

    Embrace the opportunity to reimagine your mudroom as a true extension of your home’s style and practicality. With the inspiring ideas shared here, you’re equipped to create a space that balances beauty and function effortlessly. Start planning today, and watch how a well-designed mudroom can bring a new level of comfort, efficiency, and joy to your everyday living.

  • Chic and Sophisticated: Stunning Small Kitchen Designs That Maximize Style and Space

    When it comes to kitchen design, size often feels like the ultimate dealbreaker. But here’s a little secret: a small kitchen doesn’t mean sacrificing style or functionality. In fact, these cozy culinary spaces can be some of the most charming and clever rooms in your home. With a bit of creativity and thoughtful planning, even the tiniest kitchen can become a stunning, efficient hub where meals—and memories—are made.

    Whether you love sleek modern minimalism, rustic farmhouse warmth, or vibrant eclectic vibes, small kitchens offer a unique canvas to showcase your personal taste. From smart storage solutions to bold color palettes and multi-purpose furniture, there’s a world of inspiring ideas to explore. In this post, we’ll dive into a variety of design styles and practical tips that prove small kitchens not only work—they wow. Ready to reimagine your compact cooking space? Let’s get started!

    1. Sun-Kissed Serenity: How Indoor Greenery Elevates Cozy California Kitchens

    Sun-Kissed Serenity: How Indoor Greenery Elevates Cozy California Kitchens

    Imagine a kitchen bathed in natural light, where fragrant herbs thrive on the sill and cascading pothos vines add a touch of effortless charm. This style merges the ease of California living with fresh, vibrant plant life, creating a space that feels both inviting and naturally elegant—like a serene beach day captured indoors.

    Key Design Elements

    • Ceramic herb planter set white
    • Trailing pothos in hanging macrame
    • Eucalyptus stems in glass vase
    • Natural rattan floating shelf
    • Brass plant mister vintage style
    • Linen cafe curtains oatmeal color
    • Terracotta kitchen mat washable
    • Brushed gold cabinet pulls 4-inch

    Pro Tip: For your kitchen walls, choose ‘White Heron’ (Benjamin Moore OC-57) to evoke that airy, sunlit California vibe, offering a bright canvas that highlights every green leaf with magazine-worthy clarity. Apply ‘Saybrook Sage’ (Benjamin Moore HC-114) on open shelving to seamlessly blend your greenery with the kitchen’s architecture, reinforcing a natural, earthy atmosphere. Pro tip: Position your plants near the brightest window spots to maximize growth, and mist them occasionally with a brass mister to keep leaves vibrant and dust-free.

    2. Chic Parisian Charm: Marble Surfaces Elevate Cozy Kitchen Spaces with Understated Grace

    Chic Parisian Charm: Marble Surfaces Elevate Cozy Kitchen Spaces with Understated Grace

    Embrace the timeless allure of Parisian style by transforming your small kitchen into a haven of subtle elegance. Think polished marble countertops paired with curated accents, crafting a look that feels effortlessly sophisticated—like a perfectly balanced ensemble where simplicity reigns supreme.

    Key Design Elements

    • Carrara marble countertop white veined
    • Marble peel and stick backsplash panel
    • Brass cabinet knobs antique finish
    • Crystal pendant light fixture small
    • Polished nickel bridge kitchen faucet
    • Ivory linen roman shade window
    • Marble pattern kitchen mat cushioned
    • White ceramic canisters gold trim

    Pro Tip: For cabinetry, opt for ‘Simply White’ (Benjamin Moore OC-117) to create a soft, buttery backdrop that enhances the natural beauty of marble surfaces without overwhelming the space. Apply ‘Repose Gray’ (Sherwin Williams SW-7015) on your walls to evoke a gentle, art-gallery vibe that complements the refined simplicity typical of European kitchen interiors. Pro tip: Keep your marble looking pristine by resealing it every three months and using a damp cloth for daily cleanups to prevent stains and maintain its polished glow.

    3. Timeless Charm: How Brass Accents Refine Compact Kitchens with Subtle Sophistication

    Timeless Charm: How Brass Accents Refine Compact Kitchens with Subtle Sophistication

    That cozy blend of vintage warmth and modern simplicity often admired on design feeds is a dream come true for small kitchens. Incorporating brass fixtures adds a rich, inviting glow that feels effortlessly classic—like slipping on a well-loved leather jacket over sleek denim. This style gracefully balances old-world allure with fresh updates, making limited spaces feel endlessly stylish.

    Key Design Elements

    • Brushed brass cabinet knobs unlacquered
    • Antique brass cup drawer pulls
    • Brass bar pull handles 4-inch
    • Marble hexagon tile backsplash sheet
    • Brass gooseneck kitchen faucet traditional
    • Glass front upper cabinet inserts
    • Cream linen roman shade valance
    • Vintage brass pendant light fixture

    Pro Tip: Choose ‘Revere Pewter’ (Benjamin Moore HC-172) for your cabinet bases to create a balanced greige backdrop that highlights the golden tones of brass while keeping the kitchen feeling bright and spacious. Apply ‘Accessible Beige’ (Sherwin Williams SW-7036) on walls to seamlessly blend cabinetry and surrounding surfaces, visually expanding the room and enhancing flow. Pro tip: To keep your brass hardware gleaming, buff it gently every few months using a mixture of lemon juice and baking soda, restoring its natural luster without harsh chemicals.

    4. Coastal Charm: Shaker Cabinets Elevate Compact Kitchens with Classic Elegance

    Coastal Charm: Shaker Cabinets Elevate Compact Kitchens with Classic Elegance

    The sleek, understated beauty of shaker cabinets is the cornerstone of that effortlessly chic coastal kitchen vibe you see in design spreads. Their simple recessed panel design adds subtle texture and sophistication, making even the coziest kitchens feel open and refined.

    Key Design Elements

    • White shaker style cabinet doors
    • Brushed nickel cabinet bar pulls
    • Marble look quartz countertop sample
    • Beadboard peel and stick backsplash
    • Polished chrome bridge kitchen faucet
    • Glass front cabinet door inserts
    • Woven seagrass kitchen runner rug
    • Linen roman shade light filtering

    Pro Tip: Refresh your cabinetry by painting them with Benjamin Moore’s ‘Simply White’ (OC-117) to capture that iconic Hampton cottage essence—bright, inviting, and perfect for maximizing light in compact kitchens. For walls, opt for Sherwin Williams ‘Sea Salt’ (SW-6204) to introduce a gentle coastal hue that contrasts beautifully with white shaker cabinets, enhancing depth while maintaining a serene ambiance. Pro tip: To create a seamless look, install under-cabinet lighting that highlights the shaker cabinet’s clean lines and adds warmth, making your small kitchen feel larger and more welcoming.

    5. Timeless Charm: How Reclaimed Wood Elevates Compact Kitchens with Rustic Elegance

    Timeless Charm: How Reclaimed Wood Elevates Compact Kitchens with Rustic Elegance

    Incorporating reclaimed wood elements adds a sense of history and warmth that transforms a tight kitchen into an inviting, thoughtfully curated space. These natural textures act like subtle, vintage accessories—infusing personality and depth without crowding the design. For smaller kitchens, wood grains naturally lead the eye upward, enhancing the room’s coziness while maintaining an airy feel.

    Key Design Elements

    • Reclaimed wood floating shelf barnwood
    • Distressed wood kitchen island cart
    • Rustic wood wall plank panels
    • Antique brass cabinet pulls farmhouse
    • Warm bronze kitchen faucet single-handle
    • Woven seagrass counter stool natural
    • Cream linen roman shade kitchen
    • Braided jute kitchen runner rug

    Pro Tip: Choose ‘Alabaster’ (Sherwin Williams SW-7008) for your lower cabinets to provide a soft, neutral canvas that highlights the texture and richness of reclaimed wood without competing visually. Apply ‘Edgecomb Gray’ (Benjamin Moore HC-173) on the walls to introduce a gentle warmth that harmonizes with natural wood tones while keeping the overall atmosphere crisp and sophisticated. Pro tip: To keep reclaimed wood accents looking their best, dust them regularly and apply a wood conditioner once a year to preserve their natural beauty and prevent drying or cracking.

    6. Tranquil Touch: Embrace Natural Stone Surfaces to Elevate Cozy Kitchens with Subtle Sophistication

    Tranquil Touch: Embrace Natural Stone Surfaces to Elevate Cozy Kitchens with Subtle Sophistication

    The soothing essence of natural stone, often found in serene spa environments, can transform your kitchen into a peaceful haven. Incorporating stone countertops introduces an earthy texture and balanced vibe, making compact kitchens feel effortlessly luxurious yet comfortably inviting—like wrapping yourself in a soft, elegant throw.

    Key Design Elements

    • Marble look contact paper countertop
    • Natural stone peel stick backsplash
    • Brushed brass cabinet pulls minimal
    • Bamboo floating kitchen shelf
    • Linen roman shade natural weave
    • Matte black bridge kitchen faucet
    • Cream wool kitchen runner rug
    • Ceramic stoneware canister set white

    Pro Tip: For cabinetry, opt for ‘White Heron’ (Benjamin Moore OC-57) to introduce a gentle, warm white that mirrors the subtle undertones of natural stone, enhancing the tranquil vibe throughout your kitchen. Choose ‘Agreeable Gray’ (Sherwin Williams SW-7029) on your walls to establish a serene, versatile backdrop that complements and highlights the natural stone features without overpowering them. Pro tip: To maintain a clutter-free and calm atmosphere, incorporate hidden storage solutions that keep essentials tucked away, allowing the natural stone and minimalist design to be the focal points.

    7. Eclectic Elegance: How Mixed Metals Elevate Cozy Kitchen Retreats

    Eclectic Elegance: How Mixed Metals Elevate Cozy Kitchen Retreats

    Blending different metal finishes in a compact kitchen creates an effortlessly chic vibe that feels both intentional and inviting. Much like mixing silver and gold accessories, this trend breaks old style rules, delivering a curated, collected look perfect for intimate culinary spaces. The subtle interplay of metals adds depth and personality without overwhelming the room.

    Key Design Elements

    • Brushed brass cabinet pulls 4-inch
    • Matte black kitchen faucet gooseneck
    • Copper pendant light fixture dome
    • Antique bronze cabinet knob round
    • Mixed metal floating shelf brackets
    • Champagne gold drawer handles modern
    • Black iron pot rack wall-mounted
    • Brass towel bar kitchen accent

    Pro Tip: Start with ‘Simply White’ (Benjamin Moore OC-117) on your cabinets to form a crisp, clean backdrop that allows your varied metal details to shine beautifully. Choose ‘Agreeable Gray’ (Sherwin Williams SW-7029) for your walls to provide a cozy, neutral setting that harmonizes effortlessly with both warm and cool metal tones. Pro tip: To maintain the fresh allure of mixed metals, regularly buff each finish with the right polish—this prevents dullness and keeps the metallic accents gleaming.

    8. Timeless Art Deco Elegance: Bold Geometry Elevates Small Kitchens with Luxe Flair

    Timeless Art Deco Elegance: Bold Geometry Elevates Small Kitchens with Luxe Flair

    Channel the iconic charm of 1920s New York with a modern twist that makes even the coziest kitchens feel glamorous. Combining striking geometric motifs with shimmering metallic touches creates a stylish, curated look—proof that luxury shines brightest through refined details, not square footage.

    Key Design Elements

    • Gold geometric backsplash tile hexagonal
    • Emerald green velvet bar stool
    • Brass cabinet pulls art deco
    • Black marble contact paper countertop
    • Sunburst pendant light fixture gold
    • Mirrored glass cabinet door inserts
    • Geometric black and white floor mat
    • Chrome bridge faucet polished finish

    Pro Tip: Elevate your cabinetry by applying ‘Salamander’ (Benjamin Moore 2050-10), a rich emerald hue that instantly turns plain cabinets into stunning statement pieces reminiscent of Art Deco jewels. Brighten the room and add a subtle sheen by painting the ceiling in ‘Champagne’ (Sherwin Williams SW 6644), reflecting light and introducing a touch of unexpected opulence. Pro tip: Keep metallic finishes gleaming by buffing brass and chrome elements regularly; this simple upkeep preserves their radiant allure and keeps your kitchen feeling polished.

    9. Gentle Modern: Embrace Warm Neutrals to Elevate Cozy Small Kitchens into Stylish Sanctuaries

    Gentle Modern: Embrace Warm Neutrals to Elevate Cozy Small Kitchens into Stylish Sanctuaries

    Blending creamy whites with soft taupe hues brings a soothing, inviting vibe to your kitchen, perfect for those peaceful morning coffee moments. These warm neutral shades act like a chic, timeless layer that instantly expands a small space while wrapping it in subtle elegance and comfort.

    Key Design Elements

    • Cream linen roman window shade
    • Taupe matte cabinet pulls 4-inch
    • Warm beige ceramic backsplash tile
    • Brushed gold pendant light fixture
    • Natural oak floating kitchen shelves
    • Ivory textured kitchen runner rug
    • Cream upholstered counter stool
    • Stoneware decorative canister set cream

    Pro Tip: Refresh your cabinets with ‘White Heron’ (Benjamin Moore OC-57) to achieve a warm white that feels inviting and soft, perfectly balancing natural light without ever appearing too sterile or harsh. Apply ‘Accessible Beige’ (Sherwin Williams SW-7036) on your walls to infuse the room with a gentle warmth, transforming cramped kitchens into intimate, European-inspired cozy spots. Pro tip: Incorporate open shelving with natural wood to add texture and warmth, while keeping the space airy and visually open—ideal for small kitchens aiming for that effortless, lived-in charm.

    10. Effortless Elegance: How Light Woods Elevate Cozy Kitchens with Scandinavian Flair

    Effortless Elegance: How Light Woods Elevate Cozy Kitchens with Scandinavian Flair

    Embrace the inviting glow of soft, pale woods to brighten compact kitchens and visually expand the space. This Nordic-inspired palette mimics the slimming effect of vertical stripes, creating an airy, spacious atmosphere that feels both modern and welcoming.

    Key Design Elements

    • Light oak wood grain cabinet fronts
    • Birch floating shelves natural finish
    • White oak butcher block countertop
    • Brushed brass cabinet knobs round
    • Ceramic white subway tile backsplash
    • Linen pendant light drum shade
    • Ivory cotton roman window shade
    • Cream wool kitchen runner rug

    Pro Tip: Choose ‘Simply White’ (Benjamin Moore OC-117) for your walls to provide a clean, neutral backdrop that highlights the natural beauty of light wood cabinetry while keeping the kitchen feeling fresh and open. Use ‘Alabaster’ (Sherwin Williams SW-7008) on the ceiling to reflect sunlight and foster an airy ambiance, enhancing the serene, minimalist vibe characteristic of Scandinavian design. Pro tip: Incorporate open shelving to showcase natural textures and keep the kitchen feeling uncluttered—this helps maintain the light, breezy aesthetic essential to the Scandinavian look.

    11. Bold Minimalism: Matte Black Accents Elevating Compact Kitchens with Urban Chic

    Bold Minimalism: Matte Black Accents Elevating Compact Kitchens with Urban Chic

    Inject a striking, editorial vibe into your small kitchen by pairing matte black fixtures with bright, airy surfaces. This approach channels the elegance of a classic black ensemble—streamlined, confident, and visually slimming—while adding depth that visually expands tight areas. The resulting contrast crafts a dynamic, polished space that feels much larger than its footprint.

    Key Design Elements

    • Matte black kitchen faucet pull-down
    • Matte black cabinet handles 5-inch
    • Matte black pendant light industrial
    • Black metal floating shelves bracket
    • White quartz countertop veined pattern
    • Black peel and stick subway backsplash
    • Black iron bar stool backless
    • Charcoal geometric kitchen runner rug

    Pro Tip: Use ‘Simply White’ (Benjamin Moore OC-117) on your lower cabinets to establish a crisp, luminous base that lets the matte black hardware stand out with striking clarity. Apply ‘Wrought Iron’ (Benjamin Moore 2124-10) on a key wall to cohesively unite your black accents, lending a seamless and sophisticated touch to the room’s palette. Pro tip: For easy upkeep, opt for matte black finishes that resist visible smudges and clean effortlessly with a soft cloth, keeping your kitchen looking sharp without extra effort.

    12. Breezy Coastal Elegance: Glass-Front Cabinets That Expand and Elevate Small Kitchens

    Breezy Coastal Elegance: Glass-Front Cabinets That Expand and Elevate Small Kitchens

    Bring that breezy, seaside charm seen on your favorite home makeover shows into your cozy kitchen. Glass-front upper cabinets open up the space visually, while elegantly showcasing your finest dishware—much like a curated display in a stylish boutique. This coastal-inspired approach infuses your kitchen with a fresh, vacation-ready atmosphere without the hassle of sand or salt.

    Key Design Elements

    • Glass front upper cabinet doors white
    • Brushed nickel cabinet cup pulls
    • Coastal blue peel stick backsplash
    • Woven rattan pendant light fixture
    • White ceramic canister set ribbed
    • Natural jute kitchen runner rug
    • Linen roman shade light filtering
    • Rattan wicker basket storage bins

    Pro Tip: For the inside of your glass-front cabinets, apply ‘Sea Salt’ (Sherwin Williams SW-6204) to craft a serene coastal backdrop that makes your white dishes stand out like treasures against the shore. Paint the lower cabinetry in ‘Simply White’ (Benjamin Moore OC-117) to maintain a bright and fresh foundation, allowing the upper glass cabinets to shine as the focal point of your kitchen. Pro tip: Display a mix of everyday plates and decorative pieces inside your glass cabinets to keep the look both functional and stylish, and rotate them seasonally to refresh your kitchen’s coastal vibe.

    13. Soft Curves & Natural Vibes: Elevating Compact Kitchens with Organic Modern Flair

    Soft Curves & Natural Vibes: Elevating Compact Kitchens with Organic Modern Flair

    Imagine a kitchen where edges melt away into smooth, flowing forms, transforming tight quarters into serene, spa-like sanctuaries. This organic modern style pairs gentle curves with natural textures, blending functionality and artistry for a space that feels both grounded and inviting.

    Key Design Elements

    • Curved edge laminate countertop white oak
    • Rounded corner cabinet doors matte
    • Oval pedestal kitchen table natural
    • Sculptural brass cabinet knobs arched
    • Woven rattan pendant light globe
    • Organic shaped ceramic kitchen canisters
    • Soft curve kitchen faucet brushed nickel
    • Natural fiber rounded kitchen rug

    Pro Tip: For cabinets, choose ‘White Heron’ (Benjamin Moore OC-57) to provide a soft, creamy base that highlights the gentle curves without coming off as too stark or cold. Apply ‘Evergreen Fog’ (Sherwin Williams SW-9130) on accent walls to introduce a muted, earthy tone that harmonizes effortlessly with wood elements and organic shapes. Pro tip: Keep your curved surfaces looking fresh by dusting regularly with a microfiber cloth—this maintains their smooth appeal without any heavy upkeep.

    14. Timeless Charm: Elevate Compact Kitchens with Elegant Beadboard Detailing

    Timeless Charm: Elevate Compact Kitchens with Elegant Beadboard Detailing

    Invoke the cozy warmth of a nostalgic bakery with beadboard paneling that adds both texture and character to small kitchen spaces. This look captures the enduring grace of a grandmother’s cooking haven, refreshed to fit today’s lifestyle. The vertical grooves naturally lift the eye, making tight kitchens feel open and inviting.

    Key Design Elements

    • White beadboard paneling sheets paintable
    • Vintage brass cabinet knobs round
    • Marble look laminate countertop white
    • Porcelain farmhouse apron front sink
    • Antique brass bridge kitchen faucet
    • Glass front upper cabinet doors
    • Cotton roman shade kitchen window
    • Cream ceramic canister set three-piece

    Pro Tip: Coat your beadboard in ‘Simply White’ (Benjamin Moore OC-117) to create a clean, bright foundation that visually expands your kitchen and highlights its classic cottage vibe. Apply ‘Naval’ (Sherwin Williams SW-6244) on the lower cabinetry to add depth and contrast, grounding the room while letting the crisp beadboard paneling shine above. Pro tip: For seamless installation, use a level to keep beadboard panels perfectly vertical and finish edges with caulk for a polished, built-in appearance.

    15. Chic Boho Charm: Patterned Backsplashes Elevating Compact Kitchens into Stylish Sanctuaries

    Chic Boho Charm: Patterned Backsplashes Elevating Compact Kitchens into Stylish Sanctuaries

    A striking patterned backsplash instantly elevates a small kitchen, infusing it with a curated, worldly vibe reminiscent of a chic boutique retreat. This bohemian-inspired look balances bold, artistic tile designs with elegant simplicity, creating a captivating focal point without overwhelming the space. Think of it as pairing dazzling accessories with timeless wardrobe staples—effortlessly sophisticated and unique.

    Key Design Elements

    • Moroccan patterned ceramic tile backsplash
    • Hand-painted terracotta backsplash tiles blue
    • Geometric cement tile kitchen backsplash
    • Antique brass cabinet knobs ornate
    • Woven rattan pendant light fixture
    • Kilim patterned kitchen runner washable
    • Brushed gold bridge kitchen faucet
    • Bamboo roman shade natural weave

    Pro Tip: For the lower cabinets, choose ‘Salamander’ (Benjamin Moore 2050-10), a deep, earthy green that roots the bohemian vibe and beautifully showcases your vibrant backsplash as the room’s centerpiece. Apply ‘Simply White’ (Benjamin Moore OC-117) on the upper cabinets to introduce a crisp, clean contrast that brightens the space and allows the intricate tile patterns to shine without visual competition. Pro tip: To keep the backsplash looking fresh, apply a high-quality grout sealer once a year and clean the tiles regularly with a gentle, non-abrasive cleanser to preserve their vibrant colors and textures.

    16. Effortless Elegance: Discreet Appliances That Elevate Small Kitchen Spaces

    Effortless Elegance: Discreet Appliances That Elevate Small Kitchen Spaces

    Imagine a kitchen where appliances blend flawlessly into the cabinetry, crafting a refined and cohesive look instantly reminiscent of upscale European interiors. By hiding your fridge, dishwasher, and microwave behind custom panels, your compact kitchen gains a spacious, polished feel without clutter. This sleek design approach transforms even the coziest layouts into serene, elegant spaces.

    Key Design Elements

    • Panel ready integrated refrigerator compact
    • Custom cabinet front dishwasher panel
    • Built-in microwave trim kit stainless
    • Soft close cabinet hinges concealed
    • Touch latch cabinet hardware invisible
    • Integrated range hood cabinet mount
    • Handle-free cabinet push mechanism
    • Under cabinet LED strip lighting

    Pro Tip: Opt for ‘Simply White’ (Benjamin Moore OC-117) on your cabinet panels to achieve a flawless, continuous surface where appliances blend effortlessly into the cabinetry, enhancing that sleek, unified aesthetic. Choose ‘Agreeable Gray’ (Sherwin Williams SW-7029) for your kitchen walls to provide a soft, versatile backdrop that balances warmth and neutrality, allowing your streamlined cabinetry to quietly command attention. Pro tip: To maintain this pristine look, regularly inspect and adjust hidden hinges to ensure doors align perfectly, preserving the seamless effect that defines quiet luxury.

    17. Sleek Modern Minimalism: Handle-Free Cabinets for Effortless Elegance in Cozy Kitchens

    Sleek Modern Minimalism: Handle-Free Cabinets for Effortless Elegance in Cozy Kitchens

    Achieve that flawless, high-end kitchen look often showcased on design shows—even in smaller footprints. Handle-free cabinetry removes distractions just like a perfectly fitted blazer sharpens your look, creating a space that feels both sophisticated and intentional. This style optimizes every inch while evoking the polished feel of a boutique hotel suite.

    Key Design Elements

    • Push-to-open handleless cabinet doors white
    • Integrated finger pull cabinet fronts matte
    • Soft-close cabinet hinge system concealed
    • White quartz countertop seamless edge
    • Recessed LED under cabinet lighting strip
    • Slim profile undermount kitchen sink
    • Minimalist single lever faucet chrome
    • Flush mount ceiling light fixture modern

    Pro Tip: For cabinet surfaces, opt for ‘Simply White’ (Benjamin Moore OC-117) to achieve a sharp, pristine finish that enhances the sleek, handle-free design with a custom-crafted appearance. On kitchen walls, apply ‘Agreeable Gray’ (Sherwin Williams SW-7029) to provide a gentle contrast that highlights the smooth cabinetry as the focal point without overpowering the space. Pro tip: Install soft-close hinges and quality push-to-open mechanisms to maintain the minimalist aesthetic while ensuring your cabinets operate quietly and smoothly.

    18. English Manor Charm: Elevate Small Kitchens with Bold Wallpapered Ceilings

    English Manor Charm: Elevate Small Kitchens with Bold Wallpapered Ceilings

    Transform your cozy kitchen into a striking sanctuary by styling the ceiling with intricate wallpaper patterns. This clever design choice not only lifts the eye upward to create a sense of spaciousness but also infuses the room with timeless elegance reminiscent of classic English estates. Think of it as an unexpected jewel that instantly upgrades the atmosphere with minimal effort.

    Key Design Elements

    • Floral botanical ceiling wallpaper removable
    • Wallpaper smoothing tool kit professional
    • Cream ceramic pendant light fixture
    • Antique brass cabinet cup pulls
    • Marble effect peel stick backsplash
    • Vintage style kitchen faucet brass
    • Linen roman shade natural ivory
    • Persian style kitchen runner washable

    Pro Tip: For trim and molding, opt for ‘Simply White’ (Benjamin Moore OC-117) to create sharp, clean borders that make your wallpapered ceiling stand out like a framed masterpiece. Apply ‘Evergreen Fog’ (Sherwin Williams SW-9130) on lower cabinets to introduce a deep, moody tone that beautifully complements the ornate ceiling and grounds the space with refined character. Pro tip: Use a sturdy ladder and a wallpaper brush to ensure smooth application, and maintain the ceiling’s visual impact by gently dusting with a microfiber cloth every few months.

    19. Classic Charm: Elevate Cozy Kitchens with Refined Crown Molding Accents

    Classic Charm: Elevate Cozy Kitchens with Refined Crown Molding Accents

    In smaller kitchens, crown molding elevates the space from ordinary to a refined retreat reminiscent of an elegant dining room. These architectural flourishes offer the same subtle sophistication as a perfectly fitted blazer, adding a polished touch that enhances every detail around it.

    Key Design Elements

    • Traditional crown molding trim kit
    • Decorative cabinet door molding strips
    • Classic ceiling medallion white
    • Brushed brass cabinet pulls traditional
    • Crystal glass cabinet knobs antique
    • Bronze chandelier pendant light classic
    • Ivory damask kitchen window valance
    • Persian style kitchen runner rug

    Pro Tip: To make crown molding stand out, paint the trim in ‘Simply White’ (Benjamin Moore OC-117) against walls with a warmer hue. This contrast creates a crisp shadow line that highlights the molding’s architectural beauty like delicate jewelry. For a sophisticated two-tone kitchen, paint the lower cabinets ‘Revere Pewter’ (Benjamin Moore HC-172) while leaving the upper cabinets white. This classic combination adds depth and elegance that designers often recommend for a premium look. Pro tip: Keep your crown molding looking sharp by dusting it regularly—aim for every few months—to preserve its crisp lines and prevent buildup that can dull its impact.

    20. Sun-Kissed Elegance: Elevate Small Kitchens with Terracotta’s Timeless Charm

    Sun-Kissed Elegance: Elevate Small Kitchens with Terracotta’s Timeless Charm

    Capture the essence of a Mediterranean getaway right in your own home with terracotta tiles that infuse compact kitchens with cozy sophistication. Their warm, earthy hues transform tight spaces into inviting retreats, evoking the rustic beauty of a Tuscan villa without feeling overcrowded.

    Key Design Elements

    • Terracotta hexagon floor tile matte
    • Terracotta peel and stick backsplash
    • Warm brass cabinet cup pulls
    • Butcher block countertop oak finish
    • Wrought iron pendant light fixture
    • Natural linen roman shade valance
    • Olive green ceramic kitchen canister
    • Terracotta washable kitchen runner rug

    Pro Tip: Refresh your lower cabinets with Benjamin Moore’s ‘Avocado’ (2145-10) to introduce a deep, Mediterranean-inspired contrast that beautifully complements the earthy terracotta flooring. Apply Sherwin Williams’ ‘Accessible Beige’ (SW-7036) on your walls to establish a cozy, neutral canvas that highlights the rich tones of your terracotta tiles without competing for attention. Pro tip: To keep your terracotta tiles looking their best, make sure to reseal them each year—this not only preserves their natural beauty but also protects against moisture and stains.

    21. Chic Farmhouse Flair: Weathered White Cabinets That Open Up Compact Kitchens with Grace

    Chic Farmhouse Flair: Weathered White Cabinets That Open Up Compact Kitchens with Grace

    This kitchen captures the essence of a cozy farmhouse vibe with a modern twist—think effortlessly worn whitewashed cabinetry paired with inviting rustic elements. It’s the perfect balance of homey charm and sleek simplicity, transforming tight quarters into a light-filled, thoughtfully styled space.

    Key Design Elements

    • Whitewashed shaker cabinet door fronts
    • Brushed brass cup pull handles
    • White ceramic subway tile backsplash
    • Farmhouse apron front sink white
    • Rustic wood floating shelf bracket
    • Woven seagrass pendant light fixture
    • Natural linen roman shade valance
    • Cotton braided kitchen rug cream

    Pro Tip: To nail that signature whitewashed look, mix Benjamin Moore’s ‘Simply White’ (OC-117) with water, then brush it on thinly to highlight the wood grain beneath, achieving a timeless weathered effect. For the walls, choose Sherwin Williams’ ‘Agreeable Gray’ (SW-7029)—its warm, neutral tone enhances the cabinetry’s soft finish and adds subtle depth without overpowering the space. Pro tip: Incorporate open shelving with rustic wood brackets to add both storage and visual interest, making small kitchens feel more spacious while showcasing your favorite dishware.

    22. French Country Charm: Open Shelving to Elevate Compact Kitchens with Timeless Elegance

    French Country Charm: Open Shelving to Elevate Compact Kitchens with Timeless Elegance

    Inspired by the inviting warmth seen in French countryside kitchens, this style blends rustic wooden textures with elegant ceramics, creating an inviting mix of old and new. Open shelves breathe life into smaller kitchens, turning them into light-filled, thoughtfully styled spaces that exude effortless grace.

    Key Design Elements

    • Rustic wood open kitchen shelves
    • Cream distressed floating shelf brackets
    • White ceramic kitchen canisters set
    • Antique brass cabinet cup pulls
    • Farmhouse bridge faucet polished nickel
    • Linen roman shade natural flax
    • Toile patterned kitchen runner rug
    • Wire basket shelf organizer aged

    Pro Tip: For the wall behind your open shelving, opt for ‘White Heron’ (Benjamin Moore OC-57) to achieve a subtle, plaster-like finish that highlights your dishware like art against a delicate European-inspired backdrop. Choose ‘Oyster Bay’ (Sherwin Williams SW-6206) on your lower cabinets to introduce a soft, muted sage-green tone that evokes the tranquil spirit of the French countryside without overpowering the overall look. Pro tip: Keep your display fresh by dusting shelves regularly and swapping out ceramics seasonally to maintain a balanced and inviting arrangement.

    23. Timeless Charm: Vintage Lighting Elevates Cozy Kitchens with Effortless Elegance

    Timeless Charm: Vintage Lighting Elevates Cozy Kitchens with Effortless Elegance

    A mix-and-match vintage vibe brings warmth and history to smaller kitchens, making every inch feel thoughtfully styled. Antique lighting pieces serve as focal points, much like a cherished accessory that turns a simple look into something memorable. This relaxed, curated style shines by embracing imperfection and unique contrasts.

    Key Design Elements

    • Antique brass schoolhouse pendant light
    • Vintage glass globe ceiling fixture
    • Aged copper wall sconce articulating
    • Mismatched ceramic cabinet knobs colorful
    • Distressed wood floating shelf brackets
    • Woven rattan kitchen counter stool
    • Persian style runner rug faded
    • Linen roman shade natural texture

    Pro Tip: Choose ‘Simply White’ (Benjamin Moore OC-117) for your cabinet bases to create a bright, neutral backdrop that highlights your vintage lighting without overwhelming the space. Add depth with ‘Salamander’ (Sherwin Williams SW-6154) on accent areas like pantry doors or trim to evoke a moody, gallery-like atmosphere that makes your antique fixtures stand out. Pro tip: Keep your vintage lighting in top shape by routinely checking wiring connections for safety and gently cleaning glass shades with a microfiber cloth to preserve their glow and charm.

    Conclusion

    No matter your style or space constraints, these 23 small kitchen design ideas prove that even the coziest corners can be transformed into stunning, functional hubs of your home. Whether you lean towards sleek minimalism, rustic charm, or vibrant eclectic touches, the key is to embrace your unique vision and make every inch count. Remember, a small kitchen isn’t a limitation—it’s a canvas full of creative possibilities waiting to be explored.

    So go ahead, choose the ideas that resonate most with you, and start reimagining your kitchen today. With a little inspiration and a dash of boldness, your compact space can become a warm, inviting place where memories are made and meals come to life. Your dream kitchen is within reach—take that first step and transform your space into something truly special!

  • Serene Japanese Garden Inspirations to Transform Your Backyard into a Tranquil Oasis

    There’s a unique magic in Japanese garden design that transforms even the tiniest outdoor corners into serene retreats. By blending natural elements like stone, water, and lush greenery with thoughtful simplicity, these gardens invite a sense of peace and reflection the moment you step outside. Whether it’s the gentle trickle of a water feature or the graceful curve of a stone pathway, every detail is crafted to foster calm and connection with nature.

    What makes these gardens truly special is their versatility. You can embrace a traditional vibe with koi ponds and lanterns, or opt for a more contemporary approach using clean lines, gravel, and minimalist plantings. Neither feels heavy or overwhelming; instead, they create an effortless balance that feels both intentional and welcoming. Best of all, you don’t need a sprawling yard to capture this essence—just a handful of carefully chosen elements can transform your outdoor space into a tranquil haven that invites you to pause and breathe.

    1. Cozy Japanese Garden Entryway

    Cozy Japanese Garden Entryway

    Imagine stepping into a charming garden nook where a slender stone walkway gently weaves through lush greenery, inviting a sense of peace and warmth. Along the path, cozy wooden benches and delicate bamboo accents add a touch of understated elegance, capturing the serene simplicity that defines Japanese garden style. This thoughtfully designed, compact space is perfect for side yards, making every element feel carefully placed and wonderfully harmonious without ever feeling cramped.

    2. Curved Path Japanese Garden

    Curved Path Japanese Garden

    Imagine strolling along gently winding stone paths that meander gracefully among carefully trimmed shrubs and vibrant Japanese maples. The soft, rounded shapes of the plants bring a soothing touch, while delicate lanterns and rugged natural rocks evoke the timeless charm of a classic Japanese garden. These flowing curves don’t just enhance beauty—they invite a sense of peace and spaciousness, turning any outdoor area into a serene retreat you’ll love to explore.

    3. Bamboo and Rock Meditation Garden

    Bamboo and Rock Meditation Garden

    Imagine stepping into a serene retreat where tall bamboo screens gently sway, guiding you along winding gravel trails dotted with thoughtfully arranged stones. This garden embraces simplicity and harmony, using natural elements to cultivate a sense of calm without overwhelming the senses. As evening falls, subtle lighting casts a soothing glow, turning the space into a tranquil sanctuary perfect for quiet reflection.

    4. Japanese Water Basin Corner

    Japanese Water Basin Corner

    Imagine a cozy nook where gentle water basins rest amid soft gravel and lush plants, inviting you to pause and unwind. These charming little garden spots are perfect for those smaller side yards or overlooked outdoor areas, making the most of every inch without feeling crowded. Their straightforward design brings a sense of calm and timeless beauty, turning even the tiniest space into a serene retreat.

    5. Minimal Courtyard Water Garden

    Minimal Courtyard Water Garden

    Imagine a cozy courtyard where a modest water element softly ripples amidst smooth, understated stones and a touch of greenery. Embracing the essence of Japanese garden style, this space thrives on simplicity and harmony rather than overcrowding every inch. The soothing melody of flowing water paired with uncluttered openness transforms even the smallest outdoor nook into a peaceful retreat you’ll want to linger in.

    6. Stone Circle Zen Garden

    Stone Circle Zen Garden

    Imagine a serene little oasis crafted with gentle gravel, rounded stone edges, and thoughtfully arranged plants that bring the essence of a Japanese garden right to your doorstep. These cozy circular designs are perfect for smaller yards, offering a sense of purpose and harmony without overwhelming the space. Blending smooth stones with understated greenery and earthy materials, this tranquil retreat invites you to pause, breathe, and escape the hustle of daily life.

    7. Japanese Courtyard Seating Area

    Japanese Courtyard Seating Area

    Imagine a serene courtyard where smooth wooden floors meet minimalist seating, inviting you to unwind in a space shaped by classic Japanese style. The openness of the area breathes tranquility, giving the garden a peaceful, spacious vibe that’s both soothing and refreshing. Soft green plants woven among natural wood hues bring a gentle warmth, creating an atmosphere that feels both welcoming and effortlessly refined.

    8. Small Water Basin Garden

    Small Water Basin Garden

    A petite water basin garden shows how a little space can become a peaceful retreat when thoughtfully arranged. Combining smooth stone basins with lush ferns, gentle gravel, and warm wooden accents brings a soothing, natural vibe that invites quiet reflection. Inspired by Japanese traditions, these gardens celebrate simplicity, where the gentle trickle of water and the rich textures of plants create moments of serene beauty.

    9. Pebble Fountain Retreat

    Pebble Fountain Retreat

    Imagine a cozy garden nook where smooth stones gently surround a softly bubbling fountain, inviting a sense of calm and balance. The blend of natural rock surfaces with the soothing trickle of water transforms any outdoor corner into a serene escape. These intimate fountain spaces are perfect for those seeking effortless beauty and a peaceful vibe without the fuss of high upkeep.

    10. Tiered Zen Garden Design

    Tiered Zen Garden Design

    Imagine stepping into a serene space where gently tiered beds showcase a harmonious blend of smooth stones, lush moss, and artfully trimmed plants. This thoughtful layering brings depth and movement, making even a cozy garden feel expansive and alive. With warm, subtle lighting and graceful greenery, the setting invites a calm, reflective mood that soothes the soul.

    11. Lantern Path Zen Garden

    Lantern Path Zen Garden

    Imagine a tranquil retreat where smooth stone paths meander gently over beds of lush moss and delicate gravel, softly illuminated by the glow of traditional lanterns. This kind of Japanese-inspired garden invites you to slow down and embrace a sense of peaceful rhythm with every step you take. As twilight falls, the warm lantern light casts a soothing ambiance that transforms the space into a serene haven, perfect for quiet reflection and calm moments.

    12. Buddha Fountain Garden

    Buddha Fountain Garden

    Imagine a serene garden where a gentle Buddha figure sits quietly beside a softly trickling stream, inviting a deep sense of calm and reflection. Surrounding lush plants and winding stone walkways blend effortlessly with natural rocks, weaving a peaceful harmony throughout the space. The soothing murmur of water transforms the garden into a tranquil sanctuary, perfect for moments of quiet escape and mindfulness.

    13. Stone Lantern Garden Path

    Stone Lantern Garden Path

    Imagine wandering along a gently winding path where smooth stones guide your steps, flanked by carefully shaped plants and timeless lanterns glowing softly. This kind of setting brings that serene spirit of a Japanese garden right to life, inviting you to slow down and breathe in the tranquility. Plush moss and delicate gravel add layers of soothing texture, creating a harmonious space that feels both natural and thoughtfully crafted.

    14. Minimal Indoor Zen Courtyard

    Minimal Indoor Zen Courtyard

    Imagine a serene indoor oasis where gentle greenery and carefully placed stones invite you to pause and breathe. This cozy Zen courtyard embraces simplicity, bringing a sense of harmony and elegance into even the smallest corners of your home. Soft natural light dances across textured elements, while subtle water features add a soothing touch, creating a peaceful escape without overwhelming the space.

    15. Raised Sand Meditation Garden

    Raised Sand Meditation Garden

    Imagine a tranquil space where smooth stones and gentle greenery frame carefully raked sand, inviting you to slow down and breathe. This classic Japanese garden design embraces simplicity, offering a peaceful retreat free from distractions. Encircled by warm wooden decking, it becomes a cozy nook that encourages reflection and quiet connection with nature.

    16. Modern Japanese Garden Patio

    Modern Japanese Garden Patio

    Imagine a gentle stone path weaving through lush, calming plants, softly illuminated to evoke a serene spa vibe. This modern Japanese garden style perfectly balances nature’s simplicity with sleek, contemporary lines, making patios feel both elegant and inviting. Nestled seating areas beside tranquil water elements transform the space into a peaceful sanctuary where you can truly unwind and connect with the outdoors.

    17. Modern Japanese Courtyard Garden

    Modern Japanese Courtyard Garden

    Imagine a tranquil courtyard where the delicate hues of Japanese maples blend seamlessly with smooth gravel paths and thoughtfully arranged stones, creating a space that feels both refined and inviting. A charming little pavilion nestled in one corner offers the perfect spot to unwind, turning the garden into a peaceful sanctuary right at home. This style shines because each detail is chosen with care, making the whole scene appear naturally harmonious and effortlessly beautiful.

    18. Raised Zen Deck with Japanese Maple

    Raised Zen Deck with Japanese Maple

    Imagine stepping onto a sleek wooden deck framed by crisp white stones, where a stunning Japanese maple adds a splash of fiery color. This blend of simplicity and nature brings together contemporary style with timeless Japanese garden charm. The open, airy design invites calm and reflection, letting each element shine without overwhelming the senses. With warm wood and gentle greenery, the space feels inviting and serene, proving that beauty truly lies in simplicity.

    19. Zen Sand Garden with Lantern

    Zen Sand Garden with Lantern

    Imagine a serene outdoor sanctuary where smooth sand is gently raked into flowing patterns, inviting a sense of calm and clarity. Delicate stone lanterns and charming little statues provide subtle touches of tradition, enhancing the space without crowding it. Gardens inspired by Japanese design offer a tranquil escape, turning everyday yards into peaceful havens where you can truly unwind and reconnect.

    20. Curved Stone Path Zen Garden

    Curved Stone Path Zen Garden

    Imagine wandering along a gentle, winding path made of broad, natural stones nestled within a bed of fine, raked gravel—this is the heart of a serene Japanese garden. The soft curves invite you to slow down and embrace a sense of peaceful flow, steering clear of anything too rigid or formal. By blending bold rocks with delicate, low-lying plants, the space feels both textured and harmonious, offering a quiet sanctuary that’s open and effortlessly balanced.

    21. Japanese Maple Zen Garden

    Japanese Maple Zen Garden

    Imagine a backyard where graceful Japanese maples take center stage, their vibrant leaves bringing a soothing burst of color and calm. Surrounding them, soft white gravel, artfully trimmed bushes, and timeless stone lanterns come together to create a space that feels thoughtfully composed and perfectly harmonious. This kind of garden offers a serene retreat that remains enchanting and peaceful through every season, inviting you to slow down and enjoy its quiet beauty.

    22. Mini Japanese Lantern

    Mini Japanese Lantern

    Even a small outdoor nook can be transformed into a serene retreat with a charming Japanese-style lantern as the centerpiece. Gentle lighting paired with smooth gravel and carefully trimmed plants brings a sense of harmony and tranquility. Adding delicate maple saplings and natural elements creates that classic Zen garden vibe, proving that peace and beauty don’t require a sprawling space.

    23. Raised Zen Deck Garden

    Raised Zen Deck Garden

    Imagine a serene retreat where smooth wooden decking meets carefully raked gravel, all framed by the fiery hues of a Japanese maple. This fresh twist on a classic Zen garden invites a sense of calm, letting simple shapes and soft colors highlight nature’s subtle beauty. Cozy and minimalist, these intimate garden spaces have won hearts for bringing tranquility outdoors without the hassle of constant upkeep.

    24. Small Buddha Garden Corner

    Small Buddha Garden Corner

    You don’t need a sprawling yard to invite calm and reflection into your outdoor space. A cozy nook with smooth river stones, lush plants, and a modest Buddha figure can transform even the smallest corner into a serene retreat. These intimate garden spots have grown in popularity as more of us seek peaceful havens where we can unwind and reconnect with nature.

    Final Thoughts

    No matter the size of your outdoor space, embracing the essence of Japanese garden design invites a sanctuary of calm and balance into your life. It’s about thoughtful simplicity—where each stone, plant, and ripple of water creates a quiet dialogue with nature. Even the smallest touch, like a lone bamboo shoot or a carefully placed pebble, can evoke a profound sense of harmony and reflection.

    Begin your journey with mindful intention, allowing the natural elements to guide you in crafting a garden that speaks to your soul. In this tranquil blend of artistry and nature, you’ll discover not just a beautiful retreat, but a lasting space for peace and inspiration to grow.

  • 15 Luxe Rooftop Makeover Ideas to Transform Your Space Into a Dream Oasis

    There’s something undeniably magnetic about a rooftop space—the way it opens up to expansive skies, city skylines, or tranquil horizons. With the right approach, this often-overlooked area can evolve from a bare platform into an exquisite sanctuary that rivals the elegance of a luxury penthouse. Imagine stepping onto your rooftop at sunset, greeted by plush seating, ambient lighting, and curated greenery that transform the open air into an intimate, stylish escape. This is where urban sophistication meets personal comfort, creating a retreat that feels both exclusive and inviting.

    Transforming a rooftop into a high-end oasis is less about grandeur and more about thoughtful layering of textures, colors, and functional design elements. From sleek outdoor furniture to statement décor and subtle architectural features, each piece plays a role in crafting a cohesive, upscale atmosphere. Whether nestled in a bustling city or perched above a quiet neighborhood, your rooftop can become a coveted haven—an elevated experience that turns everyday moments into extraordinary memories. Let’s explore how to harness style, comfort, and ingenuity to create a rooftop retreat that feels as luxurious as it looks.

    1. Sleek Geometric Lighting for Rooftop Ambiance

    Sleek Geometric Lighting for Rooftop Ambiance

    Elevate your rooftop into a captivating evening retreat with striking geometric lighting elements. Hang sharp-edged pendant fixtures above seating areas, either from a pergola frame or tensioned cables spanning the open space. Choose furniture with clean, architectural silhouettes—such as streamlined white chairs or sectional sofas that emphasize modern minimalism. Introduce contrast by incorporating dark-toned or metallic planters filled with spiky tropical greenery, adding vertical interest and texture.

    Complete the setting by installing subtle LED strip lights along walkways or beneath furnishings to cast a soft, gallery-inspired glow. This arrangement is perfect for those who appreciate bold lines, stark contrasts, and a sleek, contemporary vibe. You can achieve this look affordably with readily available solar or plug-in geometric lights, while sticking to a monochromatic palette to highlight the interplay of light and structure.

    Key Design Elements

    • Use tension wires or pergola beams to suspend angular pendant lights for an architectural effect.
    • Select minimalist white or neutral-toned furniture with crisp lines to maintain a modern aesthetic.
    • Incorporate black or metal planters with spiky tropical plants for added height and textural contrast.

    Pro Tip: Opt for LED strip lights under furniture or along pathways to create an inviting, museum-like ambiance without overwhelming the space.

    2. Harmonized Hues for Rooftop Revelry

    Harmonized Hues for Rooftop Revelry

    Elevate your rooftop gathering by embracing a seamless color story that ties every element together in perfect harmony. Select a cohesive color scheme—whether soft pastels or vibrant gems—and weave it through your cushions, throws, poufs, rugs, and table settings. A statement fringe umbrella creates an inviting centerpiece, anchoring the space visually while everything else layers effortlessly beneath. Accent the scene with candles and floral arrangements matching your palette to enhance the atmosphere and unify the decor.

    This styling approach suits any occasion, from birthday celebrations to bridal showers or laid-back hangouts. Sticking to a single color family ensures your space feels thoughtfully curated and effortlessly stylish. For a gentle, sophisticated vibe, opt for understated, muted tones; or if you want to make a bold impression, rich jewel colors will bring exciting energy to your rooftop retreat.

    Key Design Elements

    • Choose one or two main colors and consistently apply them to textiles, tableware, and décor accents.
    • Incorporate a standout piece like a fringe umbrella or lantern to serve as a visual anchor.
    • Use candles and fresh flowers within your color scheme to add warmth and cohesion throughout the space.

    Pro Tip: Layer different textures and shades within your chosen color palette to add depth and avoid a flat look.

    3. Chic Rooftop Retreats with Shaded Loungers

    Chic Rooftop Retreats with Shaded Loungers

    Create an inviting rooftop oasis inspired by glamorous seaside escapes with cozy lounge nooks that radiate effortless luxury. Start by choosing plush daybeds or cushioned loungers in neutral palettes, then complement them with elegant umbrellas featuring delicate fringe details in warm, sun-kissed hues. Incorporate woven side tables to effortlessly combine practicality and style—perfect for holding refreshing drinks, stylish coasters, or a vibrant bowl of seasonal fruit. Layer in textured rugs or mats beneath each seating area to visually anchor the space and define separate relaxation zones.

    Key Design Elements

    • Opt for cushioned loungers or daybeds in muted tones to evoke a serene, resort-style atmosphere.
    • Choose fringed umbrellas in natural shades to add a touch of bohemian elegance and provide ample shade.
    • Place woven side tables nearby to keep essentials like beverages and accessories within easy reach.

    Pro Tip: Roll up lightweight throws and towels in a basket to enhance comfort and add a spa-like touch to your rooftop lounge setup.

    4. Chic Garden-Inspired Rooftop Brunch

    Chic Garden-Inspired Rooftop Brunch

    Elevate your weekend mornings by crafting a garden-chic brunch setting atop your rooftop. Start with a circular wooden or woven rattan table, layering it with colorful floral plates that add a playful yet refined touch. Soft pink or peach linen napkins paired with sparkling crystal glassware and antique-style cutlery enhance the sophisticated atmosphere. Complete the look with a floral centerpiece featuring lush peonies, delicate baby’s breath, or fragrant roses arranged in a simple low vase, creating a fresh and inviting focal point. Comfortable seating is key—opt for wicker or cane chairs adorned with plush cushions to encourage leisurely, stylish dining.

    What truly sets this rooftop brunch apart is the careful curation of details—combining layered dishware, a harmonious color palette, and thoughtfully chosen accents to transform a casual meal into an elegant experience. Even if space or furniture options are limited, a high-quality linen tablecloth paired with genuine glassware can dramatically uplift the overall feel. Adding a charming beverage tray with sparkling mimosas or a vibrant fruit salad completes the scene, allowing you to host a stunning rooftop brunch that feels effortlessly luxurious.

    Key Design Elements

    • Choose a round wooden or rattan table for a natural, inviting base.
    • Incorporate floral patterned plates and blush-toned linens to add warmth and charm.
    • Use low-profile floral arrangements to keep the space open and conversation-friendly.

    Pro Tip: Opt for vintage-inspired flatware and real glassware to instantly elevate casual outdoor dining.

    5. Glowing Pergola Haven

    Glowing Pergola Haven

    Transform your rooftop into a chic retreat by outfitting a wooden pergola with cascading string or curtain lights that create a warm, inviting glow. Underneath, set up cream or beige sofas layered with plush pillows and cozy throws to encourage relaxation and comfort. Center the seating area with a sleek marble or rustic wooden coffee table, adorned with flickering candles, decorative trays, and a selection of tall, leafy plants to bring life and texture to the space. This thoughtful combination delivers an effortlessly stylish and serene atmosphere that feels both fresh and timeless.

    Designed for all seasons, this luminous pergola lounge effortlessly shifts from bright daylight haven to enchanting evening escape. When the sun sets, the soft lighting and carefully curated decor foster the perfect spot for enjoying a glass of wine, unwinding with friends, or gazing at the stars. Enhance the vibe further by adding a discreet speaker playing gentle tunes, creating a multi-sensory experience that elevates your rooftop into a personal sanctuary. This setup is the epitome of versatile elegance, making every moment spent there feel truly special.

    Key Design Elements

    • Hang warm white string or curtain lights across the pergola for soft, ambient lighting.
    • Choose neutral-toned seating with ample cushions and throws for ultimate comfort.
    • Incorporate natural elements like marble tables and leafy plants to balance textures and add sophistication.

    Pro Tip: For an extra layer of coziness, install weatherproof outdoor heaters to keep the space inviting during cooler evenings.

    6. Golden Hour Hammock Haven

    Golden Hour Hammock Haven

    Transform your rooftop into a serene escape with a hammock perfectly positioned to catch the stunning colors of sunset. Opt for a spacious woven hammock hung between sturdy wooden beams or sleek pergola posts, creating a cozy nook for unwinding. Encase the space with lush greenery—think tall palms, cascading ivy, or abundant ferns—to craft a private oasis that invites calm and tranquility. Enhance comfort with plush floor cushions, a lightweight throw, and a small side table to hold your favorite book and a refreshing drink.

    This setup is ideal for leisurely afternoons, power naps, or immersing yourself in a captivating novel as the sun dips below the horizon. If space is limited, consider a hanging swing chair or a cocoon-style lounger to replicate that floating sensation without taking up too much room. Soft, ambient lighting such as string lights or lanterns nestled among the plants will add a warm, inviting glow, setting the perfect mood for evening relaxation.

    Key Design Elements

    • Select a hammock made from breathable, weather-resistant fabric for durability and comfort.
    • Incorporate a mix of tall and trailing plants to create depth and privacy around your seating area.
    • Use battery-operated or solar-powered lights to safely illuminate your rooftop retreat after dark.

    Pro Tip: Anchor your hammock securely with heavy-duty hardware and double-check stability to ensure a safe and stress-free lounging experience.

    7. Starlit Cinema Escape

    Starlit Cinema Escape

    Transform your rooftop into an enchanting open-air theater where cozy meets chic. Hang a lightweight white sheet or position a sleek projector screen against a smooth wall to create the perfect backdrop for your film. Layer plush rugs on the floor and scatter an assortment of poufs, oversized pillows, and soft blankets to craft a welcoming lounge area that invites guests to sink in and relax. Complement the mood with low-profile tables or trays cleverly arranged to hold your favorite snacks, drinks, and softly flickering candles in glass jars, adding a warm, flickering ambiance.

    Hosting movie nights outdoors is an effortless way to make your rooftop a go-to spot for memorable gatherings. The blend of casual comfort and stylish touches delights guests and adds a unique twist to your entertainment lineup. With compact, budget-friendly projectors widely available, setting up your own cinema is simpler than ever. For an extra element of fun, curate a themed snack station complete with vintage popcorn buckets and nostalgic treats that will keep your guests coming back for more.

    Key Design Elements

    • Choose a lightweight white sheet or portable screen for easy setup and storage.
    • Use layered rugs and cushions to create a comfortable, inviting seating area.
    • Incorporate candles and string lights to enhance the cozy nighttime atmosphere.

    Pro Tip: Invest in a projector with built-in speakers or connect a compact Bluetooth sound system to ensure crystal-clear audio for your rooftop cinema experience.

    8. Chic All-White Rooftop Dining Elegance

    Chic All-White Rooftop Dining Elegance

    Transform your rooftop into a serene sanctuary with a crisp, all-white dining arrangement that embodies modern minimalism. Begin with a streamlined white table paired with sleek chairs—whether in metal, wood, or molded plastic—tailored to your personal aesthetic. Layer in a gentle linen table runner to introduce subtle texture while maintaining the clean palette. Complement the setting with pristine ceramic dinnerware, frosted candle holders, and accents of gold flatware to infuse a touch of understated luxury, while a delicate eucalyptus garland adds a whisper of greenery that keeps the look fresh and balanced.

    This design instantly evokes the vibe of an exclusive rooftop bistro, offering both tranquility and sophistication. Embracing the mantra ‘less is more’ is key, ensuring every element is purposeful and refined. To soften the starkness, incorporate soft, ambient lighting through petite candles or discreet solar lamps that create a welcoming glow as evening falls. Including a few artistic touches, like geometric candle holders or matte-finish vases, elevates the dining space with effortless style and personality.

    Key Design Elements

    • Opt for chairs with clean lines in your preferred material to maintain a cohesive look.
    • Use a linen runner to add subtle texture without disrupting the monochrome scheme.
    • Incorporate eucalyptus garlands for a natural contrast that complements the white palette.

    Pro Tip: Choose candle holders and vases with interesting shapes and matte finishes to add depth without cluttering your minimalist setup.

    9. Chic Canopy Dining Escape

    Chic Canopy Dining Escape

    Transform your rooftop into a sophisticated dining retreat by installing a light, airy canopy that blends style with shelter. Opt for a white sailcloth or sheer fabric overhead to create a breezy, inviting atmosphere while protecting your guests from the elements. Anchor the space with a weathered wooden table that exudes rustic charm, and mix in vintage-inspired chairs of varying shapes and finishes to add personality and a relaxed vibe. Accentuate the table with layered linens, amber-tinted glassware, and dried floral arrangements to bring warmth and natural texture to your alfresco setting. A cozy rug beneath the table grounds the area, tying together all the elements into a cohesive and welcoming nook. Perfect for memorable celebrations, languid summer evenings, or twilight dinners, this setup encourages lingering conversation and unforgettable moments. If your rooftop can’t accommodate a full tent, consider a generous fabric awning or a large sunshade as an alternative, then embellish the perimeter with twinkling string lights or hanging lanterns to create an enchanting glow as night falls.

    Key Design Elements

    • Choose lightweight, breathable fabrics for your canopy to ensure comfort and airflow on warm evenings.
    • Mix and match vintage or eclectic chairs for a personalized, inviting seating arrangement.
    • Incorporate soft textiles like rugs and runners to add layers of texture and comfort underfoot.

    Pro Tip: Enhance ambiance by hanging fairy lights or lanterns around the canopy’s edges to cast a warm, magical glow after sunset.

    10. Elevated Escape: Crafting a Serene Rooftop Reading Corner

    Elevated Escape: Crafting a Serene Rooftop Reading Corner

    Transform a quiet spot on your rooftop into a tranquil haven perfect for losing yourself in a good book. Start with a durable outdoor lounge chair outfitted with a plush cushion to invite long, comfortable reading sessions. Layer the area with soft floor pillows and a cozy rug to create a welcoming, defined space. Incorporate a compact wooden shelf to neatly display your favorite novels alongside charming accents such as scented candles or inspirational prints. A petite side table serves as the perfect perch for your drink, a candle, and a small potted plant, adding both function and a touch of nature to the setup.

    This cozy retreat is designed to offer a peaceful oasis amid the urban bustle. Embrace a soothing palette of neutral hues and soft fabrics to foster calmness and serenity. Utilize woven baskets to keep extra throws and books organized while maintaining an uncluttered vibe. With these carefully chosen elements, you can enjoy quiet mornings or unwind during sunset with your literary escapes, all from the comfort of your high-rise hideaway.

    Key Design Elements

    • Choose weather-resistant furniture with plush cushions for all-day comfort.
    • Use textured rugs and floor pillows to anchor the nook and add warmth.
    • Incorporate storage solutions like woven baskets to keep essentials tidy and accessible.

    Pro Tip: Opt for lightweight, movable furniture to easily adjust your nook based on sun exposure or changing moods.

    11. Chic Rooftop Fire Gathering

    Chic Rooftop Fire Gathering

    Elevate your rooftop experience with a stylish fire feature that doubles as a captivating centerpiece. Opt for a contemporary firepit crafted from stone or concrete to bring an inviting glow and a modern aesthetic to your outdoor lounge. Surround it with low-profile seating—think cushioned benches or modular sofas—adorned with rich, tactile pillows in shades inspired by nature. Enhance the ambiance by scattering floor lanterns at different heights, which cast dancing shadows and add visual interest, while tall potted plants or ornamental grasses frame the setting, offering privacy and a touch of greenery.

    Key Design Elements

    • Select a firepit with clean lines and neutral materials for timeless appeal.
    • Incorporate layered seating with plenty of cushions for ultimate comfort.
    • Use varied lighting sources like lanterns and string lights to create a warm atmosphere.

    Pro Tip: For smaller spaces, a portable tabletop fire bowl can provide the same cozy glow without sacrificing style—just remember to verify fire safety rules first.

    12. Sun-Kissed Mediterranean Rooftop Vibes

    Sun-Kissed Mediterranean Rooftop Vibes

    Transform your rooftop into a sun-drenched Mediterranean retreat by incorporating vibrant tile-inspired patterns beneath your feet. If laying down actual tiles isn’t feasible, opt for weather-resistant floor decals or stenciled rugs that evoke the timeless charm of blue and white ceramics. Complement the scene with crisp white bistro chairs, a sleek ceramic-topped table, and understated planters housing fragrant herbs like rosemary, lavender, or even small citrus trees. Keep decor simple and airy to maintain a bright, inviting atmosphere that captures the essence of coastal living.

    This setting is perfect for leisurely morning coffees, peaceful midday meals, or focused outdoor work sessions. Introduce cushions in soft tonal shades and clay pots to harmonize with the overall palette. The secret lies in balancing elegance with ease—embracing the simplicity of seaside style while adding curated details to elevate the space. For an extra touch of Mediterranean flair, incorporate lemon-inspired tableware or keep a refreshing spritz close at hand to enliven the experience.

    Key Design Elements

    • Use outdoor floor decals or stenciled rugs to replicate Mediterranean tile patterns without permanent installation.
    • Choose white bistro seating and a ceramic-top table to complement tile-inspired flooring.
    • Incorporate fragrant Mediterranean plants like rosemary or citrus trees for authentic ambiance.

    Pro Tip: Layer tonal cushions and terracotta pots to subtly echo Mediterranean hues, enhancing cohesion without overwhelming the space.

    13. Golden Hour Haven with Cozy Layers

    Golden Hour Haven with Cozy Layers

    Transform your rooftop into a chic retreat reminiscent of an upscale resort by embracing warm, inviting textures. Begin with a soft, neutral-hued sectional—think creams or soft taupes—and pile on an assortment of pillows crafted from natural materials like linen and cotton to create depth and comfort. Anchor the space with a woven jute rug that adds an earthy, tactile foundation beneath your feet. Introduce a sturdy teak coffee table as a centerpiece, styled with artful stacks of books, elegant ceramics, and a refreshing pitcher filled with citrus-infused drinks for that sophisticated yet laid-back vibe. Surround the area with lanterns placed at varying heights to cast a gentle glow, and complement the scene with sheer white curtains suspended from a wooden pergola, allowing them to sway softly in the breeze for an ethereal effect.

    This thoughtfully layered setup elevates any simple rooftop into a serene sanctuary perfect for unwinding during sunset. The palette of warm neutrals creates a seamless backdrop that encourages relaxation and lingering conversations. Don’t underestimate the power of texture—from chunky knit throws to rattan accents—to build a rich, inviting atmosphere. Lighting plays a pivotal role, so incorporate a mix of soft candlelight and solar-powered lanterns to highlight your space’s edges, making it magical well after the sun dips below the horizon.

    Key Design Elements

    • Choose a neutral sectional sofa and layer it with pillows in various natural fabrics for a cozy yet elegant look.
    • Use a jute rug to add warmth and texture underfoot, grounding your seating area.
    • Incorporate lanterns and sheer curtains to create ambient lighting and a breezy, relaxed vibe.

    Pro Tip: Mix and match textures—like smooth teak, woven jute, and soft linens—to add dimension and a high-end feel to your rooftop lounge.

    14. Chic Bohemian Canopy Retreat

    Chic Bohemian Canopy Retreat

    Transform your rooftop into a serene bohemian escape by crafting a canopy nook adorned with soft, flowing fabrics in shades like ivory or sandy beige. These airy drapes not only filter the sunlight gently but also create an inviting, ethereal atmosphere. Furnish the space with a blend of Moroccan-style poufs, plush floor cushions, and petite rattan tables to encourage relaxed, intimate gatherings at ground level. Adding textured woven rugs underneath enhances the sense of warmth and visual interest, tying the entire area together seamlessly. Surround your sanctuary with handcrafted macramé lanterns and arrange dried florals or pampas grass in rustic vases to infuse natural charm. Complete the ambiance with a cascade of glowing string lights overhead, perfect for cozying up as the sun sets. This rooftop setup excels as a versatile spot for both leisurely afternoons and lively nights spent with close friends. Its adaptable nature means you can easily combine cherished items, vintage treasures, and budget-friendly boho accents to achieve a harmonious, earthy-toned palette that feels effortlessly stylish and inviting.

    Key Design Elements

    • Choose sheer, neutral-colored fabrics for a light and airy canopy effect.
    • Incorporate a mix of textured seating like poufs and cushions to create a comfortable lounge area.
    • Use layered rugs and natural decor elements to add depth and warmth to the space.

    Pro Tip: Opt for warm-toned LED string lights to create a soft, welcoming glow without overwhelming the relaxed vibe.

    15. Chic Sip Station

    Chic Sip Station

    Design a stylish nook dedicated to your favorite refreshments by starting with a sleek metal or brass bar cart. Elevate the look with an ice bucket filled with chilled drinks, a selection of sparkling beverages, and elegant glassware to impress your guests. Introduce a pop of color and freshness by adding a petite bouquet of flowers or a sprig of leafy greens. Surround this setup with plush velvet cushions near a marble or mirrored accent table set atop a patterned geometric rug to create an inviting, upscale vibe. This compact corner packs a visual punch and works perfectly for entertaining, romantic evenings, or simply unwinding after a long day. Easily switch up the theme by swapping out drinks to suit the occasion—whether it’s a citrusy margarita, a vibrant mocktail, or a smooth espresso martini, this space adapts effortlessly to your mood and menu.

    Key Design Elements

    • Choose a sturdy, mobile bar cart in brass or polished metal for both function and style.
    • Incorporate fresh flowers or greenery to add life and color to your drink station.
    • Use comfortable velvet poufs and a geometric rug to define the space and enhance comfort.

    Pro Tip: Keep cocktail tools and napkins neatly stored on the bottom shelf of your cart to maintain a clutter-free and elegant look.

    Conclusion

    Transforming your rooftop into a penthouse-style retreat is more than just a design project—it’s an opportunity to create a personal sanctuary above the city’s hustle and bustle. With thoughtful touches and a bit of creativity, you can turn this often-overlooked space into a vibrant extension of your home, perfect for relaxing, entertaining, and soaking in breathtaking views. Remember, the most important element is your own comfort and style, so let your rooftop reflect your unique personality and lifestyle.

    Now is the perfect time to start bringing your rooftop vision to life. Whether you begin with a cozy seating area, lush greenery, or ambient lighting, each small step will elevate your outdoor experience. Embrace the process, enjoy the transformation, and soon you’ll find yourself spending more moments basking in the fresh air, feeling inspired by the beauty you’ve created just steps from your door.

  • Elevate Your Rooftop: Creative Ideas to Transform It into a Chic Outdoor Haven

    Transforming your rooftop into a stylish and inviting retreat has never been more achievable. Whether you have a sprawling terrace or a cozy urban nook, thoughtful decor choices can elevate this often-overlooked space into a personalized oasis. From contemporary lighting solutions to lush greenery, the right blend of elements will not only enhance the aesthetic appeal but also maximize comfort and functionality.

    In this article, we explore a curated selection of rooftop decor ideas designed to inspire and guide you. Discover how LED strip lighting can set a modern tone, while statement water features and fire pits add sensory appeal. Combine chic privacy screens with boho floor seating and cozy lounges to create intimate zones, or opt for a minimalist pergola to bring shade without clutter. Whether you’re planning alfresco dining, movie nights under the stars, or tranquil relaxation in a hammock, these versatile design tips ensure your rooftop becomes the ultimate urban sanctuary.

    1. Elevate Your Rooftop Ambiance with LED Accent Lighting

    Elevate Your Rooftop Ambiance with LED Accent Lighting

    With customizable LED strips that shift through a spectrum of colors and brightness levels, you can effortlessly tailor the mood—whether you’re hosting a lively gathering or enjoying a peaceful evening under the stars. This versatile setup brings both style and functionality to your rooftop haven.

    Key Design Elements

    • LED strips installed along seating and perimeter railings
    • Accentuates key architectural details with subtle illumination
    • Offers dynamic color options for versatile mood settings
    • Complements sleek, minimalist outdoor furnishings

    Pro Tip: Use app-enabled LED strips to seamlessly adjust lighting scenes without leaving your seat.

    2. Tranquil Rooftop Water Element

    Tranquil Rooftop Water Element

    Incorporating a contemporary water centerpiece, like a minimalist stone cascade or a serene reflecting basin, instantly infuses your rooftop with calm and serenity. The soothing murmur of trickling water sets a peaceful tone, ideal for moments of quiet reflection or relaxation after a busy day.

    Enhance this calming oasis by surrounding it with lush plants and softly glowing lanterns, transforming your rooftop into a rejuvenating sanctuary high above the urban bustle.

    Key Design Elements

    • Sleek stone cascade or tranquil reflecting basin
    • Soothing soundscape of gentle water flow
    • Enveloped by verdant foliage and ambient lighting
    • Creates a relaxing, spa-inspired retreat

    Pro Tip: Opt for a compact, self-sufficient water feature with an integrated pump for hassle-free setup without complicated plumbing.

    3. Show-Stopping Rooftop Dining Experience

    Show-Stopping Rooftop Dining Experience

    Transform your rooftop into a captivating dining destination where every meal feels special. Imagine a spacious wooden table adorned with gleaming metallic accents, lush floral arrangements, and the warm glow of candles, setting a sophisticated and inviting tone. Comfortable yet chic chairs complete the scene, offering guests a cozy spot to unwind while savoring both the food and panoramic cityscapes.

    From vibrant brunches bathed in morning light to intimate dinners under a starlit sky, a thoughtfully designed dining area not only enhances the ambiance but also makes your rooftop the ultimate gathering place for memorable moments and lively conversation.

    Key Design Elements

    • Expansive wooden table as a focal point
    • Shimmering metallic flatware paired with fresh floral decor
    • Soft candlelight to create a cozy glow
    • Ergonomic and fashionable seating options

    Pro Tip: Incorporate a durable, weather-resistant table runner and centerpiece to maintain elegance through all seasons.

    4. Chic Bohemian Lounge with Rugs and Cushions

    Chic Bohemian Lounge with Rugs and Cushions

    Transform your rooftop into a serene retreat by embracing a bohemian-inspired floor seating setup. Combine vibrant, textured rugs with plush cushions arranged casually around a low-profile wooden table to create a welcoming spot perfect for casual chats, sunset sips, or quiet moments beneath the stars. This layered approach not only invites relaxation but also adds rich visual depth to your outdoor haven.

    Elevate the ambiance further by draping delicate string lights overhead and positioning an array of leafy plants nearby. These elements work harmoniously to infuse your space with a natural, artistic flair, making it feel both intimate and effortlessly stylish—an ideal sanctuary for unwinding or entertaining under the open sky.

    Key Design Elements

    • Stacked textured rugs for warmth and pattern
    • Vibrant cushions for comfort and color
    • Minimalist low wooden table as a focal point
    • Strategic placement of greenery and twinkling lights

    Pro Tip: Opt for weatherproof rugs and cushions designed to withstand sun and moisture to keep your boho vibe fresh season after season.

    5. Stylish Seclusion with Artistic Screens

    Stylish Seclusion with Artistic Screens

    Transform your rooftop into a serene retreat by incorporating artistic wooden screens that blend functionality with flair. These screens, adorned with eye-catching geometric designs, not only provide a sense of privacy but also serve as captivating focal points. When complemented with cozy rattan seating, a sleek coffee table, and vibrant potted greenery, the area becomes a tranquil haven ideal for relaxing or entertaining away from prying eyes.

    This thoughtfully curated setup encourages a harmonious balance between open-air freedom and intimate enclosure, allowing you to enjoy your outdoor space with comfort and style. The combination of natural textures and sculptural elements adds depth and personality, making your rooftop a chic escape above the city bustle.

    Key Design Elements

    • Wooden screens featuring bold geometric motifs
    • Freestanding panels that define private zones
    • Comfortable rattan lounge chairs paired with a minimalist coffee table
    • Abundant greenery through thriving potted plants

    Pro Tip: Choose portable privacy panels that can be effortlessly moved to refresh your rooftop arrangement anytime.

    6. Starlit Cinema Retreat

    Starlit Cinema Retreat

    Elevate your rooftop into a magical alfresco theater where film lovers can gather beneath the night sky. Set up a generously sized projector screen paired with plush floor pillows and snug throws to invite everyone to relax in comfort. A rustic serving tray laden with your favorite snacks and refreshing drinks adds a touch of hospitality, while gentle string lights cast a warm, inviting glow across the space.

    Whether you’re hosting an intimate date night or a lively group screening, this rooftop cinema promises unforgettable memories under twinkling stars, blending entertainment with the charm of the outdoors.

    Key Design Elements

    • Ample projection screen for vivid viewing
    • Generous cushions and soft blankets for cozy seating
    • Charming wooden tray stocked with refreshments
    • Delicate string lights to create a soothing ambiance

    Pro Tip: Opt for a short-throw projector to achieve sharp images without requiring extensive setup space.

    7. Cozy Rooftop Retreat: Swings and Hammocks

    Cozy Rooftop Retreat: Swings and Hammocks

    Transform your rooftop into a tranquil escape with the addition of a stylish hanging chair or hammock that invites relaxation. Imagine sinking into a beautifully crafted macramé swing, gently suspended from a sturdy wooden frame, creating an idyllic nook for savoring a good book or drifting off in peaceful repose. Layering in vibrant, patterned cushions alongside a petite side table adorned with flickering candles enhances the inviting and laid-back ambiance.

    As dusk falls, delicate string lights intertwined around the frame cast a warm, enchanting glow, turning the space into a magical sanctuary. Whether you’re swaying softly above the cityscape or simply soaking in the serene atmosphere, this inviting setup effortlessly elevates your rooftop into a personal haven of calm and style.

    Key Design Elements

    • Macramé hanging chair supported by a robust wooden frame
    • Colorful patterned cushions for added comfort and charm
    • Compact side table featuring softly glowing candles
    • Twinkling string lights draped around the structure

    Pro Tip: Choose a hammock made from UV-resistant, weatherproof fabric to maintain durability year-round.

    8. Chic Pergola Oasis for Rooftop Retreats

    Chic Pergola Oasis for Rooftop Retreats

    Transform your rooftop into a stylish sanctuary with a streamlined black metal pergola that blends modern design with practical shade. Soft, billowy white curtains draped gracefully around the structure add an airy, romantic vibe, gently swaying with the breeze and introducing a light, delicate contrast. Nestle an elegant outdoor dining ensemble beneath this haven, setting the stage for memorable meals shared under the open sky.

    Enhance the pergola’s contemporary appeal by surrounding it with lush potted greenery like slender olive trees or climbing vines, which infuse natural warmth and vitality to the rooftop space. This refined setup effortlessly balances sophistication and comfort, making it an inviting spot for everything from lively brunches to tranquil dinners, all while providing shelter from harsh sunlight.

    Key Design Elements

    • Contemporary black metal pergola with clean lines
    • Ethereal white sheers that flow with the wind
    • Sophisticated outdoor dining furniture for intimate gatherings
    • Lush olive trees or climbing plants to soften the look

    Pro Tip: Choose a pergola with adjustable curtains or shade options to customize comfort throughout the day.

    9. Elevate Your Rooftop with a Luxe Canopy Retreat

    Elevate Your Rooftop with a Luxe Canopy Retreat

    Transform your rooftop into a serene sanctuary by introducing a chic canopy bed framed within a private cabana. Soft, billowing curtains sway gently in the breeze, offering both seclusion and a touch of sophistication. Surround yourself with cushy pillows and warm throws that invite lounging, while taking in breathtaking views of the cityscape or ocean horizon—turning your outdoor space into a personal oasis.

    Enhance the ambiance with subtle lantern lighting paired alongside a compact side table to hold your favorite refreshments. This combination creates a spa-inspired hideaway where comfort meets style, perfect for unwinding or entertaining under the open sky.

    Key Design Elements

    • Elegant four-poster canopy frame
    • Delicate curtains that provide shade and privacy
    • Comfort-enhancing cushions and cozy throws
    • Ambient lanterns for a warm, inviting glow

    Pro Tip: Choose weather-resistant fabrics like outdoor linen or canvas to keep your cabana looking fresh through all seasons.

    10. Ignite Warmth with a Rooftop Fire Feature

    Ignite Warmth with a Rooftop Fire Feature

    Transform your rooftop into a welcoming retreat by incorporating a stylish fire feature that radiates both heat and charm. Position a sleek, round fire pit at the center, encircled by contemporary rattan seating cushioned for ultimate comfort, to craft an inviting space where friends and family naturally gather as the temperature drops. The dancing flames not only provide soothing warmth but also create a serene ambiance that encourages lingering conversations under the night sky.

    Elevate the cozy vibe by adding soft, textured throws and setting out a selection of comforting beverages like steaming mulled wine or rich hot chocolate. Coupled with panoramic cityscapes, the gentle glow and crackle of the fire will transform your rooftop into a memorable, luxurious escape perfect for unwinding and making lasting memories.

    Key Design Elements

    • Round fire pit serves as a captivating centerpiece
    • Comfortable rattan loungers with plush padding
    • Soft throws for added warmth and texture
    • Inviting beverage station with seasonal hot drinks

    Pro Tip: Opt for a propane fire pit to enjoy hassle-free lighting and minimal smoke for a cleaner outdoor experience.

    11. Elevate Your Rooftop with a Verdant Living Wall

    Elevate Your Rooftop with a Verdant Living Wall

    Transform your rooftop into a serene sanctuary by installing a thriving living wall bursting with rich greenery. Imagine a tapestry of trailing ivy, blooming blossoms, and lush ferns climbing skyward—creating an eye-catching backdrop that simultaneously offers privacy and visual interest. This vibrant display breathes new life into your outdoor space, providing a peaceful escape amid the bustling cityscape.

    Enhance this natural haven by adding a rustic wooden bench adorned with bright, weather-resistant cushions. This inviting seating area blends the warmth of natural materials with the soothing presence of plants, crafting an ideal spot to unwind, savor a cup of coffee, or simply soak in the fresh air and calm atmosphere.

    Key Design Elements

    • Wall-mounted ivy and colorful flowering plants for dynamic greenery
    • Natural barrier that enhances privacy while beautifying the space
    • Comfortable wooden seating accented with lively outdoor pillows
    • Diverse foliage including ferns to add depth and visual interest

    Pro Tip: Incorporate self-watering planters to keep your vertical garden healthy with minimal effort.

    12. Chic and Comfortable Rooftop Retreat

    Chic and Comfortable Rooftop Retreat

    Transform your rooftop into a serene haven with seating that beckons you to unwind. Opt for a roomy sectional sofa dressed in soft, earthy cushions that invite long conversations or quiet moments alone. Center the area with a sleek wooden coffee table, tastefully decorated with flickering candles and a petite greenery accent that brings natural charm to the urban setting. A cozy outdoor rug beneath your feet not only unifies the space but also enhances the breathtaking cityscape visible beyond.

    Elevate the ambiance by layering in a variety of textured pillows and cozy throws, adding depth and warmth to your lounge. As twilight descends, this cozy nook becomes the perfect spot to savor your favorite drink while soaking in the glittering skyline, offering a peaceful respite after a busy day.

    Key Design Elements

    • Spacious sectional sofa featuring soft, natural-hued cushions
    • Simple wooden coffee table highlighted with candles and greenery
    • Inviting outdoor rug that anchors and defines the lounge area
    • Assorted textured pillows and plush throws for extra comfort

    Pro Tip: Select durable, weatherproof cushion fabrics in muted shades to maintain a fresh look through all seasons.

    13. Enchanting Rooftop Radiance

    Enchanting Rooftop Radiance

    Elevate your rooftop experience by draping delicate string lights that cast a gentle, inviting glow. These twinkling illuminations instantly turn your outdoor space into a serene haven, perfect for intimate get-togethers or peaceful evenings under the open sky. Whether hung above or intertwined with a pergola, the soft lighting brings warmth and charm to your rooftop sanctuary.

    Enhance the mood further by mixing in rustic lanterns on tables or railings, adding layers of cozy light. For a touch of magic, incorporate battery-powered LED candles or cluster tiny firefly lights inside glass jars, creating an enchanting atmosphere that feels like a secret retreat floating above the city’s hustle and bustle.

    Key Design Elements

    • Drape warm white fairy lights overhead for a soft glow
    • Place rustic lanterns along railings and tabletops
    • Add battery-operated LED candles for safe, flickering light
    • Use firefly-style string lights in glass containers for whimsical charm

    Pro Tip: Opt for solar-powered string lights to enjoy eco-friendly illumination that lasts all evening.

    14. Elevated Elegance: Crafting a Multi-Tiered Rooftop Oasis

    Elevated Elegance: Crafting a Multi-Tiered Rooftop Oasis

    Transform your rooftop into a dynamic sanctuary by incorporating tiered wooden decking that defines distinct areas for relaxation, meals, and social gatherings. This layered approach not only maximizes usable space but also adds visual intrigue, allowing each section to serve a unique purpose within a harmonious layout. Complementing the natural warmth of timber with thoughtfully chosen outdoor furnishings and lush plant accents helps cultivate an inviting atmosphere that encourages both comfort and style.

    Blending materials like smooth stone, rich wood, and soft textiles brings texture and depth, setting the stage for a chic yet welcoming environment. This multifaceted design elevates your rooftop beyond a simple open area, turning it into a personalized outdoor haven perfect for unwinding or entertaining under the sky.

    Key Design Elements

    • Create distinct areas for dining, lounging, and socializing
    • Incorporate chic and comfortable outdoor seating
    • Use greenery to define and soften spaces
    • Combine varied textures like wood, stone, and fabric for visual richness

    Pro Tip: Apply a UV-protective finish to your wooden decking each year to preserve its vibrant hue and durability.

    Conclusion

    Elevating your rooftop into a captivating outdoor haven is all about harmonizing style, comfort, and purpose. By integrating elements like multi-level wooden decking, vertical gardens, and ambient string lights, you craft a layered environment that invites relaxation and entertainment alike. Each piece, from a statement dining table to a private cabana, contributes to a cohesive retreat that reflects your unique taste.

    With these thoughtfully chosen decor ideas, your rooftop can transcend its original function and become a cherished extension of your home. Embrace the opportunity to create a space where vibrant gatherings, quiet moments, and lifelong memories unfold beneath open skies.

  • Elevate Your Bathroom Ambiance with Luxe Lighting Designs for a Spa-Inspired Daily Escape

    Bathroom lighting is often overlooked, yet it plays a crucial role in transforming a simple space into a sanctuary of style and comfort. Too many bathrooms rely on harsh, unflattering fixtures that wash out features and kill any sense of ambiance. But when thoughtfully designed, lighting can elevate your daily rituals, turning mundane moments into indulgent experiences that refresh both body and mind.

    Luxury bathroom lighting goes beyond mere visibility—it sets the tone for relaxation, enhances architectural details, and complements sophisticated finishes. Imagine soft, layered illumination that flatters your reflection, calms the senses during a soak, and invites you to savor every step of your skincare routine. The difference between good and great lighting is the ability to blend function with elegance, creating a space that feels less like a utilitarian room and more like a personal retreat.

    In the collection ahead, you’ll discover inspiring lighting ideas that redefine what a bathroom can be. From subtle accent lights to statement fixtures, these designs harness light to craft moods and celebrate textures, proving that the right approach to lighting can dramatically uplift your bathroom experience. Ready to rethink how light influences your daily routine? Let these luxurious concepts guide your transformation.

    1. Glow Up: Floating Tub Chandelier Ideas

    Glow Up: Floating Tub Chandelier Ideas

    Imagine stepping into a bathroom where a breathtaking chandelier seems to float effortlessly above a freestanding tub, transforming the space into a sanctuary of art and light. Delicate glass rods cascade downward like shimmering icicles, their translucent forms capturing and refracting light to cast a soft, mesmerizing glow that dances across the room. This sculptural masterpiece is more than just illumination—it’s a captivating centerpiece that commands attention and elevates the entire bathing experience to something truly unforgettable.

    Behind the tub, a polished marble wall stands as a luxurious backdrop, its smooth, natural veining adding depth and sophistication. Flanking the scene, flickering candle sconces lend a warm, intimate ambiance, layering the lighting to create a rich interplay of shadows and highlights. Together, these elements compose a visually stunning tableau—cinematic in its drama and elegance—where every soak feels like an indulgent escape. The floating tub chandelier doesn’t just light the room; it transforms it, making the bath the star of a serene yet striking masterpiece.

    Key Design Elements

    • Select a chandelier that is designed and certified for use in moist or damp bathroom spaces.
    • Install the chandelier so that it hangs at least 8 feet above the bathtub surface to ensure safe clearance.
    • Opt for dimmable LED candelabra bulbs to easily adjust the lighting intensity and create the desired mood.

    Pro Tip: Mount the chandelier on its own dimmer switch, independent from the main bathroom lights, so you can easily adjust the lighting to set a relaxing mood while soaking.

    2. Serene Ambiance with Hidden Cove Lighting

    Serene Ambiance with Hidden Cove Lighting

    Imagine stepping into a serene sanctuary where light seems to float effortlessly from the edges of the ceiling, casting a delicate, ethereal glow that gently cascades down the walls. This hidden cove lighting, cleverly recessed and outfitted with subtle LEDs, banishes the need for obvious fixtures, enveloping the bathroom in a tranquil, spa-like atmosphere. The soft illumination highlights every detail, transforming the space into a haven of quiet elegance and calm.

    At the heart of this tranquil retreat rests a freestanding oval tub, set gracefully upon natural stone floors that soak up the warm, ambient light. Surrounding wooden details contribute a comforting richness, balancing the room’s cool sophistication with an organic touch. Complementing this harmonious blend, brushed nickel fixtures add a refined, understated shine, tying together the palette in effortless style. The concealed lighting not only adds depth and intrigue but also maintains a clean, uncluttered look, turning the bathroom into a luxurious escape bathed in soft, inviting radiance.

    Key Design Elements

    • Opt for LED strips with a high number of LEDs per meter (60 or more) to achieve consistent and uniform illumination.
    • Incorporate a diffuser channel to soften the light and prevent bright spots within the cove.
    • Select a color temperature around 2700K to create a cozy and calming ambiance in your bathroom lighting.

    Pro Tip: Install cove lighting to create a relaxing atmosphere, and add a dedicated task light on a different switch for clear, focused illumination when needed.

    3. Modern Track Lighting: Flexible Bathroom Glow

    Modern Track Lighting: Flexible Bathroom Glow

    Sleek black track lighting elegantly traces the ceiling, offering a dynamic way to illuminate every corner of your bathroom. With its flexible spotlights, you can easily direct beams onto mirrors for flawless makeup application, accentuate vanity areas, or spotlight striking architectural elements that make your space truly unique. The minimalist design of the tracks complements the raw texture of industrial-style tiles and smooth concrete floors, while the glow of brass faucets introduces a subtle touch of warmth, creating a balanced and inviting atmosphere.

    This lighting system isn’t just about style—its adaptability lets you effortlessly shift the focus depending on your mood or task. Whether you’re setting a soft, ambient glow for a relaxing soak or bright, targeted light for grooming, the modular nature of the track fixtures means your bathroom lighting evolves with your needs. Marrying artistry with practicality, this modern track lighting setup is the perfect finishing touch for bathrooms that embrace contemporary or industrial aesthetics, transforming everyday routines into stylish rituals.

    Key Design Elements

    • Select a track lighting setup that allows each light to be directed independently for personalized illumination.
    • Opt for spotlights with a tight beam angle (15-25 degrees) to highlight specific areas or features.
    • Pair track lights with under-cabinet LED strips to ensure even and comprehensive bathroom lighting.

    Pro Tip: Mount the track lighting on a dimmer so you can easily lower the brightness at night, creating a calm and soothing atmosphere instead of harsh, bright light.

    4. Dramatic Crystal Chandeliers Above Tubs

    Dramatic Crystal Chandeliers Above Tubs

    Imagine sinking into a freestanding clawfoot tub, your sanctuary crowned by a dazzling crystal chandelier that commands attention from above. This radiant centerpiece transforms the space into a theatrical display of elegance, its myriad facets casting shimmering patterns across gleaming marble walls and polished floors. Each flicker of light dances like liquid diamonds, elevating the bath from mere routine to a lavish ritual filled with sparkle and sophistication.

    Surrounding gilded mirrors and intricately designed sconces amplify the chandelier’s opulence, creating layers of shimmering reflections that envelop the room. The gentle flicker of candlelight weaves through the brilliance, infusing the atmosphere with a warm, romantic glow that whispers luxury at every turn. This harmonious blend of radiant illumination and classic glamour evokes the indulgent charm of a boutique hotel suite, transforming an everyday bath into a sensory escape where beauty and comfort intertwine seamlessly.

    Beyond its breathtaking aesthetics, the crystal chandelier’s glow infuses the entire bathroom with an inviting ambiance that feels both grand and intimate. Though installing such a dramatic fixture may require careful planning, the payoff is an unforgettable visual spectacle and an elevated bathing experience that redefines what it means to unwind in style.

    Key Design Elements

    • Choose a chandelier specifically designed to withstand moisture if it’s installed close to the bathtub.
    • Position the chandelier so it hangs at least 8 feet above the edge of the tub to maintain safety and balanced aesthetics.
    • Install a dimmer switch to easily adjust the lighting from bright and functional to soft and intimate.

    Pro Tip: Choose a crystal chandelier that is UL damp-rated to ensure it’s safe and suitable for use in the humid environment above your bathtub.

    5. Enchant Your Bathroom with Lantern Lights

    Enchant Your Bathroom with Lantern Lights

    Imagine stepping into a bathroom where the soft, amber glow of lantern-style ceiling lights instantly transforms the space into a cozy sanctuary. These pendants, framed in sleek black metal and encasing frosted glass, gently diffuse light to create a warm, inviting atmosphere above the vanity. Their timeless design lends a rustic yet refined charm, effortlessly blending with the farmhouse-style stone countertop and natural textures nearby. Each lantern becomes a captivating centerpiece, drawing the eye upward and infusing the room with both character and comfort.

    Beyond mere functionality, these lantern lights evoke a sense of enduring craftsmanship, as if they’ve been woven into the very architecture of the bathroom itself. Paired with subtle touches like fresh greenery and woven baskets, they soften the overall aesthetic, balancing rugged textures with organic warmth. This lighting choice doesn’t just illuminate—it tells a story of thoughtful design, where luxury meets homely comfort, making every morning routine feel like a charming retreat. Whether your style leans rustic, modern, or somewhere in between, these lanterns bring both personality and sophistication to the heart of your home.

    Key Design Elements

    • Opt for lantern lights featuring frosted or seeded glass to create a gentle, evenly spread illumination.
    • Install the fixtures so the bottom sits about 7 feet above the floor to ensure ample headroom.
    • Combine different metal tones like matte black and brass to add depth and visual interest to your bathroom decor.

    Pro Tip: Install smart bulbs in lantern-style ceiling fixtures to easily switch between warm light for relaxing evenings and cooler tones for an energizing morning.

    6. Globe Pendant Cluster Lighting Magic

    Globe Pendant Cluster Lighting Magic

    Above the vanity, a captivating arrangement of globe pendants hangs gracefully, each orb suspended at a different level to craft a dynamic, eye-catching sculpture of light. These frosted glass spheres, adorned with subtle brushed gold accents, emit a soft, ethereal glow that seems to drift gently in the air like luminous bubbles. The delicately layered heights lend a rhythmic flow to the composition, transforming ordinary lighting into a striking work of art that instantly draws the eye.

    Reflected in the expansive mirrors, the glowing globes multiply their presence, doubling the sense of depth and enchantment in the space. Below, a rich walnut vanity grounds the scene with its warm, natural tones, offering a perfect counterpoint to the cool marble walls that surround it. This inventive cluster not only delivers brilliant illumination for daily routines but also elevates the bathroom into an immersive experience where form and function dance seamlessly—a radiant centerpiece that feels contemporary, playful, and utterly sophisticated.

    Key Design Elements

    • Adjust the pendant lights so they hang at different levels, spacing them about 4 to 8 inches apart for a natural, dynamic effect.
    • Opt for frosted glass globes to soften the light and reduce glare directly in your line of sight.
    • Select canopy hardware in brushed gold or brass finishes to add warmth and create a unified aesthetic.

    Pro Tip: Opt for one canopy with varying cord lengths instead of separate pendants to achieve a neater ceiling look and simplify the electrical setup.

    7. Brighten Bathrooms: Skylight & Recessed Lighting

    Brighten Bathrooms: Skylight & Recessed Lighting

    Imagine stepping into a bathroom bathed in a cascade of natural light streaming through a sleek, rectangular skylight positioned right above the vanity. This daylight floods the space with a luminous glow, making the room feel open, fresh, and effortlessly uplifting. The sunlight dances across glossy porcelain tiles, amplifying their reflective surfaces and transforming the bathroom into a radiant sanctuary where light seems to ripple and shimmer with every glance.

    As the sun dips below the horizon, a trio of recessed LED downlights seamlessly takes over, casting a gentle yet consistent glow that keeps the atmosphere bright and inviting no matter the hour. These understated fixtures, finished in matte black, add a touch of modern sophistication, anchoring the airy room with a subtle, elegant contrast. Together, the skylight and recessed lighting create a dynamic interplay of illumination — blending natural warmth with sleek artificial light to craft a space that feels both luxurious and alive, evolving effortlessly from dawn to dusk.

    Key Design Elements

    • Opt for a tubular skylight to bring in natural light when installing a traditional skylight isn’t feasible.
    • Arrange recessed lights evenly in a grid layout to ensure balanced, overall illumination throughout the bathroom.
    • Select recessed light trims in matte black to introduce a sleek, contemporary accent to your lighting design.

    Pro Tip: Add a motorized shade to your skylight to easily reduce glare when the sun is strongest, allowing you to maintain natural light without discomfort.

    8. Elevate Luxury with Recessed Shower Lighting

    Elevate Luxury with Recessed Shower Lighting

    Imagine stepping into your shower and being enveloped in a warm, radiant glow that seems to come from nowhere yet perfectly showcases every detail around you. Recessed spotlights, seamlessly embedded in the ceiling above, cast a gentle cascade of light directly onto the rainfall showerhead, turning it into a shimmering centerpiece. The carefully positioned beams dance across the tiled walls, causing their textures and colors to sparkle with an almost magical brilliance. This subtle yet striking illumination transforms the ordinary act of showering into an immersive, sensory retreat that feels like a private spa sanctuary.

    The glass enclosure, sleek and frameless, amplifies the soft luminosity, creating reflections that add depth and a sense of spaciousness to the area. Below, a minimalist floating vanity drifts effortlessly, ensuring that nothing distracts from the shower’s radiant allure. The entire composition feels architectural—clean lines and thoughtful light blending into an utterly indulgent atmosphere. Here, light doesn’t just reveal the space; it elevates it, turning everyday rituals into moments of exquisite luxury and relaxation, where the beauty of the fixtures and tiles is celebrated with both subtlety and grandeur.

    Key Design Elements

    • Install recessed lighting fixtures that are rated safe for wet environments to ensure durability in the shower area.
    • Aim the lights so they skim across the tile surfaces, enhancing the texture and depth of the walls.
    • Select warm white bulbs around 2700K to create a cozy and calming ambiance during showers.

    Pro Tip: Add a dedicated dimmer switch for your shower lights so you can easily adjust the brightness, enhancing the ambiance and making your shower feel more like a relaxing spa retreat.

    9. Sleek Vertical Strip Lighting Ideas

    Sleek Vertical Strip Lighting Ideas

    Slim vertical LED strips flanking frameless mirrors cast a crisp, balanced glow that perfectly lights the face, making every grooming routine feel effortlessly precise. The illumination wraps softly around the edges, blending modern technology with a gentle warmth that transforms the space into a sanctuary of style and function. This lighting design hints at the future while still inviting comfort, turning ordinary moments into a quietly luxurious experience.

    Set against smooth marble vanities adorned with brushed brass fixtures, the lighting’s cool radiance contrasts beautifully with the natural textures, creating a harmonious interplay of materials. Pale gray tiles catch and diffuse the LED beams, adding depth and softness that enhance the room’s serene atmosphere. Together, these elements evoke the polished elegance of a chic boutique hotel, where every detail whispers refinement without excess.

    More than just beautiful, this arrangement excels in delivering clear, shadow-free illumination perfect for detailed tasks, all while preserving a minimalist, uncluttered aesthetic. The vertical light strips emphasize clean lines and modern grace, striking the perfect balance between cutting-edge sophistication and inviting warmth—never clinical, always captivating.

    Key Design Elements

    • Install vertical light strips along the sides of your bathroom mirror to eliminate shadows on your face.
    • Incorporate aluminum channels to securely house the lights and give the setup a sleek, polished look.
    • Select LED strips with a color rendering index above 95 to ensure true-to-life colors for precise grooming.

    Pro Tip: Install the vertical light strips so they go a bit beyond the top and bottom edges of the mirror to enhance the look with a striking, floor-to-ceiling illumination.

    10. Perfectly Balanced Bathroom Wall Sconces

    Perfectly Balanced Bathroom Wall Sconces

    Imagine the perfect harmony achieved by two elegant wall sconces gracefully framing an arched mirror—an arrangement that exudes timeless charm and effortlessly complements any bathroom style. The warm glow from frosted glass shades, set in brushed brass fixtures, bathes the space in a soft, inviting light that flatters every reflection. This carefully curated pairing doesn’t just illuminate; it elevates the entire room, casting a gentle radiance that feels both luxurious and welcoming.

    The beauty of this design lies in its cohesion. Polished marble countertops and matching brass hardware echo the sconces’ finishes, weaving a thread of sophistication throughout the bathroom. Meanwhile, understated neutral subway tiles add subtle texture that enriches the space without stealing focus. The perfectly balanced symmetry not only creates a visually pleasing focal point but also ensures consistent, shadow-free lighting—ideal for everyday routines like shaving or applying makeup. This classic lighting layout is a foolproof choice that seamlessly bridges the gap between traditional elegance and modern simplicity, promising style that endures.

    Key Design Elements

    • Position wall sconces around eye level, roughly 60 to 65 inches above the floor.
    • Place sconces 28 to 36 inches apart, aligning them evenly with the center of the mirror.
    • Opt for frosted glass shades to create a gentle, evenly spread illumination.

    Pro Tip: Choose wall sconces that include dimmers or pair them with smart bulbs, so you can easily adjust the lighting level and instantly change the atmosphere of your bathroom.

    11. Glow Up: Under-Mirror Lighting Innovation

    Glow Up: Under-Mirror Lighting Innovation

    Imagine stepping into a bathroom where the mirror itself becomes a radiant source of light, glowing softly from its very edges. This cutting-edge under-mirror integrated lighting transforms the space into a realm of sleek elegance, casting a gentle, white illumination that perfectly balances function and ambiance. No longer reliant on bulky fixtures or harsh overhead bulbs, the light wraps seamlessly around the mirror, delivering pristine clarity for grooming tasks while subtly bathing the room in a calming, spa-like glow.

    Complementing this luminous feature, a contemporary floating vanity with a polished quartz countertop anchors the design in modern luxury. Surrounding it, expansive neutral-toned tiles stretch smoothly across the walls, evoking a serene, minimalist oasis that invites relaxation. This clever integration of light within the mirror edges eradicates visual clutter, creating uninterrupted lines that emphasize the room’s streamlined sophistication. The result is a bathroom that doesn’t just look refined—it feels effortlessly futuristic and welcoming, where every detail speaks to thoughtful design and everyday practicality.

    Key Design Elements

    • Opt for mirrors that include built-in anti-fog heating elements to keep the surface clear and enhance convenience.
    • Pick mirrors featuring touch-sensitive dimmer switches to easily customize brightness levels.
    • Aim for lighting with a color temperature in the 2700K to 3000K range to create warm, flattering illumination.

    Pro Tip: Install a backlit mirror alongside an independent ceiling light on a different switch, allowing you to customize and adjust your bathroom lighting for different needs.

    12. Glow Up with Backlit LED Vanity

    Glow Up with Backlit LED Vanity

    Imagine stepping into a bathroom where the mirror itself seems to radiate a gentle, enchanting glow. Full-width backlit LED mirrors cast a luminous halo that bathes the entire vanity area in soft, even light—eliminating harsh shadows and making every grooming detail effortlessly clear. This seamless illumination transforms a routine morning ritual into a moment of quiet indulgence, where function meets serene beauty.

    Beneath the cabinets, slender LED strips trace subtle beams of light across glossy floors, layering the space with warmth and dimension. The interplay of these lights against textured stone walls creates a captivating contrast, adding richness and character to the room. Paired with polished chrome fixtures, the lighting scheme emphasizes a sleek, contemporary design that feels both futuristic and inviting. The result is a sophisticated, spa-inspired ambiance that pulses with an elegant, high-tech glow—luxurious and calming, never cold or clinical.

    Key Design Elements

    • Select LED strips featuring a color rendering index (CRI) above 90 to ensure true-to-life colors in your bathroom.
    • Incorporate dimmable LED drivers to easily control the light intensity based on different times and needs.
    • Opt for a 3000K color temperature to create a cozy and inviting ambiance with warm white light.

    Pro Tip: Install LED strips beneath the vanity to create a soft, floating light along the floor, giving your bathroom a sleek, high-end ambiance.

    13. Timeless Charm: Candle-Style Bathroom Lights

    Timeless Charm: Candle-Style Bathroom Lights

    Imagine stepping into a bathroom where the soft, inviting glow of candle-style wall sconces instantly transports you to a bygone era of refined elegance. These lights, with their gently tapered frosted shades resting on gleaming brass bases, cast a warm and flickering radiance that dances like real candle flames, wrapping the room in a romantic embrace. Their subtle shimmer highlights the room’s classic features—a pristine marble pedestal sink and timeless checkerboard floors—creating a harmonious blend of function and beauty.

    More than mere lighting, these sconces serve as architectural treasures in their own right, seamlessly woven into the fabric of traditional or transitional bathroom designs. They don’t feel like afterthoughts or add-ons; instead, they become integral accents that enhance the space’s sophistication and charm. Whether illuminating your evening routine or setting the mood for relaxation, this classic lighting style offers an enduring sense of grace that never goes out of fashion.

    Key Design Elements

    • Choose LED bulbs that mimic flickering flames to achieve an authentic candlelight ambiance safely
    • Mount the lights on a dimmer switch to easily adjust brightness from everyday use to mood lighting
    • Position the fixtures near a sizable mirror to reflect and enhance the soft, inviting illumination

    Pro Tip: Select wall sconces that direct light upward so the illumination reflects off the ceiling, creating a soft, inviting glow that enhances the bathroom’s atmosphere.

    14. Vintage Industrial Bathroom Lighting Ideas

    Vintage Industrial Bathroom Lighting Ideas

    In this bathroom, vintage industrial lighting takes center stage, transforming the space into a cozy urban retreat. Exposed cage sconces encase glowing Edison bulbs, their amber filaments flickering softly against the raw, textured concrete walls. The warm, golden radiance gently bathes the room, evoking a sense of timeless charm and inviting intimacy. Each light fixture feels like a piece of history, adding depth and distinctive personality that breathe life into the rugged surroundings.

    Balancing the industrial edge, a sturdy wooden vanity with its rich, weathered grain anchors the design, while matte black faucets punctuate the scene with bold, minimalist flair. Nearby, understated pendant lights hover delicately around the bathtub, layering the illumination and offering versatile moods—whether for relaxing baths or energizing morning routines. This fusion of vintage warmth and industrial grit crafts a space that’s not only visually striking but also warmly authentic, perfectly suited for those who cherish the raw beauty of urban loft living.

    Key Design Elements

    • Install LED Edison-style bulbs to combine classic vintage appeal with energy-saving technology.
    • Opt for open cage sconces to enhance illumination while maintaining an industrial aesthetic.
    • Add recessed lighting to provide focused, practical brightness that complements the vintage fixtures.

    Pro Tip: Combine Edison bulb wall sconces with a bold industrial-style mirror to create a unified and purposeful look in your bathroom.

    15. Elevate Vanity Style with Pendant Lights

    Elevate Vanity Style with Pendant Lights

    Suspended gracefully above the vanity, a pair of elegant glass pendant lights transform the bathroom into a dazzling showcase of style and sophistication. Their transparent, jewel-like forms shimmer softly, casting a gentle glow that elevates the entire space with an air of refined luxury. Warm brass rods suspend the pendants with effortless charm, infusing the room with a subtle golden hue that contrasts beautifully against the cooler marble surfaces below.

    As the delicate glass shades diffuse the light, they create a focused radiance that highlights every intricate veining and polished reflection on the marble countertops, revealing textures that often go unnoticed under typical overhead lighting. An expansive, frameless mirror stretches behind the vanity, capturing and multiplying the luminous glow to brighten the room and amplify its sense of spaciousness. Complemented by a sleek floating vanity adorned with matte black hardware, the brass pendants strike a perfect balance—becoming captivating sculptural accents that continue to enchant the eye, whether glowing warmly or resting quietly in daylight.

    Key Design Elements

    • Install pendant lights so the bottom hangs about 60-65 inches from the floor to provide ideal lighting for daily tasks.
    • Opt for glass or frosted shades to ensure the light spreads evenly throughout the space.
    • Combine warm brass fixtures with neutral stone surfaces to create a classic and enduring style.

    Pro Tip: Install pendant lights on both sides of the mirror instead of above it to provide even lighting that reduces shadows on your face while you get ready.

    Conclusion

    True luxury in bathroom lighting comes not from extravagance, but from thoughtful design that blends different types of light to enhance both function and mood. By thoughtfully layering lighting—combining ambient, task, and accent sources—you transform your bathroom into a sanctuary where every detail is illuminated with purpose and style, creating a space that feels both inviting and effortlessly elegant.

    Approaching your lighting plan with intention allows you to highlight your bathroom’s unique features and support your daily rituals with ease and grace. When lighting is done right, it elevates the entire room, turning simple materials into something extraordinary and turning everyday routines into moments of calm and indulgence. In this way, well-crafted bathroom lighting becomes the silent hero of your home’s comfort and beauty.

  • 15 Round Dining Table Decor Ideas for a Stylish and Inviting Space

    Round dining tables naturally encourage conversation and connection, making them a favorite choice for everything from intimate family dinners to festive celebrations. Their curved shape creates a balanced, welcoming atmosphere, but decorating them requires a thoughtful approach to avoid clutter while still making a statement. Whether your style leans toward rustic charm, modern elegance, coastal relaxation, or glamorous sophistication, the right centerpiece and accents can completely transform your table.

    The following round dining table decor ideas have been reimagined and reordered to provide fresh inspiration for creating a beautiful, memorable setting in any home or event space.

    1. Create a Luxe Display with Gold Accents and Mirrors

    A mirrored centerpiece instantly adds depth and elegance to a round dining table. Place a circular mirror in the center and layer gold candleholders, metallic vases, or decorative ornaments on top. The reflective surface amplifies candlelight and highlights decorative details, making the table feel larger and more sophisticated. This glamorous arrangement is ideal for holiday dinners, weddings, or upscale entertaining.

    2. Style a Seasonal Fruit Centerpiece

    Fresh fruit can be surprisingly stylish when thoughtfully arranged. Fill decorative bowls or tiered trays with seasonal produce such as lemons, oranges, pomegranates, figs, or grapes. Add fresh herbs, greenery, or floral accents to enhance the presentation. This approach introduces vibrant color, natural texture, and practical functionality since guests can enjoy the fruit throughout the gathering.

    3. Add Warmth with Rustic Wooden Lanterns

    Wooden lanterns provide a cozy focal point that works beautifully on round tables. Fill them with pillar candles, fairy lights, or LED lantern candles for a welcoming glow. Complete the arrangement with eucalyptus branches, pinecones, or dried flowers to create a relaxed farmhouse-inspired aesthetic. This look is particularly effective during autumn gatherings and outdoor celebrations.

    4. Design a Romantic Floating Candle Display

    Floating candles offer timeless elegance without overwhelming the table. Arrange them in clear glass bowls filled with water, then scatter flower petals, floating greenery, or decorative stones around the candles. The result is a calming and romantic centerpiece that enhances intimate dinners, anniversary celebrations, and wedding receptions.

    5. Embrace Contemporary Style with Geometric Terrariums

    For a modern look, geometric terrariums bring structure and visual interest to a round table. Fill metal-framed terrariums with succulents, air plants, moss, or decorative stones. Tiny string lights woven inside create an eye-catching display after dark. Their compact size makes them ideal for smaller dining tables where space is limited.

    6. Incorporate Personalized Place Settings

    Thoughtful details can make guests feel genuinely welcomed. Personalized name cards, handwritten notes, or small favors placed at each seat add a meaningful touch. Mini succulents, candles, chocolates, or custom keepsakes create a memorable experience while contributing to the overall table design.

    7. Create Drama with Monochromatic Floral Arrangements

    Choosing flowers in a single color palette creates a sophisticated and cohesive statement. White roses, blush peonies, deep burgundy dahlias, or vibrant yellow tulips arranged in coordinating vessels can dramatically enhance the table without appearing busy. The uniform color scheme creates visual harmony while still delivering plenty of impact.

    8. Layer Fairy Lights with Cascading Greenery

    Nothing creates enchantment quite like soft lighting combined with natural foliage. Drape eucalyptus, ivy, or olive branches across the table and weave delicate fairy lights throughout the arrangement. The gentle illumination creates an inviting atmosphere perfect for evening entertaining, garden parties, and seasonal celebrations.

    9. Showcase Vintage Books and Antique Finds

    For a distinctive centerpiece, stack a collection of vintage books and top them with antique accessories such as brass candlesticks, pocket watches, or decorative clocks. This arrangement adds personality and storytelling to the table while serving as an excellent conversation starter. Small floral accents help soften the look and balance the vintage elements.

    10. Elevate Formal Gatherings with Crystal Candelabras

    Crystal candelabras remain one of the most dramatic centerpieces available. Their height and sparkle naturally draw attention, while candlelight reflected through crystal creates a luxurious atmosphere. Surround the base with floral garlands, greenery, or tea lights to complete the arrangement. This timeless design is particularly fitting for weddings, holiday dinners, and elegant celebrations.

    11. Bring Coastal Charm to the Table

    Capture the relaxed beauty of the shoreline with a coastal-inspired centerpiece. Arrange seashells, driftwood, coral accents, and glass containers filled with sand around the center of the table. Blue-and-white linens reinforce the nautical theme while maintaining a refined and polished appearance. This decor style is ideal for summer entertaining and beach-inspired homes.

    12. Introduce Bohemian Texture with Pampas Grass

    Bohemian-inspired decor continues to be popular for its relaxed and natural feel. Use pampas grass arrangements in ceramic or woven containers as a centerpiece, then pair them with macramé runners, textured placemats, and neutral-toned tableware. The combination creates a laid-back yet stylish atmosphere perfect for casual gatherings.

    13. Keep It Simple with a Minimalist Runner and Candles

    Sometimes less truly is more. A textured table runner combined with candles of varying heights creates a clean, modern look that complements almost any interior style. Glass, ceramic, or metal candleholders add subtle sophistication without distracting from the table’s simplicity. This versatile arrangement works equally well for everyday dining and special occasions.

    14. Arrange Vintage Tea Sets Filled with Flowers

    Repurpose vintage teacups, saucers, and teapots as charming floral containers. Small blooms, greenery, or delicate wildflowers placed inside these pieces create a whimsical centerpiece with plenty of personality. This setup is particularly lovely for brunches, bridal showers, garden parties, and afternoon tea gatherings.

    15. Celebrate the Seasons with Fresh Floral Centerpieces

    Nothing enhances a round dining table quite like fresh flowers. Seasonal blooms arranged in low-profile vases allow guests to converse comfortably while adding color, fragrance, and natural beauty. Layering different flowers with greenery creates depth and dimension, while unique containers such as colored glass, ceramic pots, or wooden boxes help personalize the display.

    Conclusion

    A beautifully decorated round dining table serves as more than just a place to eat—it becomes the centerpiece of meaningful conversations and memorable gatherings. Whether you prefer the elegance of crystal candelabras, the relaxed appeal of coastal accents, the warmth of rustic lanterns, or the simplicity of fresh flowers, there are countless ways to enhance your table while reflecting your personal style.

    The most successful round table designs balance beauty and practicality, ensuring guests feel comfortable while enjoying a visually appealing setting. By mixing textures, lighting, natural elements, and personalized details, you can create a table arrangement that feels welcoming, stylish, and perfectly suited to any occasion.

  • 15 Craftsman Dining Room Ideas for Timeless Elegance and Warm Gatherings

    The Craftsman style remains one of the most beloved interior design movements because of its focus on quality craftsmanship, natural materials, and enduring beauty. A Craftsman dining room is more than just a place to enjoy meals—it’s a welcoming space that celebrates handcrafted details, functional design, and a deep connection to nature.

    From rich woodwork and artisan lighting to built-in storage and architectural accents, Craftsman dining rooms create an atmosphere that feels both sophisticated and comfortable. Whether you’re renovating an older home or bringing Craftsman charm into a modern space, these inspiring ideas will help you design a dining room that feels timeless, practical, and inviting.

    1. Incorporate Built-In Storage for Seamless Style

    One of the defining features of Craftsman interiors is the use of built-in furniture that blends beauty with practicality. Consider adding a custom hutch, buffet, or wall-to-wall cabinetry that matches your dining room woodwork.

    Built-in storage keeps dishes, serving pieces, and seasonal décor organized while maintaining a clean, uncluttered appearance. Displaying heirloom china, handcrafted pottery, or decorative glassware inside these cabinets adds personality and showcases the artisanal spirit that defines Craftsman design.

    2. Highlight the Room with Stained Glass Lighting

    Lighting plays a major role in creating the cozy atmosphere Craftsman homes are known for. Stained glass chandeliers and pendant lights instantly add character while serving as beautiful focal points above the dining table.

    The warm glow filtering through colorful glass panels creates an intimate dining experience while reinforcing the handcrafted aesthetic. Choose geometric or nature-inspired designs that reflect traditional Craftsman artistry.

    3. Embrace Rich and Natural Wood Finishes

    Nothing captures the essence of Craftsman style better than beautiful woodwork. Oak, walnut, cherry, and mahogany are excellent choices for dining tables, trim, floors, and cabinetry.

    Rather than hiding natural grain patterns, Craftsman interiors celebrate them. Rich wood finishes create warmth, texture, and authenticity, helping the dining room feel welcoming and grounded. Layering multiple wood elements throughout the space creates a cohesive and timeless design.

    4. Add Exposed Ceiling Beams for Rustic Character

    Exposed wood beams instantly draw the eye upward and add architectural depth to a dining room. Whether structural or decorative, beams contribute to the handcrafted look that makes Craftsman homes so distinctive.

    Dark-stained beams against a lighter ceiling create dramatic contrast, while natural finishes produce a softer, more rustic appearance. This feature works especially well in rooms with vaulted or higher ceilings.

    5. Create a Nature-Inspired Color Palette

    Craftsman interiors are heavily influenced by the natural world. Earthy shades such as olive green, clay, rust, mustard yellow, deep brown, and warm beige create a soothing environment that complements natural wood surfaces.

    Use these colors on walls, upholstery, curtains, or decorative accents. The result is a harmonious space that feels calm, balanced, and connected to nature.

    6. Choose Mission-Style Furniture for Authentic Appeal

    Mission furniture is virtually synonymous with Craftsman design. Known for its sturdy construction, clean lines, and minimal ornamentation, this furniture style emphasizes function and quality over excess decoration.

    A solid wood Mission dining table paired with matching chairs creates an elegant centerpiece while maintaining the understated sophistication that defines Craftsman interiors.

    7. Introduce Decorative Art Tile Accents

    Handcrafted art tiles provide an opportunity to add color, texture, and visual interest without overwhelming the room. Consider using decorative tiles around a fireplace, as a feature wall, or within built-in cabinetry.

    Nature motifs, geometric patterns, and earthy colors are especially fitting for a Craftsman-inspired space. These artistic details reinforce the emphasis on handmade craftsmanship.

    8. Frame the Space with Classic Wainscoting

    Wainscoting adds instant architectural richness to a dining room. Wood paneling creates visual texture while protecting walls from everyday wear and tear.

    Pairing wainscoting with crown molding, plate rails, or wood trim enhances the room’s traditional appeal. Whether stained to match surrounding woodwork or painted in complementary tones, wainscoting contributes to a polished and sophisticated look.

    9. Display Handcrafted Pottery and Artisan Décor

    The Craftsman movement celebrates the value of handmade objects. Decorating with artisan pottery, hand-thrown ceramics, woven baskets, and handcrafted artwork reinforces the style’s authenticity.

    Rather than filling the room with mass-produced accessories, focus on meaningful pieces that tell a story and showcase skilled craftsmanship. These details add warmth and personality while making the space feel truly unique.

    10. Install Leaded Glass Features for Vintage Charm

    Leaded glass windows are among the most recognizable elements of traditional Craftsman architecture. Their geometric patterns and textured surfaces diffuse sunlight beautifully while adding artistic interest.

    Beyond windows, leaded glass can be incorporated into cabinet doors, room dividers, or decorative panels. These details create a sense of history and elegance that perfectly complements Craftsman interiors.

    11. Make a Statement with a Large Central Chandelier

    A substantial light fixture can anchor the entire dining room while reinforcing the room’s architectural character. Wrought iron chandeliers, handcrafted lantern-style fixtures, or oversized pendant lights fit beautifully within a Craftsman setting.

    The goal is to choose a fixture that feels substantial, well-crafted, and timeless rather than flashy or overly ornate.

    12. Incorporate Natural Stone Elements

    Natural stone introduces texture and a sense of permanence to a Craftsman dining room. Stone fireplaces, accent walls, hearths, or flooring add visual depth while emphasizing the connection to natural materials.

    When paired with warm wood tones, stone creates a balanced and inviting environment that feels both rugged and refined.

    13. Keep the Design Simple and Functional

    One of the guiding principles of Craftsman design is that beauty should never come at the expense of functionality. Avoid overcrowding the room with excessive decorations or trendy furnishings.

    Instead, focus on well-made pieces that serve a purpose and contribute to the room’s overall harmony. Clean lines, practical storage, and thoughtful layouts help the craftsmanship become the true focal point.

    14. Layer Natural Textiles for Comfort

    Soft furnishings help balance the substantial wood elements commonly found in Craftsman interiors. Linen curtains, wool rugs, cotton table runners, and botanical-patterned cushions add warmth and softness.

    Stick with natural fibers whenever possible to maintain authenticity and create a cozy atmosphere that’s perfect for everyday dining and special occasions alike.

    15. Design an Open and Inviting Layout

    Many Craftsman homes feature open floor plans that encourage connection between living spaces. Creating visual flow between the dining room, kitchen, and living area makes the home feel larger and more welcoming.

    Natural light can move freely throughout the space, highlighting beautiful woodwork and architectural details. An open layout also makes entertaining easier, allowing guests to move comfortably between rooms during gatherings.

    Conclusion

    A Craftsman dining room combines timeless design principles with everyday functionality, creating a space that feels warm, welcoming, and built to last. By incorporating rich wood finishes, handcrafted details, natural materials, and thoughtful architectural elements, you can create a dining area that celebrates both beauty and practicality.

    Whether you choose built-in cabinetry, stained glass lighting, exposed beams, or Mission-style furniture, each detail contributes to the signature Craftsman aesthetic. The result is a dining room that feels authentic, comfortable, and perfectly suited for everything from casual family dinners to memorable holiday celebrations.

    A well-designed Craftsman dining room isn’t about following trends—it’s about investing in quality materials, meaningful craftsmanship, and timeless style that will remain beautiful for years to come.

  • 15 Black Accent Wall Dining Room Ideas for a Bold and Elegant Look

    A black accent wall is one of the most powerful ways to add sophistication, depth, and personality to a dining room. While many homeowners shy away from dark colors, black can actually make a space feel more refined, intimate, and visually striking when paired with the right furnishings, textures, and lighting. Whether your style leans modern, industrial, rustic, vintage, or luxurious, a black feature wall provides a dramatic backdrop that elevates the entire room.

    From textured finishes and statement lighting to natural materials and metallic accents, these black accent wall dining room ideas showcase how versatile this bold design choice can be. Explore these inspiring concepts and discover how a touch of black can transform an ordinary dining space into a memorable gathering place.

    1. Pair Black Walls with Lush Greenery

    Nothing softens a dark wall better than vibrant greenery. A black accent wall creates a stunning backdrop for large indoor plants, trailing vines, or potted trees. The contrast between deep black and fresh green foliage instantly adds life and balance to the room. This combination feels modern yet organic, creating a dining area that is both dramatic and welcoming.

    2. Create Luxury with Black and Marble

    For a truly upscale look, combine a black accent wall with marble surfaces. Whether it’s a marble dining table, sideboard top, or decorative accessories, the natural veining adds movement and elegance against the dark backdrop. This pairing delivers a timeless, high-end aesthetic that feels sophisticated without appearing overly formal.

    3. Highlight a Statement Chandelier

    A black wall naturally draws attention to lighting fixtures. Install a dramatic chandelier or oversized pendant above the dining table and allow it to become the room’s centerpiece. The dark backdrop enhances the fixture’s silhouette while creating a beautiful contrast with the warm glow of the lighting.

    4. Incorporate Rich Textured Finishes

    Instead of a flat painted surface, consider adding texture through plaster, paneling, textured wallpaper, or decorative molding painted black. Texture prevents the wall from feeling one-dimensional and creates visual depth. This layered look works especially well in contemporary and transitional dining rooms.

    5. Style a Black Wall with Vintage Treasures

    A black accent wall provides the perfect setting for antique furnishings and vintage décor. Ornate mirrors, aged wooden tables, brass candlesticks, and vintage artwork stand out beautifully against the dark background. The result is a dining room filled with character, warmth, and timeless charm.

    6. Embrace the Beauty of Matte Black

    A matte black finish offers understated elegance and sophistication. Unlike glossy surfaces, matte paint absorbs light and creates a soft, velvety appearance. Pair it with natural wood furniture and warm textiles to create a cozy dining environment that feels both modern and inviting.

    7. Make Artwork the Centerpiece

    Turn your dining room into a personal gallery by using a black accent wall as a backdrop for oversized artwork. Bright colors, abstract designs, or large framed prints become more vibrant and eye-catching against the dark surface. This approach instantly adds personality and visual interest.

    8. Blend Black with Natural Stone Elements

    Combining black walls with stone accents introduces an appealing mix of modern and natural textures. Stone tabletops, feature columns, or decorative accessories create contrast and warmth while maintaining a sophisticated appearance. The result feels grounded, elegant, and effortlessly stylish.

    9. Create Contrast with White Furnishings

    A black-and-white color palette remains one of the most timeless design combinations. Pair your black accent wall with white dining chairs, a white table, or crisp white décor pieces. The dramatic contrast creates a clean, contemporary look that feels fresh and visually balanced.

    10. Add Glamour Through Gold Accents

    Gold and black are a classic pairing for luxury interiors. Gold-framed mirrors, brass light fixtures, metallic candleholders, and decorative accessories instantly elevate a black accent wall. The warm metallic tones bring brightness and elegance while enhancing the room’s sophisticated atmosphere.

    11. Install a Black Shiplap Feature Wall

    Shiplap adds architectural interest and texture while maintaining a clean appearance. Painting shiplap black creates a stylish balance between rustic charm and modern sophistication. Pair it with light wood furniture and soft upholstery to create a welcoming dining space with plenty of visual depth.

    12. Design a Sleek Minimalist Space

    If you prefer simplicity, a black accent wall can serve as the perfect foundation for minimalist décor. Clean-lined furniture, neutral color palettes, and carefully selected accessories allow the wall to become the focal point without overwhelming the room. The result is calm, refined, and effortlessly modern.

    13. Introduce Industrial-Inspired Details

    A black wall works beautifully in industrial-style dining rooms. Combine it with exposed metal furniture, steel-framed shelving, concrete finishes, and Edison bulb lighting. These raw materials complement the dark backdrop and create an urban-inspired space full of personality and edge.

    14. Use a Glossy Finish for Added Drama

    A glossy black accent wall reflects light and creates a sense of depth that matte finishes cannot achieve. This reflective surface can make smaller dining rooms feel more expansive while adding a luxurious touch. Pair it with metallic accents and elegant furnishings for maximum impact.

    15. Turn the Wall into a Functional Chalkboard

    For families or casual dining spaces, a chalkboard black accent wall offers both style and practicality. Use it to write menus, inspirational quotes, seasonal artwork, or family messages. This playful feature keeps the dining room interactive while maintaining the dramatic appeal of a black wall.

    Conclusion

    A black accent wall can completely redefine the atmosphere of a dining room, transforming it from ordinary to unforgettable. Whether you prefer the warmth of wood, the luxury of marble, the elegance of gold accents, or the freshness of indoor plants, black serves as a versatile foundation for countless design styles. The key to success lies in balancing the richness of the dark wall with texture, lighting, and complementary materials.

    By incorporating one or more of these black accent wall dining room ideas, you can create a space that feels dramatic, sophisticated, and uniquely personal. Rather than making a room feel smaller or darker, a thoughtfully designed black accent wall adds depth, character, and timeless elegance that will remain stylish for years to come.