Blog

  • Elevate Your Rooftop: Creative Ideas to Transform It into a Chic Outdoor Haven

    Transforming your rooftop into a stylish and inviting retreat has never been more achievable. Whether you have a sprawling terrace or a cozy urban nook, thoughtful decor choices can elevate this often-overlooked space into a personalized oasis. From contemporary lighting solutions to lush greenery, the right blend of elements will not only enhance the aesthetic appeal but also maximize comfort and functionality.

    In this article, we explore a curated selection of rooftop decor ideas designed to inspire and guide you. Discover how LED strip lighting can set a modern tone, while statement water features and fire pits add sensory appeal. Combine chic privacy screens with boho floor seating and cozy lounges to create intimate zones, or opt for a minimalist pergola to bring shade without clutter. Whether you’re planning alfresco dining, movie nights under the stars, or tranquil relaxation in a hammock, these versatile design tips ensure your rooftop becomes the ultimate urban sanctuary.

    1. Elevate Your Rooftop Ambiance with LED Accent Lighting
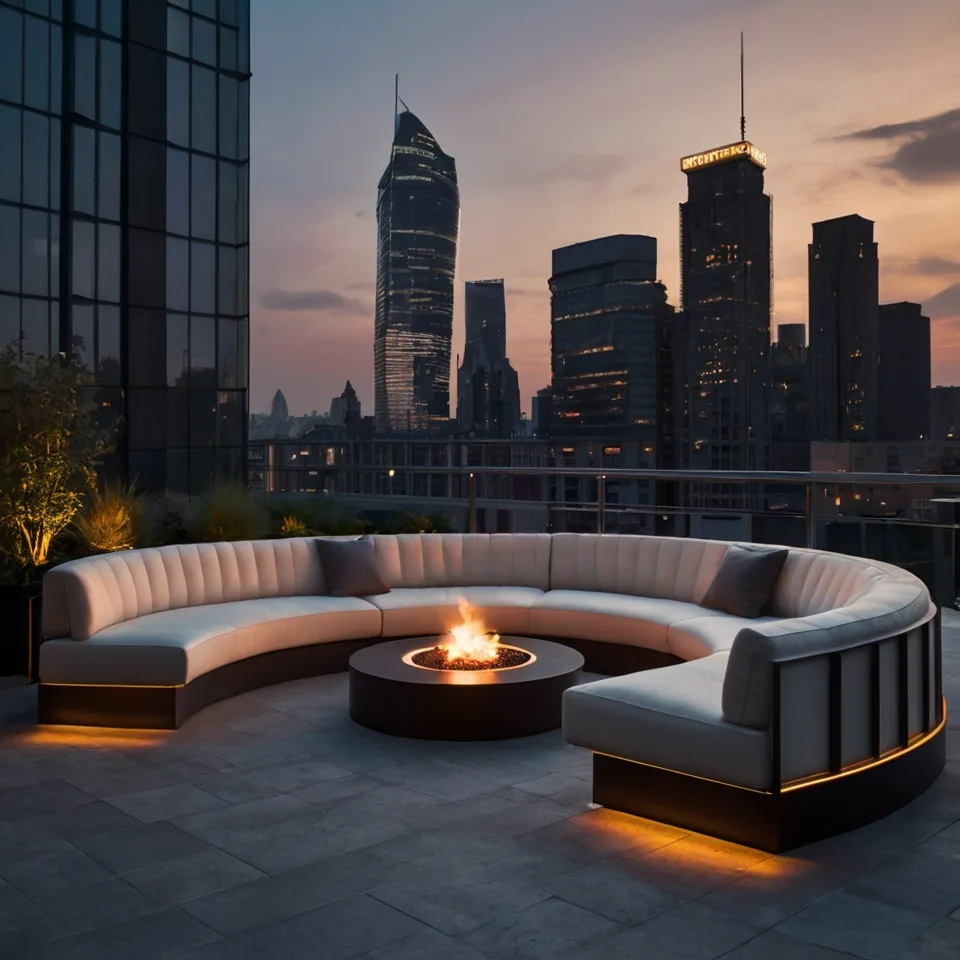
    Elevate Your Rooftop Ambiance with LED Accent Lighting

    With customizable LED strips that shift through a spectrum of colors and brightness levels, you can effortlessly tailor the mood—whether you’re hosting a lively gathering or enjoying a peaceful evening under the stars. This versatile setup brings both style and functionality to your rooftop haven.

    Key Design Elements

    • LED strips installed along seating and perimeter railings
    • Accentuates key architectural details with subtle illumination
    • Offers dynamic color options for versatile mood settings
    • Complements sleek, minimalist outdoor furnishings

    Pro Tip: Use app-enabled LED strips to seamlessly adjust lighting scenes without leaving your seat.

    2. Tranquil Rooftop Water Element
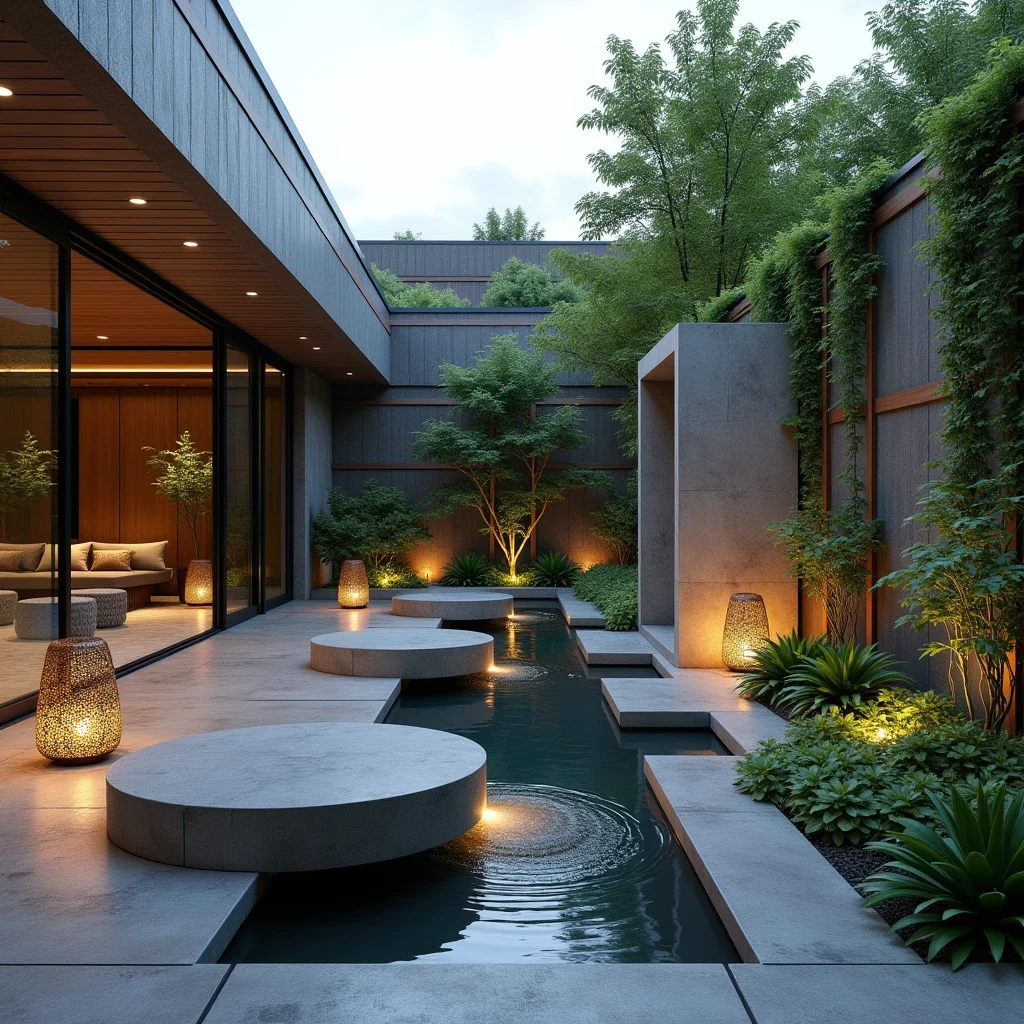
    Tranquil Rooftop Water Element

    Incorporating a contemporary water centerpiece, like a minimalist stone cascade or a serene reflecting basin, instantly infuses your rooftop with calm and serenity. The soothing murmur of trickling water sets a peaceful tone, ideal for moments of quiet reflection or relaxation after a busy day.

    Enhance this calming oasis by surrounding it with lush plants and softly glowing lanterns, transforming your rooftop into a rejuvenating sanctuary high above the urban bustle.

    Key Design Elements

    • Sleek stone cascade or tranquil reflecting basin
    • Soothing soundscape of gentle water flow
    • Enveloped by verdant foliage and ambient lighting
    • Creates a relaxing, spa-inspired retreat

    Pro Tip: Opt for a compact, self-sufficient water feature with an integrated pump for hassle-free setup without complicated plumbing.

    3. Show-Stopping Rooftop Dining Experience
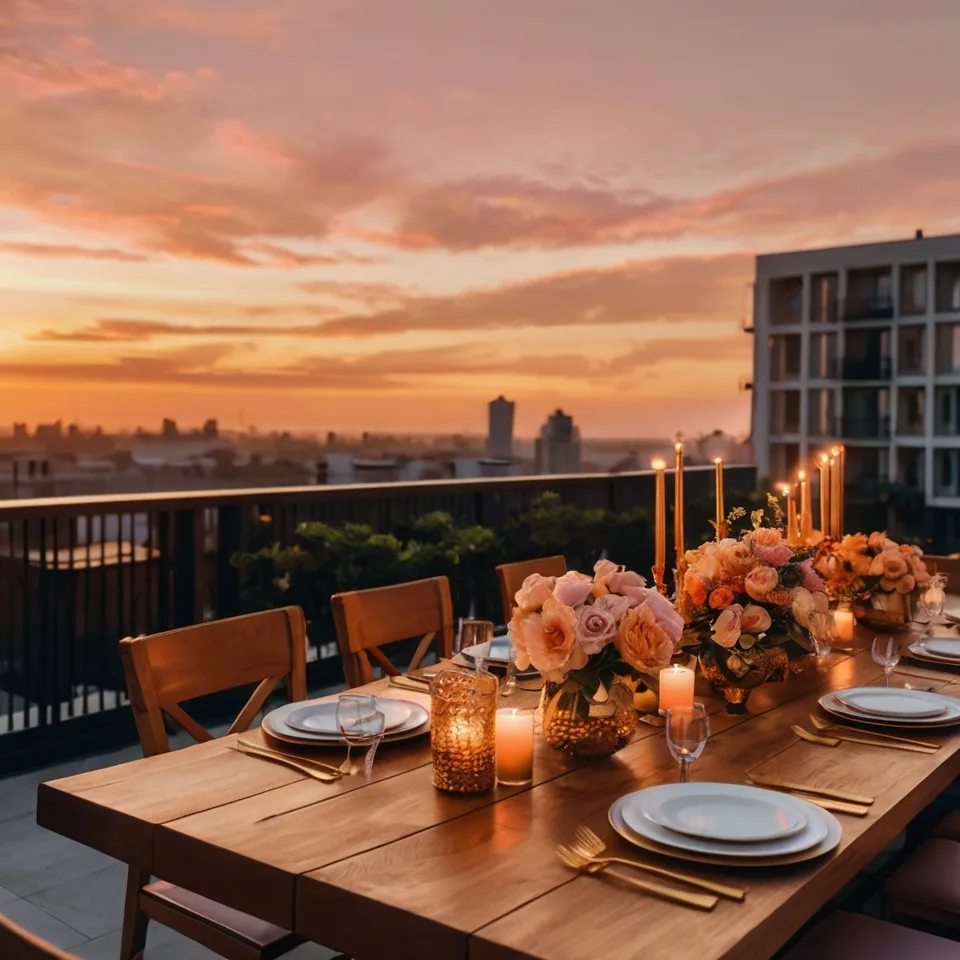
    Show-Stopping Rooftop Dining Experience

    Transform your rooftop into a captivating dining destination where every meal feels special. Imagine a spacious wooden table adorned with gleaming metallic accents, lush floral arrangements, and the warm glow of candles, setting a sophisticated and inviting tone. Comfortable yet chic chairs complete the scene, offering guests a cozy spot to unwind while savoring both the food and panoramic cityscapes.

    From vibrant brunches bathed in morning light to intimate dinners under a starlit sky, a thoughtfully designed dining area not only enhances the ambiance but also makes your rooftop the ultimate gathering place for memorable moments and lively conversation.

    Key Design Elements

    • Expansive wooden table as a focal point
    • Shimmering metallic flatware paired with fresh floral decor
    • Soft candlelight to create a cozy glow
    • Ergonomic and fashionable seating options

    Pro Tip: Incorporate a durable, weather-resistant table runner and centerpiece to maintain elegance through all seasons.

    4. Chic Bohemian Lounge with Rugs and Cushions
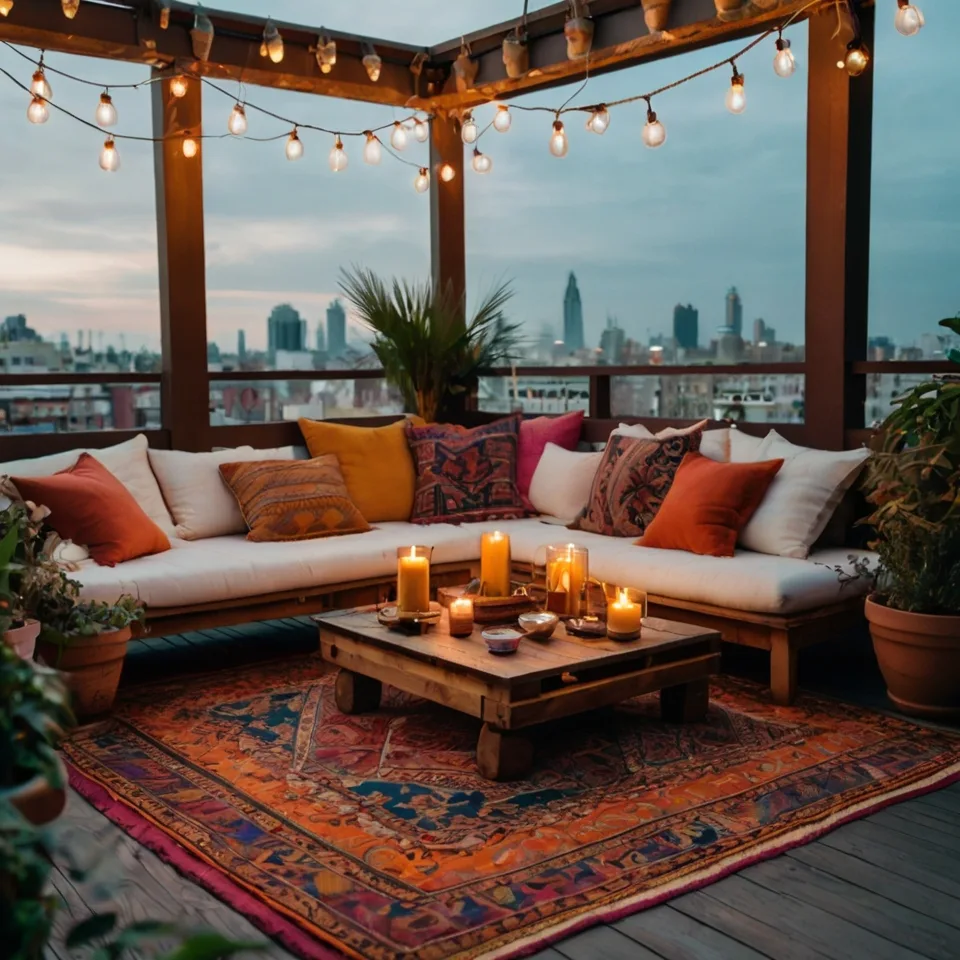
    Chic Bohemian Lounge with Rugs and Cushions

    Transform your rooftop into a serene retreat by embracing a bohemian-inspired floor seating setup. Combine vibrant, textured rugs with plush cushions arranged casually around a low-profile wooden table to create a welcoming spot perfect for casual chats, sunset sips, or quiet moments beneath the stars. This layered approach not only invites relaxation but also adds rich visual depth to your outdoor haven.

    Elevate the ambiance further by draping delicate string lights overhead and positioning an array of leafy plants nearby. These elements work harmoniously to infuse your space with a natural, artistic flair, making it feel both intimate and effortlessly stylish—an ideal sanctuary for unwinding or entertaining under the open sky.

    Key Design Elements

    • Stacked textured rugs for warmth and pattern
    • Vibrant cushions for comfort and color
    • Minimalist low wooden table as a focal point
    • Strategic placement of greenery and twinkling lights

    Pro Tip: Opt for weatherproof rugs and cushions designed to withstand sun and moisture to keep your boho vibe fresh season after season.

    5. Stylish Seclusion with Artistic Screens
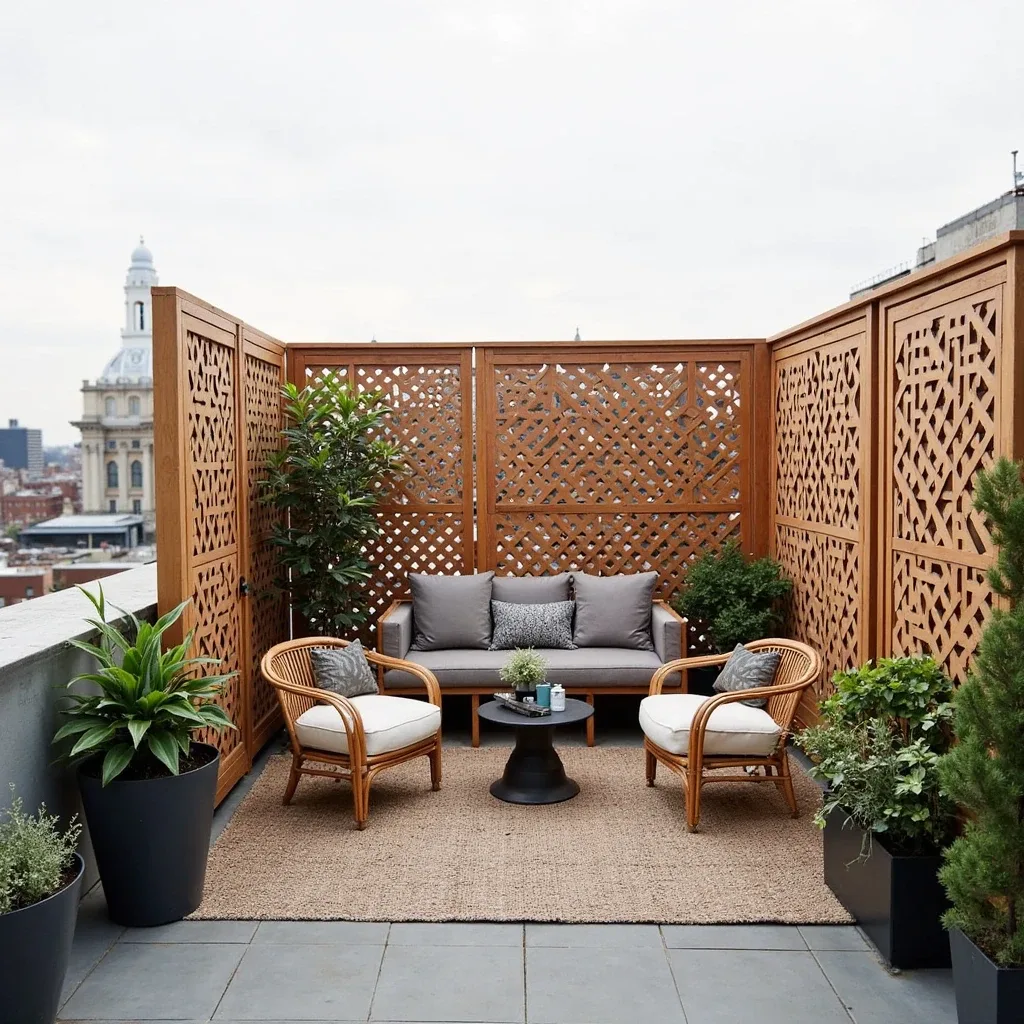
    Stylish Seclusion with Artistic Screens

    Transform your rooftop into a serene retreat by incorporating artistic wooden screens that blend functionality with flair. These screens, adorned with eye-catching geometric designs, not only provide a sense of privacy but also serve as captivating focal points. When complemented with cozy rattan seating, a sleek coffee table, and vibrant potted greenery, the area becomes a tranquil haven ideal for relaxing or entertaining away from prying eyes.

    This thoughtfully curated setup encourages a harmonious balance between open-air freedom and intimate enclosure, allowing you to enjoy your outdoor space with comfort and style. The combination of natural textures and sculptural elements adds depth and personality, making your rooftop a chic escape above the city bustle.

    Key Design Elements

    • Wooden screens featuring bold geometric motifs
    • Freestanding panels that define private zones
    • Comfortable rattan lounge chairs paired with a minimalist coffee table
    • Abundant greenery through thriving potted plants

    Pro Tip: Choose portable privacy panels that can be effortlessly moved to refresh your rooftop arrangement anytime.

    6. Starlit Cinema Retreat
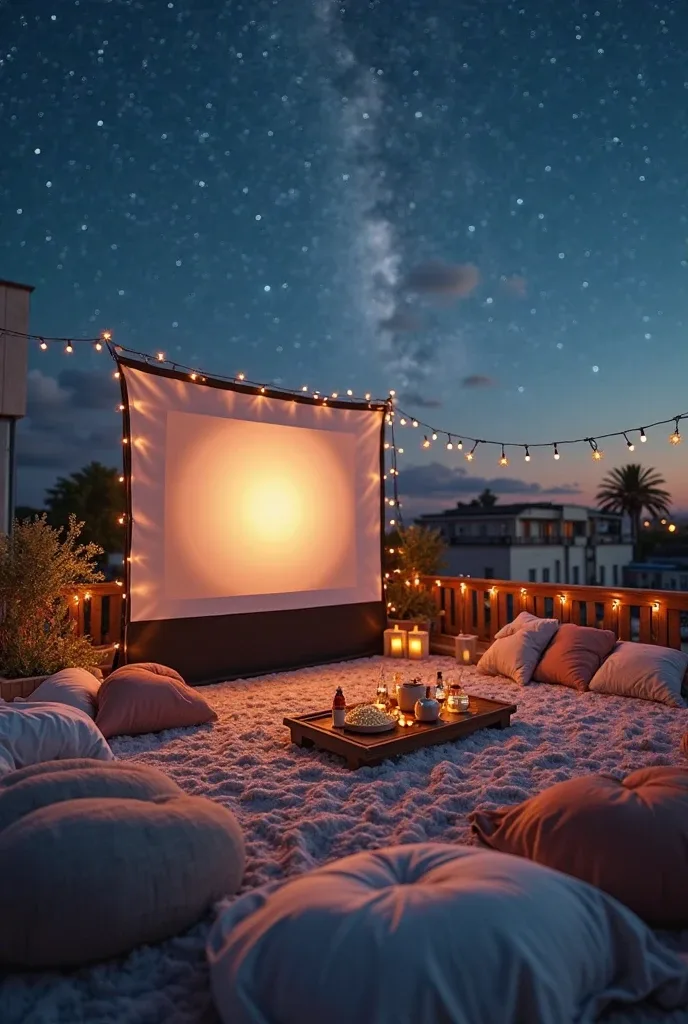
    Starlit Cinema Retreat

    Elevate your rooftop into a magical alfresco theater where film lovers can gather beneath the night sky. Set up a generously sized projector screen paired with plush floor pillows and snug throws to invite everyone to relax in comfort. A rustic serving tray laden with your favorite snacks and refreshing drinks adds a touch of hospitality, while gentle string lights cast a warm, inviting glow across the space.

    Whether you’re hosting an intimate date night or a lively group screening, this rooftop cinema promises unforgettable memories under twinkling stars, blending entertainment with the charm of the outdoors.

    Key Design Elements

    • Ample projection screen for vivid viewing
    • Generous cushions and soft blankets for cozy seating
    • Charming wooden tray stocked with refreshments
    • Delicate string lights to create a soothing ambiance

    Pro Tip: Opt for a short-throw projector to achieve sharp images without requiring extensive setup space.

    7. Cozy Rooftop Retreat: Swings and Hammocks
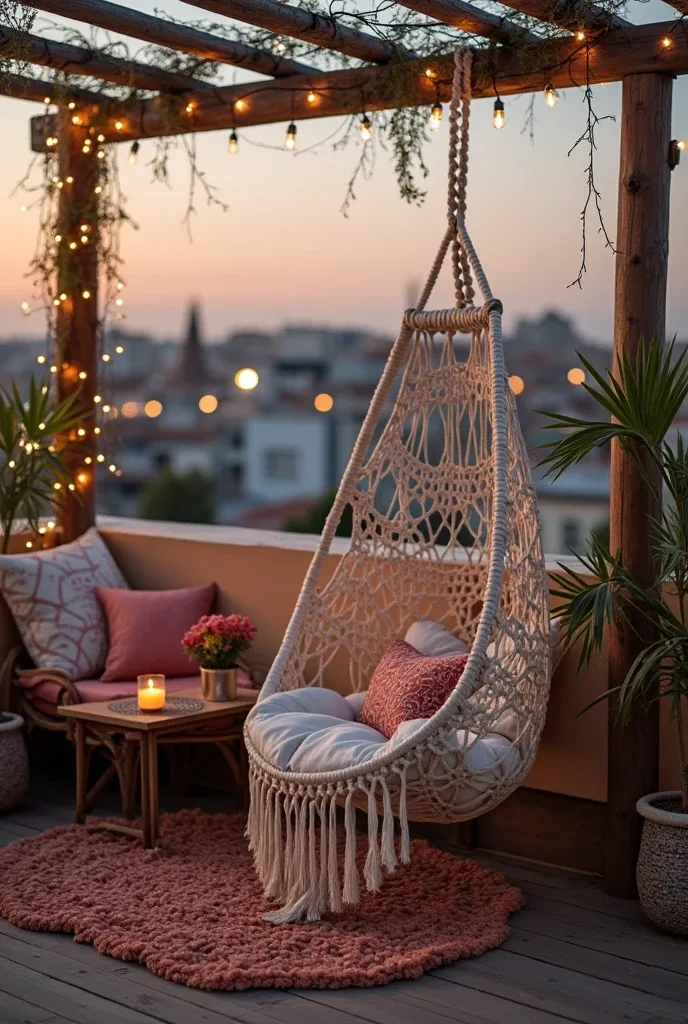
    Cozy Rooftop Retreat: Swings and Hammocks

    Transform your rooftop into a tranquil escape with the addition of a stylish hanging chair or hammock that invites relaxation. Imagine sinking into a beautifully crafted macramé swing, gently suspended from a sturdy wooden frame, creating an idyllic nook for savoring a good book or drifting off in peaceful repose. Layering in vibrant, patterned cushions alongside a petite side table adorned with flickering candles enhances the inviting and laid-back ambiance.

    As dusk falls, delicate string lights intertwined around the frame cast a warm, enchanting glow, turning the space into a magical sanctuary. Whether you’re swaying softly above the cityscape or simply soaking in the serene atmosphere, this inviting setup effortlessly elevates your rooftop into a personal haven of calm and style.

    Key Design Elements

    • Macramé hanging chair supported by a robust wooden frame
    • Colorful patterned cushions for added comfort and charm
    • Compact side table featuring softly glowing candles
    • Twinkling string lights draped around the structure

    Pro Tip: Choose a hammock made from UV-resistant, weatherproof fabric to maintain durability year-round.

    8. Chic Pergola Oasis for Rooftop Retreats
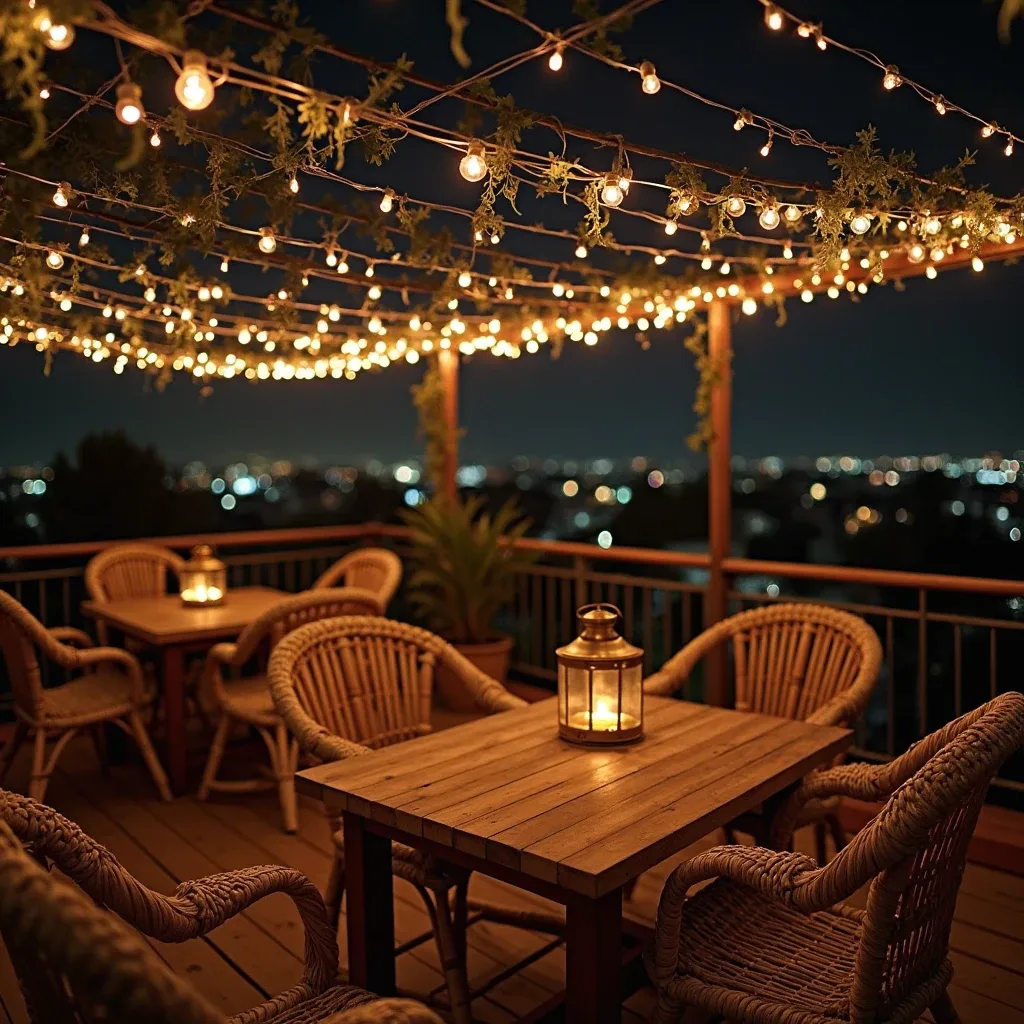
    Chic Pergola Oasis for Rooftop Retreats

    Transform your rooftop into a stylish sanctuary with a streamlined black metal pergola that blends modern design with practical shade. Soft, billowy white curtains draped gracefully around the structure add an airy, romantic vibe, gently swaying with the breeze and introducing a light, delicate contrast. Nestle an elegant outdoor dining ensemble beneath this haven, setting the stage for memorable meals shared under the open sky.

    Enhance the pergola’s contemporary appeal by surrounding it with lush potted greenery like slender olive trees or climbing vines, which infuse natural warmth and vitality to the rooftop space. This refined setup effortlessly balances sophistication and comfort, making it an inviting spot for everything from lively brunches to tranquil dinners, all while providing shelter from harsh sunlight.

    Key Design Elements

    • Contemporary black metal pergola with clean lines
    • Ethereal white sheers that flow with the wind
    • Sophisticated outdoor dining furniture for intimate gatherings
    • Lush olive trees or climbing plants to soften the look

    Pro Tip: Choose a pergola with adjustable curtains or shade options to customize comfort throughout the day.

    9. Elevate Your Rooftop with a Luxe Canopy Retreat

    Elevate Your Rooftop with a Luxe Canopy Retreat

    Transform your rooftop into a serene sanctuary by introducing a chic canopy bed framed within a private cabana. Soft, billowing curtains sway gently in the breeze, offering both seclusion and a touch of sophistication. Surround yourself with cushy pillows and warm throws that invite lounging, while taking in breathtaking views of the cityscape or ocean horizon—turning your outdoor space into a personal oasis.

    Enhance the ambiance with subtle lantern lighting paired alongside a compact side table to hold your favorite refreshments. This combination creates a spa-inspired hideaway where comfort meets style, perfect for unwinding or entertaining under the open sky.

    Key Design Elements

    • Elegant four-poster canopy frame
    • Delicate curtains that provide shade and privacy
    • Comfort-enhancing cushions and cozy throws
    • Ambient lanterns for a warm, inviting glow

    Pro Tip: Choose weather-resistant fabrics like outdoor linen or canvas to keep your cabana looking fresh through all seasons.

    10. Ignite Warmth with a Rooftop Fire Feature
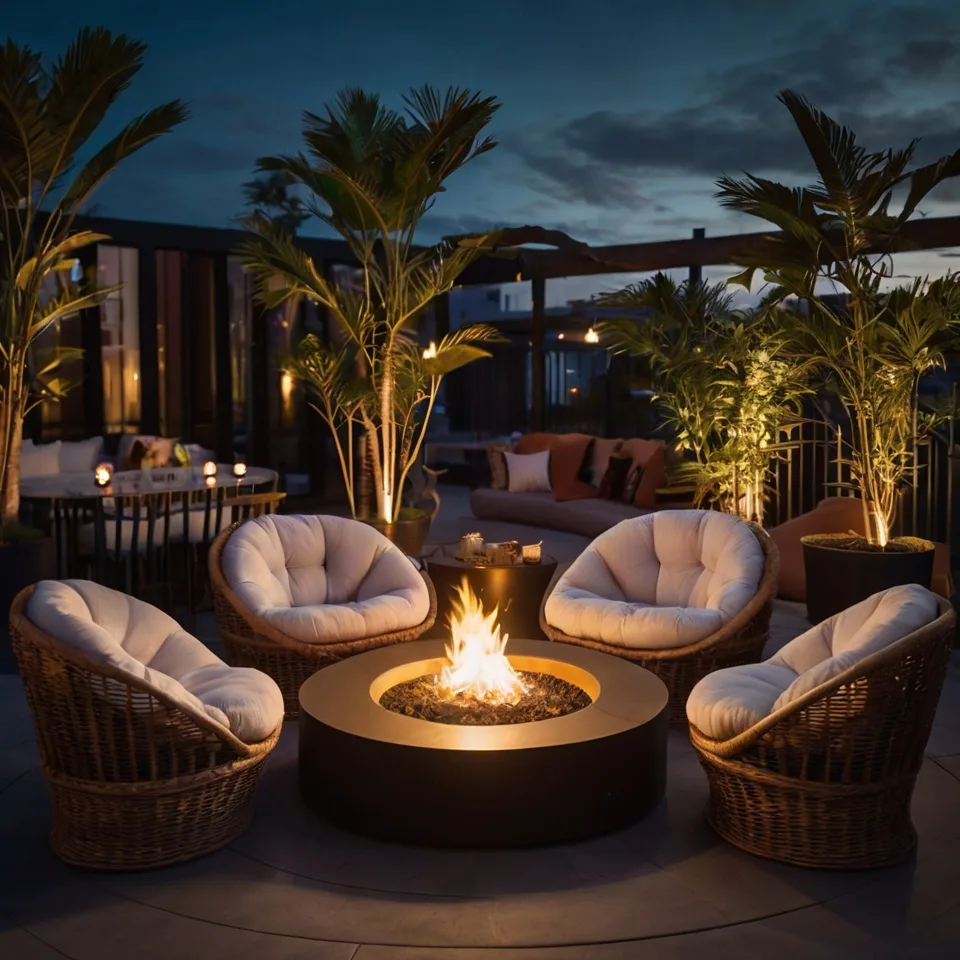
    Ignite Warmth with a Rooftop Fire Feature

    Transform your rooftop into a welcoming retreat by incorporating a stylish fire feature that radiates both heat and charm. Position a sleek, round fire pit at the center, encircled by contemporary rattan seating cushioned for ultimate comfort, to craft an inviting space where friends and family naturally gather as the temperature drops. The dancing flames not only provide soothing warmth but also create a serene ambiance that encourages lingering conversations under the night sky.

    Elevate the cozy vibe by adding soft, textured throws and setting out a selection of comforting beverages like steaming mulled wine or rich hot chocolate. Coupled with panoramic cityscapes, the gentle glow and crackle of the fire will transform your rooftop into a memorable, luxurious escape perfect for unwinding and making lasting memories.

    Key Design Elements

    • Round fire pit serves as a captivating centerpiece
    • Comfortable rattan loungers with plush padding
    • Soft throws for added warmth and texture
    • Inviting beverage station with seasonal hot drinks

    Pro Tip: Opt for a propane fire pit to enjoy hassle-free lighting and minimal smoke for a cleaner outdoor experience.

    11. Elevate Your Rooftop with a Verdant Living Wall
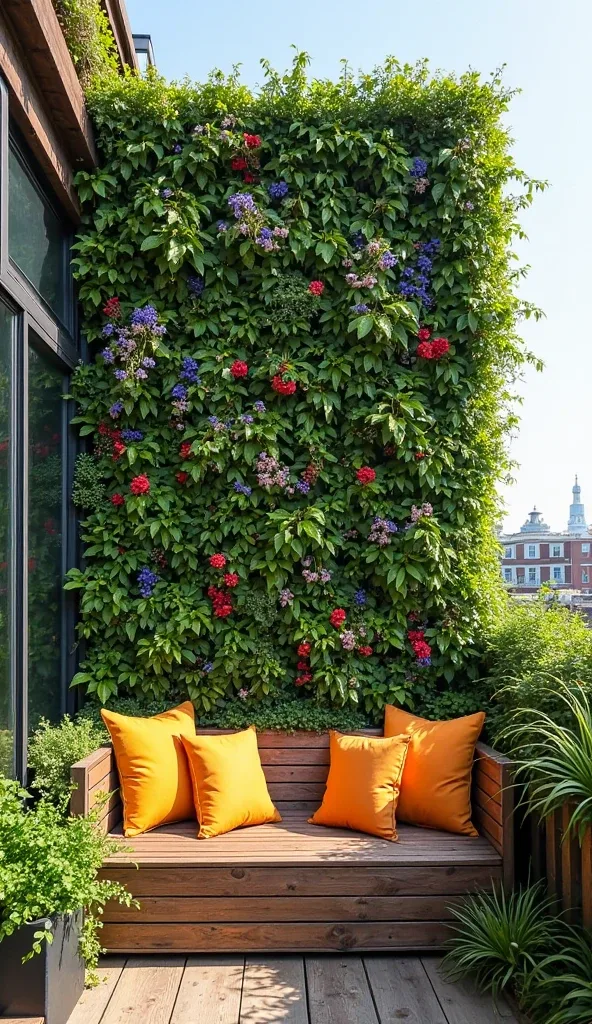
    Elevate Your Rooftop with a Verdant Living Wall

    Transform your rooftop into a serene sanctuary by installing a thriving living wall bursting with rich greenery. Imagine a tapestry of trailing ivy, blooming blossoms, and lush ferns climbing skyward—creating an eye-catching backdrop that simultaneously offers privacy and visual interest. This vibrant display breathes new life into your outdoor space, providing a peaceful escape amid the bustling cityscape.

    Enhance this natural haven by adding a rustic wooden bench adorned with bright, weather-resistant cushions. This inviting seating area blends the warmth of natural materials with the soothing presence of plants, crafting an ideal spot to unwind, savor a cup of coffee, or simply soak in the fresh air and calm atmosphere.

    Key Design Elements

    • Wall-mounted ivy and colorful flowering plants for dynamic greenery
    • Natural barrier that enhances privacy while beautifying the space
    • Comfortable wooden seating accented with lively outdoor pillows
    • Diverse foliage including ferns to add depth and visual interest

    Pro Tip: Incorporate self-watering planters to keep your vertical garden healthy with minimal effort.

    12. Chic and Comfortable Rooftop Retreat
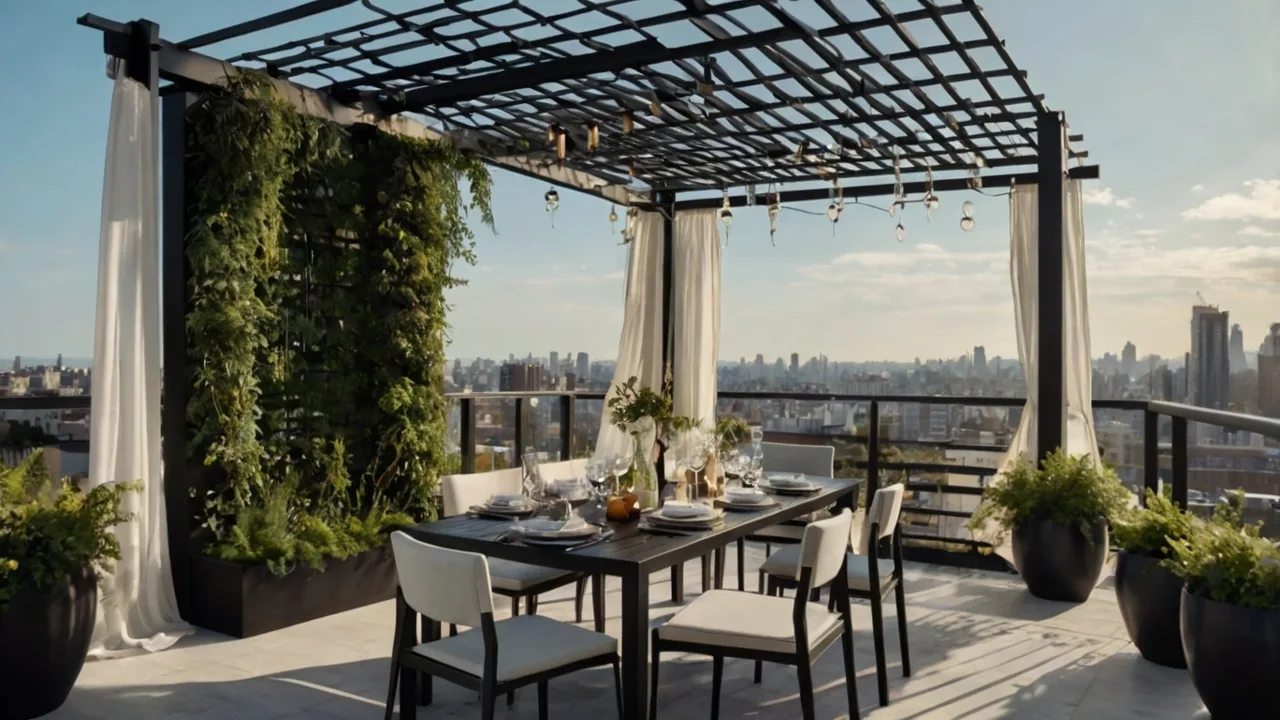
    Chic and Comfortable Rooftop Retreat

    Transform your rooftop into a serene haven with seating that beckons you to unwind. Opt for a roomy sectional sofa dressed in soft, earthy cushions that invite long conversations or quiet moments alone. Center the area with a sleek wooden coffee table, tastefully decorated with flickering candles and a petite greenery accent that brings natural charm to the urban setting. A cozy outdoor rug beneath your feet not only unifies the space but also enhances the breathtaking cityscape visible beyond.

    Elevate the ambiance by layering in a variety of textured pillows and cozy throws, adding depth and warmth to your lounge. As twilight descends, this cozy nook becomes the perfect spot to savor your favorite drink while soaking in the glittering skyline, offering a peaceful respite after a busy day.

    Key Design Elements

    • Spacious sectional sofa featuring soft, natural-hued cushions
    • Simple wooden coffee table highlighted with candles and greenery
    • Inviting outdoor rug that anchors and defines the lounge area
    • Assorted textured pillows and plush throws for extra comfort

    Pro Tip: Select durable, weatherproof cushion fabrics in muted shades to maintain a fresh look through all seasons.

    13. Enchanting Rooftop Radiance
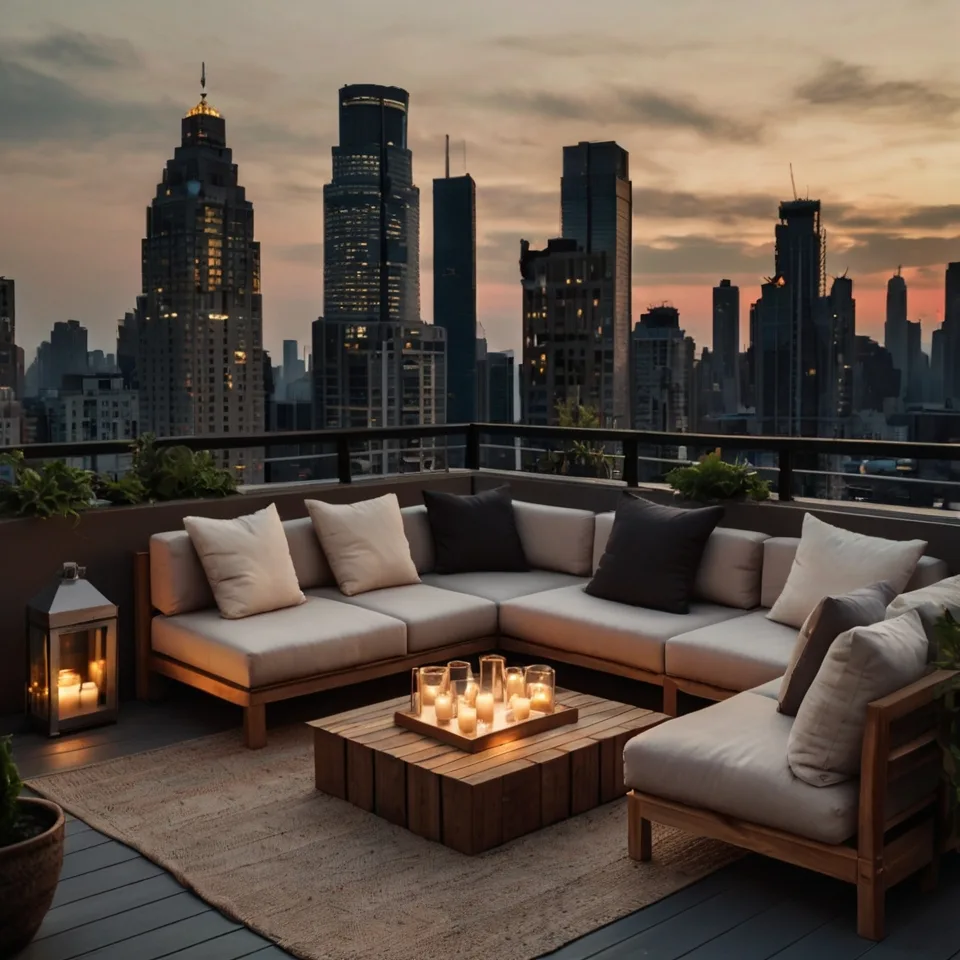
    Enchanting Rooftop Radiance

    Elevate your rooftop experience by draping delicate string lights that cast a gentle, inviting glow. These twinkling illuminations instantly turn your outdoor space into a serene haven, perfect for intimate get-togethers or peaceful evenings under the open sky. Whether hung above or intertwined with a pergola, the soft lighting brings warmth and charm to your rooftop sanctuary.

    Enhance the mood further by mixing in rustic lanterns on tables or railings, adding layers of cozy light. For a touch of magic, incorporate battery-powered LED candles or cluster tiny firefly lights inside glass jars, creating an enchanting atmosphere that feels like a secret retreat floating above the city’s hustle and bustle.

    Key Design Elements

    • Drape warm white fairy lights overhead for a soft glow
    • Place rustic lanterns along railings and tabletops
    • Add battery-operated LED candles for safe, flickering light
    • Use firefly-style string lights in glass containers for whimsical charm

    Pro Tip: Opt for solar-powered string lights to enjoy eco-friendly illumination that lasts all evening.

    14. Elevated Elegance: Crafting a Multi-Tiered Rooftop Oasis
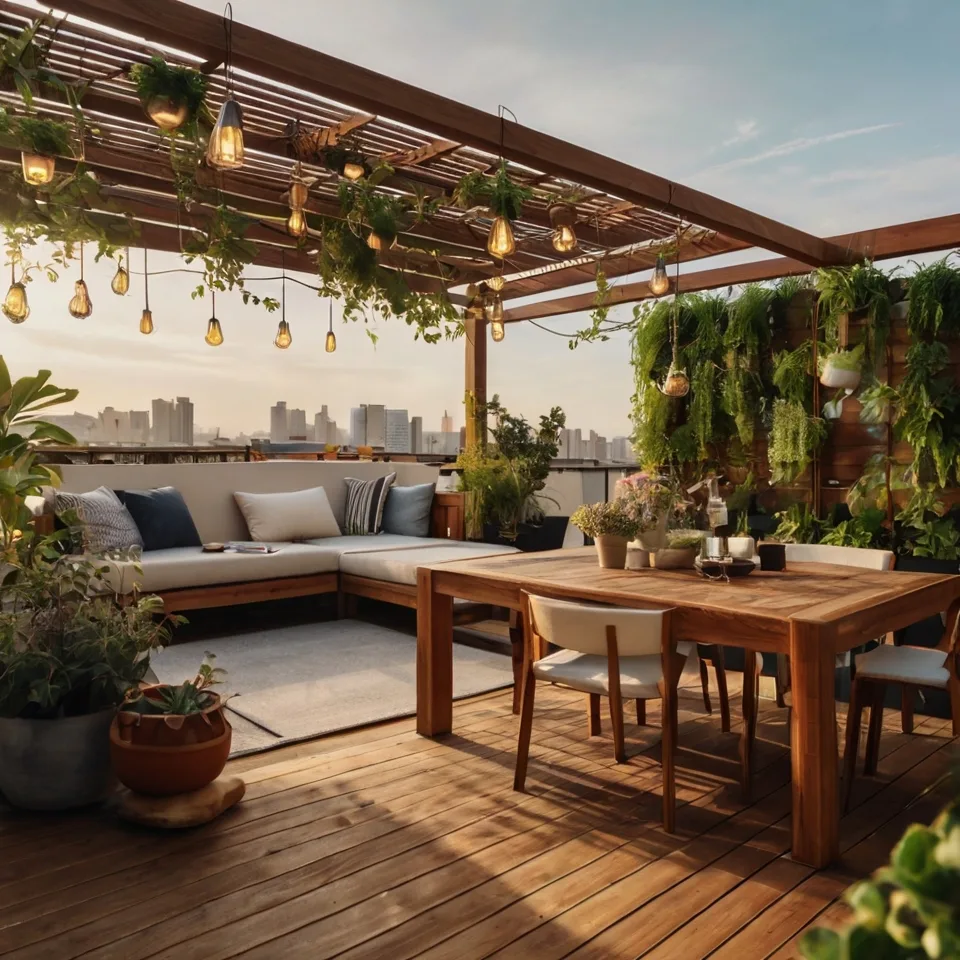
    Elevated Elegance: Crafting a Multi-Tiered Rooftop Oasis

    Transform your rooftop into a dynamic sanctuary by incorporating tiered wooden decking that defines distinct areas for relaxation, meals, and social gatherings. This layered approach not only maximizes usable space but also adds visual intrigue, allowing each section to serve a unique purpose within a harmonious layout. Complementing the natural warmth of timber with thoughtfully chosen outdoor furnishings and lush plant accents helps cultivate an inviting atmosphere that encourages both comfort and style.

    Blending materials like smooth stone, rich wood, and soft textiles brings texture and depth, setting the stage for a chic yet welcoming environment. This multifaceted design elevates your rooftop beyond a simple open area, turning it into a personalized outdoor haven perfect for unwinding or entertaining under the sky.

    Key Design Elements

    • Create distinct areas for dining, lounging, and socializing
    • Incorporate chic and comfortable outdoor seating
    • Use greenery to define and soften spaces
    • Combine varied textures like wood, stone, and fabric for visual richness

    Pro Tip: Apply a UV-protective finish to your wooden decking each year to preserve its vibrant hue and durability.

    Conclusion

    Elevating your rooftop into a captivating outdoor haven is all about harmonizing style, comfort, and purpose. By integrating elements like multi-level wooden decking, vertical gardens, and ambient string lights, you craft a layered environment that invites relaxation and entertainment alike. Each piece, from a statement dining table to a private cabana, contributes to a cohesive retreat that reflects your unique taste.

    With these thoughtfully chosen decor ideas, your rooftop can transcend its original function and become a cherished extension of your home. Embrace the opportunity to create a space where vibrant gatherings, quiet moments, and lifelong memories unfold beneath open skies.
  • Elevate Your Bathroom Ambiance with Luxe Lighting Designs for a Spa-Inspired Daily Escape

    Bathroom lighting is often overlooked, yet it plays a crucial role in transforming a simple space into a sanctuary of style and comfort. Too many bathrooms rely on harsh, unflattering fixtures that wash out features and kill any sense of ambiance. But when thoughtfully designed, lighting can elevate your daily rituals, turning mundane moments into indulgent experiences that refresh both body and mind.

    Luxury bathroom lighting goes beyond mere visibility—it sets the tone for relaxation, enhances architectural details, and complements sophisticated finishes. Imagine soft, layered illumination that flatters your reflection, calms the senses during a soak, and invites you to savor every step of your skincare routine. The difference between good and great lighting is the ability to blend function with elegance, creating a space that feels less like a utilitarian room and more like a personal retreat.

    In the collection ahead, you’ll discover inspiring lighting ideas that redefine what a bathroom can be. From subtle accent lights to statement fixtures, these designs harness light to craft moods and celebrate textures, proving that the right approach to lighting can dramatically uplift your bathroom experience. Ready to rethink how light influences your daily routine? Let these luxurious concepts guide your transformation.

    1. Glow Up: Floating Tub Chandelier Ideas

    Glow Up: Floating Tub Chandelier Ideas

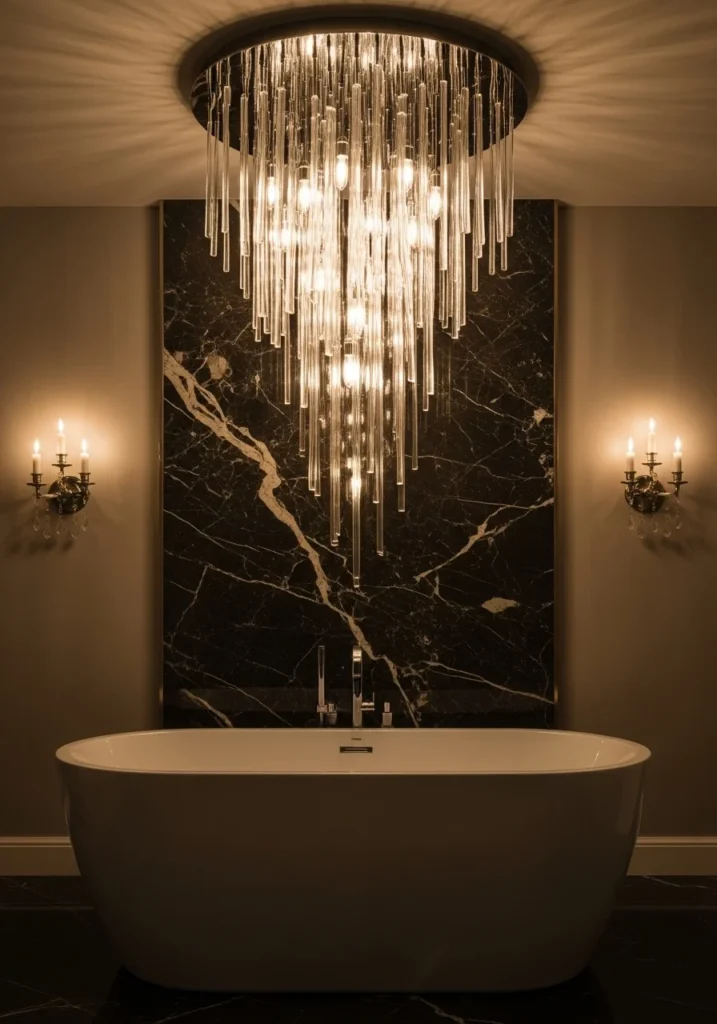
    Imagine stepping into a bathroom where a breathtaking chandelier seems to float effortlessly above a freestanding tub, transforming the space into a sanctuary of art and light. Delicate glass rods cascade downward like shimmering icicles, their translucent forms capturing and refracting light to cast a soft, mesmerizing glow that dances across the room. This sculptural masterpiece is more than just illumination—it’s a captivating centerpiece that commands attention and elevates the entire bathing experience to something truly unforgettable.

    Behind the tub, a polished marble wall stands as a luxurious backdrop, its smooth, natural veining adding depth and sophistication. Flanking the scene, flickering candle sconces lend a warm, intimate ambiance, layering the lighting to create a rich interplay of shadows and highlights. Together, these elements compose a visually stunning tableau—cinematic in its drama and elegance—where every soak feels like an indulgent escape. The floating tub chandelier doesn’t just light the room; it transforms it, making the bath the star of a serene yet striking masterpiece.

    Key Design Elements

    • Select a chandelier that is designed and certified for use in moist or damp bathroom spaces.
    • Install the chandelier so that it hangs at least 8 feet above the bathtub surface to ensure safe clearance.
    • Opt for dimmable LED candelabra bulbs to easily adjust the lighting intensity and create the desired mood.

    Pro Tip: Mount the chandelier on its own dimmer switch, independent from the main bathroom lights, so you can easily adjust the lighting to set a relaxing mood while soaking.

    2. Serene Ambiance with Hidden Cove Lighting

    Serene Ambiance with Hidden Cove Lighting

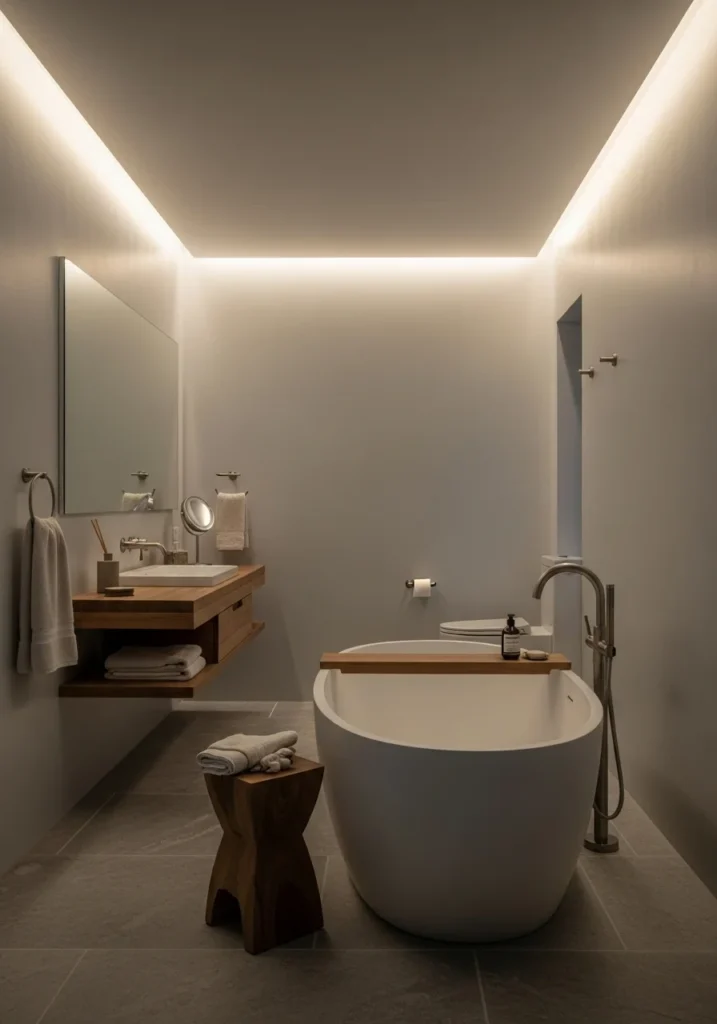
    Imagine stepping into a serene sanctuary where light seems to float effortlessly from the edges of the ceiling, casting a delicate, ethereal glow that gently cascades down the walls. This hidden cove lighting, cleverly recessed and outfitted with subtle LEDs, banishes the need for obvious fixtures, enveloping the bathroom in a tranquil, spa-like atmosphere. The soft illumination highlights every detail, transforming the space into a haven of quiet elegance and calm.

    At the heart of this tranquil retreat rests a freestanding oval tub, set gracefully upon natural stone floors that soak up the warm, ambient light. Surrounding wooden details contribute a comforting richness, balancing the room’s cool sophistication with an organic touch. Complementing this harmonious blend, brushed nickel fixtures add a refined, understated shine, tying together the palette in effortless style. The concealed lighting not only adds depth and intrigue but also maintains a clean, uncluttered look, turning the bathroom into a luxurious escape bathed in soft, inviting radiance.

    Key Design Elements

    • Opt for LED strips with a high number of LEDs per meter (60 or more) to achieve consistent and uniform illumination.
    • Incorporate a diffuser channel to soften the light and prevent bright spots within the cove.
    • Select a color temperature around 2700K to create a cozy and calming ambiance in your bathroom lighting.

    Pro Tip: Install cove lighting to create a relaxing atmosphere, and add a dedicated task light on a different switch for clear, focused illumination when needed.

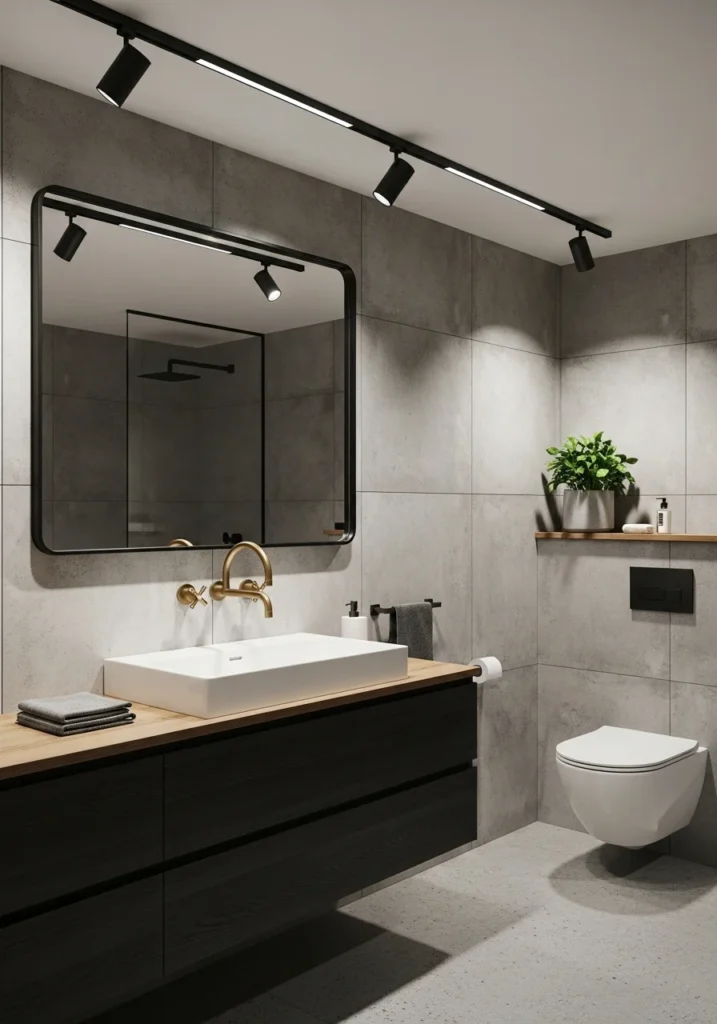
    3. Modern Track Lighting: Flexible Bathroom Glow

    Modern Track Lighting: Flexible Bathroom Glow

    Sleek black track lighting elegantly traces the ceiling, offering a dynamic way to illuminate every corner of your bathroom. With its flexible spotlights, you can easily direct beams onto mirrors for flawless makeup application, accentuate vanity areas, or spotlight striking architectural elements that make your space truly unique. The minimalist design of the tracks complements the raw texture of industrial-style tiles and smooth concrete floors, while the glow of brass faucets introduces a subtle touch of warmth, creating a balanced and inviting atmosphere.

    This lighting system isn’t just about style—its adaptability lets you effortlessly shift the focus depending on your mood or task. Whether you’re setting a soft, ambient glow for a relaxing soak or bright, targeted light for grooming, the modular nature of the track fixtures means your bathroom lighting evolves with your needs. Marrying artistry with practicality, this modern track lighting setup is the perfect finishing touch for bathrooms that embrace contemporary or industrial aesthetics, transforming everyday routines into stylish rituals.

    Key Design Elements

    • Select a track lighting setup that allows each light to be directed independently for personalized illumination.
    • Opt for spotlights with a tight beam angle (15-25 degrees) to highlight specific areas or features.
    • Pair track lights with under-cabinet LED strips to ensure even and comprehensive bathroom lighting.

    Pro Tip: Mount the track lighting on a dimmer so you can easily lower the brightness at night, creating a calm and soothing atmosphere instead of harsh, bright light.

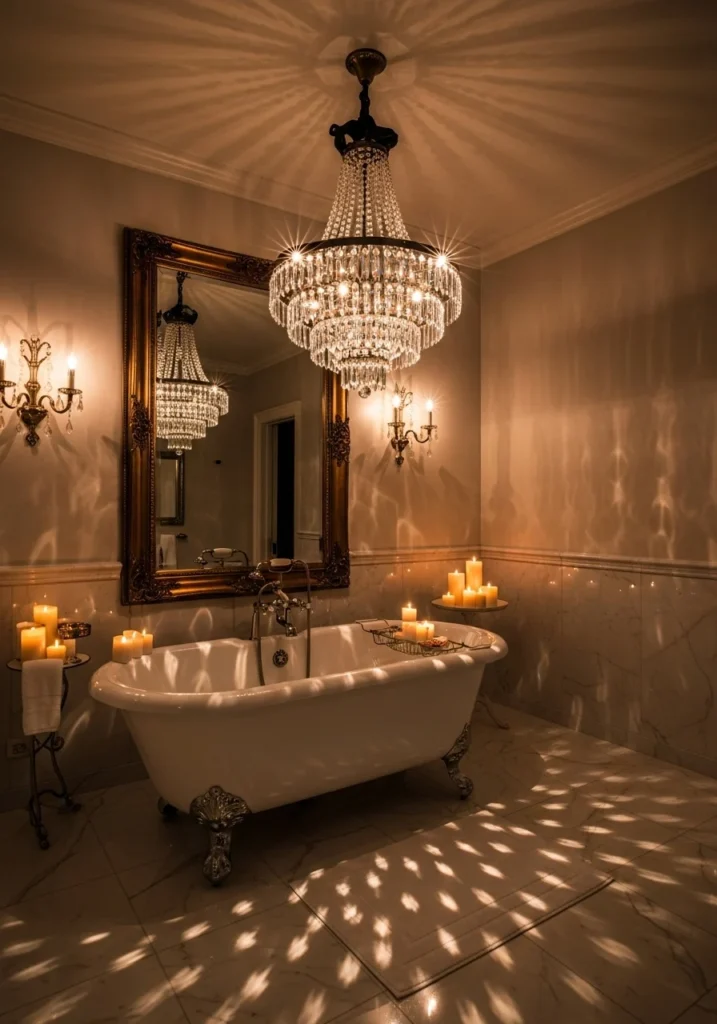
    4. Dramatic Crystal Chandeliers Above Tubs

    Dramatic Crystal Chandeliers Above Tubs

    Imagine sinking into a freestanding clawfoot tub, your sanctuary crowned by a dazzling crystal chandelier that commands attention from above. This radiant centerpiece transforms the space into a theatrical display of elegance, its myriad facets casting shimmering patterns across gleaming marble walls and polished floors. Each flicker of light dances like liquid diamonds, elevating the bath from mere routine to a lavish ritual filled with sparkle and sophistication.

    Surrounding gilded mirrors and intricately designed sconces amplify the chandelier’s opulence, creating layers of shimmering reflections that envelop the room. The gentle flicker of candlelight weaves through the brilliance, infusing the atmosphere with a warm, romantic glow that whispers luxury at every turn. This harmonious blend of radiant illumination and classic glamour evokes the indulgent charm of a boutique hotel suite, transforming an everyday bath into a sensory escape where beauty and comfort intertwine seamlessly.

    Beyond its breathtaking aesthetics, the crystal chandelier’s glow infuses the entire bathroom with an inviting ambiance that feels both grand and intimate. Though installing such a dramatic fixture may require careful planning, the payoff is an unforgettable visual spectacle and an elevated bathing experience that redefines what it means to unwind in style.

    Key Design Elements

    • Choose a chandelier specifically designed to withstand moisture if it’s installed close to the bathtub.
    • Position the chandelier so it hangs at least 8 feet above the edge of the tub to maintain safety and balanced aesthetics.
    • Install a dimmer switch to easily adjust the lighting from bright and functional to soft and intimate.

    Pro Tip: Choose a crystal chandelier that is UL damp-rated to ensure it’s safe and suitable for use in the humid environment above your bathtub.

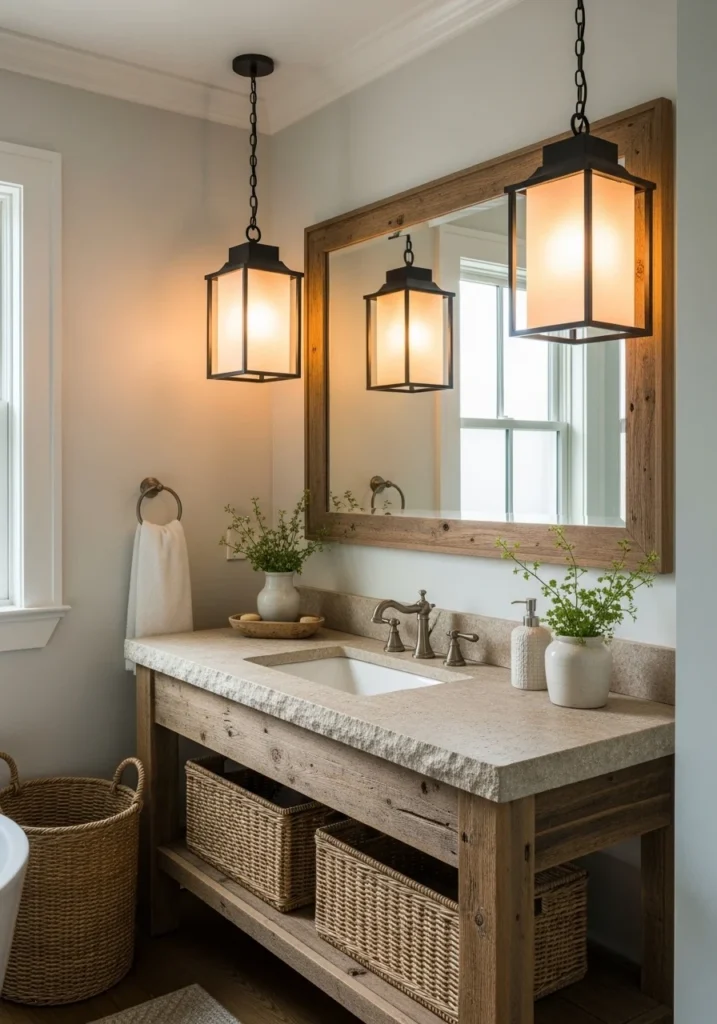
    5. Enchant Your Bathroom with Lantern Lights

    Enchant Your Bathroom with Lantern Lights

    Imagine stepping into a bathroom where the soft, amber glow of lantern-style ceiling lights instantly transforms the space into a cozy sanctuary. These pendants, framed in sleek black metal and encasing frosted glass, gently diffuse light to create a warm, inviting atmosphere above the vanity. Their timeless design lends a rustic yet refined charm, effortlessly blending with the farmhouse-style stone countertop and natural textures nearby. Each lantern becomes a captivating centerpiece, drawing the eye upward and infusing the room with both character and comfort.

    Beyond mere functionality, these lantern lights evoke a sense of enduring craftsmanship, as if they’ve been woven into the very architecture of the bathroom itself. Paired with subtle touches like fresh greenery and woven baskets, they soften the overall aesthetic, balancing rugged textures with organic warmth. This lighting choice doesn’t just illuminate—it tells a story of thoughtful design, where luxury meets homely comfort, making every morning routine feel like a charming retreat. Whether your style leans rustic, modern, or somewhere in between, these lanterns bring both personality and sophistication to the heart of your home.

    Key Design Elements

    • Opt for lantern lights featuring frosted or seeded glass to create a gentle, evenly spread illumination.
    • Install the fixtures so the bottom sits about 7 feet above the floor to ensure ample headroom.
    • Combine different metal tones like matte black and brass to add depth and visual interest to your bathroom decor.

    Pro Tip: Install smart bulbs in lantern-style ceiling fixtures to easily switch between warm light for relaxing evenings and cooler tones for an energizing morning.

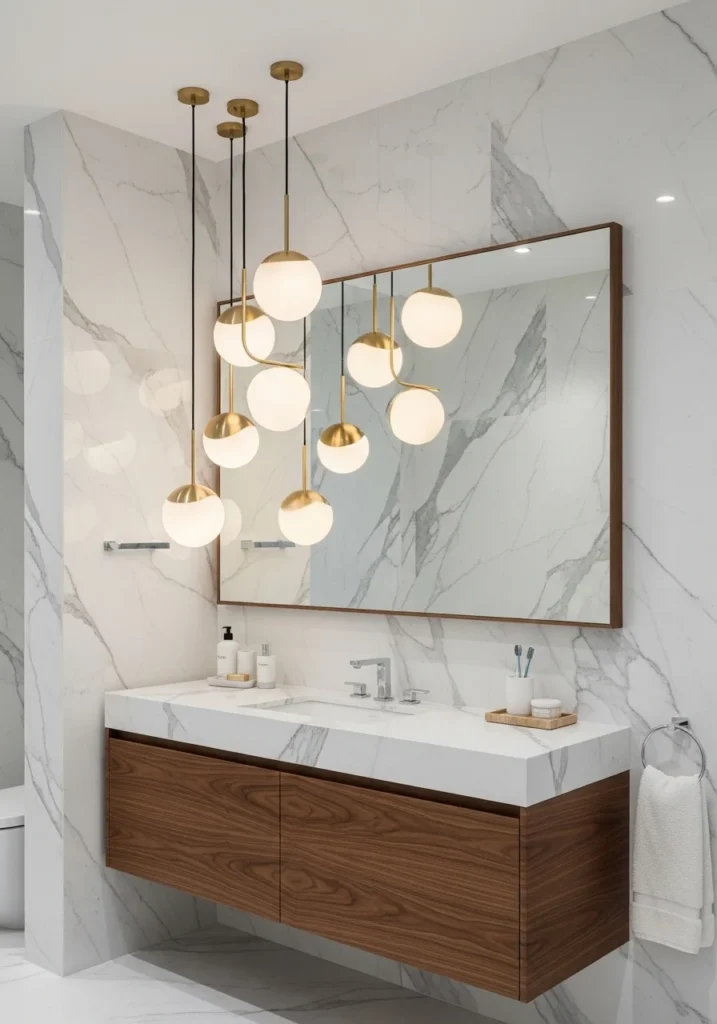
    6. Globe Pendant Cluster Lighting Magic

    Globe Pendant Cluster Lighting Magic

    Above the vanity, a captivating arrangement of globe pendants hangs gracefully, each orb suspended at a different level to craft a dynamic, eye-catching sculpture of light. These frosted glass spheres, adorned with subtle brushed gold accents, emit a soft, ethereal glow that seems to drift gently in the air like luminous bubbles. The delicately layered heights lend a rhythmic flow to the composition, transforming ordinary lighting into a striking work of art that instantly draws the eye.

    Reflected in the expansive mirrors, the glowing globes multiply their presence, doubling the sense of depth and enchantment in the space. Below, a rich walnut vanity grounds the scene with its warm, natural tones, offering a perfect counterpoint to the cool marble walls that surround it. This inventive cluster not only delivers brilliant illumination for daily routines but also elevates the bathroom into an immersive experience where form and function dance seamlessly—a radiant centerpiece that feels contemporary, playful, and utterly sophisticated.

    Key Design Elements

    • Adjust the pendant lights so they hang at different levels, spacing them about 4 to 8 inches apart for a natural, dynamic effect.
    • Opt for frosted glass globes to soften the light and reduce glare directly in your line of sight.
    • Select canopy hardware in brushed gold or brass finishes to add warmth and create a unified aesthetic.

    Pro Tip: Opt for one canopy with varying cord lengths instead of separate pendants to achieve a neater ceiling look and simplify the electrical setup.

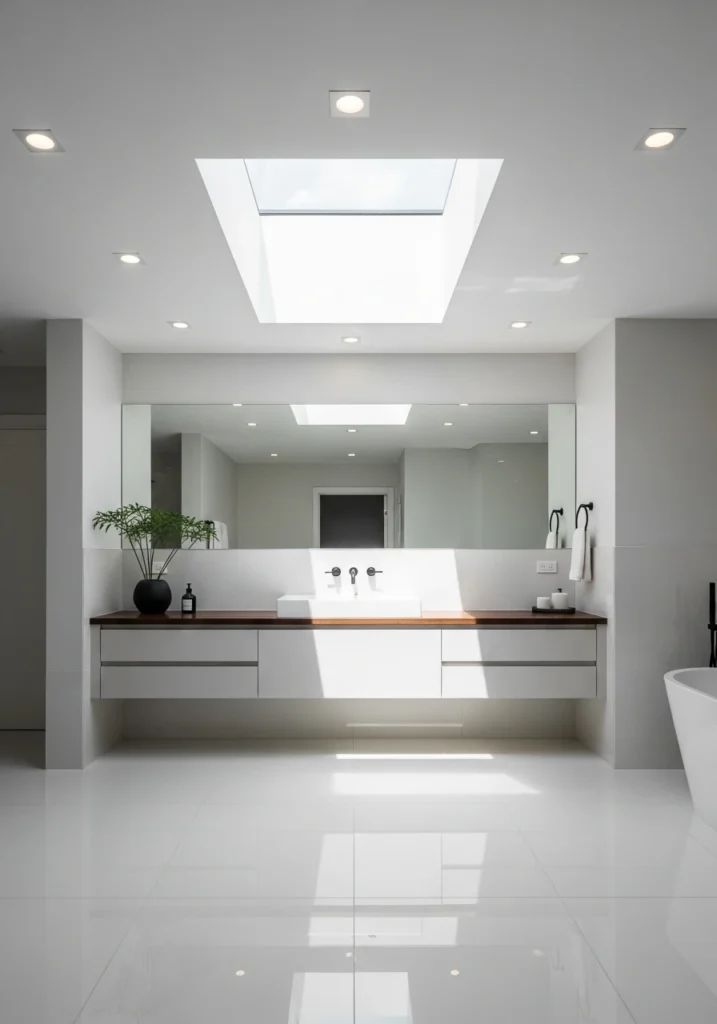
    7. Brighten Bathrooms: Skylight & Recessed Lighting

    Brighten Bathrooms: Skylight & Recessed Lighting

    Imagine stepping into a bathroom bathed in a cascade of natural light streaming through a sleek, rectangular skylight positioned right above the vanity. This daylight floods the space with a luminous glow, making the room feel open, fresh, and effortlessly uplifting. The sunlight dances across glossy porcelain tiles, amplifying their reflective surfaces and transforming the bathroom into a radiant sanctuary where light seems to ripple and shimmer with every glance.

    As the sun dips below the horizon, a trio of recessed LED downlights seamlessly takes over, casting a gentle yet consistent glow that keeps the atmosphere bright and inviting no matter the hour. These understated fixtures, finished in matte black, add a touch of modern sophistication, anchoring the airy room with a subtle, elegant contrast. Together, the skylight and recessed lighting create a dynamic interplay of illumination — blending natural warmth with sleek artificial light to craft a space that feels both luxurious and alive, evolving effortlessly from dawn to dusk.

    Key Design Elements

    • Opt for a tubular skylight to bring in natural light when installing a traditional skylight isn’t feasible.
    • Arrange recessed lights evenly in a grid layout to ensure balanced, overall illumination throughout the bathroom.
    • Select recessed light trims in matte black to introduce a sleek, contemporary accent to your lighting design.

    Pro Tip: Add a motorized shade to your skylight to easily reduce glare when the sun is strongest, allowing you to maintain natural light without discomfort.

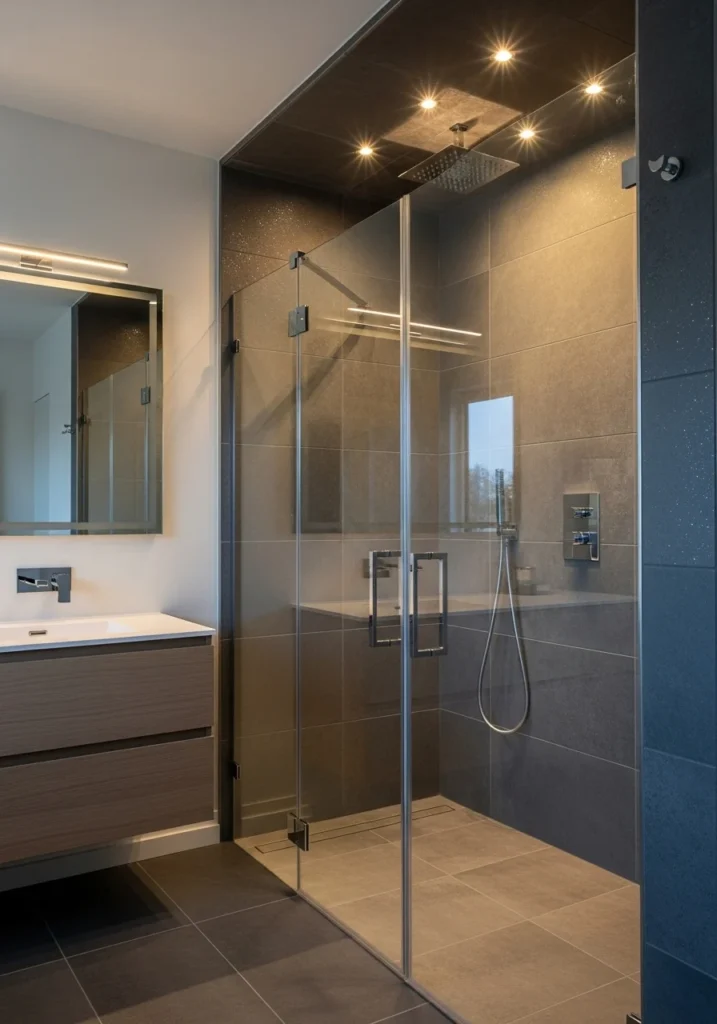
    8. Elevate Luxury with Recessed Shower Lighting

    Elevate Luxury with Recessed Shower Lighting

    Imagine stepping into your shower and being enveloped in a warm, radiant glow that seems to come from nowhere yet perfectly showcases every detail around you. Recessed spotlights, seamlessly embedded in the ceiling above, cast a gentle cascade of light directly onto the rainfall showerhead, turning it into a shimmering centerpiece. The carefully positioned beams dance across the tiled walls, causing their textures and colors to sparkle with an almost magical brilliance. This subtle yet striking illumination transforms the ordinary act of showering into an immersive, sensory retreat that feels like a private spa sanctuary.

    The glass enclosure, sleek and frameless, amplifies the soft luminosity, creating reflections that add depth and a sense of spaciousness to the area. Below, a minimalist floating vanity drifts effortlessly, ensuring that nothing distracts from the shower’s radiant allure. The entire composition feels architectural—clean lines and thoughtful light blending into an utterly indulgent atmosphere. Here, light doesn’t just reveal the space; it elevates it, turning everyday rituals into moments of exquisite luxury and relaxation, where the beauty of the fixtures and tiles is celebrated with both subtlety and grandeur.

    Key Design Elements

    • Install recessed lighting fixtures that are rated safe for wet environments to ensure durability in the shower area.
    • Aim the lights so they skim across the tile surfaces, enhancing the texture and depth of the walls.
    • Select warm white bulbs around 2700K to create a cozy and calming ambiance during showers.

    Pro Tip: Add a dedicated dimmer switch for your shower lights so you can easily adjust the brightness, enhancing the ambiance and making your shower feel more like a relaxing spa retreat.

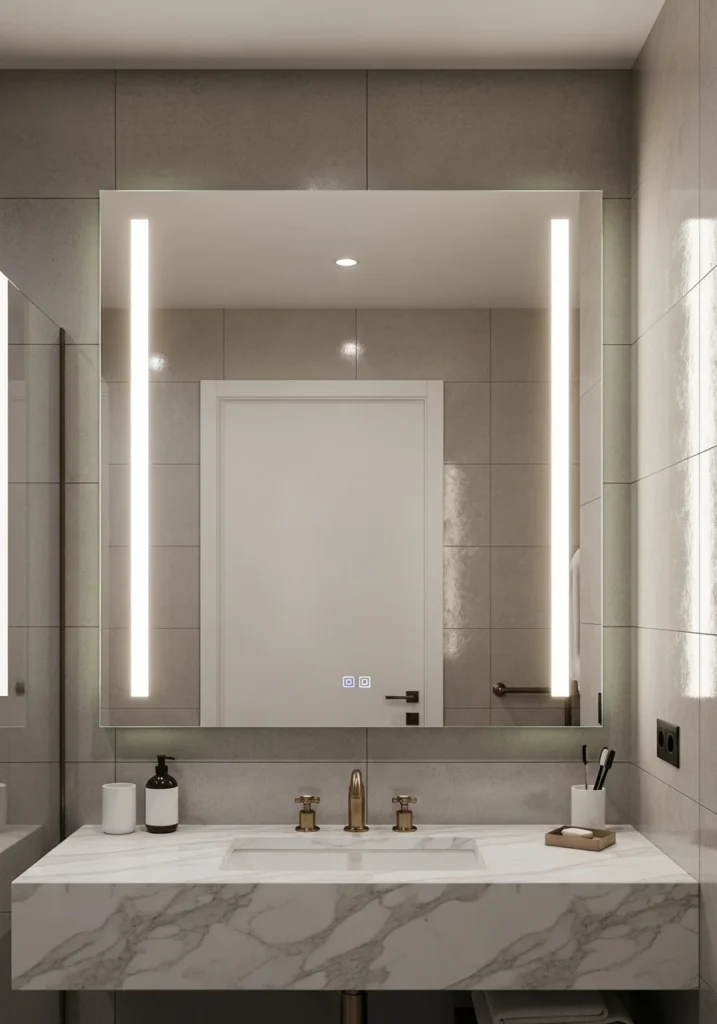
    9. Sleek Vertical Strip Lighting Ideas

    Sleek Vertical Strip Lighting Ideas

    Slim vertical LED strips flanking frameless mirrors cast a crisp, balanced glow that perfectly lights the face, making every grooming routine feel effortlessly precise. The illumination wraps softly around the edges, blending modern technology with a gentle warmth that transforms the space into a sanctuary of style and function. This lighting design hints at the future while still inviting comfort, turning ordinary moments into a quietly luxurious experience.

    Set against smooth marble vanities adorned with brushed brass fixtures, the lighting’s cool radiance contrasts beautifully with the natural textures, creating a harmonious interplay of materials. Pale gray tiles catch and diffuse the LED beams, adding depth and softness that enhance the room’s serene atmosphere. Together, these elements evoke the polished elegance of a chic boutique hotel, where every detail whispers refinement without excess.

    More than just beautiful, this arrangement excels in delivering clear, shadow-free illumination perfect for detailed tasks, all while preserving a minimalist, uncluttered aesthetic. The vertical light strips emphasize clean lines and modern grace, striking the perfect balance between cutting-edge sophistication and inviting warmth—never clinical, always captivating.

    Key Design Elements

    • Install vertical light strips along the sides of your bathroom mirror to eliminate shadows on your face.
    • Incorporate aluminum channels to securely house the lights and give the setup a sleek, polished look.
    • Select LED strips with a color rendering index above 95 to ensure true-to-life colors for precise grooming.

    Pro Tip: Install the vertical light strips so they go a bit beyond the top and bottom edges of the mirror to enhance the look with a striking, floor-to-ceiling illumination.

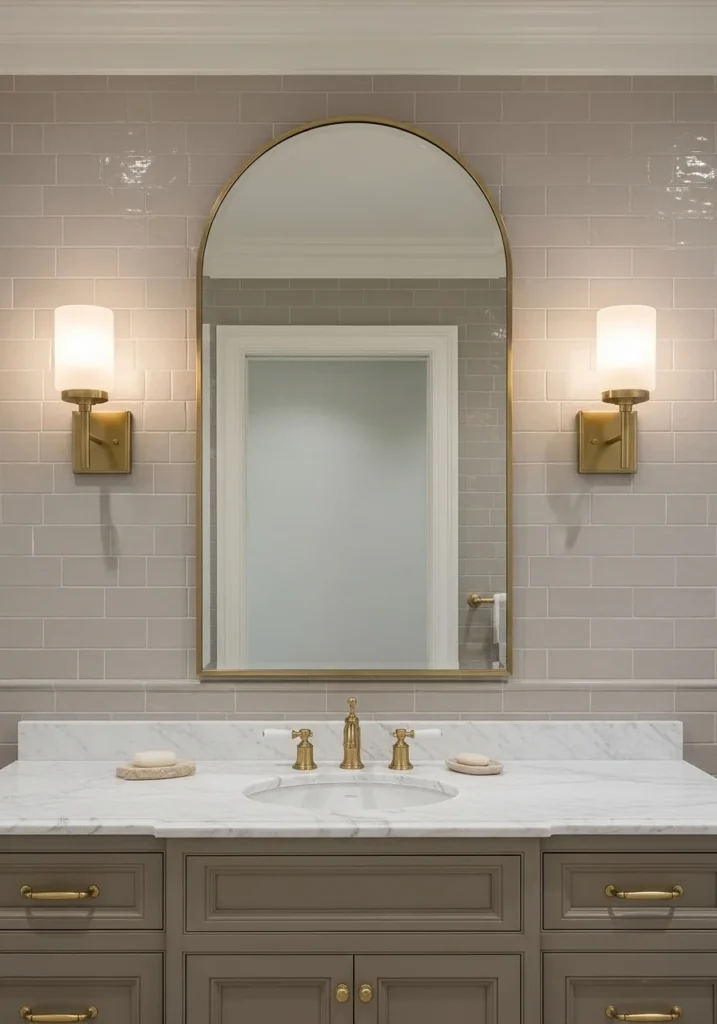
    10. Perfectly Balanced Bathroom Wall Sconces

    Perfectly Balanced Bathroom Wall Sconces

    Imagine the perfect harmony achieved by two elegant wall sconces gracefully framing an arched mirror—an arrangement that exudes timeless charm and effortlessly complements any bathroom style. The warm glow from frosted glass shades, set in brushed brass fixtures, bathes the space in a soft, inviting light that flatters every reflection. This carefully curated pairing doesn’t just illuminate; it elevates the entire room, casting a gentle radiance that feels both luxurious and welcoming.

    The beauty of this design lies in its cohesion. Polished marble countertops and matching brass hardware echo the sconces’ finishes, weaving a thread of sophistication throughout the bathroom. Meanwhile, understated neutral subway tiles add subtle texture that enriches the space without stealing focus. The perfectly balanced symmetry not only creates a visually pleasing focal point but also ensures consistent, shadow-free lighting—ideal for everyday routines like shaving or applying makeup. This classic lighting layout is a foolproof choice that seamlessly bridges the gap between traditional elegance and modern simplicity, promising style that endures.

    Key Design Elements

    • Position wall sconces around eye level, roughly 60 to 65 inches above the floor.
    • Place sconces 28 to 36 inches apart, aligning them evenly with the center of the mirror.
    • Opt for frosted glass shades to create a gentle, evenly spread illumination.

    Pro Tip: Choose wall sconces that include dimmers or pair them with smart bulbs, so you can easily adjust the lighting level and instantly change the atmosphere of your bathroom.

    11. Glow Up: Under-Mirror Lighting Innovation

    Glow Up: Under-Mirror Lighting Innovation

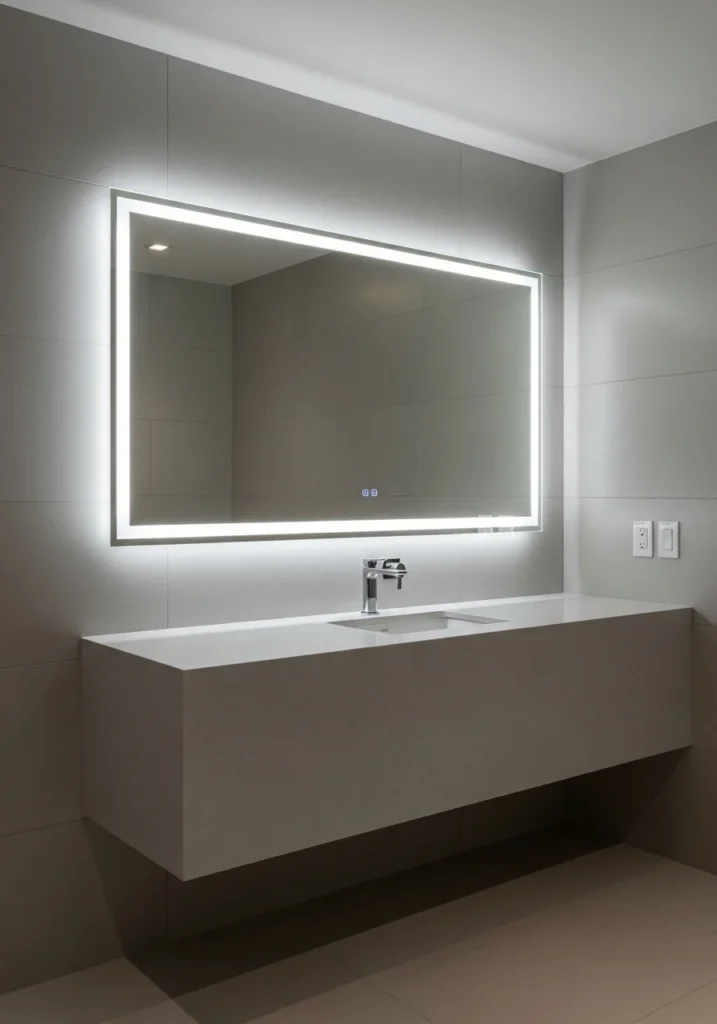
    Imagine stepping into a bathroom where the mirror itself becomes a radiant source of light, glowing softly from its very edges. This cutting-edge under-mirror integrated lighting transforms the space into a realm of sleek elegance, casting a gentle, white illumination that perfectly balances function and ambiance. No longer reliant on bulky fixtures or harsh overhead bulbs, the light wraps seamlessly around the mirror, delivering pristine clarity for grooming tasks while subtly bathing the room in a calming, spa-like glow.

    Complementing this luminous feature, a contemporary floating vanity with a polished quartz countertop anchors the design in modern luxury. Surrounding it, expansive neutral-toned tiles stretch smoothly across the walls, evoking a serene, minimalist oasis that invites relaxation. This clever integration of light within the mirror edges eradicates visual clutter, creating uninterrupted lines that emphasize the room’s streamlined sophistication. The result is a bathroom that doesn’t just look refined—it feels effortlessly futuristic and welcoming, where every detail speaks to thoughtful design and everyday practicality.

    Key Design Elements

    • Opt for mirrors that include built-in anti-fog heating elements to keep the surface clear and enhance convenience.
    • Pick mirrors featuring touch-sensitive dimmer switches to easily customize brightness levels.
    • Aim for lighting with a color temperature in the 2700K to 3000K range to create warm, flattering illumination.

    Pro Tip: Install a backlit mirror alongside an independent ceiling light on a different switch, allowing you to customize and adjust your bathroom lighting for different needs.

    12. Glow Up with Backlit LED Vanity

    Glow Up with Backlit LED Vanity

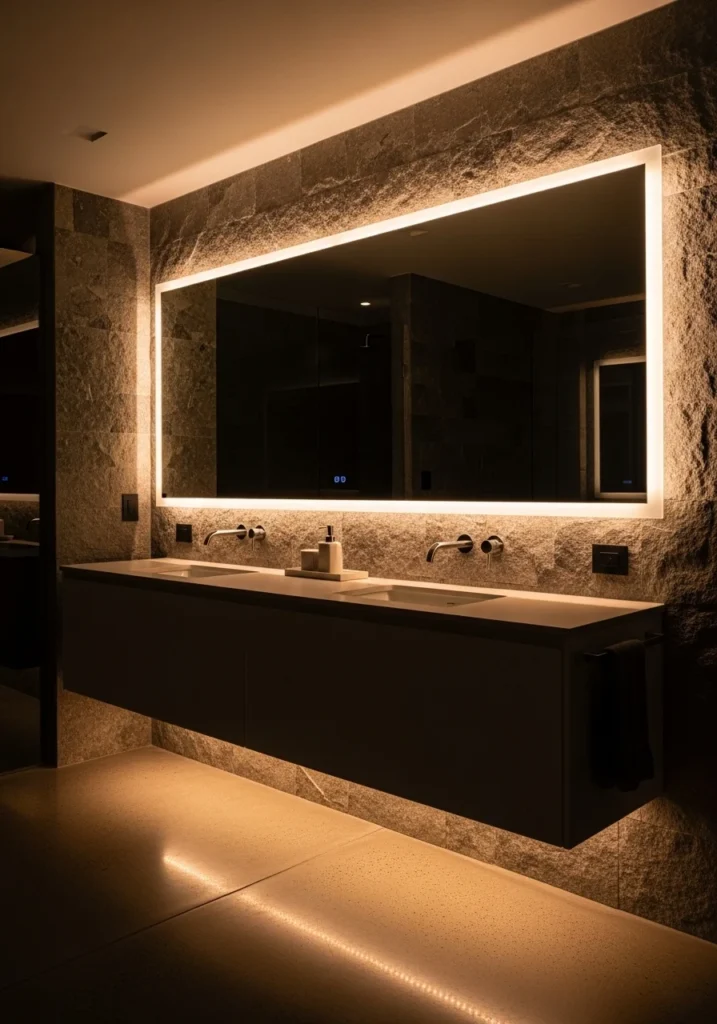
    Imagine stepping into a bathroom where the mirror itself seems to radiate a gentle, enchanting glow. Full-width backlit LED mirrors cast a luminous halo that bathes the entire vanity area in soft, even light—eliminating harsh shadows and making every grooming detail effortlessly clear. This seamless illumination transforms a routine morning ritual into a moment of quiet indulgence, where function meets serene beauty.

    Beneath the cabinets, slender LED strips trace subtle beams of light across glossy floors, layering the space with warmth and dimension. The interplay of these lights against textured stone walls creates a captivating contrast, adding richness and character to the room. Paired with polished chrome fixtures, the lighting scheme emphasizes a sleek, contemporary design that feels both futuristic and inviting. The result is a sophisticated, spa-inspired ambiance that pulses with an elegant, high-tech glow—luxurious and calming, never cold or clinical.

    Key Design Elements

    • Select LED strips featuring a color rendering index (CRI) above 90 to ensure true-to-life colors in your bathroom.
    • Incorporate dimmable LED drivers to easily control the light intensity based on different times and needs.
    • Opt for a 3000K color temperature to create a cozy and inviting ambiance with warm white light.

    Pro Tip: Install LED strips beneath the vanity to create a soft, floating light along the floor, giving your bathroom a sleek, high-end ambiance.

    13. Timeless Charm: Candle-Style Bathroom Lights

    Timeless Charm: Candle-Style Bathroom Lights

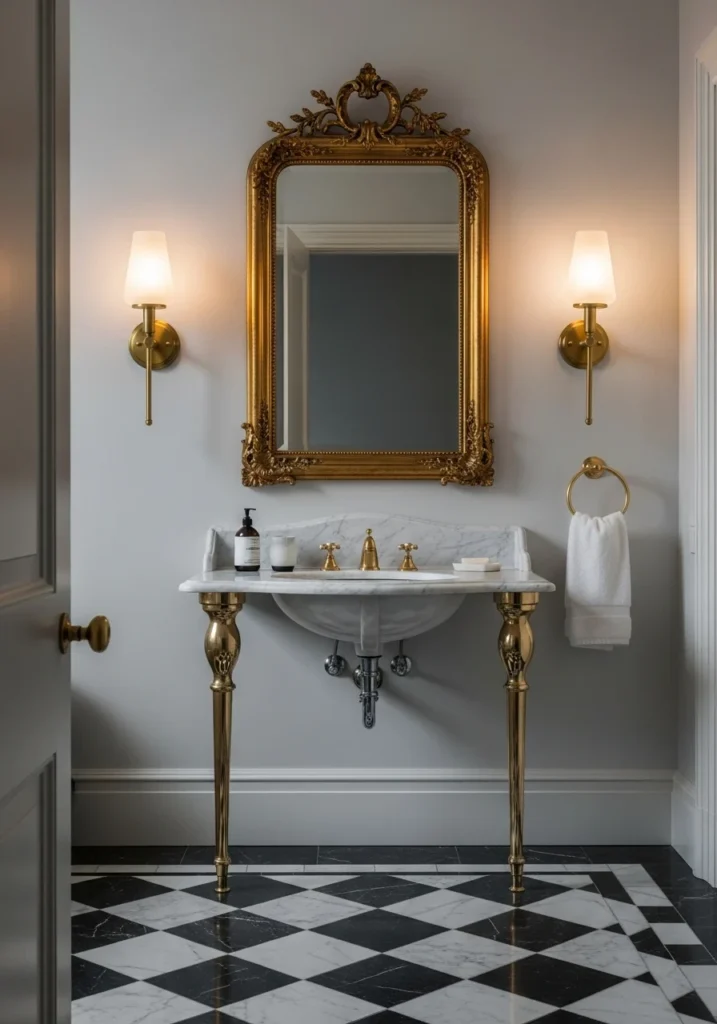
    Imagine stepping into a bathroom where the soft, inviting glow of candle-style wall sconces instantly transports you to a bygone era of refined elegance. These lights, with their gently tapered frosted shades resting on gleaming brass bases, cast a warm and flickering radiance that dances like real candle flames, wrapping the room in a romantic embrace. Their subtle shimmer highlights the room’s classic features—a pristine marble pedestal sink and timeless checkerboard floors—creating a harmonious blend of function and beauty.

    More than mere lighting, these sconces serve as architectural treasures in their own right, seamlessly woven into the fabric of traditional or transitional bathroom designs. They don’t feel like afterthoughts or add-ons; instead, they become integral accents that enhance the space’s sophistication and charm. Whether illuminating your evening routine or setting the mood for relaxation, this classic lighting style offers an enduring sense of grace that never goes out of fashion.

    Key Design Elements

    • Choose LED bulbs that mimic flickering flames to achieve an authentic candlelight ambiance safely
    • Mount the lights on a dimmer switch to easily adjust brightness from everyday use to mood lighting
    • Position the fixtures near a sizable mirror to reflect and enhance the soft, inviting illumination

    Pro Tip: Select wall sconces that direct light upward so the illumination reflects off the ceiling, creating a soft, inviting glow that enhances the bathroom’s atmosphere.

    14. Vintage Industrial Bathroom Lighting Ideas

    Vintage Industrial Bathroom Lighting Ideas

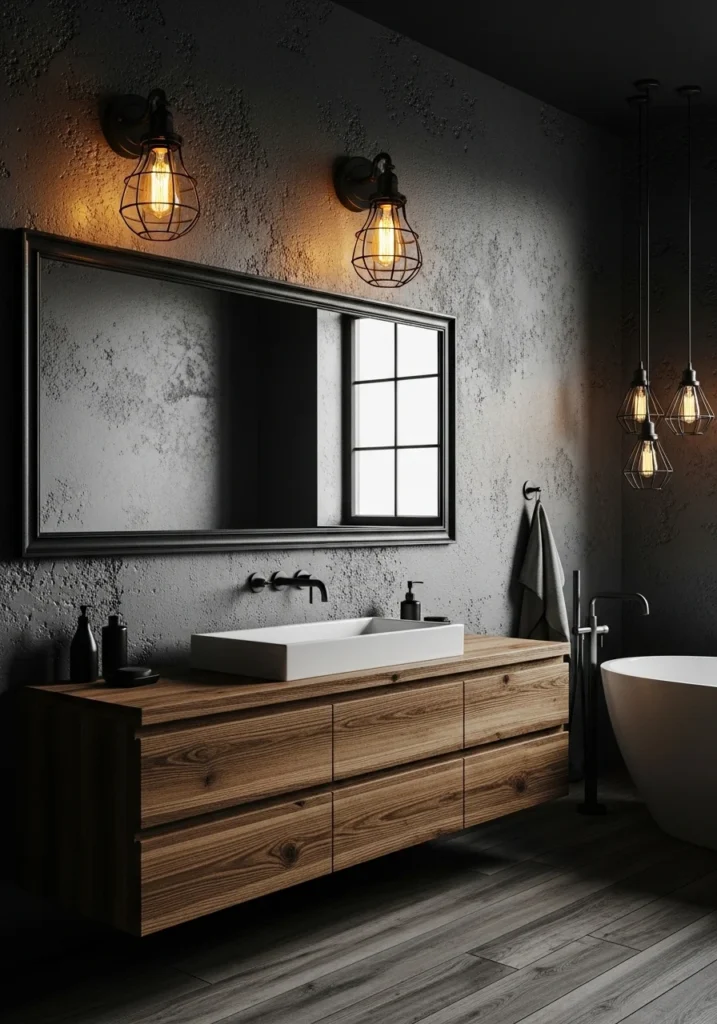
    In this bathroom, vintage industrial lighting takes center stage, transforming the space into a cozy urban retreat. Exposed cage sconces encase glowing Edison bulbs, their amber filaments flickering softly against the raw, textured concrete walls. The warm, golden radiance gently bathes the room, evoking a sense of timeless charm and inviting intimacy. Each light fixture feels like a piece of history, adding depth and distinctive personality that breathe life into the rugged surroundings.

    Balancing the industrial edge, a sturdy wooden vanity with its rich, weathered grain anchors the design, while matte black faucets punctuate the scene with bold, minimalist flair. Nearby, understated pendant lights hover delicately around the bathtub, layering the illumination and offering versatile moods—whether for relaxing baths or energizing morning routines. This fusion of vintage warmth and industrial grit crafts a space that’s not only visually striking but also warmly authentic, perfectly suited for those who cherish the raw beauty of urban loft living.

    Key Design Elements

    • Install LED Edison-style bulbs to combine classic vintage appeal with energy-saving technology.
    • Opt for open cage sconces to enhance illumination while maintaining an industrial aesthetic.
    • Add recessed lighting to provide focused, practical brightness that complements the vintage fixtures.

    Pro Tip: Combine Edison bulb wall sconces with a bold industrial-style mirror to create a unified and purposeful look in your bathroom.

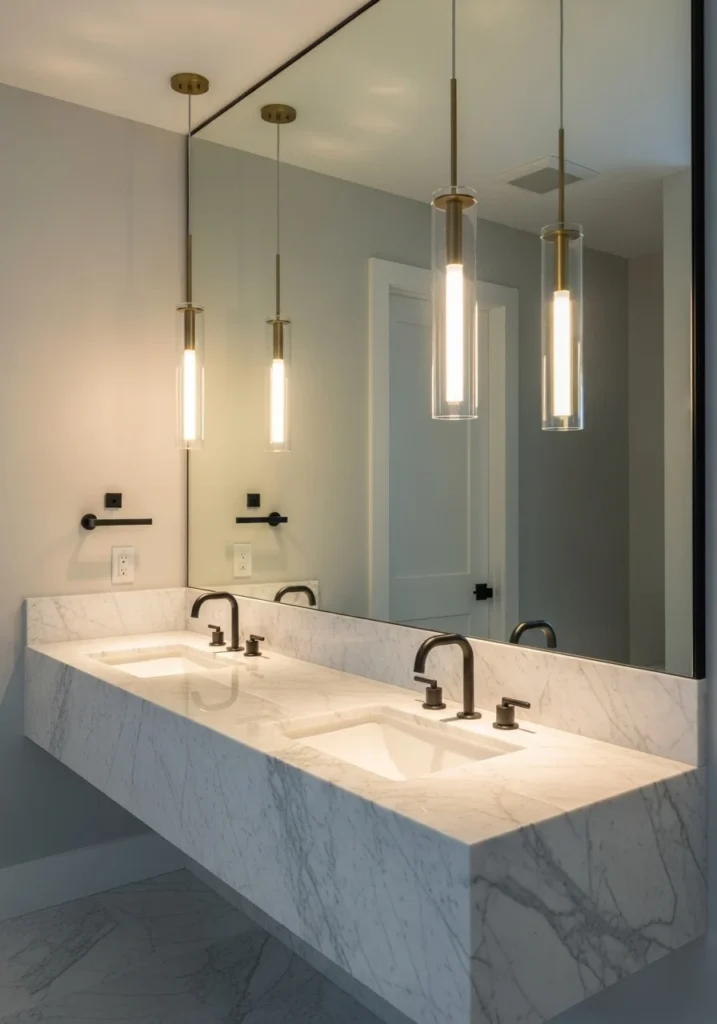
    15. Elevate Vanity Style with Pendant Lights

    Elevate Vanity Style with Pendant Lights

    Suspended gracefully above the vanity, a pair of elegant glass pendant lights transform the bathroom into a dazzling showcase of style and sophistication. Their transparent, jewel-like forms shimmer softly, casting a gentle glow that elevates the entire space with an air of refined luxury. Warm brass rods suspend the pendants with effortless charm, infusing the room with a subtle golden hue that contrasts beautifully against the cooler marble surfaces below.

    As the delicate glass shades diffuse the light, they create a focused radiance that highlights every intricate veining and polished reflection on the marble countertops, revealing textures that often go unnoticed under typical overhead lighting. An expansive, frameless mirror stretches behind the vanity, capturing and multiplying the luminous glow to brighten the room and amplify its sense of spaciousness. Complemented by a sleek floating vanity adorned with matte black hardware, the brass pendants strike a perfect balance—becoming captivating sculptural accents that continue to enchant the eye, whether glowing warmly or resting quietly in daylight.

    Key Design Elements

    • Install pendant lights so the bottom hangs about 60-65 inches from the floor to provide ideal lighting for daily tasks.
    • Opt for glass or frosted shades to ensure the light spreads evenly throughout the space.
    • Combine warm brass fixtures with neutral stone surfaces to create a classic and enduring style.

    Pro Tip: Install pendant lights on both sides of the mirror instead of above it to provide even lighting that reduces shadows on your face while you get ready.

    Conclusion

    True luxury in bathroom lighting comes not from extravagance, but from thoughtful design that blends different types of light to enhance both function and mood. By thoughtfully layering lighting—combining ambient, task, and accent sources—you transform your bathroom into a sanctuary where every detail is illuminated with purpose and style, creating a space that feels both inviting and effortlessly elegant.

    Approaching your lighting plan with intention allows you to highlight your bathroom’s unique features and support your daily rituals with ease and grace. When lighting is done right, it elevates the entire room, turning simple materials into something extraordinary and turning everyday routines into moments of calm and indulgence. In this way, well-crafted bathroom lighting becomes the silent hero of your home’s comfort and beauty.

  • 15 Round Dining Table Decor Ideas for a Stylish and Inviting Space

    Round dining tables naturally encourage conversation and connection, making them a favorite choice for everything from intimate family dinners to festive celebrations. Their curved shape creates a balanced, welcoming atmosphere, but decorating them requires a thoughtful approach to avoid clutter while still making a statement. Whether your style leans toward rustic charm, modern elegance, coastal relaxation, or glamorous sophistication, the right centerpiece and accents can completely transform your table.

    The following round dining table decor ideas have been reimagined and reordered to provide fresh inspiration for creating a beautiful, memorable setting in any home or event space.

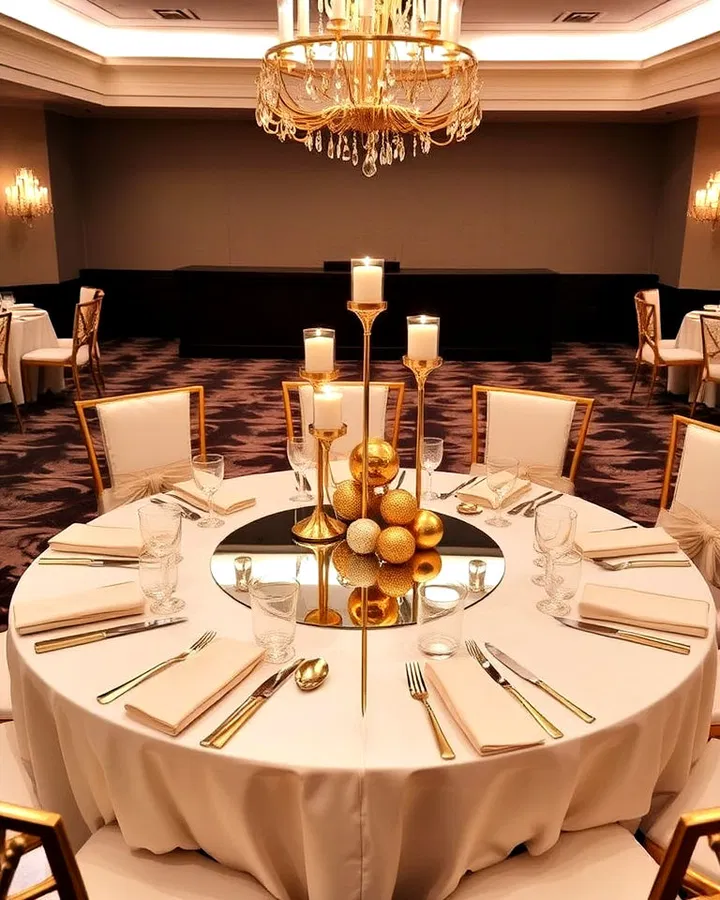
    1. Create a Luxe Display with Gold Accents and Mirrors

    A mirrored centerpiece instantly adds depth and elegance to a round dining table. Place a circular mirror in the center and layer gold candleholders, metallic vases, or decorative ornaments on top. The reflective surface amplifies candlelight and highlights decorative details, making the table feel larger and more sophisticated. This glamorous arrangement is ideal for holiday dinners, weddings, or upscale entertaining.

    2. Style a Seasonal Fruit Centerpiece

    Fresh fruit can be surprisingly stylish when thoughtfully arranged. Fill decorative bowls or tiered trays with seasonal produce such as lemons, oranges, pomegranates, figs, or grapes. Add fresh herbs, greenery, or floral accents to enhance the presentation. This approach introduces vibrant color, natural texture, and practical functionality since guests can enjoy the fruit throughout the gathering.

    3. Add Warmth with Rustic Wooden Lanterns

    Wooden lanterns provide a cozy focal point that works beautifully on round tables. Fill them with pillar candles, fairy lights, or LED lantern candles for a welcoming glow. Complete the arrangement with eucalyptus branches, pinecones, or dried flowers to create a relaxed farmhouse-inspired aesthetic. This look is particularly effective during autumn gatherings and outdoor celebrations.

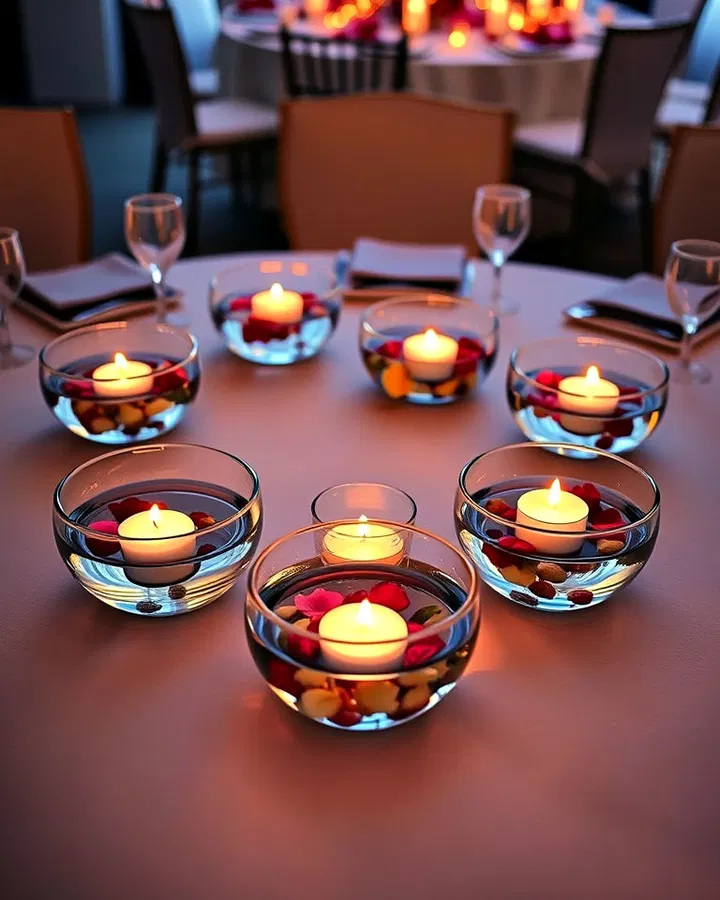
    4. Design a Romantic Floating Candle Display

    Floating candles offer timeless elegance without overwhelming the table. Arrange them in clear glass bowls filled with water, then scatter flower petals, floating greenery, or decorative stones around the candles. The result is a calming and romantic centerpiece that enhances intimate dinners, anniversary celebrations, and wedding receptions.

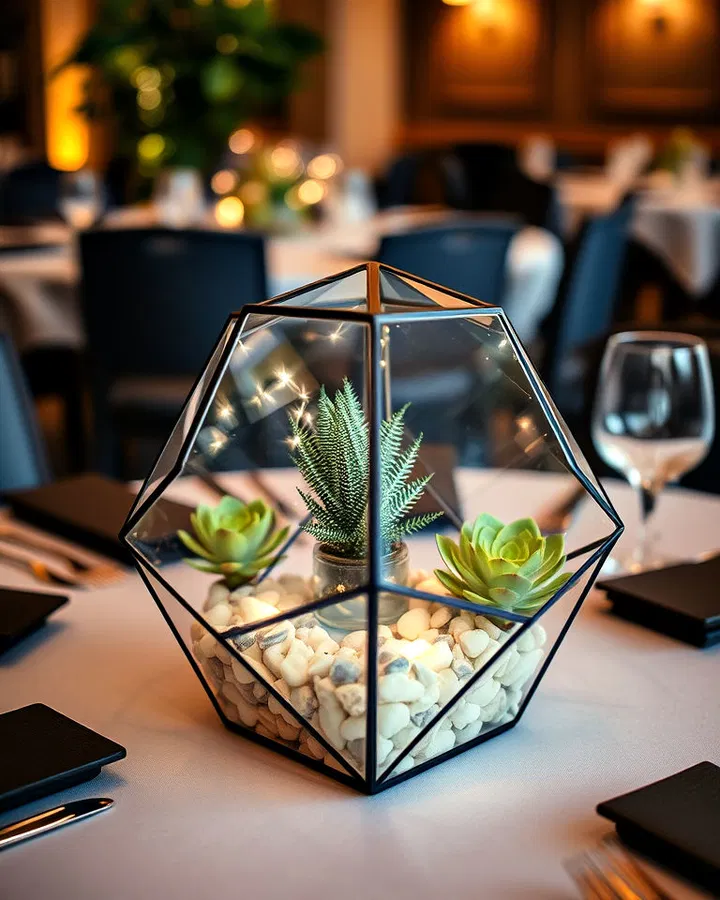
    5. Embrace Contemporary Style with Geometric Terrariums

    For a modern look, geometric terrariums bring structure and visual interest to a round table. Fill metal-framed terrariums with succulents, air plants, moss, or decorative stones. Tiny string lights woven inside create an eye-catching display after dark. Their compact size makes them ideal for smaller dining tables where space is limited.

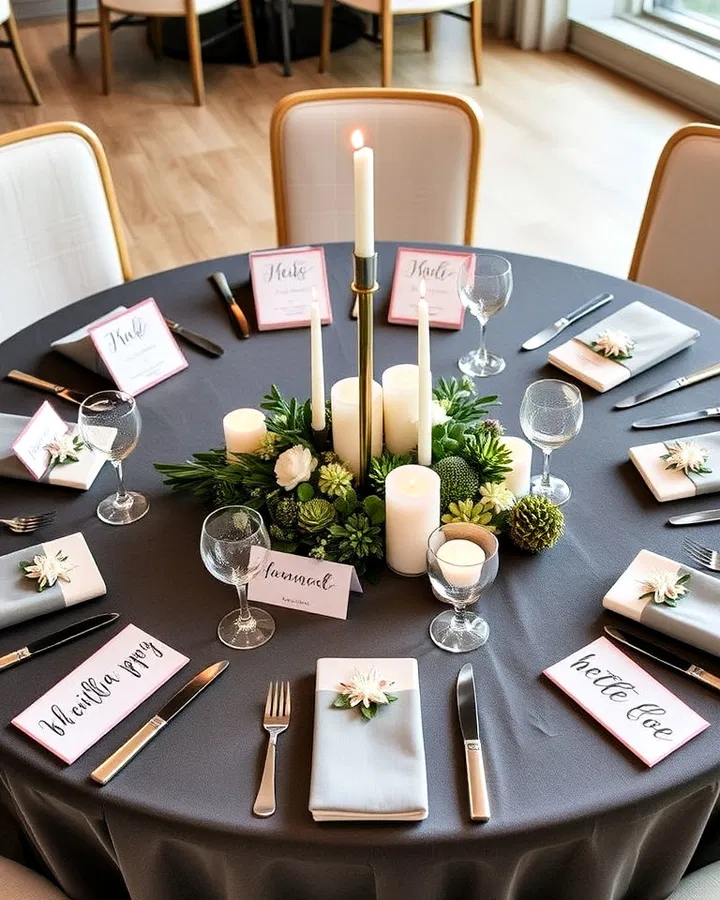
    6. Incorporate Personalized Place Settings

    Thoughtful details can make guests feel genuinely welcomed. Personalized name cards, handwritten notes, or small favors placed at each seat add a meaningful touch. Mini succulents, candles, chocolates, or custom keepsakes create a memorable experience while contributing to the overall table design.

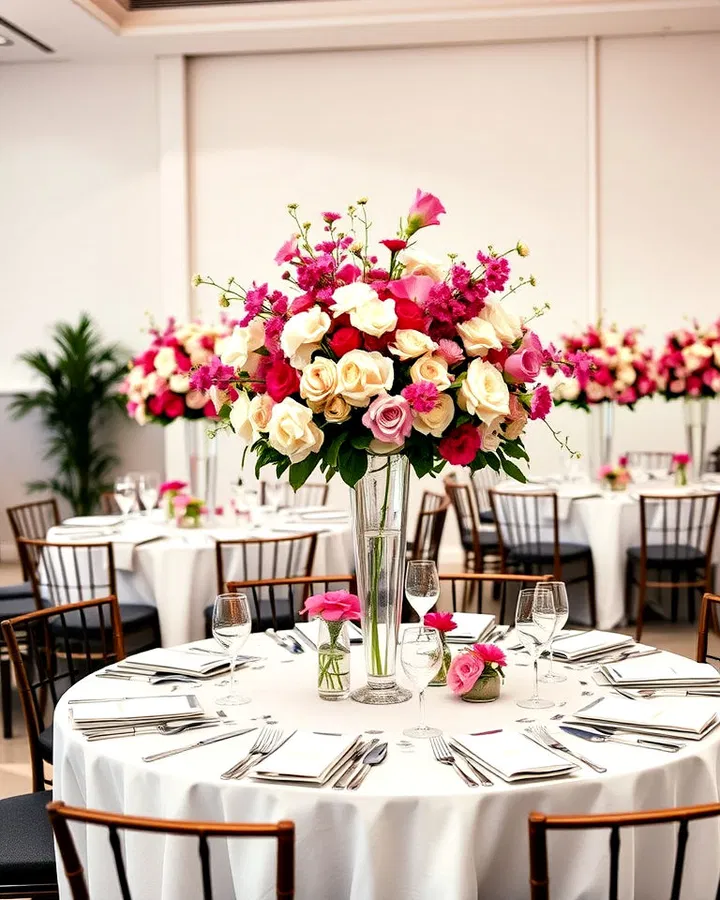
    7. Create Drama with Monochromatic Floral Arrangements

    Choosing flowers in a single color palette creates a sophisticated and cohesive statement. White roses, blush peonies, deep burgundy dahlias, or vibrant yellow tulips arranged in coordinating vessels can dramatically enhance the table without appearing busy. The uniform color scheme creates visual harmony while still delivering plenty of impact.

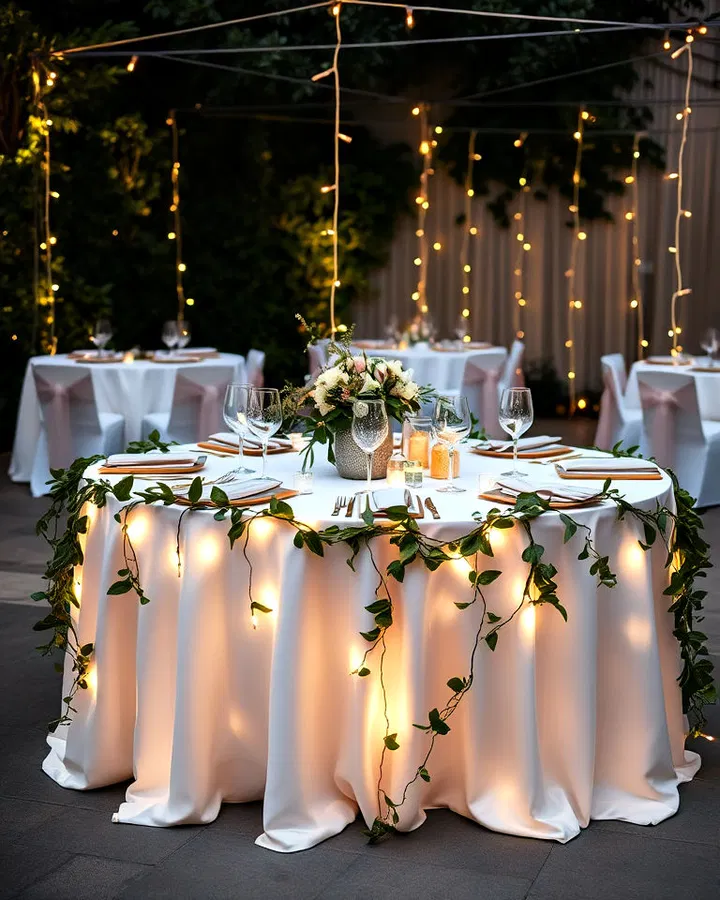
    8. Layer Fairy Lights with Cascading Greenery

    Nothing creates enchantment quite like soft lighting combined with natural foliage. Drape eucalyptus, ivy, or olive branches across the table and weave delicate fairy lights throughout the arrangement. The gentle illumination creates an inviting atmosphere perfect for evening entertaining, garden parties, and seasonal celebrations.

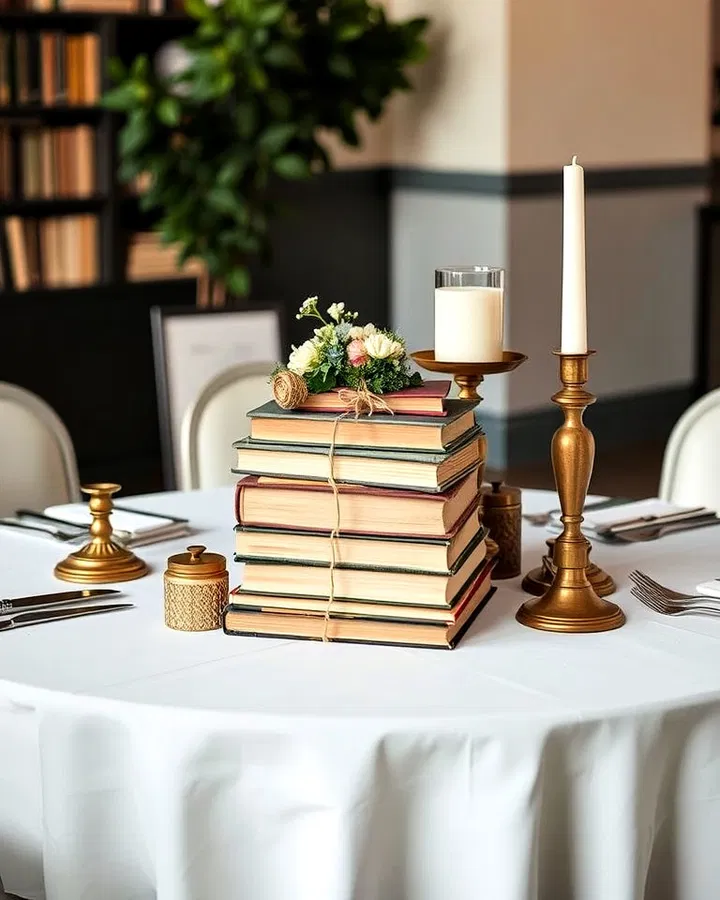
    9. Showcase Vintage Books and Antique Finds

    For a distinctive centerpiece, stack a collection of vintage books and top them with antique accessories such as brass candlesticks, pocket watches, or decorative clocks. This arrangement adds personality and storytelling to the table while serving as an excellent conversation starter. Small floral accents help soften the look and balance the vintage elements.

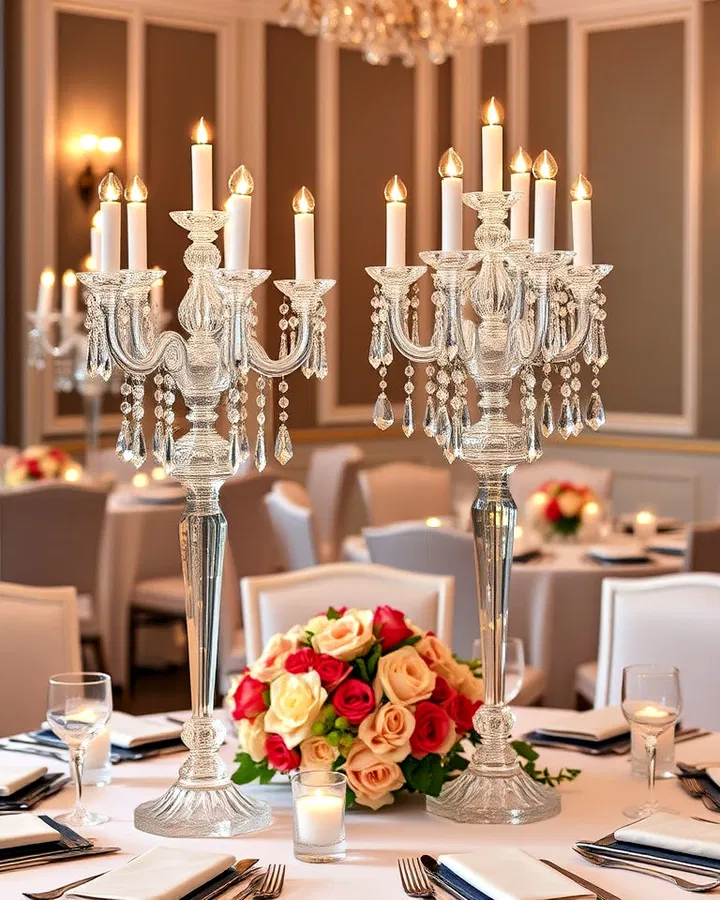
    10. Elevate Formal Gatherings with Crystal Candelabras

    Crystal candelabras remain one of the most dramatic centerpieces available. Their height and sparkle naturally draw attention, while candlelight reflected through crystal creates a luxurious atmosphere. Surround the base with floral garlands, greenery, or tea lights to complete the arrangement. This timeless design is particularly fitting for weddings, holiday dinners, and elegant celebrations.

    11. Bring Coastal Charm to the Table

    Capture the relaxed beauty of the shoreline with a coastal-inspired centerpiece. Arrange seashells, driftwood, coral accents, and glass containers filled with sand around the center of the table. Blue-and-white linens reinforce the nautical theme while maintaining a refined and polished appearance. This decor style is ideal for summer entertaining and beach-inspired homes.

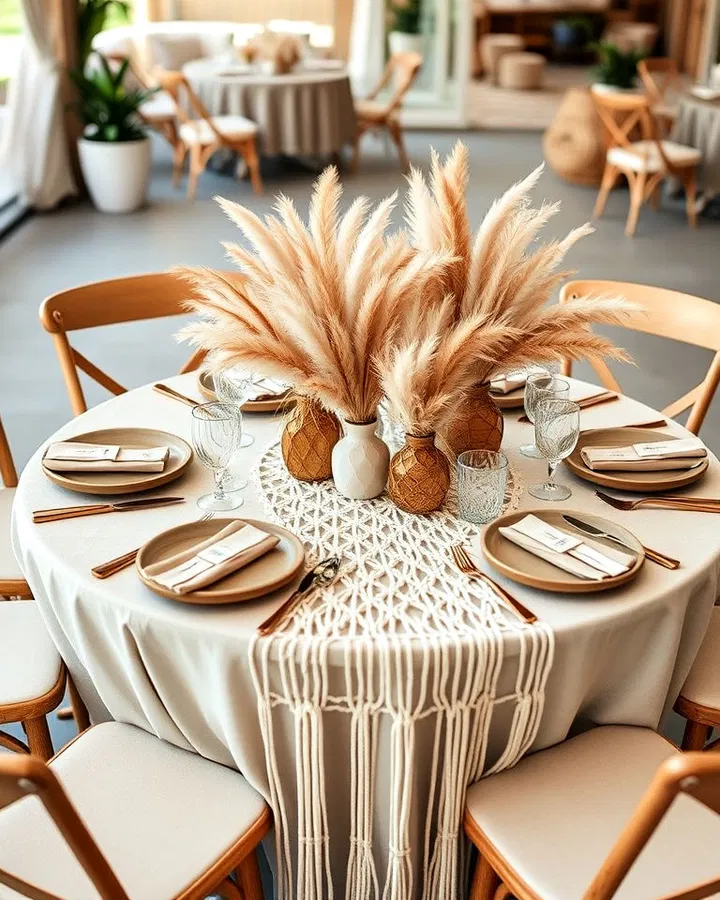
    12. Introduce Bohemian Texture with Pampas Grass

    Bohemian-inspired decor continues to be popular for its relaxed and natural feel. Use pampas grass arrangements in ceramic or woven containers as a centerpiece, then pair them with macramé runners, textured placemats, and neutral-toned tableware. The combination creates a laid-back yet stylish atmosphere perfect for casual gatherings.

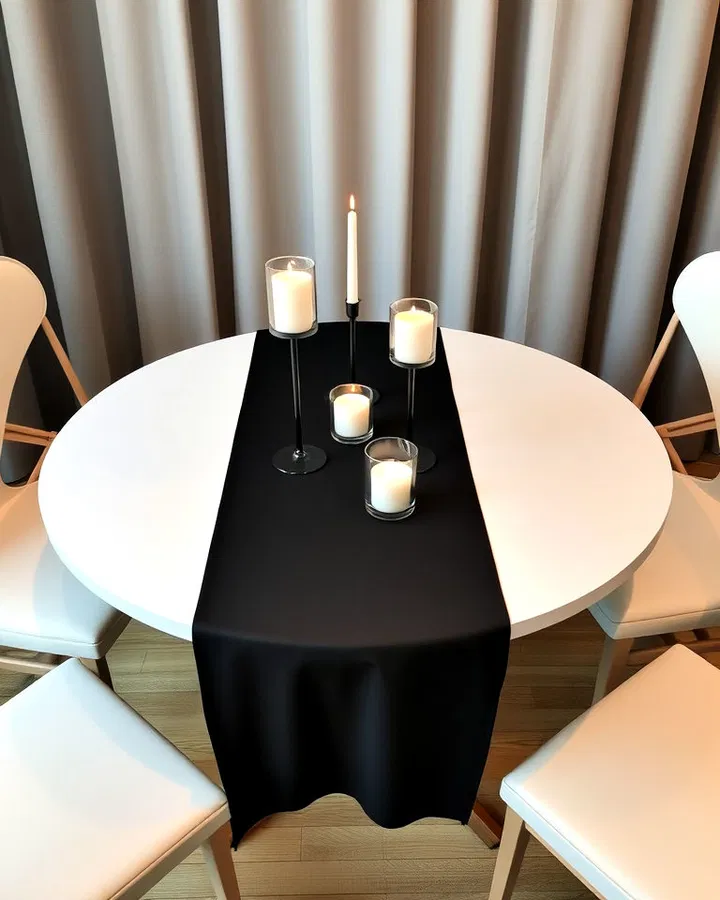
    13. Keep It Simple with a Minimalist Runner and Candles

    Sometimes less truly is more. A textured table runner combined with candles of varying heights creates a clean, modern look that complements almost any interior style. Glass, ceramic, or metal candleholders add subtle sophistication without distracting from the table’s simplicity. This versatile arrangement works equally well for everyday dining and special occasions.

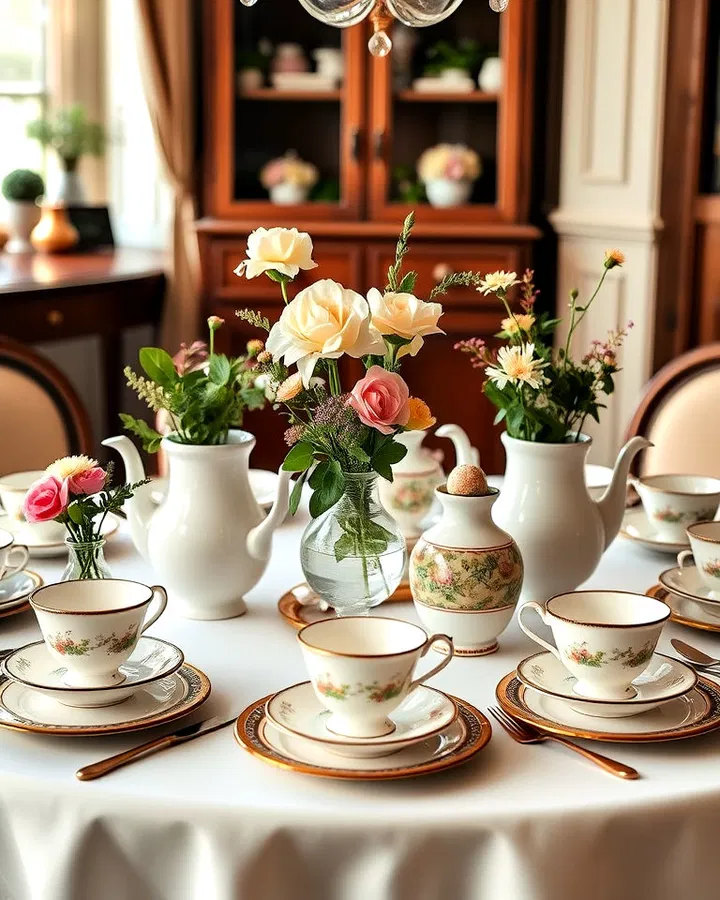
    14. Arrange Vintage Tea Sets Filled with Flowers

    Repurpose vintage teacups, saucers, and teapots as charming floral containers. Small blooms, greenery, or delicate wildflowers placed inside these pieces create a whimsical centerpiece with plenty of personality. This setup is particularly lovely for brunches, bridal showers, garden parties, and afternoon tea gatherings.

    15. Celebrate the Seasons with Fresh Floral Centerpieces

    Nothing enhances a round dining table quite like fresh flowers. Seasonal blooms arranged in low-profile vases allow guests to converse comfortably while adding color, fragrance, and natural beauty. Layering different flowers with greenery creates depth and dimension, while unique containers such as colored glass, ceramic pots, or wooden boxes help personalize the display.

    Conclusion

    A beautifully decorated round dining table serves as more than just a place to eat—it becomes the centerpiece of meaningful conversations and memorable gatherings. Whether you prefer the elegance of crystal candelabras, the relaxed appeal of coastal accents, the warmth of rustic lanterns, or the simplicity of fresh flowers, there are countless ways to enhance your table while reflecting your personal style.

    The most successful round table designs balance beauty and practicality, ensuring guests feel comfortable while enjoying a visually appealing setting. By mixing textures, lighting, natural elements, and personalized details, you can create a table arrangement that feels welcoming, stylish, and perfectly suited to any occasion.

  • 15 Craftsman Dining Room Ideas for Timeless Elegance and Warm Gatherings

    The Craftsman style remains one of the most beloved interior design movements because of its focus on quality craftsmanship, natural materials, and enduring beauty. A Craftsman dining room is more than just a place to enjoy meals—it’s a welcoming space that celebrates handcrafted details, functional design, and a deep connection to nature.

    From rich woodwork and artisan lighting to built-in storage and architectural accents, Craftsman dining rooms create an atmosphere that feels both sophisticated and comfortable. Whether you’re renovating an older home or bringing Craftsman charm into a modern space, these inspiring ideas will help you design a dining room that feels timeless, practical, and inviting.

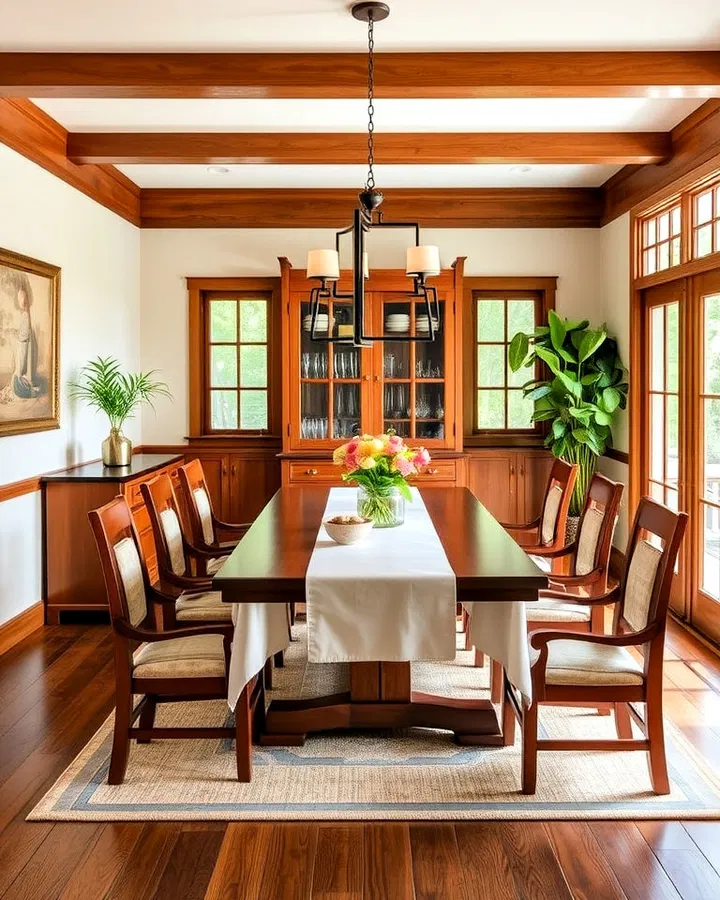
    1. Incorporate Built-In Storage for Seamless Style

    One of the defining features of Craftsman interiors is the use of built-in furniture that blends beauty with practicality. Consider adding a custom hutch, buffet, or wall-to-wall cabinetry that matches your dining room woodwork.

    Built-in storage keeps dishes, serving pieces, and seasonal décor organized while maintaining a clean, uncluttered appearance. Displaying heirloom china, handcrafted pottery, or decorative glassware inside these cabinets adds personality and showcases the artisanal spirit that defines Craftsman design.

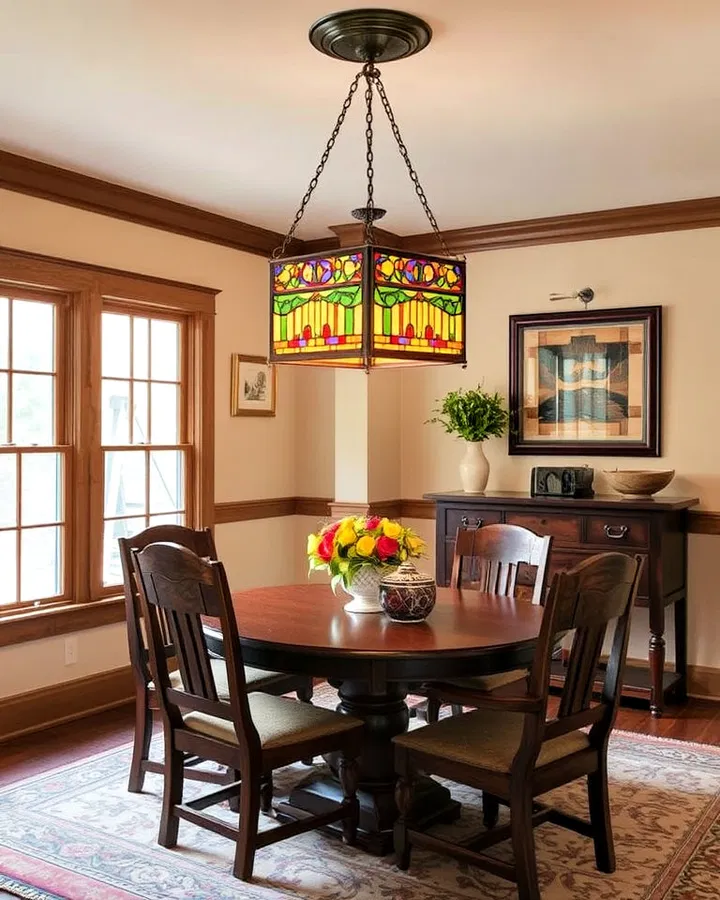
    2. Highlight the Room with Stained Glass Lighting

    Lighting plays a major role in creating the cozy atmosphere Craftsman homes are known for. Stained glass chandeliers and pendant lights instantly add character while serving as beautiful focal points above the dining table.

    The warm glow filtering through colorful glass panels creates an intimate dining experience while reinforcing the handcrafted aesthetic. Choose geometric or nature-inspired designs that reflect traditional Craftsman artistry.

    3. Embrace Rich and Natural Wood Finishes

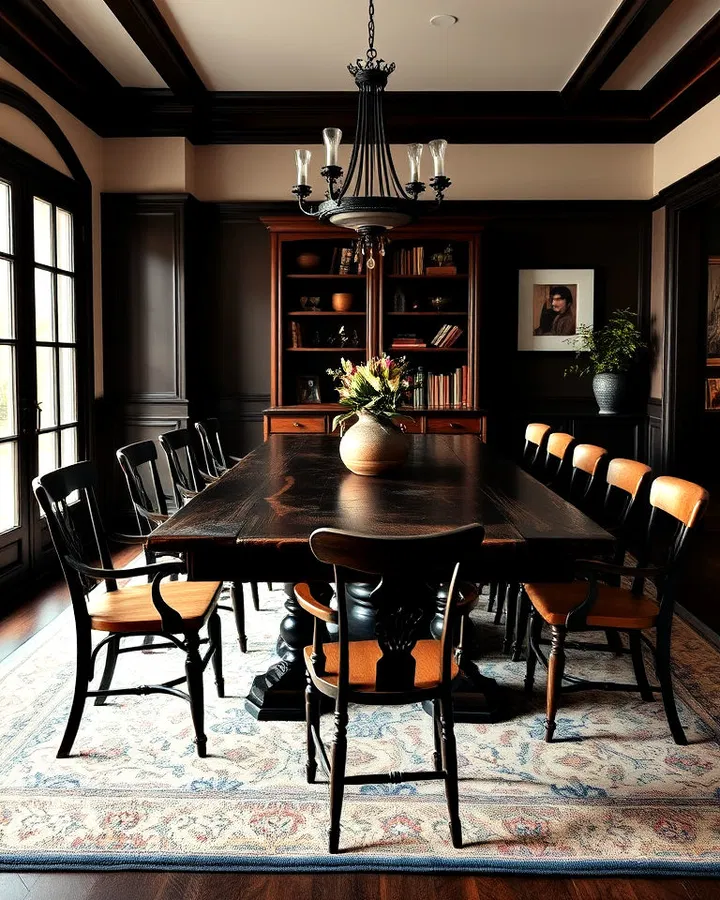
    Nothing captures the essence of Craftsman style better than beautiful woodwork. Oak, walnut, cherry, and mahogany are excellent choices for dining tables, trim, floors, and cabinetry.

    Rather than hiding natural grain patterns, Craftsman interiors celebrate them. Rich wood finishes create warmth, texture, and authenticity, helping the dining room feel welcoming and grounded. Layering multiple wood elements throughout the space creates a cohesive and timeless design.

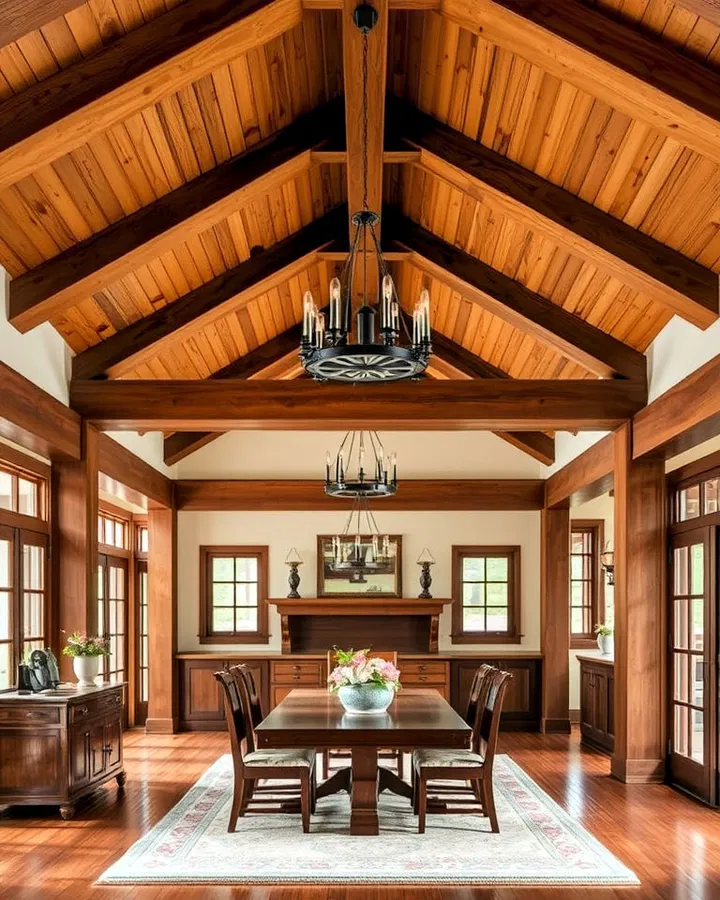
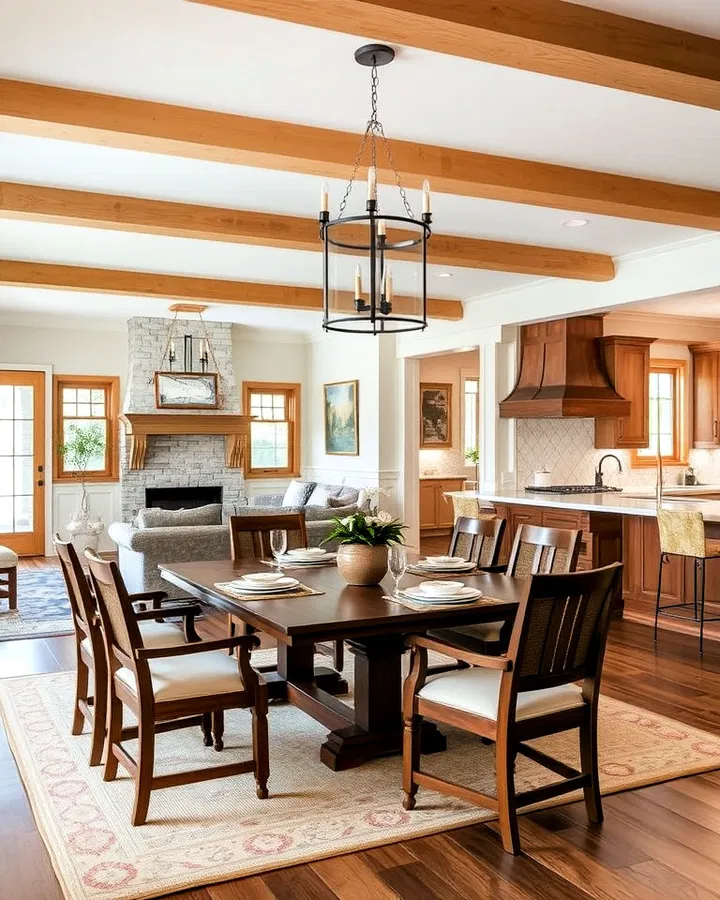
    4. Add Exposed Ceiling Beams for Rustic Character

    Exposed wood beams instantly draw the eye upward and add architectural depth to a dining room. Whether structural or decorative, beams contribute to the handcrafted look that makes Craftsman homes so distinctive.

    Dark-stained beams against a lighter ceiling create dramatic contrast, while natural finishes produce a softer, more rustic appearance. This feature works especially well in rooms with vaulted or higher ceilings.

    5. Create a Nature-Inspired Color Palette

    Craftsman interiors are heavily influenced by the natural world. Earthy shades such as olive green, clay, rust, mustard yellow, deep brown, and warm beige create a soothing environment that complements natural wood surfaces.

    Use these colors on walls, upholstery, curtains, or decorative accents. The result is a harmonious space that feels calm, balanced, and connected to nature.

    6. Choose Mission-Style Furniture for Authentic Appeal

    Mission furniture is virtually synonymous with Craftsman design. Known for its sturdy construction, clean lines, and minimal ornamentation, this furniture style emphasizes function and quality over excess decoration.

    A solid wood Mission dining table paired with matching chairs creates an elegant centerpiece while maintaining the understated sophistication that defines Craftsman interiors.

    7. Introduce Decorative Art Tile Accents

    Handcrafted art tiles provide an opportunity to add color, texture, and visual interest without overwhelming the room. Consider using decorative tiles around a fireplace, as a feature wall, or within built-in cabinetry.

    Nature motifs, geometric patterns, and earthy colors are especially fitting for a Craftsman-inspired space. These artistic details reinforce the emphasis on handmade craftsmanship.

    8. Frame the Space with Classic Wainscoting

    Wainscoting adds instant architectural richness to a dining room. Wood paneling creates visual texture while protecting walls from everyday wear and tear.

    Pairing wainscoting with crown molding, plate rails, or wood trim enhances the room’s traditional appeal. Whether stained to match surrounding woodwork or painted in complementary tones, wainscoting contributes to a polished and sophisticated look.

    9. Display Handcrafted Pottery and Artisan Décor

    The Craftsman movement celebrates the value of handmade objects. Decorating with artisan pottery, hand-thrown ceramics, woven baskets, and handcrafted artwork reinforces the style’s authenticity.

    Rather than filling the room with mass-produced accessories, focus on meaningful pieces that tell a story and showcase skilled craftsmanship. These details add warmth and personality while making the space feel truly unique.

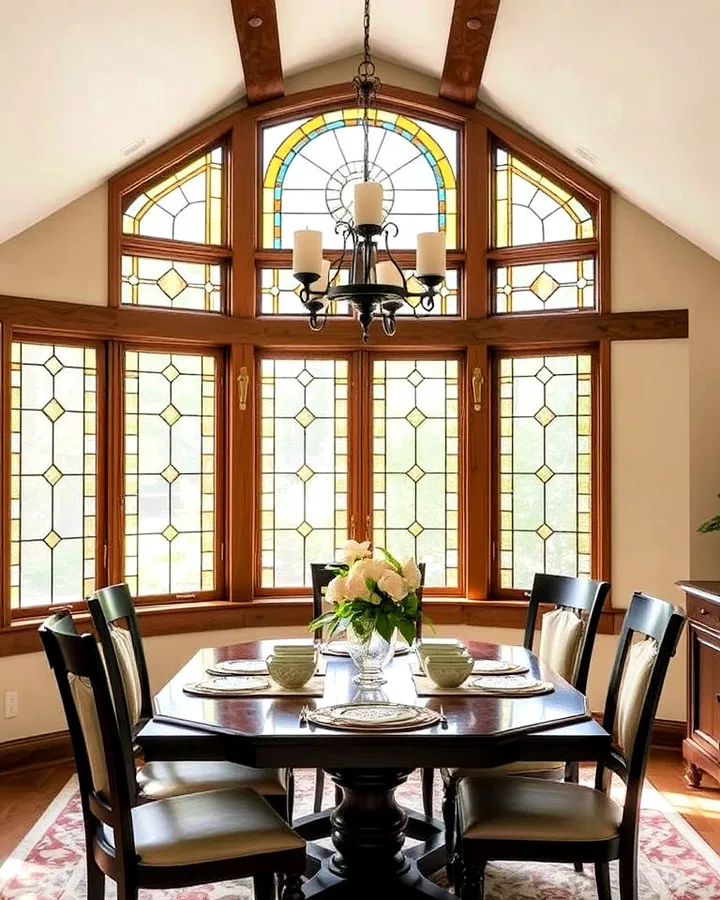
    10. Install Leaded Glass Features for Vintage Charm

    Leaded glass windows are among the most recognizable elements of traditional Craftsman architecture. Their geometric patterns and textured surfaces diffuse sunlight beautifully while adding artistic interest.

    Beyond windows, leaded glass can be incorporated into cabinet doors, room dividers, or decorative panels. These details create a sense of history and elegance that perfectly complements Craftsman interiors.

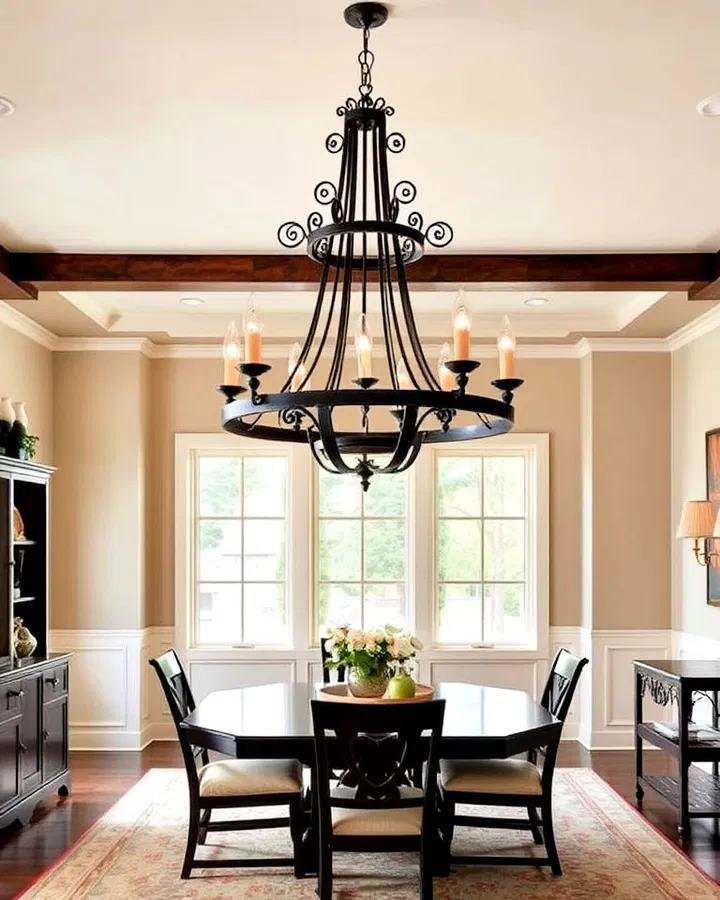
    11. Make a Statement with a Large Central Chandelier

    A substantial light fixture can anchor the entire dining room while reinforcing the room’s architectural character. Wrought iron chandeliers, handcrafted lantern-style fixtures, or oversized pendant lights fit beautifully within a Craftsman setting.

    The goal is to choose a fixture that feels substantial, well-crafted, and timeless rather than flashy or overly ornate.

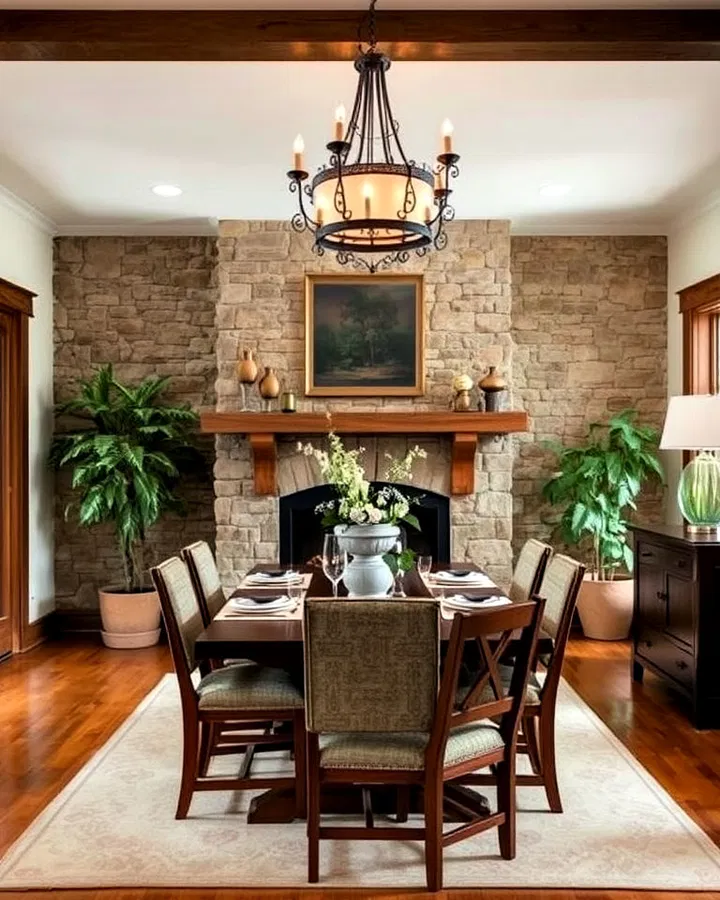
    12. Incorporate Natural Stone Elements

    Natural stone introduces texture and a sense of permanence to a Craftsman dining room. Stone fireplaces, accent walls, hearths, or flooring add visual depth while emphasizing the connection to natural materials.

    When paired with warm wood tones, stone creates a balanced and inviting environment that feels both rugged and refined.

    13. Keep the Design Simple and Functional

    One of the guiding principles of Craftsman design is that beauty should never come at the expense of functionality. Avoid overcrowding the room with excessive decorations or trendy furnishings.

    Instead, focus on well-made pieces that serve a purpose and contribute to the room’s overall harmony. Clean lines, practical storage, and thoughtful layouts help the craftsmanship become the true focal point.

    14. Layer Natural Textiles for Comfort

    Soft furnishings help balance the substantial wood elements commonly found in Craftsman interiors. Linen curtains, wool rugs, cotton table runners, and botanical-patterned cushions add warmth and softness.

    Stick with natural fibers whenever possible to maintain authenticity and create a cozy atmosphere that’s perfect for everyday dining and special occasions alike.

    15. Design an Open and Inviting Layout

    Many Craftsman homes feature open floor plans that encourage connection between living spaces. Creating visual flow between the dining room, kitchen, and living area makes the home feel larger and more welcoming.

    Natural light can move freely throughout the space, highlighting beautiful woodwork and architectural details. An open layout also makes entertaining easier, allowing guests to move comfortably between rooms during gatherings.

    Conclusion

    A Craftsman dining room combines timeless design principles with everyday functionality, creating a space that feels warm, welcoming, and built to last. By incorporating rich wood finishes, handcrafted details, natural materials, and thoughtful architectural elements, you can create a dining area that celebrates both beauty and practicality.

    Whether you choose built-in cabinetry, stained glass lighting, exposed beams, or Mission-style furniture, each detail contributes to the signature Craftsman aesthetic. The result is a dining room that feels authentic, comfortable, and perfectly suited for everything from casual family dinners to memorable holiday celebrations.

    A well-designed Craftsman dining room isn’t about following trends—it’s about investing in quality materials, meaningful craftsmanship, and timeless style that will remain beautiful for years to come.

  • 15 Black Accent Wall Dining Room Ideas for a Bold and Elegant Look

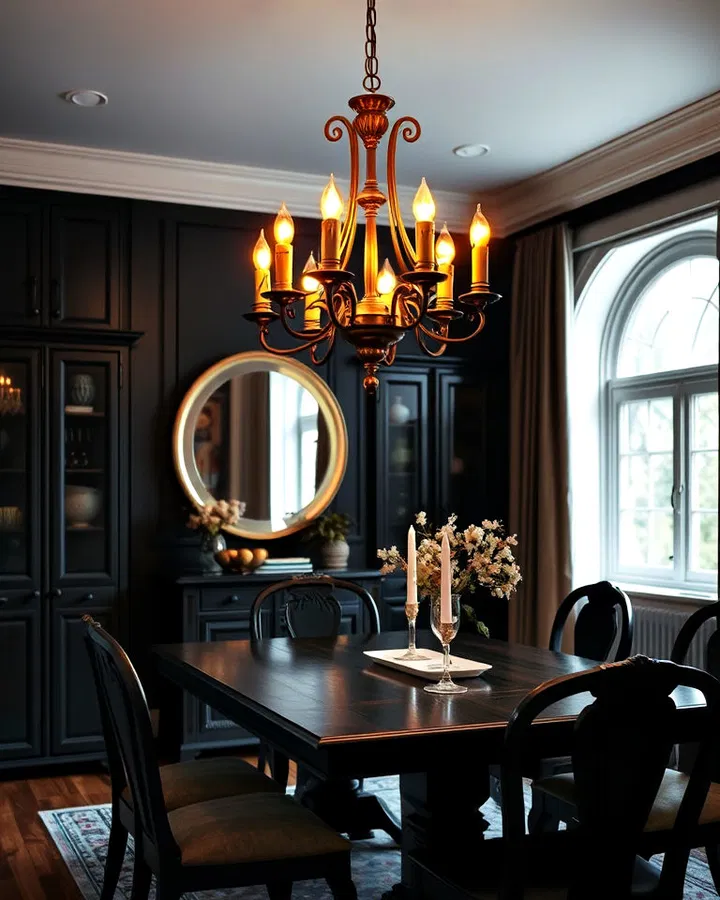
    A black accent wall is one of the most powerful ways to add sophistication, depth, and personality to a dining room. While many homeowners shy away from dark colors, black can actually make a space feel more refined, intimate, and visually striking when paired with the right furnishings, textures, and lighting. Whether your style leans modern, industrial, rustic, vintage, or luxurious, a black feature wall provides a dramatic backdrop that elevates the entire room.

    From textured finishes and statement lighting to natural materials and metallic accents, these black accent wall dining room ideas showcase how versatile this bold design choice can be. Explore these inspiring concepts and discover how a touch of black can transform an ordinary dining space into a memorable gathering place.

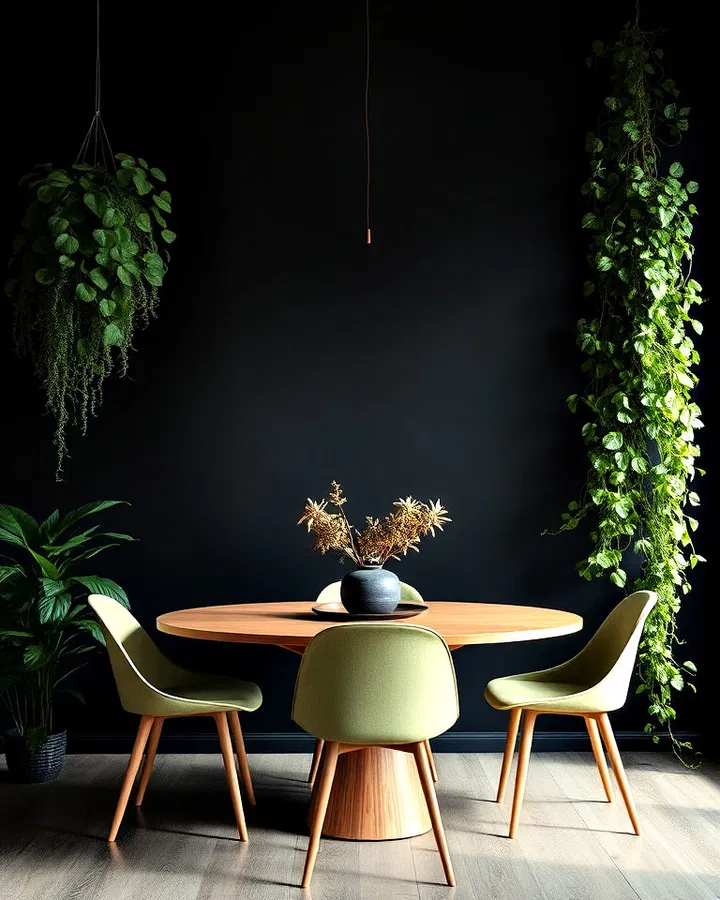
    1. Pair Black Walls with Lush Greenery

    Nothing softens a dark wall better than vibrant greenery. A black accent wall creates a stunning backdrop for large indoor plants, trailing vines, or potted trees. The contrast between deep black and fresh green foliage instantly adds life and balance to the room. This combination feels modern yet organic, creating a dining area that is both dramatic and welcoming.

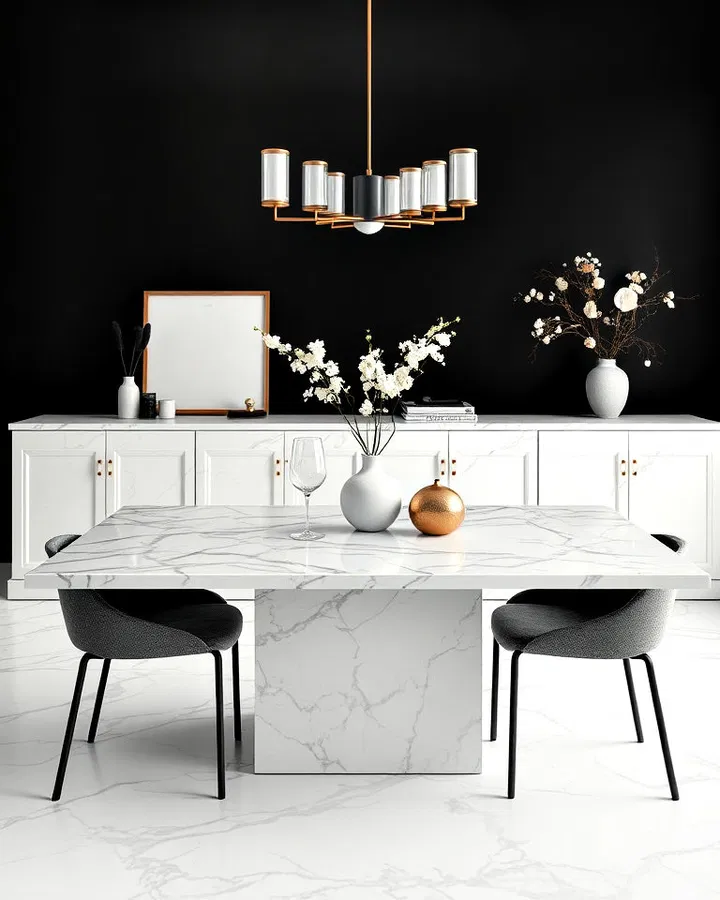
    2. Create Luxury with Black and Marble

    For a truly upscale look, combine a black accent wall with marble surfaces. Whether it’s a marble dining table, sideboard top, or decorative accessories, the natural veining adds movement and elegance against the dark backdrop. This pairing delivers a timeless, high-end aesthetic that feels sophisticated without appearing overly formal.

    3. Highlight a Statement Chandelier

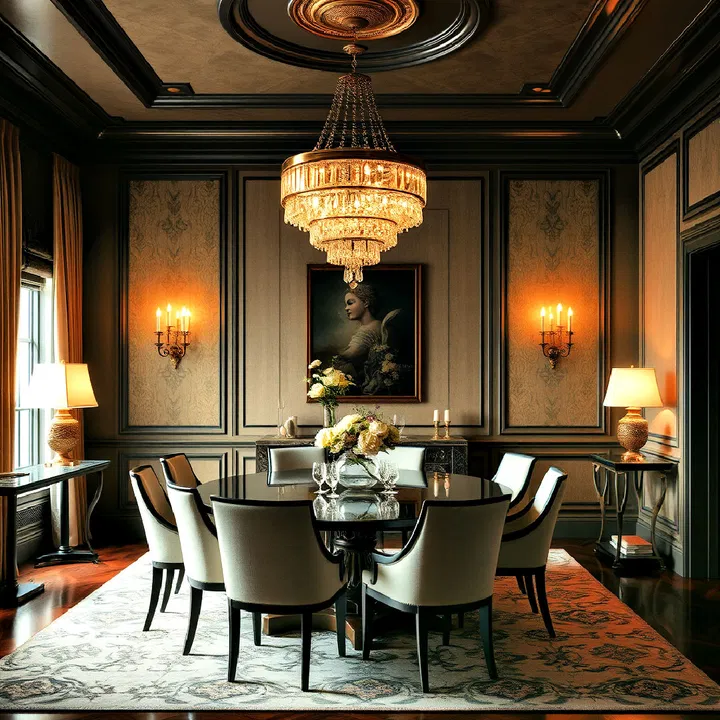
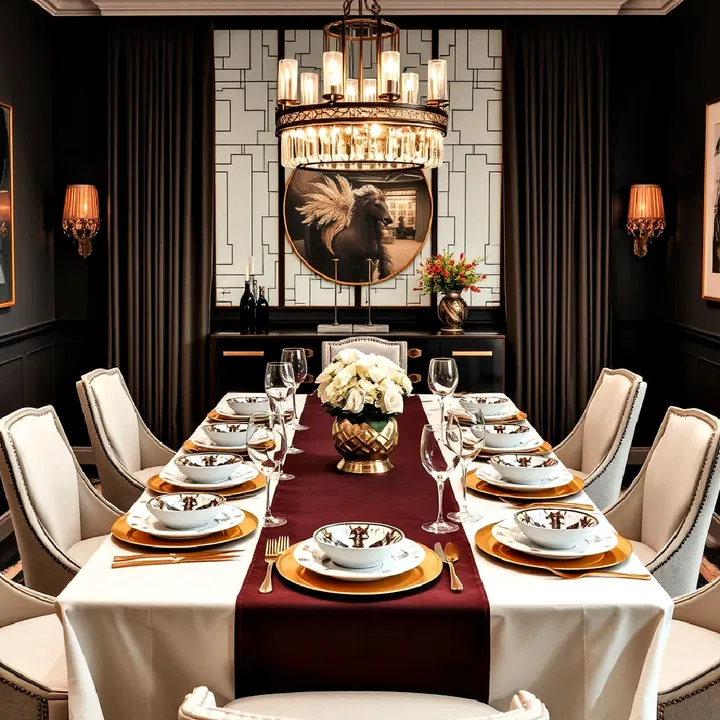
    A black wall naturally draws attention to lighting fixtures. Install a dramatic chandelier or oversized pendant above the dining table and allow it to become the room’s centerpiece. The dark backdrop enhances the fixture’s silhouette while creating a beautiful contrast with the warm glow of the lighting.

    4. Incorporate Rich Textured Finishes

    Instead of a flat painted surface, consider adding texture through plaster, paneling, textured wallpaper, or decorative molding painted black. Texture prevents the wall from feeling one-dimensional and creates visual depth. This layered look works especially well in contemporary and transitional dining rooms.

    5. Style a Black Wall with Vintage Treasures

    A black accent wall provides the perfect setting for antique furnishings and vintage décor. Ornate mirrors, aged wooden tables, brass candlesticks, and vintage artwork stand out beautifully against the dark background. The result is a dining room filled with character, warmth, and timeless charm.

    6. Embrace the Beauty of Matte Black

    A matte black finish offers understated elegance and sophistication. Unlike glossy surfaces, matte paint absorbs light and creates a soft, velvety appearance. Pair it with natural wood furniture and warm textiles to create a cozy dining environment that feels both modern and inviting.

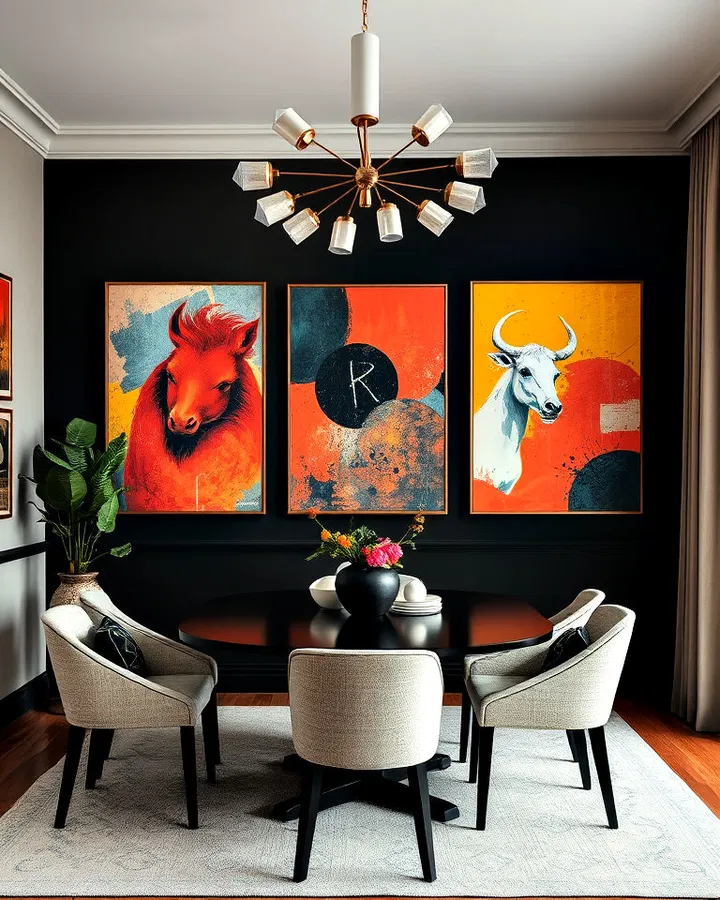
    7. Make Artwork the Centerpiece

    Turn your dining room into a personal gallery by using a black accent wall as a backdrop for oversized artwork. Bright colors, abstract designs, or large framed prints become more vibrant and eye-catching against the dark surface. This approach instantly adds personality and visual interest.

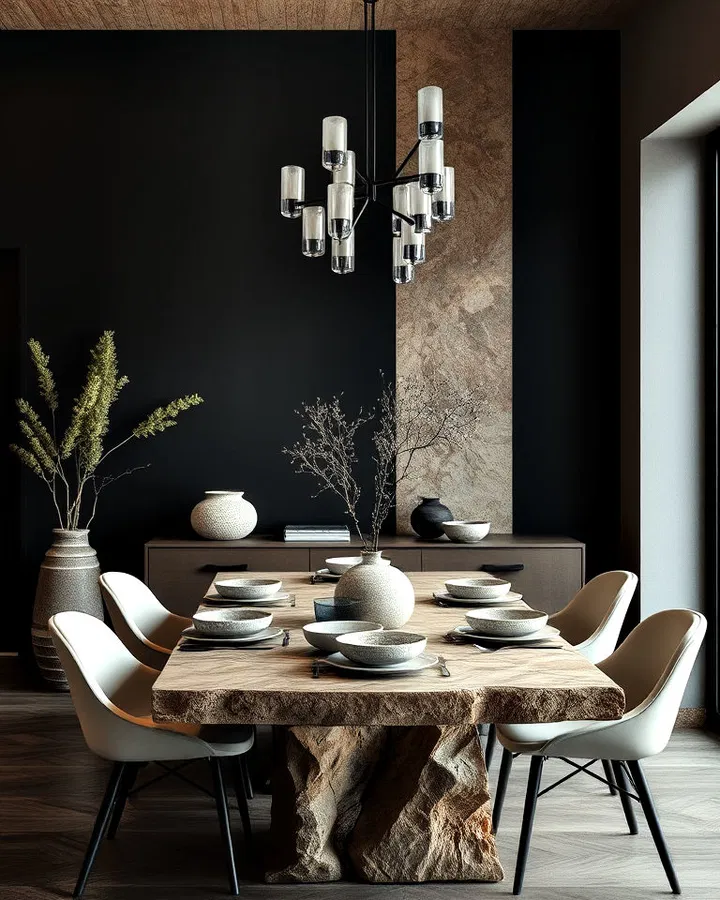
    8. Blend Black with Natural Stone Elements

    Combining black walls with stone accents introduces an appealing mix of modern and natural textures. Stone tabletops, feature columns, or decorative accessories create contrast and warmth while maintaining a sophisticated appearance. The result feels grounded, elegant, and effortlessly stylish.

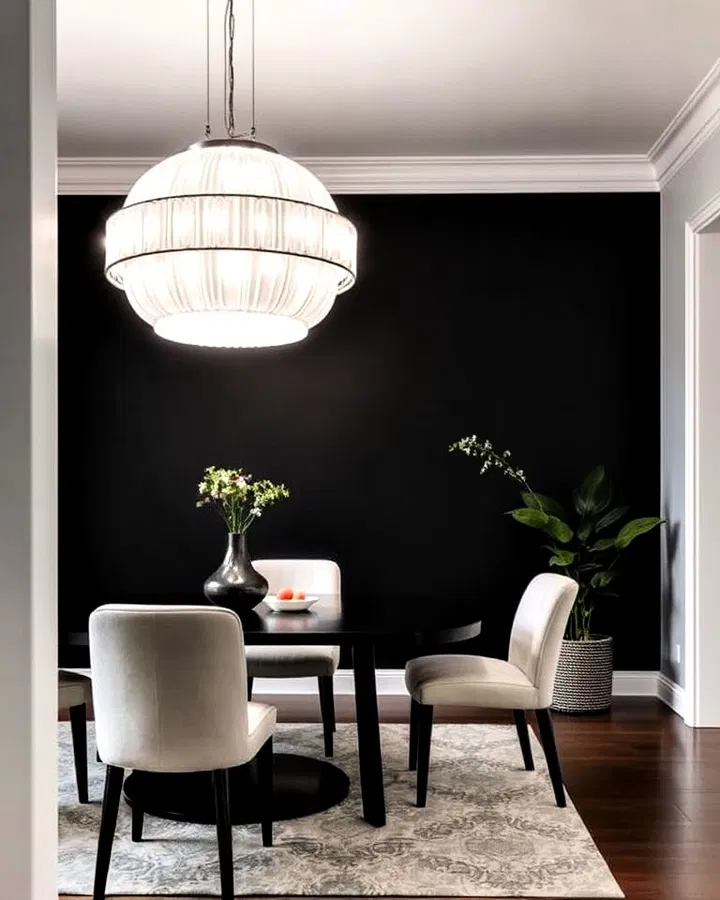
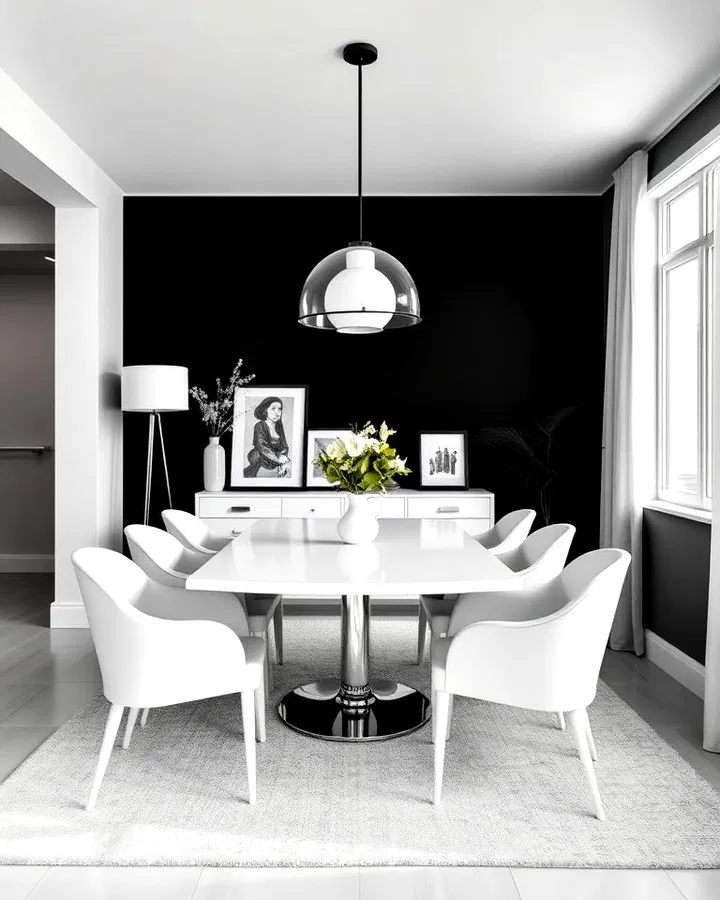
    9. Create Contrast with White Furnishings

    A black-and-white color palette remains one of the most timeless design combinations. Pair your black accent wall with white dining chairs, a white table, or crisp white décor pieces. The dramatic contrast creates a clean, contemporary look that feels fresh and visually balanced.

    10. Add Glamour Through Gold Accents

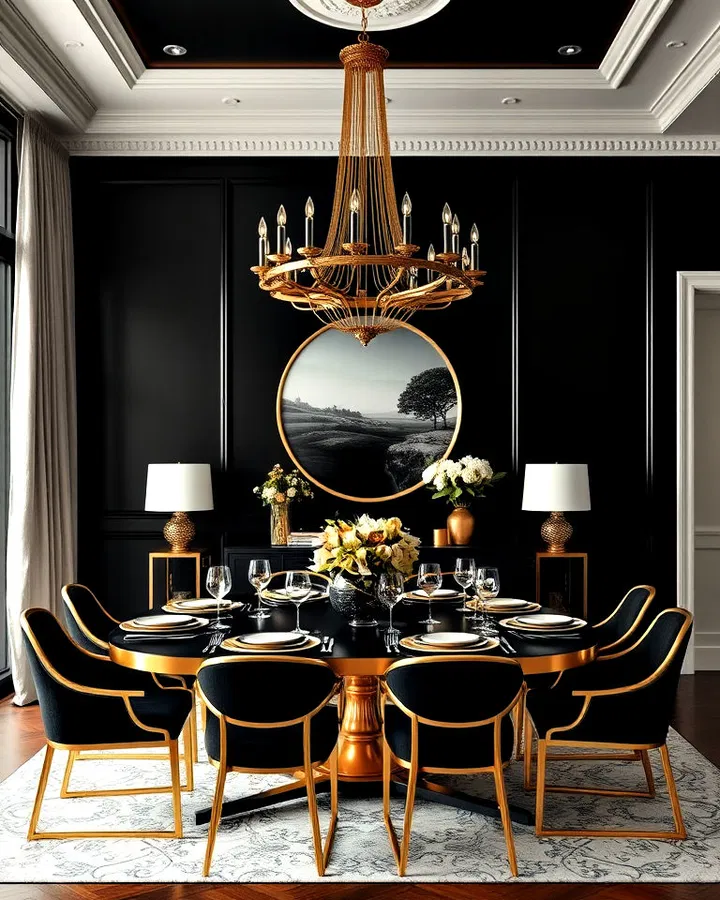
    Gold and black are a classic pairing for luxury interiors. Gold-framed mirrors, brass light fixtures, metallic candleholders, and decorative accessories instantly elevate a black accent wall. The warm metallic tones bring brightness and elegance while enhancing the room’s sophisticated atmosphere.

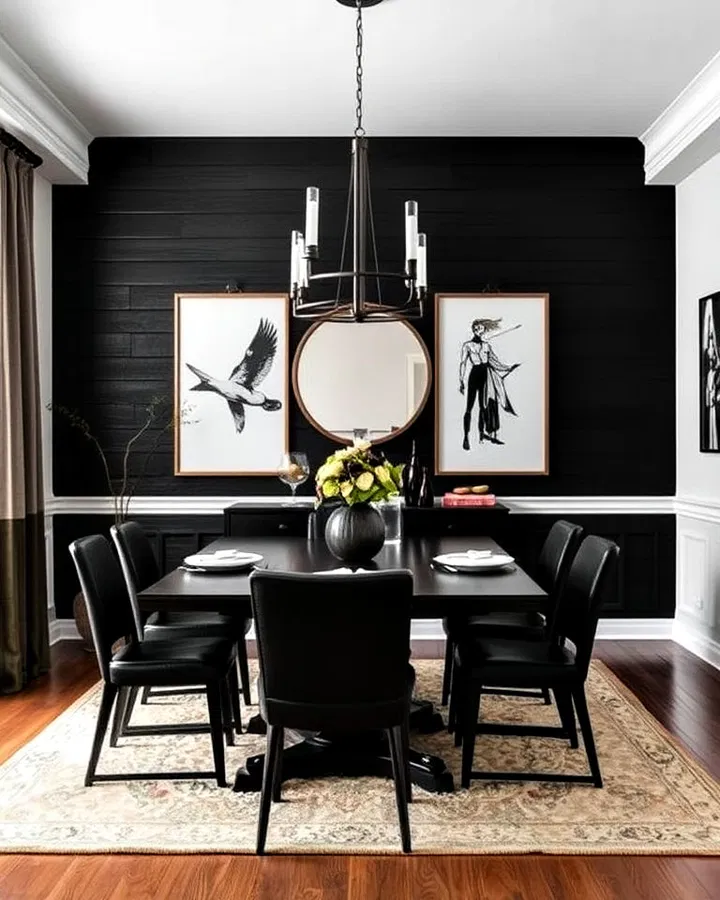
    11. Install a Black Shiplap Feature Wall

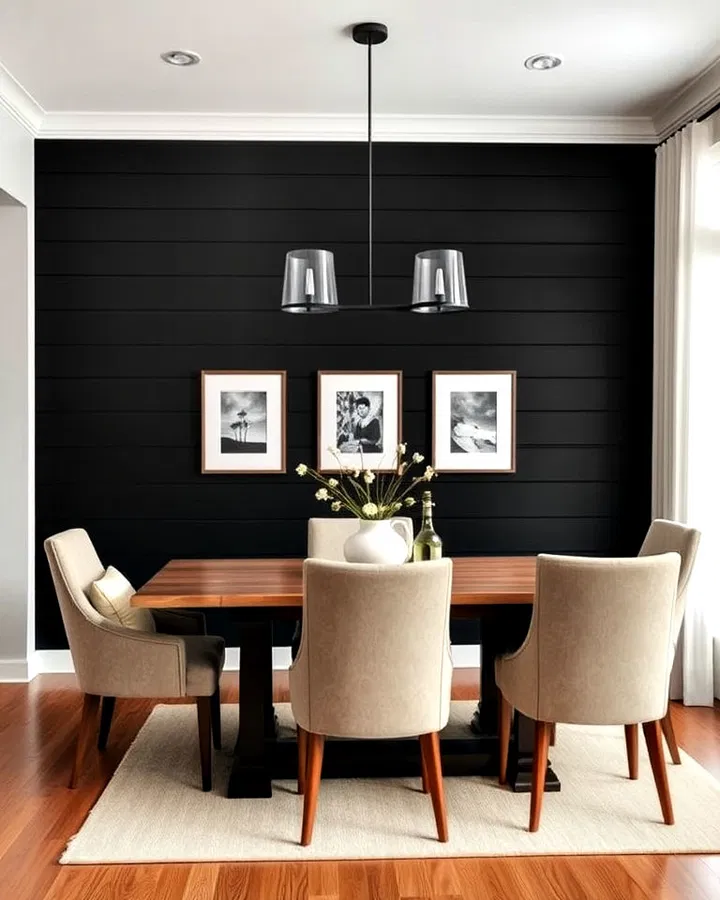
    Shiplap adds architectural interest and texture while maintaining a clean appearance. Painting shiplap black creates a stylish balance between rustic charm and modern sophistication. Pair it with light wood furniture and soft upholstery to create a welcoming dining space with plenty of visual depth.

    12. Design a Sleek Minimalist Space

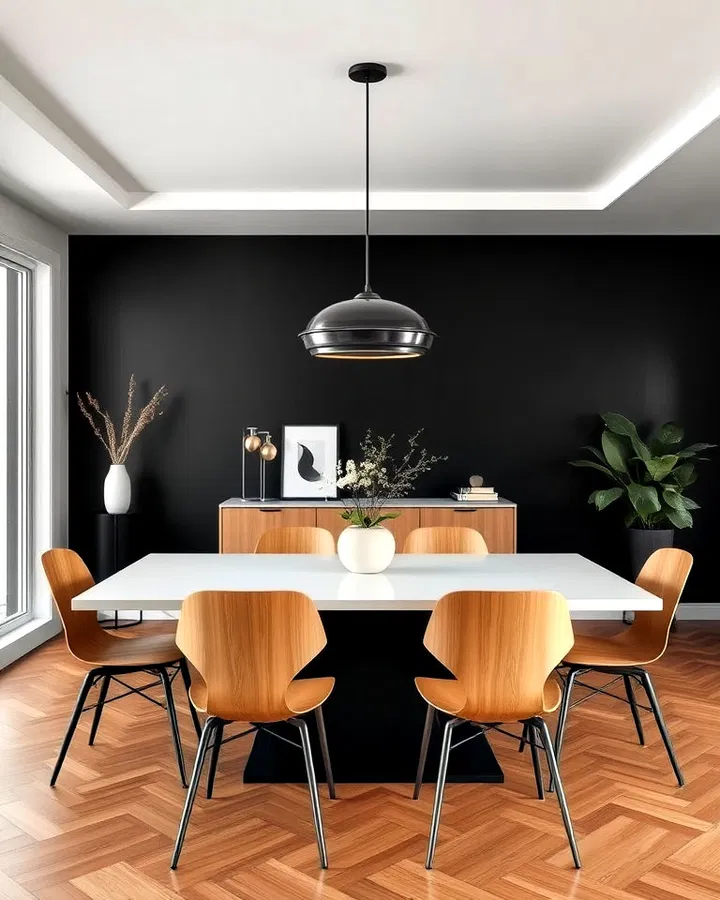
    If you prefer simplicity, a black accent wall can serve as the perfect foundation for minimalist décor. Clean-lined furniture, neutral color palettes, and carefully selected accessories allow the wall to become the focal point without overwhelming the room. The result is calm, refined, and effortlessly modern.

    13. Introduce Industrial-Inspired Details

    A black wall works beautifully in industrial-style dining rooms. Combine it with exposed metal furniture, steel-framed shelving, concrete finishes, and Edison bulb lighting. These raw materials complement the dark backdrop and create an urban-inspired space full of personality and edge.

    14. Use a Glossy Finish for Added Drama

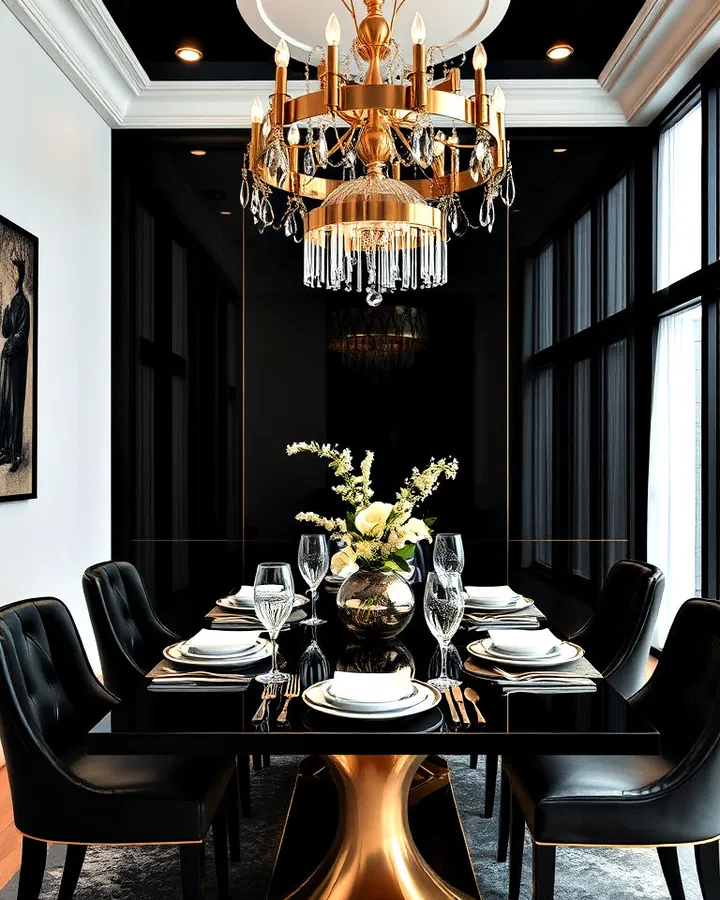
    A glossy black accent wall reflects light and creates a sense of depth that matte finishes cannot achieve. This reflective surface can make smaller dining rooms feel more expansive while adding a luxurious touch. Pair it with metallic accents and elegant furnishings for maximum impact.

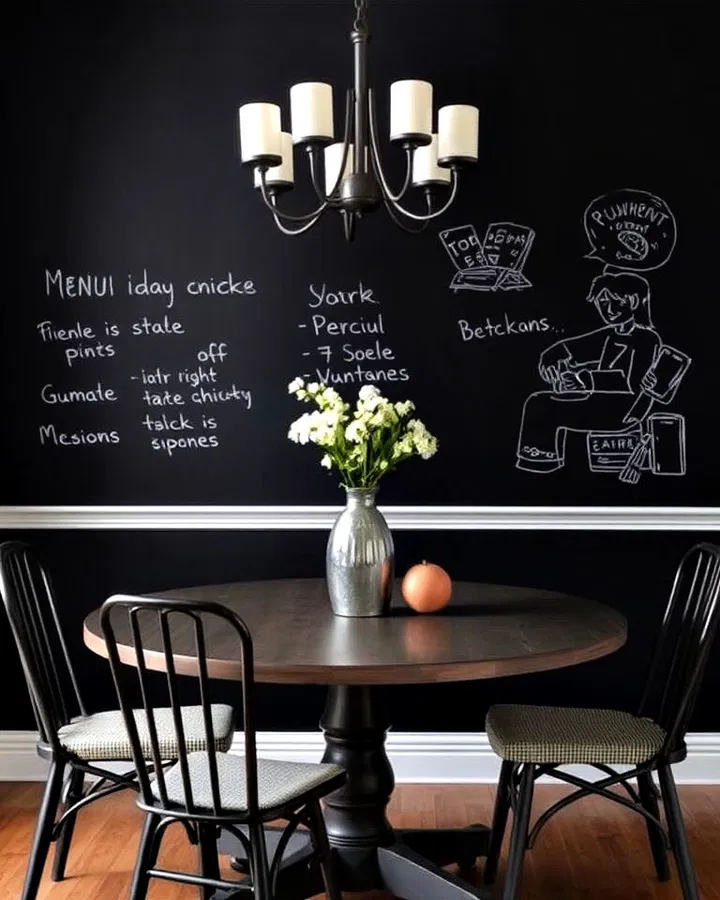
    15. Turn the Wall into a Functional Chalkboard

    For families or casual dining spaces, a chalkboard black accent wall offers both style and practicality. Use it to write menus, inspirational quotes, seasonal artwork, or family messages. This playful feature keeps the dining room interactive while maintaining the dramatic appeal of a black wall.

    Conclusion

    A black accent wall can completely redefine the atmosphere of a dining room, transforming it from ordinary to unforgettable. Whether you prefer the warmth of wood, the luxury of marble, the elegance of gold accents, or the freshness of indoor plants, black serves as a versatile foundation for countless design styles. The key to success lies in balancing the richness of the dark wall with texture, lighting, and complementary materials.

    By incorporating one or more of these black accent wall dining room ideas, you can create a space that feels dramatic, sophisticated, and uniquely personal. Rather than making a room feel smaller or darker, a thoughtfully designed black accent wall adds depth, character, and timeless elegance that will remain stylish for years to come.

  • 15 Dark Academia Dining Room Ideas for a Timeless and Sophisticated Space

    Dark Academia is more than a design trend—it’s a celebration of knowledge, history, and old-world elegance. Inspired by grand libraries, historic universities, and classic literature, this aesthetic transforms ordinary dining rooms into captivating spaces filled with character and intrigue. Rich woods, antique furnishings, dramatic lighting, and carefully curated vintage details work together to create an atmosphere that feels both intellectual and inviting.

    Whether you’re hosting candlelit dinner parties or enjoying quiet family meals, a Dark Academia dining room encourages meaningful conversation and timeless style. From statement furniture to scholarly décor, these ideas will help you create a dining space worthy of a classic novel.

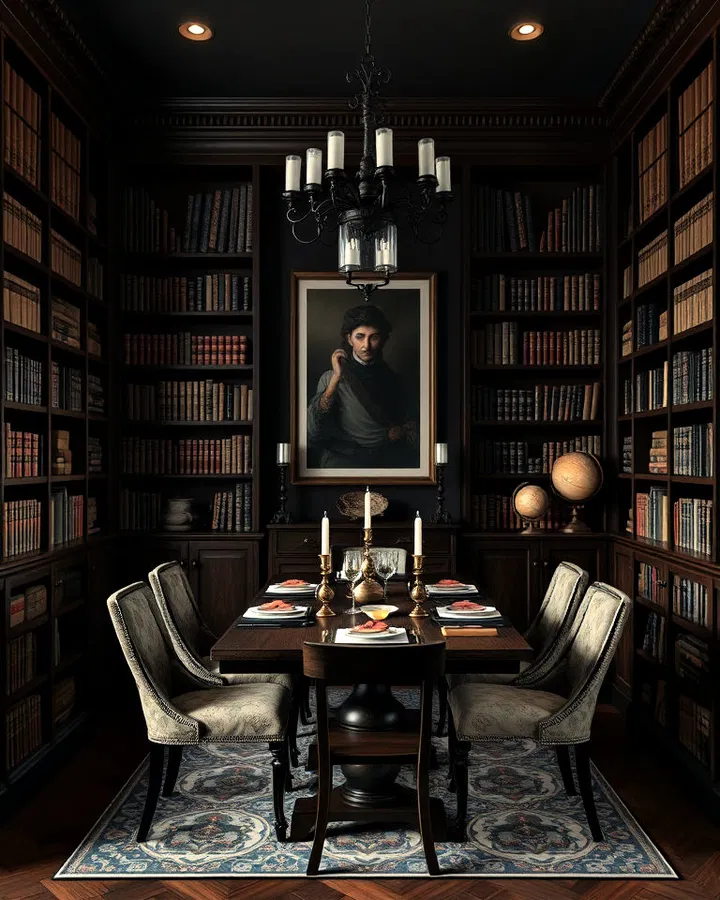
    1. Create a Scholarly Library-Inspired Dining Room

    Nothing embodies Dark Academia quite like a room surrounded by books. Installing built-in bookshelves around your dining area instantly creates an atmosphere reminiscent of an old university study or private library. Fill the shelves with leather-bound classics, antique books, vintage globes, and decorative artifacts collected over time.

    Dark-stained wood shelving enhances the dramatic mood, while carefully arranged objects add layers of visual interest. This setup transforms every meal into an experience surrounded by culture, history, and intellectual charm.

    2. Anchor the Room with a Dark Wood Dining Table

    A substantial dark wood dining table serves as the heart of any Dark Academia dining room. Look for pieces crafted from oak, walnut, or mahogany featuring carved details, distressed finishes, or traditional craftsmanship.

    The deep wood tones establish the moody foundation that defines the aesthetic. Pair the table with vintage seating and elegant accessories to create a timeless focal point that feels both refined and welcoming.

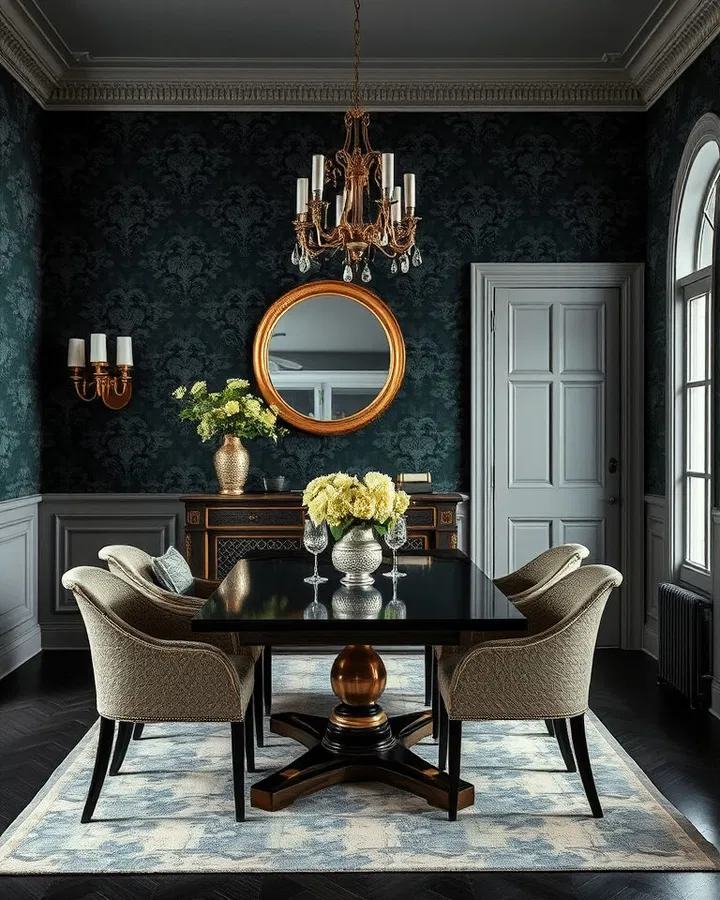
    3. Introduce Moody Wallpaper for Dramatic Depth

    Dark Academia interiors thrive on rich layers and visual texture. Wallpaper featuring damask, floral, botanical, or toile patterns adds sophistication while creating a dramatic backdrop for the room.

    Choose colors such as charcoal, deep green, navy blue, or black with subtle metallic accents. The result is a dining room that feels enveloping, luxurious, and full of character.

    4. Add an Antique Chandelier for Old-World Charm

    Lighting plays a crucial role in creating the mysterious ambiance associated with Dark Academia. An antique-inspired chandelier made from brass, wrought iron, or aged metal introduces instant grandeur.

    Opt for candle-style bulbs to mimic the warm glow of traditional candlelight. Suspended above the dining table, the fixture becomes both a practical light source and a striking architectural feature.

    5. Decorate with Leather-Bound Books

    Books aren’t just for shelves—they can also serve as beautiful decorative accents. Arrange stacks of vintage or leather-bound books on sideboards, buffets, or console tables throughout the dining room.

    Pair them with antique magnifying glasses, brass objects, and vintage clocks to create curated vignettes that reinforce the scholarly spirit of the space.

    6. Layer the Floor with a Vintage Persian Rug

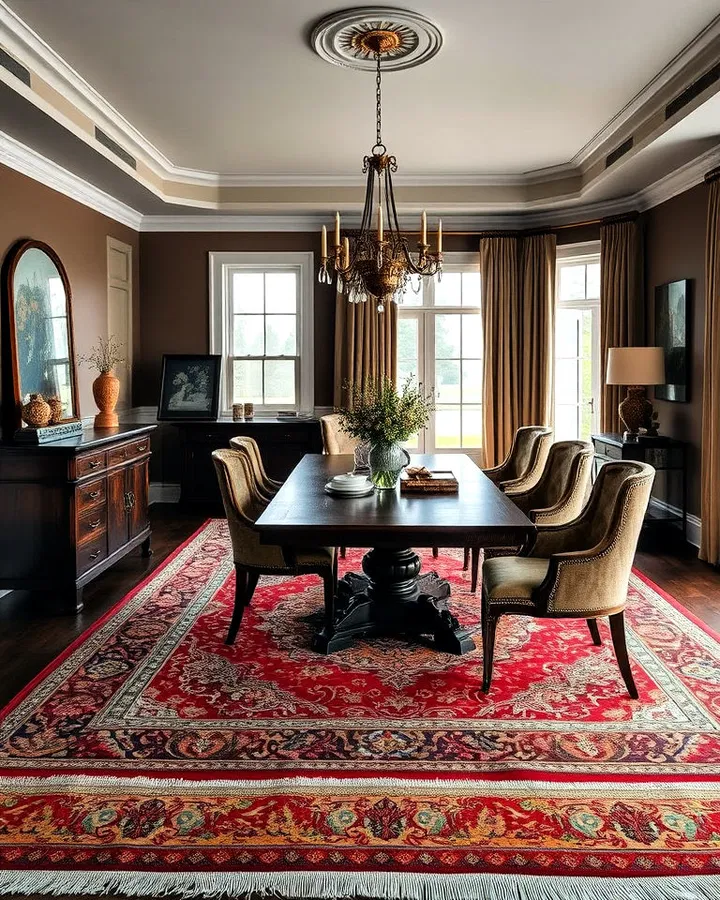
    A Persian rug instantly introduces warmth, history, and visual complexity beneath the dining table. Rich reds, golds, browns, and muted blues complement the Dark Academia palette beautifully.

    Beyond adding comfort underfoot, a vintage rug helps define the dining area and softens the room’s darker furnishings with intricate pattern and texture.

    7. Display a Collection of Ornate Tableware

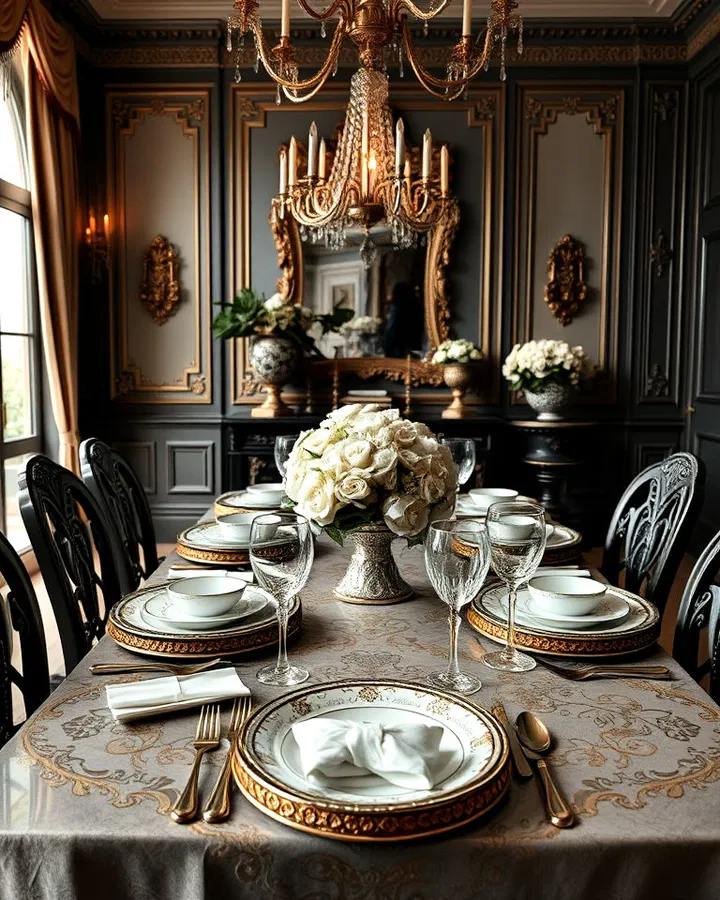
    Transform everyday dining into a special occasion by investing in elegant tableware. Plates with gold edging, crystal stemware, silver cutlery, and vintage serving pieces create a refined tablescape worthy of a historic manor.

    Even when not in use, beautifully displayed tableware contributes to the room’s luxurious atmosphere and old-world appeal.

    8. Frame the Space with Heavy Drapery

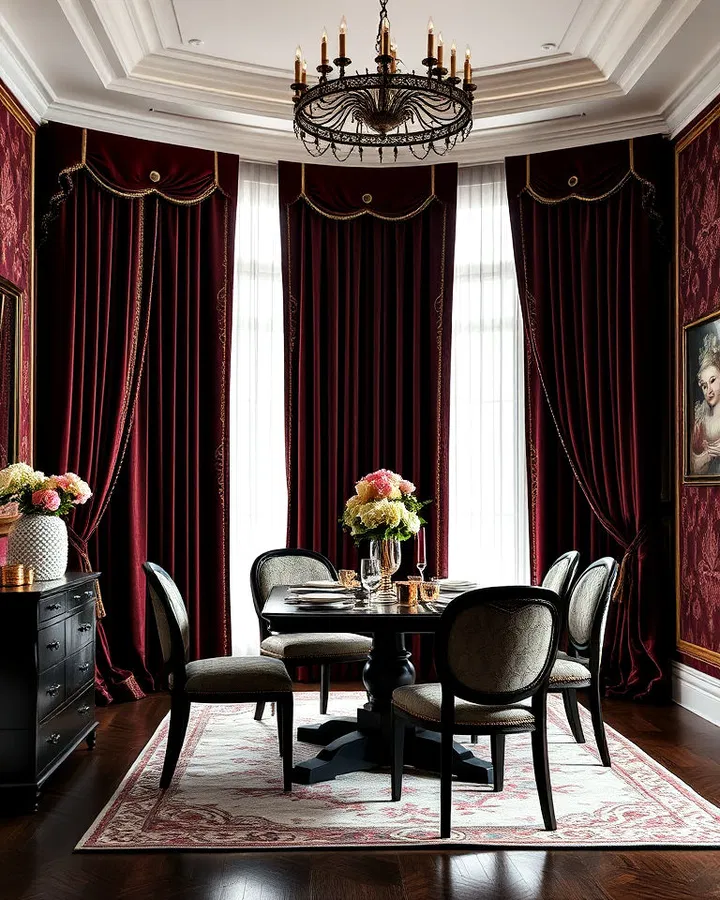
    Luxurious floor-to-ceiling curtains help create the enclosed, intimate feeling that defines Dark Academia interiors. Velvet, brocade, or richly textured fabrics work particularly well.

    Choose deep hues such as burgundy, forest green, charcoal, or navy. Intricate patterns and decorative trim can further elevate the look while adding warmth and privacy.

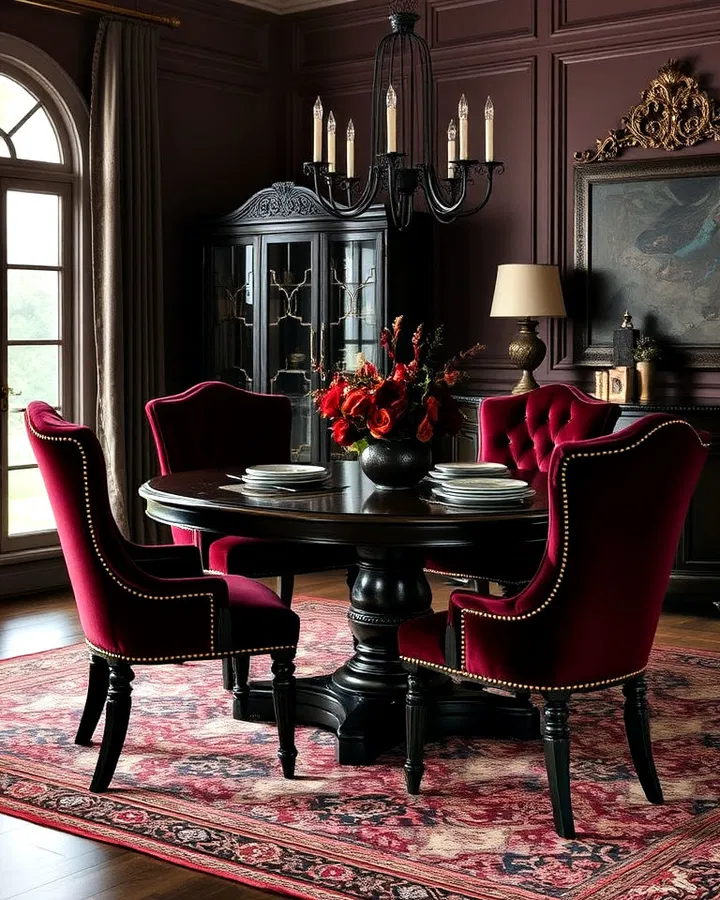
    9. Incorporate Velvet Dining Chairs

    Velvet instantly brings richness and sophistication into the dining room. Upholstered chairs in jewel tones like emerald green, deep sapphire, or wine red provide a beautiful contrast against dark wood furniture.

    The soft texture adds comfort while introducing an element of luxury that feels perfectly suited to the Dark Academia aesthetic.

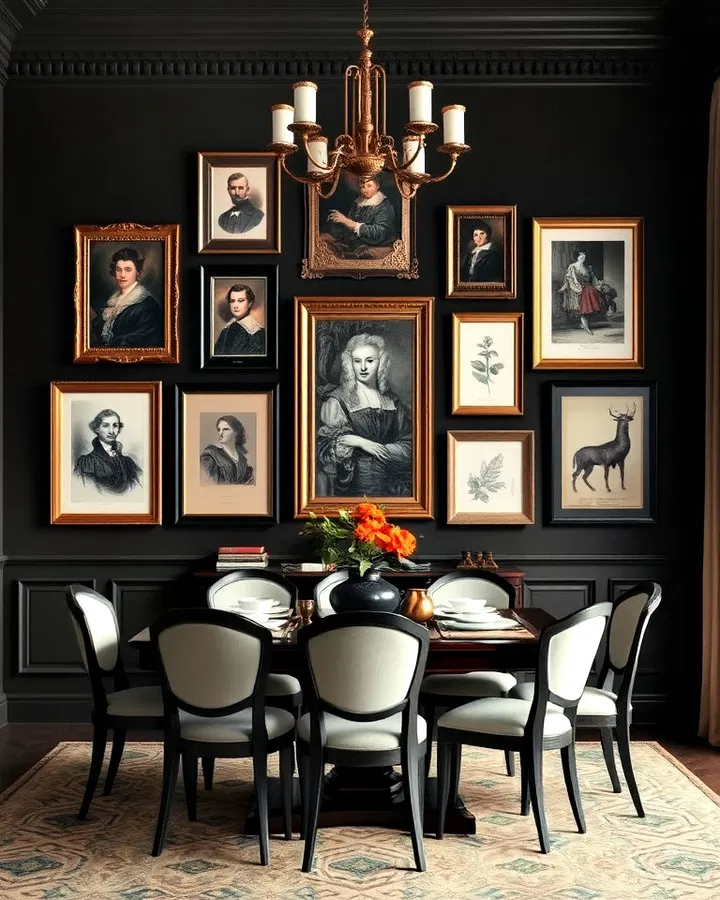
    10. Showcase a Gallery Wall of Vintage Art

    A thoughtfully curated gallery wall gives your dining room personality and depth. Mix vintage portraits, botanical illustrations, architectural sketches, and literary-inspired artwork within antique frames.

    Gold, bronze, or dark wood frames enhance the historic feel, creating a visual display that feels collected over generations rather than purchased all at once.

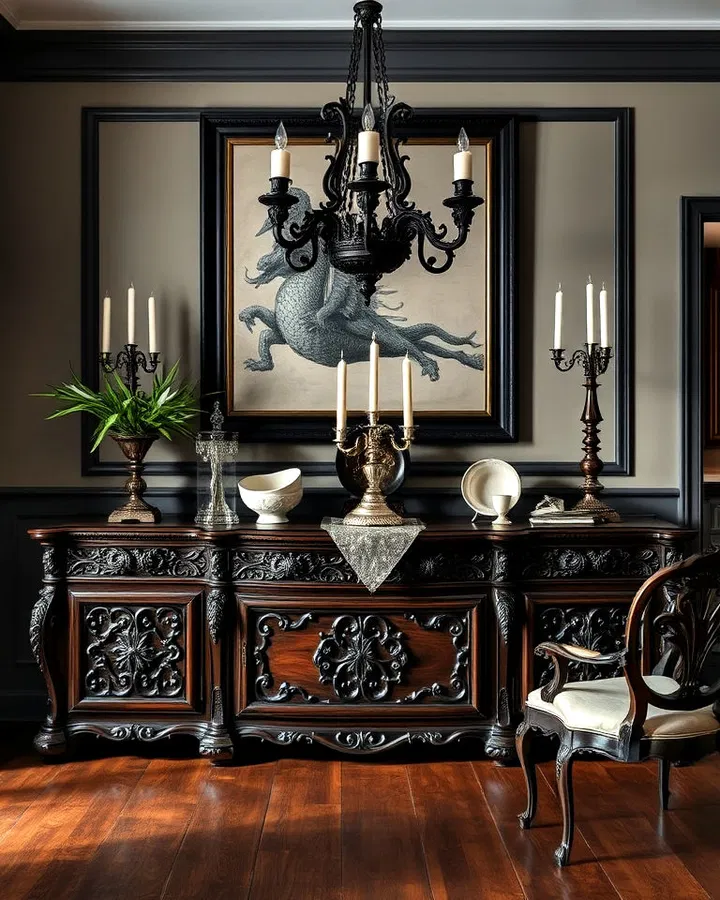
    11. Add an Ornately Carved Sideboard

    A beautifully crafted sideboard provides both storage and decorative opportunity. Look for antique or vintage-inspired pieces featuring carved detailing, rich wood finishes, and traditional craftsmanship.

    Use the surface to display silver trays, candelabras, antique decanters, and treasured collectibles that strengthen the room’s timeless character.

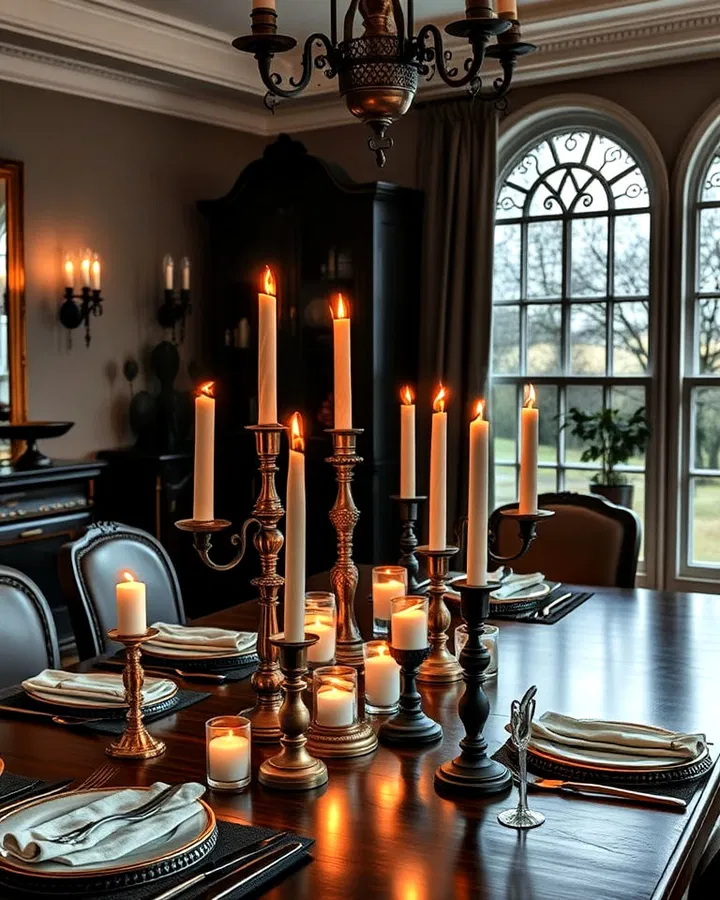
    12. Create Atmosphere with Candlesticks and Candelabras

    Few decorative elements feel more Dark Academia than candlelight. Brass, silver, or black iron candlesticks arranged along the dining table introduce warmth and romance to the space.

    Varying heights create visual interest, while the flickering glow helps establish the intimate mood associated with historic dining rooms and grand libraries.
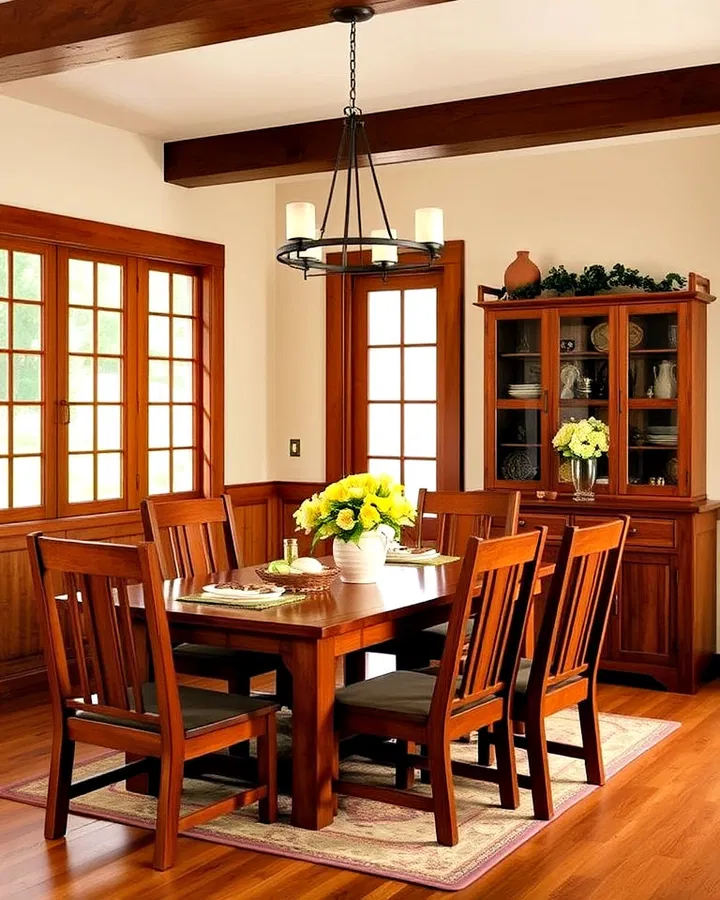
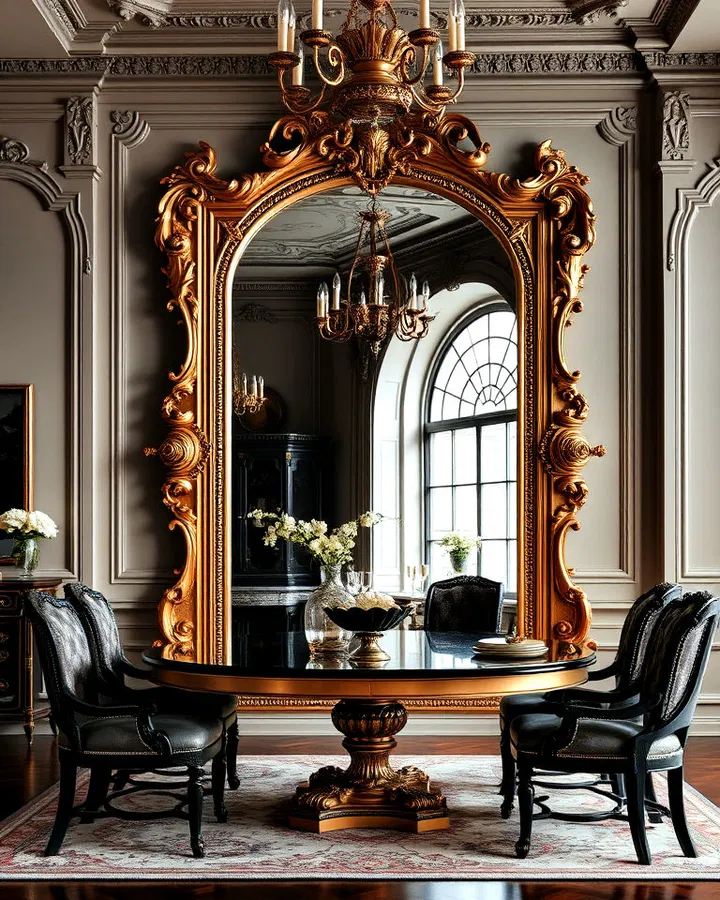
    13. Make a Statement with an Ornate Mirror

    An oversized mirror framed in gilded wood or intricate baroque detailing adds elegance and drama. Mirrors reflect both natural and artificial light, helping dark interiors feel brighter without sacrificing mood.

    Placed opposite windows or near a chandelier, a statement mirror can enhance the room’s depth while becoming a decorative focal point.

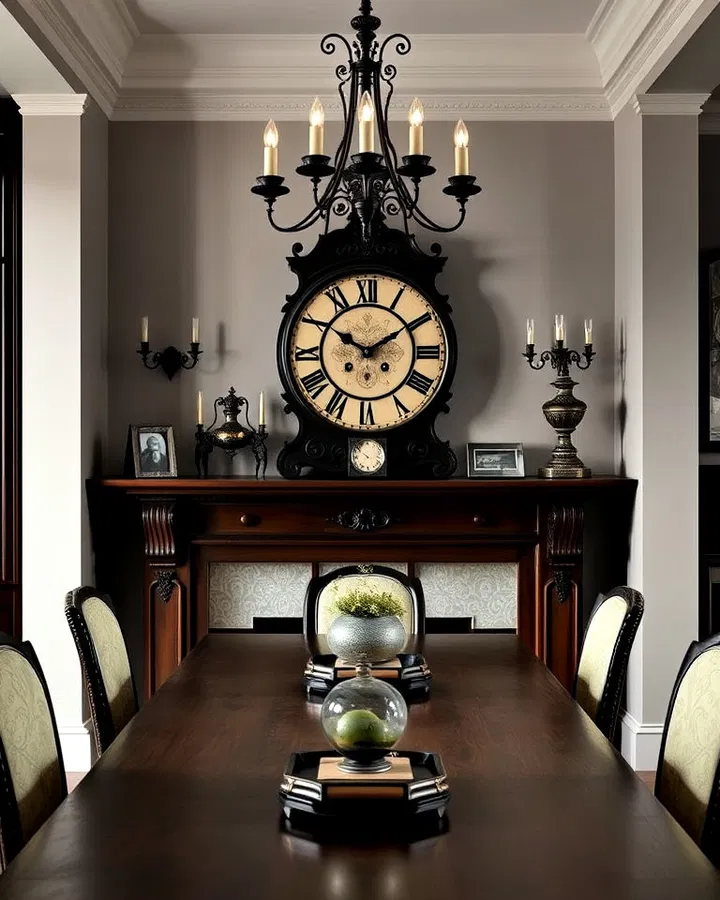
    14. Feature a Vintage Clock as a Conversation Piece

    A vintage clock introduces both function and symbolism into the dining room. Clocks with Roman numerals, brass finishes, or decorative pendulums complement the nostalgic atmosphere perfectly.

    Whether displayed on a wall, mantel, or sideboard, this timeless accessory reinforces the aesthetic’s fascination with history and the passage of time.

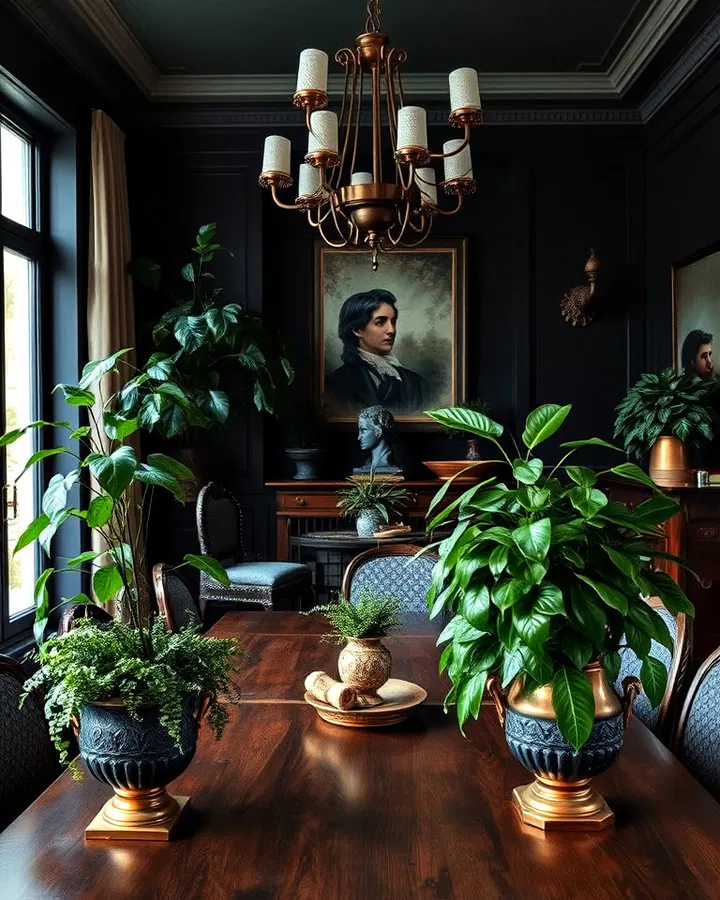
    15. Bring Life to the Room with Antique Planters

    Dark Academia interiors benefit from touches of nature that soften their dramatic palette. Lush greenery such as ivy, ferns, pothos, or monstera plants adds organic texture and visual contrast.

    Display plants in antique ceramic pots, aged brass containers, or vintage urns to maintain the room’s classic character while introducing fresh vitality.

    Conclusion

    A Dark Academia dining room blends vintage sophistication with intellectual charm, creating a space that feels both elegant and deeply personal. By layering rich materials, antique-inspired furnishings, dramatic lighting, and scholarly décor, you can transform your dining area into a setting filled with warmth, mystery, and timeless appeal.

    Whether you start with a grand library wall, a velvet seating arrangement, or simply a collection of antique accessories, every carefully chosen detail contributes to the story your room tells. The beauty of Dark Academia lies in its ability to celebrate history, creativity, and thoughtful living—making every meal feel like a scene from a beloved classic novel.

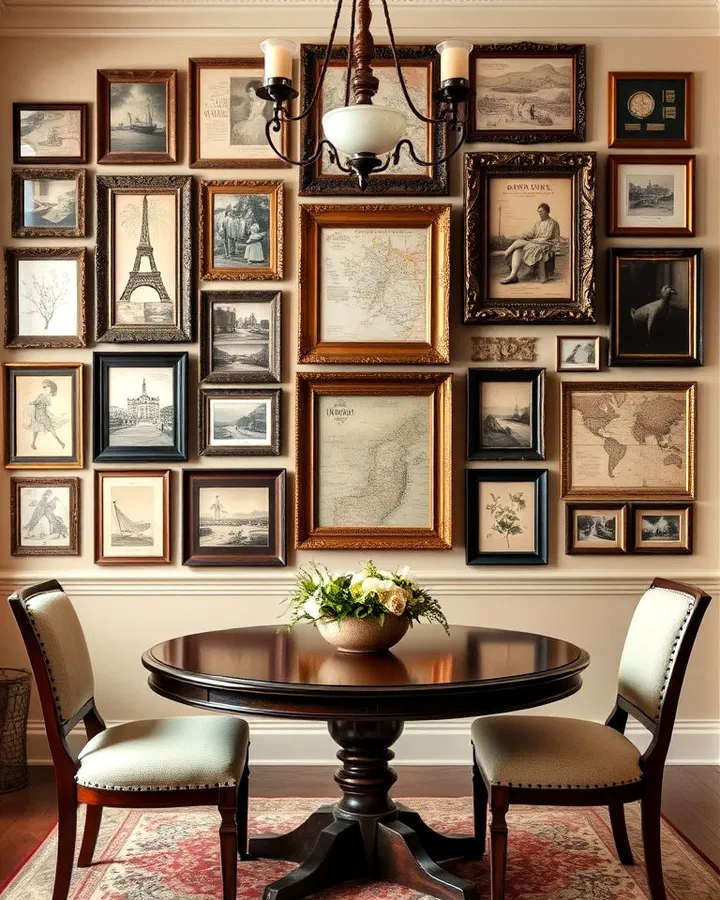
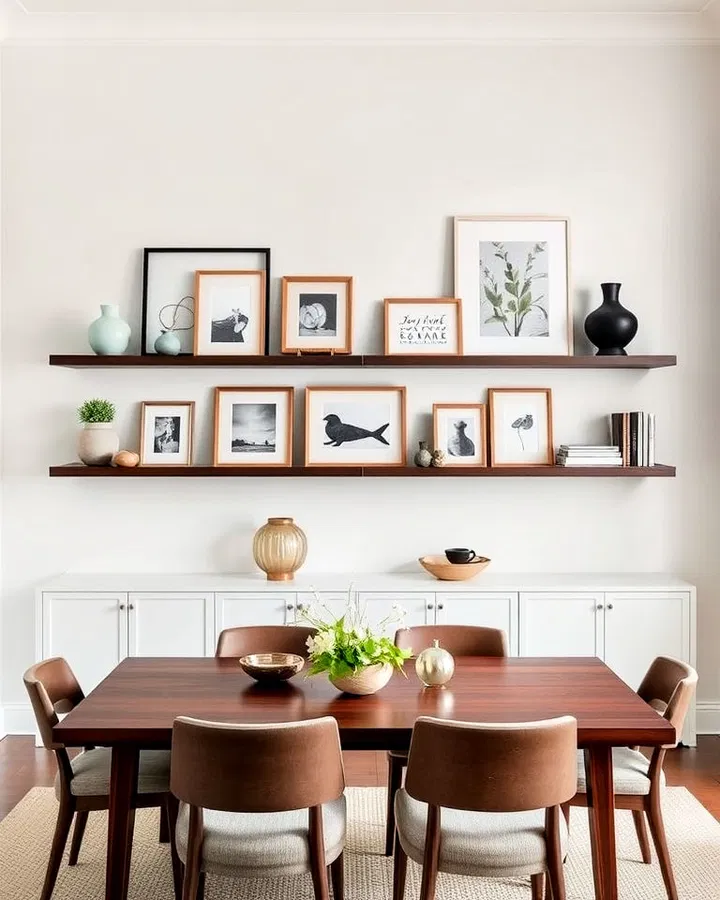
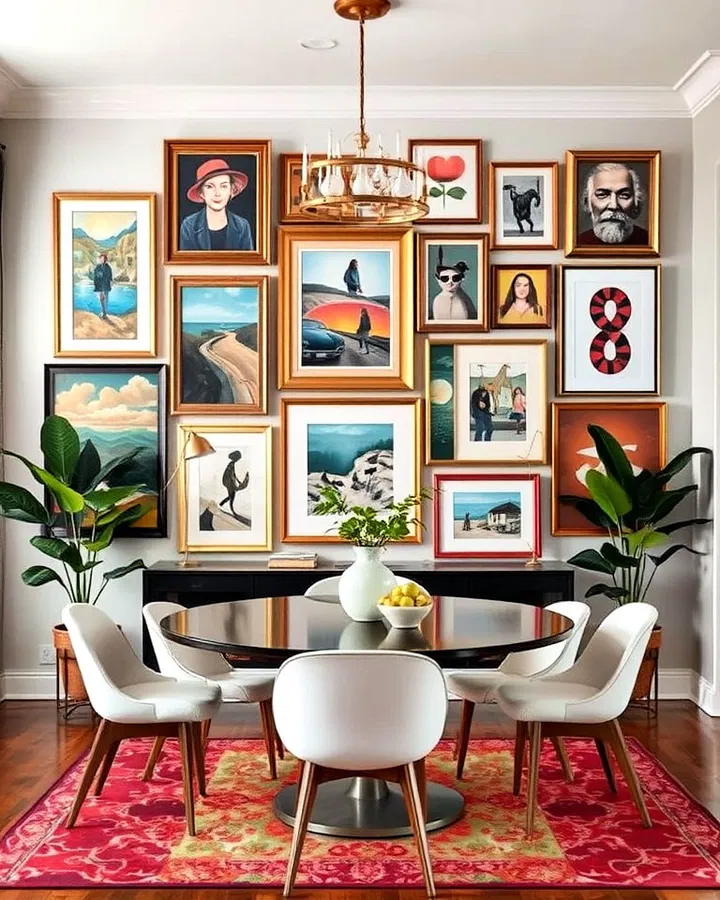
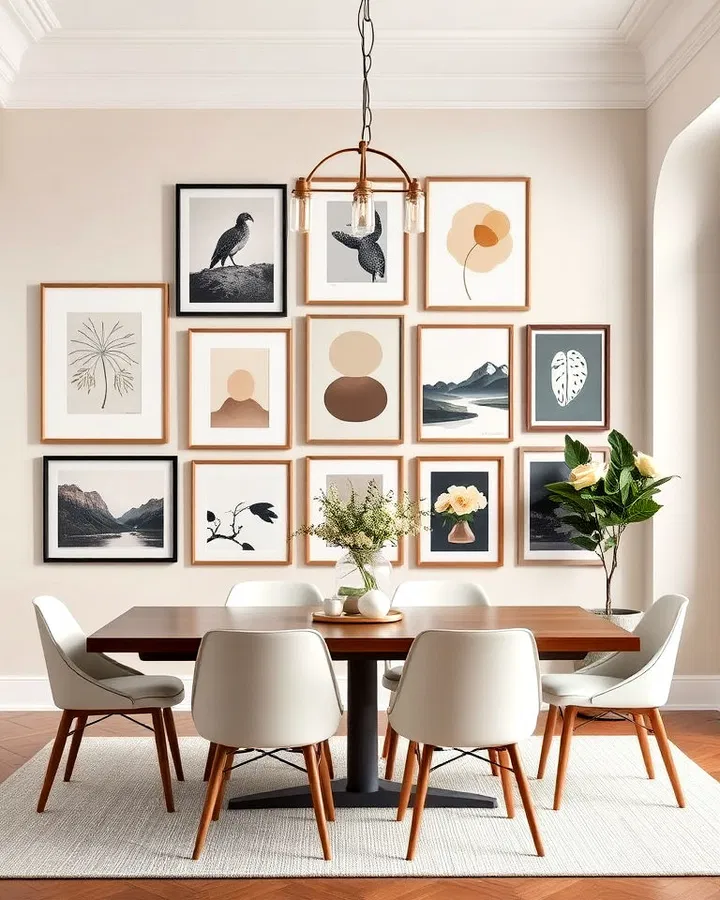
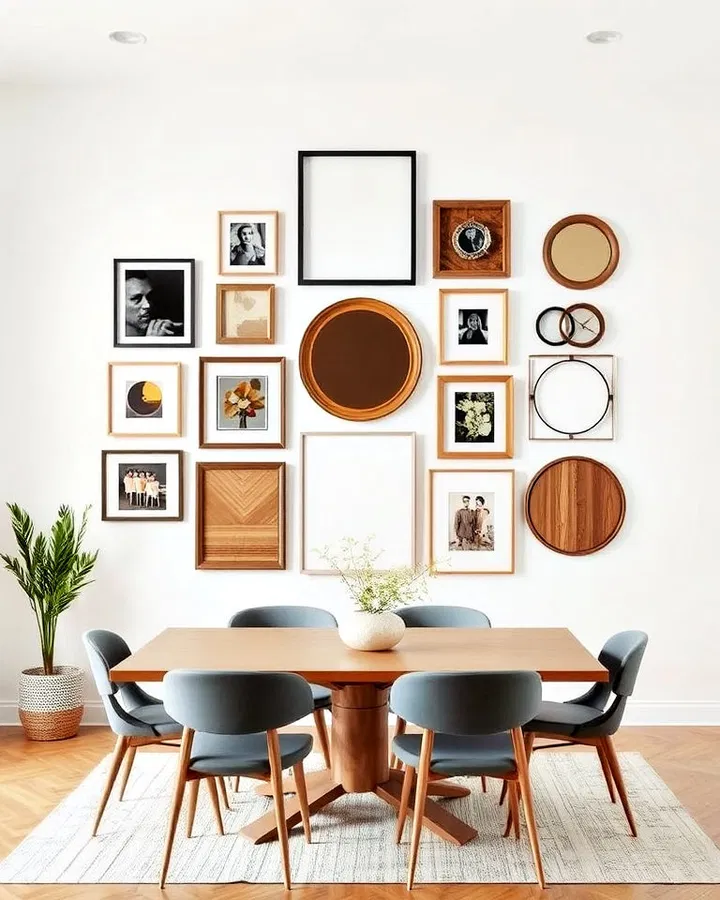
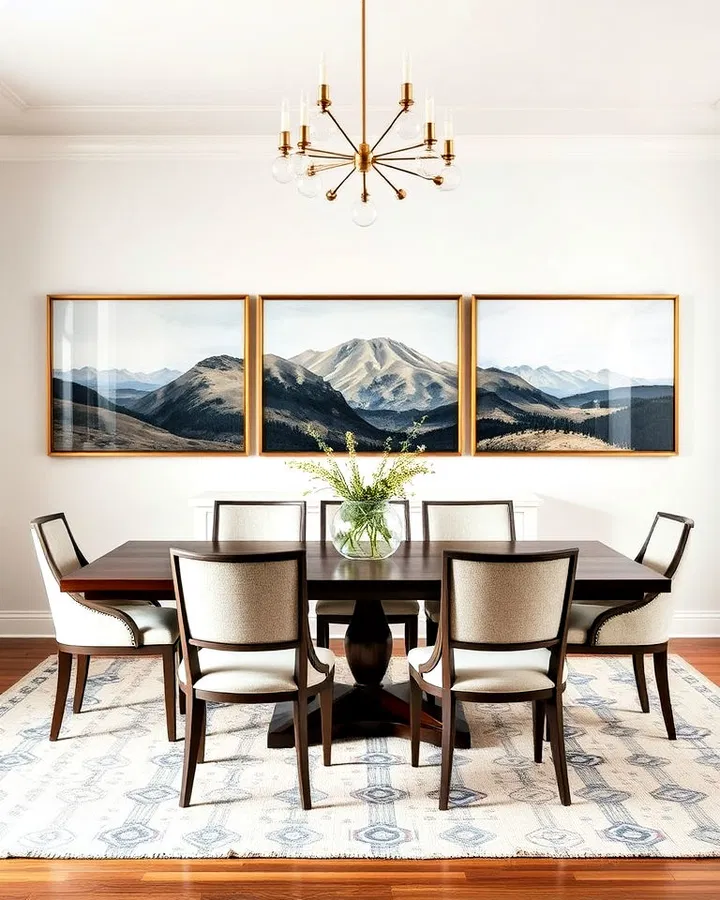
  • 15 Dining Room Gallery Wall Ideas to Instantly Elevate Your Space

    A dining room should feel just as thoughtfully designed as any other area of your home. While furniture, lighting, and color palettes help establish the mood, the walls often provide the greatest opportunity to showcase personality. A well-planned gallery wall can transform a plain dining area into a sophisticated focal point, adding warmth, character, and visual interest.

    Whether you prefer modern minimalism, vintage charm, or bold artistic displays, the right gallery wall can enhance your dining experience while reflecting your unique style. From family photographs and oversized artwork to mirrors and textured décor, these dining room gallery wall ideas offer inspiration for every aesthetic.

    1. Create Drama with an Oversized Statement Artwork

    Nothing commands attention quite like a large-scale piece of art. A single oversized canvas above the dining table can instantly anchor the room and create a striking focal point. Abstract paintings, colorful landscapes, or dramatic black-and-white photography all work beautifully in this setup.

    To enhance the effect, pair the main artwork with a few smaller complementary pieces nearby. This arrangement works especially well in dining rooms with high ceilings or expansive walls where smaller decorations might feel lost.

    2. Design a Personal Family Photo Gallery

    Turn your dining room into a meaningful gathering place by showcasing treasured family memories. A collection of framed photographs creates a welcoming atmosphere and often becomes a natural conversation starter during meals.
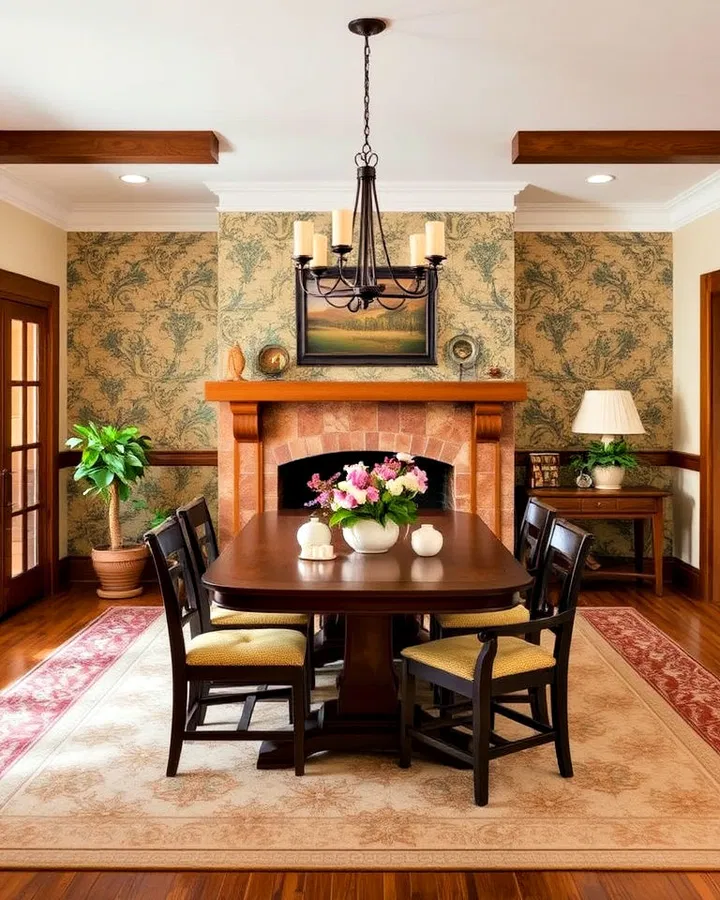
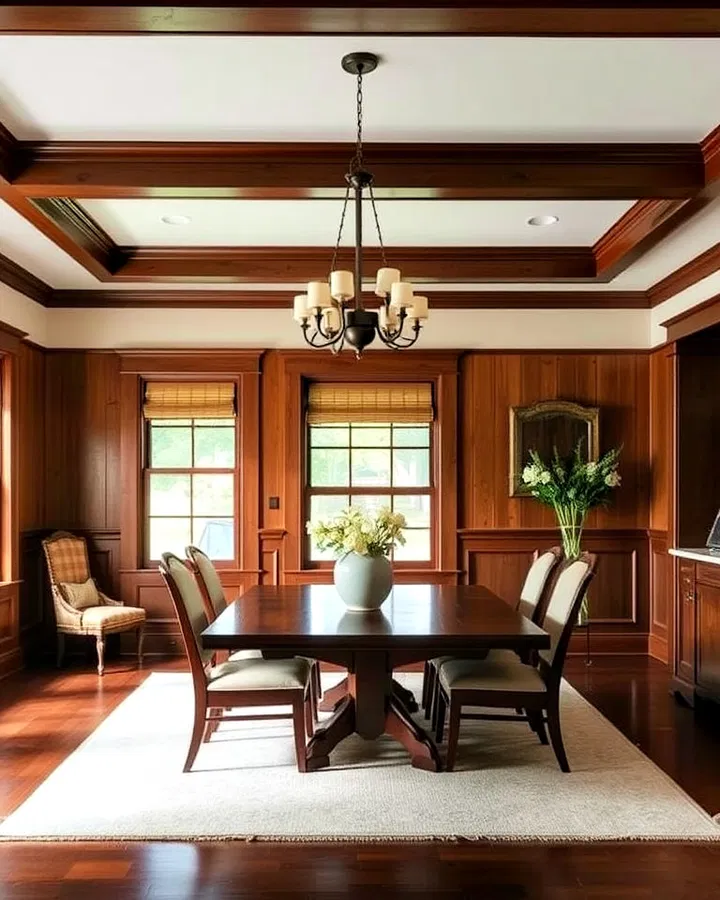
    Choose matching frames for a cohesive appearance or mix frame styles for a more casual look. Black-and-white photos add timeless elegance, while colorful images bring energy and warmth to the space.
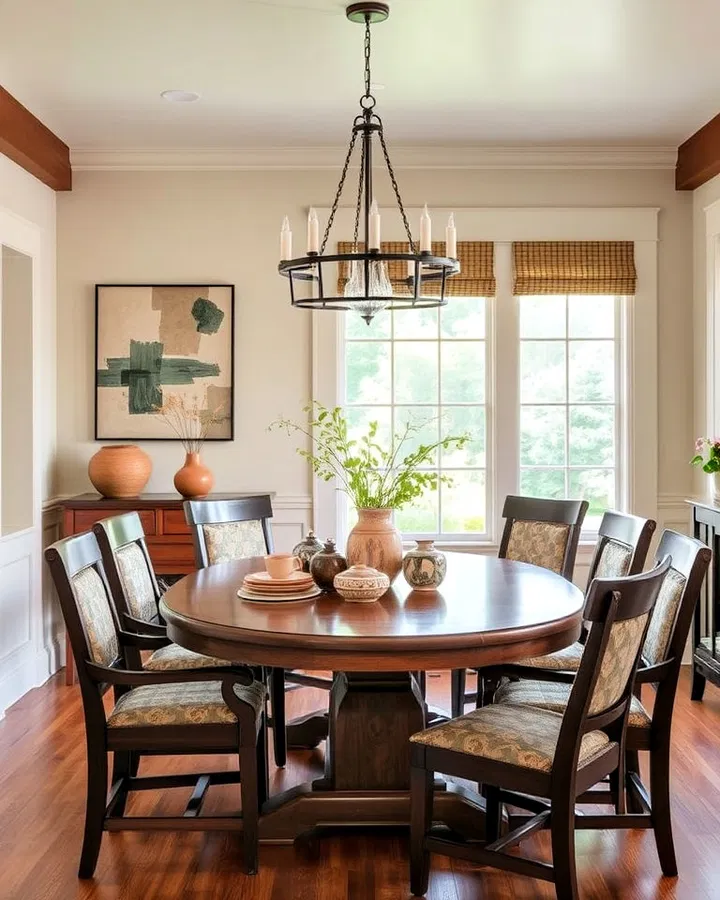
    3. Mix Mirrors and Artwork for Added Dimension

    Combining mirrors with framed art creates a gallery wall that feels both decorative and functional. Mirrors reflect natural light throughout the room, helping smaller dining spaces appear larger and brighter.

    Experiment with circular, oval, and rectangular mirror shapes alongside your favorite prints and paintings. Metallic frames can add a touch of luxury while maintaining balance throughout the arrangement.

    4. Incorporate Nature-Inspired Artwork

    Bring the beauty of the outdoors inside with a gallery wall inspired by nature. Botanical illustrations, scenic landscapes, pressed flowers, and wildlife photography all contribute to a peaceful and refreshing atmosphere.

    Natural wood frames and earthy color palettes complement this theme perfectly. This style is especially suited to farmhouse, rustic, cottage, and organic-modern dining rooms.

    5. Build a Sophisticated Black-and-White Collection

    A monochromatic gallery wall never goes out of style. Black-and-white artwork offers a clean, refined appearance that works beautifully in contemporary, minimalist, and transitional interiors.

    Mix photography, sketches, and typography prints while keeping the color palette consistent. The simplicity of black and white allows textures, shapes, and composition to become the stars of the display.

    6. Layer Vintage and Antique Treasures

    For a dining room filled with character, curate a collection of vintage finds and antique pieces. Old maps, historical prints, heirloom photographs, postcards, and framed documents can tell a fascinating story while adding depth and charm.

    Mix ornate antique frames with simpler modern designs to create contrast. The result feels collected over time rather than purchased all at once, giving the room a rich and authentic personality.

    7. Style Floating Shelves as a Flexible Gallery Wall

    Gallery walls don’t always have to involve dozens of nails and permanent arrangements. Floating shelves provide a versatile alternative that allows you to easily rotate artwork and decorative accessories.
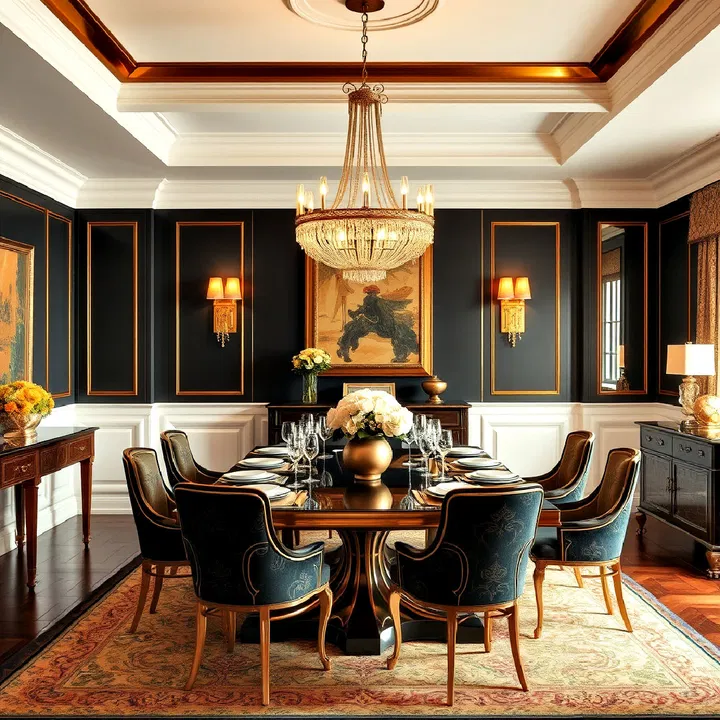
    Layer framed prints with small sculptures, candles, books, and greenery. The flexibility of shelves makes it simple to update your display whenever your style evolves or the seasons change.

    8. Experiment with an Eclectic Art Collection

    An eclectic gallery wall celebrates creativity and individuality. Mix paintings, photography, illustrations, abstract art, and even unexpected objects to create a unique visual story.

    Vary frame styles, sizes, and finishes to add personality while maintaining some common element—such as color or theme—to keep the arrangement feeling intentional rather than chaotic.

    9. Use a Monochromatic Color Scheme

    Instead of focusing on black and white, consider building your gallery wall around a single color family. Shades of blue, green, beige, or terracotta can create a highly cohesive and designer-inspired look.

    Matching artwork tones with your dining room’s overall palette helps the gallery wall feel integrated into the space while still making a statement.

    10. Add Texture with Decorative Wall Pieces

    Gallery walls can go beyond framed art. Incorporating textured elements introduces dimension and warmth that flat artwork alone cannot achieve.

    Consider woven baskets, macramé hangings, carved wooden panels, ceramic wall art, or textile pieces. These tactile accents are particularly effective in bohemian, coastal, and rustic dining rooms.
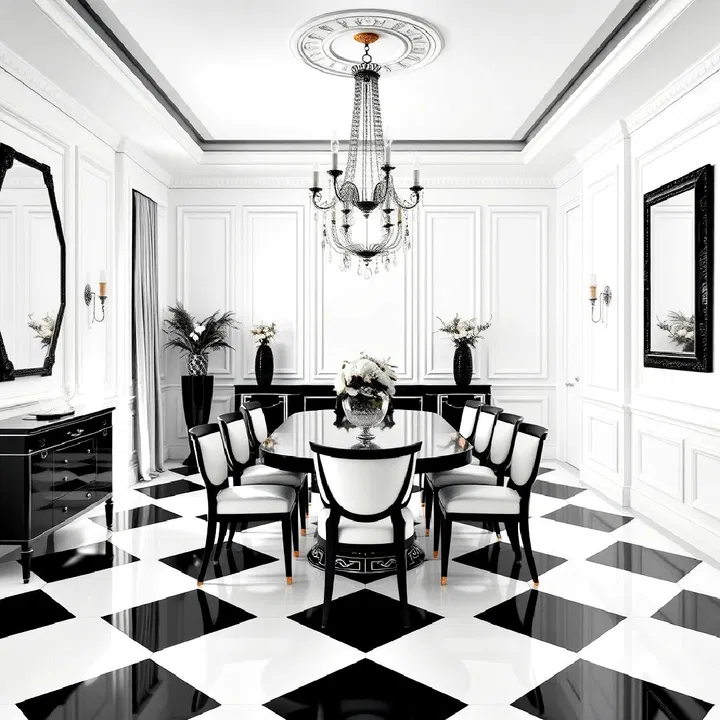
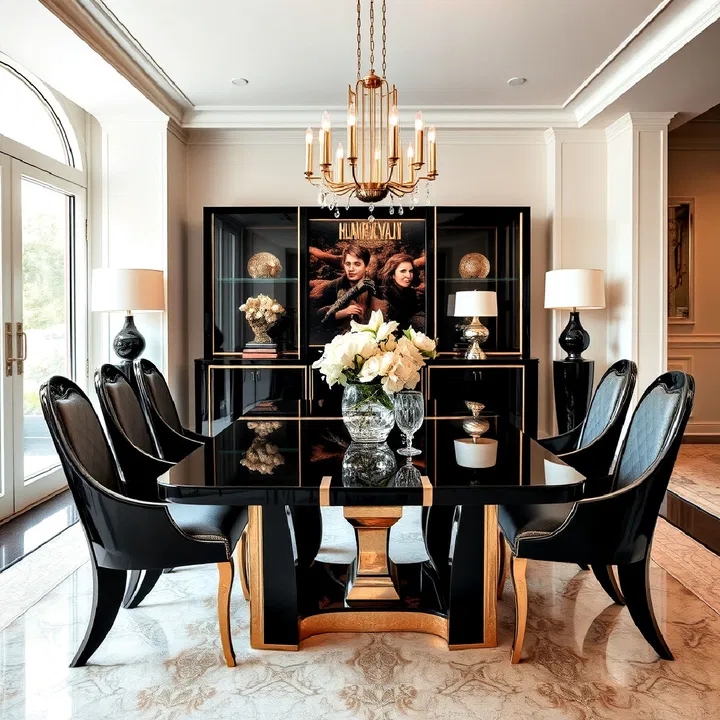
    11. Arrange Frames in Perfect Symmetry
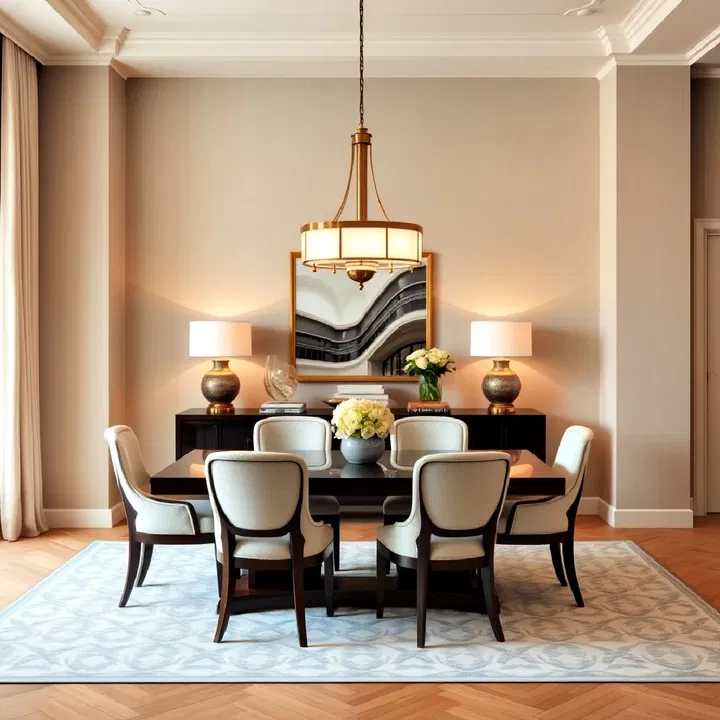
    A symmetrical gallery wall offers a timeless sense of order and sophistication. Matching frame sizes arranged in a grid pattern create a clean, balanced appearance that feels polished and intentional.

    This approach works exceptionally well in formal dining rooms where structure and elegance are priorities. Keeping artwork styles and colors consistent further enhances the refined look.

    12. Rotate Seasonal Artwork Throughout the Year

    Keep your dining room feeling fresh by changing artwork with the seasons. Spring florals, summer landscapes, autumn-inspired prints, and winter scenes can transform the mood of the space throughout the year.

    Using ledges, shelves, or easy-to-hang systems makes swapping pieces simple and enjoyable. This approach is perfect for homeowners who love decorating and refreshing their interiors regularly.

    13. Showcase Inspirational Typography

    Words can be just as impactful as images. A gallery wall centered around typography introduces personality, humor, or inspiration into the dining room.

    Choose meaningful quotes, family mottos, or food-themed sayings that complement the room’s atmosphere. Mixing font styles and frame sizes adds visual variety while maintaining a cohesive theme.

    14. Combine Different Shapes and Frame Styles

    A gallery wall featuring varied frame shapes creates a dynamic and contemporary appearance. Blend circular mirrors, rectangular artwork, square photographs, and uniquely shaped pieces for an artistic look.

    Mixing materials such as wood, brass, black metal, and acrylic frames adds even more visual interest while helping the display feel curated and custom-designed.

    15. Make an Impact with a Large Triptych Display

    A triptych consists of three related artworks displayed side by side, creating a dramatic and cohesive centerpiece. This format works particularly well with panoramic landscapes, abstract designs, or photographic series.

    The consistent spacing between each panel creates a sense of balance while allowing the artwork to stretch across a substantial portion of the dining room wall. It’s an excellent choice for modern and transitional interiors seeking gallery-worthy sophistication.

    Conclusion

    A thoughtfully designed gallery wall can completely transform your dining room, turning empty walls into captivating design features. Whether you gravitate toward structured symmetry, meaningful family photographs, bold statement art, or textured decorative elements, there is a gallery wall style to suit every home and personality.

    The most successful gallery walls balance creativity with intention, creating a display that complements the room while reflecting your unique taste. Start with a theme, experiment with layouts, and don’t be afraid to mix art, photographs, mirrors, and decorative objects. With the right combination, your dining room gallery wall can become the centerpiece that brings the entire space together.

  • 20 Art Deco Dining Room Ideas for a Glamorous and Sophisticated Home

    Art Deco remains one of the most iconic interior design styles thanks to its combination of luxury, bold geometry, and timeless elegance. Inspired by the glamour of the 1920s and 1930s, Art Deco dining rooms celebrate rich materials, striking patterns, metallic finishes, and carefully balanced layouts. Whether you’re planning a complete dining room makeover or simply adding a few Deco-inspired touches, these ideas can help create a space that feels refined, dramatic, and inviting.

    From jewel-toned seating to gleaming brass accents and geometric flooring, these Art Deco dining room ideas will help you capture the sophistication of this enduring design movement.

    1. Make a Statement with Dramatic Art Deco Lighting

    Lighting is often the centerpiece of an Art Deco dining room. A stunning chandelier featuring tiered designs, frosted globes, geometric shapes, or metallic detailing instantly establishes the room’s luxurious character. Beyond providing illumination, these fixtures act as sculptural artwork that draws attention upward and enhances the overall elegance of the space.

    2. Embrace Rich Velvet Dining Chairs

    Nothing says luxury quite like velvet. Upholstered dining chairs in emerald green, sapphire blue, burgundy, or deep plum introduce softness while maintaining a sophisticated atmosphere. The plush texture contrasts beautifully with glass, marble, and metal surfaces, creating a layered and inviting dining experience.

    3. Incorporate Striking Geometric Patterns

    Geometric motifs are one of the defining features of Art Deco interiors. Zigzags, fan patterns, chevrons, sunbursts, and repeating arches add movement and visual interest throughout the room. Introduce these patterns through wallpaper, area rugs, curtains, or upholstery to instantly establish an authentic Deco aesthetic.

    4. Add Glamour with Mirrored Furniture

    Mirrored surfaces reflect light beautifully and help create the glamorous ambiance associated with Art Deco design. A mirrored buffet, cabinet, or accent table can make the room feel larger while adding sparkle and sophistication. These reflective pieces pair especially well with metallic finishes and bold geometric details.

    5. Choose a Luxurious Marble Dining Table

    Marble has long been associated with elegance and refinement. A dining table featuring a marble top instantly elevates the room while providing a durable and timeless focal point. Whether you prefer dramatic black marble or classic white stone with bold veining, marble perfectly complements the luxurious nature of Art Deco interiors.

    6. Introduce Warm Brass and Gold Accents

    Gold and brass details are essential for achieving a classic Art Deco look. Incorporate these finishes through lighting fixtures, chair frames, cabinet hardware, mirrors, and decorative accessories. The warm metallic glow adds richness and creates a beautiful contrast against darker furnishings and jewel-toned décor.

    7. Create a Bold Black-and-White Foundation

    A black-and-white palette delivers instant Art Deco sophistication. High-contrast color combinations feel elegant, timeless, and visually dramatic. Consider black lacquer furniture against crisp white walls or install a checkerboard floor to recreate the glamorous spirit of vintage Art Deco interiors.

    8. Showcase Sleek Lacquered Furniture

    Glossy lacquered furniture embodies the polished luxury that defines Art Deco style. Dining tables, sideboards, or cabinets finished in black, white, or deep jewel tones create reflective surfaces that enhance light and visual drama. Pair them with metallic accents for an especially glamorous effect.

    9. Design Around Perfect Symmetry

    Art Deco spaces often feel organized and refined because they emphasize balance and symmetry. Position matching lamps, artwork, mirrors, or decorative objects on either side of a buffet or console. This structured approach creates harmony and reinforces the elegance associated with the style.

    10. Experiment with Bold Jewel-Tone Colors

    Deep, saturated colors help create the rich atmosphere Art Deco is known for. Emerald green, navy blue, ruby red, and sapphire tones add depth and sophistication to walls, upholstery, and decorative accents. Combined with metallic finishes, these colors create a luxurious and memorable dining space.

    11. Install Chevron Flooring for Visual Movement

    Chevron floors bring energy and architectural interest to a dining room. Whether crafted from hardwood or patterned tile, the directional design naturally draws the eye through the space. This classic Art Deco pattern adds sophistication while reinforcing the geometric themes that define the style.

    12. Incorporate Chrome for a Sleek Modern Edge

    While gold and brass add warmth, chrome introduces a cooler and more modern Art Deco interpretation. Chrome table legs, chair frames, mirrors, or lighting fixtures contribute shine and elegance while maintaining the streamlined aesthetic that became popular during the Deco era.

    13. Invest in a Sophisticated Sideboard or Buffet

    A sleek sideboard provides both storage and style. Look for designs featuring lacquered finishes, geometric detailing, mirrored panels, or metallic hardware. These pieces not only help organize dining essentials but also serve as stunning visual anchors within the room.

    14. Decorate with Sculptural Accessories

    Art Deco celebrates craftsmanship and artistic expression. Sculptural vases, abstract figurines, geometric candleholders, and decorative objects add personality while reinforcing the room’s sophisticated aesthetic. Carefully chosen accessories can elevate the space without creating clutter.

    15. Use Glass and Crystal to Enhance Luxury

    Glass and crystal elements help create the sparkle and refinement associated with Art Deco interiors. Crystal chandeliers, decorative bowls, glass tabletops, and elegant stemware introduce reflective surfaces that catch the light beautifully and contribute to the room’s glamorous atmosphere.

    16. Select Streamlined Furniture Silhouettes

    Art Deco furniture often combines smooth curves with clean, streamlined forms. Dining chairs featuring rounded backs or tables with softened edges help balance geometric patterns while introducing a sense of movement and sophistication. These silhouettes keep the room feeling elegant rather than overly rigid.

    17. Feature Exotic Wood Finishes

    Premium wood veneers such as walnut, ebony, and macassar add richness and depth to Art Deco interiors. Their distinctive grain patterns bring natural beauty into the room while highlighting the exceptional craftsmanship that was highly valued during the Art Deco period.

    18. Display Large-Scale Statement Artwork

    A dramatic piece of artwork can become the focal point of your dining room. Look for pieces featuring geometric compositions, abstract forms, metallic details, or stylized figures inspired by the Art Deco era. Large-scale art helps reinforce the room’s personality and visual impact.

    19. Layer Multiple Light Sources

    In addition to a statement chandelier, consider incorporating wall sconces, buffet lamps, or accent lighting. Layered illumination creates a warm and inviting atmosphere while highlighting architectural details, furniture finishes, and decorative accents throughout the room.

    20. Elevate Dining with Art Deco-Inspired Table Settings

    Complete the look with thoughtfully styled table settings. Geometric dinnerware, crystal glassware, metallic flatware, and luxurious linens create a dining experience that feels elegant and memorable. Decorative chargers and bold napkin treatments further enhance the sense of occasion and sophistication.

    Conclusion

    Art Deco dining rooms are all about celebrating glamour, craftsmanship, and timeless elegance. By combining luxurious materials such as marble, velvet, crystal, and exotic woods with bold geometric patterns and metallic accents, you can create a dining space that feels both sophisticated and welcoming. Whether you embrace a dramatic black-and-white palette, invest in a statement chandelier, or introduce subtle Deco-inspired accessories, these design ideas offer endless opportunities to transform your dining room into a stunning showpiece.

    The beauty of Art Deco lies in its balance of luxury and functionality. With the right combination of textures, finishes, and architectural details, your dining room can capture the enduring charm of one of history’s most beloved design styles.

  • Top Mudroom Shoe Storage Solutions to Keep Your Entryway Organized and Stylish

    Step into a space where the everyday mess of shoes and gear turns into a neatly curated retreat! Your mudroom doesn’t have to be just a catch-all for muddy boots and scattered sneakers—it can be a stylish, organized sanctuary that welcomes you home. Imagine walking in and instantly knowing exactly where every pair belongs, with no more frantic searches or accidental trips over forgotten footwear.

    In this guide, we’re exploring smart and chic shoe storage ideas that marry practicality with aesthetic appeal. Whether you’re managing a household full of active kids or just want to keep your own collection tidy, these clever solutions will inspire you to transform your mudroom into a showcase of order and design. Get ready to embrace organization in a way that’s as beautiful as it is functional!

    What You Might Need

    • Storage benches
    • Shoe racks
    • Baskets or bins
    • Wall hooks or pegboards
    • Labels for organization
    • Paint or wood stain for DIY upgrades
    • Measuring tape and tools for installation

    1. Organized Mudroom Magic with Woven Basket Storage

    Organized Mudroom Magic with Woven Basket Storage

    Transform your mudroom into a clutter-free haven with a stylish woven basket storage system. By assigning each family member a dedicated basket, you create a simple yet effective way to keep shoes, gloves, and hats neatly tucked away. The natural texture of woven baskets adds warmth and charm, blending effortlessly with a variety of interior styles. Labeling each basket clearly ensures that everyone knows exactly where their belongings belong, making clean-up a breeze for all ages. This approach not only keeps your space tidy but also encourages kids to take responsibility for their own gear, promoting a sense of order and independence.

    Steps to Create It:

    1. Select sturdy woven baskets that fit your mudroom shelves or bench storage area.
    2. Attach clear, personalized labels to each basket to designate ownership or item type.
    3. Place the baskets in an accessible spot where family members can easily drop their shoes and accessories.
    4. Establish a routine encouraging everyone to place their items in their labeled basket as they enter the home.

    💡 Pro Tip: Choose baskets with handles to make it easier to grab and carry items when heading out.


    2. Creative Mudroom Shoe Storage: Build a Cozy Bench with Shoe Shelves

    Creative Mudroom Shoe Storage: Build a Cozy Bench with Shoe Shelves

    Transform your mudroom into a welcoming and organized entryway with a custom-built shoe bench that combines comfort and functionality. This inviting bench offers a soft cushion for sitting while putting on or removing shoes, making your daily routine easier and more enjoyable. Below the seating area, open shelves provide accessible and tidy storage for your family’s footwear, helping to keep clutter at bay and ensuring every pair has its place.

    Crafted from warm wood tones and finished to match your decor, this shoe bench not only maximizes space but also adds a charming, rustic touch to your mudroom. Complement the design with wall-mounted hooks for jackets and bags, creating an efficient hub for your belongings that welcomes guests and family alike.

    Steps to Create It:

    1. Start by measuring the intended mudroom space to ensure your bench fits perfectly and gather all necessary woodworking materials.
    2. Construct a sturdy wooden bench frame with integrated open shelves underneath to accommodate multiple pairs of shoes.
    3. Apply paint or wood stain to enhance the bench’s durability and aesthetic appeal, then add a comfortable cushion on top for seating.
    4. Install coordinating wall hooks nearby to hang jackets, scarves, or bags, completing the functional mudroom setup.

    💡 Pro Tip: Choose moisture-resistant finishes for the bench to protect against damp shoes and ensure long-lasting durability.


    3. Sleek Floating Shelves: Stylish and Functional Shoe Storage for Your Mudroom

    Sleek Floating Shelves: Stylish and Functional Shoe Storage for Your Mudroom

    Transform your mudroom into a chic and organized space with floating shelves designed specifically for shoe storage. These shelves offer a minimalist aesthetic that keeps your footwear neatly displayed while maximizing floor space. The blend of natural wood tones with a streamlined metal frame brings a contemporary vibe, making your entryway feel fresh and airy. Alongside the shelves, incorporating a cozy bench provides a convenient seating area to slip shoes on and off comfortably. To maintain a tidy appearance, woven baskets tucked under the bench serve as hidden compartments for additional shoes or small accessories, ensuring everything stays within easy reach without cluttering the room.

    Steps to Create It:

    1. Mount floating shelves at different levels to accommodate various shoe heights and styles.
    2. Customize the finish of your shelves with paint or stain that complements your existing mudroom palette.
    3. Attach hooks beneath the shelves to hang keys, bags, or outerwear, enhancing storage capability.

    💡 Pro Tip: Choose durable, easy-to-clean materials for your shelves to keep your shoe storage looking fresh despite daily wear.


    4. Stylish Boot Trays to Organize Your Mudroom Shoes

    Stylish Boot Trays to Organize Your Mudroom Shoes

    Keep your mudroom neat and inviting with the addition of a stylish boot tray. These trays are designed to catch mud, water, and dirt from your shoes, preventing messes from spreading throughout your home. Beyond their practical use, boot trays can enhance your entryway’s aesthetic, especially when paired with natural elements like smooth river rocks. This combination not only aids in drainage but also adds an earthy, textured feel that blends seamlessly with various decor styles.

    Selecting the right boot tray involves balancing function and style. Opt for materials and colors that complement your mudroom’s theme while offering durability and easy cleaning. Incorporating a tray with built-in drainage or adding decorative stones can elevate the look and keep your floors protected from moisture and grime. This simple addition transforms your mudroom into a welcoming, organized space where every shoe has its place.

    Steps to Create It:

    1. Measure your mudroom area to pick a boot tray that fits perfectly without overcrowding.
    2. Position the tray directly inside the entrance to catch dirt and moisture as soon as you step in.
    3. Layer the tray with polished river rocks or pebbles to improve drainage and introduce a natural design element.
    4. Regularly empty and clean the tray to maintain a fresh and clutter-free mudroom environment.

    💡 Pro Tip: For extra protection, choose a boot tray with raised edges and pair it with a waterproof mat underneath to safeguard your floors from spills and stains.


    5. Creative Pegboard Shoe Storage for an Organized Mudroom

    Creative Pegboard Shoe Storage for an Organized Mudroom

    Transform your mudroom with a stylish pegboard shoe storage system that maximizes vertical space and keeps your footwear within easy reach. This setup not only declutters your floor but also turns your shoes into a colorful and eye-catching display. From boots to sneakers, every pair finds its perfect spot, making your daily routine more efficient and your entryway more inviting.

    Customizing the pegboard allows you to tailor the arrangement to fit your unique collection and room dimensions. Whether you prefer a vibrant painted backdrop or a sleek neutral tone, this versatile solution adds personality and practicality to your mudroom. Say goodbye to messy piles and hello to a neat, accessible shoe showcase.

    Steps to Create It:

    1. Secure a pegboard firmly on an empty wall in your mudroom.
    2. Arrange hooks and small shelves on the pegboard to hold different types of shoes securely.
    3. Choose a paint color that complements your mudroom’s decor and apply it to the pegboard for a personalized look.
    4. Organize your shoes by style or frequency of use to streamline your daily routine.

    💡 Pro Tip: Use adjustable pegboard accessories to easily rearrange your shoe display as your collection grows or changes.


    6. Effortless Mudroom Organization with Open Shoe Shelving

    Effortless Mudroom Organization with Open Shoe Shelving

    Maximize your mudroom’s functionality with open shoe shelving that combines convenience and style. This design allows you to quickly spot and grab your favorite pair, streamlining your morning routine and keeping your entryway neat. With shoes neatly arranged and in plain sight, you reduce clutter and eliminate the frustration of digging through hidden storage. Additionally, the open structure promotes ventilation, helping to prevent odors and prolong the life of your footwear.

    Personalize your open shoe shelves by selecting materials and finishes that complement your home’s decor, whether it’s rustic wood, sleek metal, or a painted finish that adds a pop of color. Tailoring the size and number of shelves to your specific needs ensures every pair of shoes has its place, making your mudroom a welcoming and efficient transition space.

    Steps to Create It:

    1. Select an open shelving unit with multiple levels to accommodate various shoe sizes.
    2. Position the shoe rack close to the entrance for seamless access when coming and going.
    3. Arrange footwear based on frequency of use, placing daily essentials within easy reach.
    4. Add decorative baskets or bins on lower shelves to store accessories like slippers or shoe care items.

    💡 Pro Tip: Opt for adjustable shelves to customize spacing and accommodate boots, sneakers, and flats comfortably.


    7. Maximize Mudroom Space with a Stylish Vertical Shoe Organizer

    Maximize Mudroom Space with a Stylish Vertical Shoe Organizer

    In mudrooms where floor space is limited, a vertical shoe organizer offers an elegant and practical storage solution. By utilizing vertical height, this organizer frees up valuable room while keeping your footwear collection visible and orderly. Whether you have boots, sandals, or everyday sneakers, the multi-tiered shelves accommodate a wide range of styles without cluttering your entryway.

    This compact storage piece not only streamlines your mudroom but also adds a touch of sophistication with its clean lines and modern design. Its slim profile fits perfectly against any wall, making it ideal for narrow spaces or busy homes where quick access to shoes is essential. Embracing vertical storage helps you maintain a neat, welcoming entrance that efficiently manages your shoe collection.

    Steps to Create It:

    1. Select a tall, narrow shoe organizer designed to optimize vertical space.
    2. Securely fasten the organizer to the wall to ensure stability and safety.
    3. Sort shoes by type or how often you wear them to keep frequently used pairs within easy reach.
    4. Maintain the organizer regularly by removing off-season footwear to keep the space clutter-free.

    💡 Pro Tip: Choose a vertical shoe organizer with adjustable shelves to customize storage for different shoe sizes and styles.


    8. Maximize Mudroom Organization with a Mobile Shoe Cart

    Maximize Mudroom Organization with a Mobile Shoe Cart

    Incorporating a mobile shoe cart into your mudroom setup is an excellent way to keep footwear neatly arranged while adding a touch of versatility to your space. This type of cart, typically crafted from durable materials like metal or wood, comes equipped with several tiers to accommodate everything from sneakers to boots. Its mobility allows you to effortlessly reposition it, whether to create more room during busy times or to tidy up after guests leave.

    The adaptability of a rolling shoe cart means it can serve multiple purposes beyond simple storage. You might find it handy for holding accessories like umbrellas or bags when not in use for shoes. Additionally, its portability makes cleaning beneath and around it a breeze, helping maintain a clutter-free and inviting entryway. With the right cart, your mudroom can become a model of efficiency and style.

    Steps to Create It:

    1. Select a sturdy rolling cart featuring multiple shelves suitable for different shoe sizes.
    2. Incorporate adjustable dividers or baskets on each tier to separate and organize shoes effectively.
    3. Position the cart in your preferred area of the mudroom, moving it as needed for convenience or cleaning.
    4. Regularly declutter the cart to ensure only currently used footwear occupies the space.

    💡 Pro Tip: Opt for a rolling cart with lockable wheels to keep it securely in place when stationary.


    9. Organized Cubby Shoe Storage with Personalized Labels

    Organized Cubby Shoe Storage with Personalized Labels

    Transform your mudroom into a streamlined and visually appealing space with a cubby shoe storage system featuring personalized labels. This approach not only keeps shoes neatly separated but also makes it effortless for each family member to locate and store their footwear. Incorporating a cozy bench alongside the cubbies creates a welcoming spot to sit comfortably while slipping on shoes, enhancing the overall functionality of the area.

    By adding colorful baskets or bins atop the cubbies, you introduce an element of style and additional storage for smaller items like gloves or scarves. This setup not only elevates the look of your mudroom but also teaches children the importance of organization and responsibility in a fun, engaging manner.

    Steps to Create It:

    1. Select or construct a cubby storage unit tailored to fit your mudroom space.
    2. Attach personalized labels or nameplates to each cubby to designate ownership.
    3. Incorporate baskets or bins within or above the cubbies for added storage and aesthetic appeal.
    4. Add a comfortable bench adjacent to the cubby system to provide seating while putting on shoes.

    💡 Pro Tip: Use color-coded labels or baskets for each family member to make shoe storage even quicker and more intuitive.


    10. Maximize Mudroom Space with an Over-the-Door Shoe Organizer

    Maximize Mudroom Space with an Over-the-Door Shoe Organizer

    An over-the-door shoe organizer is an excellent way to optimize your mudroom area while keeping your shoes tidy and within easy reach. Its multiple compartments allow for a variety of footwear styles to be stored together, from casual sneakers to dressy sandals. This solution not only frees up floor space but also brings a sense of organization to your entryway, making it easier to find the right pair quickly.

    By using an over-the-door design, you make efficient use of often-overlooked vertical space. This method keeps shoes off the ground, reducing clutter and helping maintain a clean, welcoming environment. It’s a smart and accessible approach for busy households where shoes tend to accumulate at the door.

    Steps to Create It:

    1. Select an organizer featuring transparent or breathable mesh pockets to easily see the contents.
    2. Securely hang the organizer over your mudroom door using sturdy hooks or attachments.
    3. Designate each pocket for a specific shoe or assign them to different family members for streamlined access.
    4. Regularly check and rearrange shoes to keep the organizer neat and functional.

    💡 Pro Tip: Choose an organizer with adjustable pockets to accommodate various shoe sizes and types for maximum versatility.


    11. Smart Mudroom Seating with Concealed Shoe Storage

    Smart Mudroom Seating with Concealed Shoe Storage

    Transform your mudroom into a stylish and functional space by incorporating a seating bench with hidden compartments for shoe storage. This clever design not only offers a cozy place to sit while lacing up or removing shoes but also keeps footwear neatly tucked away, reducing floor clutter. The concealed storage makes it easy to maintain an organized area, especially during busy mornings or muddy seasons.

    Ideal for households of all sizes, these secret cubbies help establish a designated spot for each person’s shoes, promoting tidiness and convenience. Pair the bench with wall-mounted hooks above to hang coats, bags, and hats, creating an all-in-one station that streamlines your daily routine while adding charm to your entryway.

    Steps to Create It:

    1. Measure the available wall space in your mudroom to determine the bench size.
    2. Select or customize a bench that includes hidden storage compartments beneath the seating area.
    3. Enhance comfort by placing plush cushions or pillows on top of the bench.
    4. Label or personalize each hidden cubby to assign shoe storage spots for every family member.

    💡 Pro Tip: Incorporate removable baskets or bins inside the cubbies to make cleaning and seasonal shoe swaps effortless.


    12. Transform Your Mudroom with Stylish Crate Shoe Storage

    Transform Your Mudroom with Stylish Crate Shoe Storage

    Incorporating repurposed wooden crates into your mudroom is a fantastic way to blend functionality with a cozy, rustic vibe. These versatile crates offer ample storage space for shoes, helping to keep your entryway neat and welcoming. Whether you find them at local thrift shops or online, a bit of sanding and a fresh coat of paint can easily customize them to complement your home’s aesthetic. The open structure of the crates also promotes ventilation, allowing shoes to stay fresh and free from moisture buildup.

    Arranging crates in a creative stack or along a wall turns ordinary storage into a charming focal point. This method not only maximizes your mudroom’s space but also allows for sorting different types of footwear, from everyday sneakers to seasonal boots. The rustic texture and natural wood tones add warmth and character, making your mudroom both practical and inviting.

    Steps to Create It:

    1. Select wooden crates that suit your style and clean them thoroughly.
    2. Customize the crates with paint or stain to blend seamlessly with your mudroom decor.
    3. Arrange the crates in a stacked or side-by-side formation to create accessible shelving.
    4. Designate each crate for specific categories of shoes to maintain organization.

    💡 Pro Tip: Choose crates with slatted sides or bottoms to improve airflow and prevent odors from building up in your shoe storage.


    13. Maximize Mudroom Style with Sleek Pull-Out Shoe Drawers

    Maximize Mudroom Style with Sleek Pull-Out Shoe Drawers

    Transform your mudroom into an organized haven with pull-out shoe drawers that blend functionality and style. These drawers cleverly conceal your footwear, keeping the area clutter-free while making it effortless to find the pair you want. By tucking shoes neatly away, you create a cohesive and polished look that enhances your home’s entrance.

    Ideal for busy households, pull-out drawers offer quick access without the chaos of scattered shoes. Their space-saving design not only optimizes storage but also simplifies daily routines, ensuring your mudroom stays inviting and well-kept. Whether you prefer sneakers, boots, or sandals, this solution keeps everything orderly and within reach.

    Steps to Create It:

    1. Take precise measurements of the space beneath your mudroom bench or cabinets to ensure a perfect fit.
    2. Choose and install pull-out drawers equipped with durable sliding mechanisms for smooth operation.
    3. Add non-slip liners inside each drawer to keep shoes securely in place and protect the drawer surfaces.

    💡 Pro Tip: Select soft-close drawer slides to prevent noise and prolong the life of your shoe storage drawers.


    14. Maximize Mudroom Efficiency with Wall-Mounted Hooks and Shoe Shelves

    Maximize Mudroom Efficiency with Wall-Mounted Hooks and Shoe Shelves

    Transform your mudroom into a streamlined and functional space with the clever combination of wall-mounted hooks and a dedicated shoe shelf. This design not only keeps your footwear organized and off the floor but also provides handy spots for hanging jackets, backpacks, and hats. By thoughtfully arranging these elements, you create a clutter-free zone where everything has its place, making daily comings and goings effortless.

    The shoe shelf offers a clear, visible storage solution that helps everyone in the household quickly find their shoes, while the hooks above ensure that outerwear and accessories stay within easy reach. This layered approach optimizes vertical space, perfect for smaller mudrooms or entryways. Plus, organizing by shoe type or family member becomes a breeze, contributing to a welcoming and orderly home environment.

    Steps to Create It:

    1. Secure durable wall hooks at a comfortable height for hanging coats and bags.
    2. Install a compact shoe shelf directly below the hooks to keep footwear neatly arranged.
    3. Add storage baskets or bins on the shelf for smaller items like gloves and scarves.
    4. Label sections or baskets to designate specific spots for each family member or shoe category.

    💡 Pro Tip: Choose wall hooks with a sturdy design and finish that complements your decor for both style and long-lasting use.


    15. Sleek Sliding Door Storage: Tidy Up Your Mudroom Shoes

    Sleek Sliding Door Storage: Tidy Up Your Mudroom Shoes

    Mudrooms often become the catch-all spot for shoes and outdoor essentials, resulting in a cluttered and disorganized area. Incorporating sliding doors into your shoe storage solution offers a sleek and space-saving option to keep everything neatly tucked away. These doors glide smoothly to reveal your shoe collection, while maintaining a clean, streamlined look when closed.

    Beyond functionality, sliding doors provide an opportunity to elevate your mudroom’s style. Choose finishes and colors that complement your existing decor, creating a cohesive and inviting entryway. This method transforms chaotic clutter into an attractive feature, making your space both practical and visually appealing.

    With sliding door storage, accessing your shoes becomes effortless without the bulk of swinging doors. This approach maximizes every inch of your mudroom, ensuring your footwear stays organized and easy to find.

    Steps to Create It:

    1. Select or construct a storage unit equipped with sliding doors tailored to your mudroom size.
    2. Incorporate shelves or compartments inside the unit to separate and organize different types of shoes.
    3. Enhance the appearance of the sliding doors by applying a fresh coat of paint or adding decorative wallpaper that matches your interior style.

    💡 Pro Tip: Opt for soft-close sliding door hardware to minimize noise and extend the lifespan of your storage unit.


    Final Thoughts

    With these 15 creative shoe storage solutions, your mudroom can become more than just a transitional space—it can be a stylish and orderly welcome zone that sets the tone for your entire home. Imagine stepping into an entryway where clutter is tamed and every pair of shoes has its perfect place, making daily routines smoother and more enjoyable.

    The possibilities are endless, and the transformation is within reach. Choose the idea that sparks your inspiration and watch as your mudroom evolves into a harmonious blend of beauty and practicality. Your journey toward a calmer, more organized home starts now—embrace it and let your space reflect the peace you seek.

  • 25 Kids Room Accent Wall Ideas to Spark Creativity and Style

    Creating a beautiful and inspiring bedroom for your child doesn’t always require a complete makeover. Sometimes, a single accent wall can completely transform the look and feel of the space. Accent walls add color, personality, and visual interest while helping define different areas for sleeping, studying, playing, or relaxing. They can also reflect your child’s interests, hobbies, and imagination, making the room feel more personal and welcoming.

    Whether your child dreams of exploring outer space, diving beneath the ocean, building with LEGO bricks, or curling up with their favorite books, there’s an accent wall idea that can bring those interests to life. These creative designs range from simple DIY projects to statement-making murals, offering inspiration for every style and budget.

    1. Galaxy Adventure Wall

    Bring the wonders of the universe into your child’s room with a stunning galaxy-themed accent wall. Deep shades of navy, midnight blue, and black create the perfect backdrop for stars, planets, constellations, and swirling nebula effects. Glow-in-the-dark paint or decals can make the stars shine after dark, turning bedtime into a magical experience. This design encourages curiosity about astronomy and science while creating a dramatic visual centerpiece. Pair the wall with space-themed bedding, rocket-shaped shelves, or astronaut decor to complete the celestial atmosphere.

    2. Painted Arch Feature Wall

    A painted arch is one of the simplest ways to create a designer-inspired accent wall without spending a fortune. By painting a large arch behind a bed, reading nook, or desk area, you instantly create a focal point that adds dimension and character. Soft pastel arches create a calm and playful feel, while bold colors make a modern statement. This versatile design works in nurseries, children’s rooms, and even teen bedrooms because it can easily evolve with changing tastes and styles.

    3. Chalkboard Creativity Wall

    A chalkboard accent wall combines decoration and functionality in one creative feature. Kids can draw pictures, write messages, practice spelling words, solve math problems, or simply express their creativity whenever inspiration strikes. The wall becomes a constantly changing piece of art that grows with your child. Parents love this idea because it keeps creative activities contained to one designated space while encouraging learning and imagination. Colorful chalk organizers and magnetic accessories can make the wall even more interactive.

    4. Animal Safari Mural

    Turn an ordinary bedroom into an exciting wildlife adventure with an animal-themed mural. Large illustrations of elephants, giraffes, lions, monkeys, or woodland creatures instantly bring the room to life. Whether you choose hand-painted artwork, removable wallpaper, or oversized decals, animal murals create an immersive environment that sparks curiosity about nature. This design works especially well in nurseries and younger children’s rooms where imaginative play is a central part of daily life.

    5. World Explorer Map Wall

    A world map accent wall is both educational and visually striking. Covering an entire wall with a colorful map encourages children to learn about geography, different cultures, and faraway destinations. Add push pins, stickers, or markers to track family vacations or dream destinations. This accent wall can inspire a love of travel and exploration while serving as a valuable learning tool. It also transitions beautifully into older children’s and teen rooms.

    6. Pastel Rainbow Ombre Wall

    A rainbow ombre wall creates a soft, dreamy atmosphere that feels both playful and calming. Instead of bold rainbow stripes, the colors blend seamlessly into one another, creating a watercolor-like effect. Gentle shades of pink, lavender, blue, mint, and peach add warmth and charm without overwhelming the room. This style works especially well in nurseries, toddler rooms, and spaces designed to promote relaxation and comfort.

    7. LEGO Building Wall

    For children who love building and creating, a LEGO accent wall can become the ultimate play feature. Large LEGO baseplates mounted directly onto the wall allow kids to build vertically and display their favorite creations. The wall serves as both decoration and entertainment, helping keep toys organized while encouraging imaginative play. Adding storage bins nearby makes cleanup easier and creates a dedicated creative zone within the room.

    8. Mountain Landscape Wall

    A mountain-inspired accent wall brings the beauty of the outdoors inside. Layered mountain silhouettes painted in varying shades create depth, movement, and a sense of adventure. Soft neutral tones create a calming effect, while brighter colors make the design more playful. This versatile style works well in nature-themed rooms and pairs beautifully with wooden furniture, camping-inspired decor, and cozy textiles.

    9. Personalized Name Wall

    Nothing makes a room feel more special than featuring your child’s name as part of the design. Large painted lettering, wooden initials, custom neon signs, or decorative decals can become the focal point of the room. Surrounding the name with stars, flowers, animals, or favorite colors creates a personalized design that celebrates your child’s individuality. This timeless idea helps children feel connected to their space and gives the room a unique identity.

    10. Bold Geometric Patterns

    Geometric accent walls offer a fun and modern way to introduce color and shape into a child’s room. Triangles, diamonds, circles, and abstract patterns create visual energy while remaining stylish enough to grow with your child. Painter’s tape makes it easy to create clean lines and customized designs. Whether you choose bright contrasting colors or subtle neutral shades, geometric walls add movement and personality without feeling overly themed.

    11. Fairy Light Feature Wall

    Fairy lights instantly add warmth and enchantment to a bedroom. String lights can be arranged in cascading patterns, woven behind sheer curtains, or displayed around photographs and artwork. The soft glow creates a cozy atmosphere that makes the room feel inviting and magical. This design is particularly popular with older children and preteens because it adds charm without requiring a major renovation.

    12. Whimsical Wallpaper Wonderland

    Wallpaper offers endless possibilities for creating a themed accent wall. From woodland animals and fairy tale castles to outer space adventures and tropical jungles, there is a design for every personality. Modern removable wallpaper makes installation easy and allows for future updates as interests change. A whimsical wallpaper wall instantly establishes a theme while adding color, texture, and character to the room.

    13. Underwater Ocean Scene

    Dive beneath the waves with an underwater-themed accent wall that transforms the room into a colorful ocean paradise. Fish, sea turtles, coral reefs, dolphins, and underwater plants create an immersive environment full of imagination and discovery. Shades of blue mimic ocean depths while colorful sea creatures add excitement and visual interest. This theme is perfect for children fascinated by marine life and aquatic adventures.

    14. Framed Art Display Gallery

    Showcasing your child’s artwork on a dedicated gallery wall celebrates creativity and makes them feel proud of their accomplishments. Use clipboards, frames, magnetic strips, or floating shelves to display drawings, paintings, and school projects. Since artwork can easily be swapped out, the wall continually evolves over time. This personal and meaningful accent wall turns cherished creations into part of the room’s decor.

    15. Nature-Inspired Greenery Wall

    A greenery-inspired wall brings a refreshing sense of nature indoors. Leaf-patterned wallpaper, painted vines, botanical murals, or faux plant installations create a soothing environment filled with natural beauty. This style pairs well with wooden furniture, woven baskets, and earthy color palettes. The calming atmosphere helps create a peaceful retreat while introducing children to the beauty of the natural world.

    16. Pegboard Organization Wall

    A pegboard accent wall combines style and practicality, making it ideal for busy kids’ rooms. Hooks, baskets, shelves, and organizers can be rearranged as needed to store toys, books, art supplies, and collectibles. Bright paint colors transform the pegboard into a decorative feature rather than just a storage solution. As children grow, the layout can be adjusted to suit changing interests and storage needs.

    17. Striking Chevron Design

    Chevron patterns bring movement and energy to a room through their distinctive zigzag shape. This eye-catching design works well with both vibrant and neutral color palettes, making it easy to customize. Chevron walls add depth and visual interest while maintaining a clean, modern look. The pattern can be bold enough to stand out while remaining versatile enough to suit various decorating styles.

    18. Metallic Starburst Wall

    For children who love sparkle and shine, a metallic starburst wall offers a touch of glamour. Gold, silver, or copper stars scattered across the wall catch natural light and create a magical effect. This design works beautifully in celestial-themed rooms but is versatile enough to complement a variety of styles. The reflective accents add dimension and elegance while maintaining a playful atmosphere.

    19. Book Lover’s Feature Wall

    Encourage a lifelong love of reading with a book-themed accent wall. Floating shelves filled with colorful books become both functional storage and decorative artwork. Organize books by color, genre, or theme to create a visually appealing display. Pair the wall with a comfortable reading nook, bean bag chair, or soft lighting to create a cozy space where children can relax and enjoy their favorite stories.

    20. Hand-Painted Abstract Art Wall

    An abstract accent wall allows for complete creative freedom. Bold brushstrokes, splashes of color, geometric shapes, or flowing patterns can be customized to match your child’s personality and interests. This DIY-friendly option creates a one-of-a-kind design that feels artistic and energetic. Because there are no strict rules, parents can experiment with colors and techniques to create something truly unique.

    21. Polka Dot Accent Wall

    Polka dots are a timeless design choice that adds fun and playfulness to any room. Large dots create a bold statement, while smaller dots provide subtle texture and charm. Available in endless color combinations, polka dot walls work equally well in nurseries, playrooms, and older children’s bedrooms. Peel-and-stick decals make this one of the easiest accent wall projects to complete.

    22. Wooden Slat Accent Wall

    Wooden slat walls introduce warmth, texture, and architectural detail. Natural wood tones create a cozy atmosphere, while painted slats add a modern touch. The vertical lines draw the eye upward, making the room feel larger and more refined. This timeless design works beautifully behind beds, desks, or reading corners and can easily transition into a teen or adult space later on.

    23. Glow-in-the-Dark Wall Features

    Glow-in-the-dark elements add an exciting surprise that transforms the room after sunset. Stars, constellations, animals, planets, or fantasy-inspired designs remain subtle during the day but illuminate beautifully at night. The gentle glow can also provide comfort for children who prefer a little light while sleeping. This idea combines practicality with imagination, creating a truly magical environment.

    24. Superhero Headquarters Wall

    Let your child become the hero of their own story with a superhero-themed accent wall. Comic-inspired graphics, city skylines, character symbols, and bold colors bring excitement and adventure to the room. This design encourages imaginative play and celebrates favorite characters while creating a dynamic and energetic atmosphere. Coordinating bedding and accessories can further enhance the theme.

    25. Classic Striped Statement Wall

    Striped walls remain one of the most versatile and enduring accent wall designs. Vertical stripes can make ceilings appear taller, while horizontal stripes create the illusion of a wider room. The pattern can be adapted to suit any age group by changing the colors and stripe widths. Whether you choose bright playful tones or sophisticated neutrals, stripes provide visual interest without overpowering the space.

    Conclusion

    A well-designed accent wall can completely redefine a child’s bedroom, transforming it into a space that inspires creativity, learning, comfort, and self-expression. From interactive chalkboard surfaces and educational world maps to whimsical murals and modern geometric patterns, these ideas prove that a single wall can make a huge impact. The best accent walls not only enhance the room’s appearance but also support your child’s interests, imagination, and growth. By choosing a design that reflects their personality and adapts to changing tastes, you can create a space they’ll enjoy and remember for years to come.