We’re in a moment where less can be more, especially in kitchen design. Instead of layering a separate backsplash material over the wall, more homeowners and designers are letting the countertop reach up the wall as a single, dramatic plane: what we’re calling the statement stone trick. It’s bold, clean, and remarkably practical. In 2026, with better fabrication techniques and wider stone options, using a full-height or partial-height stone application to replace a traditional tile or subway backsplash is one of the fastest ways to modernize a kitchen and add long-term value.
In the sections that follow, we’ll explain what the statement stone trick is and why it works, compare it to traditional backsplashes, break down the best materials and edge treatments, walk through installation options and substrate needs, and give design-forward tips so the look reads cohesive rather than contrived. Whether you’re planning a full remodel or a targeted refresh, we’ll help you make your countertop do the heavy lifting, literally and visually.
The Statement Stone Trick: What It Is And Why It Works
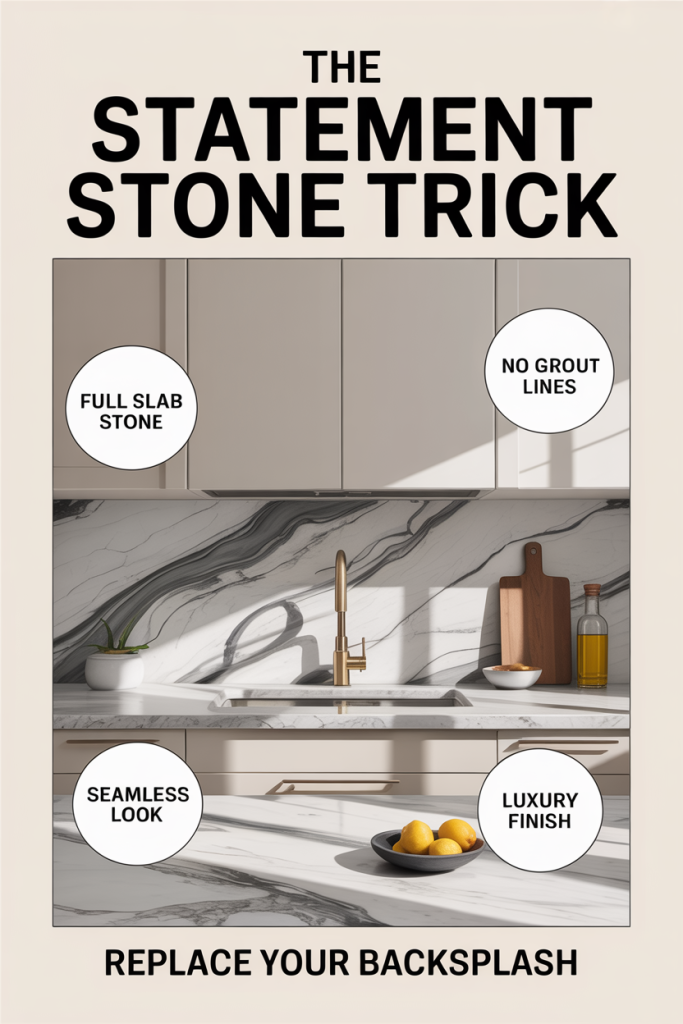
The statement stone trick is simple in concept but powerful in effect: extend the countertop material up the wall behind the sink and cooktop to replace a separate backsplash. That extension can be a full-height slab running from counter to ceiling, a mid-height splash (commonly 12″–24″), or a continuous waterfall that wraps the countertop edge and climbs the wall. The idea is to rely on one continuous material to create a strong visual anchor rather than piecing multiple surfaces together.
Why it works now: fabrication and transport advances let us work with larger, lighter slabs and tighter seams than a decade ago. Engineered stones and large-format porcelain mimic natural veining while offering greater consistency, useful when you want a dramatic, book-matched slab. From a design standpoint, a single stone plane reads as less busy and more luxe: it simplifies the silhouette, highlights veining or veined book-matching, and provides a practical, wipe-clean surface in the most splash-prone area.
Functionally, statement stone is durable and hygienic. Solid, non-porous engineered quartz and some porcelains resist staining and microbial growth better than grout-lined tile. Even natural stones like honed marble or leathered granite perform well if sealed properly and used in the right applications. Finally, the statement stone trick reduces maintenance headaches: fewer grout lines, no caulk that’s constantly failing, and a unified surface that’s easy to keep looking new.
Benefits Over Traditional Backsplashes
Choosing statement stone instead of traditional tile backsplashes delivers benefits across aesthetics, durability, and resale value. Aesthetic benefits are immediate: a full slab behind the work zones reads as high-end, creates visual continuity, and allows veining or pattern to become the room’s focal point. We often see this in modern open-plan kitchens where the backsplash is visible from living spaces, the uninterrupted stone reads like art.
From a durability and maintenance standpoint, stone reduces porous surfaces and eliminates grout lines where dirt, grease, and mildew accumulate. This is especially valuable behind the range and sink. Engineered materials typically come with manufacturer care guidelines and warranties that outpace older backsplash installations. For households that cook frequently, that’s a real time-saver.
On the value side, cohesive material selections tend to fetch higher appraisals. Buyers perceive continuous slabs as intentional, premium choices. When we compare kitchens with tiled backsplashes to those with integrated stone, the latter often scores better in listings and staging scenarios. Also, water infiltration issues related to failed backsplash caulk are less likely when the material runs into a properly prepped substrate, reducing potential long-term repair costs.
There are trade-offs, cost and the potential for a colder look if overused, but we find that with thoughtful pairing of texture and color, the benefits generally outweigh the downsides for most mid- to high-end projects.
Best Materials, Finishes, And Edge Treatments For Statement Stone
Material choice is the single biggest decision when using the statement stone trick. Here’s what we recommend based on performance and aesthetics:
- Engineered quartz: Low maintenance, high consistency, and excellent for bold veining or uniform colors. Many manufacturers now produce slabs in generous sizes suitable for full-height runs. Quartz is non-porous, which makes it ideal behind sinks and ranges.
- Large-format porcelain: Extremely resilient to heat and scratching, porcelain is available in very large panels and can convincingly mimic marble, fossil, or concrete. It’s lighter than many natural stones and resists staining without sealing.
- Natural stone (marble, granite, quartzite): Marble offers unmatched beauty for dramatic veining and book-matching, but it’s more maintenance-heavy and requires proper sealing. Granite and quartzite are tougher and more heat resistant: quartzite’s veining can be stunning when finished properly.
- Sintered stone (e.g., Neolith): Highly durable and heat-resistant with wide format options, great for full-height applications and exterior uses.
Finishes to consider:
- Polished: Reflective and elegant: shows veining clearly but can reveal water spots.
- Honed: Softer, matte finish that hides smudges and gives a warmer look.
- Leathered: Textured surface that reduces fingerprints and adds tactile interest, works well for casual, layered kitchens.
Edge treatments:
- Simple eased or beveled edges keep the look modern and let the slab speak.
- A waterfall edge continuing down to the floor is dramatic and pairs well with island focal points.
- Integrated sinks and undermount detail reduce visual seams and reinforce the monolithic appearance.
When choosing material and finish, we balance the visual impact with day-to-day use. For heavy-cooking households we lean toward porcelain, quartzite, or engineered quartz: for show-stopping design statements we might choose book-matched marble with a honed or leathered finish to minimize wear visibility.
Installation Options And What Each Entails
There are several installation strategies for executing a statement stone backsplash, and each comes with different costs, skill requirements, and lead times. We break them into three practical pathways: full-height slab installations, waterfall integrations, and panel systems. Selecting the right method depends on slab size availability, structural wall conditions, and budget.
Key factors that influence choice include: slab format and availability (larger slabs reduce seams), substrate flatness (walls often require furring or backerboard), and site logistics, can the slab be transported and maneuvered through the home? We recommend consulting your fabricator early so slab selection and templating can be coordinated with cabinetry trades to minimize seams and ensure continuous pattern flows.
Below, we cover surface prep and substrate requirements as well as common attachment methods so you can weigh options with contractors and suppliers.
Surface Prep And Substrate Requirements
(This section is an H3 subordinate to “Installation Options And What Each Entails”)
Proper surface preparation is non-negotiable. Walls behind countertops are rarely perfectly flat or plumb: small deviations magnify when you apply a slab. We always start by assessing the substrate: drywall over studs, cement board, existing tile, or masonry each requires different prep.
Typical steps include:
- Remove loose finishes and old tile backer where necessary. You want a stable, flat plane.
- Install a rigid, water-resistant backer such as cement board or a gypsum-based tile backer for heavy slabs. For thin porcelain paneling, manufacturers often allow directly fastening to studs with appropriate blocking.
- Add blocking where heavy anchoring is required, especially at seam lines, upper supports, and around extractor hoods.
- Confirm the wall is plumb and shim where necessary: fabricators rely on very tight tolerances for edge spans and seam alignment.
We also pay attention to penetration points like faucets, electrical outlets, and range hoods. Pre-place blocking and coordinate heights to avoid awkward seams or exposed mechanical work. For wet areas, we’ll specify a moisture barrier behind the backerboard to prevent long-term issues.
A clear, detailed template taken by the fabricator after cabinets are installed is essential: it’s the roadmap that prevents costly mistakes and ensures tight seams and pattern alignment.
Design And Styling Tips For A Cohesive Look
Treat the statement stone as a design centerpiece and plan the room’s other elements around it. We aim for balance: when the wall is visually heavy, cabinets, hardware, and lighting should either recede or complement without competing. Consider scale, proportion, and contrast, those three moves will keep the room grounded rather than visually top-heavy.
Practical starting points:
- Decide whether the stone will be the feature or a background. If it’s the feature, keep cabinet colors softer and hardware minimal. If the stone is a backdrop (subtle veining, neutral color), you can introduce stronger cabinet contrast or patterned tile on adjacent walls.
- Use repetition. Pull a color from the stone’s veins into a pendant finish, cabinet paint, or open shelving to create intentional repetition that reads as curated.
- Be mindful of appliances. Stainless, black stainless, or paneled appliances each interact differently with the stone’s finish. We often advise mockups or swatches installed near the space to test shifting light.
Below we break down pairing scale, color and pattern considerations, then get specific about lighting, trims, and seams to help you elevate the finish.
Conclusion
The statement stone trick gives us a smart way to simplify kitchen surfaces and amplify style. In 2026, better materials and panel systems make it easier and more cost-effective than before to let the countertop do the heavy lifting. When we choose the right material and finish, prep the substrate carefully, and coordinate lighting and seams, a single stone plane becomes a durable, low-maintenance, high-impact solution.
If you’re remodeling, start conversations early with your fabricator and cabinetmaker, get slabs chosen before finalizing cabinet heights so patterns align and seams fall where they’re least visible. The result is a kitchen that reads as cohesive, modern, and thoughtfully detailed, exactly what buyers and homeowners want today.
Leave a Reply