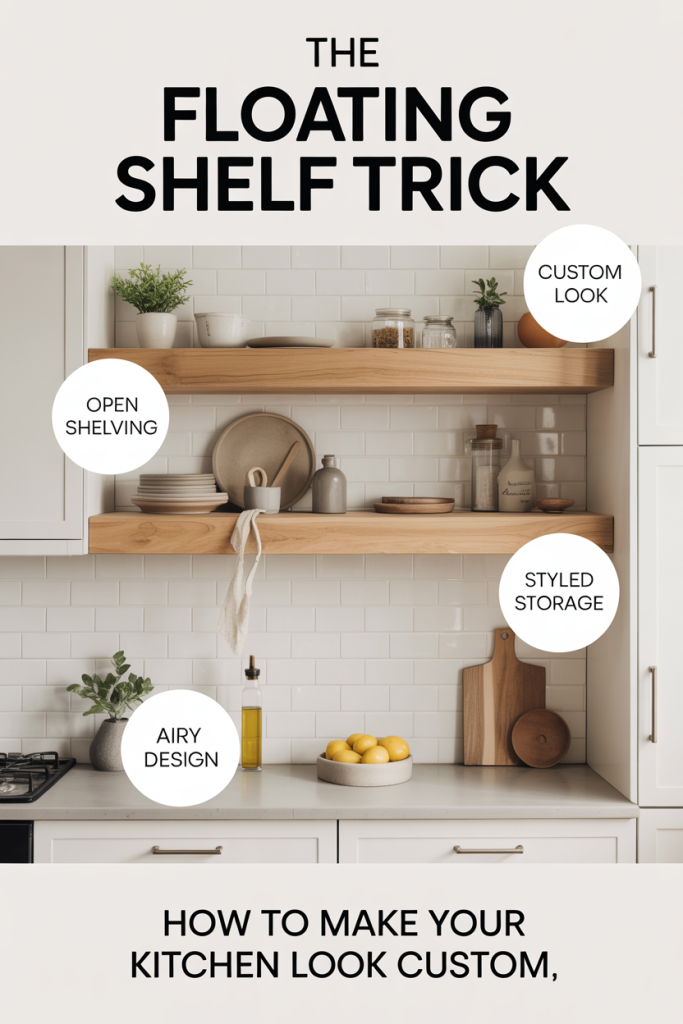
Floating shelves are arguably the easiest trick to make a kitchen look like it was custom-built for your home. They read as intentional, architectural, and, when done right, seamless with surrounding millwork. In this guide we’ll walk through why the floating shelf trick that makes kitchens look custom works so reliably, how to pick the right materials and sizes, where to place shelves for a built‑in feel, installation details that hide the hardware, and styling rules that keep the result elegant instead of cluttered. We’ll also flag common mistakes we see (so you don’t repeat them). Whether you’re updating a rental kitchen or planning a full remodel in 2026, these practical tips will help us get the high-end look without the high-end price tag.
Why Floating Shelves Instantly Read As Custom Millwork
Floating shelves have a visual simplicity that mimics custom cabinetry because they reduce visual noise and emphasize horizontal lines, the same traits architects use in built-in millwork. When a shelf appears to emerge directly from the wall with no visible brackets, our brains interpret that as a deliberate, permanent element rather than a temporary accessory. That permanence is a huge part of why the floating shelf trick that makes kitchens look custom is so effective.
There are a few psychological and design reasons floating shelves read as custom: first, they create uninterrupted sightlines. Without bracket clutter, cabinets and countertops connect visually, which makes the whole run of kitchen elements feel unified. Second, they create shadow gaps that mimic inset cabinetry details and reveal crisp edges, small signals that suggest precision carpentry. Third, they encourage curated display rather than crowded storage, which aligns with the tidy, integrated aesthetic homeowners associate with custom work.
Practically, floating shelves also allow us to extend materials and finishes into previously unused vertical space. Matching a simple wood shelf to a countertop or cabinet face ties elements together the same way a built-in open box would. In short, a well-chosen floating shelf reads like millwork because it borrows the visual language of custom design: continuity, restraint, and precision.
How To Choose The Right Floating Shelf For Your Kitchen
Choosing the right floating shelf is about three core decisions: material and finish, size and thickness, and load capacity. Each choice affects whether the shelf will feel integrated or out of place.
We recommend starting with the room’s primary finishes. If your countertops are quartz, a painted or stained wood shelf can add warmth and contrast. If your cabinets are a warm wood tone, a shelf in the same species, or a close match, will make the shelving feel like a deliberate extension of the cabinetry. Conversely, a metal or painted shelf can serve as a subtle accent against wood cabinets if you want contrast. Remember the floating shelf trick that makes kitchens look custom often relies on harmony rather than loud contrast: the shelf should look like it belongs.
The second decision is scale. Oversized, thick shelves can feel heavy and custom, but they demand strong anchors and can crowd small kitchens. Narrow, thin shelves read delicate and can vanish in a busy space. Measure the distance between countertops, upper cabinets, and the ceiling. A general rule is to keep shelf depth at least 6–12 inches for practical storage: for heavy items or cookbooks, plan 10–12 inches. Thickness between 1 to 2 inches looks modern: thicker planks (2–3 inches) look substantial and intentional.
Finally, consider load capacity. Floating shelves use internal brackets or reinforced cleats, and the shelf material affects how much weight they can safely hold. MDF or plywood cores with a veneer layer are stable and resist bowing: solid wood looks great but can warp if not properly sealed. If you plan to store heavy pottery, mixing bowls, or stacked plates, design for at least 20–30 pounds per linear foot, and consult the manufacturer’s rating or a carpenter if you’re unsure. Choosing wisely here keeps the aesthetic we want and prevents sagging, the quickest way to ruin a custom look.
Placement And Layout Strategies For A Built‑In Look
Placement is where the floating shelf trick that makes kitchens look custom really becomes a craft. A shelf that’s misplaced will read as an afterthought: the right placement makes it look intentional and built-in.
We begin by mapping sight lines. When you stand in a kitchen, your eye follows horizontal planes: counter, backsplash, open shelves, and upper cabinets. Align shelf runs with existing horizontal elements whenever possible. For example, placing a shelf so its underside lines up with the bottom of upper cabinets or the top of the backsplash creates a continuous profile that reads as designed.
Consider the concept of negative space. Built-in millwork often balances open and closed storage: continuous base cabinets grounded on the floor, closed upper cabinets for concealed storage, with a deliberate open niche for display. We suggest using floating shelves to create that niche, group shelves across one run and keep the adjacent run closed. That contrast enhances the feeling that the open shelves are an architectural feature rather than random wall storage.
Another tactic: staggered runs. On a long wall, break the length into sections with vertical anchors like a clock, a pendant, or a piece of art. Three shorter shelf runs with consistent depth feel more curated than one long shelf that collects clutter. Also, respect appliance clearance and functional zones, don’t place a shelf directly above a stove unless the shelf is heat-resistant and you’re intentional about what sits there. Finally, factor in human scale: shelves should be reachable for everyday items (about 48–52 inches from the floor for primary access) while higher shelves can serve decorative roles.
Installation Tips For A Seamless, Built‑In Appearance
Installation quality is where the floating shelf trick that makes kitchens look custom succeeds or fails. We can replicate a millwork look only if fastenings are invisible, edges are crisp, and shelves are perfectly level.
Hidden fixings are your friend. There are a few reliable systems: internal steel brackets that slide into a hollow shelf, threaded rod inserts anchored into studs, or recessed cleats glued and screwed to the wall with the shelf fitted over them. The cleat method is time-tested for a sturdy, invisible look. Whatever system we pick, fasten into studs or use high-quality anchors rated for the expected load, sheetrock alone won’t cut it for most kitchen uses.
Wall prep matters. Remove old drywall anchors and patch uneven surfaces. For tile backsplashes, consider placing shelves in grout lines or use a French cleat that spans multiple studs and hides minor irregularities. When mounting to plaster, pre-drill and use appropriate anchors to avoid cracking. We also recommend using a laser level and a straightedge during layout: a shelf off by even a quarter-inch will read as DIY.
Reinforcement techniques: if you want long spans without visible supports, consider adding a slim steel rod through the shelf anchored into studs at both ends. For heavy loads, build a plywood core inside a veneer shelf and reinforce the internal bracket points with blocking. During finishing, fill and sand mounting seams, and caulk the back where the shelf meets the wall to create that continuous, built-in shadow line. The small finishing touches, tight joints, consistent paint or stain, and clean caulking, make the floating shelf trick that makes kitchens look custom truly convincing.
Styling And Function: Decorating Floating Shelves Without Clutter
Styling is where the floating shelf trick that makes kitchens look custom really shines. The goal is to create a curated display that feels functional and intentional rather than a catchall for everything.
We use the rule of threes and consistent color stories. Group items in odd numbers and vary heights to create rhythm. For instance: a pair of stacked bowls, a medium vase, and a small stack of cookbooks create balance without looking staged. Stick to a limited palette, two neutrals and one accent color, so the shelf visually reads as part of the kitchen’s architecture.
Mix function and decor. Alternate practical items (mugs, bowls, canisters) with decorative objects (small plants, a framed photo, a ceramic pitcher). Use matching containers for pantry items: clear glass jars with uniform lids or labeled canisters create visual cohesion and hide the mess. Consider baskets or boxes on lower shelves to store out-of-sight items while maintaining the tidy effect.
Leave breathing room. A common mistake is to pack every inch, open shelves need negative space to feel high-end. Aim to fill roughly 60–70% of the shelf and rotate items seasonally. Lighting helps: under-shelf LEDs or a nearby pendant can highlight the display and create the shadow lines that mimic inset cabinetry. Finally, resist the urge to place too many small items together: a few well-chosen objects will always feel more intentional than a crowded mantel of miscellaneous items.
Common Mistakes To Avoid When Using Floating Shelves In Kitchens
Even small missteps can betray the built-in illusion. Here are the common mistakes we consistently advise clients to avoid so the floating shelf trick that makes kitchens look custom actually works.
- Skimping on Anchors: Relying on drywall anchors for anything beyond light decorative items is asking for sagging and disaster. Always anchor to studs or use heavy-duty anchors rated for the intended load.
- Picking the Wrong Depth: Too shallow and the shelf is useless: too deep and it overwhelms the space. Test with a cardboard mock-up before committing. Depth should align with intended use, 8–12 inches covers most kitchen needs.
- Ignoring Finish Consistency: A shelf that clashes with cabinet finishes or hardware will read as an add-on. Match undertones (warm vs. cool) rather than exact colors, and keep finishes matte or low-sheen to echo cabinetry.
- Overcrowding: Open shelves invite curation. If everything is visible, nothing reads as special. Keep only items you’d use or display confidently, and hide the rest.
- Poor Spacing and Leveling: Uneven gaps, crooked shelves, or inconsistent spacing between tiers instantly date the installation. Measure twice, level once, and have patience during layout.
- Placing Shelves Over Hazardous Zones Without Thought: Shelves above high-heat areas or where steam accumulates need appropriate materials and distance. Also consider grease buildup and how it will affect both the shelf surface and the items on display.
Avoiding these mistakes keeps the floating shelf trick that makes kitchens look custom from becoming a cautionary tale. Careful planning and honest assessment of usage will pay off.
Leave a Reply