Author: Nick Garcia

  • Top 25 Chic Small Patio Designs to Elevate Your Summer Outdoor Space

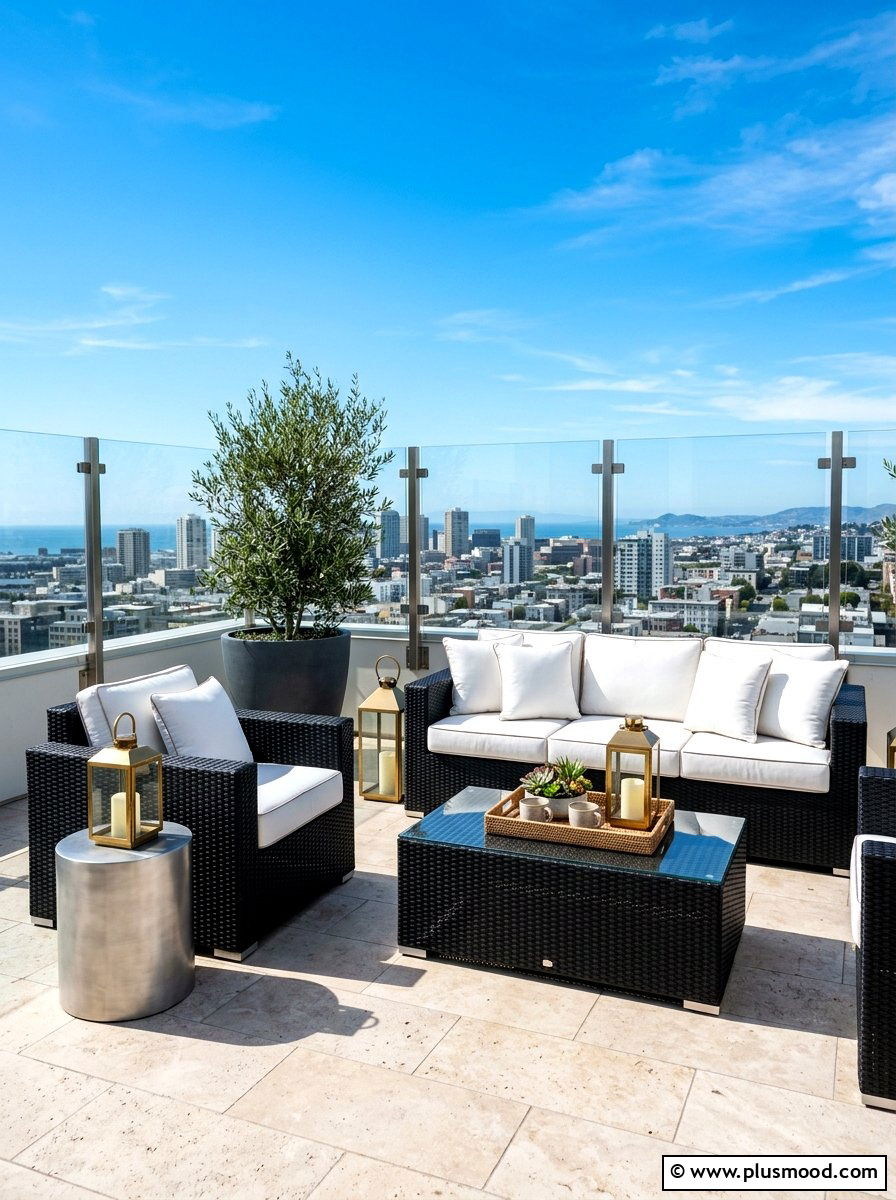
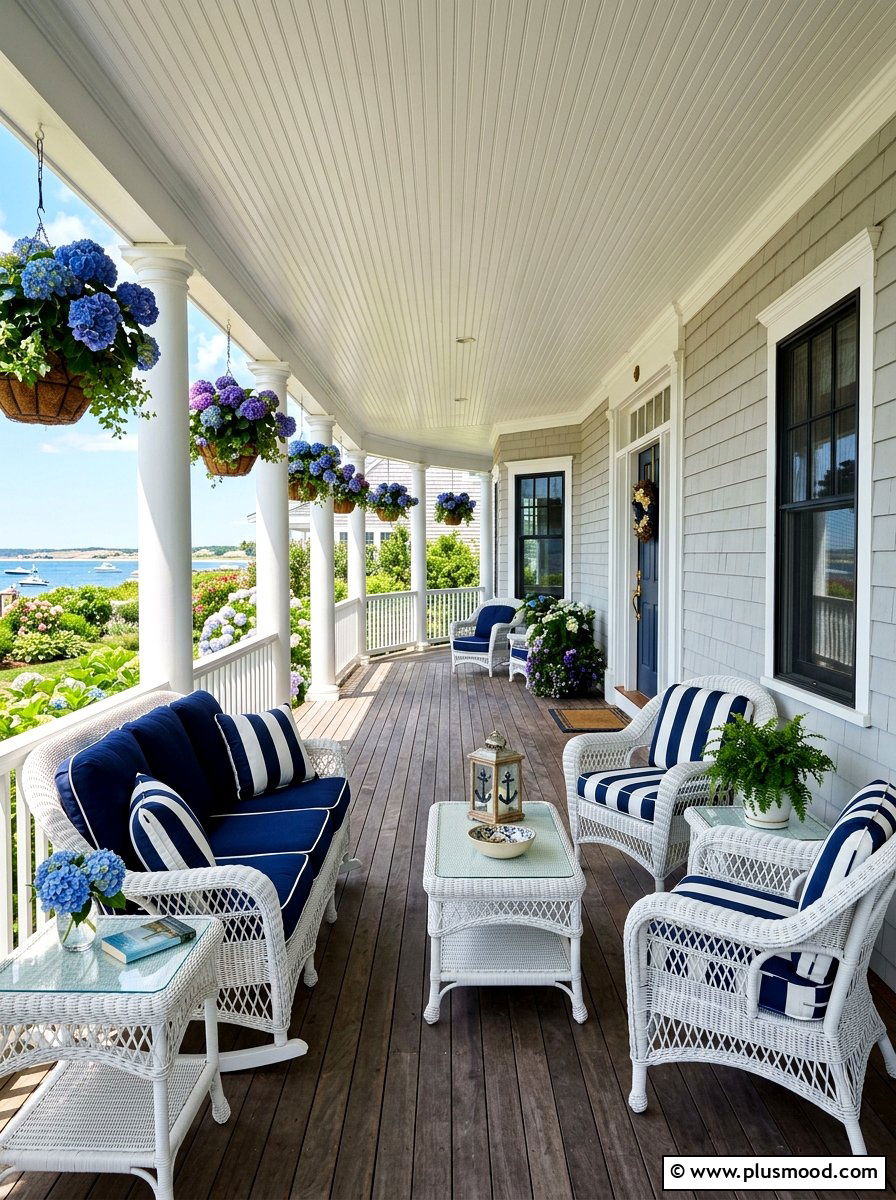
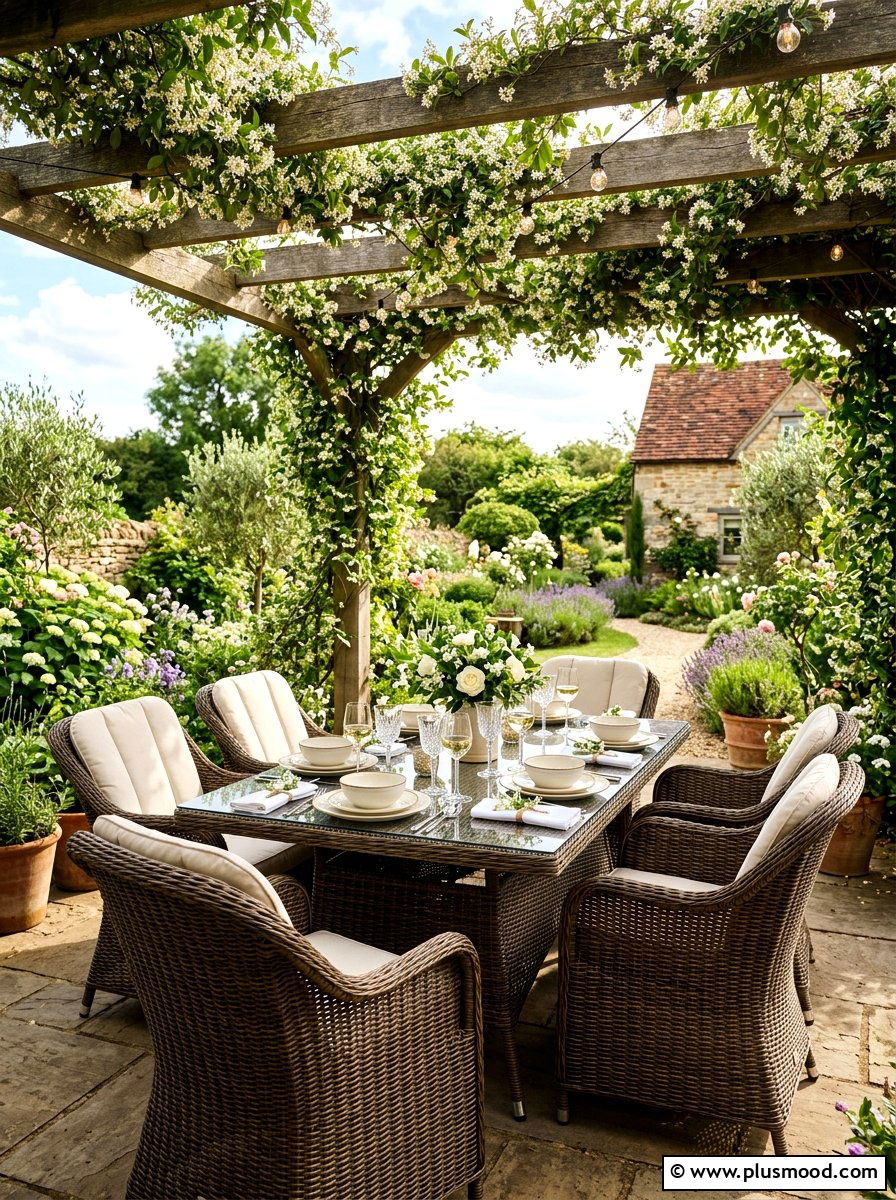
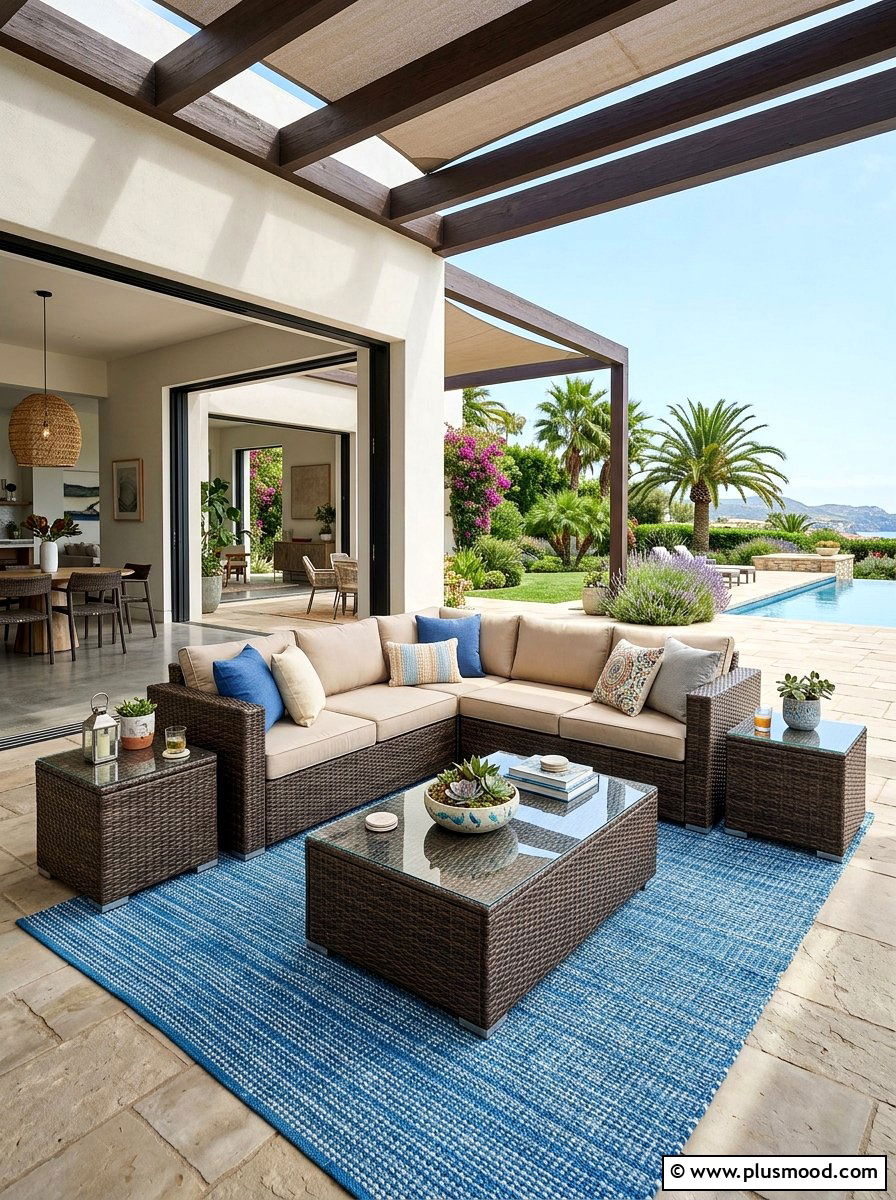
    With warmer weather inviting us outside, the desire to create a cozy outdoor haven intensifies. Even if your outdoor space is modest, a charming and inviting summer retreat is entirely within reach. Small patios and balconies can become personal sanctuaries, carefully crafted to extend the comfort and style of your interior living areas.

    By smartly arranging furnishings, incorporating pieces that serve multiple purposes, and surrounding yourself with vibrant plants, you can cultivate a lush and functional environment. This approach allows you to maximize every inch, turning compact spaces into delightful spots perfect for relaxation and entertaining. In this article, we’ll uncover clever design strategies to help you elevate your small outdoor area into a stylish summer escape you’ll love to share.

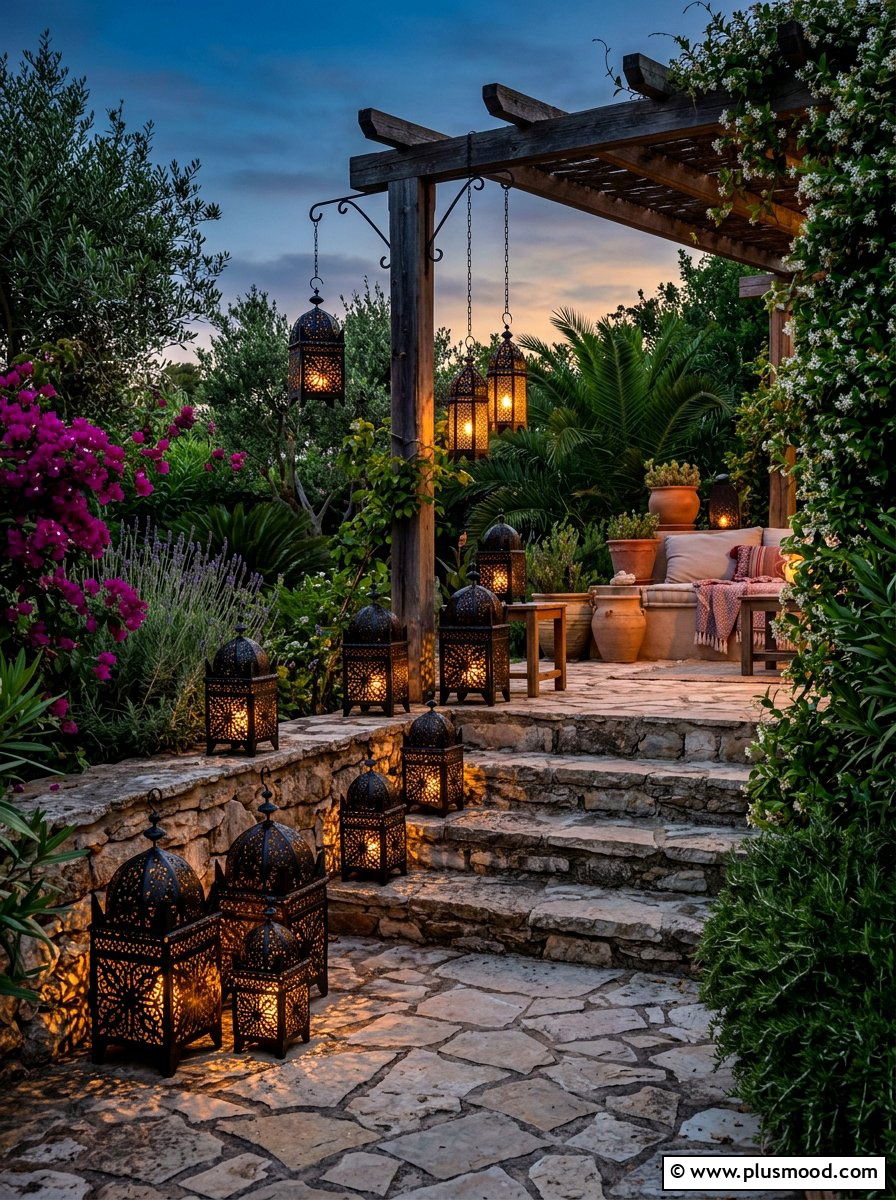
    1. Eco-Friendly Ambiance with Solar Lanterns

    Eco-Friendly Ambiance with Solar Lanterns

    Illuminate your outdoor spaces effortlessly with solar lanterns, an energy-saving lighting solution that absorbs sunlight during the day and softly glows after dusk. Available in diverse designs from rustic metal to sleek glass, these lanterns offer a charming and sustainable way to brighten your patio or garden.

    Key Design Elements

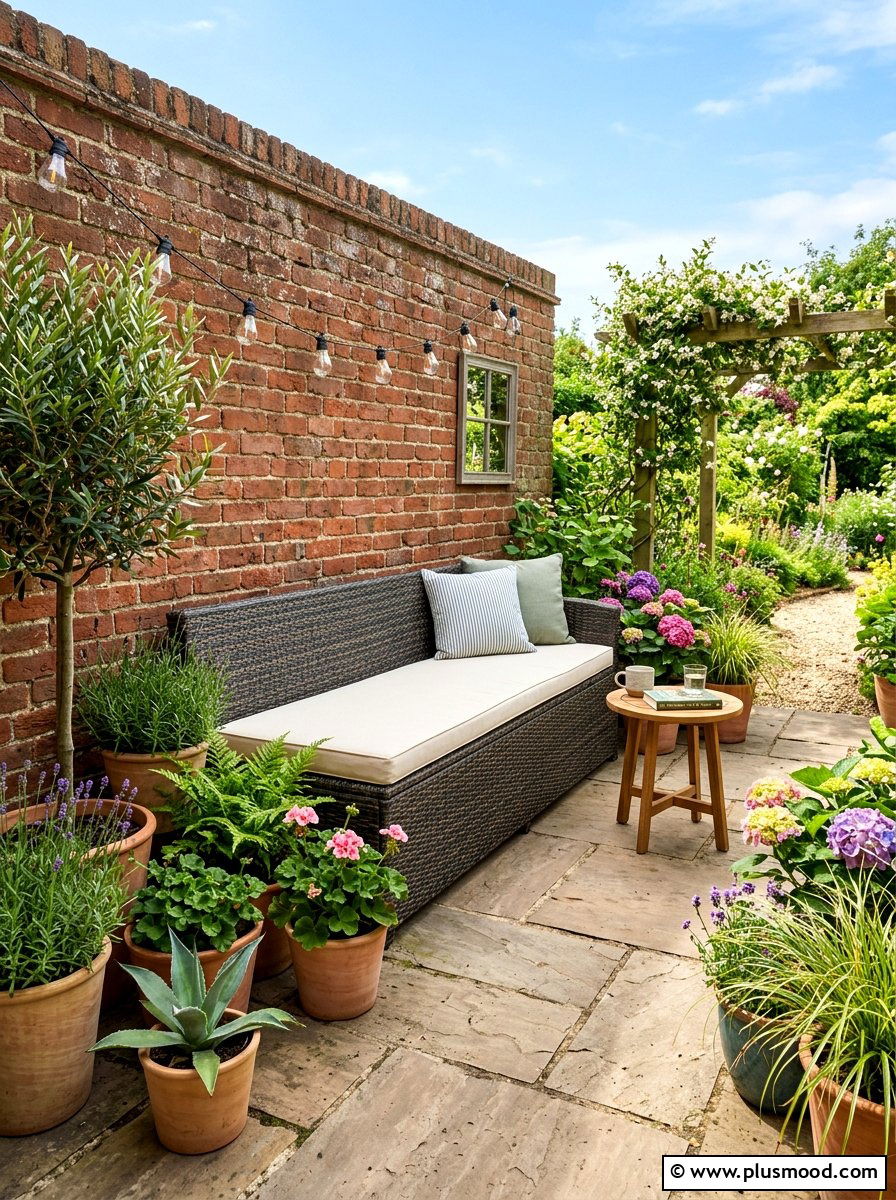
    • Mix different styles and sizes of solar lanterns to create a dynamic and inviting atmosphere.
    • Position lanterns at varying heights—on tables, steps, or hanging—to add depth and visual interest.
    • Opt for lanterns with automatic dusk-to-dawn sensors to enjoy hassle-free, consistent illumination.

    Pro Tip: For a captivating nighttime setting, combine solar lanterns with battery-operated fairy lights to enhance warmth and sparkle.

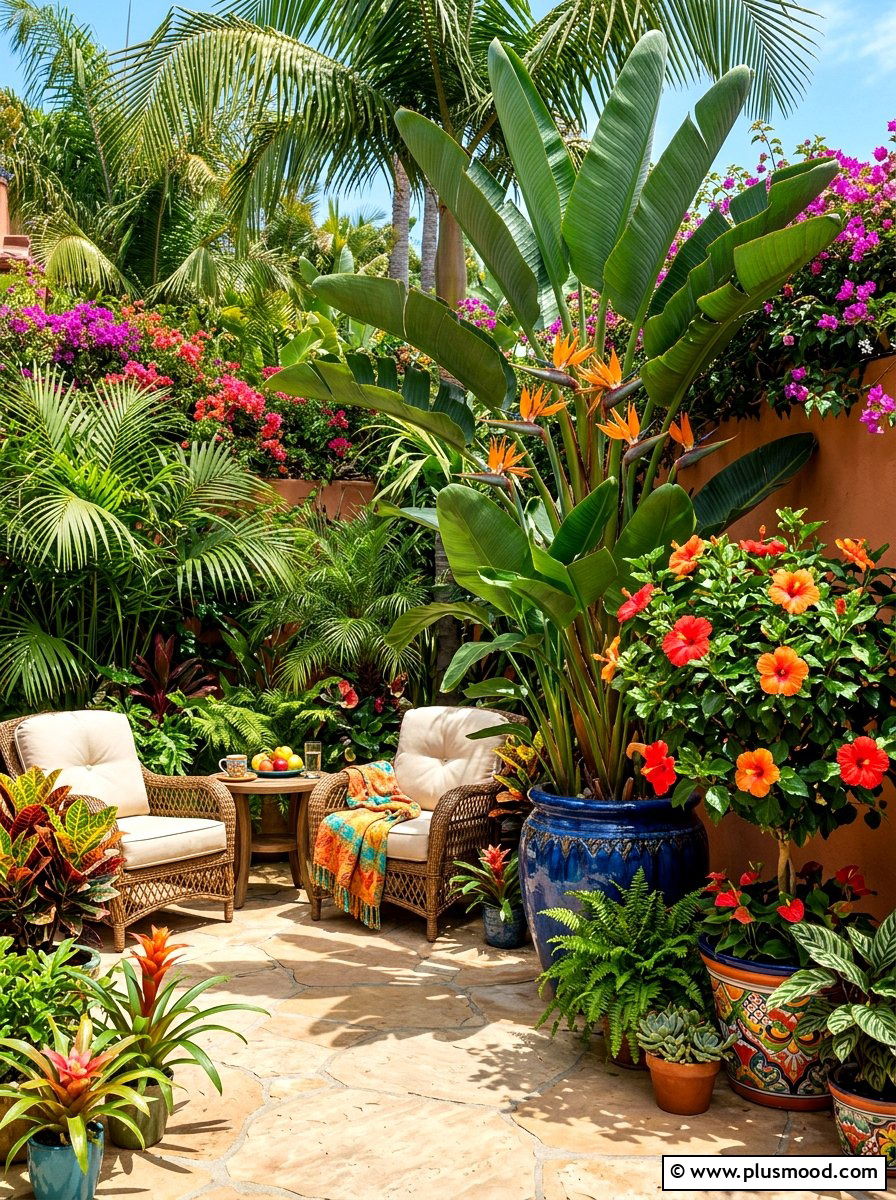
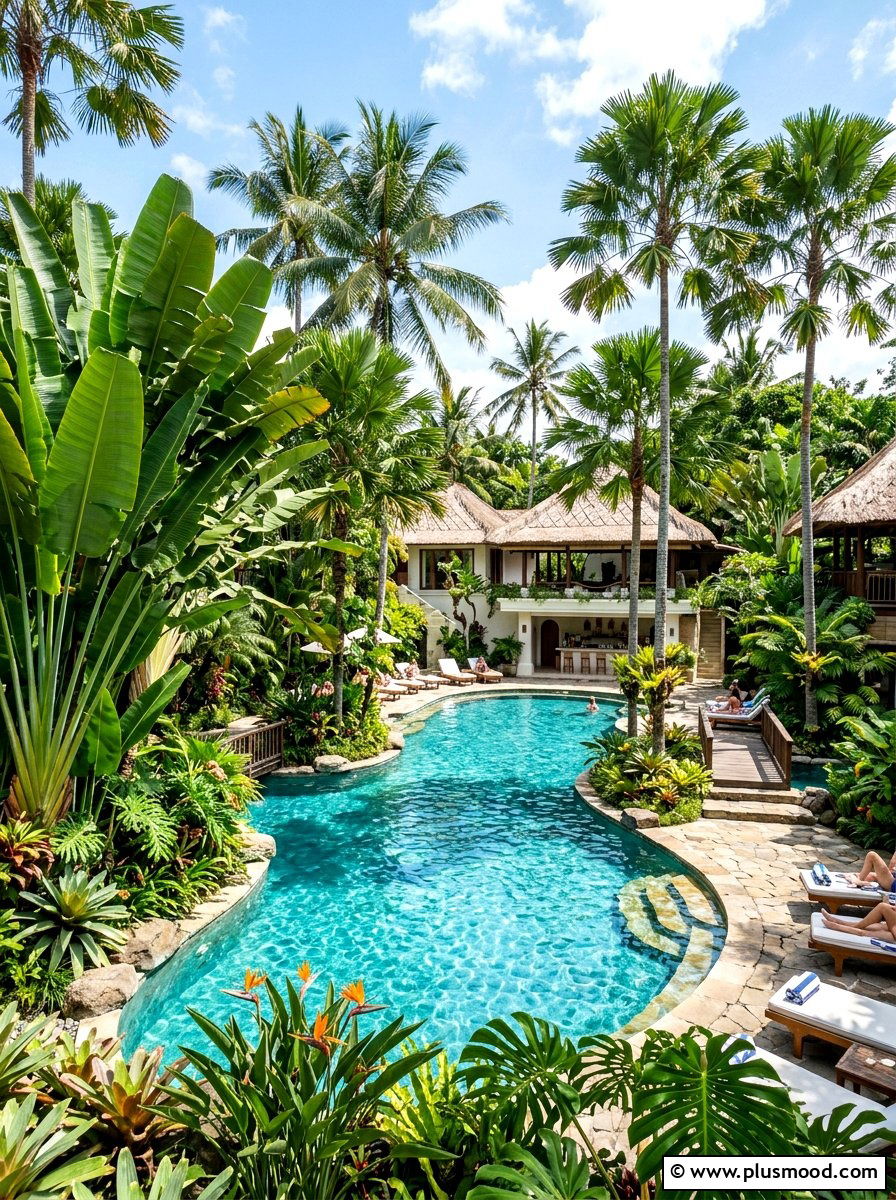
    2. Creating a Tropical Oasis on Your Patio

    Creating a Tropical Oasis on Your Patio

    Transform your patio into a vibrant getaway by introducing tropical plants that boast bold foliage and colorful blooms. Selecting hardy varieties that thrive in warm weather ensures a thriving mini paradise right outside your door. Grouping plants thoughtfully not only enhances visual appeal but also crafts an inviting, serene ambiance.

    Key Design Elements

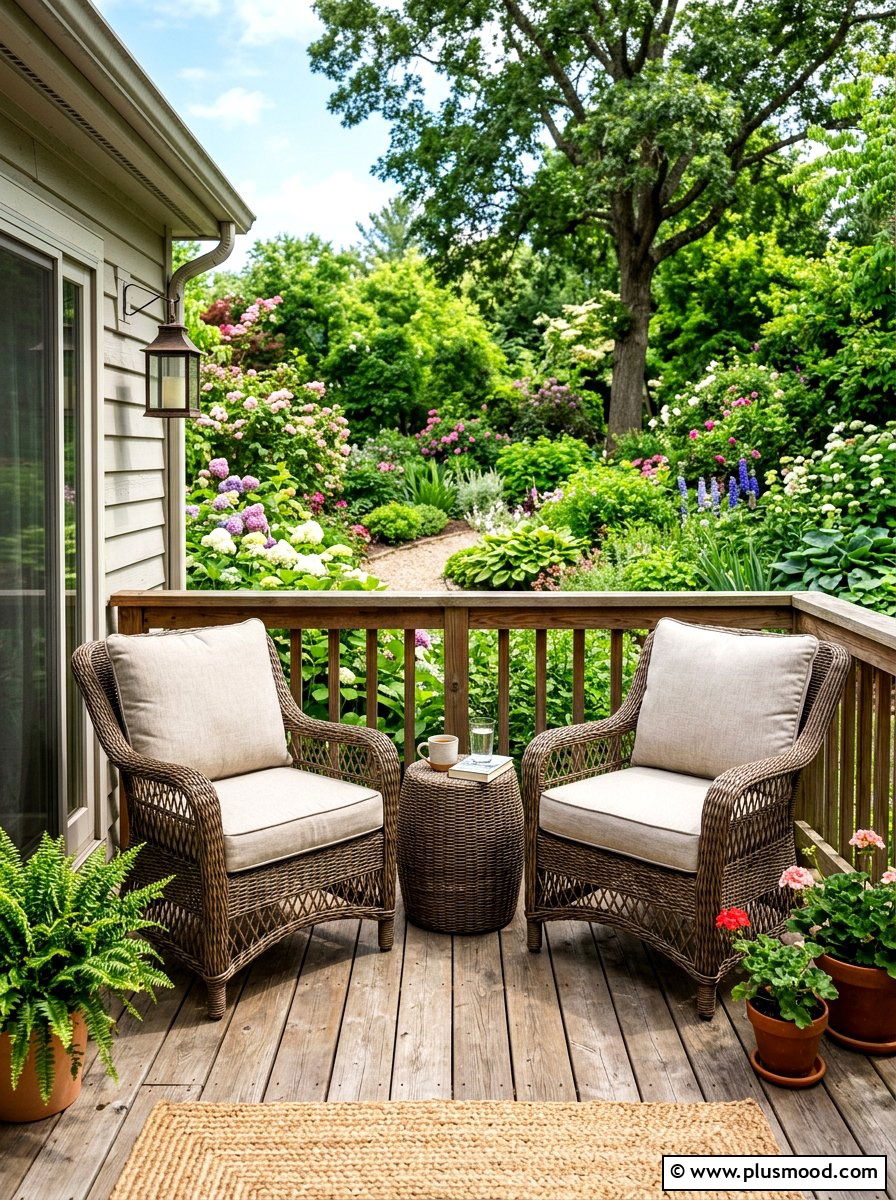
    • Choose heat-loving plants like hibiscus, bird of paradise, and canna lilies for bursts of color and texture.
    • Arrange pots at varying heights to build depth and create a layered, lush garden feel.
    • Cluster plants closely to establish a dense, jungle-inspired retreat that helps buffer city sounds.

    Pro Tip: Incorporate large-leafed plants such as elephant ears or monstera to instantly elevate the tropical vibe and provide natural shade.

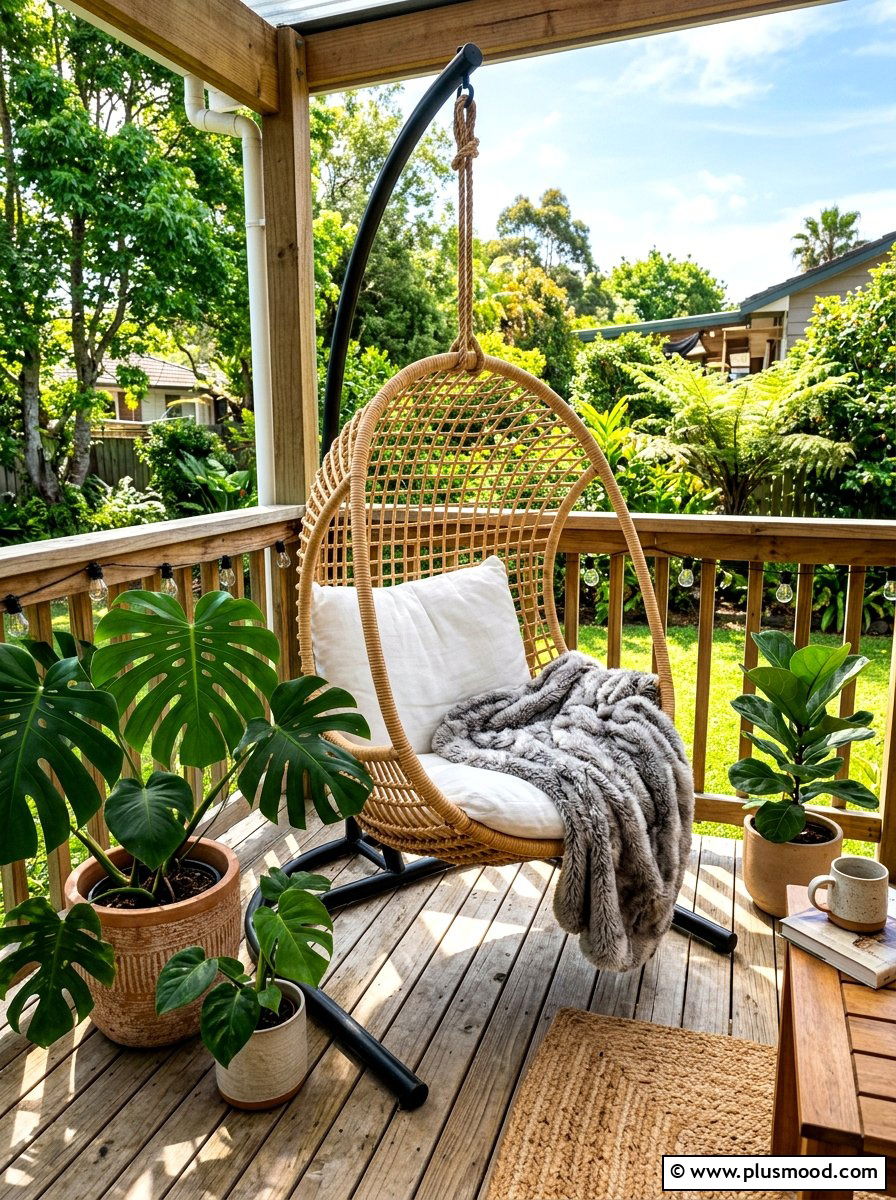
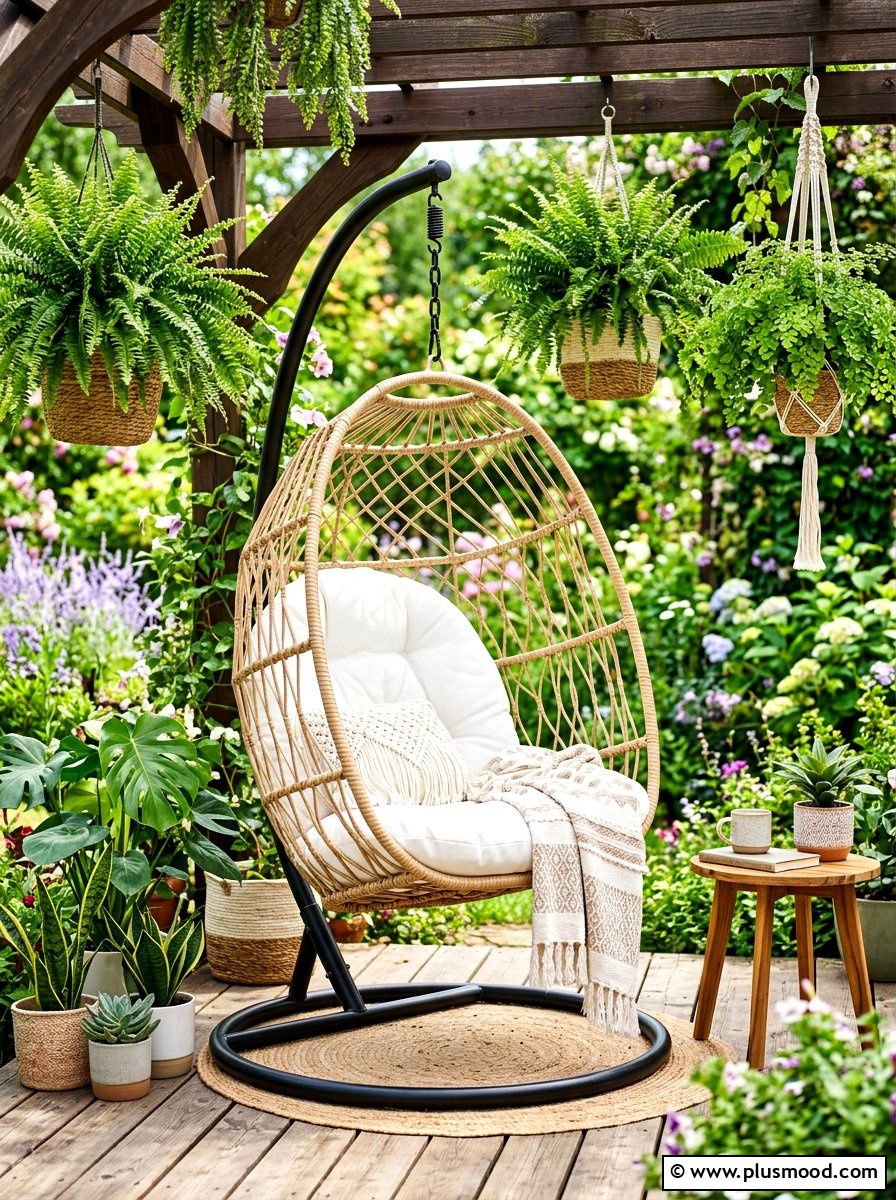
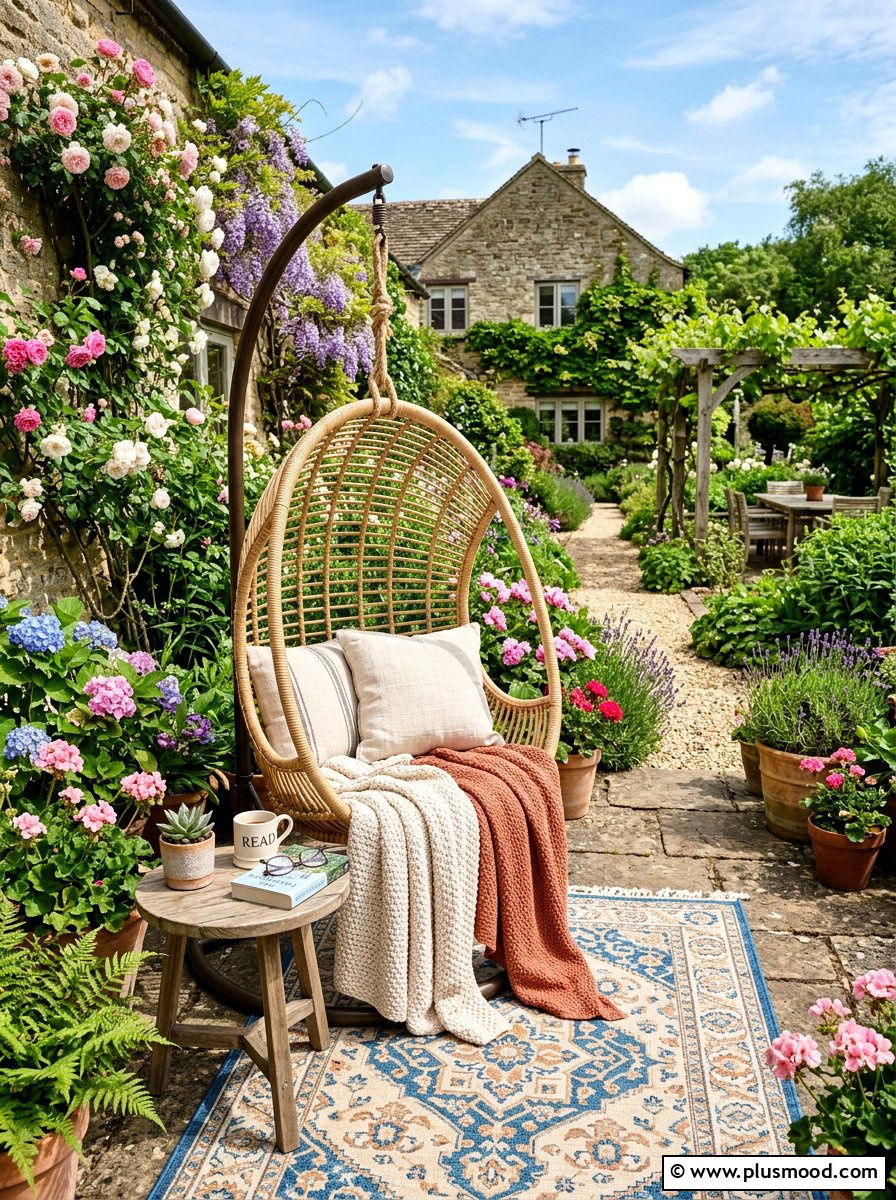
    3. Elevate Your Outdoor Space with a Hanging Egg Chair

    Elevate Your Outdoor Space with a Hanging Egg Chair

    Transform your summer patio into a cozy retreat with the chic and whimsical hanging egg chair. Its suspended design not only saves floor space but also creates a serene nook perfect for unwinding. This stylish piece effortlessly blends comfort and contemporary flair, making it a standout addition to any outdoor setting.

    Key Design Elements

    • Choose a weather-resistant cushion and throw to ensure durability and comfort throughout the season.
    • Install the chair from a sturdy ceiling beam or use a freestanding frame for versatile placement options.
    • Coordinate pillows and accessories in colors that complement your existing outdoor décor to create a cohesive look.

    Pro Tip: Add fairy lights or a small side table nearby to enhance ambiance and functionality in your hanging chair nook.

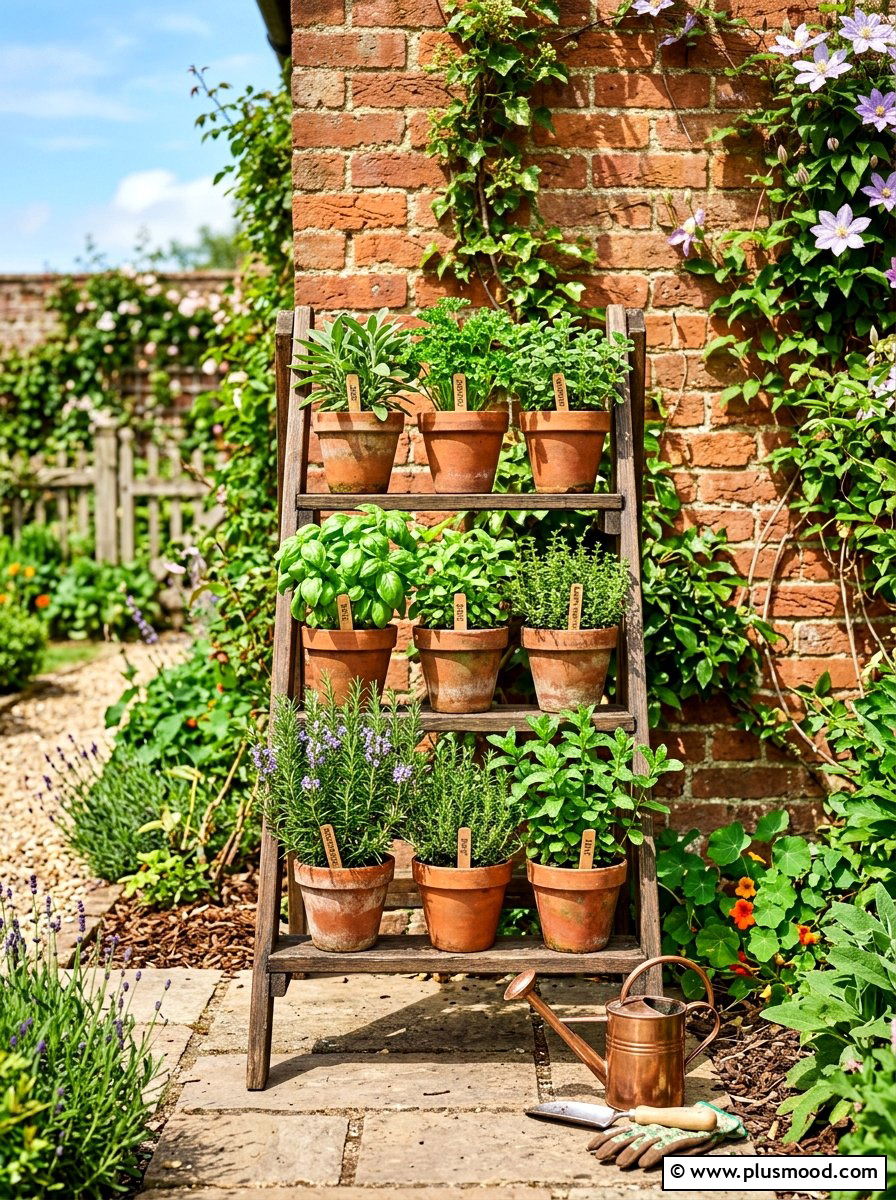
    4. Creating a Stylish and Space-Saving Herb Garden

    Creating a Stylish and Space-Saving Herb Garden

    Transform your compact patio into a charming and functional herb oasis. Growing basil, mint, and rosemary right outside your kitchen not only enhances your outdoor ambiance but also provides fresh ingredients at your fingertips. Utilizing vertical or tiered planters helps you make the most of limited space while adding lush greenery and delightful aromas to your home.

    Key Design Elements

    • Choose a vertical or tiered planter to save floor space and increase planting capacity.
    • Select herbs that thrive in your local climate to ensure healthy growth and abundant harvests.
    • Place the herb garden near your kitchen door for easy access during meal preparation.

    Pro Tip: Incorporate self-watering containers to maintain consistent moisture levels, reducing maintenance and boosting herb vitality.

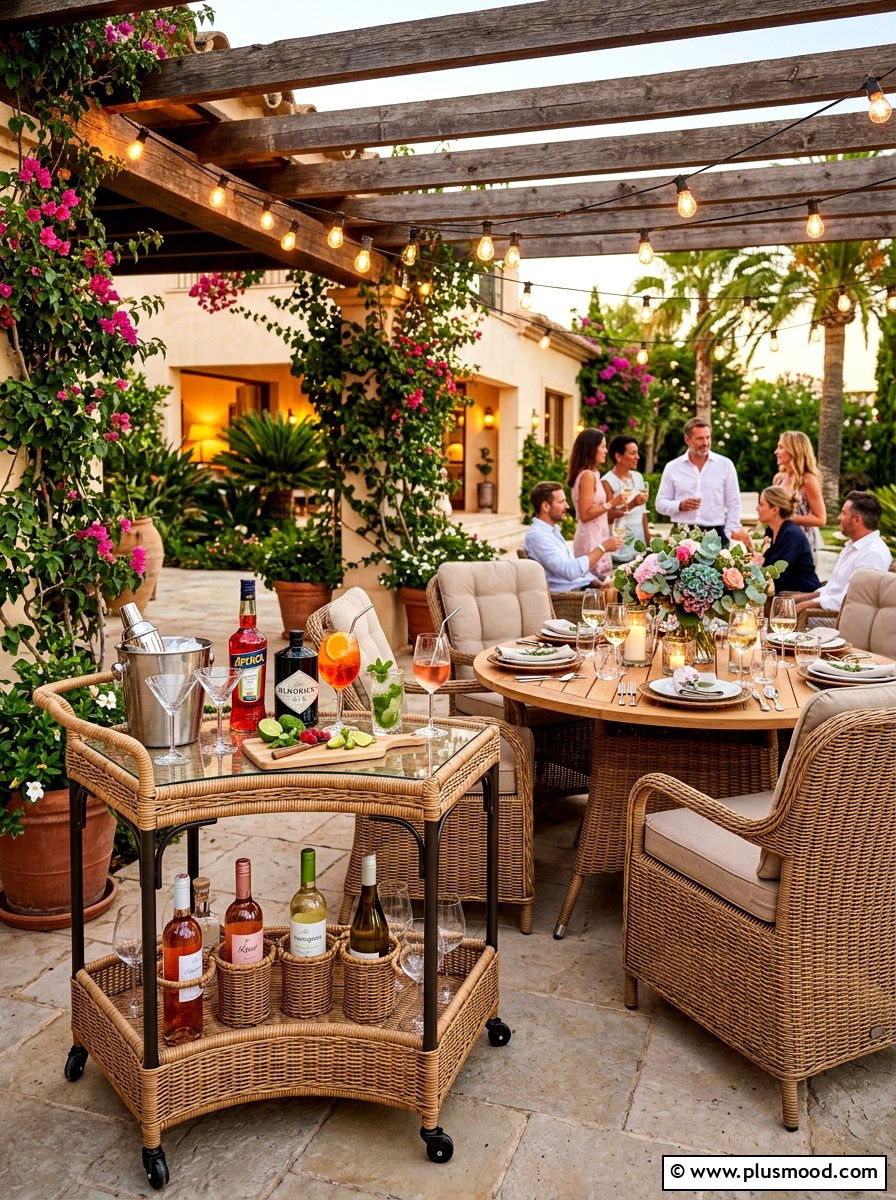
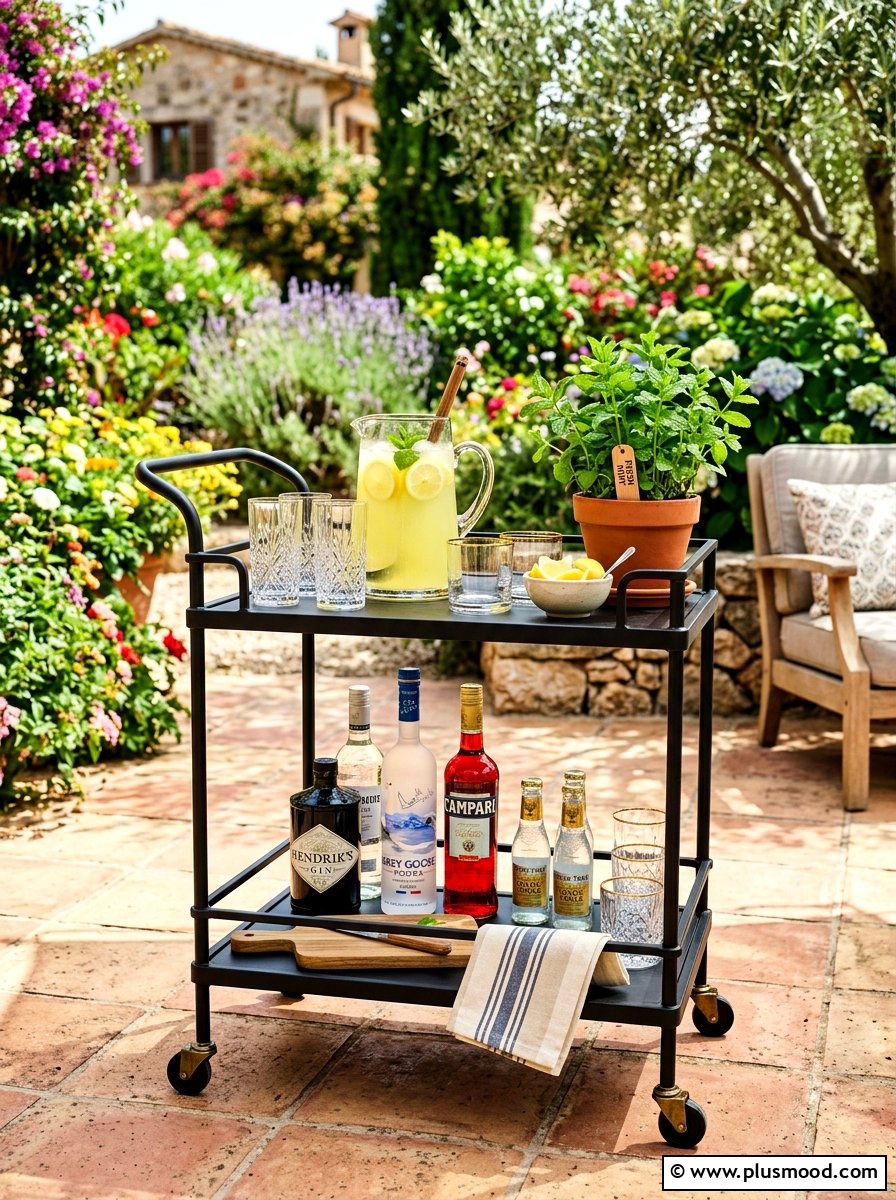
    5. Elevate Your Patio with a Mobile Outdoor Bar Cart

    Elevate Your Patio with a Mobile Outdoor Bar Cart

    Transform your patio into an inviting entertainment spot by adding a sleek outdoor bar cart. This compact setup not only streamlines your drink service but also enhances the overall ambiance for effortless summer gatherings. With versatile shelves and mobility, it perfectly balances practicality and style.

    Key Design Elements

    • Choose a bar cart with sturdy wheels to easily reposition it for different occasions or when needing extra space.
    • Designate the top tier for mixing drinks and the lower shelf for storing glasses, mixers, and snacks within arm’s reach.
    • Add personality by accessorizing with fresh citrus fruits and a small potted herb or succulent.

    Pro Tip: Select weather-resistant materials and finishes to ensure your bar cart looks great and lasts through all seasons.

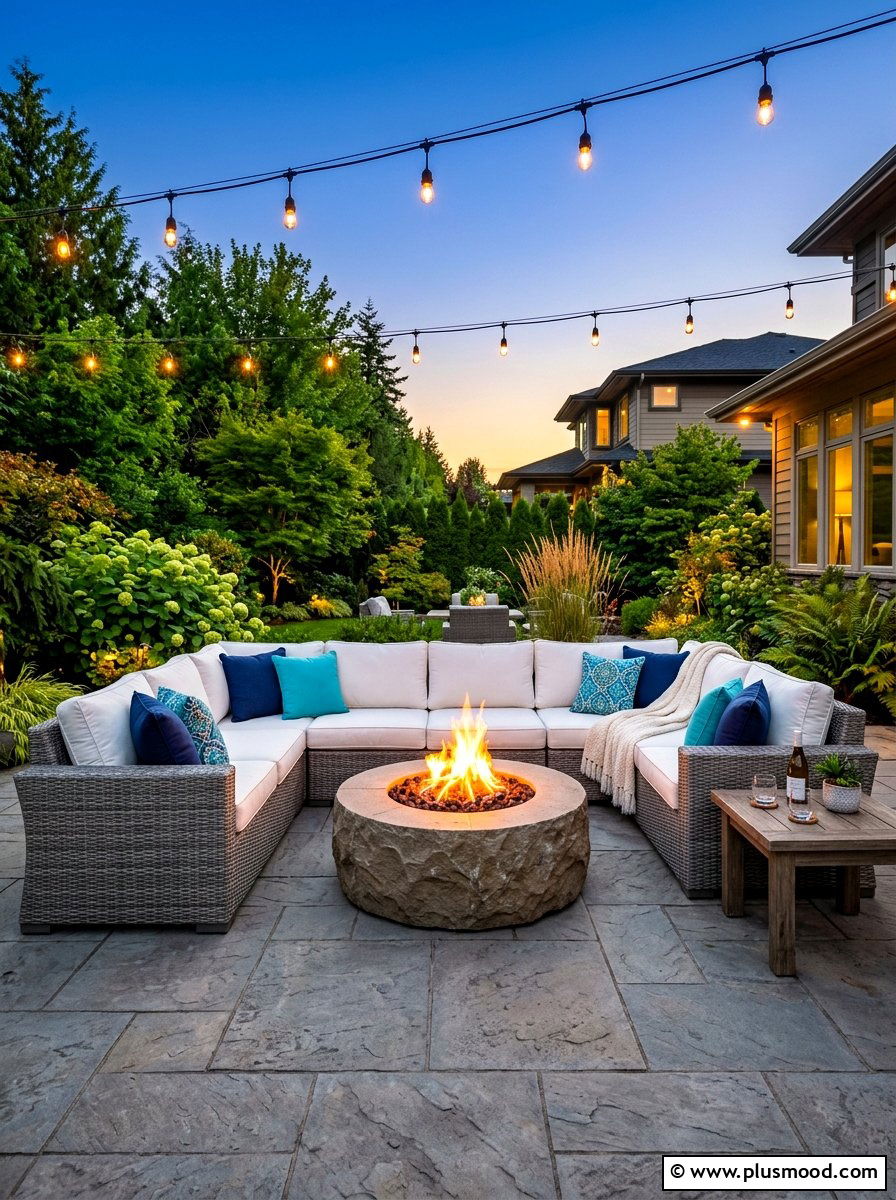
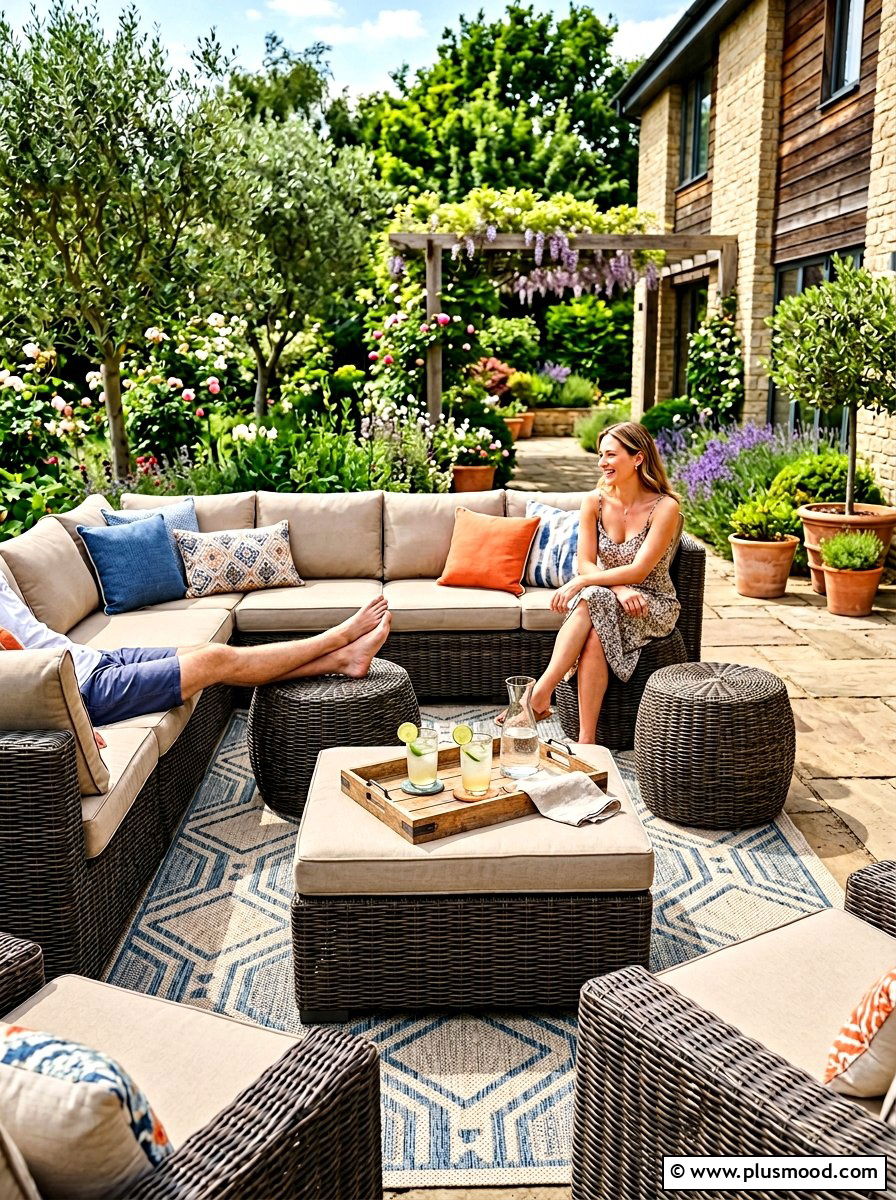
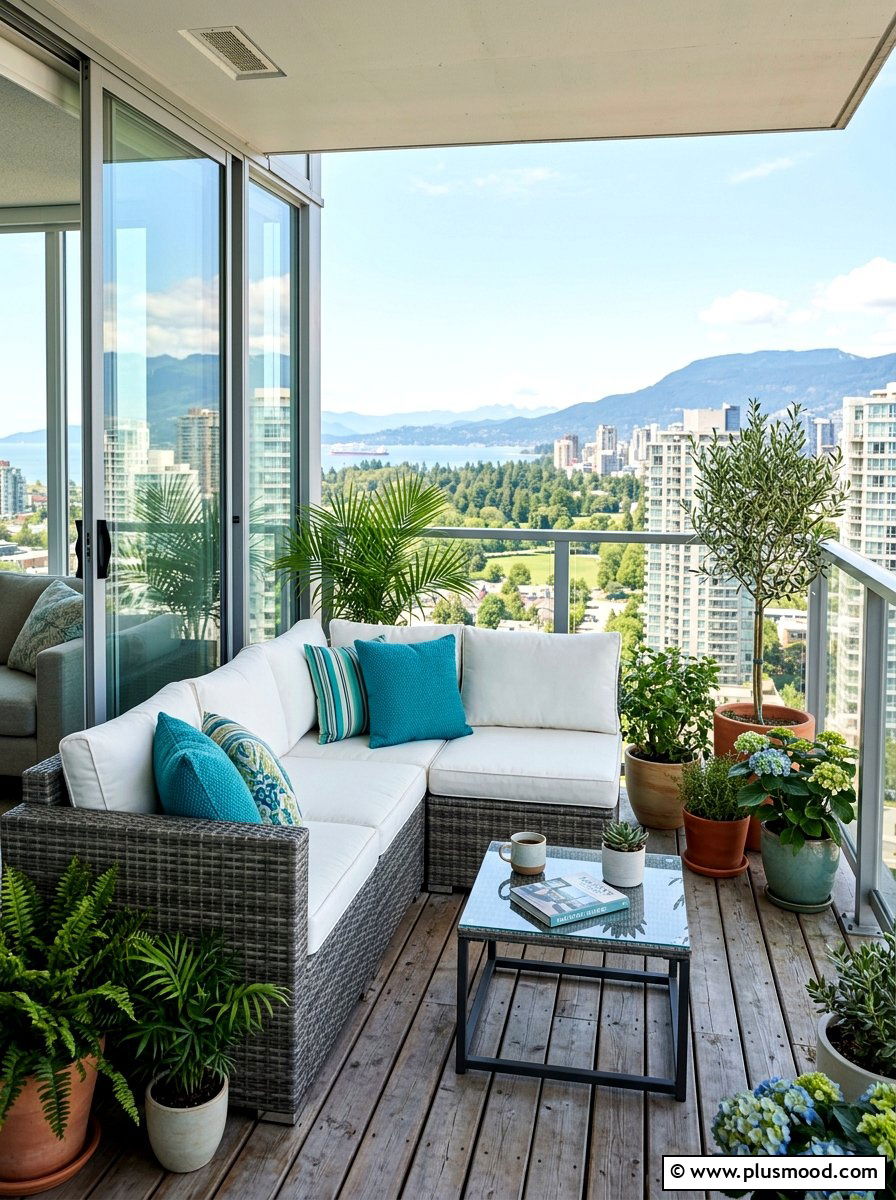
    6. Maximize Comfort with a Corner Sectional Sofa

    Maximize Comfort with a Corner Sectional Sofa

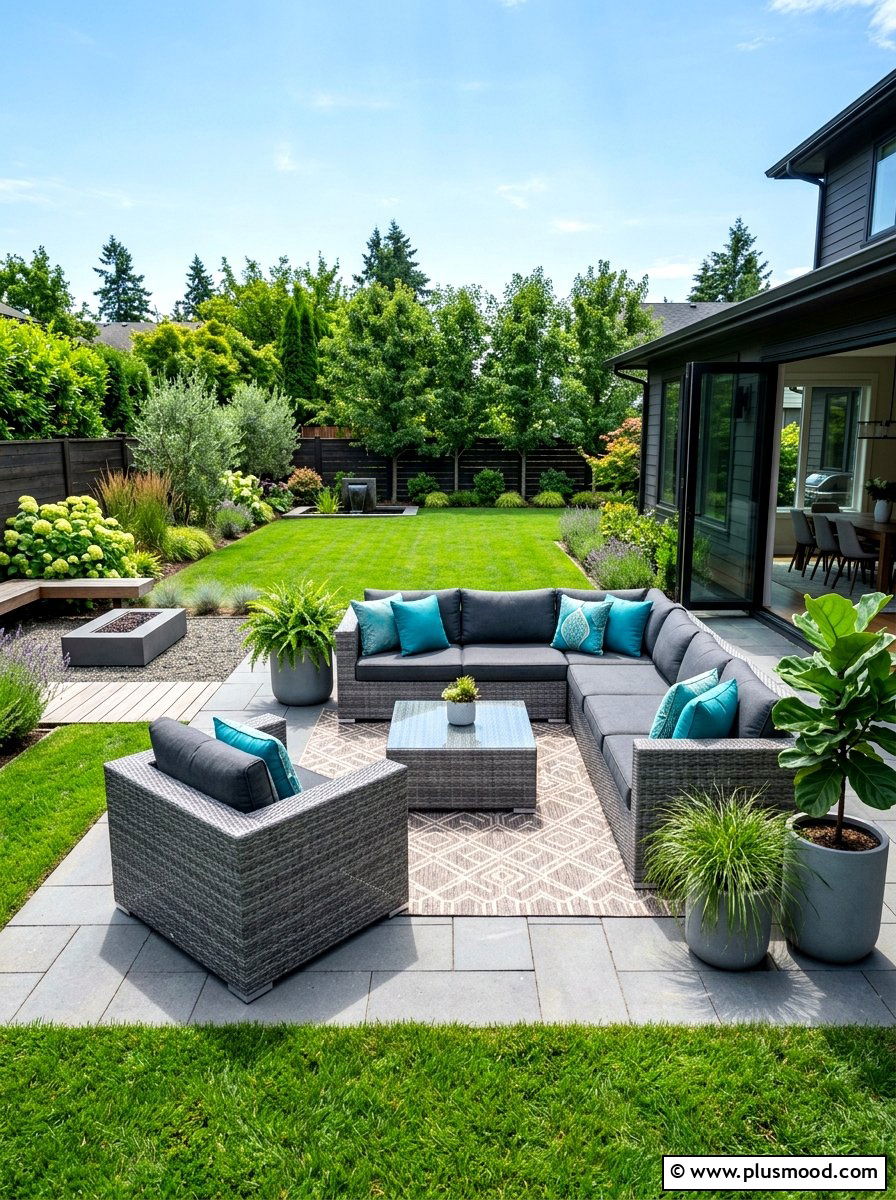
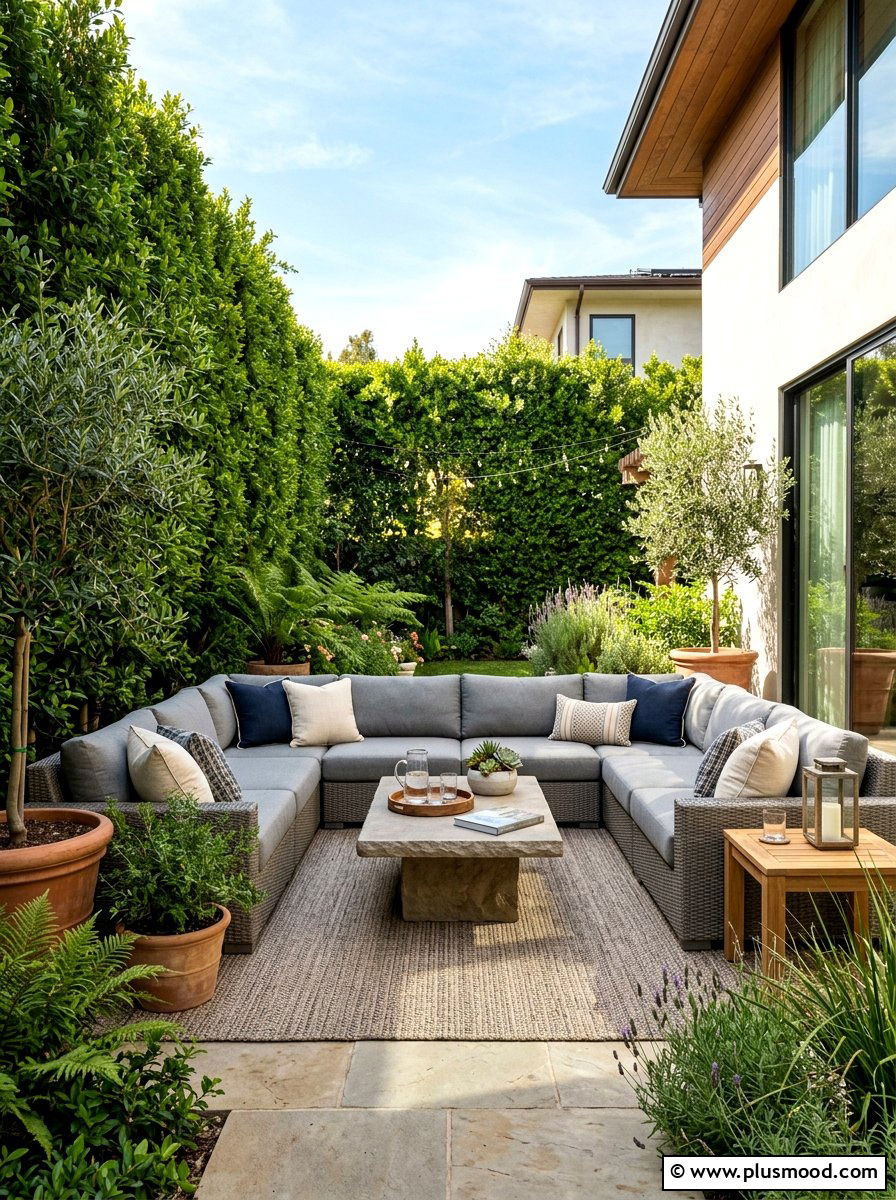
    Transform underutilized outdoor corners into cozy social hubs by incorporating a compact L-shaped sectional sofa. This seating arrangement not only enhances the flow of your patio but also cultivates a welcoming atmosphere perfect for relaxing afternoons or lively gatherings. Opting for sleek designs helps maintain an open and airy vibe without overwhelming the space.

    Key Design Elements

    • Choose sectionals with slim frames and low backs to preserve clear sightlines and prevent visual clutter.
    • Select durable, weather-proof cushions in deep hues like navy or charcoal for an elegant yet practical finish.
    • Position the sectional to free up central areas, creating a spacious and inviting outdoor living zone.

    Pro Tip: Invest in modular sectional pieces that can be rearranged seasonally to refresh the layout and suit varying occasions.

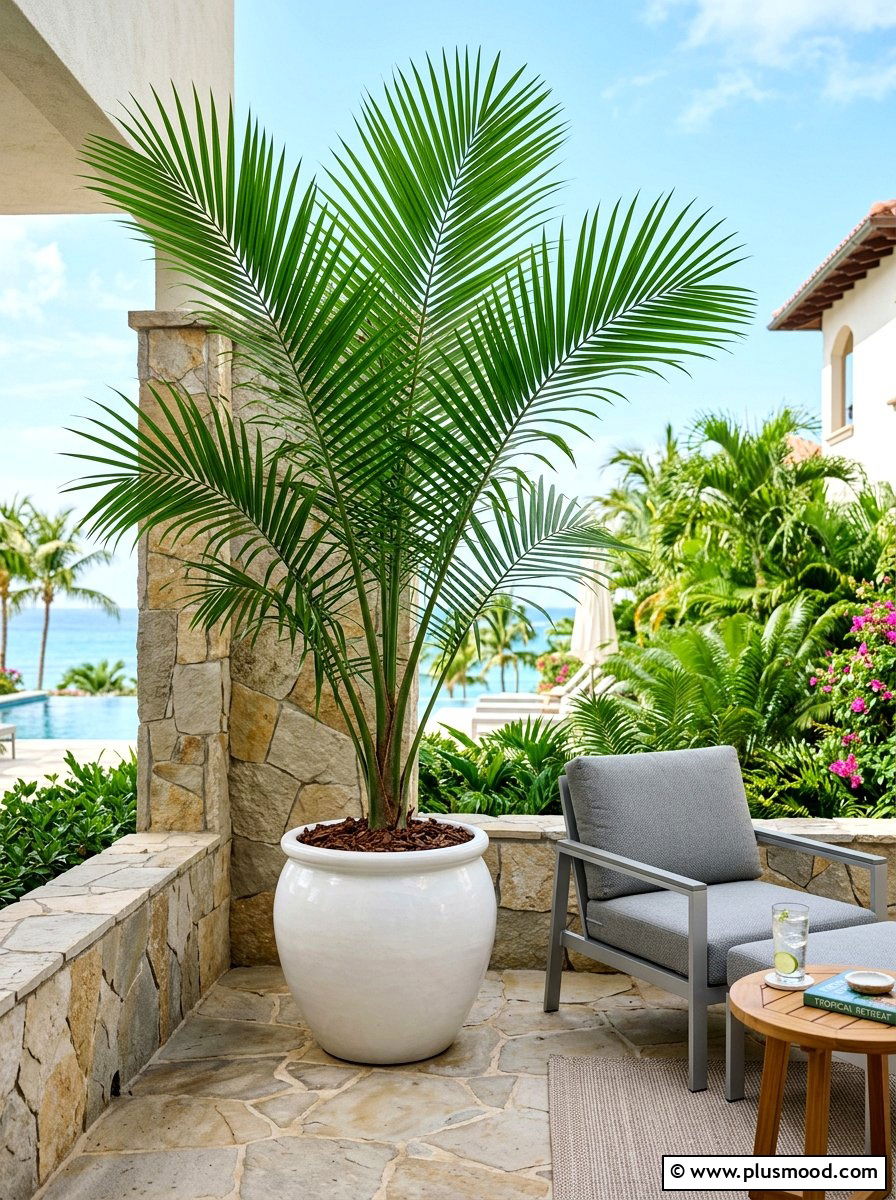
    7. Maximize Your Outdoor Space with Bold Large Planters

    Maximize Your Outdoor Space with Bold Large Planters

    Transform your patio’s ambiance by incorporating a few sizable statement plants that draw the eye upward and create an inviting atmosphere. Large, sculptural greenery like a majestic palm or fiddle leaf fig can effortlessly redefine your outdoor area, making it feel more expansive and luxurious. Strategically placing these dramatic plants adds depth and personality while elevating your space’s overall aesthetic.

    Key Design Elements

    • Choose tall, architectural plants to introduce height and structure to your patio.
    • Position oversized pots in corners to break harsh lines and frame your seating area.
    • Opt for planters with unique textures or shapes to boost the visual allure of your greenery.

    Pro Tip: For an impressive visual statement, cluster two or three large potted plants of varying heights together to create a dynamic focal point that anchors your outdoor space.

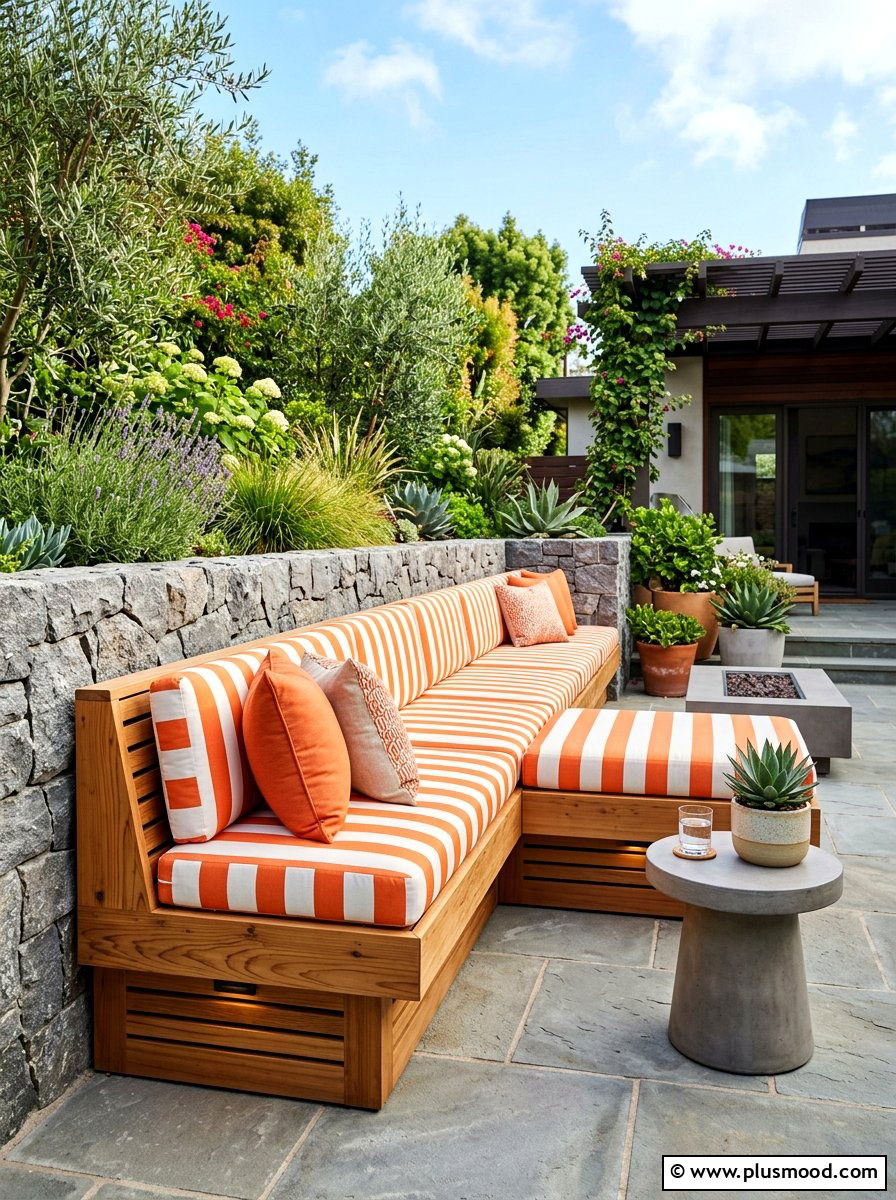
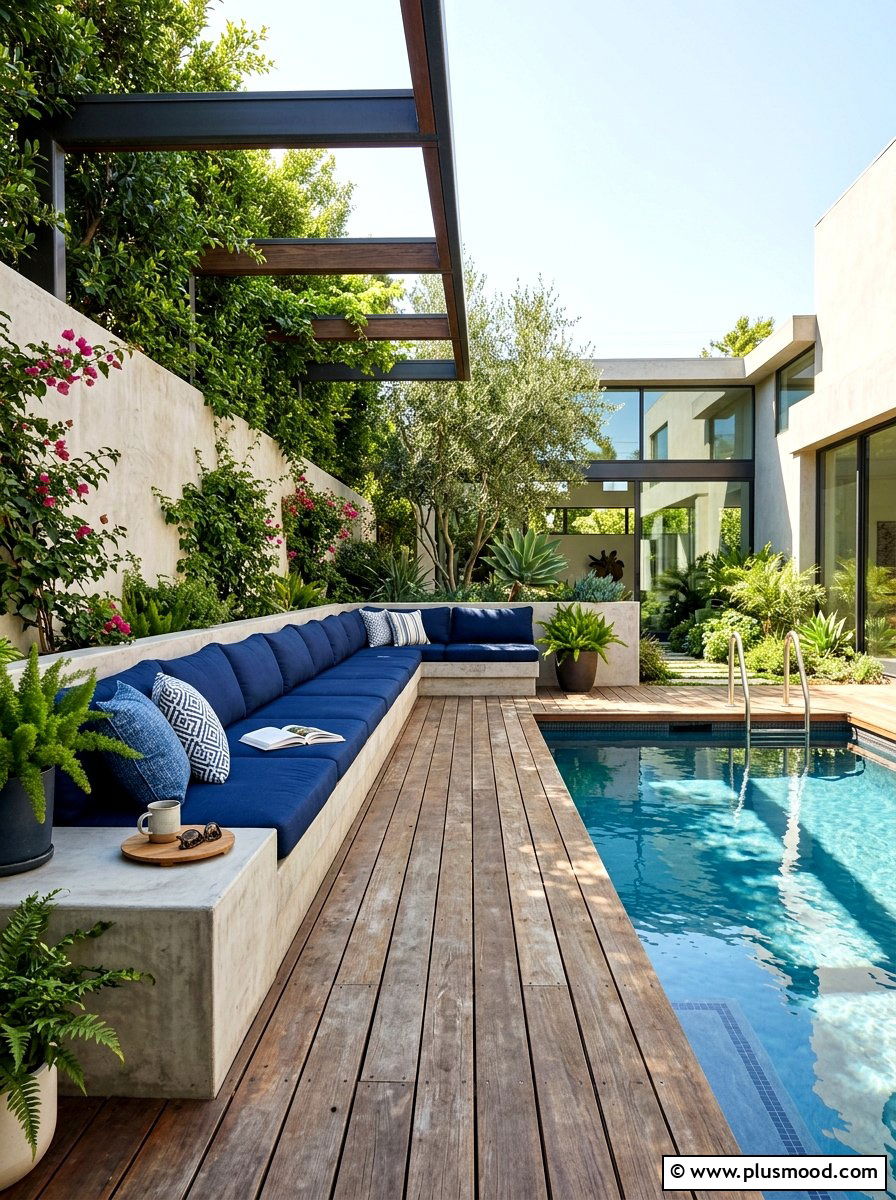
    8. Seamless Seating with Built-In Benches

    Seamless Seating with Built-In Benches

    Integrating seating directly into your patio’s structure not only maximizes space but also enhances the overall design. Built-in benches can be crafted from materials like wood or stone to harmonize with your home’s exterior, offering a stylish and functional addition. Additionally, these benches often provide concealed storage underneath, perfect for keeping cushions and garden tools tucked away.

    Key Design Elements

    • Position built-in benches along walls or railings to free up floor space and maintain an open patio layout.
    • Choose durable materials that complement your home’s exterior for a cohesive aesthetic.
    • Incorporate storage compartments beneath the seating to keep your outdoor essentials organized and easily accessible.

    Pro Tip: Add custom outdoor cushions in vibrant or neutral tones to enhance comfort while elevating the visual appeal of your built-in bench.

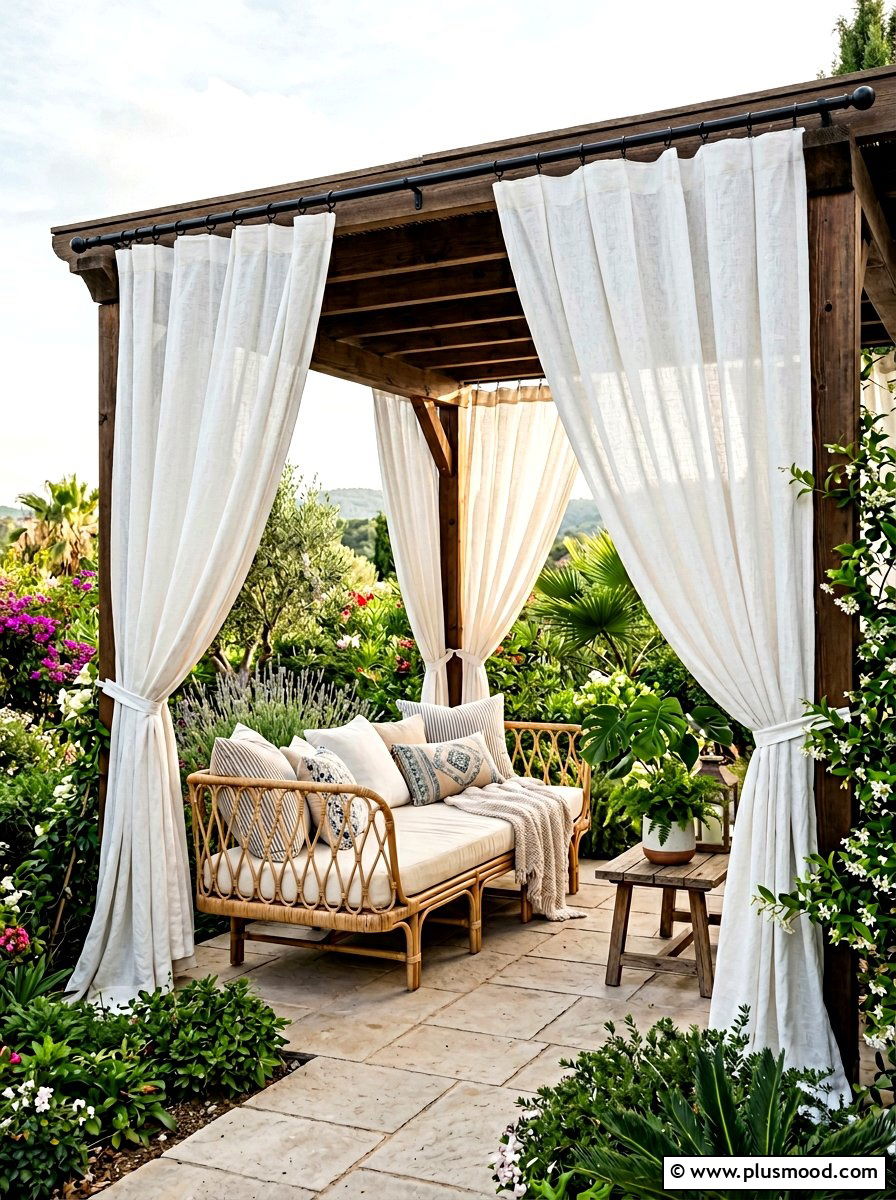
    9. Elevate Your Patio with Elegant Outdoor Privacy Curtains

    Elevate Your Patio with Elegant Outdoor Privacy Curtains

    Transform your outdoor space into a serene retreat with flowing privacy curtains that gently diffuse sunlight and shield your area from unwanted views. Unlike rigid structures, these curtains introduce a dynamic softness and create a breezy, inviting atmosphere on any small patio. Easily drawn closed for shade or tied back to showcase your surroundings, they bring a sophisticated charm that turns your patio into a cozy outdoor sanctuary.

    Key Design Elements

    • Choose lightweight, weather-resistant fabrics in light colors to keep the space airy and bright.
    • Install a sturdy, rust-proof rod system that allows curtains to glide smoothly for easy adjustment.
    • Use tiebacks or decorative hooks to elegantly frame your view when curtains are open.

    Pro Tip: For extra protection against wind and sun, layer your outdoor curtains with matching bamboo shades that can be rolled down as needed.

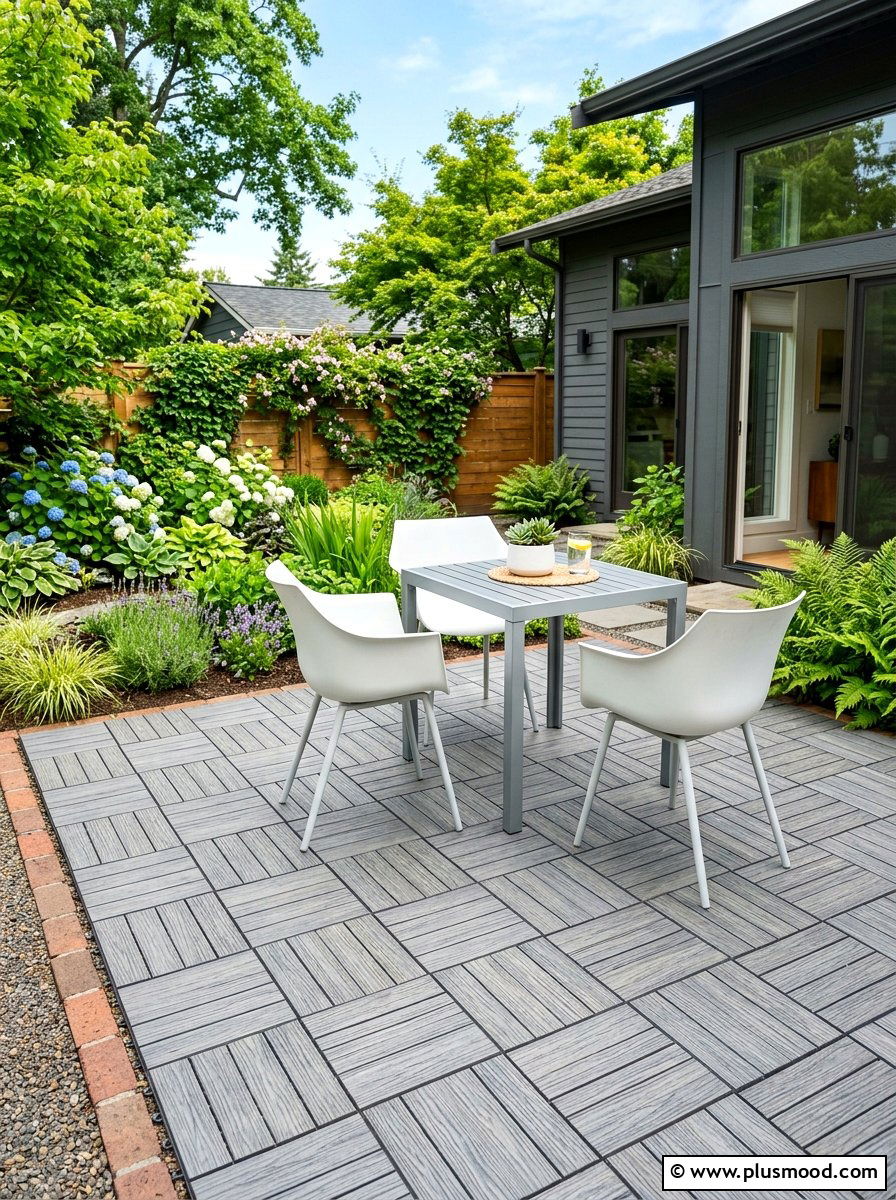
    10. Transform Your Patio with Easy-Install Outdoor Floor Tiles

    Transform Your Patio with Easy-Install Outdoor Floor Tiles

    Revitalize your worn-out concrete patio effortlessly by installing interlocking outdoor floor tiles. These versatile tiles come in a variety of styles—from natural wood finishes to elegant stone designs and durable composites—offering an instant aesthetic upgrade without heavy renovation. Designed with drainage in mind, they keep your outdoor space clean and dry, making them perfect for all seasons.

    Key Design Elements

    • Select tiles with built-in drainage channels to prevent water pooling and enhance longevity.
    • Opt for lighter shades or eye-catching patterns to brighten and visually expand your patio space.
    • Choose modular interlocking tiles for a straightforward, tool-free installation process suitable for DIY projects.

    Pro Tip: Before installation, clean and level the concrete surface thoroughly to ensure tiles lay flat and last longer.

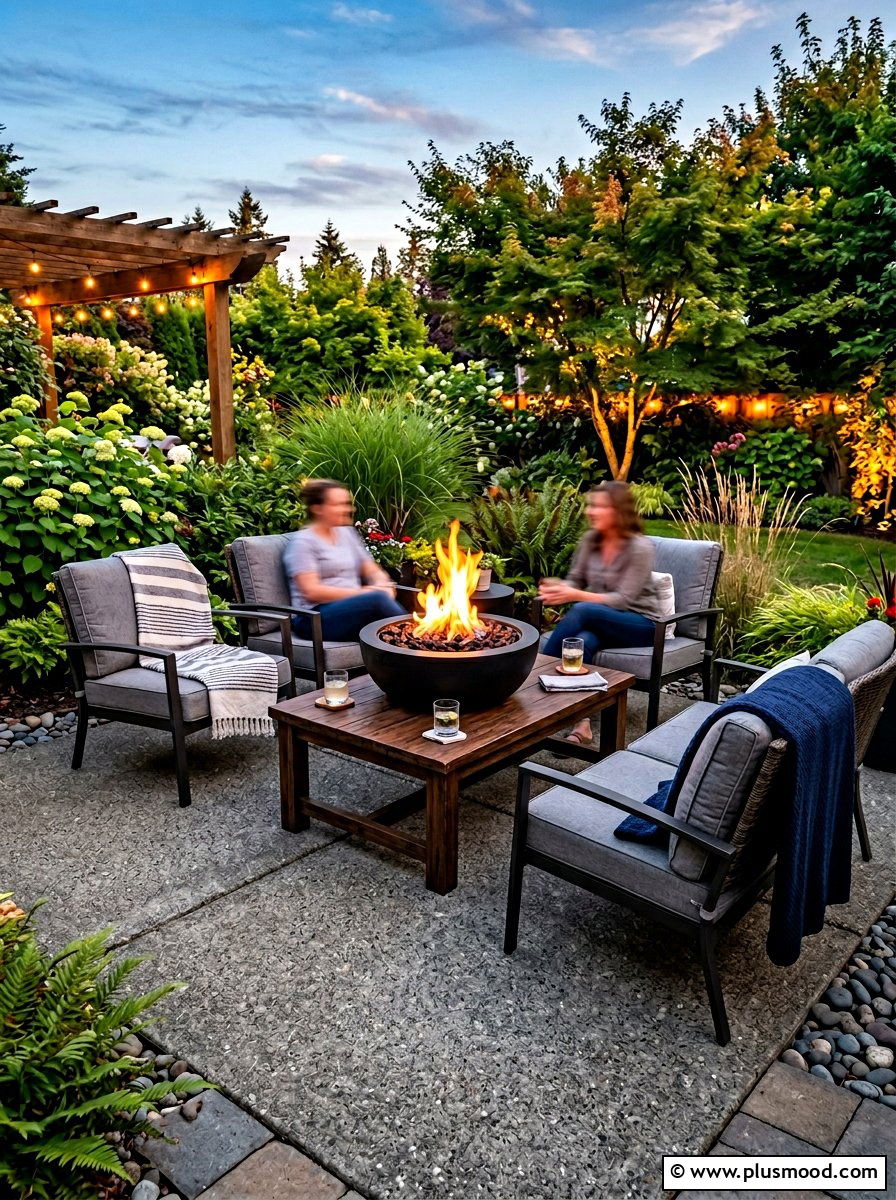
    11. Cozy Elegance with Tabletop Fire Pits

    Cozy Elegance with Tabletop Fire Pits

    Experience the charm and warmth of a fire without sacrificing space by using a tabletop fire pit. These sleek, compact units offer a safe and stylish solution to bring flickering flames to small outdoor areas like balconies or patios. Their smokeless design enhances the ambiance, creating a relaxing and inviting atmosphere for intimate gatherings.

    Key Design Elements

    • Choose gel or propane-fueled models for clean, hassle-free flames ideal for confined spaces.
    • Place the fire pit centrally on your coffee or side table to create a captivating evening centerpiece.
    • Pair with comfortable seating and soft lighting to amplify the cozy mood and enhance outdoor enjoyment.

    Pro Tip: Always keep a fire extinguisher nearby and ensure proper ventilation to maintain safety in compact outdoor settings.

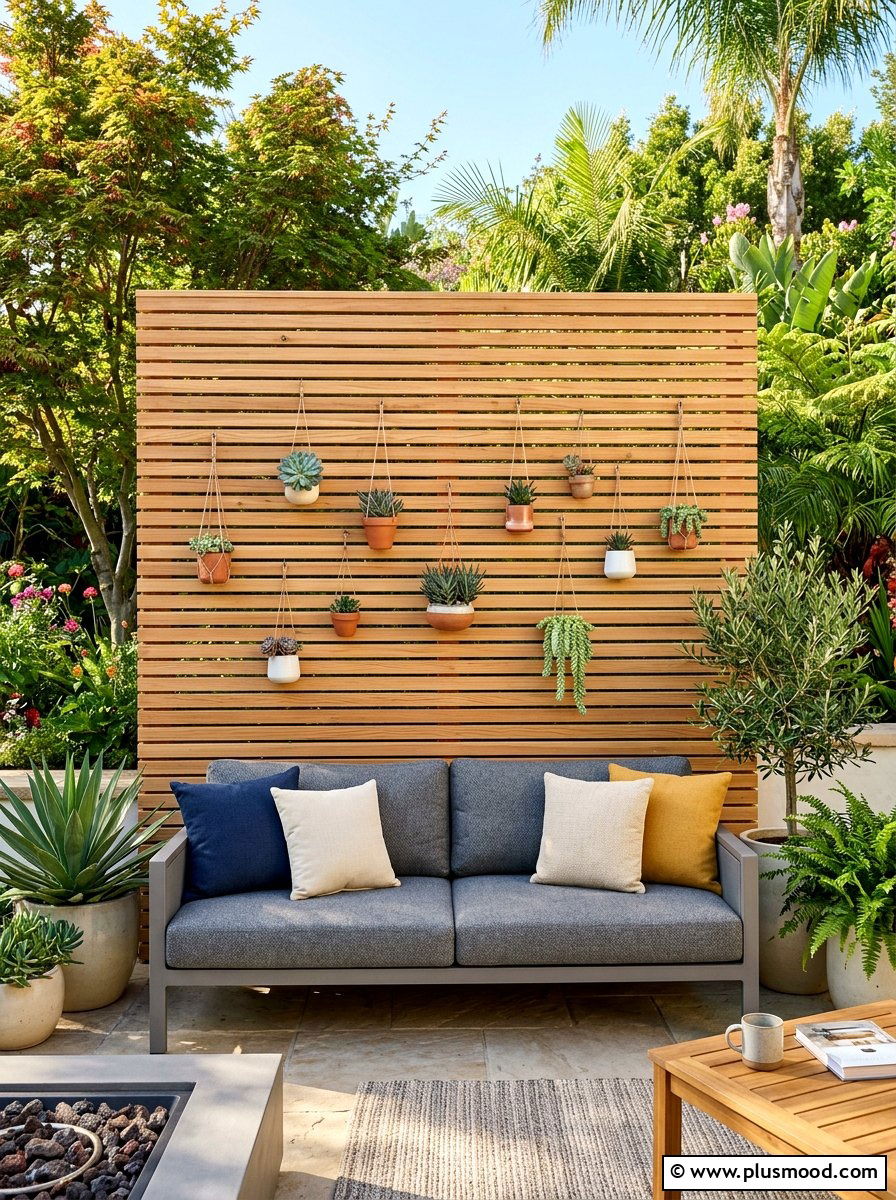
    12. Revitalize Your Outdoor Space with a Stylish Wood Slat Wall

    Revitalize Your Outdoor Space with a Stylish Wood Slat Wall

    Elevate a plain brick wall or outdated fence by installing a wood slat wall, a trendy and inviting design element perfect for small patios. The strategically spaced wooden slats introduce texture and warmth, creating an eye-catching backdrop that harmonizes effortlessly with greenery and modern outdoor furniture.

    Key Design Elements

    • Choose between vertical or horizontal slats to match your patio’s style and enhance visual interest.
    • Leave small gaps between boards to allow for air flow and to hang decorative items like planters or lanterns.
    • Select weather-resistant wood or apply a protective finish to ensure durability and maintain the wood’s natural beauty.

    Pro Tip: Incorporate climbing plants or string lights along the slat wall to add depth and a cozy ambiance to your outdoor retreat.

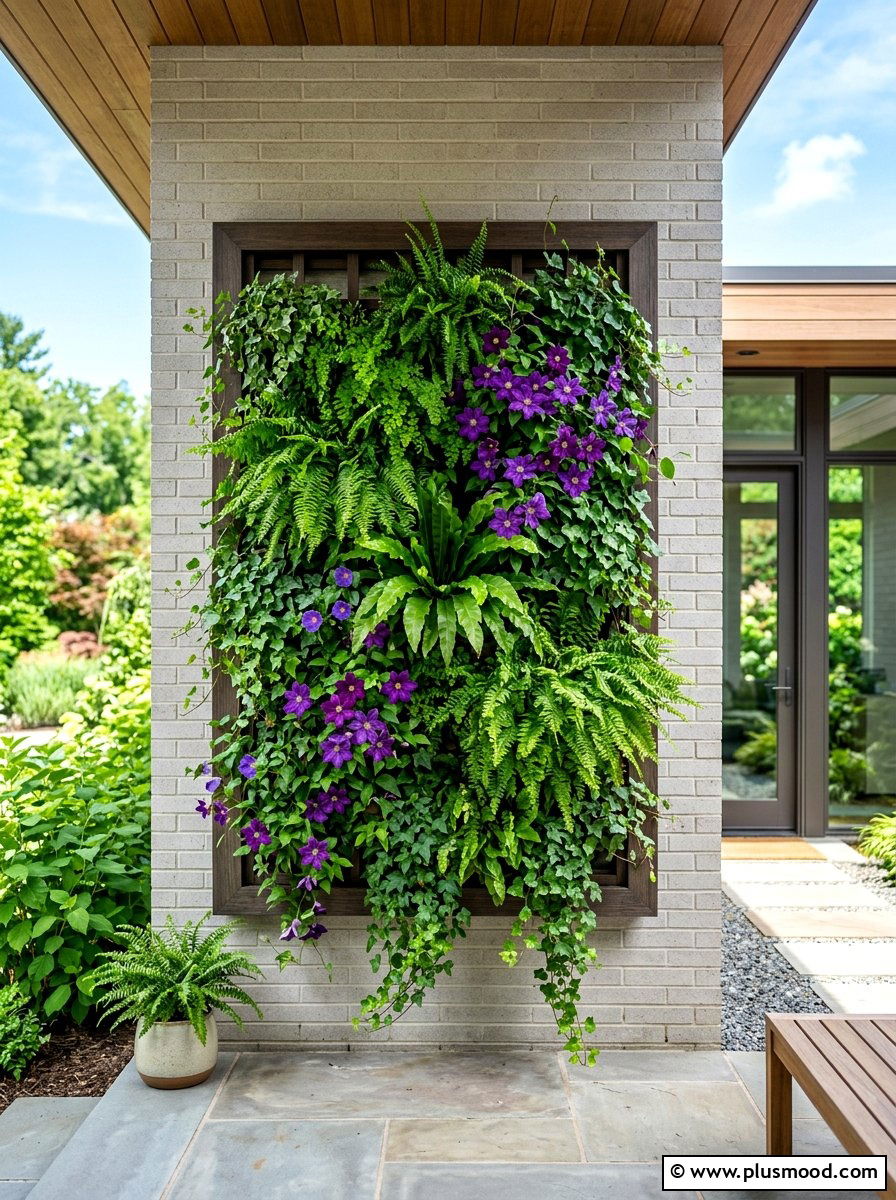
    13. Transform Your Patio with a Vertical Garden Wall

    Transform Your Patio with a Vertical Garden Wall

    Maximize limited outdoor space by turning your walls into a vibrant vertical garden. This technique brings a refreshing, natural atmosphere to your patio while creating the illusion of height and spaciousness. Combining various plants like trailing vines and lush ferns can craft a stunning living artwork that also helps keep your area cooler during hot days.

    Key Design Elements

    • Install modular wall planters or DIY wooden trellises to support climbing and cascading plants.
    • Mix different plant textures, such as delicate ivy paired with bold, spiky foliage, for dynamic visual interest.
    • Position your vertical garden in a spot with appropriate sunlight to ensure healthy growth and vibrant colors.

    Pro Tip: Incorporate self-watering planters or a drip irrigation system to maintain your vertical garden’s health effortlessly.

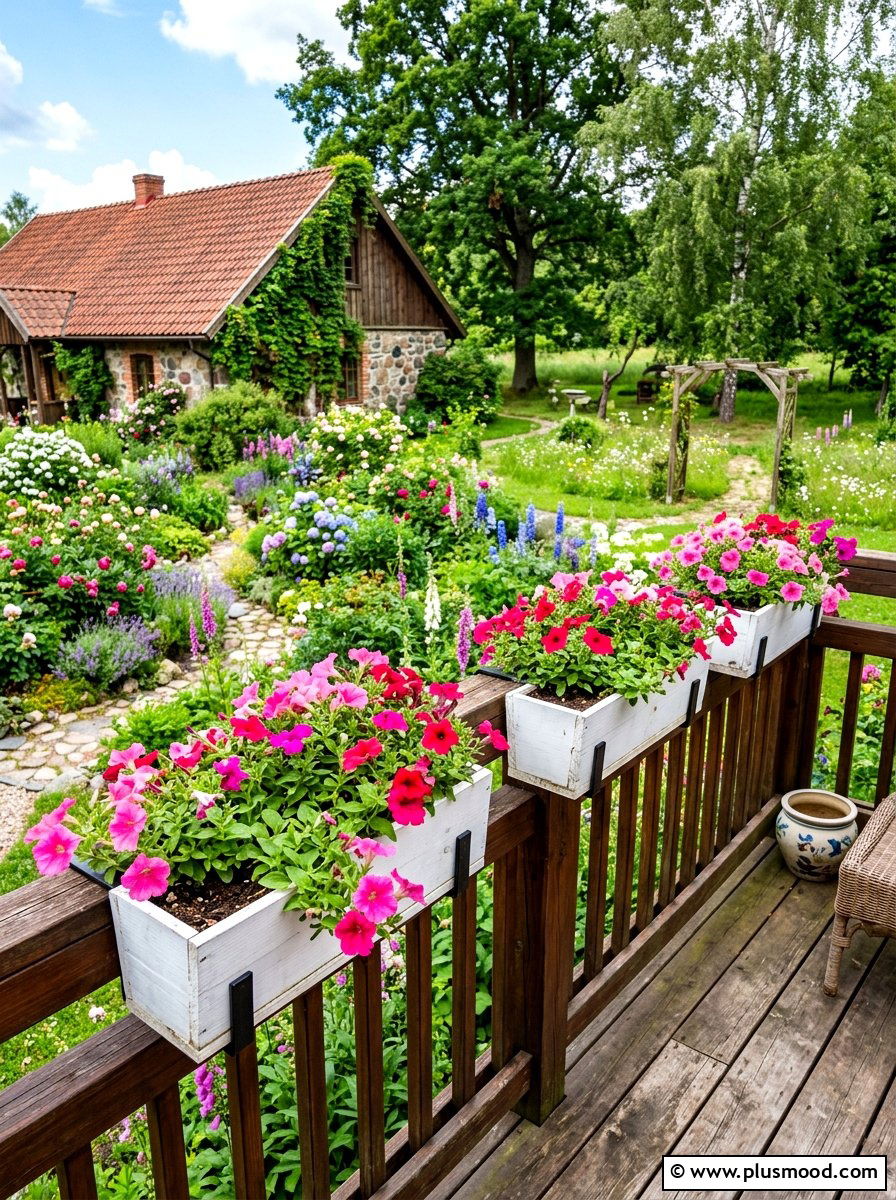
    14. Maximize Patio Space with Deck Railing Planters

    Maximize Patio Space with Deck Railing Planters

    Transform your balcony or deck edges into vibrant floral displays without sacrificing valuable floor area. Deck railing planters are designed to securely hook onto railings, creating a charming border of blossoms that enhances your outdoor space. This method elevates your garden to eye level, offering an immersive, colorful experience while keeping the patio open and uncluttered.

    Key Design Elements

    • Choose trailing plants like petunias or ivy geraniums for a lush, cascading effect.
    • Install matching planters along the entire railing for a uniform and polished look.
    • Secure planters properly to withstand wind and weather, ensuring safety and longevity.

    Pro Tip: Opt for self-watering railing planters to reduce maintenance and keep your flowers thriving throughout the season.

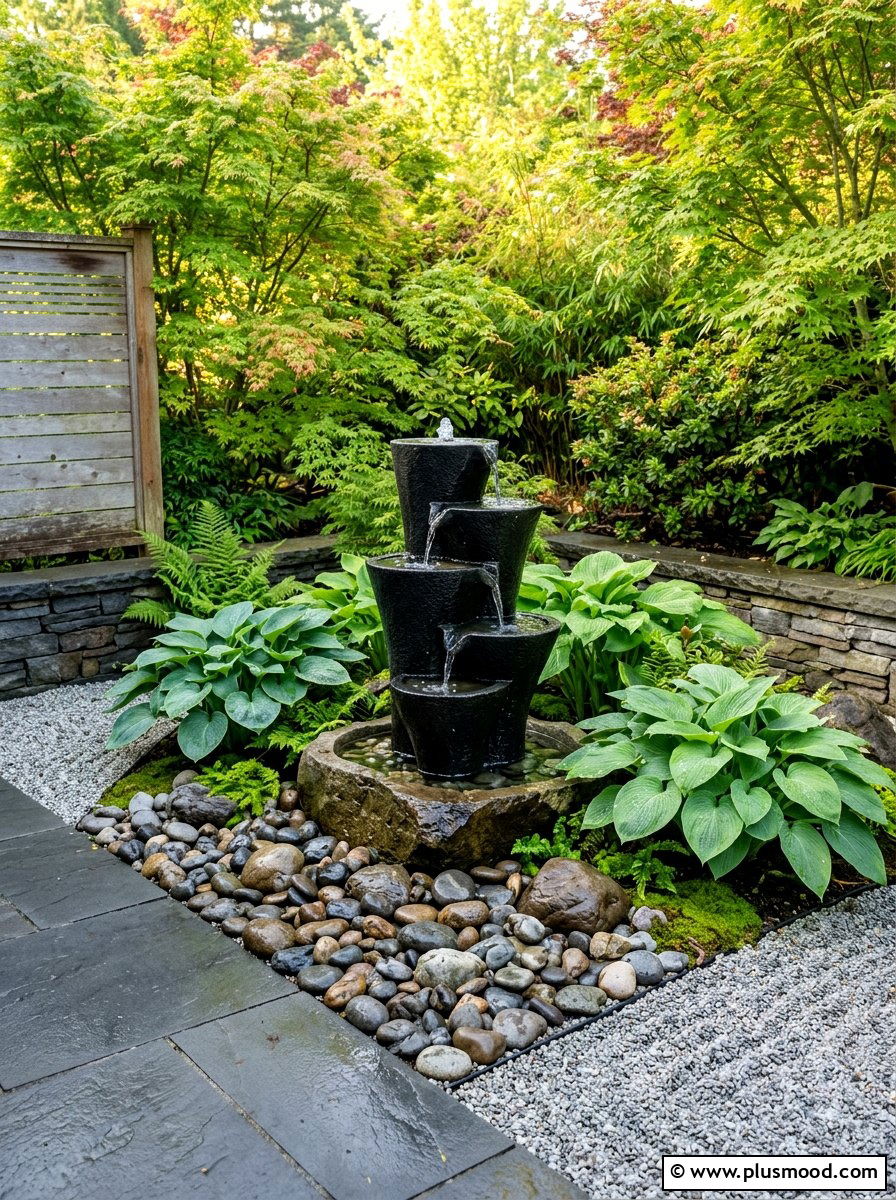
    15. Elevate Your Space with a Compact Water Fountain

    Elevate Your Space with a Compact Water Fountain

    Transform any nook or tabletop into a tranquil retreat with a petite water feature that drowns out urban noise and adds serene ambiance. These sleek, plug-in fountains offer the gentle melody of flowing water without the need for extensive installation or space. Incorporating a small water element not only cools your outdoor area but also invites local wildlife, enriching your connection to nature.

    Key Design Elements

    • Choose a self-contained fountain that fits easily on a side table or shelf to maximize space efficiency.
    • Opt for models with quiet, energy-efficient pumps that plug directly into standard outlets for hassle-free setup.
    • Place the water feature near plants or seating areas to enhance relaxation and attract birds and butterflies.

    Pro Tip: Regularly clean and refill your water feature to maintain clear, fresh water and ensure continuous soothing sounds.

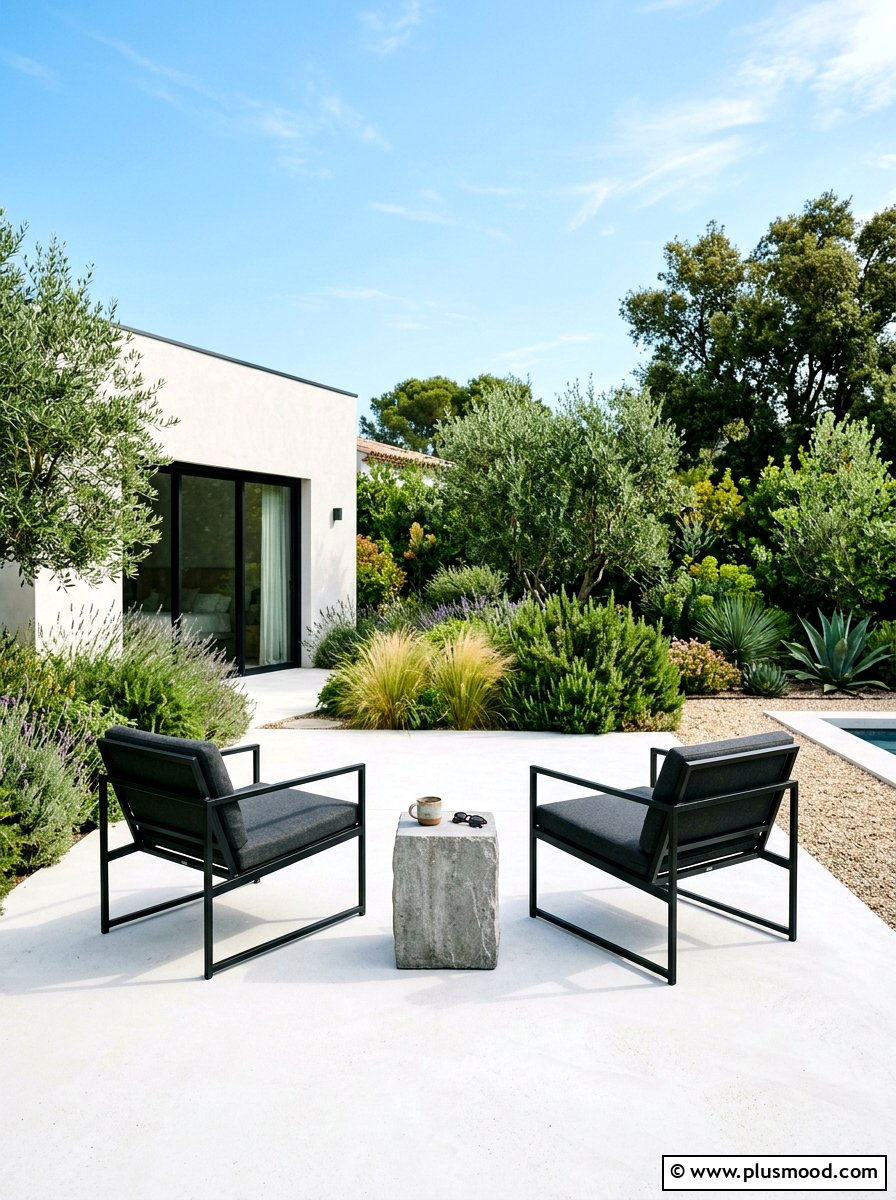
    16. Creating an Airy Minimalist Patio

    Creating an Airy Minimalist Patio

    Maximizing a small patio’s potential often means embracing simplicity. By focusing on a streamlined design with a limited color scheme and carefully selected furniture pieces, you can cultivate an inviting, serene outdoor space. This method highlights both the structural elements and natural surroundings, offering a balanced and elegant atmosphere.

    Key Design Elements

    • Select only essential furniture with clean lines, such as two contemporary chairs paired with a sleek stone side table.
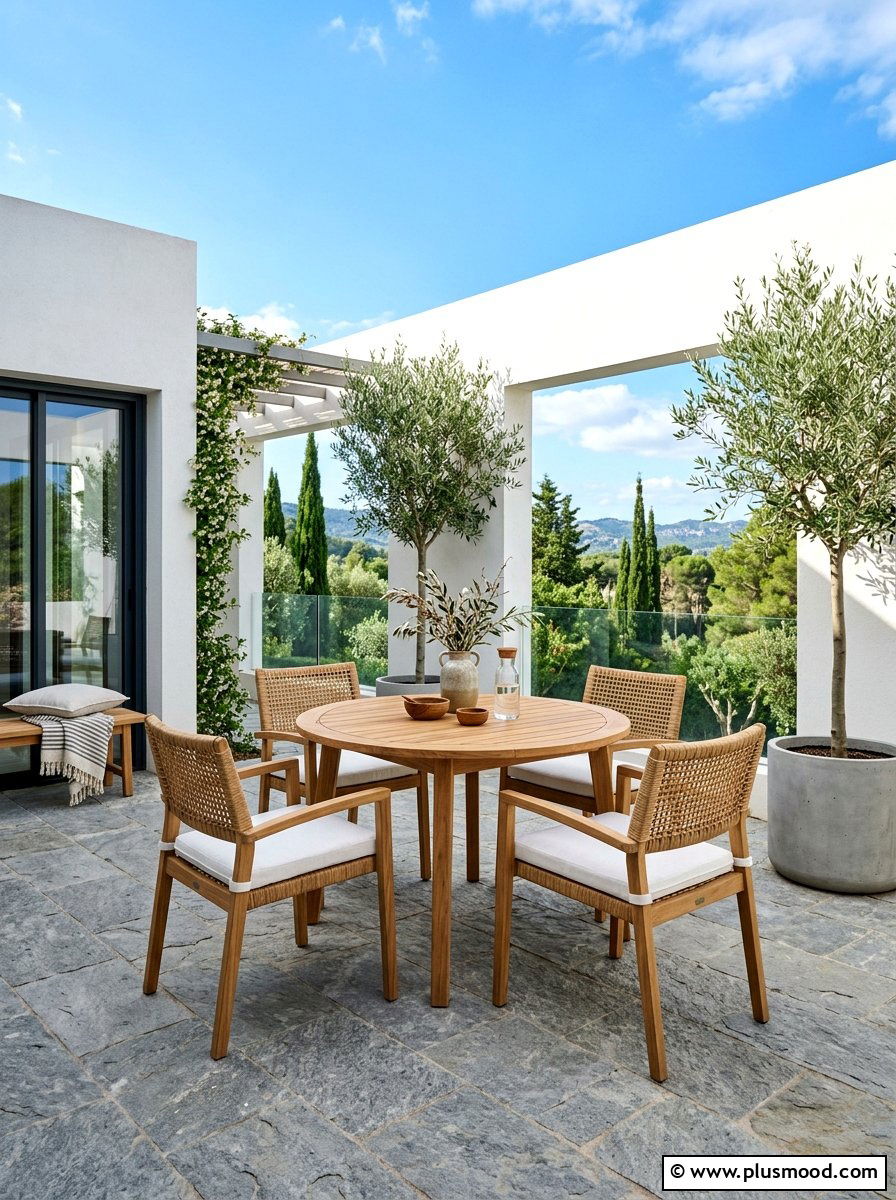
    • Incorporate a neutral palette featuring shades like soft gray, crisp white, and natural wood tones to maintain a cohesive and calming aesthetic.
    • Avoid clutter by minimizing decorative items, ensuring each piece serves a functional or visual purpose.

    Pro Tip: Invest in durable, timeless pieces that bring both comfort and style, elevating your outdoor space without overcrowding it.

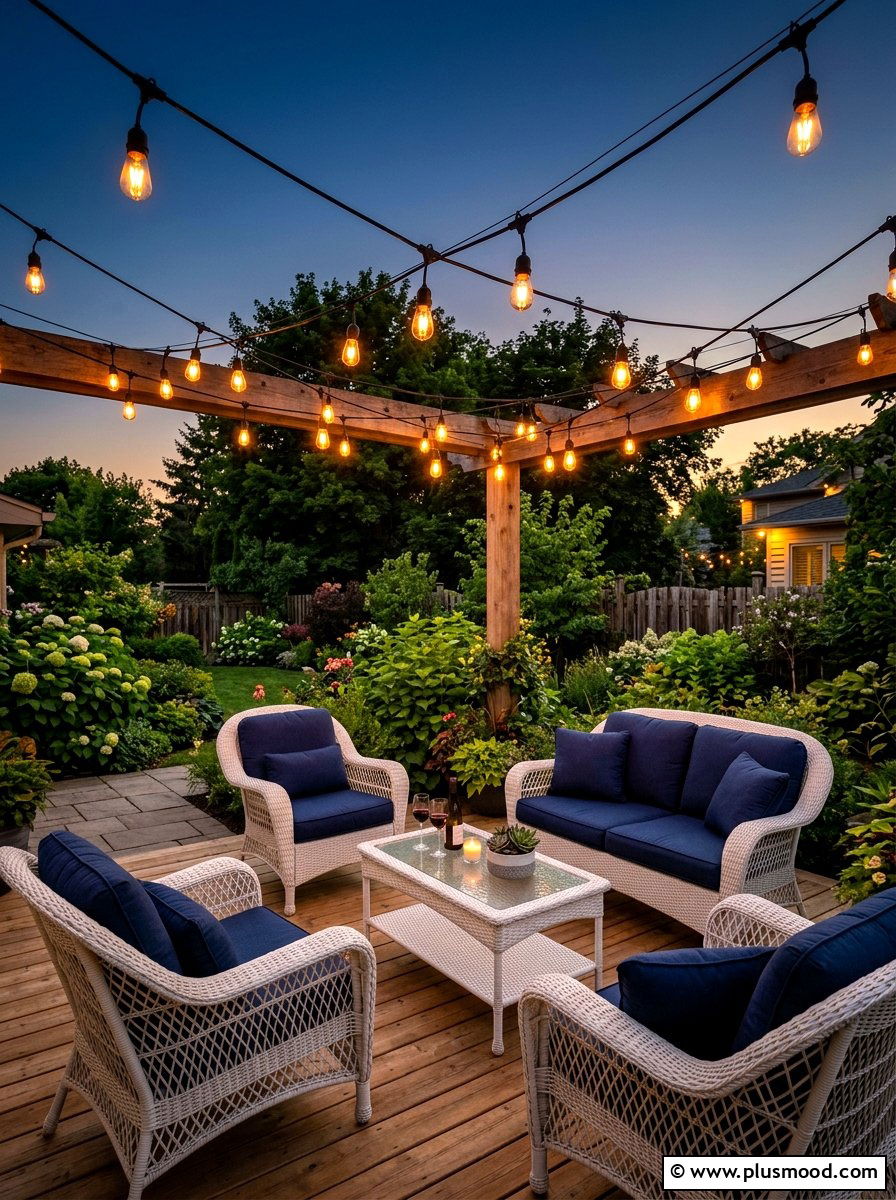
    17. Enchant Your Patio with Twinkling Outdoor String Lights

    Enchant Your Patio with Twinkling Outdoor String Lights

    Transform your outdoor space into a charming haven with the gentle radiance of string lights. These budget-friendly lighting solutions effortlessly set a welcoming mood, perfect for relaxing evenings or lively gatherings. Whether draped overhead or intertwined along railings, they enhance your patio’s ambiance while adding a touch of elegance.

    Key Design Elements

    • Drape string lights in a zigzag pattern above seating areas to create an intimate canopy effect.
    • Wrap lights around railings or pergola beams to outline and define your outdoor space.
    • Choose LED Edison bulbs for a warm, vintage-inspired glow that’s both stylish and energy-efficient.

    Pro Tip: Opt for solar-powered string lights to enjoy hassle-free illumination that’s eco-friendly and easy to install.

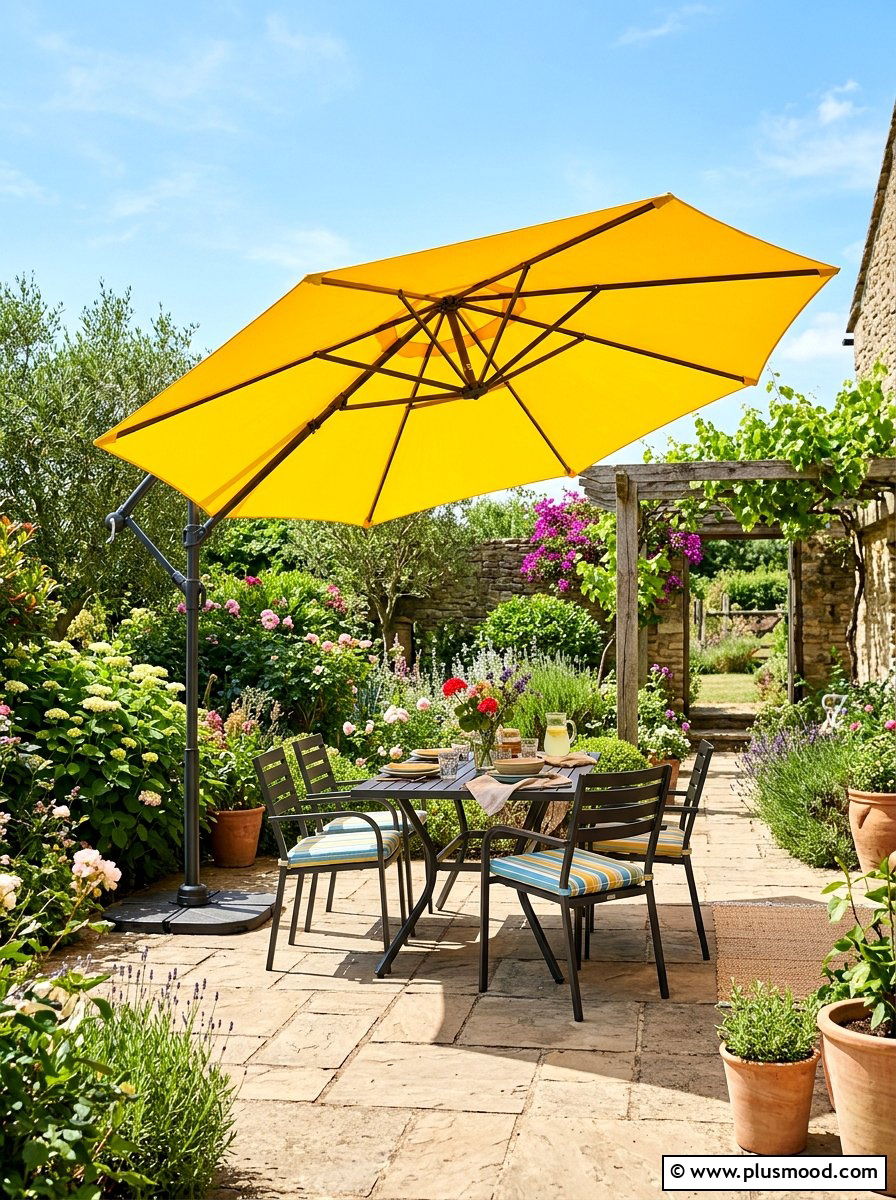
    18. Maximizing Comfort with Patio Umbrella Shade

    Maximizing Comfort with Patio Umbrella Shade

    Beating the summer heat on a sunny south-facing patio requires smart shading solutions. A compact, premium patio umbrella not only shields you from harmful UV rays but also enhances your outdoor ambiance. Opting for designs like half-umbrellas can save space while offering full protection, especially on cozy balconies or compact decks.

    Key Design Elements

    • Select a vibrant umbrella color such as turquoise or yellow to brighten your outdoor area.
    • Consider a half-sized umbrella that fits snugly against walls to maximize limited patio space.
    • Choose an umbrella with an adjustable tilt feature to maintain optimal shade throughout the day.

    Pro Tip: Install a tilting patio umbrella to effortlessly track the sun’s position and keep your seating area comfortably shaded all day long.

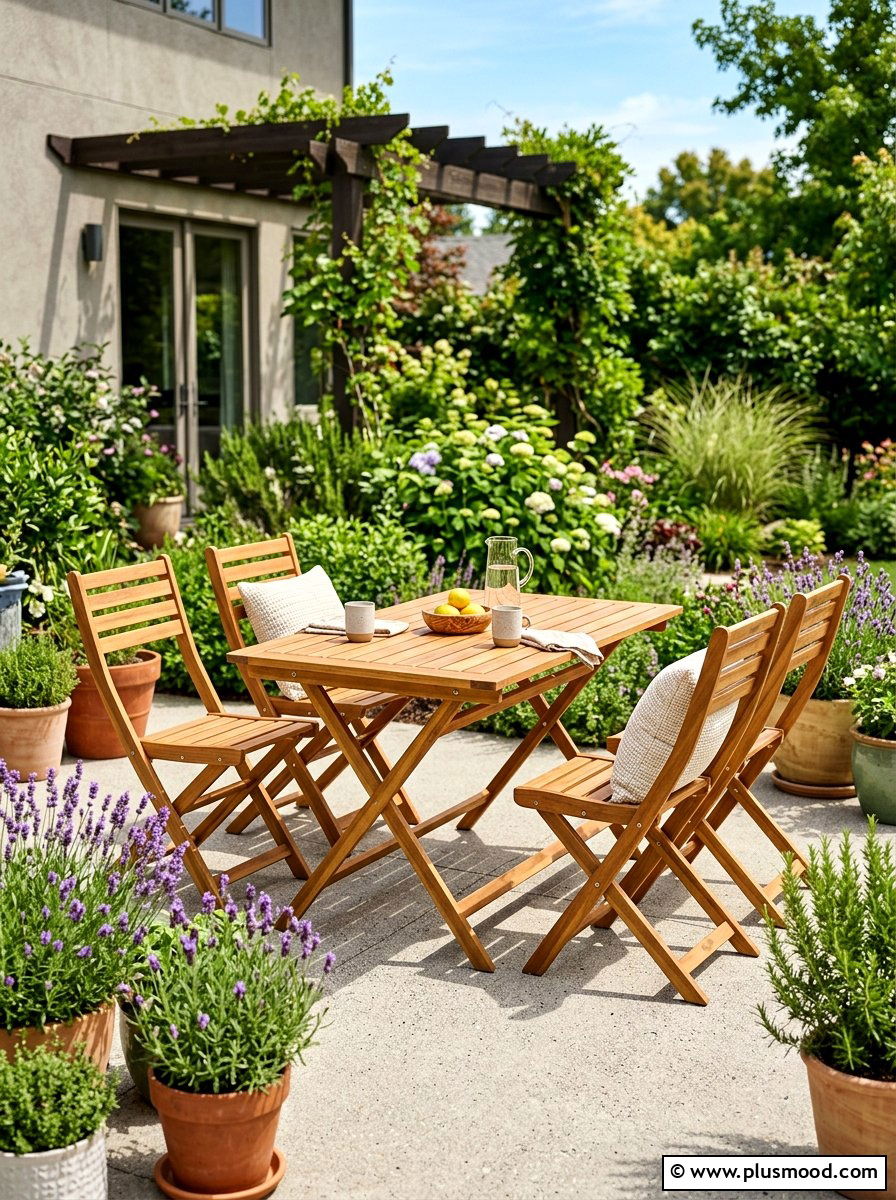
    19. Maximize Versatility with Folding Patio Furniture

    Maximize Versatility with Folding Patio Furniture

    Transform your outdoor space effortlessly with folding patio furniture, perfect for adapting to a variety of activities. These pieces combine practicality with stylish design, enabling you to free up space when needed and create inviting seating in seconds. Choose quality materials that blend durability with ease of use for a seamless indoor-outdoor experience.

    Key Design Elements

    • Select folding furniture crafted from durable hardwoods like teak or acacia for longevity and a refined appearance.
    • Choose models that fold completely flat to maximize floor space when storing or repurposing your patio area.
    • Incorporate matching folding tables and chairs to maintain a cohesive look while enhancing functionality.

    Pro Tip: Keep your folding furniture well-maintained by regularly cleaning and treating the wood to preserve its natural beauty and extend its lifespan.

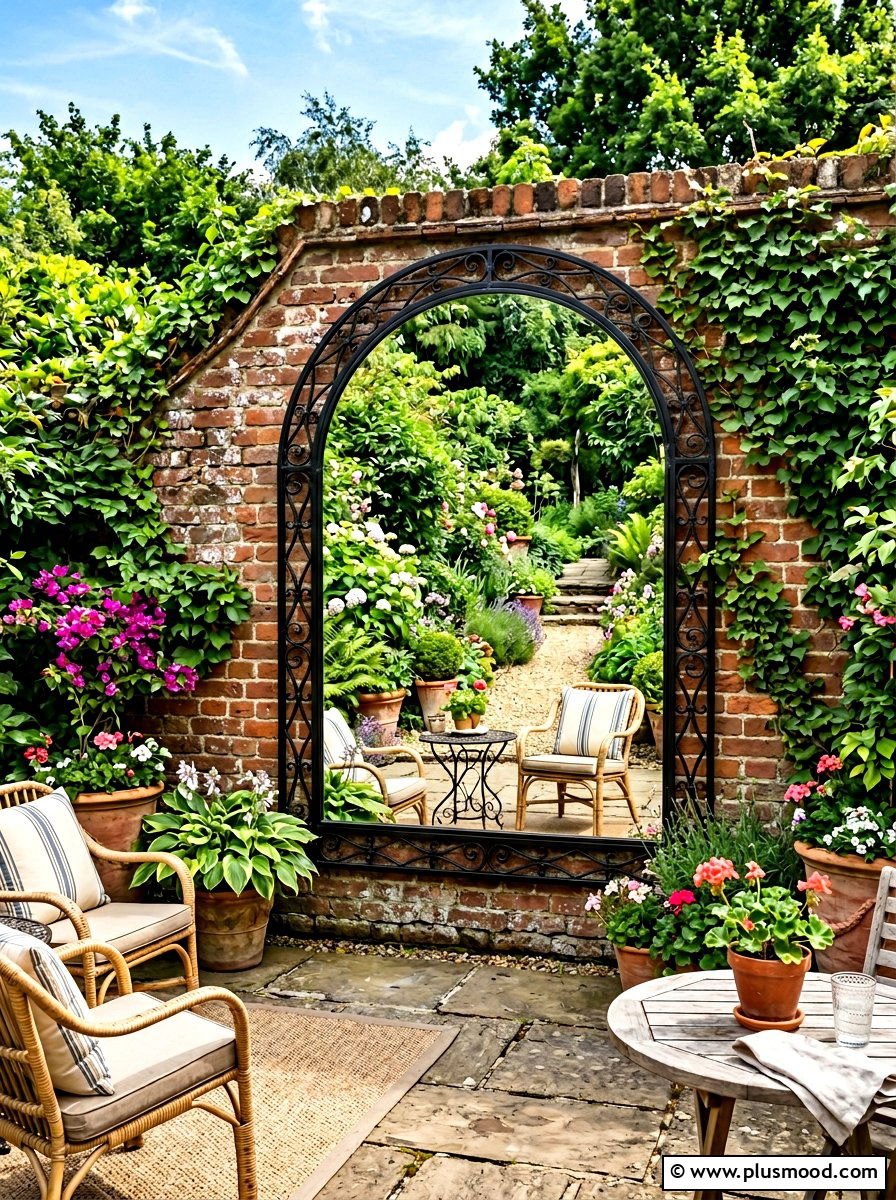
    20. Enhance Your Patio with a Weather-Resistant Mirror

    Enhance Your Patio with a Weather-Resistant Mirror

    Transform a small patio into a visually expansive haven by installing a large, durable mirror designed for outdoor use. This reflective element not only amplifies natural light but also creates a seamless connection between your greenery and decor, making the space appear larger and more inviting.

    Key Design Elements

    • Select a mirror frame that complements your existing outdoor furniture, such as distressed wood for a rustic vibe or polished metal for a modern look.
    • Position the mirror opposite a focal point like a garden or seating area to maximize the reflection and depth.
    • Ensure the mirror is specifically rated for outdoor conditions to withstand weather changes without damage.

    Pro Tip: To boost the illusion of space even further, place small string lights around the mirror’s frame, adding warmth and enhancing evening ambiance.

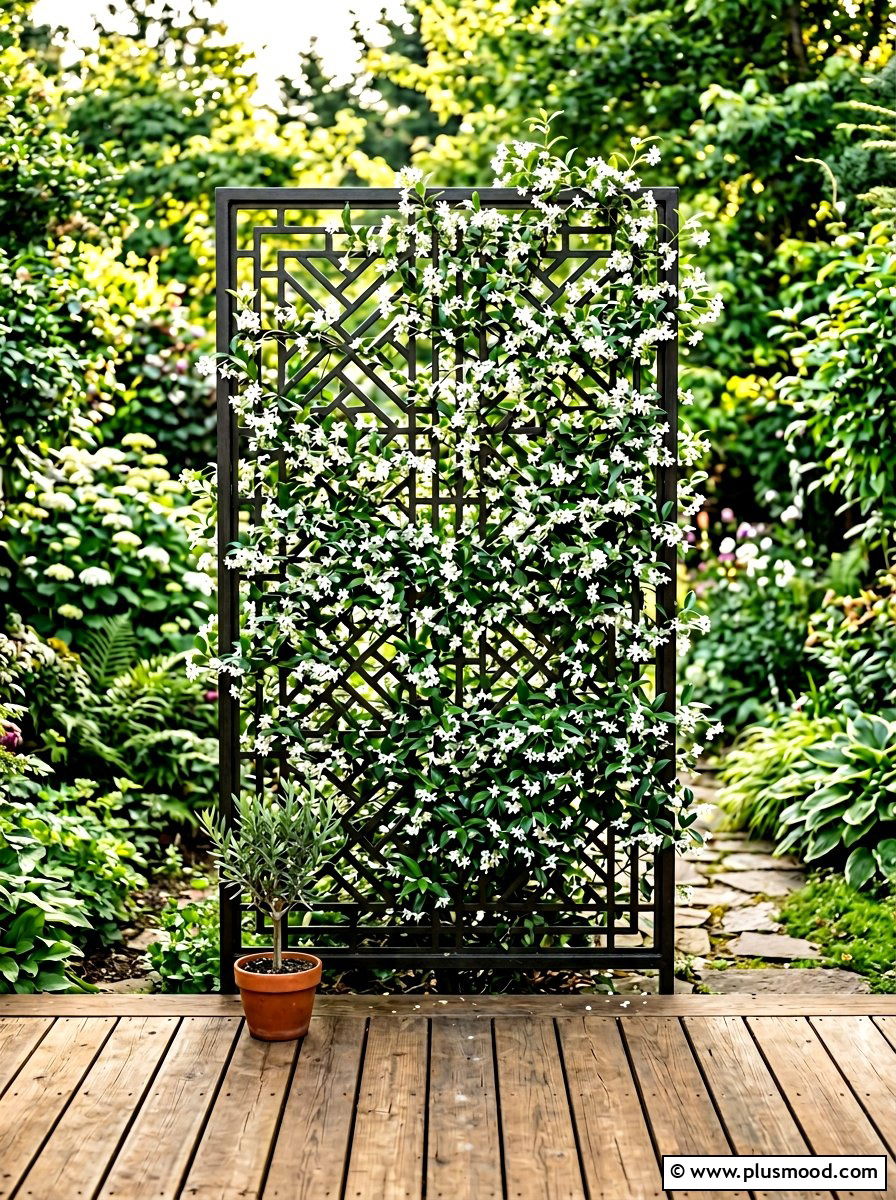
    21. Creating a Secluded Oasis with a Privacy Screen Trellis

    Creating a Secluded Oasis with a Privacy Screen Trellis

    Transform your small patio into a cozy retreat by incorporating a privacy screen trellis adorned with lush climbing plants. This stylish feature not only shields your space from prying eyes but also maintains airflow and sunlight, ensuring a comfortable and inviting atmosphere. The vertical element adds depth and charm, turning your outdoor area into a tranquil garden escape.

    Key Design Elements

    • Select quick-growing vines like jasmine or clematis to enjoy fragrant blooms and rapid coverage.
    • Opt for materials like wood or metal for your trellis to complement your existing outdoor décor.
    • Position the trellis strategically to maximize privacy while preserving natural light and ventilation.

    Pro Tip: For an extra touch of elegance, incorporate fairy lights or hanging lanterns on your trellis to create a warm, inviting glow in the evenings.

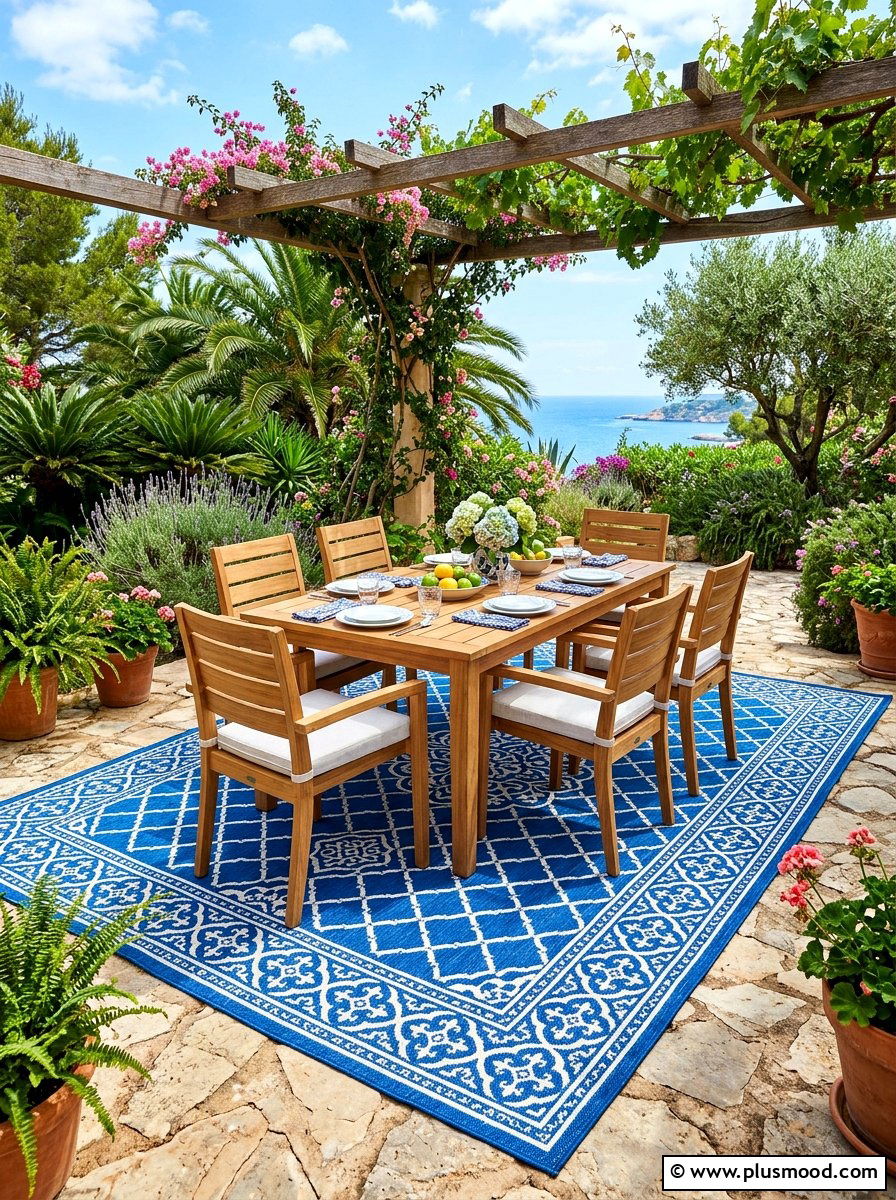
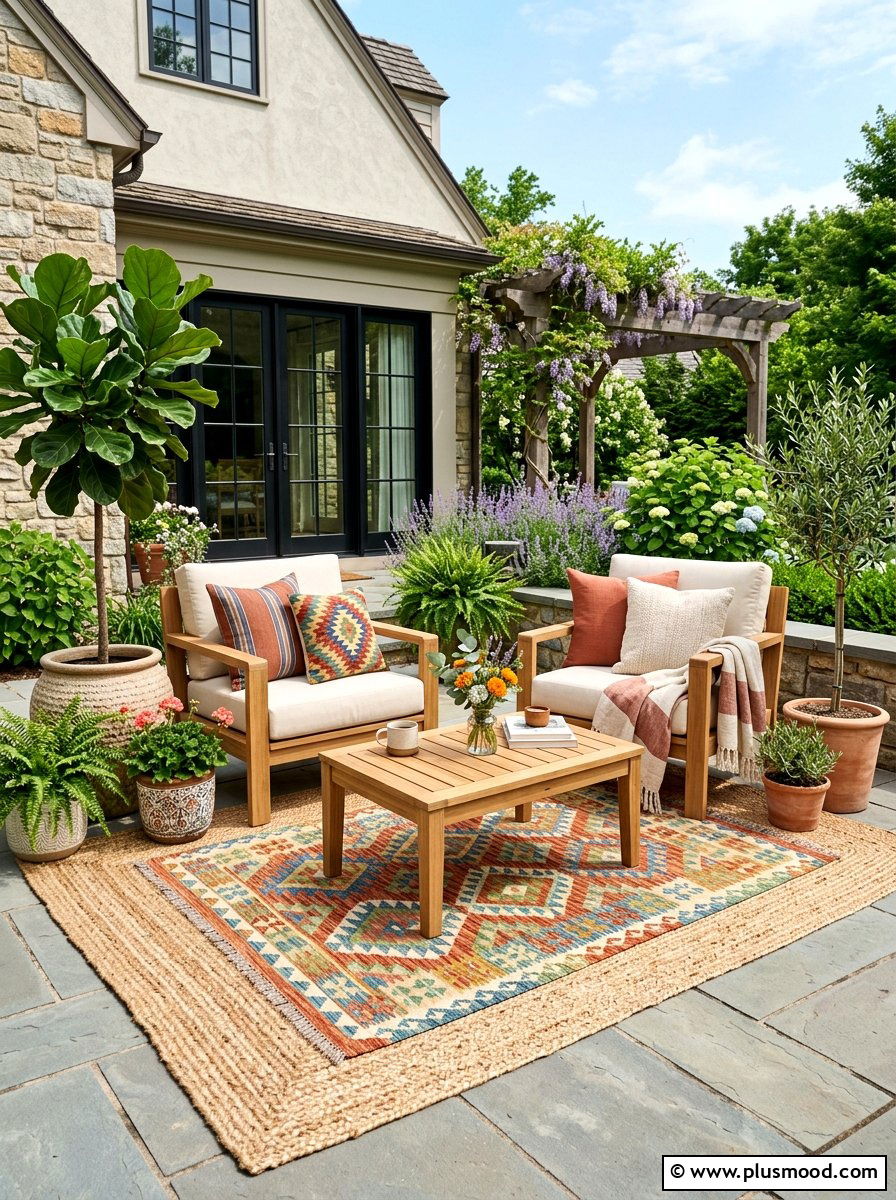
    22. Define Your Patio Space with an Outdoor Rug

    Define Your Patio Space with an Outdoor Rug

    Transform your small concrete patio into a cozy and inviting retreat by incorporating an outdoor rug. This simple addition anchors your seating area, creating a sense of purpose and comfort while enhancing the overall aesthetic. Choose a rug that complements your style and withstands the elements to maximize durability and appeal.

    Key Design Elements

    • Pick a rug with vibrant patterns or natural textures to reflect your personal taste and enliven the area.
    • Opt for weather-resistant fabrics like polypropylene to ensure longevity against sun, moisture, and wear.
    • Position the rug close to the patio edges to visually expand the floor and make the space feel larger.

    Pro Tip: Place outdoor rug pads beneath to prevent slipping and promote airflow, extending the rug’s lifespan.

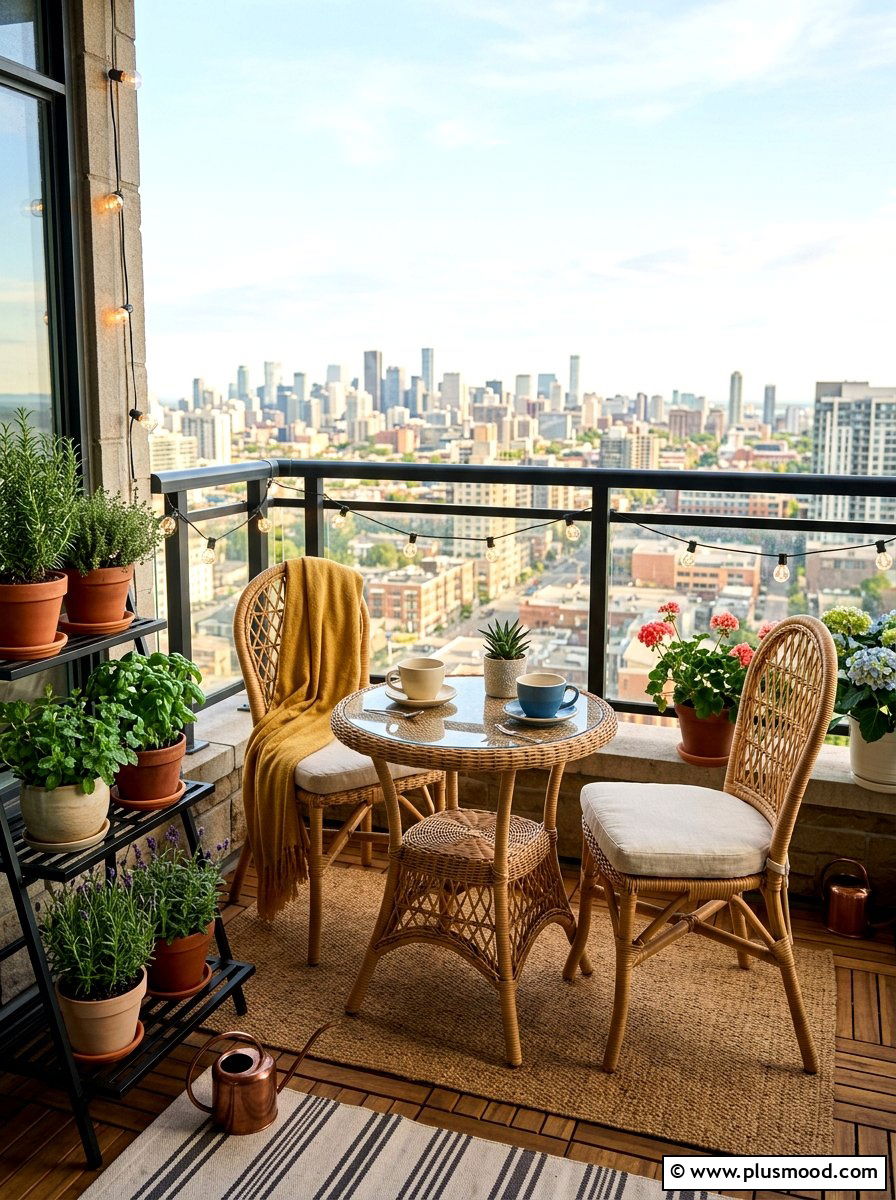
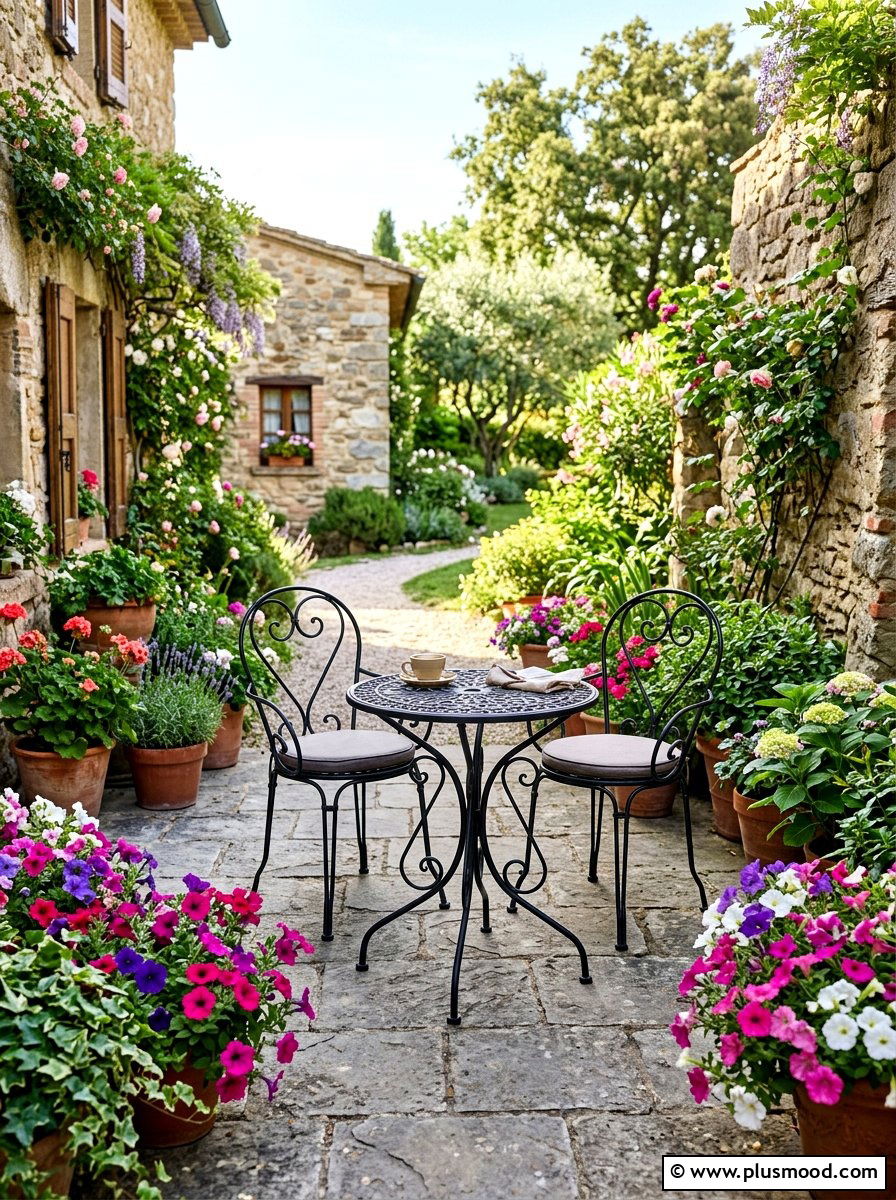
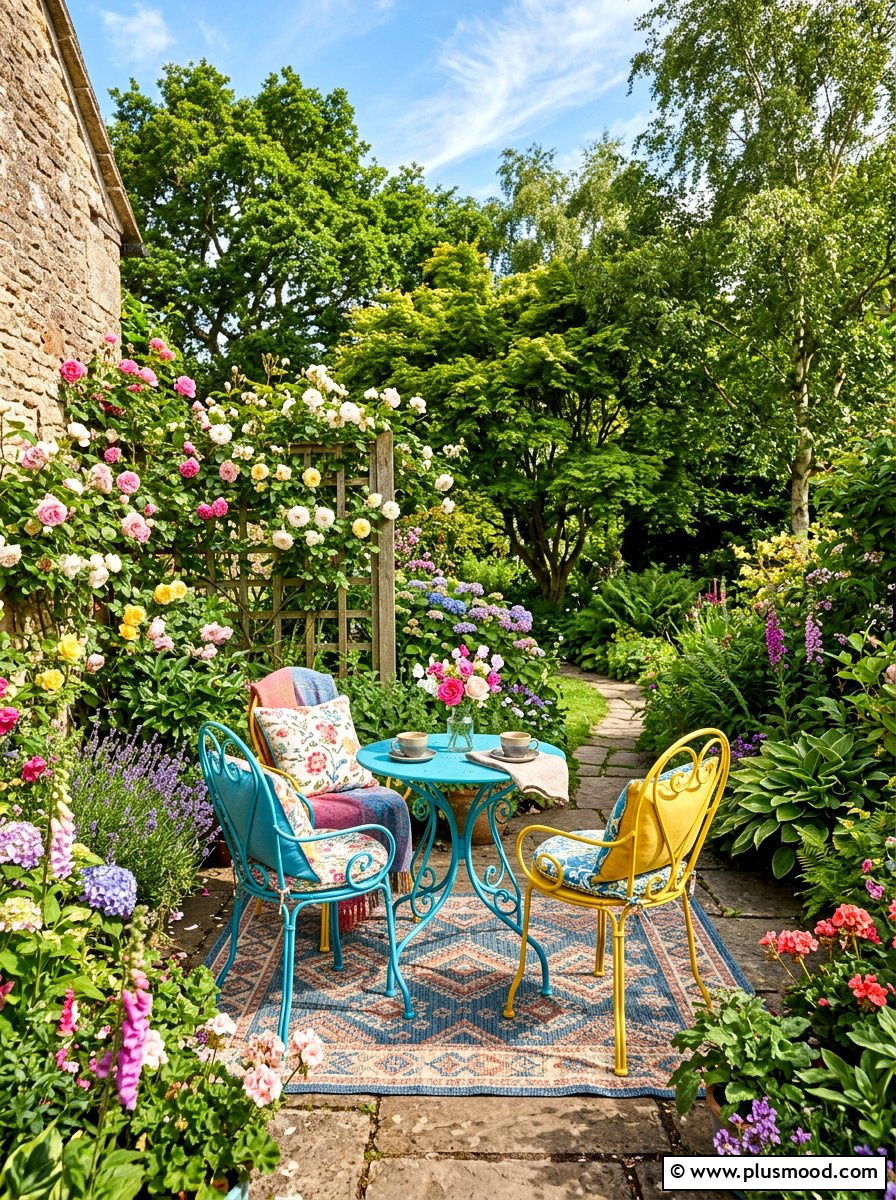
    23. Cozy Elegance: Choosing the Perfect Small Patio Bistro Set

    Cozy Elegance: Choosing the Perfect Small Patio Bistro Set

    A petite bistro set is an ideal choice for maximizing limited outdoor space, offering a delightful spot to unwind with your favorite beverage. Opt for durable, weather-resistant materials like powder-coated steel or wrought iron to combine longevity with style. Adding vibrant colors or intricate designs can transform your patio into a charming retreat that draws the eye.

    Key Design Elements

    • Select compact, lightweight furniture for easy mobility and space-saving benefits.
    • Look for weatherproof finishes to ensure your set withstands sun and rain without fading.
    • Incorporate a small side table or tray to enhance functionality and hold essentials.

    Pro Tip: Place your bistro set in a sunlit nook and accessorize with colorful cushions or a potted plant to create an inviting, personalized outdoor oasis.

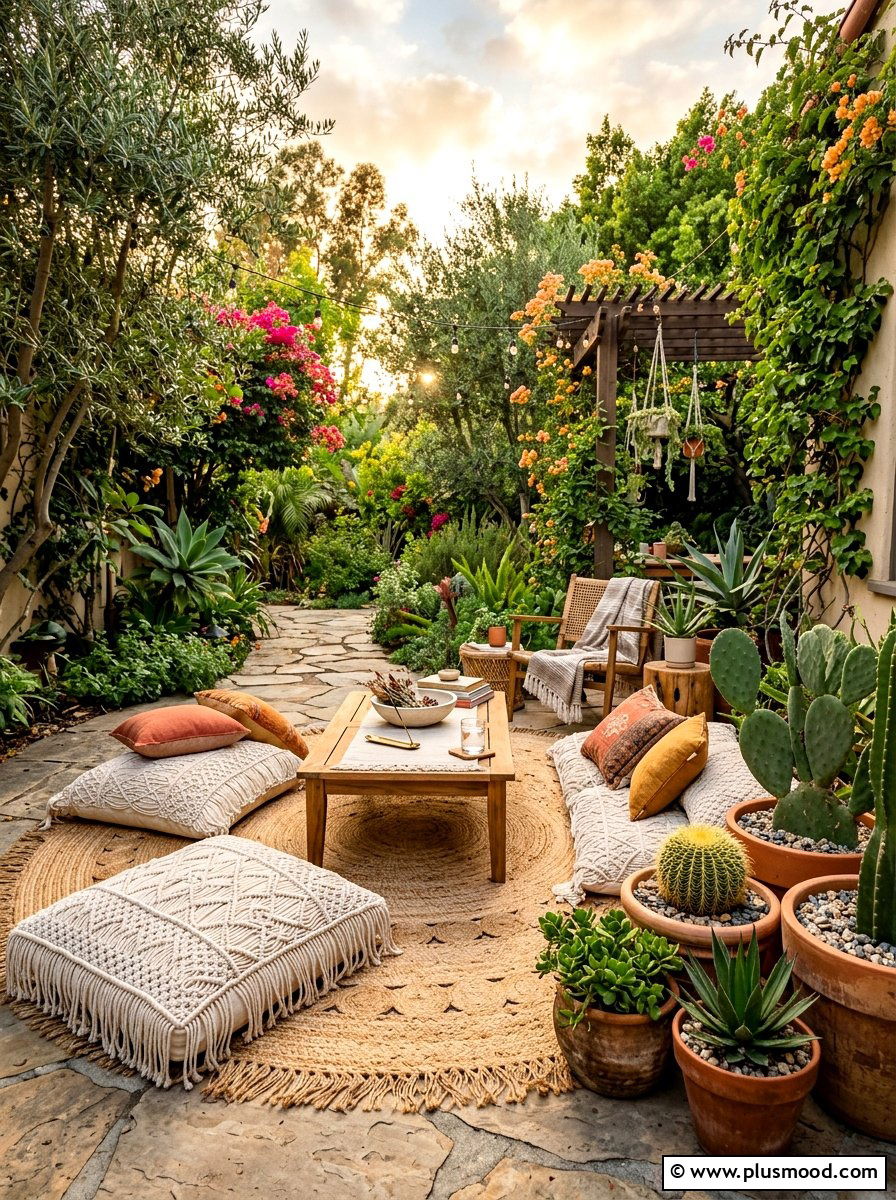
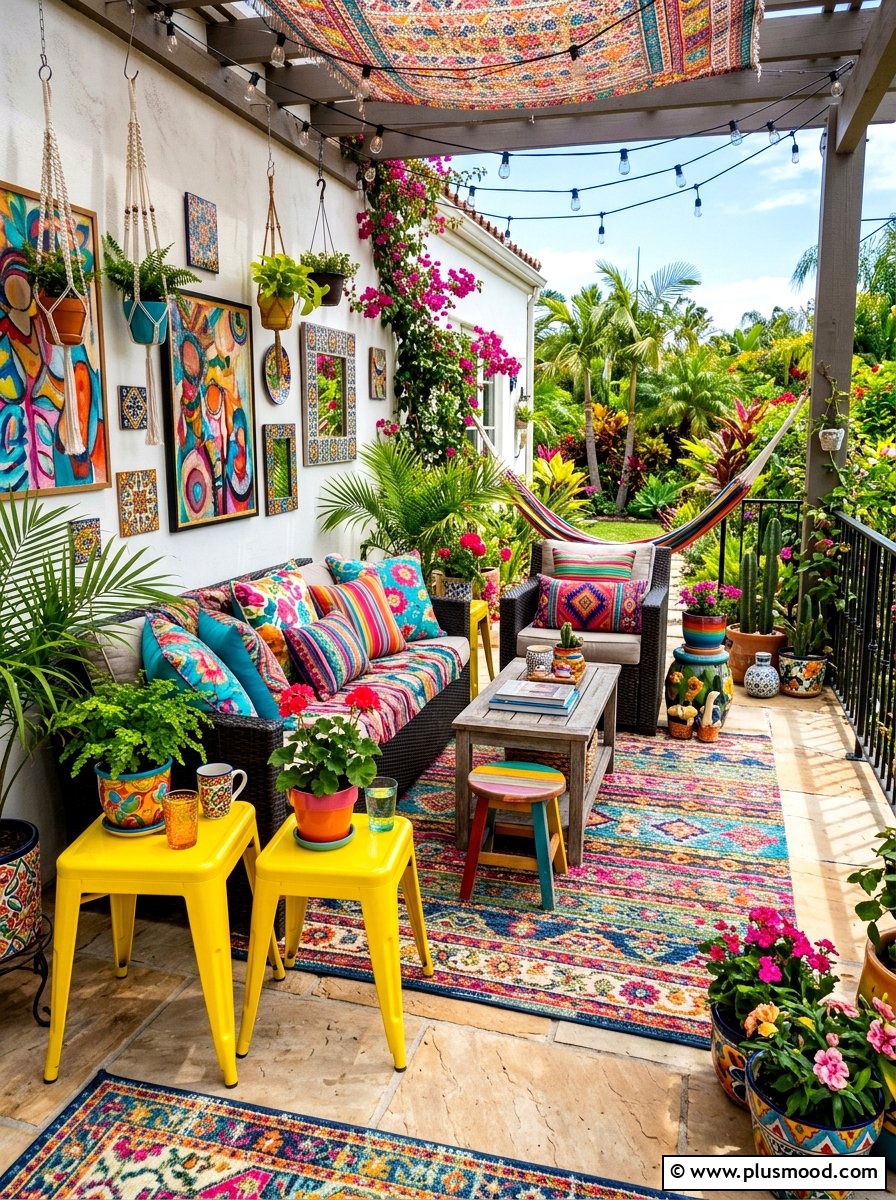
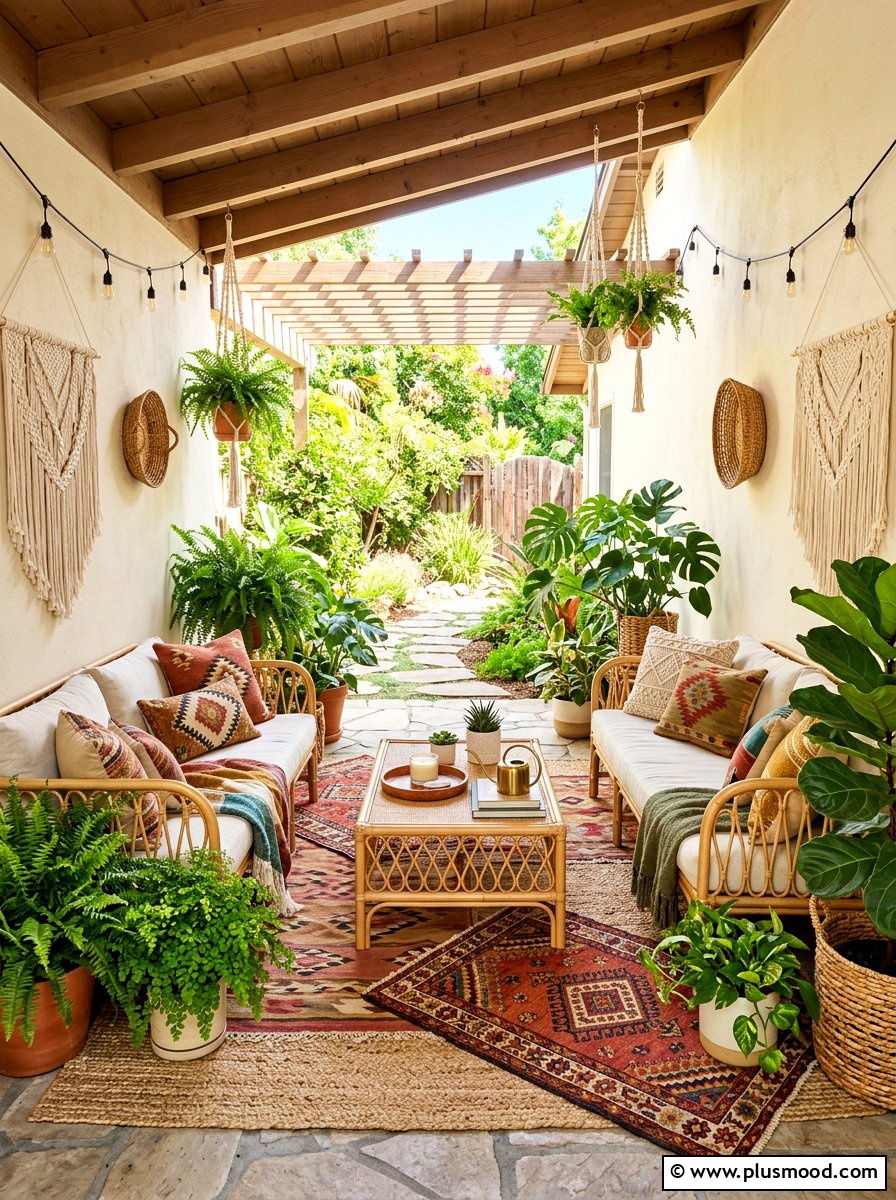
    24. Creating a Cozy Boho Oasis on Your Patio

    Creating a Cozy Boho Oasis on Your Patio

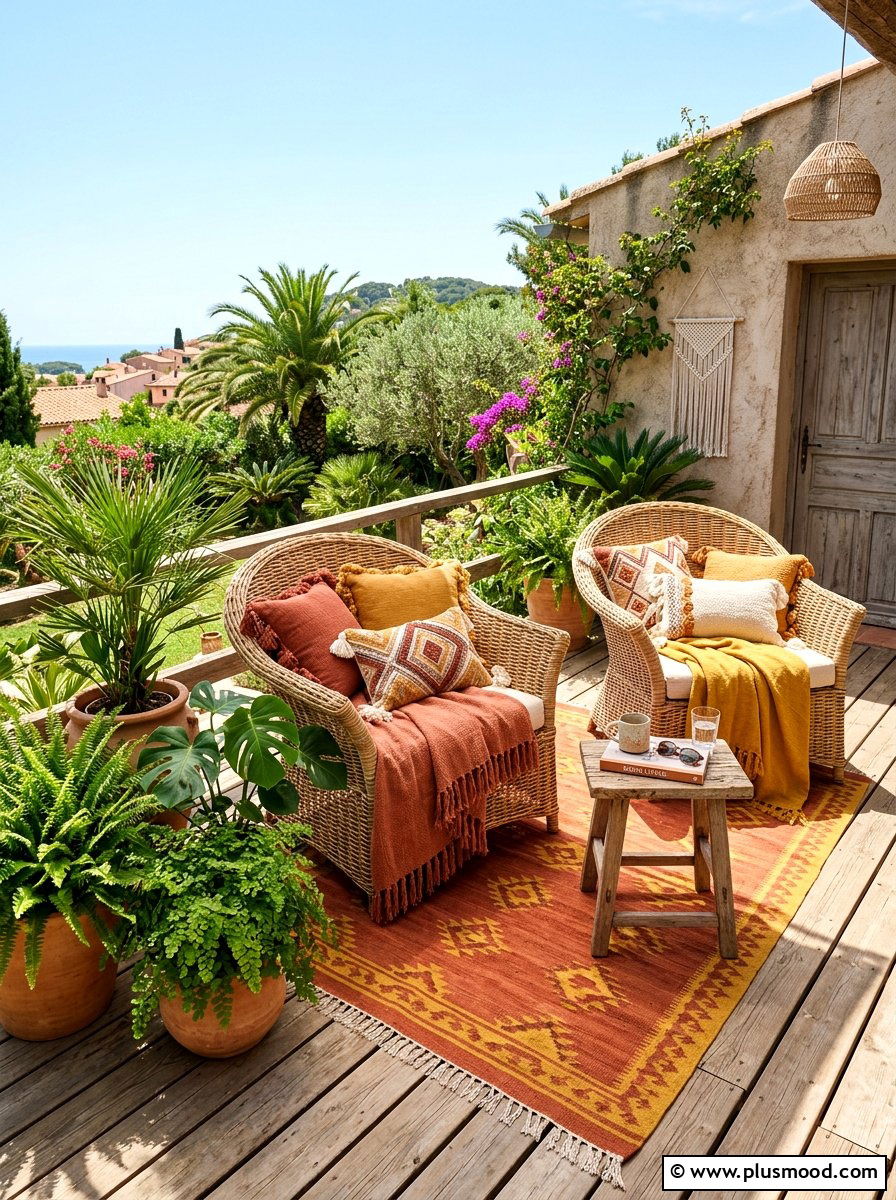
    Transform your small patio into a serene and inviting bohemian retreat by focusing on natural materials and layered textures. This style thrives on earthy tones and eclectic accents, making your outdoor space feel warm, welcoming, and full of character. Combining different textiles and handcrafted elements can turn even a compact area into a vibrant and personalized haven.

    Key Design Elements

    • Lay down a natural fiber rug, like jute or sisal, to add warmth and texture underfoot.
    • Incorporate oversized floor cushions and poufs in neutral shades to enhance comfort and encourage relaxation.
    • Decorate with woven baskets, macramé hangings, and terracotta planters to introduce artisanal charm and organic shapes.

    Pro Tip: Mix patterns thoughtfully by pairing soft, neutral hues with subtle pops of color in your textiles to create depth without overwhelming a small space.

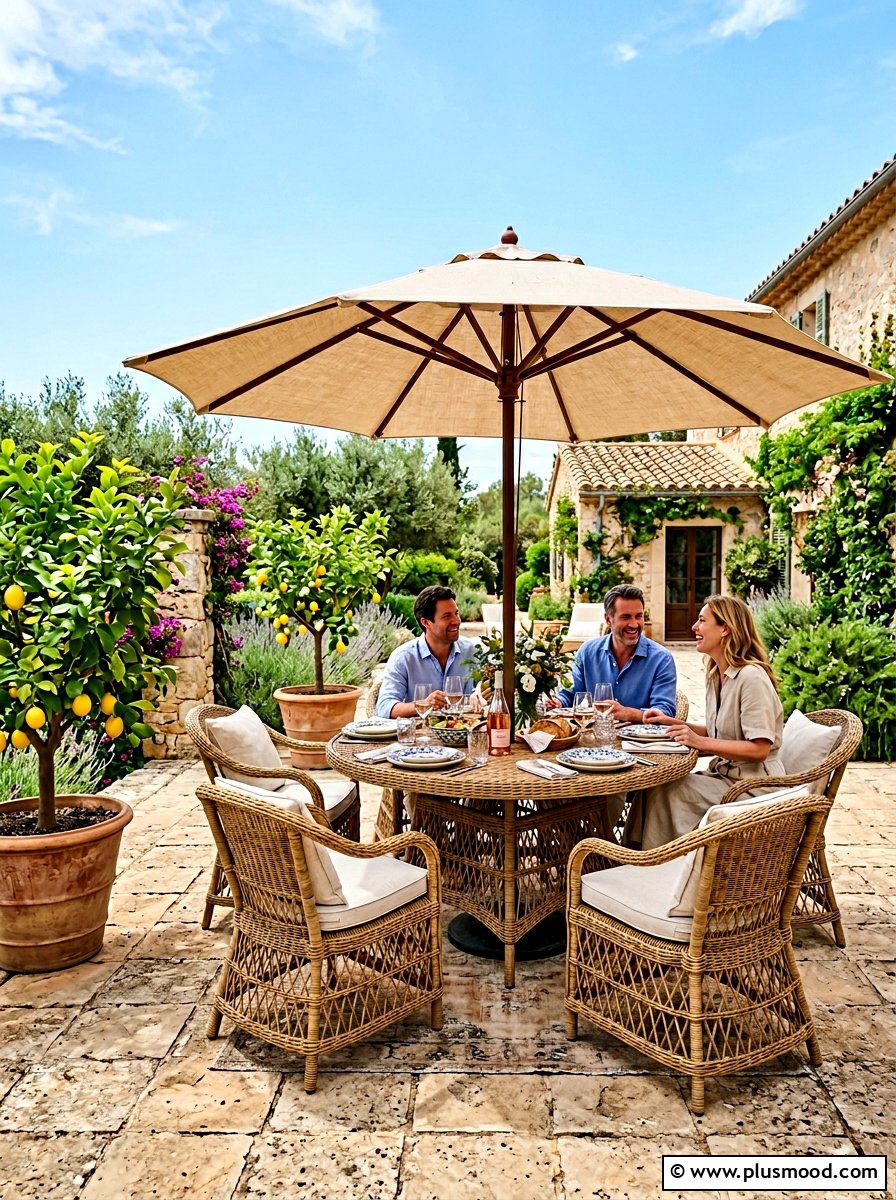
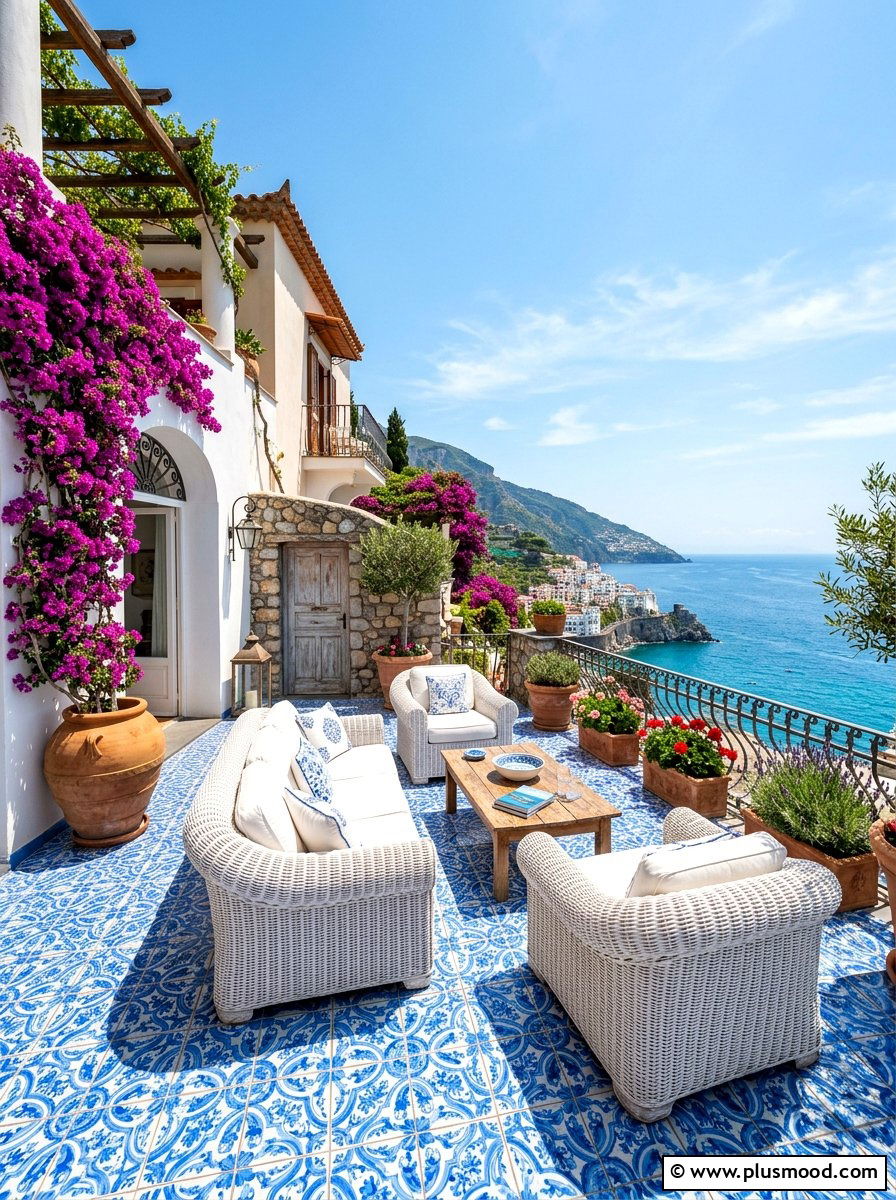
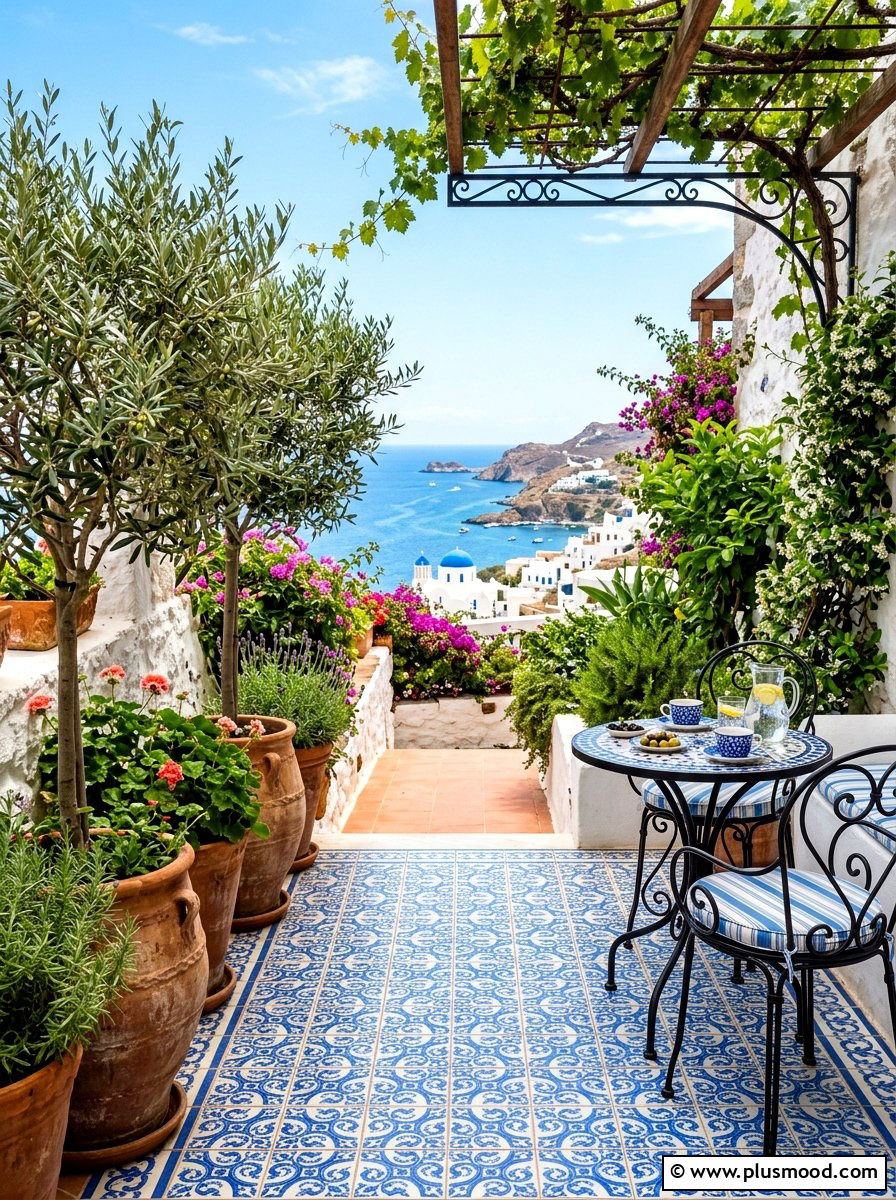
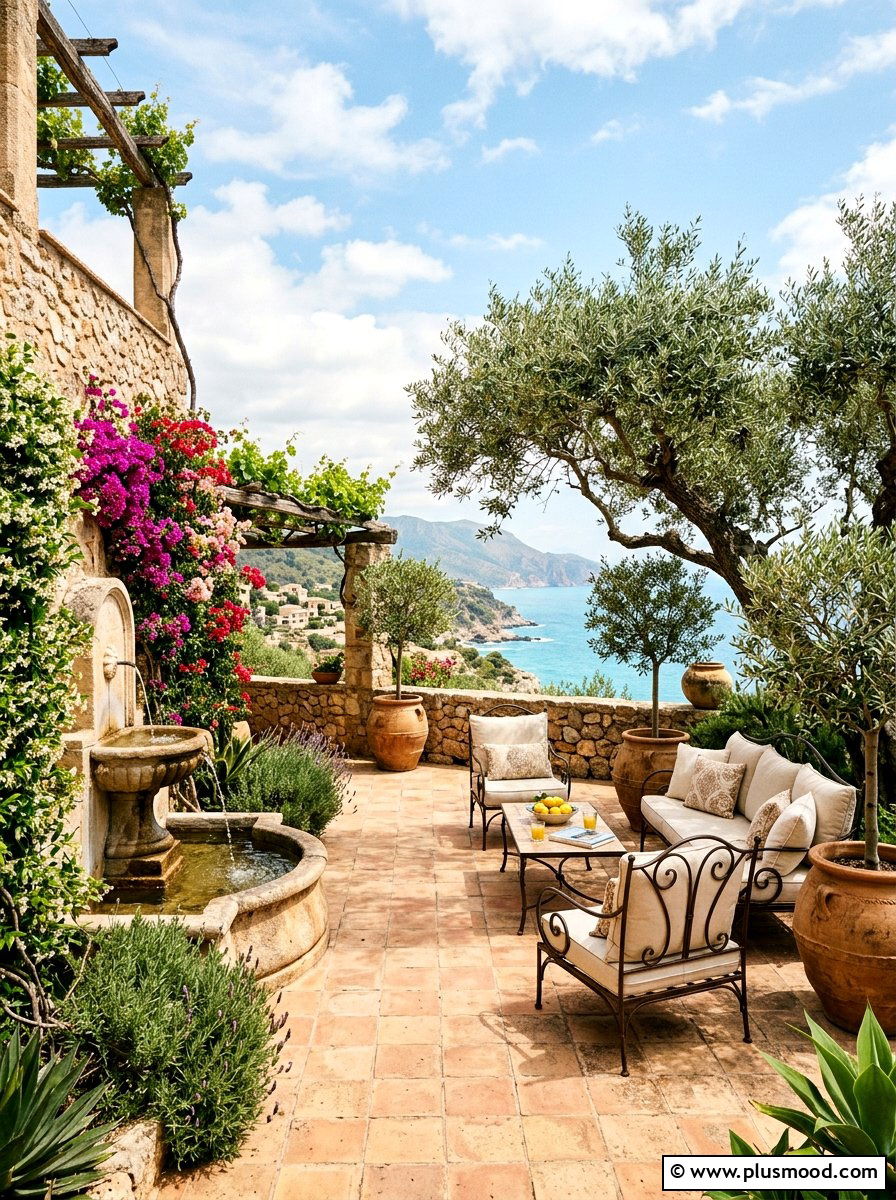
    25. Embrace Mediterranean Charm on Your Small Patio

    Embrace Mediterranean Charm on Your Small Patio

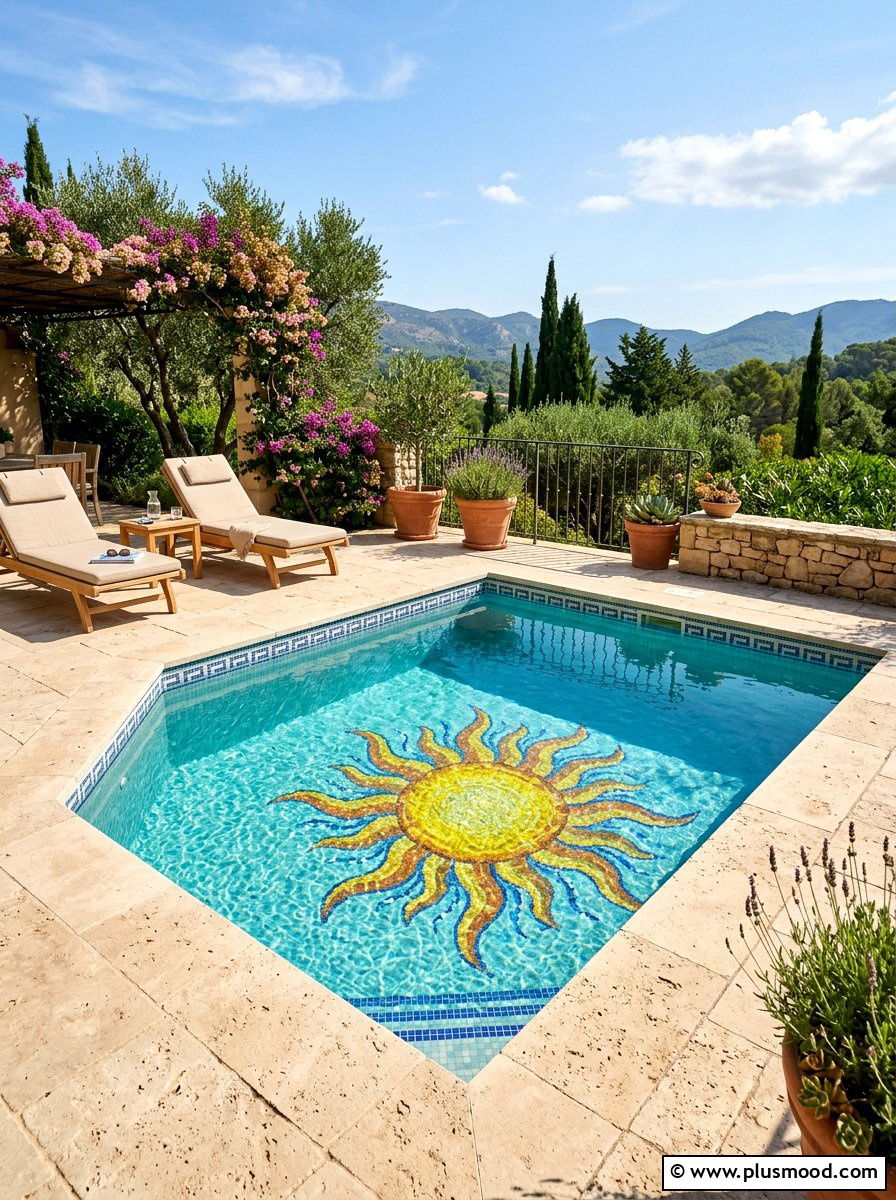
    Capture the inviting essence of coastal Europe by designing your small patio with Mediterranean influences. This style harmonizes earthy terracotta hues with cool blue and white accents, creating a serene and timeless outdoor retreat. Incorporating natural textures and aromatic plants will transport you to sunlit shores every time you step outside.

    Key Design Elements

    • Use terracotta planters paired with vibrant blue and white cushions or throws to evoke coastal vibes.
    • Add texture and aroma with olive trees, lavender, or herbs native to the Mediterranean region.
    • Choose rustic stone elements and wrought iron furniture to enhance the authentic, relaxed atmosphere.

    Pro Tip: Incorporate a colorful mosaic tabletop centerpiece to bring a handcrafted Mediterranean touch that ties the entire patio together.

    Conclusion

    Creating a stunning and inviting small patio is an exciting opportunity to blend innovation with personal style. Thoughtful design choices—like incorporating clever storage solutions, selecting versatile furnishings, and adding layers of texture and light—can elevate even the coziest spaces into dynamic outdoor havens. These ideas underscore that limited square footage doesn’t equate to limited potential; rather, it invites more intentional and creative expressions of comfort and charm.

    No matter your aesthetic—be it serene and minimalist, vibrant and eclectic, or lush and tropical—your small patio can become a cherished retreat that revitalizes your summer experience. Embrace the process with patience and attention to detail, and watch as your outdoor space transforms into a beautifully functional sanctuary perfect for relaxation and memorable gatherings alike.

  • Chill in Style: 30 Inspiring Outdoor Patio Lounge Ideas for a Perfect Summer Vibe

    With the arrival of sunny days and balmy evenings, outdoor living spaces beckon homeowners to reinvent them as serene escapes perfect for unwinding or hosting friends and family. The trend of merging indoor comfort with the refreshing ambiance of nature is capturing attention everywhere, inspiring fresh takes on patios and balconies alike. Whether your outdoor area is expansive or modest, thoughtful design choices can transform it into a chic and cozy haven that complements your lifestyle and aesthetic preferences.

    Crafting an inviting patio retreat goes beyond simply arranging furniture—it’s about harmonizing textures, colors, and accessories to create a seamless flow between indoors and out. From eco-conscious materials that stand the test of time to bold color schemes that evoke sun-soaked Mediterranean vibes, there’s no limit to how you can personalize your space. This season’s top ideas blend practicality with style, encouraging you to curate an outdoor setting that’s not only beautiful but also a true extension of your home’s essence. Dive into our guide to discover inspiring design concepts that will elevate your backyard or balcony into a standout sanctuary for summer living.

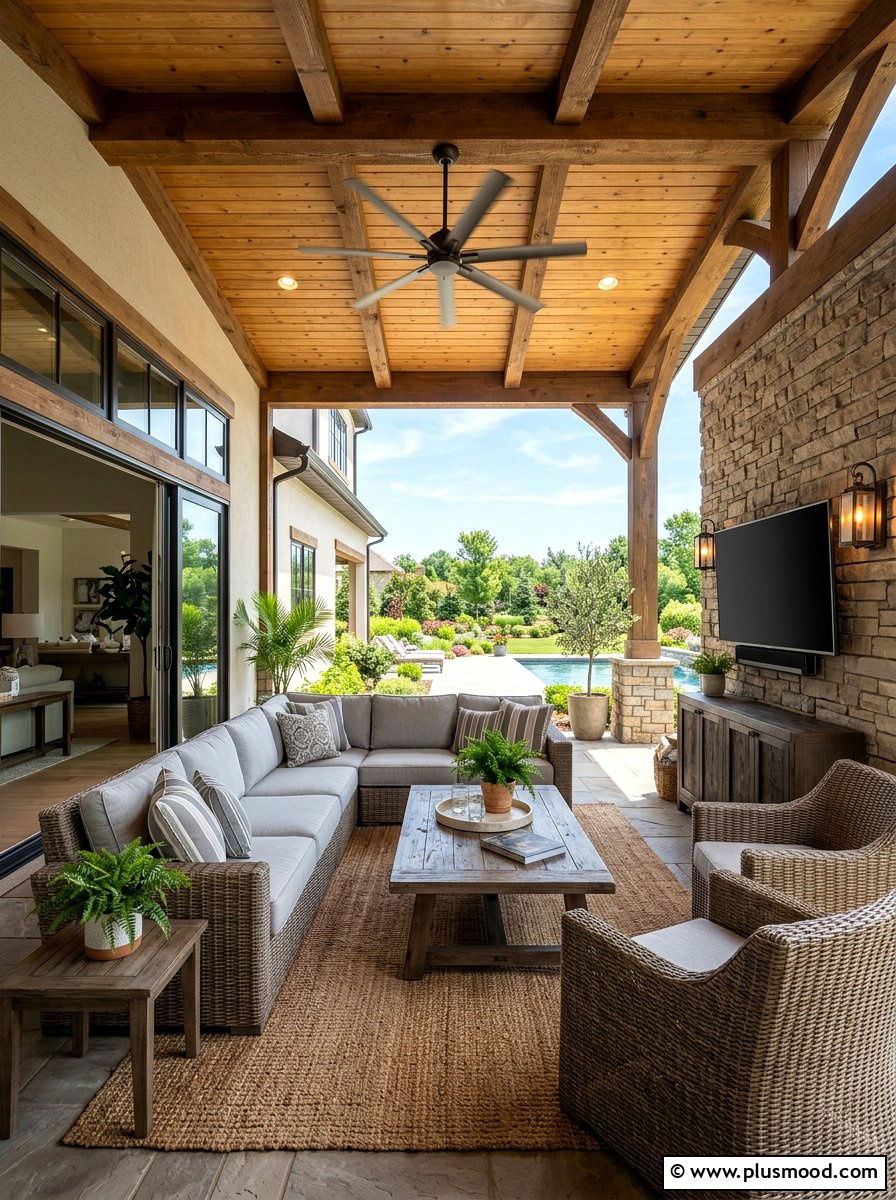
    1. Enhancing Your Covered Patio with Comfortable and Durable Furniture

    Enhancing Your Covered Patio with Comfortable and Durable Furniture

    A covered patio creates an ideal setting for an inviting outdoor lounge that’s shielded from weather conditions. This allows for the inclusion of more substantial and cozy furnishings that might not withstand exposure on an open deck. By integrating entertainment features and thoughtful lighting, you can craft a versatile space for relaxation and gatherings.

    Key Design Elements

    • Opt for sturdy, upholstered sofas or solid wood tables suited for sheltered outdoor environments.
    • Incorporate weatherproof electronics like an outdoor TV and speakers to elevate entertainment options.
    • Install a ceiling fan to promote airflow and maintain a comfortable temperature during warm days.
    • Use layered lighting with a combination of floor lamps and wall-mounted fixtures to adapt ambiance.

    Pro Tip: Choose fade-resistant fabrics and rustproof hardware on furniture to ensure longevity while enjoying the comfort of your covered patio.

    2. Mastering the Art of Layering Outdoor Rugs

    Mastering the Art of Layering Outdoor Rugs

    Combining multiple outdoor rugs introduces a rich texture and warmth that instantly elevates your patio’s ambiance. Begin with a broad, natural-fiber rug as your foundation, then add a smaller, vibrant rug on top to visually define and enhance your sitting zone. This layering method not only grounds your outdoor furniture but also brings an inviting, cozy atmosphere ideal for relaxing barefoot in the sun.

    Key Design Elements

    • Use a large, neutral-toned rug made from materials like jute or sisal as a sturdy base layer.
    • Add a smaller, patterned or brightly colored rug to highlight your seating or dining area.
    • Mix different textures, such as a woven base rug paired with a soft, plush layer, for added dimension.
    • Coordinate the rug colors with outdoor cushions and plant pots to create a harmonious and polished look.

    Pro Tip: Choose rugs with non-slip backings or add outdoor rug pads underneath to keep layered rugs stable and safe.

    3. Cozy Hanging Chair Retreat

    Cozy Hanging Chair Retreat

    Transform a small patio corner into a serene escape with a hanging chair or swinging daybed. By carefully selecting a spot that offers delightful views, you can create an inviting space perfect for unwinding and enjoying your surroundings. Enhance the nook with thoughtful decor elements that promote comfort and privacy.

    Key Design Elements

    • Place the hanging chair where you can admire garden blooms or poolside scenery.
    • Anchor the area with an outdoor rug and a collection of lush potted plants.
    • Include a compact side table to hold drinks or reading materials.
    • Add soft cushions and cozy throws to boost comfort and warmth.

    Pro Tip: Choose weather-resistant fabrics and materials to ensure your hanging chair nook stays comfortable and stylish through all seasons.

    4. Cozy Small Bistro Sets for Intimate Outdoor Spaces

    Cozy Small Bistro Sets for Intimate Outdoor Spaces

    A quaint bistro set is ideal for transforming a petite patio or a tucked-away garden nook into a cozy retreat. Opt for lightweight, space-saving materials like wrought iron or powder-coated metal to easily fit limited areas while maintaining style. Enhancing the setup with plush cushions and delicate floral accents can create a warm, welcoming atmosphere.

    Key Design Elements

    • Choose compact wrought iron or colorful metal bistro sets that complement tight spaces.
    • Add soft cushions to chairs for extra comfort and a personal touch.
    • Place the set near fragrant plants or under a leafy tree to enjoy natural shade and scent.
    • Use a small outdoor rug to visually anchor the area and define it as a distinct space.

    Pro Tip: Position your bistro set close to blooming greenery to combine seating comfort with delightful natural aromas and shade.

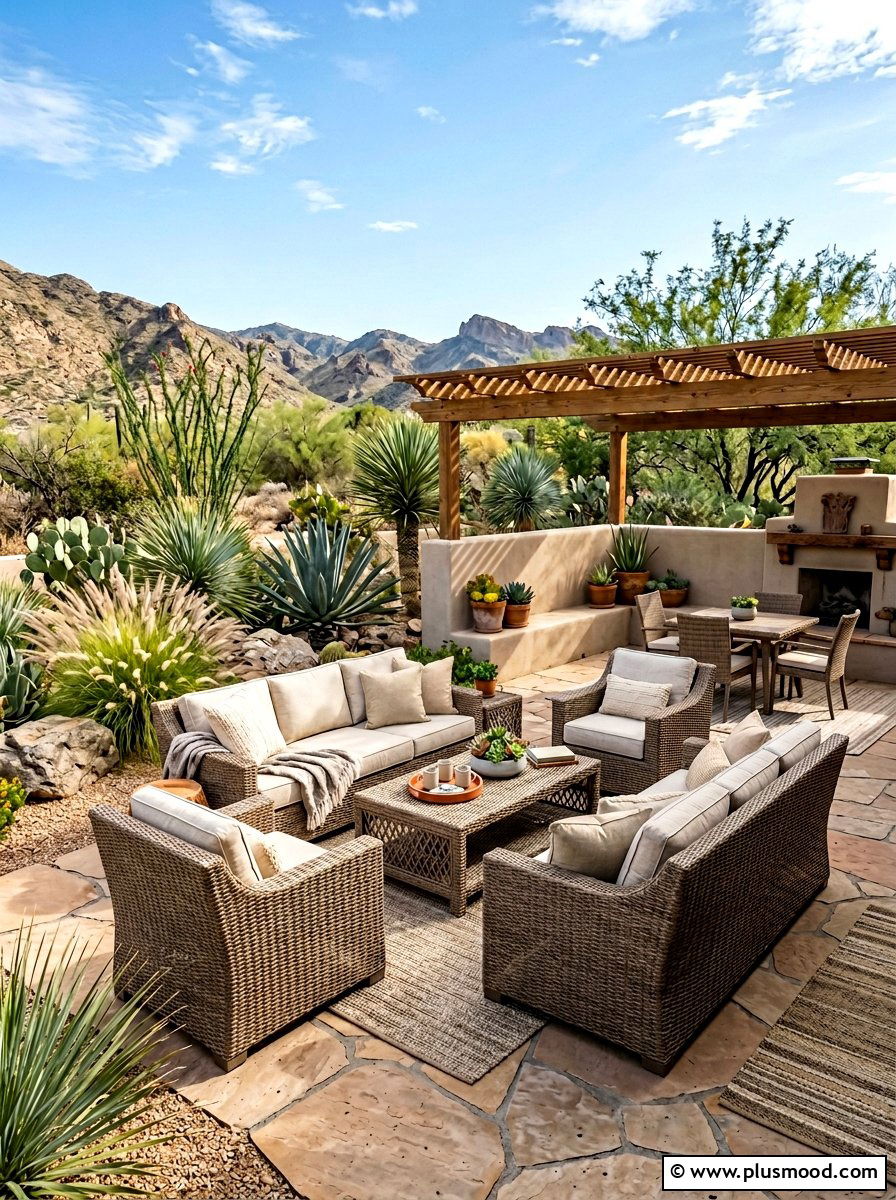
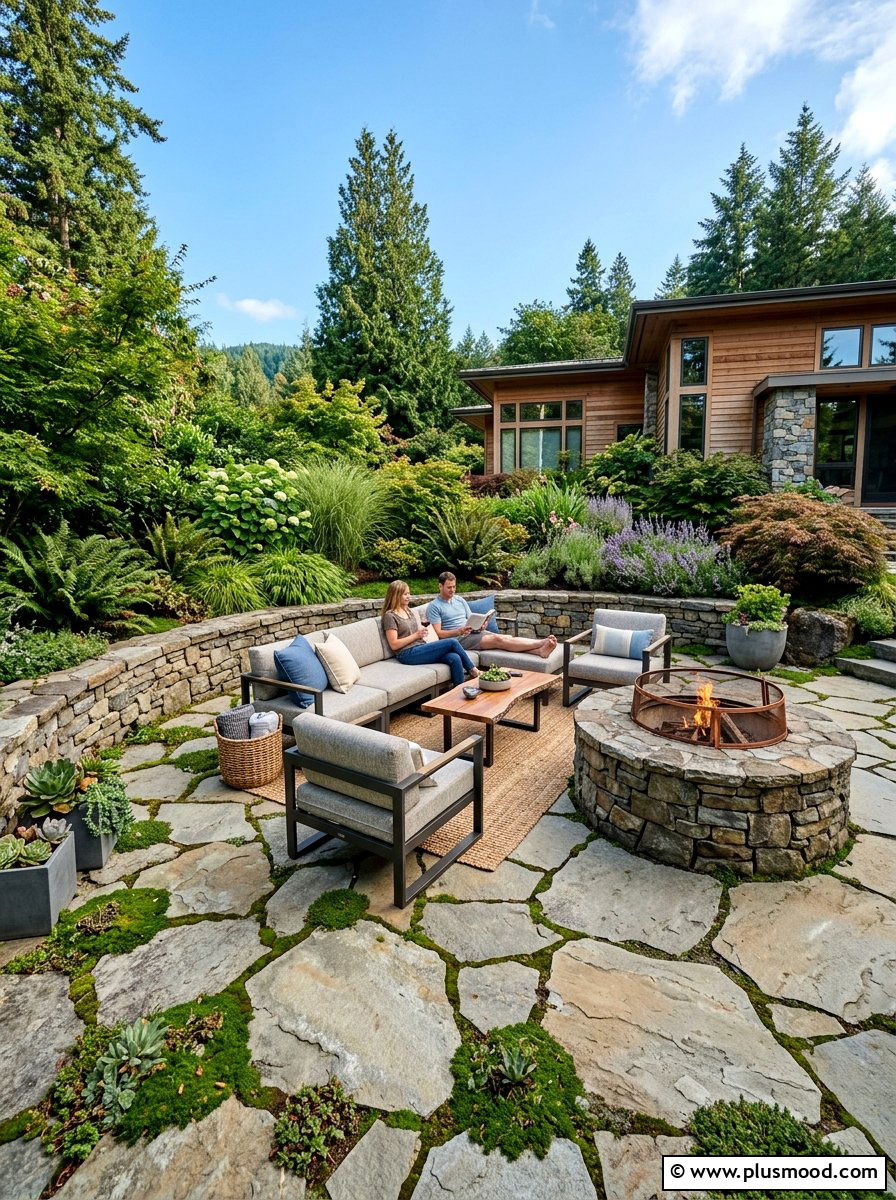
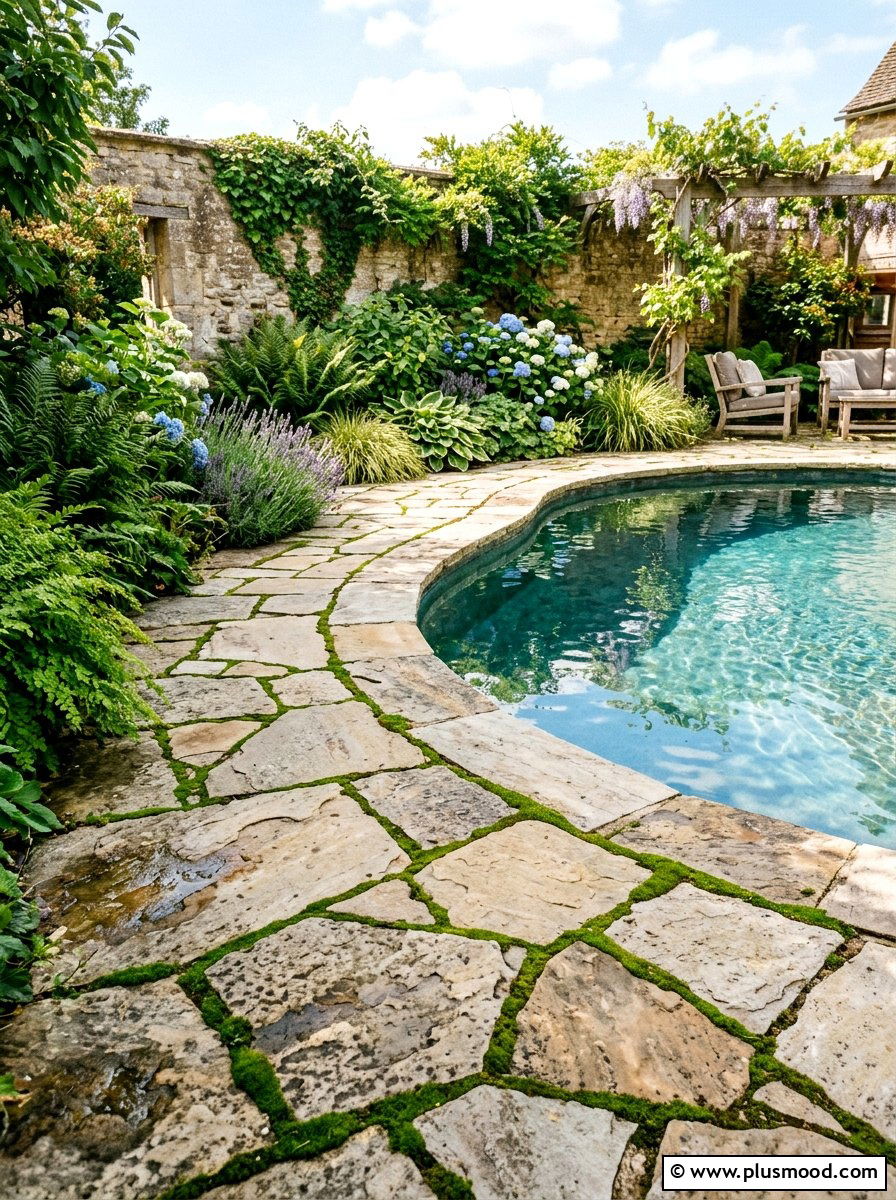
    5. Creating a Stunning Flagstone Patio Floor

    Creating a Stunning Flagstone Patio Floor

    A flagstone patio floor offers a natural, enduring surface that complements various outdoor furniture styles seamlessly. By arranging uneven, organic-shaped stones, you can create a harmonious flow that blends effortlessly with your garden and landscape. Pairing the stone base with sleek modern furniture or incorporating natural elements enhances both comfort and visual appeal.

    Key Design Elements

    • Lay irregular flagstones with minimal grout lines for a natural, cohesive look.
    • Combine the stone floor with minimalist or rustic furniture to create charming contrasts.
    • Introduce creeping ground covers like moss or thyme between stones to add softness and subtle fragrance.
    • Enhance the patio with built-in features such as stone benches or a firepit to boost structure and function.

    Pro Tip: Seal your flagstone surface annually to protect against weathering while preserving its vibrant natural colors.

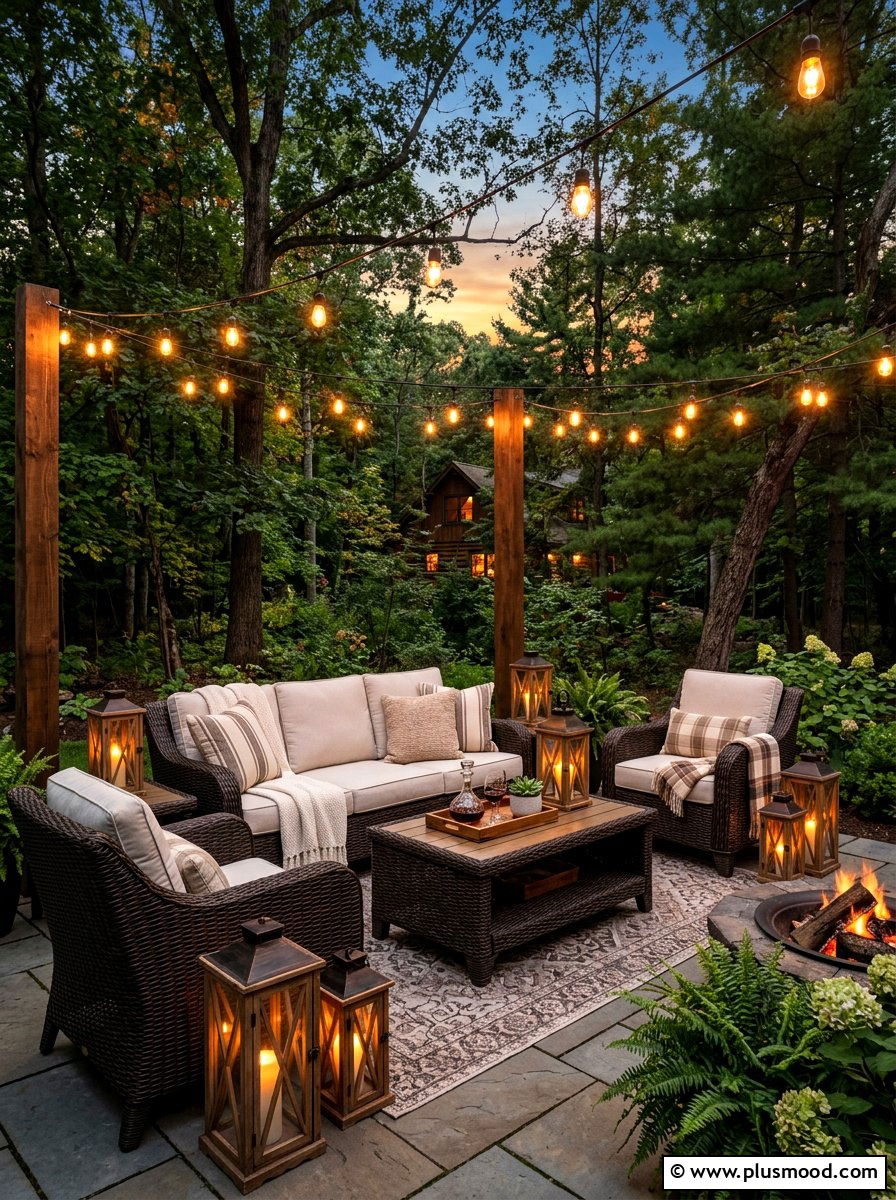
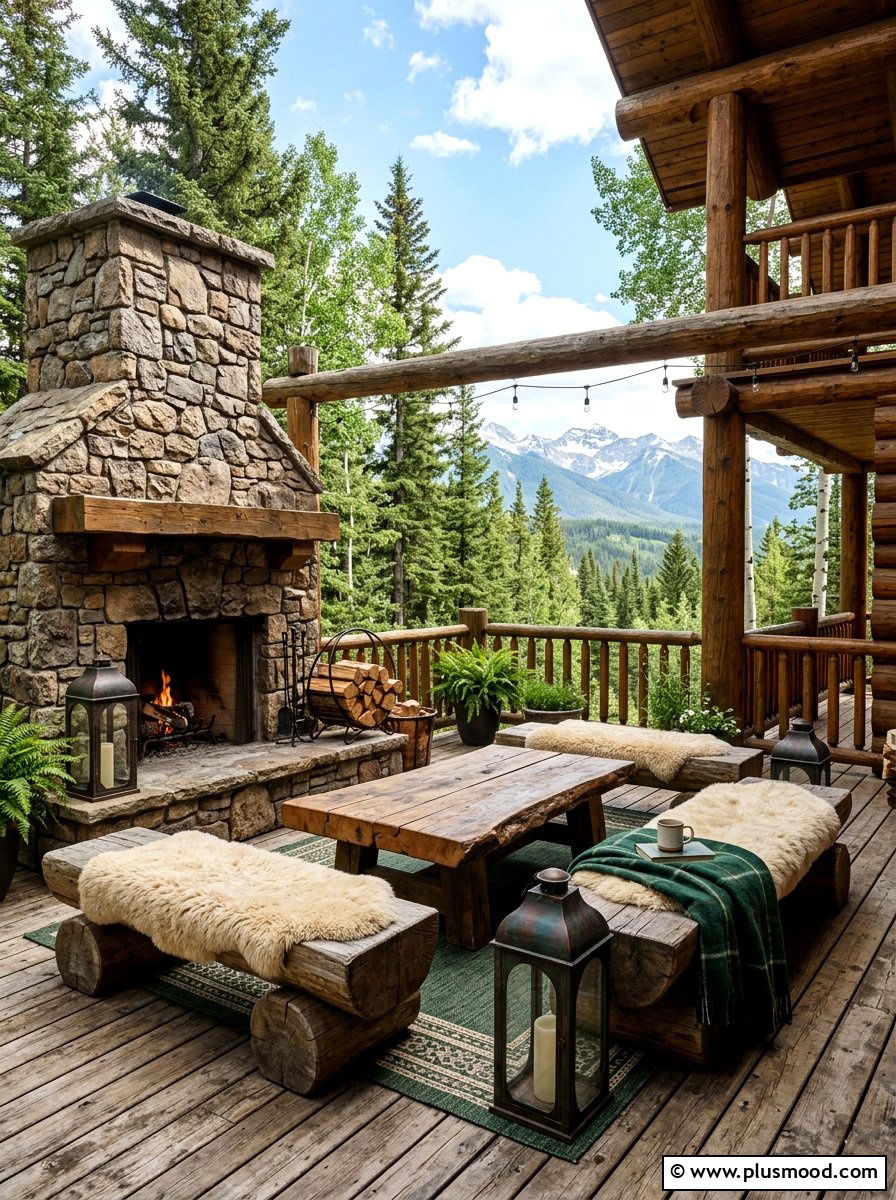
    6. Charming Rustic Wood Patio Ideas

    Charming Rustic Wood Patio Ideas

    Celebrate the natural beauty of wood and rugged textures in your outdoor space to create a warm, inviting patio. Incorporate sturdy reclaimed timber furniture paired with soft, cozy textiles to achieve an authentic, earthy ambiance. Complement the design with nature-inspired colors and functional accents that blend effortlessly with the surrounding landscape.

    Key Design Elements

    • Anchor your seating area with a large reclaimed wood table or chunky wood benches adorned with plush throws.
    • Choose a palette of muted earth tones like soft beiges, mossy greens, and rich browns to harmonize with nature.
    • Include stone or metal elements such as a fireplace surround or a rustic wood holder to add practical charm.
    • Use oversized lanterns featuring flickering candles to cast a welcoming, soft glow in the evening.

    Pro Tip: Opt for weather-resistant natural fabrics and finishes to ensure your rustic wood patio stays beautiful and durable year-round.

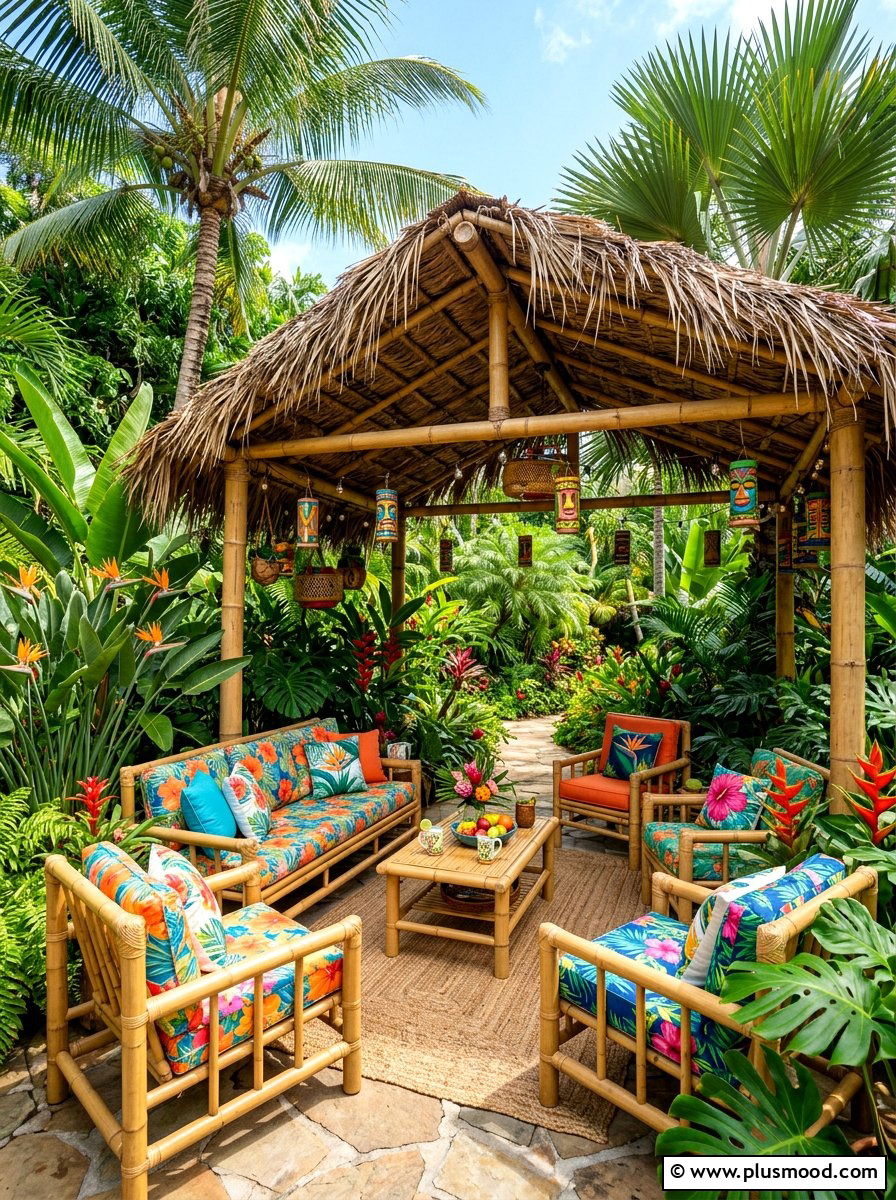
    7. Designing a Lush Tropical Garden Retreat

    Designing a Lush Tropical Garden Retreat

    Transform your outdoor space into a vibrant tropical haven by layering lush greenery and bright, lively hues. Opt for durable natural materials like teak or bamboo furniture to enhance the authentic island ambiance while withstanding outdoor elements. Accentuate the space with colorful floral textiles and ambient lighting to evoke the spirit of a tropical paradise.

    Key Design Elements

    • Choose weather-resistant teak or bamboo furniture to create a natural, enduring foundation.
    • Incorporate cushions and rugs with vivid floral prints to reflect exotic garden blooms.
    • Install shade structures such as large umbrellas or a thatched canopy for comfort and style.
    • Enhance evening vibes with tiki torches or multicolored lanterns that add warmth and character.

    Pro Tip: Integrate a variety of tropical plants in varying heights around your lounge area to create depth and a true jungle-inspired feel.

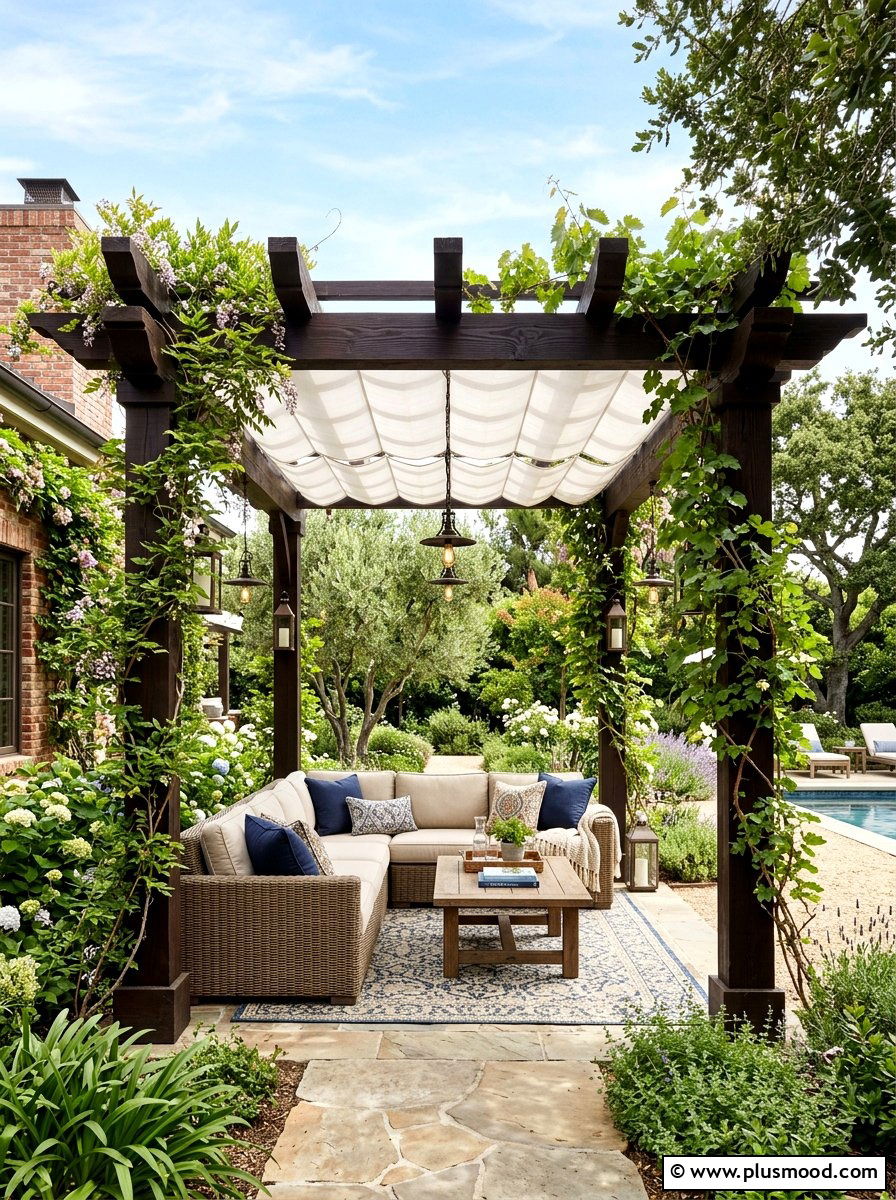
    8. Creating Comfortable Shade with a Pergola Canopy

    Creating Comfortable Shade with a Pergola Canopy

    A pergola transforms your outdoor lounge into a stylish retreat while offering much-needed shade from harsh sunlight. Enhance your pergola’s shelter by installing retractable fabric covers or encouraging lush climbing vines to weave through the overhead beams. This setup not only defines your outdoor space but also makes it ideal for relaxation and dining throughout the day and evening.

    Key Design Elements

    • Add retractable canopy fabrics for adjustable shade coverage.
    • Plant fast-growing climbers like wisteria or ivy for natural shade and greenery.
    • Arrange cozy seating and a dining table underneath for multifunctional use.
    • Install pendant or string lights to create a warm ambiance after sunset.

    Pro Tip: For an inviting and private atmosphere, hang lightweight outdoor curtains that gently sway with the breeze while softening the sunlight.

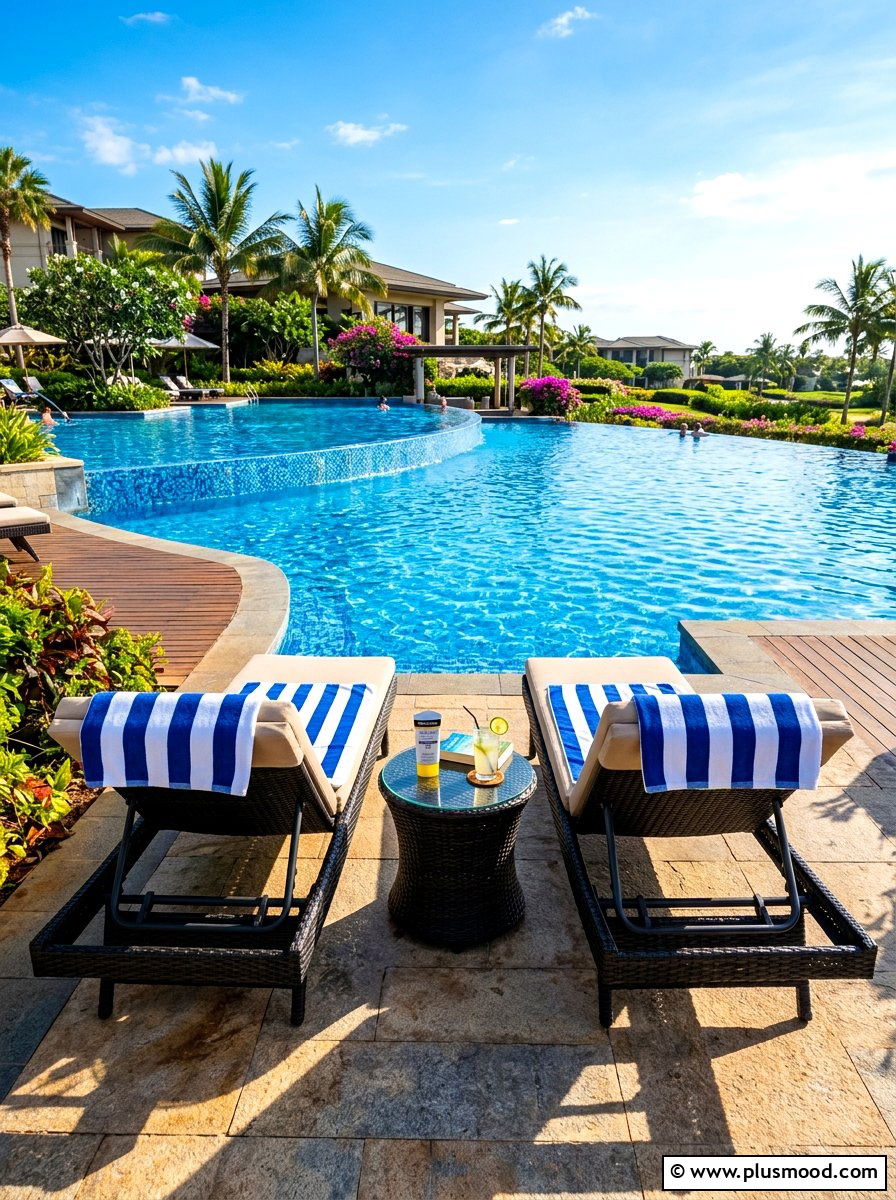
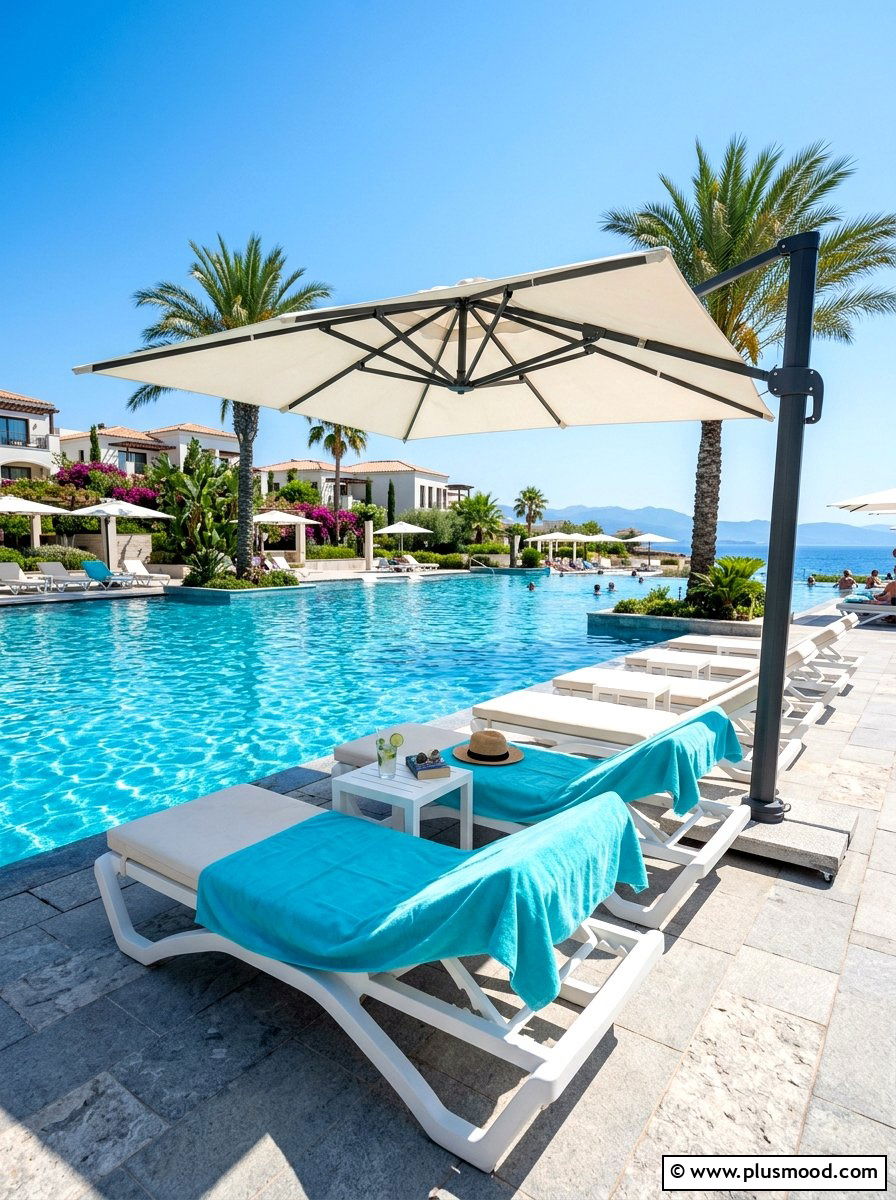
    9. Creating the Perfect Poolside Lounge Setup

    Creating the Perfect Poolside Lounge Setup

    To craft a stylish and functional lounge space by your pool, prioritize durable, weatherproof furniture paired with lively, inviting colors that evoke a tropical getaway vibe. Opt for adjustable chairs made from resilient materials that can handle sun and water exposure. Incorporating bold textiles and practical shade solutions will elevate the comfort and appeal of your outdoor retreat.

    Key Design Elements

    • Select adjustable loungers crafted from powder-coated aluminum or synthetic resin for lasting durability.
    • Incorporate bright, oversized towels and coordinating cushions to add vibrant accents.
    • Use a large, movable umbrella to offer flexible shade options throughout the day.
    • Place compact, weatherproof side tables nearby for easy access to essentials like drinks and sunscreen.

    Pro Tip: Position lounge chairs with small gaps between them to allow airflow and create a relaxed, inviting atmosphere around your pool.

    10. Creating a Stylish Built-In Patio Bench

    Creating a Stylish Built-In Patio Bench

    Incorporating a built-in bench into your patio design enhances both the aesthetics and functionality of your outdoor space. Whether crafted from natural stone or wood, these benches can seamlessly blend with your home’s existing design, offering a sturdy yet inviting seating option. With the right cushions and added features, your built-in bench becomes the heart of a welcoming outdoor retreat.

    Key Design Elements

    • Choose materials like cedar, teak, or stone to complement your patio’s style and weather resistance needs.
    • Use plush, weatherproof cushions and an assortment of throw pillows to boost comfort and add personality.
    • Build integrated storage compartments beneath the bench to neatly store gardening supplies or outdoor essentials.
    • Position a sizable coffee table or fire pit in front of the bench to encourage socializing and complete the seating area.

    Pro Tip: Incorporate drainage holes or slightly sloped seating surfaces to prevent water pooling and extend the life of your built-in bench.

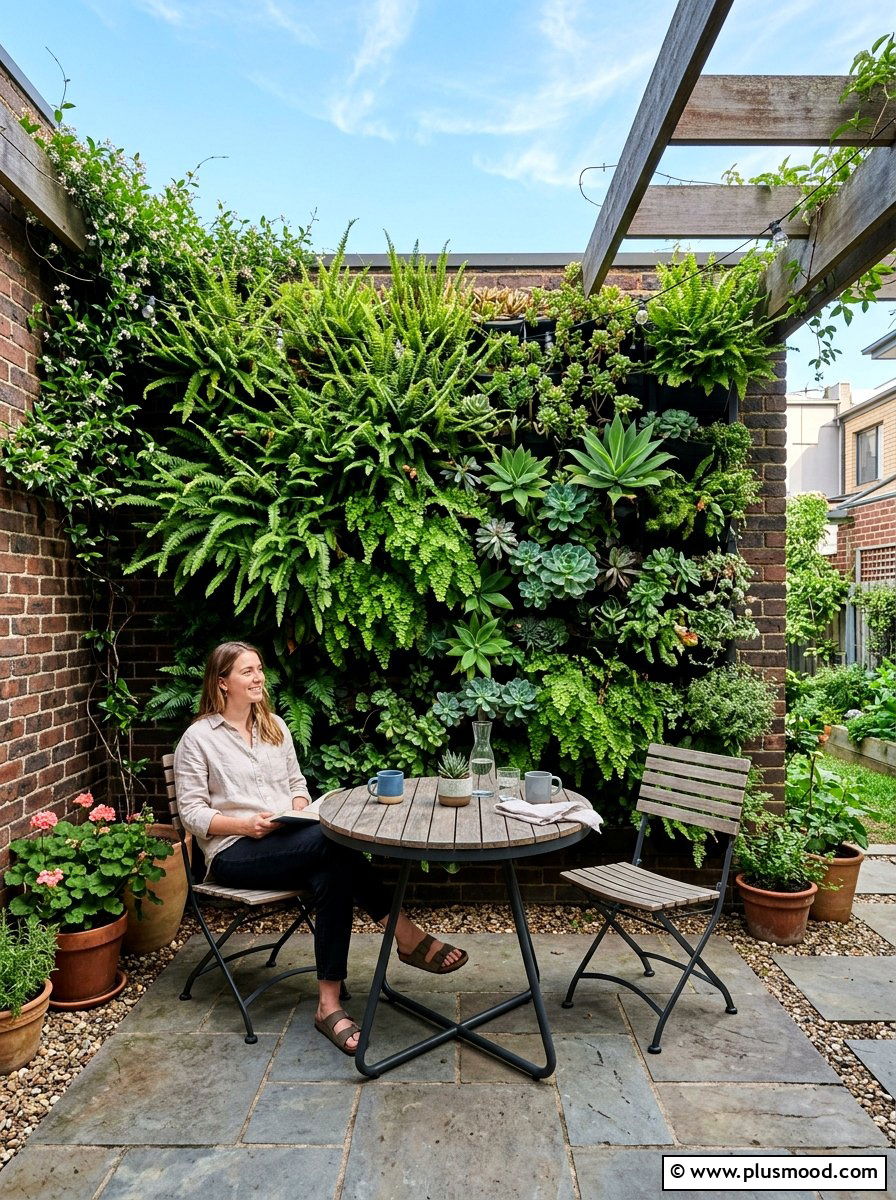
    11. Creating a Vertical Garden Oasis on Your Patio

    Creating a Vertical Garden Oasis on Your Patio

    Transform your patio into a verdant sanctuary by incorporating a vertical garden, perfect for enhancing greenery without sacrificing space. Utilizing wall-mounted planters or cascading pots filled with a mix of ferns, succulents, and aromatic herbs can introduce both privacy and a refreshing natural ambiance. Positioning your seating area near this vibrant green feature turns your patio into a peaceful retreat that effortlessly blends style and nature.

    Key Design Elements

    • Install modular wall planters or hanging containers to maximize vertical growing space.
    • Select a variety of plants that thrive in your climate and provide different textures and colors.
    • Place seating nearby to enjoy the natural air purification and calming effect of the greenery.
    • Choose minimalist furniture in soft, neutral tones to highlight the lush plants without overpowering them.

    Pro Tip: For an easy DIY vertical garden, use recycled wooden pallets or lattice panels to mount your plants, allowing flexibility in arrangement and plant choice.

    12. Vibrant Patio Styling Ideas

    Vibrant Patio Styling Ideas

    Embrace the spirit of summer by designing a lively patio space bursting with color and personality. Begin with a simple, neutral foundation and build layers of bold patterns and bright hues through accessories and decor. Incorporate diverse planters with blooming flowers and add vivid accents to transform your outdoor area into a cheerful retreat.

    Key Design Elements

    • Start with understated furniture and add colorful cushions and throws for an energetic vibe.
    • Mix various planters in an array of shades and sizes to create visual interest with greenery.
    • Use vibrant rugs and patterned textiles that share a color palette to tie the look together.
    • Enhance the ambiance with colorful lanterns, wind chimes, or a striking painted wall.

    Pro Tip: Focus on a unifying color family when mixing patterns to keep the space harmonious yet dynamic.

    13. Streamlined Outdoor Lounge Spaces

    Streamlined Outdoor Lounge Spaces

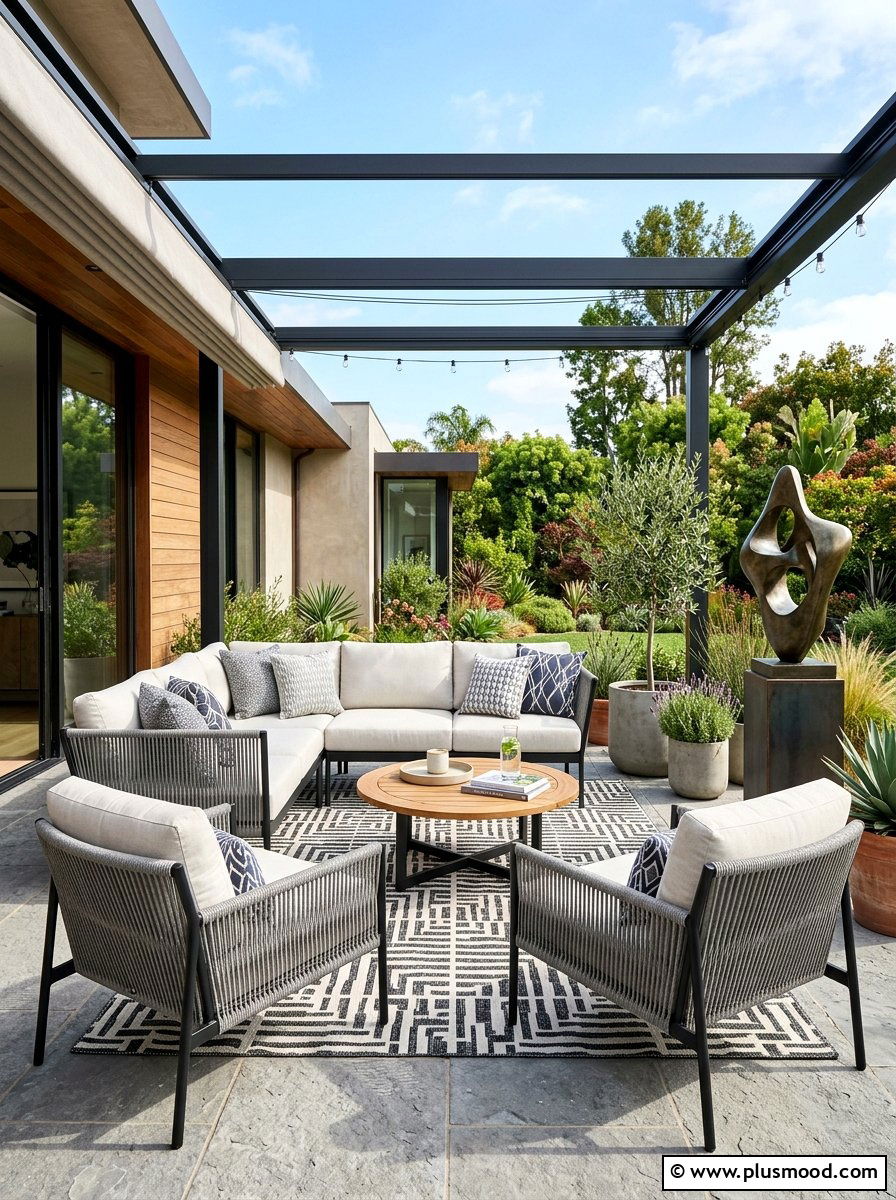
    Embrace simplicity in your outdoor lounge by focusing on sleek silhouettes, a restrained color scheme, and premium materials that elevate the ambiance effortlessly. Opt for furniture with minimalist frames paired with cushions in calming neutral hues to craft a refined and inviting atmosphere. Keeping the area airy and unobstructed enhances comfort and promotes a tranquil vibe.

    Key Design Elements

    • Choose slender-framed seating with cushions in soft grays, creams, or taupes for a timeless palette.
    • Maintain an open layout that facilitates easy flow and maximizes usable space.
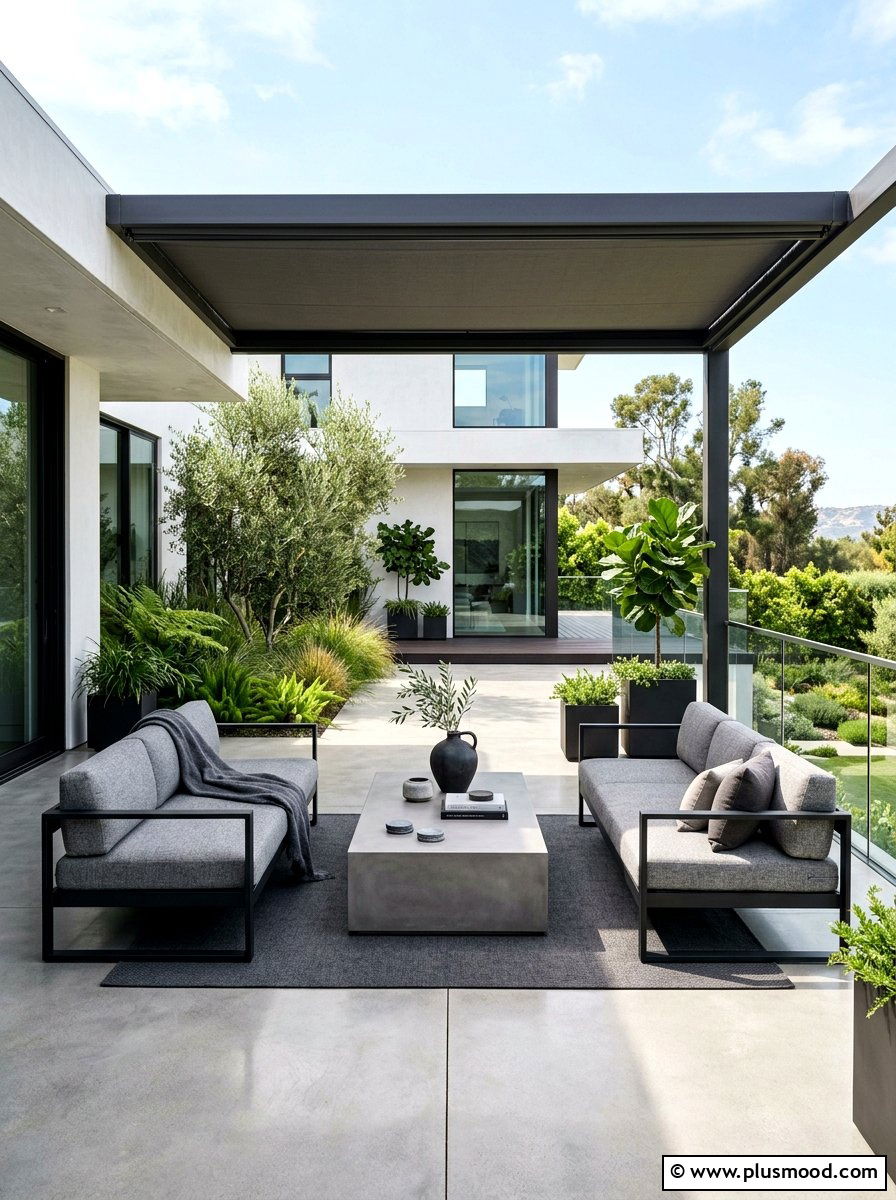
    • Incorporate a modest coffee table made from natural stone or concrete for understated elegance.
    • Add subtle accents like wood slat screens or geometric planters with minimalist greenery to enrich texture.

    Pro Tip: Select furniture pieces with clean lines and stick to a cohesive neutral color scheme to achieve a serene and sophisticated outdoor lounge.

    14. Eco-Chic Bamboo Patio Lounge Ideas

    Eco-Chic Bamboo Patio Lounge Ideas

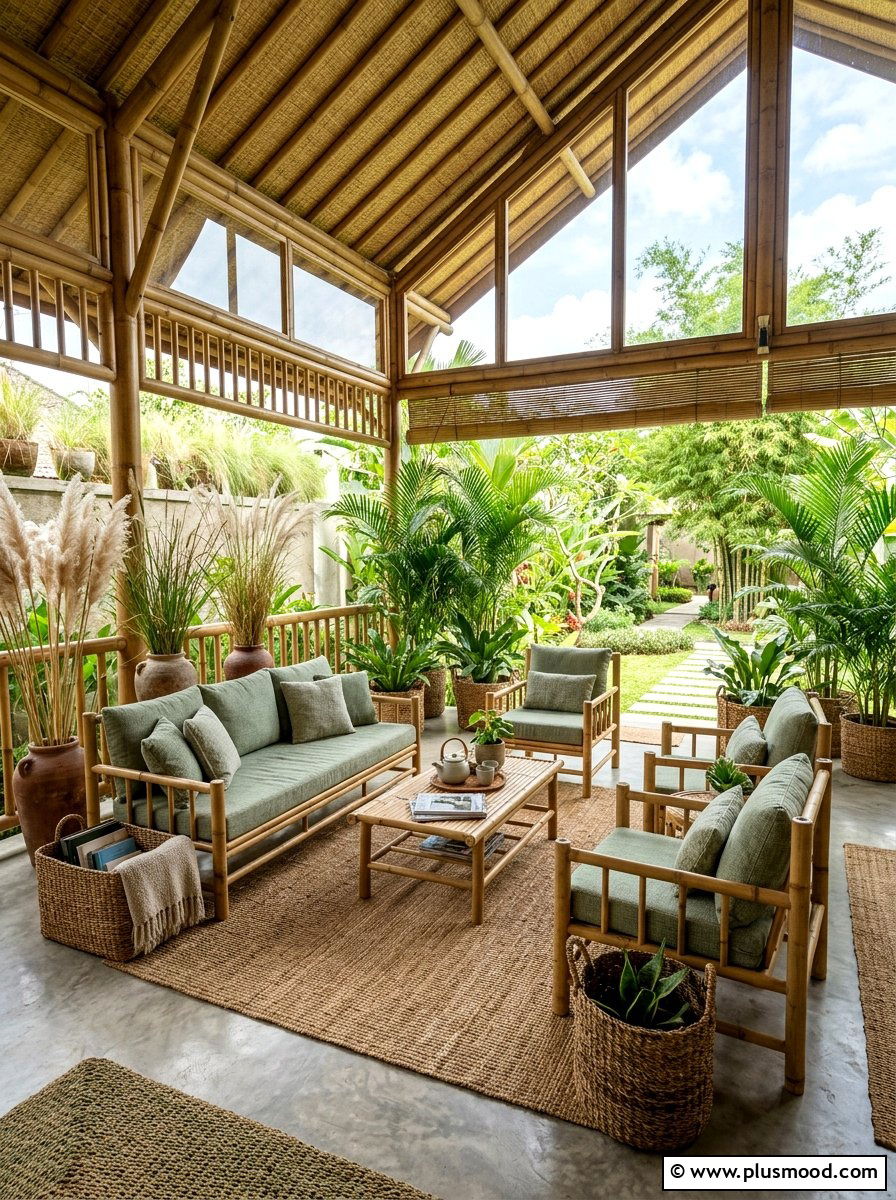
    Opting for bamboo patio furniture brings both sustainability and elegance to your outdoor space. Known for its lightweight strength, bamboo allows easy movement while providing a stylish foundation. Complement the set with earth-toned cushions and natural accents to cultivate a calming, nature-inspired ambiance that’s perfect for relaxation.

    Key Design Elements

    • Choose cushions in soft, muted shades like olive or burnt orange to enhance the bamboo’s natural beauty.
    • Incorporate a natural fiber rug made of jute or sisal to add warmth and texture underfoot.
    • Use woven baskets crafted from seagrass or rattan to keep your patio essentials organized.
    • Surround the seating area with tall ornamental grasses and tropical plants for a tranquil garden vibe.

    Pro Tip: Regularly treat your bamboo furniture with a clear, eco-friendly sealant to protect it from weather while preserving its natural look.

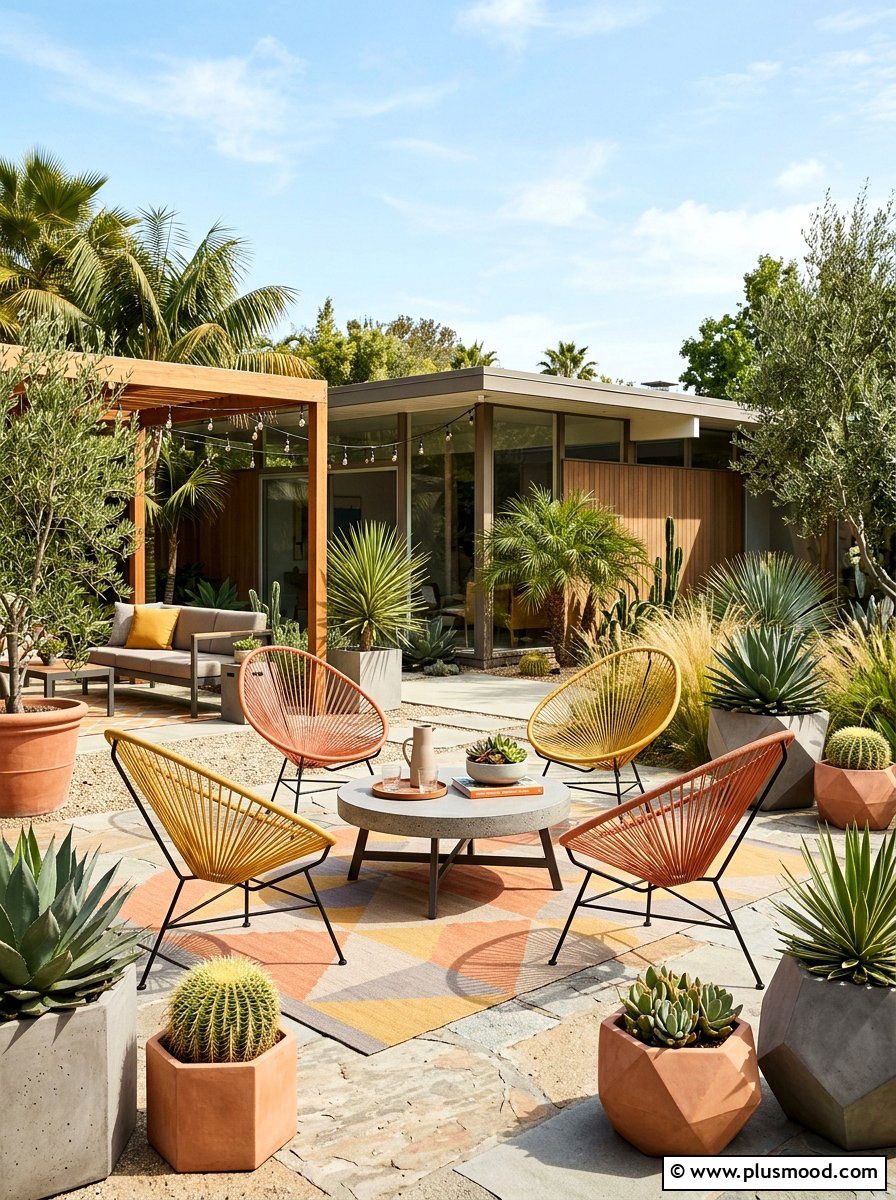
    15. Stylish Mid-Century Modern Outdoor Spaces

    Stylish Mid-Century Modern Outdoor Spaces

    Create a chic mid-century modern vibe on your patio by selecting furniture that features sleek tapered legs and smooth, organic curves. Embrace a harmonious blend of natural textures and contemporary materials to give your outdoor area an authentic vintage-modern fusion. Incorporate bold yet muted hues like burnt orange, mustard, and teal throughout your decor to enhance the timeless mid-century feel.

    Key Design Elements

    • Choose lounge seating with classic silhouettes, such as wire-frame or egg-shaped designs, for a retro flair.
    • Integrate a low-profile wooden slatted bench or a simple round concrete coffee table to add visual structure.
    • Use geometric ceramic planters filled with sculptural plants like snake plants or yuccas to complete the look.
    • Opt for textiles and cushions in subdued earthy tones to balance bold mid-century colors.

    Pro Tip: Mix contrasting materials like warm wood and sleek metal to achieve effortless mid-century modern outdoor elegance.

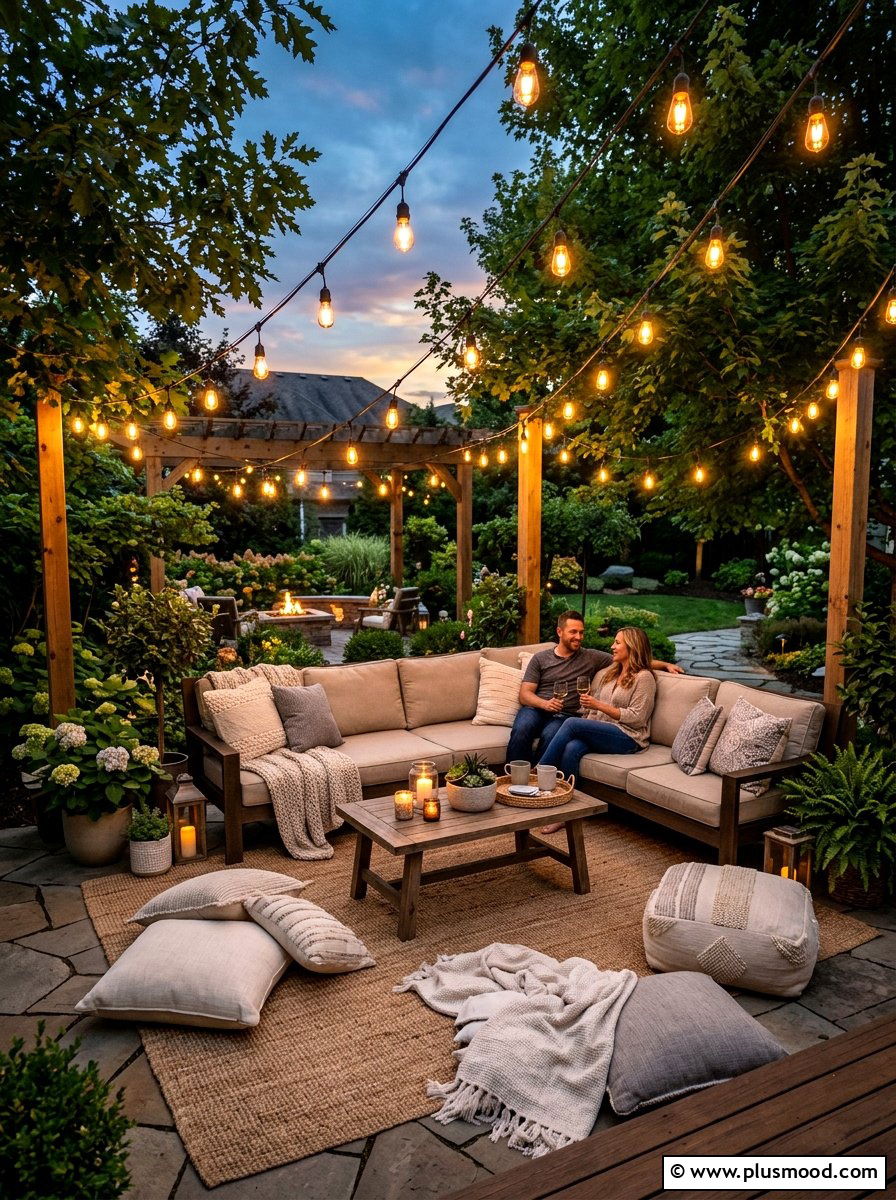
    16. Creating a Captivating Backyard Ambiance with String Lights

    Creating a Captivating Backyard Ambiance with String Lights

    Transform your outdoor space into a cozy retreat by incorporating string lights that emit a gentle, inviting glow. Arranging these lights thoughtfully around your patio or garden can instantly elevate the atmosphere, making it perfect for intimate evenings or lively gatherings. Pairing the illumination with comfortable seating enhances the overall experience.

    Key Design Elements

    • Install robust Edison-style bulbs in a crisscross layout above your main seating zone for balanced lighting.
    • Complement the setup with plush, oversized cushions and a spacious sectional to foster a laid-back vibe.
    • Integrate solar lanterns on tables or along the edges of your space to introduce varied light sources.
    • Choose furniture in neutral tones to highlight the warm, golden hues of the lighting.

    Pro Tip: Secure your string lights with weather-resistant clips or hooks to ensure durability and easy removal for seasonal changes.

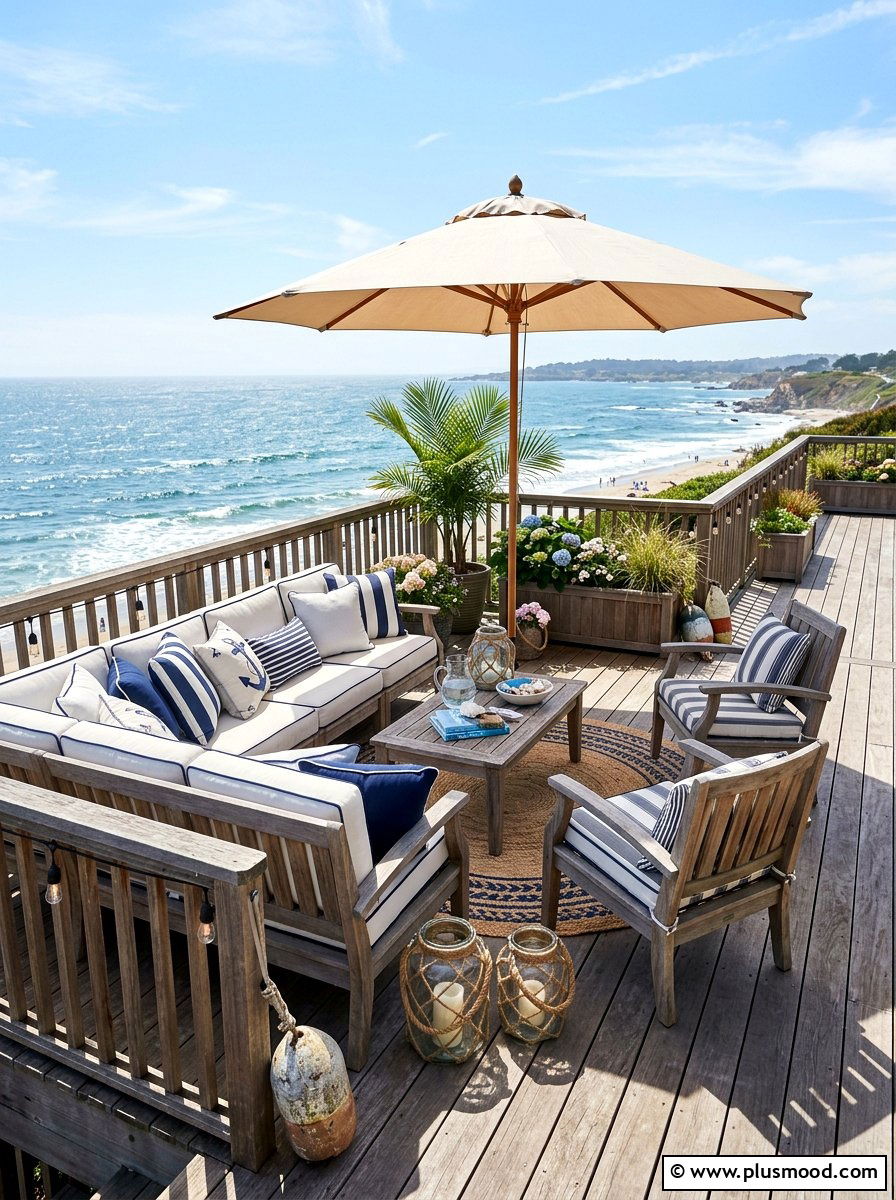
    17. Seaside-Inspired Deck Styling

    Seaside-Inspired Deck Styling

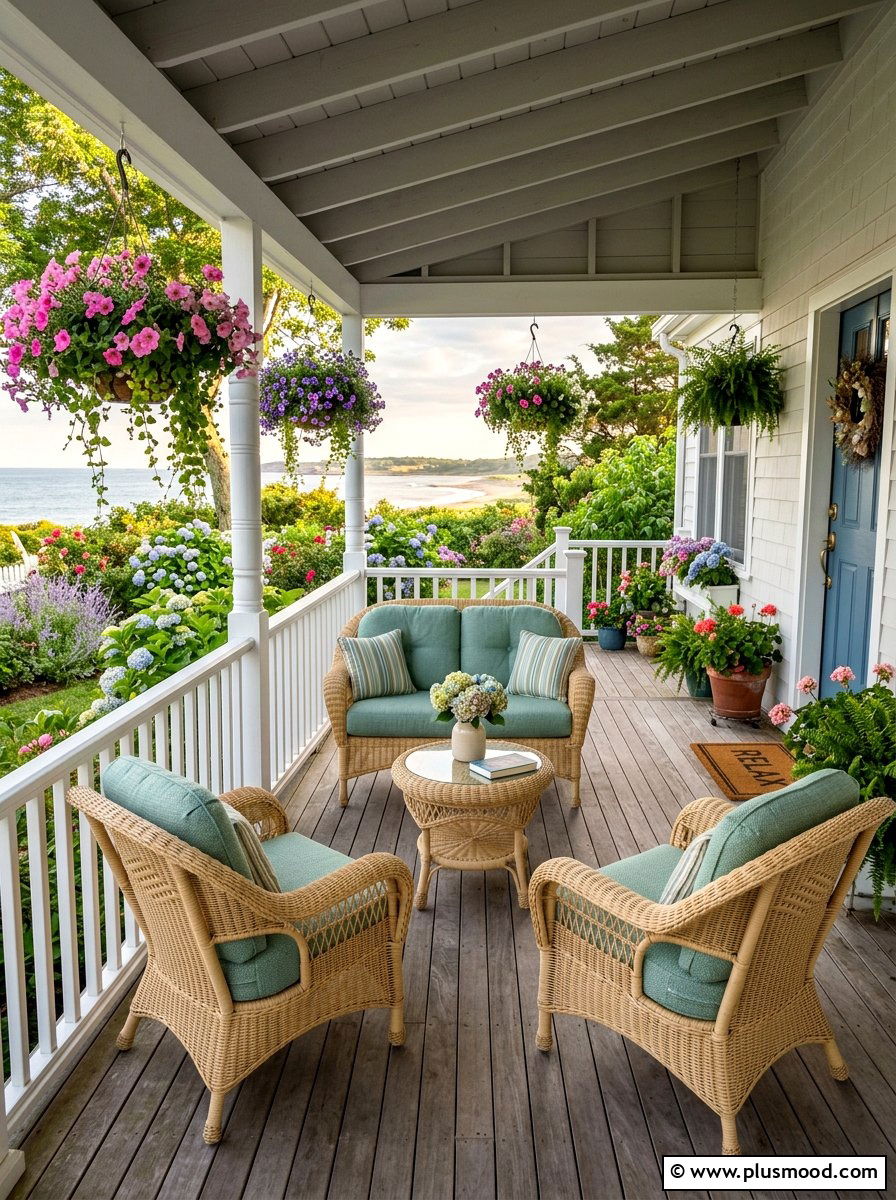
    Transform your deck into a serene coastal retreat by embracing a palette inspired by the ocean and shore. Incorporate soft blues, sandy tones, and crisp whites to evoke the tranquility of the beach. Natural textures and subtle nautical details bring an inviting, relaxed atmosphere that makes every outdoor moment feel like a seaside escape.

    Key Design Elements

    • Choose furniture in weathered or whitewashed wood to mimic the look of sun-bleached driftwood.
    • Mix in cushions and throws with stripes or maritime patterns for a subtle nautical touch.
    • Add light-colored umbrellas to provide shade while maintaining a breezy, open feel.
    • Use decorative elements like rope accents, lanterns, or sea glass-inspired accessories to enhance the coastal vibe.

    Pro Tip: Incorporate potted plants like sea grasses or succulents to bring natural greenery that complements your coastal color scheme.

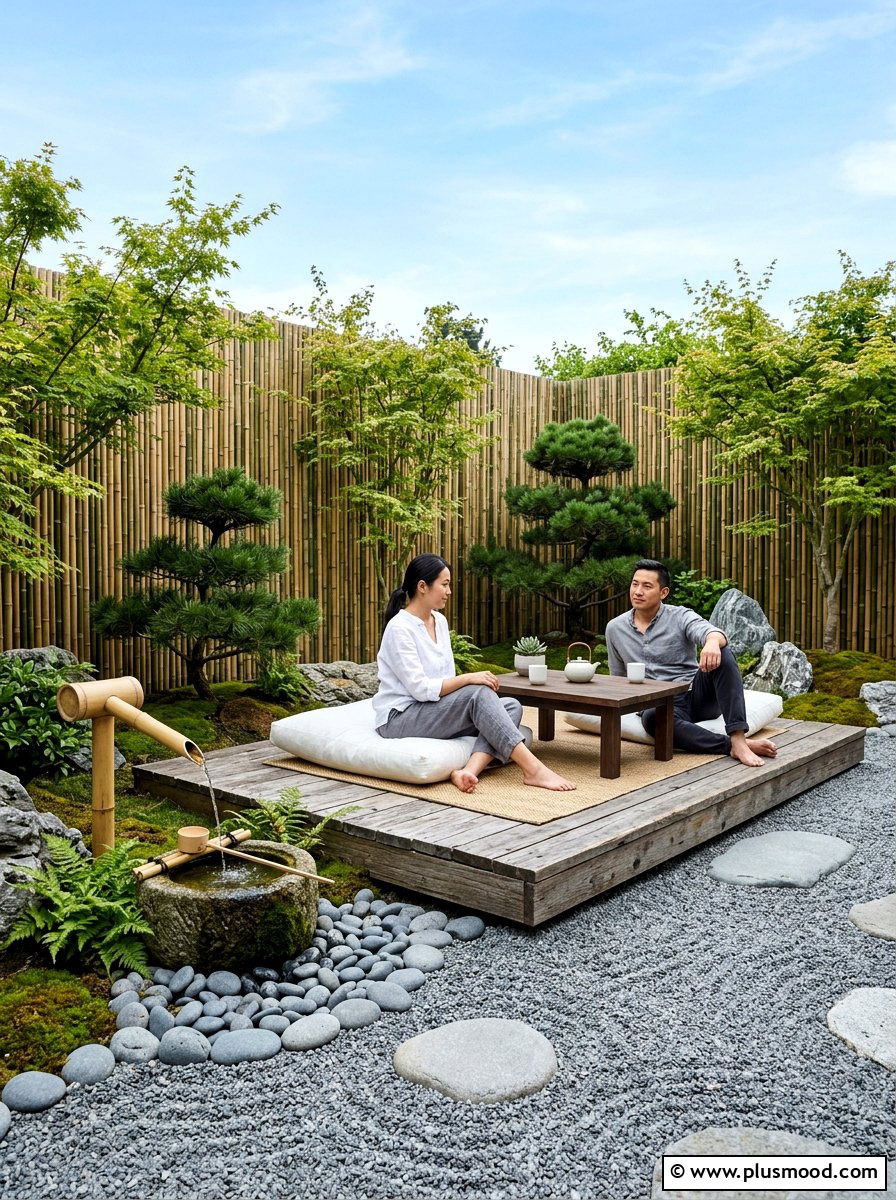
    18. Designing a Serene Zen Garden Seating Area

    Designing a Serene Zen Garden Seating Area

    Crafting a zen garden seating space focuses on embracing minimalism and harmony to foster a peaceful outdoor retreat. Utilizing soft, neutral hues and natural materials helps maintain a soothing ambiance that promotes relaxation and mindfulness. Thoughtfully chosen seating options and subtle natural features enhance the calming atmosphere, making your patio a perfect spot for quiet reflection.

    Key Design Elements

    • Opt for a neutral color scheme with shades like soft whites, gentle grays, and warm wood finishes to create a tranquil environment.
    • Select low-profile seating such as floor cushions or simple wooden benches to cultivate a sense of grounded calmness.
    • Incorporate natural accents like a small sand raked area, a flowing bamboo water feature, or a carefully placed sculptural stone for meditation focus.
    • Enclose the area with a bamboo screen or natural privacy barrier to reduce noise and visual distractions.

    Pro Tip: Place a small, quiet water element near your seating to add a soothing auditory layer that enhances mindfulness and relaxation.

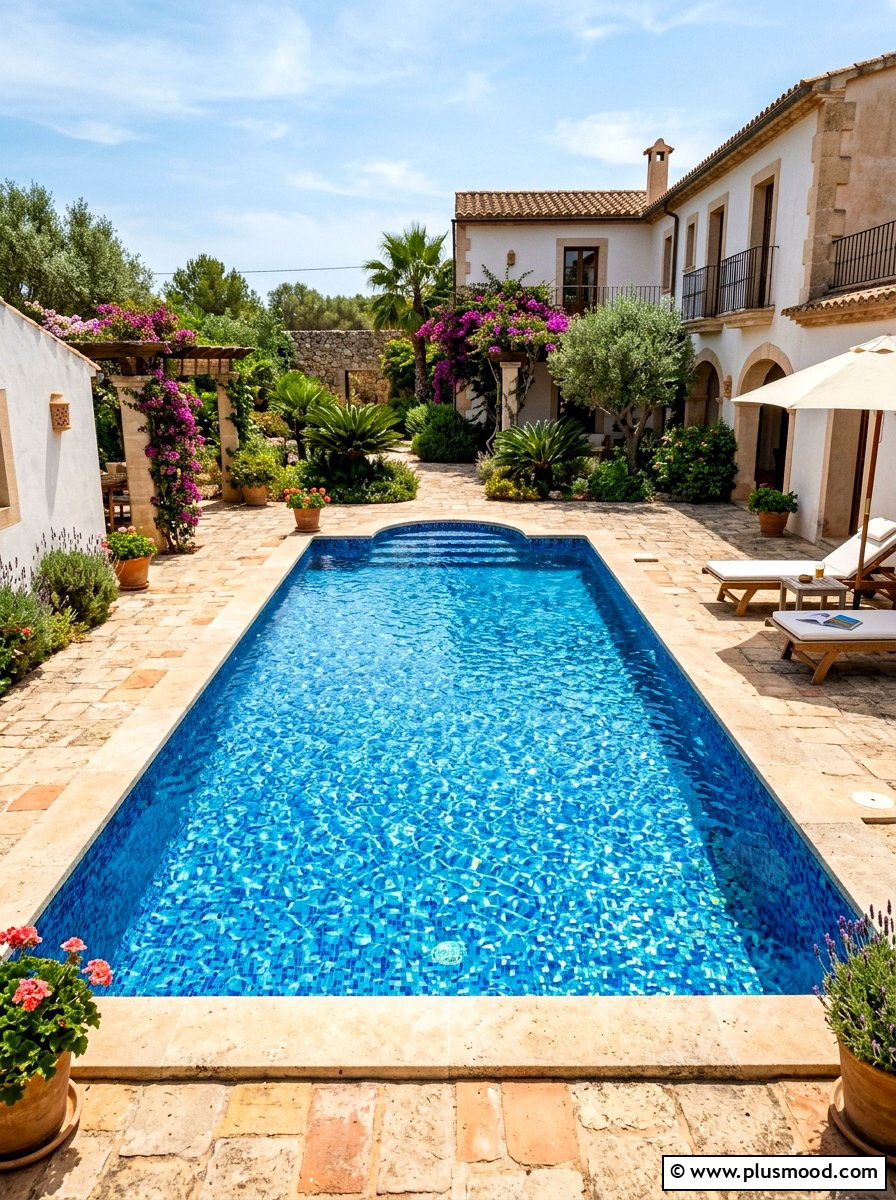
    19. Creating a Mediterranean-Inspired Stone Patio

    Creating a Mediterranean-Inspired Stone Patio

    Embrace the charm of the Mediterranean by incorporating warm tones, natural stone elements, and classic details to craft a relaxing outdoor haven. Start by layering your patio with materials like terracotta tiles or flagstone, offering both durability and rustic elegance. Complement the stone foundation with wrought iron seating adorned with soft, neutral cushions to maintain a timeless and inviting vibe.

    Key Design Elements

    • Choose terracotta or flagstone flooring for an authentic and sturdy base.
    • Incorporate wrought iron furniture with light-colored cushions to balance texture and comfort.
    • Enhance ambiance with a small water fountain to bring gentle, soothing sounds.
    • Use potted olive trees and vibrant trailing plants such as bougainvillea to add natural color and Mediterranean flair.

    Pro Tip: To amplify the Mediterranean feel, position your greenery near seating areas to provide shade and a sense of intimacy while diffusing natural fragrance.

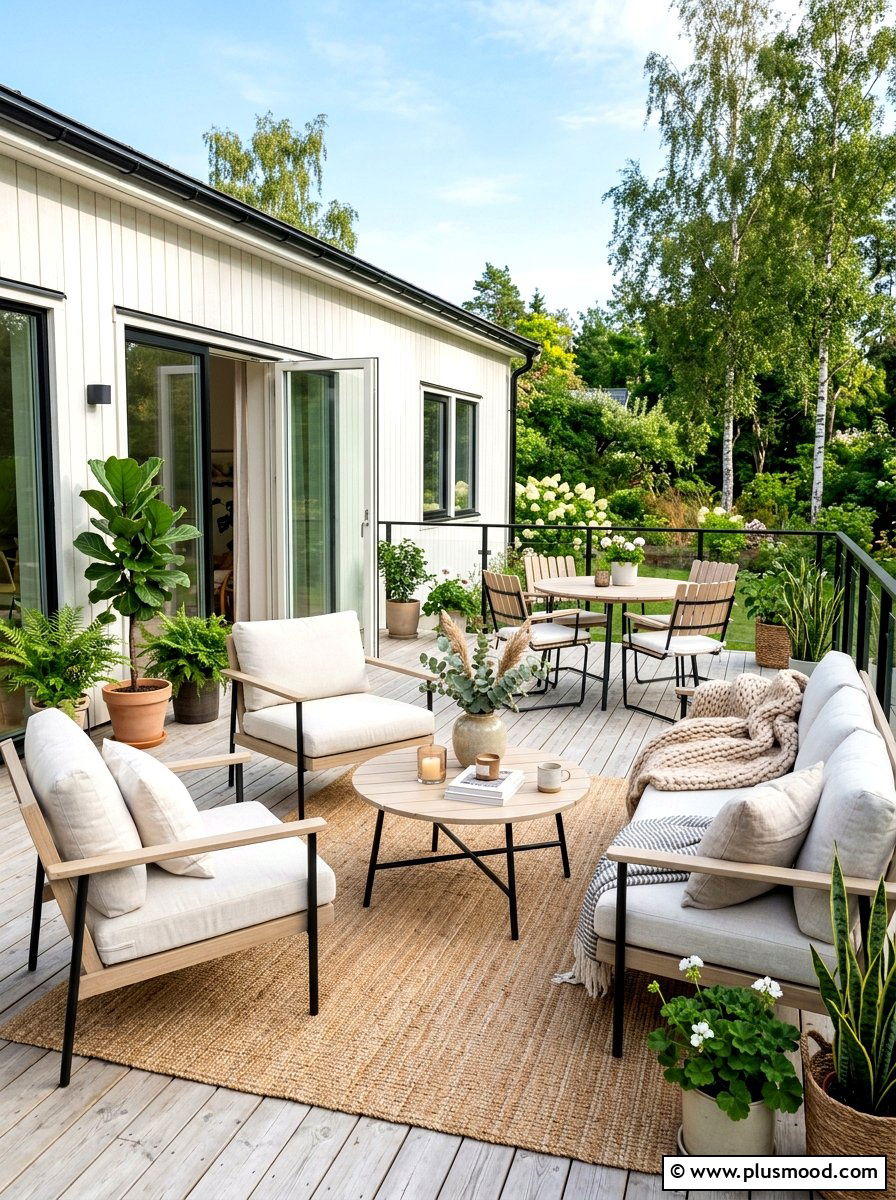
    20. Contemporary Nordic Patio Retreat

    Contemporary Nordic Patio Retreat

    Capture the essence of Nordic design outdoors by blending light tones and natural materials to craft a serene and functional patio space. Opt for streamlined, minimalist furniture crafted from light-hued woods like birch or maple, complemented by cushions in soft neutrals. Introduce subtle contrasts with understated black elements, while layering in cozy textiles and greenery to create an inviting atmosphere.

    Key Design Elements

    • Choose outdoor furniture with clean lines made from pale woods such as birch or maple.
    • Pair seating with cushions in whites, creams, or gentle grays for a light, airy feel.
    • Add contrast through sleek black accents like metal side tables or modern planters.
    • Incorporate cozy textures like linen throws and wool pillows to enhance warmth and comfort.

    Pro Tip: Integrate a mix of fragrant potted herbs and simple green plants to bring fresh life and a soothing aroma to your Nordic-inspired patio.

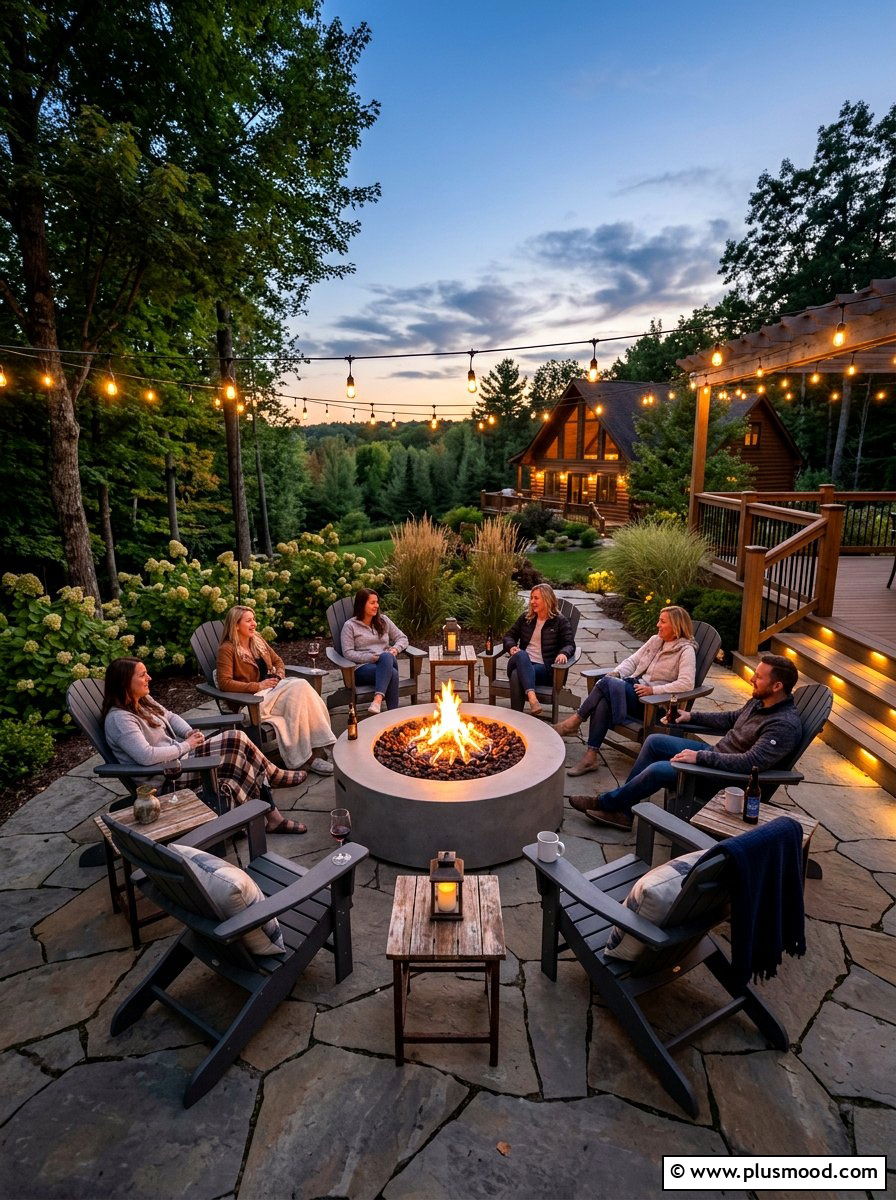
    21. Creating Comfortable Seating Around Your Fire Pit

    Creating Comfortable Seating Around Your Fire Pit

    Arranging a seating area around your fire pit transforms your outdoor space into a warm and inviting retreat perfect for chilly evenings. Opt for cozy seating options arranged in a circular pattern to promote easy conversation and shared warmth. Incorporating stylish, durable materials and thoughtful lighting helps balance comfort with modern aesthetics.

    Key Design Elements

    • Place cushioned chairs or a curved sectional in a circle to foster connection and maximize heat distribution.
    • Select fire pits crafted from sleek materials like Corten steel or polished concrete for a contemporary look.
    • Include small side tables nearby to hold drinks, snacks, and essentials for a hassle-free gathering.
    • Use subtle outdoor lighting, such as soft LED strip lights or lanterns, to highlight the fire pit without overpowering its glow.

    Pro Tip: Enhance comfort by adding weather-resistant throw blankets and outdoor rugs to your fire pit seating area for a cozy, inviting atmosphere.

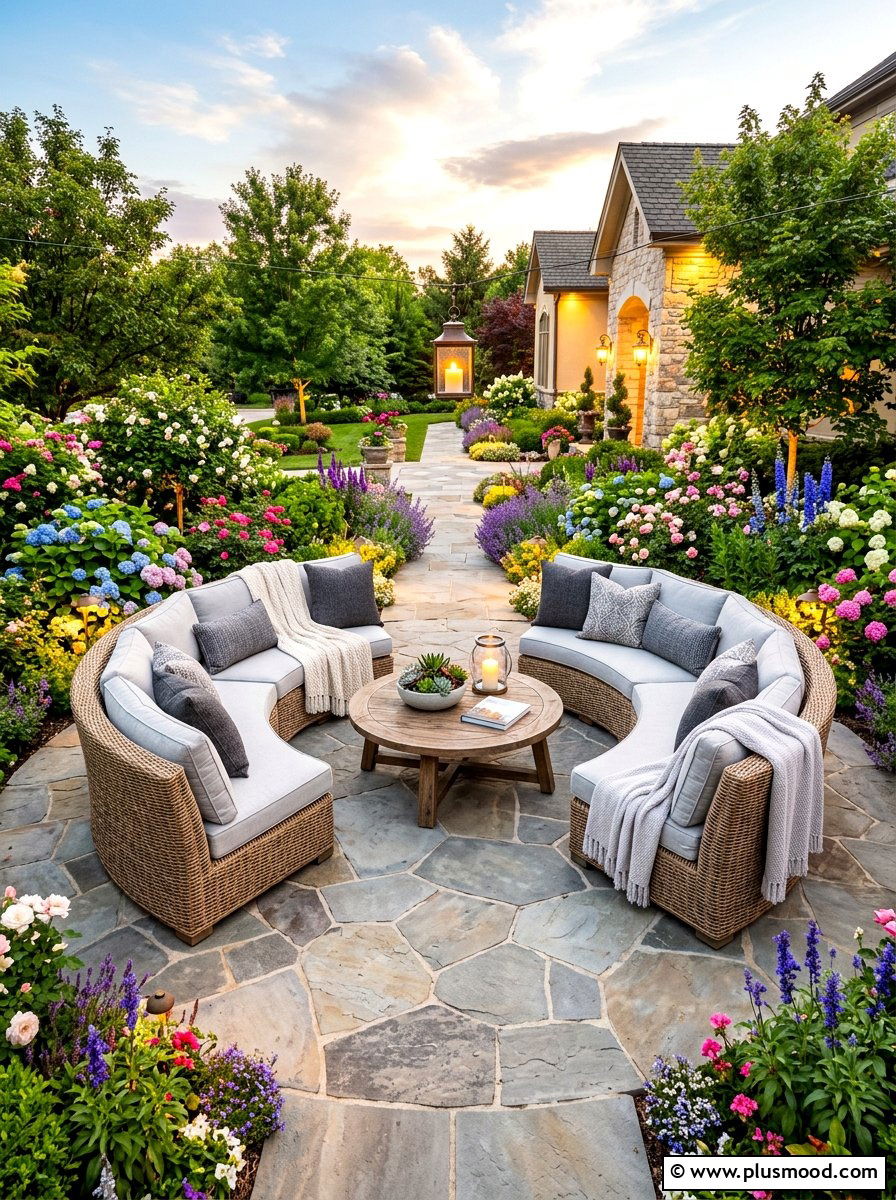
    22. Creating Cozy Outdoor Seating with a Sectional Sofa

    Creating Cozy Outdoor Seating with a Sectional Sofa

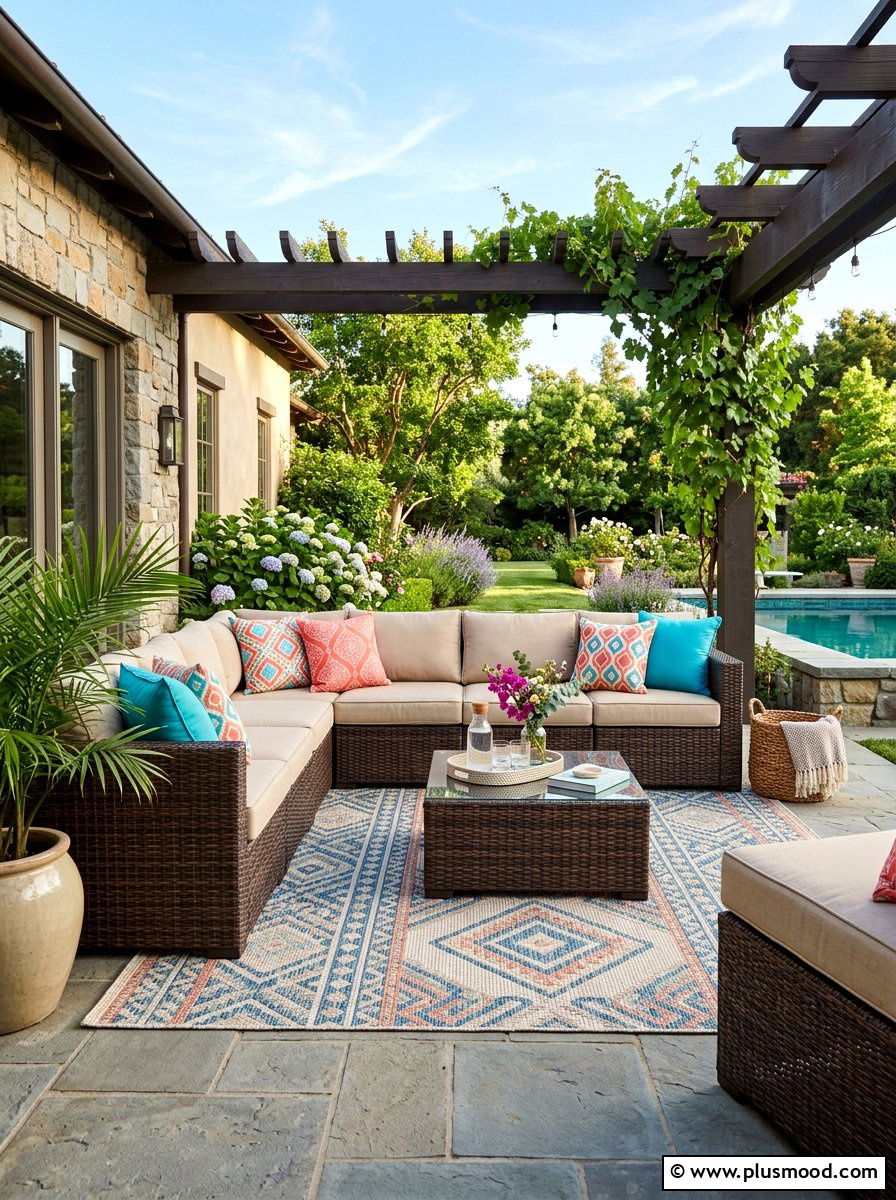
    An expansive outdoor sectional sofa transforms your patio into a cozy retreat reminiscent of indoor living. Opt for a flexible modular setup that adapts to various gatherings, whether entertaining a crowd or enjoying quiet relaxation. Choose durable, weather-resistant fabrics to keep your furniture looking fresh through countless seasons.

    Key Design Elements

    • Select sectional pieces that can be rearranged easily to fit different event sizes and needs.
    • Invest in fade-proof and moisture-resistant upholstery to maintain durability.
    • Incorporate a substantial central coffee table to anchor the seating area and hold drinks or decorative items.
    • Use tall potted plants or hedges around the sofa to create privacy and a more intimate vibe.

    Pro Tip: Choose lightweight modular sections with built-in connectors to streamline rearranging and storage when needed.

    23. Designing an Inviting Boho Patio Retreat

    Designing an Inviting Boho Patio Retreat

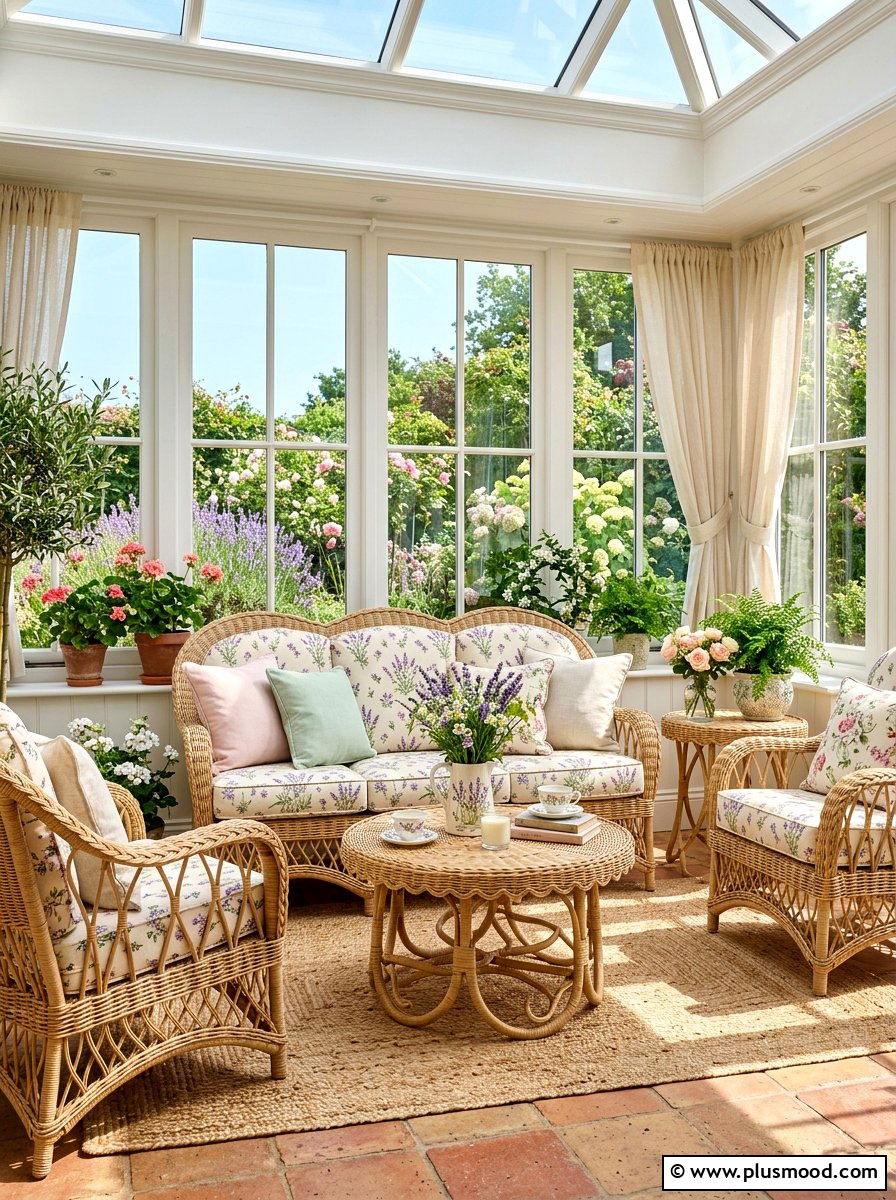
    Transform your outdoor space into a cozy bohemian haven by blending natural elements with diverse textures for a carefree and eclectic ambiance. Opt for comfortable, low-slung wicker or rattan seating that encourages long, leisurely evenings outdoors. Define your lounging area with vibrant patterned rugs and infuse the surroundings with handmade decor pieces and lush greenery to craft a warm, welcoming environment.

    Key Design Elements

    • Choose low-profile wicker or rattan furniture for a stylish yet casual seating setup.
    • Layer colorful, patterned outdoor rugs to create distinct zones and add softness underfoot.
    • Decorate walls and nearby structures with handcrafted macramé art or hanging planters for artisanal appeal.
    • Incorporate large leafy plants and cascading ferns to evoke a tranquil, nature-inspired setting.

    Pro Tip: Mix and match various textures and patterns in your textiles and accessories to enhance the boho vibe while keeping the space inviting and cohesive.

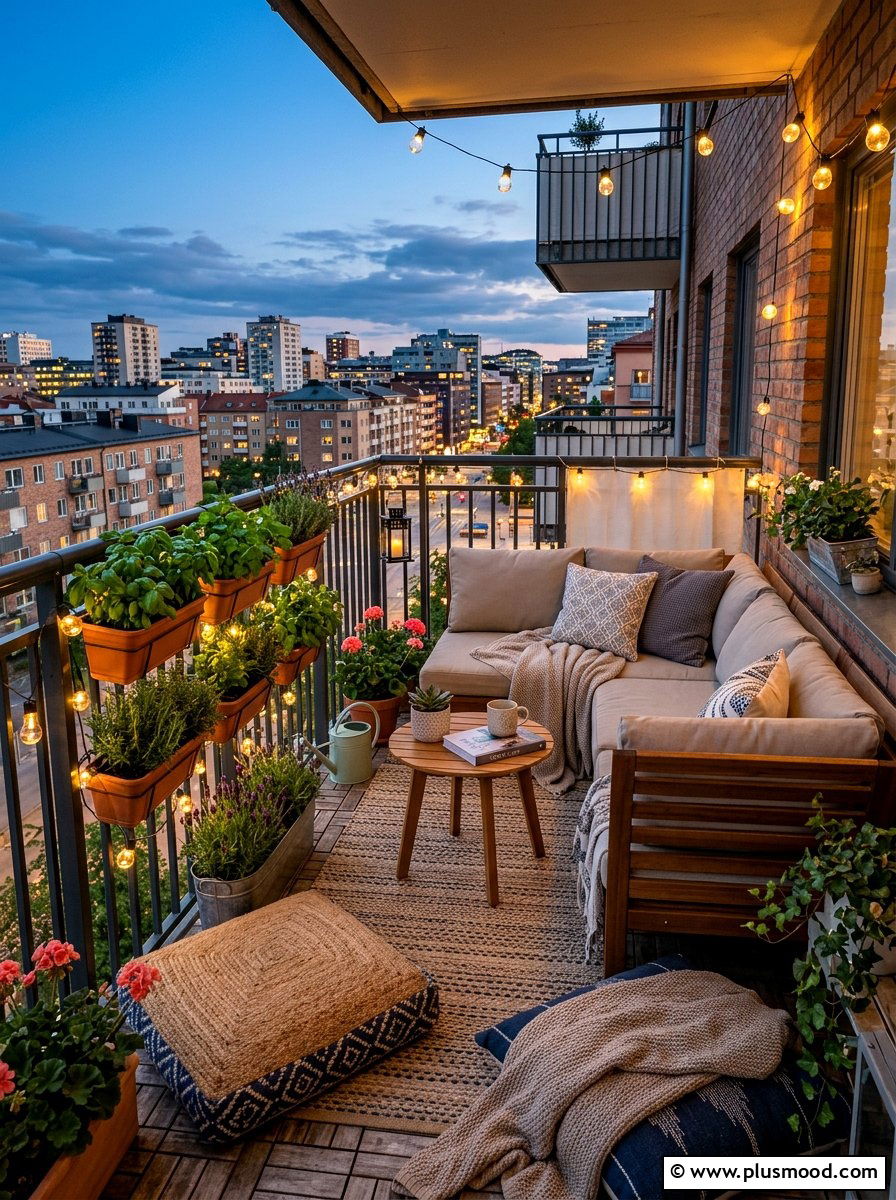
    24. Maximizing Comfort on Your Apartment Balcony

    Maximizing Comfort on Your Apartment Balcony

    Creating a cozy seating area on a compact apartment balcony involves smart design choices and versatile furniture. Opt for space-saving seating options and incorporate greenery vertically to keep the area open and inviting. Adding warm textures and ambient lighting can instantly turn the balcony into a relaxing retreat.

    Key Design Elements

    • Select a small-scale loveseat or modular seating to fit limited space efficiently.
    • Use foldable or stackable chairs to free up room when they’re not in use.
    • Install vertical planters or railing-mounted pots to add plants without sacrificing floor space.
    • Layer an outdoor rug with weatherproof cushions to enhance comfort and style.

    Pro Tip: Choose LED string lights with a timer feature to effortlessly create a cozy atmosphere without extra hassle.

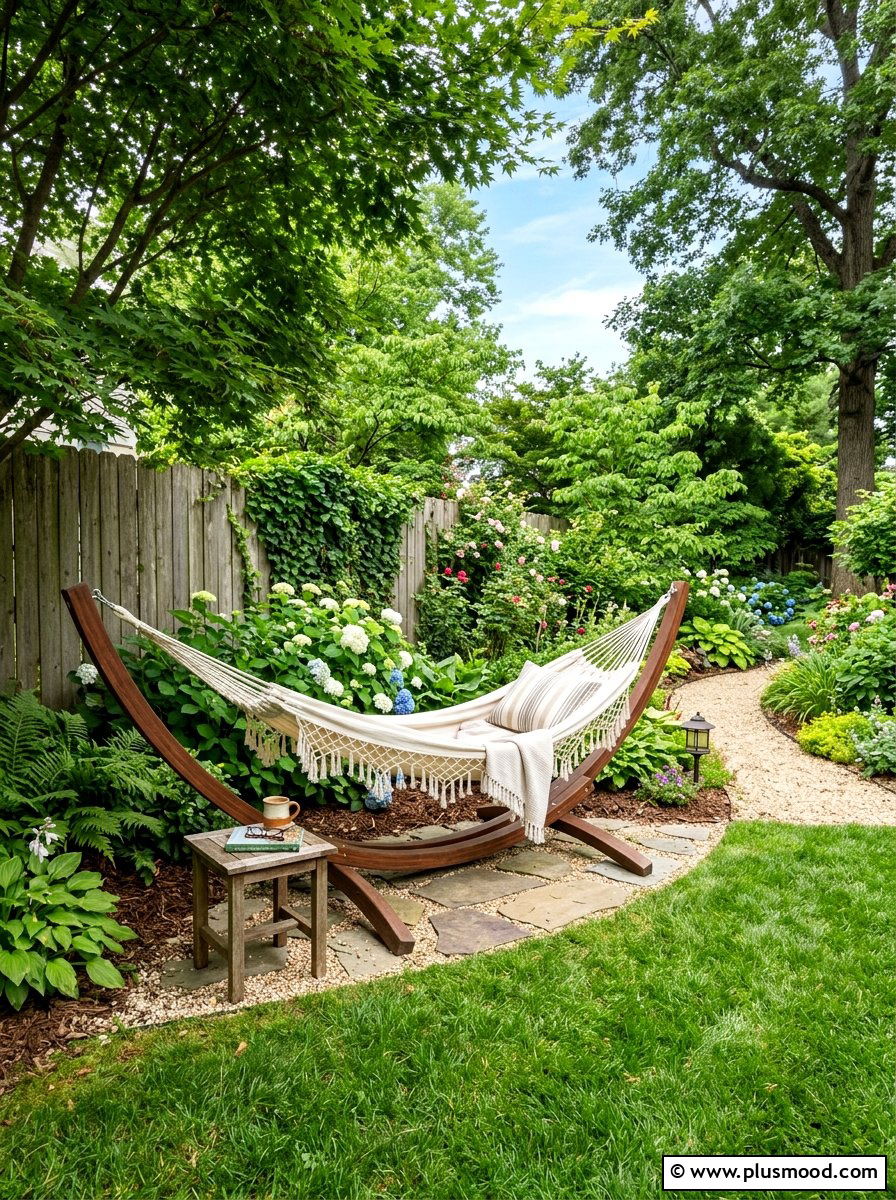
    25. Creating a Cozy Hammock Stand Area in Your Garden

    Creating a Cozy Hammock Stand Area in Your Garden

    Transform your garden into a peaceful retreat by setting up a hammock with a freestanding frame, perfect for those without ideal tree spots. Selecting a shady nook enhances comfort, making it an inviting place to unwind with a book or enjoy a leisurely rest. Adding thoughtful details like natural ground cover and convenient surfaces can elevate the overall relaxation experience.

    Key Design Elements

    • Choose a durable wooden or metal hammock stand that complements your outdoor aesthetic.
    • Locate your hammock near trees or bushes that provide ample shade to keep cool on warm days.
    • Enhance the area around the stand with soft plants like clover or decorative stones for added texture and appeal.
    • Place a small, weatherproof side table nearby to hold essentials like books, drinks, or gadgets.

    Pro Tip: For extra comfort and style, layer your hammock with a breathable outdoor cushion or throw blanket that can withstand the elements.

    Conclusion

    Elevate your outdoor living by crafting a summer patio that truly reflects your unique style and invites you to unwind in comfort and elegance. Whether you lean toward lively, colorful accents or prefer a sleek, understated vibe, the essence lies in blending beauty and functionality with thoughtfully chosen pieces. Turning your outdoor area into a serene retreat not only enhances your home’s charm but also creates a welcoming backdrop for joyful moments with family and friends.

    As you embark on your seasonal makeover, keep in mind that thoughtful touches—like cozy cushions, ambient lighting, or a textured rug—can transform any space into a captivating oasis. Let these ideas inspire you to design a stunning patio sanctuary, where every detail contributes to an atmosphere of relaxation and effortless enjoyment throughout the sunny months ahead.

  • Contemporary Poolside Landscaping Inspirations for a Sleek Outdoor Oasis

    Crafting an elegant outdoor haven begins with embracing the principles of modern design, where a simple pool area evolves into a stylish and serene escape. Contemporary outdoor spaces often highlight sleek lines, subtle color schemes, and a harmonious connection between water features and the natural environment. This design philosophy prioritizes simplicity and utility, making sure that every detail contributes thoughtfully to the overall ambiance.

    By thoughtfully selecting materials such as polished concrete, natural stone, and vibrant plant life, you can transform your backyard into a tranquil, resort-inspired retreat. This curated approach not only enhances the aesthetic appeal but also ensures your outdoor space is both inviting and functional. Dive into these innovative ideas to redefine your pool area and bring a touch of modern luxury to your home’s exterior.

    1. Wood Deck Pool Surround

    Wood Deck Pool Surround

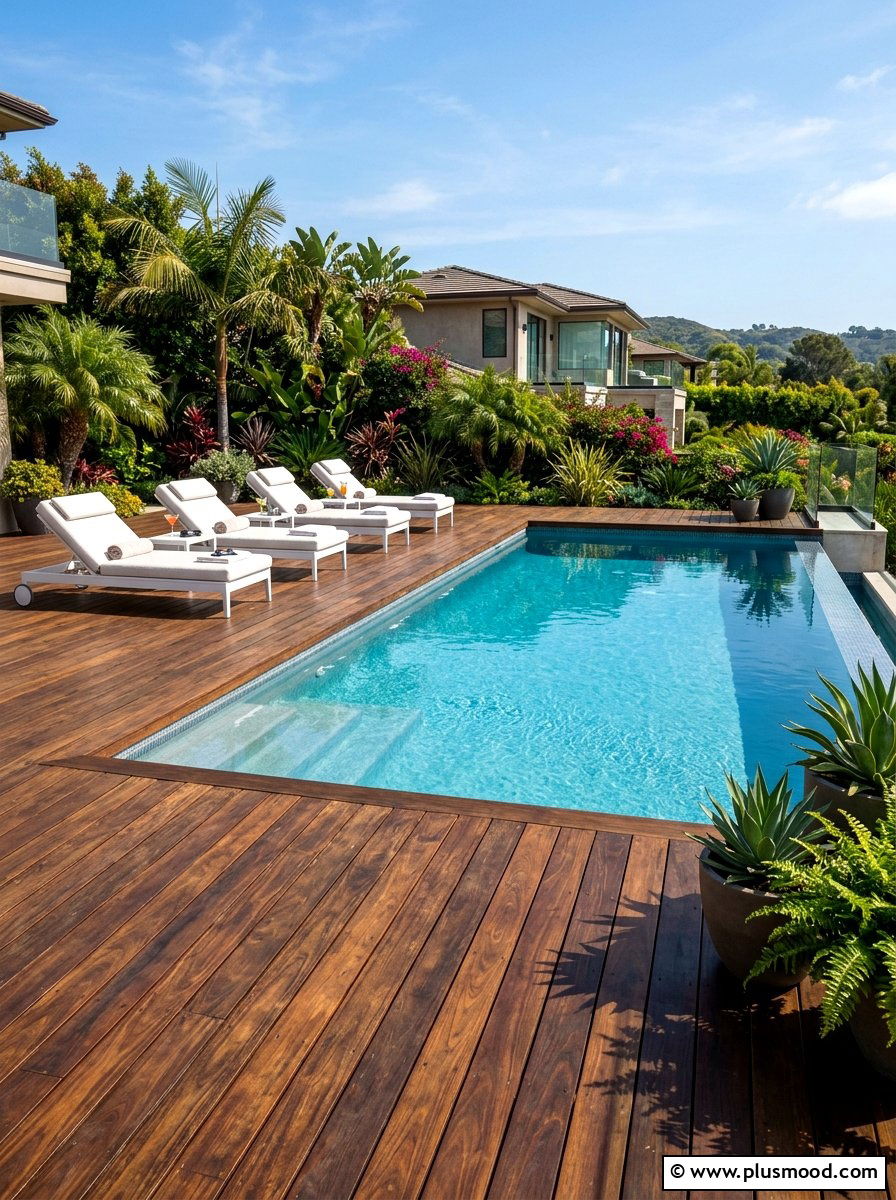
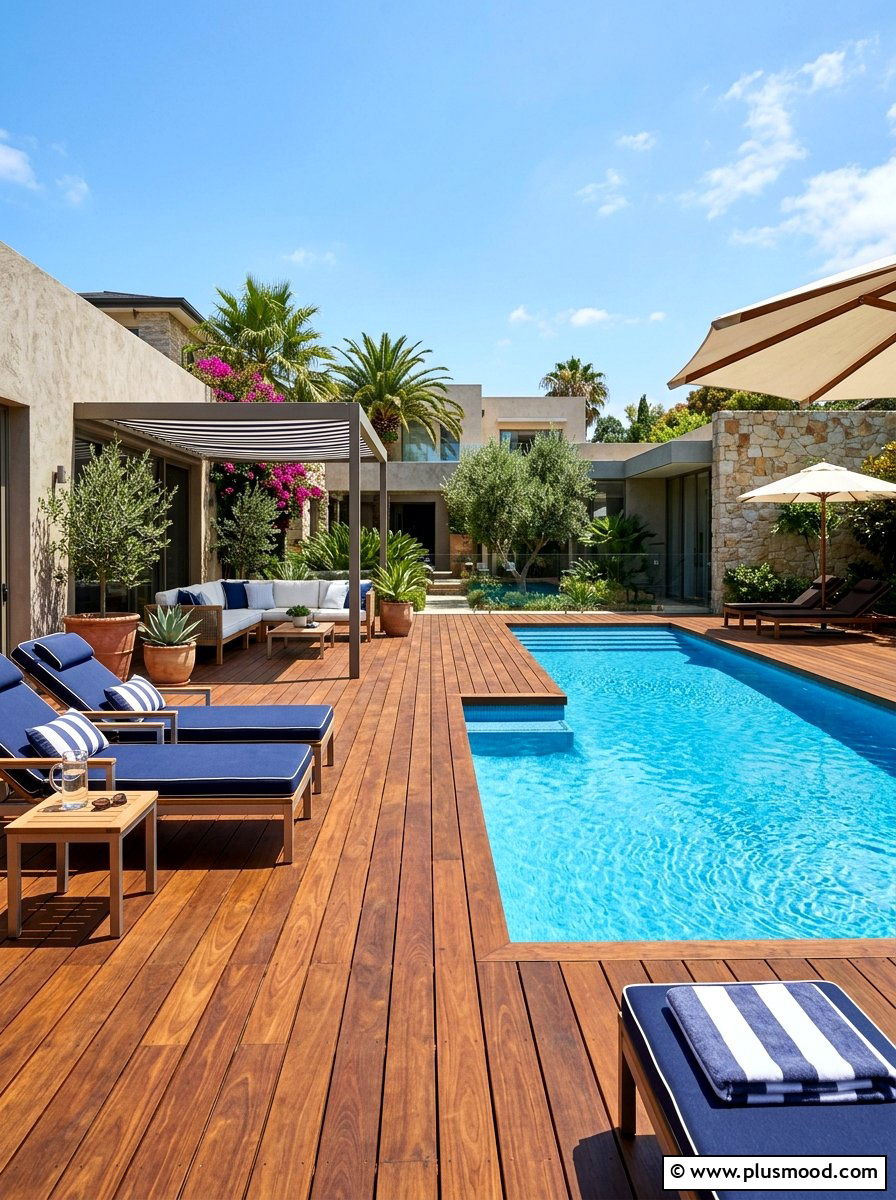
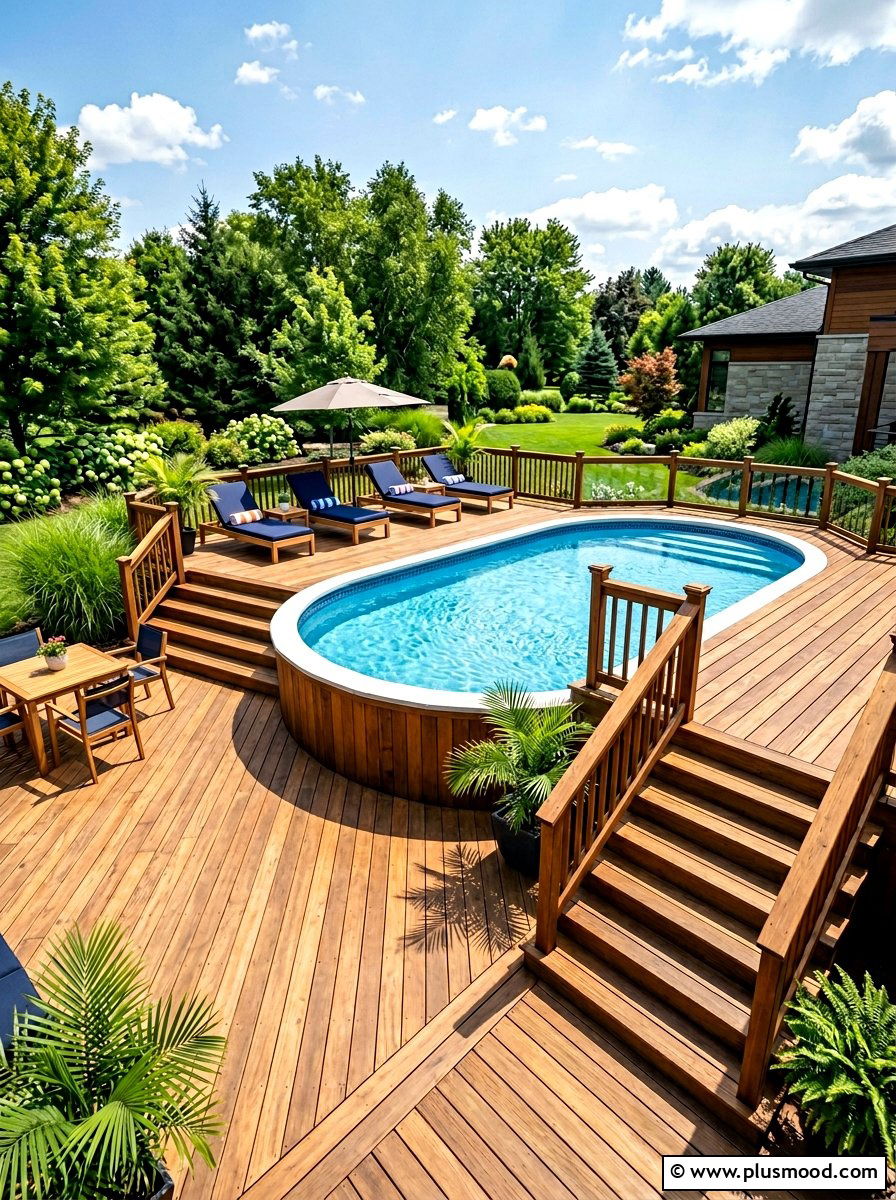
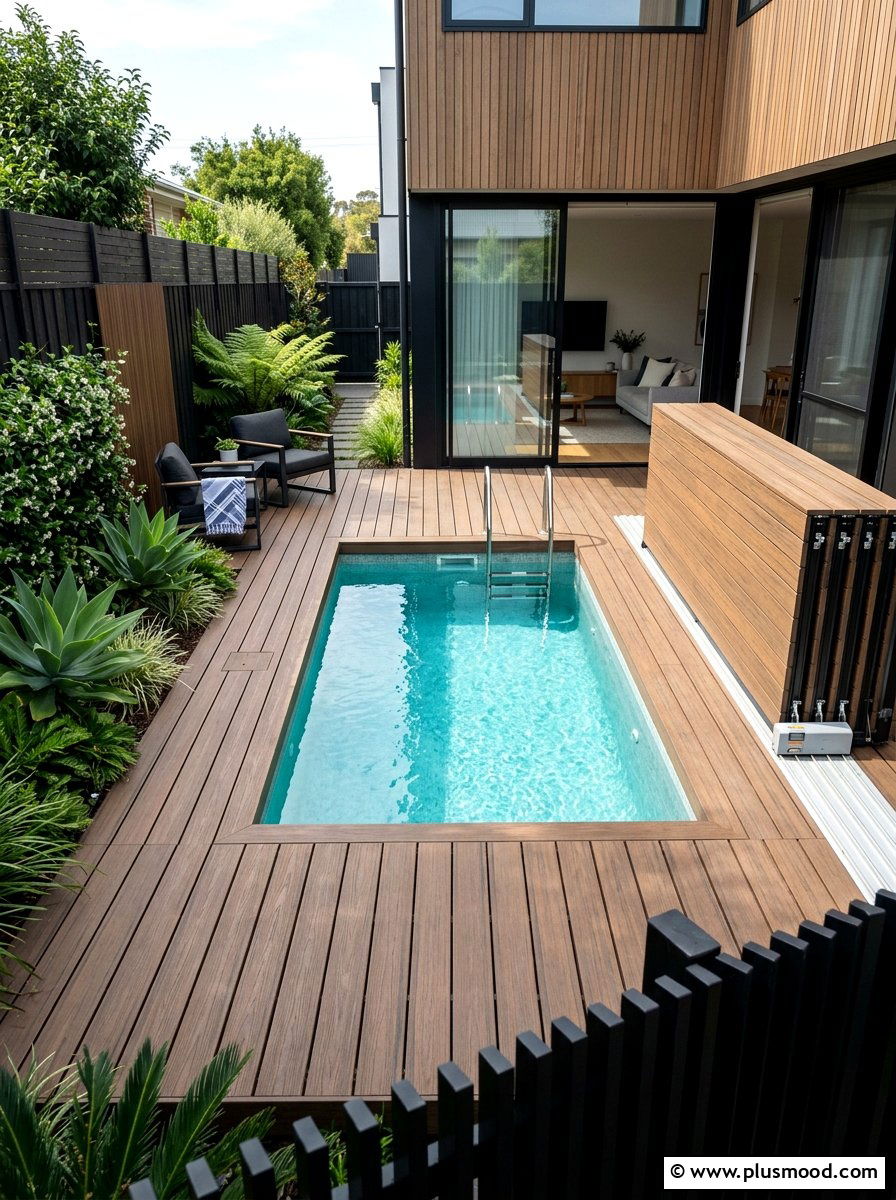
    A wood deck surrounding your pool adds a touch of natural elegance that softens the sleekness of contemporary pool designs. Many homeowners choose IPE wood for its remarkable strength and deep, luxurious color that weathers gracefully over time. The linear arrangement of the decking planks naturally guides your gaze along the pool’s streamlined form, enhancing its modern appeal. This inviting wooden platform offers a cozy, warm surface perfect for relaxing barefoot or soaking up the sun. It seamlessly connects the architectural lines of your home with the lush, organic feel of your outdoor landscape.

    2. Privacy Screen For Pool

    Privacy Screen For Pool

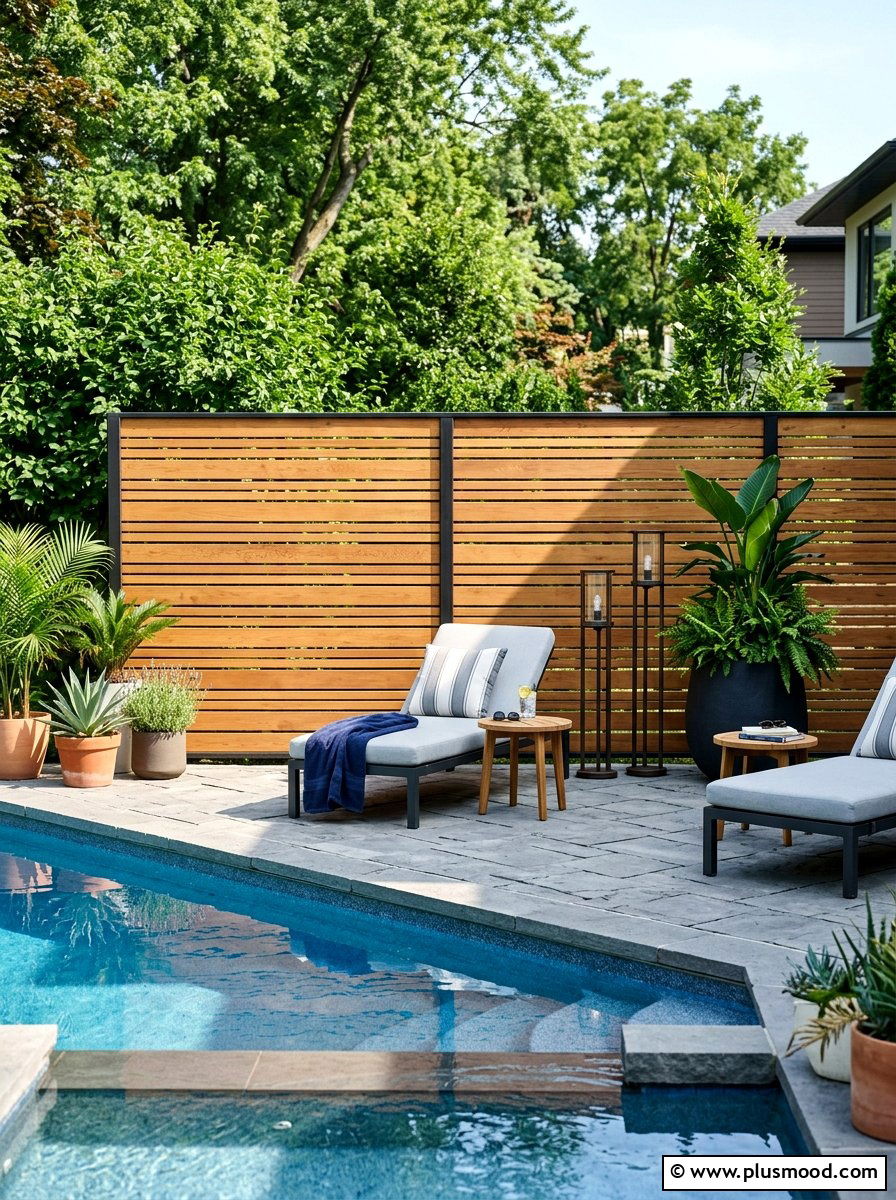
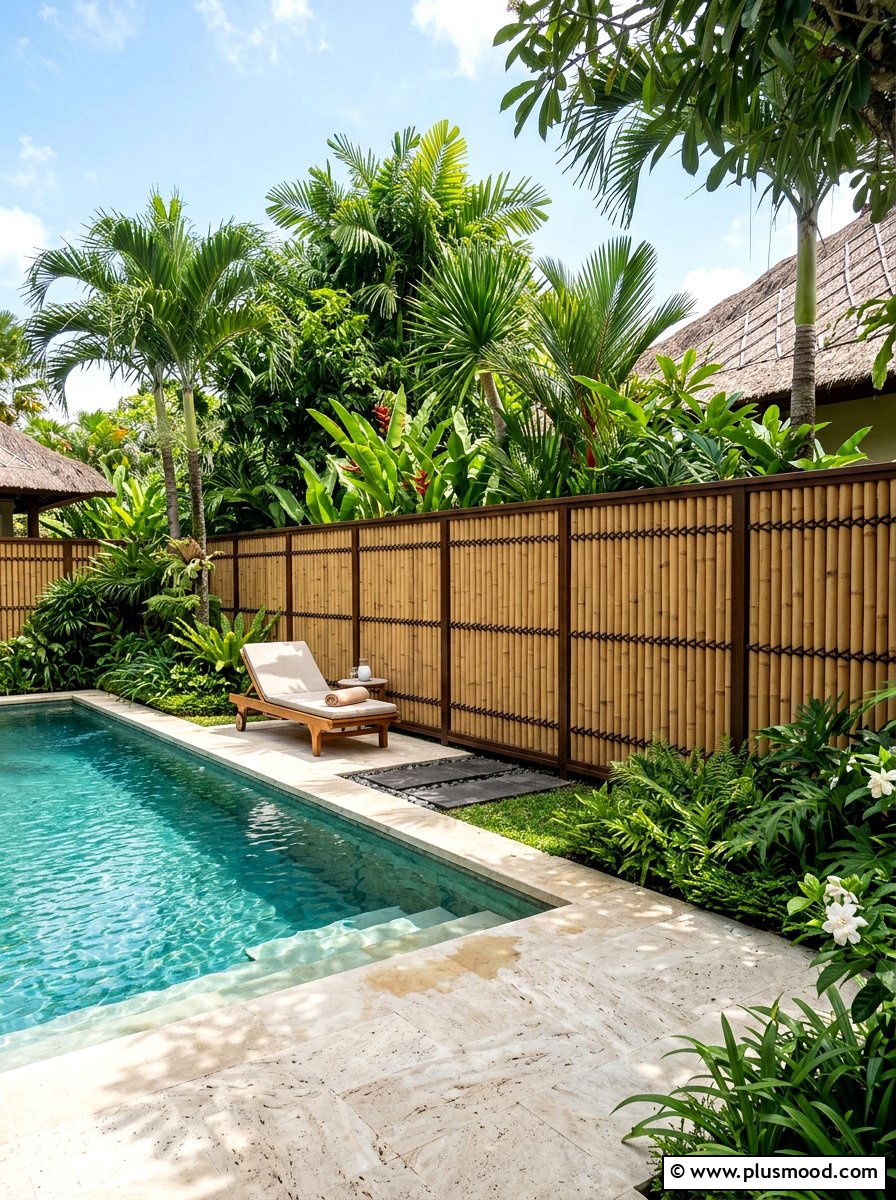
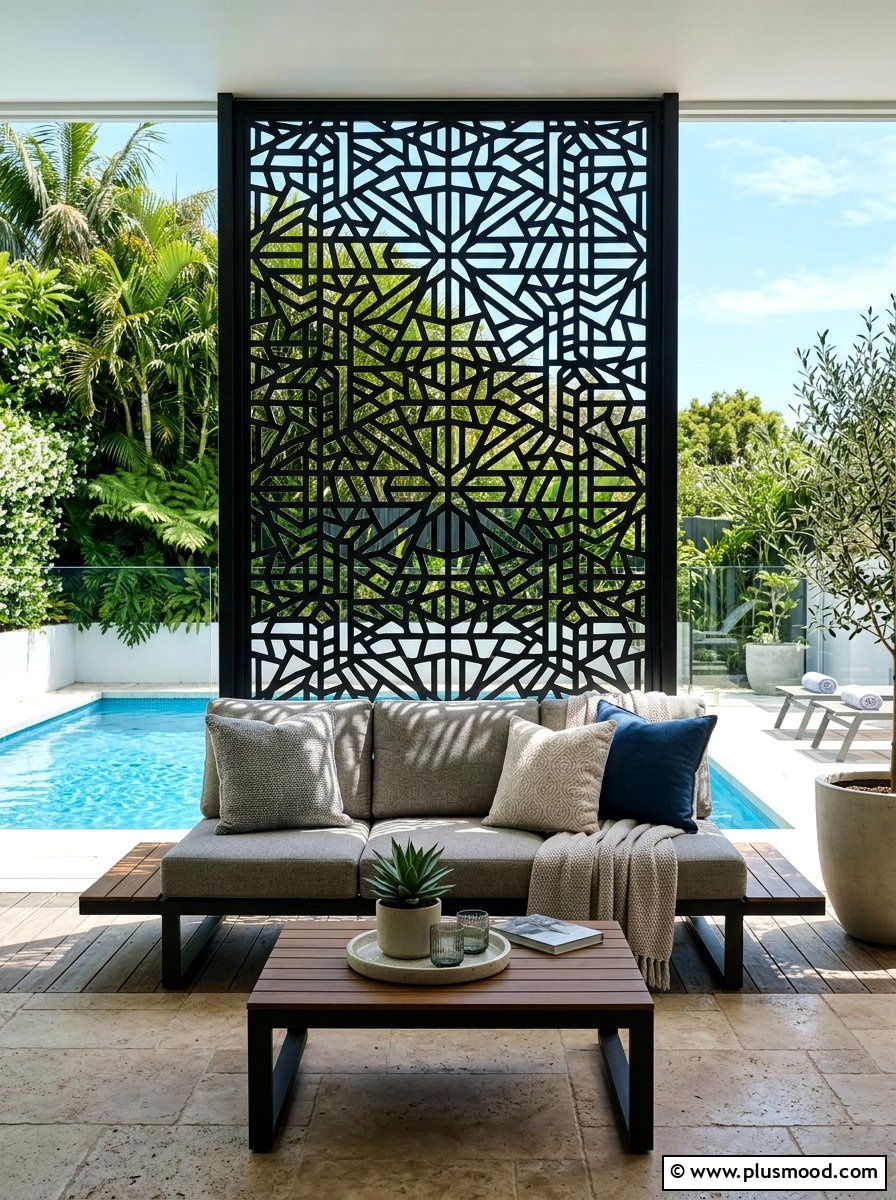
    Contemporary privacy screens for pools often feature innovative materials such as intricate metal designs, sleek horizontal wood panels, or elegant frosted glass to shield your space from prying eyes. These installations double as artistic accents, enhancing the visual appeal around your pool with unique textures and forms. Opting for slatted designs encourages gentle breezes and soft natural light, ensuring your outdoor area remains open and inviting rather than closed off. They also serve practical purposes, concealing unsightly pool machinery or crafting intimate retreats for outdoor showers and lounging. Selecting a finish that complements your home’s exterior creates a harmonious, polished appearance that elevates the entire backyard aesthetic.

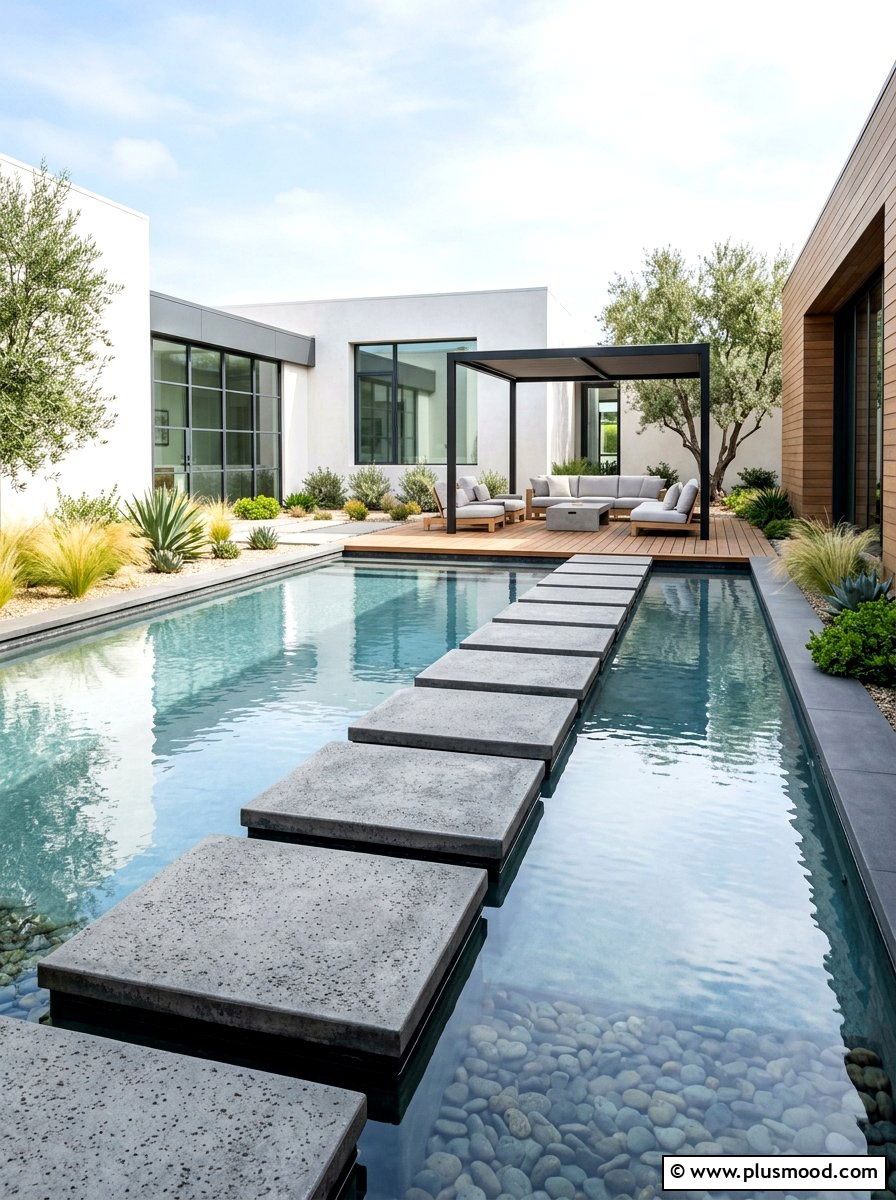
    3. Floating Pool Steps

    Floating Pool Steps

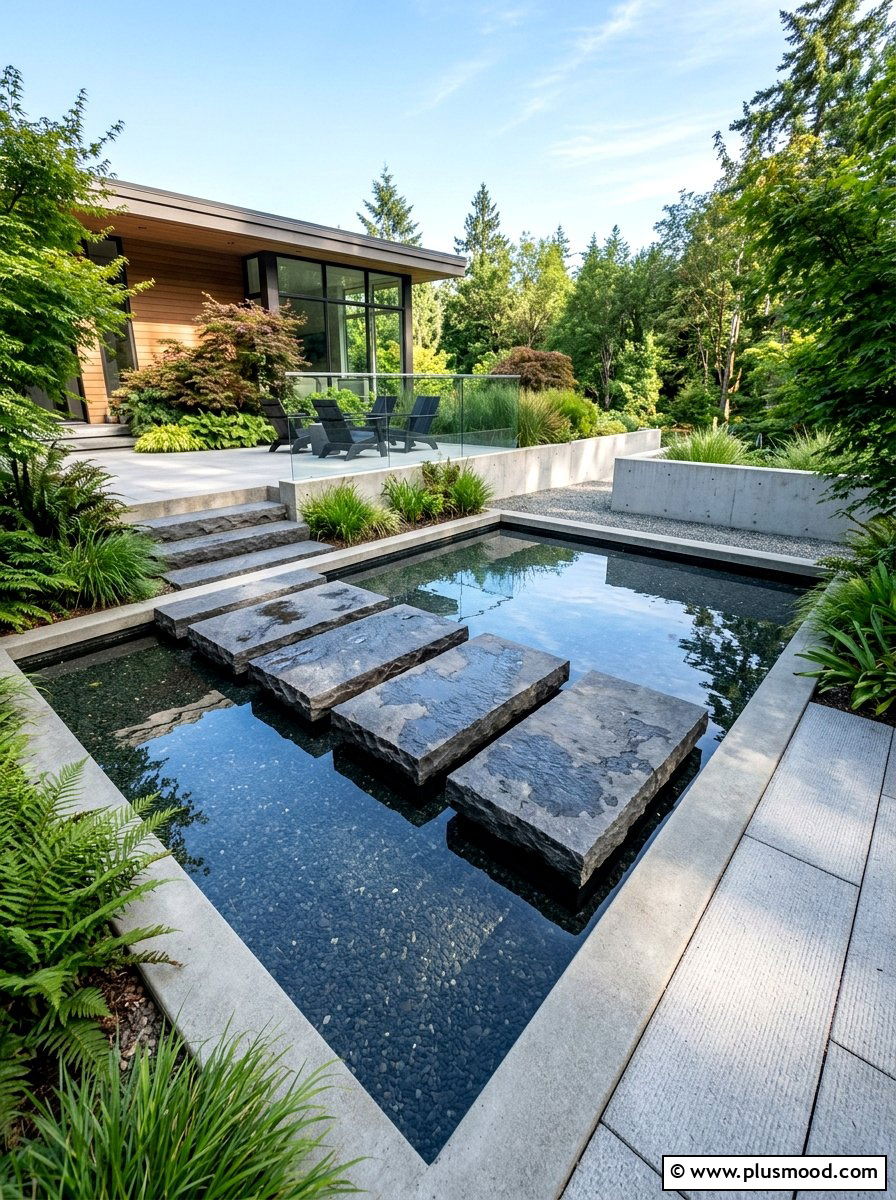
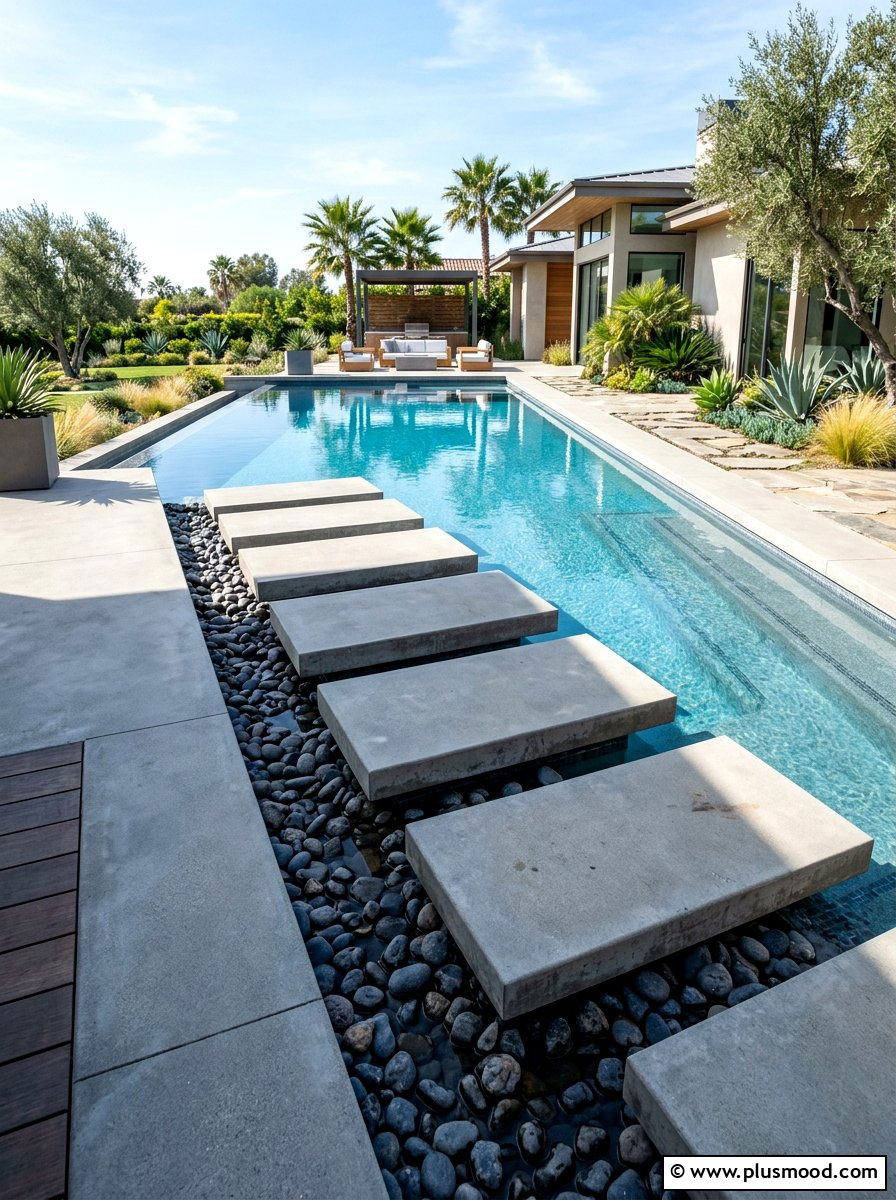
    Floating pool steps create a striking visual effect by suspending wide stone or concrete slabs above the water, giving the impression they are effortlessly hovering. This innovative design offers a sleek and modern pathway to navigate between patio levels or access the pool itself. Often, the spaces between each step are filled with clear water or smooth pebbles, intensifying the illusion of weightlessness while bringing a serene, calming vibe. By drawing attention to the clean, horizontal lines of your outdoor space, these steps blend functionality with artistic flair. Incorporating floating steps makes a bold design statement, reflecting your passion for refined detail and cutting-edge outdoor living.

    4. Modern Outdoor Shower

    Modern Outdoor Shower

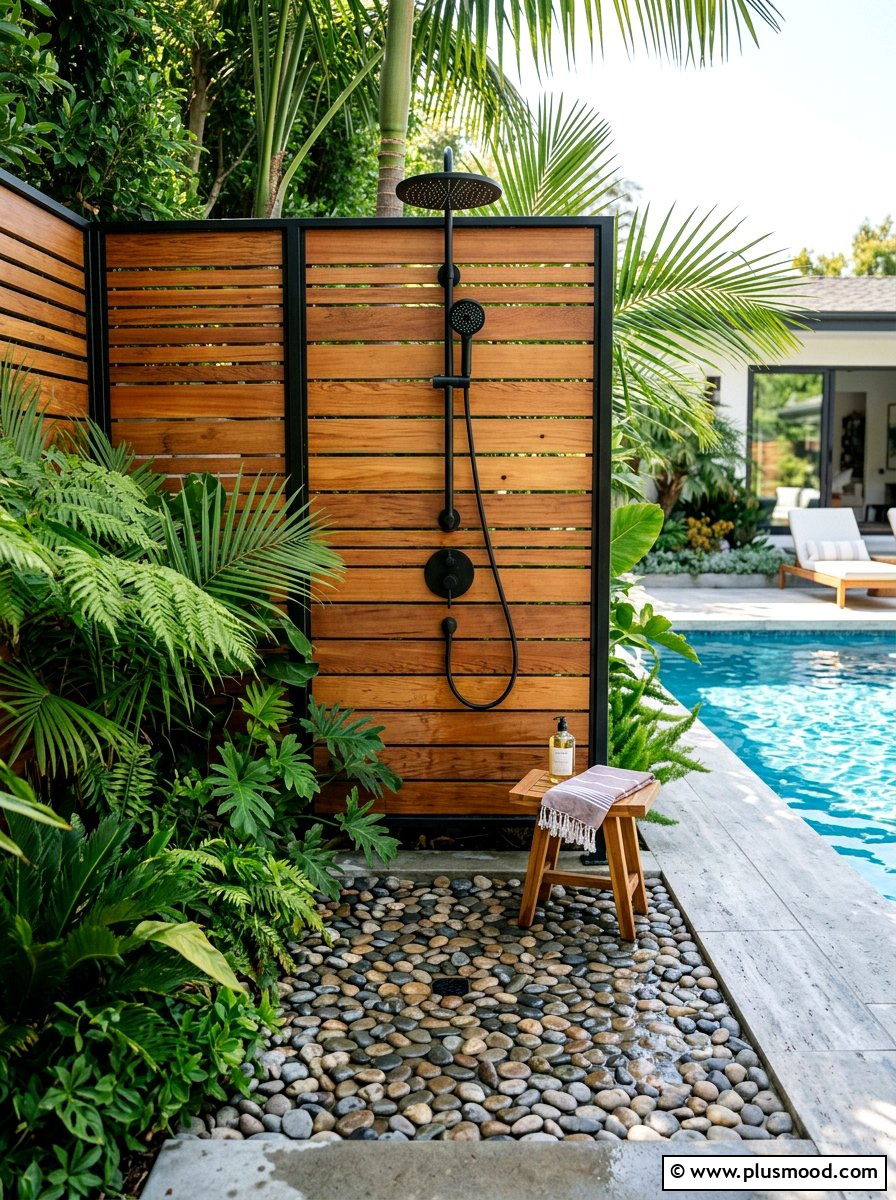
    Incorporating a modern outdoor shower elevates your pool area with a blend of style and practicality. Often discreetly positioned behind stylish privacy screens crafted from natural wood or stone, it offers a perfect spot for refreshing rinses before and after a swim. Choosing fixtures in matte black or brushed gold finishes creates a striking, contemporary accent that complements organic elements such as bamboo or polished concrete. Flooring options like smooth river stones or slatted wooden decks not only ensure effective drainage but also evoke a serene, spa-inspired ambiance. This elegant feature brings a resort-quality atmosphere to your backyard while helping maintain cleanliness inside your home.

    5. Natural Stone Pool Coping

    Natural Stone Pool Coping

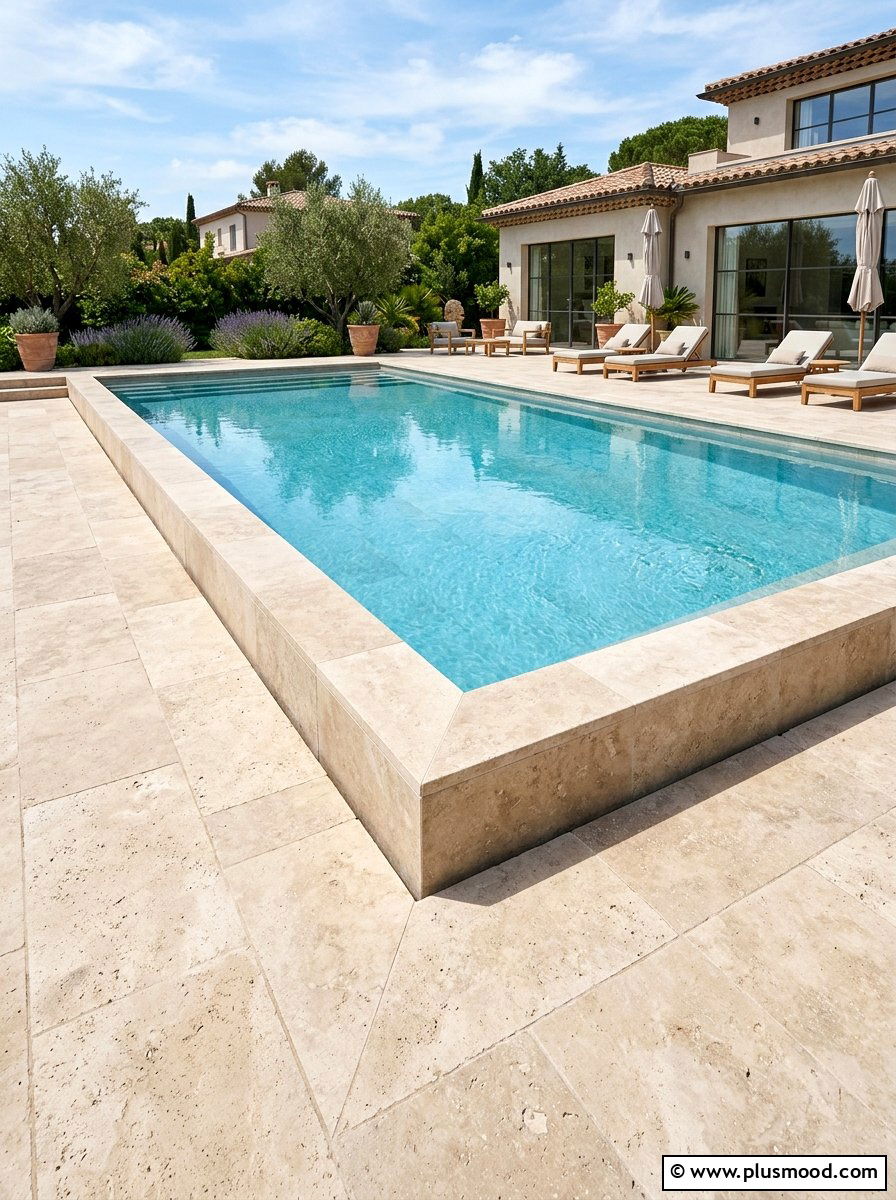
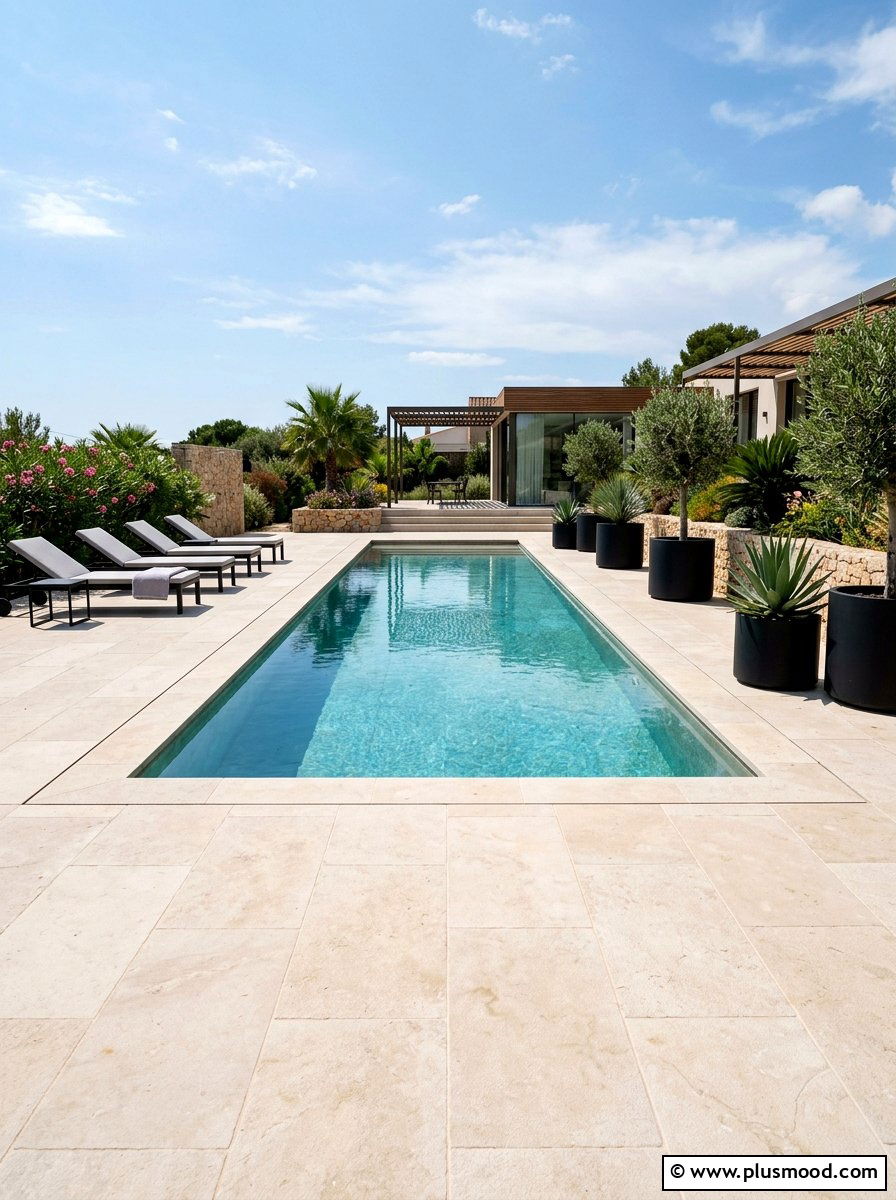
    Natural stone pool coping serves as the elegant border crowning the upper edge of your pool, offering a sophisticated and durable finish. Contemporary styles frequently feature square or drop-face edges that lend the pool a bold, solid presence with crisp, defined lines. Materials such as travertine, limestone, and granite are favored for their natural slip resistance and ability to remain cool under intense sunlight. Selecting the same stone for both the coping and the adjacent decking crafts a cohesive, streamlined look that enhances modern appeal. This harmonious integration results in a polished, high-end atmosphere that elevates the entire pool area.

    6. Poolside Fire Pit

    Poolside Fire Pit

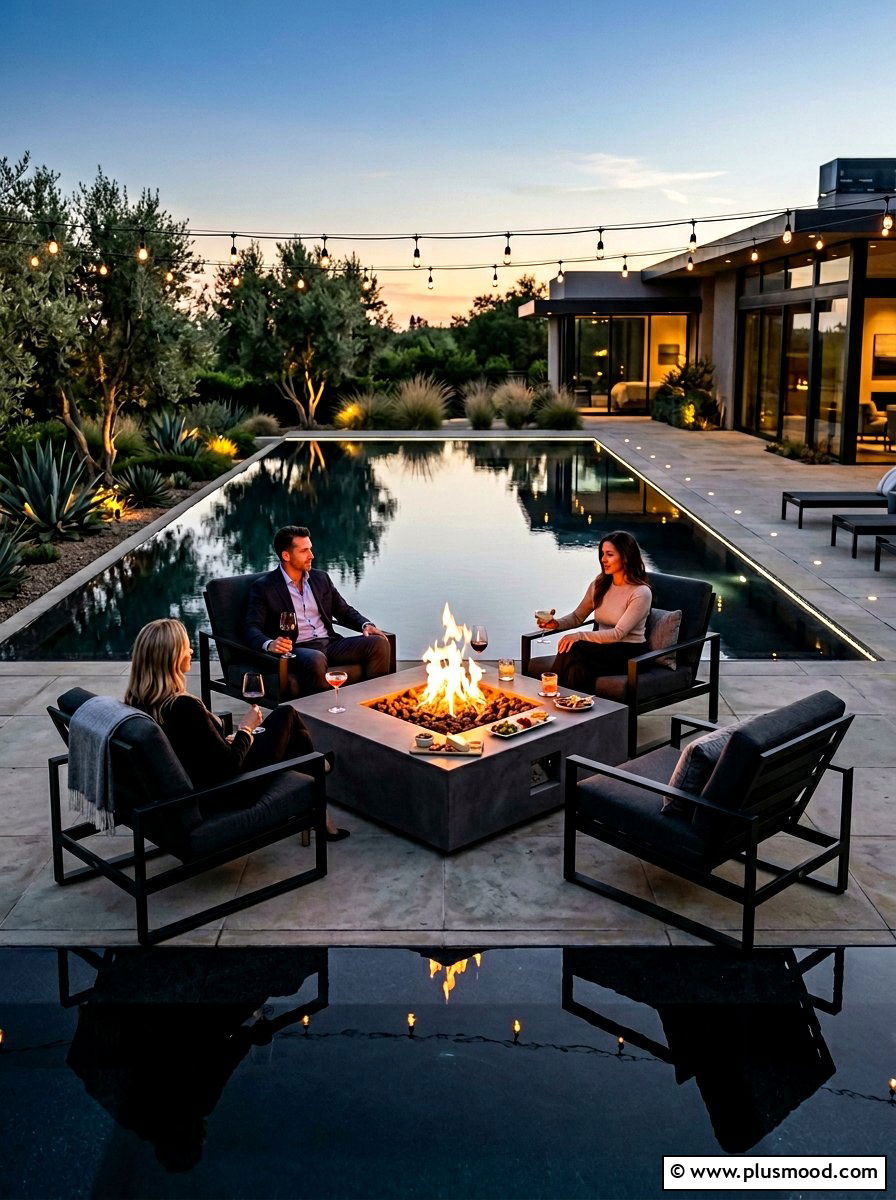
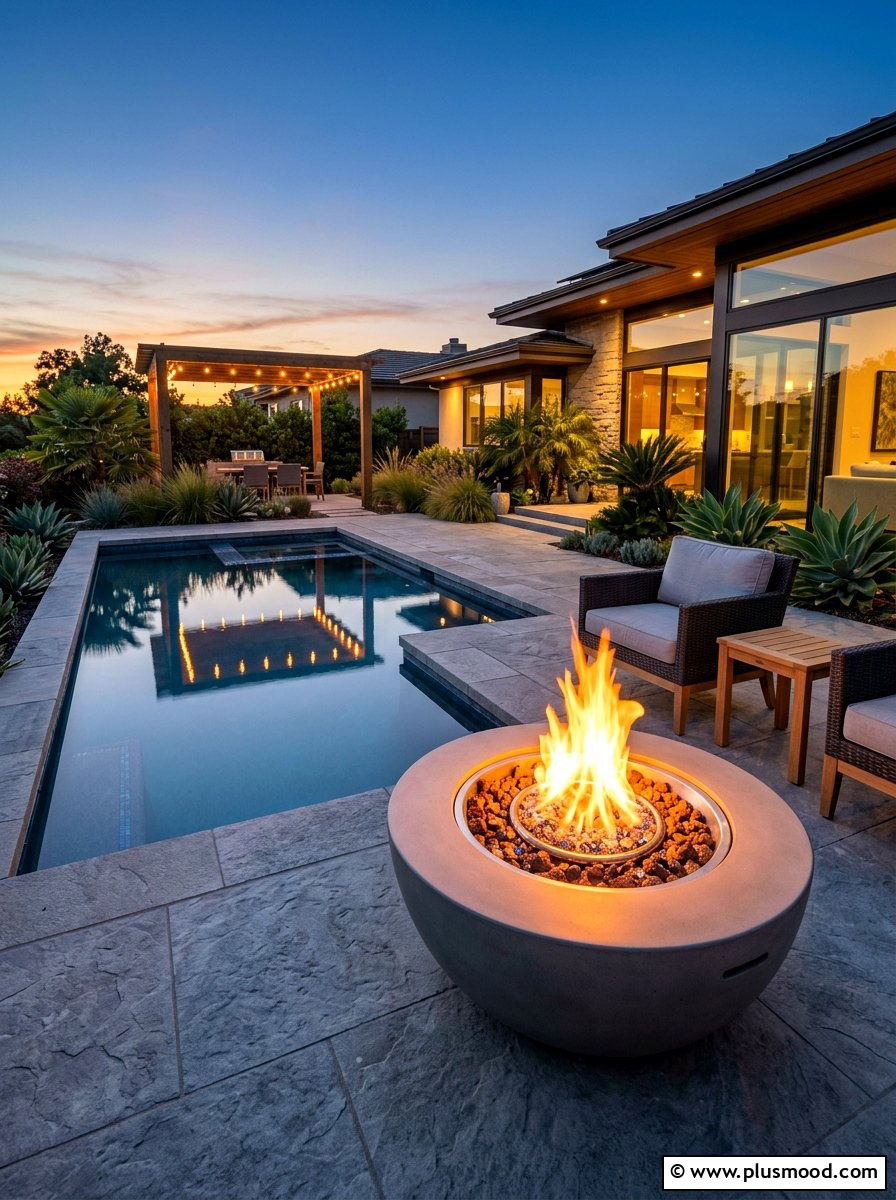
    Incorporating a fire pit beside your pool enhances your backyard’s appeal and invites you to enjoy the outdoors even as temperatures drop. Contemporary styles often embrace clean lines with geometric shapes crafted from materials like polished concrete or matte black steel, offering a chic and modern aesthetic. Placing the fire pit close to the water’s edge creates captivating reflections, amplifying the mesmerizing glow of the flames. This cozy feature naturally becomes a social hub where loved ones can gather to warm up and unwind after a refreshing swim. Whether fueled by gas for ease or wood for a classic ambiance, a poolside fire pit elevates your outdoor living space with both warmth and style.

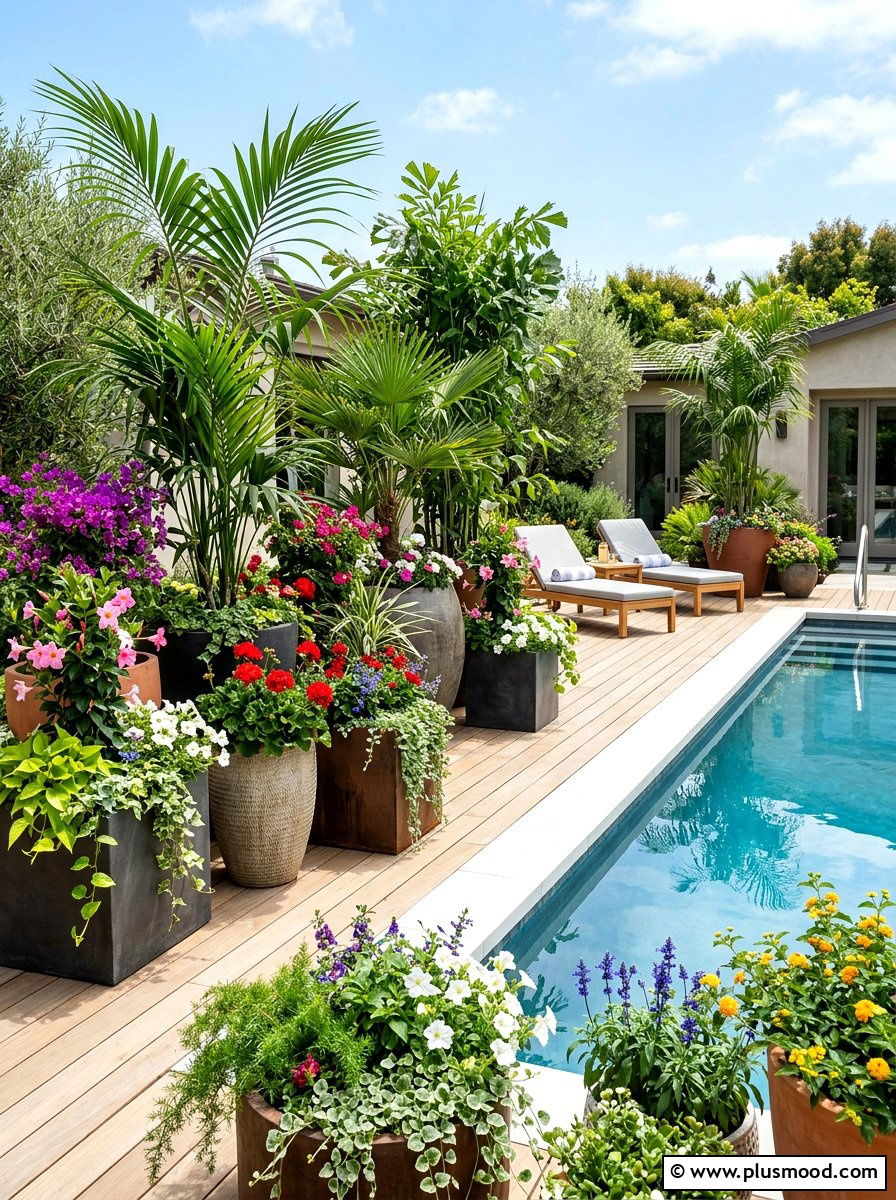
    7. Tropical Modern Landscaping

    Tropical Modern Landscaping

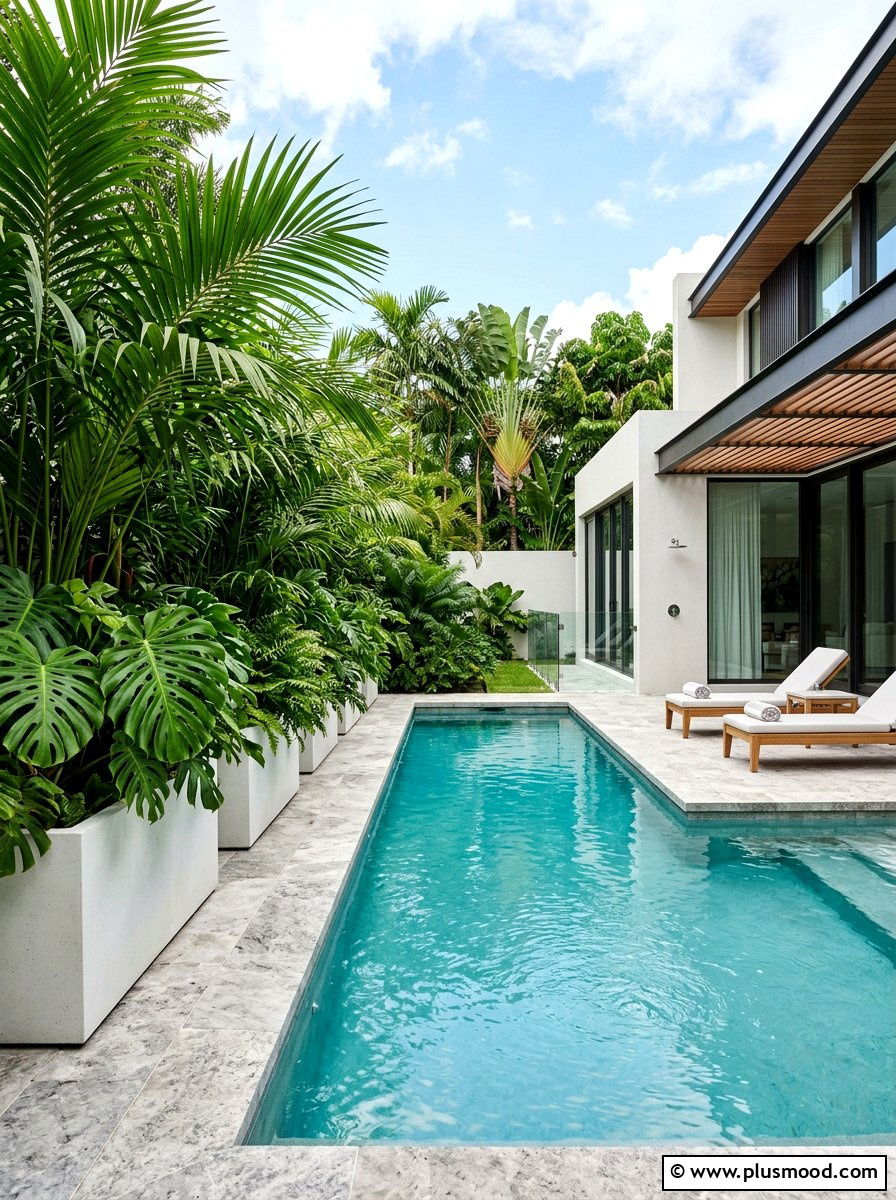
    Tropical modern landscaping beautifully merges the rich, vibrant essence of tropical flora with sleek, minimalist design principles. Incorporating plants such as palms, monstera, and bird of paradise in carefully arranged geometric containers helps establish a balanced, contemporary vibe. The striking greenery stands out vividly against neutral-toned materials like white concrete and soft gray stone, which are staples of modern outdoor spaces. This approach fosters a secluded, tranquil atmosphere around your pool, evoking the feeling of a private tropical retreat. To keep these lush plants thriving while preserving a crisp, well-maintained look, efficient watering systems like drip irrigation are essential.

    8. Black Bottom Pool

    Black Bottom Pool

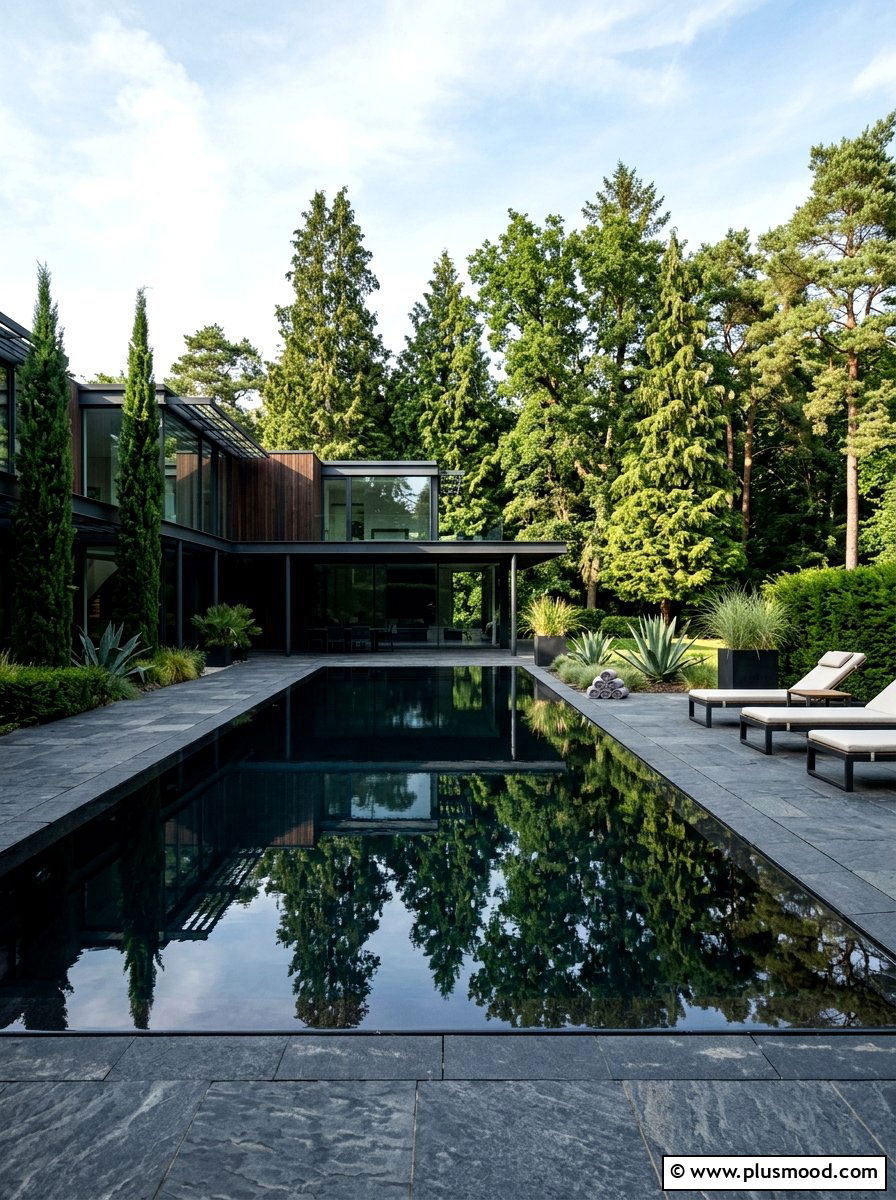
    A pool with a black bottom brings a rich, elegant ambiance that mimics the serene look of a natural lagoon or sleek, polished granite. Its dark surface captures and retains sunlight more effectively than traditional lighter finishes, often resulting in subtly warmer water. This striking hue enhances reflections, turning nearby trees, sky, and architectural details into a captivating visual display. Ideal for contemporary residences that incorporate dark tones or slate elements, it seamlessly complements modern design aesthetics. Rather than just a swimming area, a black-bottom pool becomes a stunning focal point that elevates your outdoor space with an artful, luxurious feel.

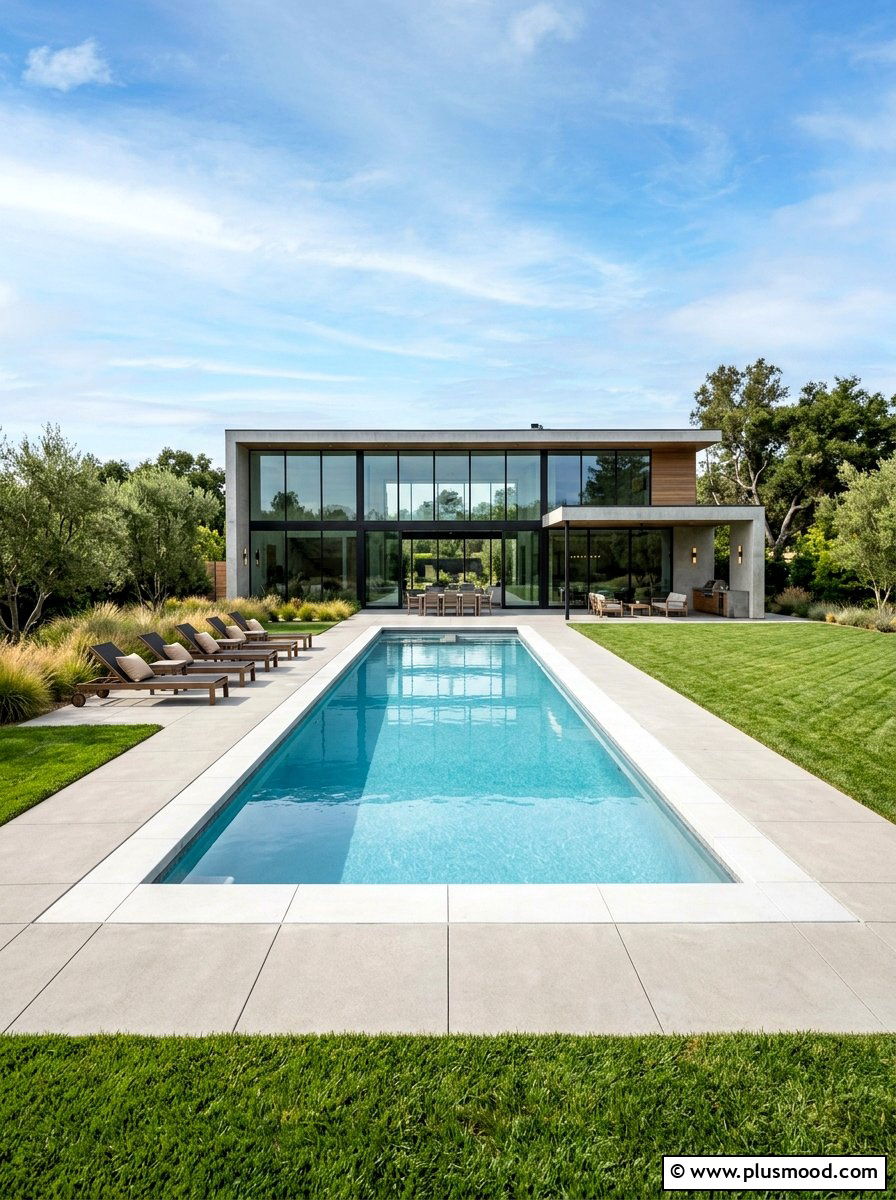
    9. Rectangular Geometric Pool

    Rectangular Geometric Pool

    The rectangular pool continues to be a favorite in modern landscaping due to its sleek lines and enduring architectural charm. Its straightforward form optimizes the swimming area while complementing the clean, orderly design of a contemporary outdoor space. Using slim edging and oversized tiles can highlight the pool’s elongated, linear shape, adding a sophisticated touch. This style often echoes the angular design of the home, fostering a seamless connection between indoor and outdoor environments. Additionally, the rectangular shape simplifies installation of automatic covers, offering both convenience and safety for today’s homeowners.

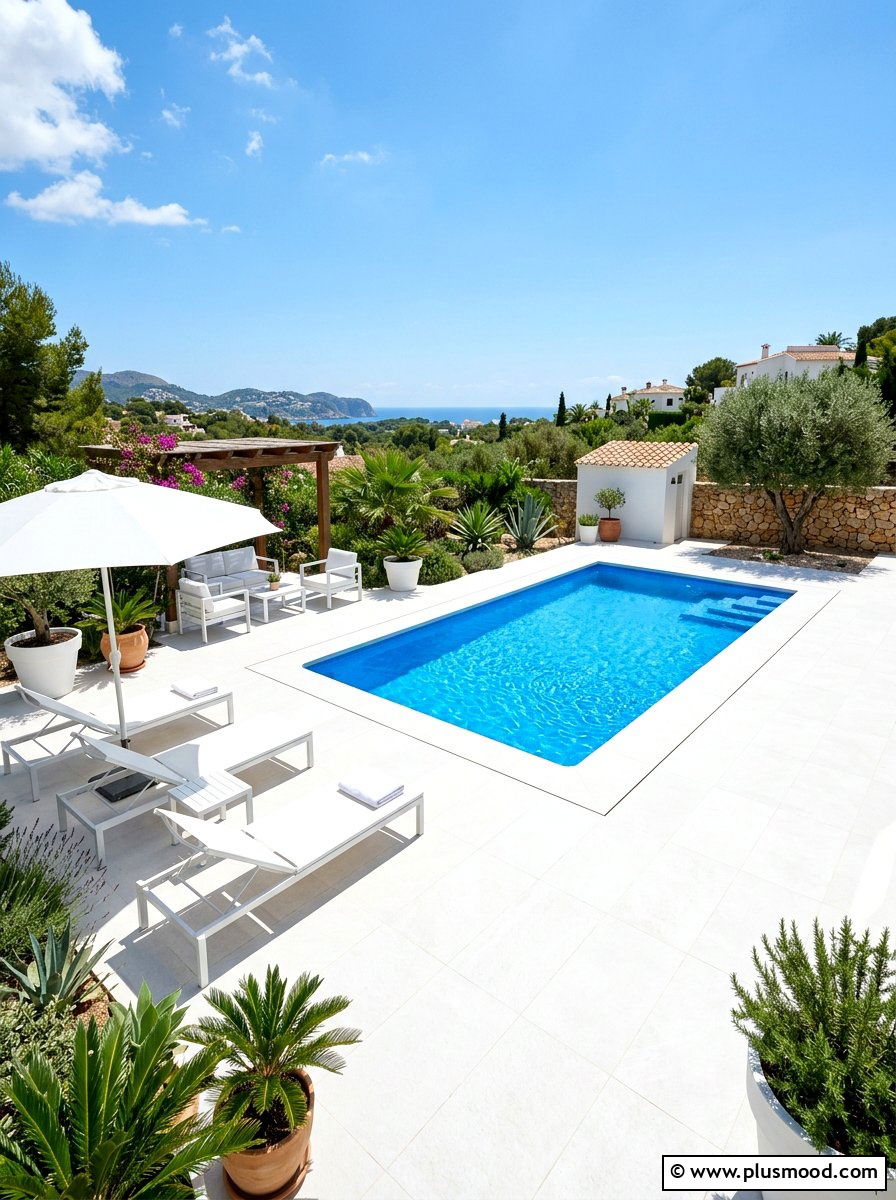
    10. White Pool Patio

    White Pool Patio

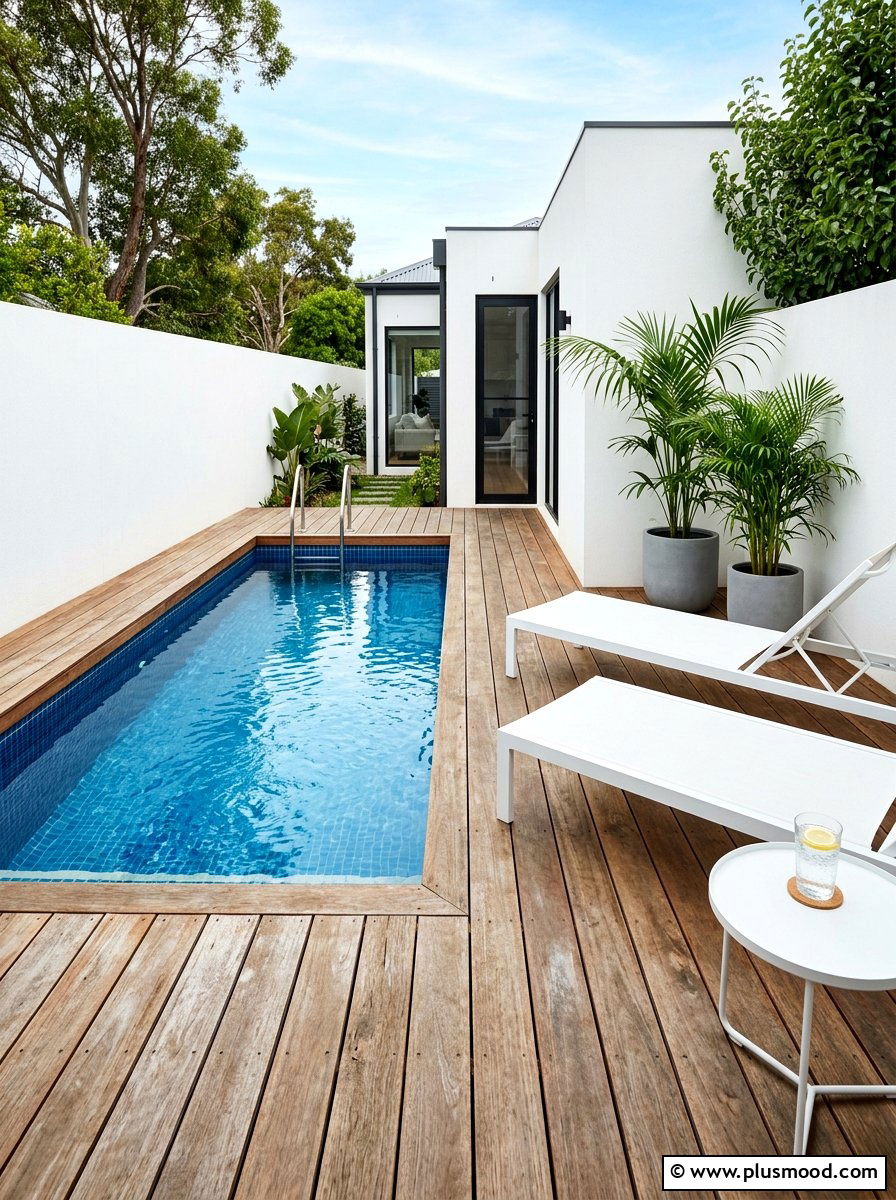
    A patio decked out in white or soft, pale tones brings a luminous, Mediterranean vibe that feels both fresh and stylish under the sun’s glow. These lighter shades naturally reflect sunlight, helping to maintain a cooler surface for comfortable barefoot strolls even during peak summer heat. The pristine backdrop intensifies the pool’s blue hues, enhancing the overall sense of a luxurious seaside retreat. Complementing the space with sleek white furnishings and subtle greenery results in an open, serene environment that feels effortlessly elegant. While it demands more upkeep to stay spotless, the striking aesthetic it delivers is well worth the effort for any contemporary homeowner.

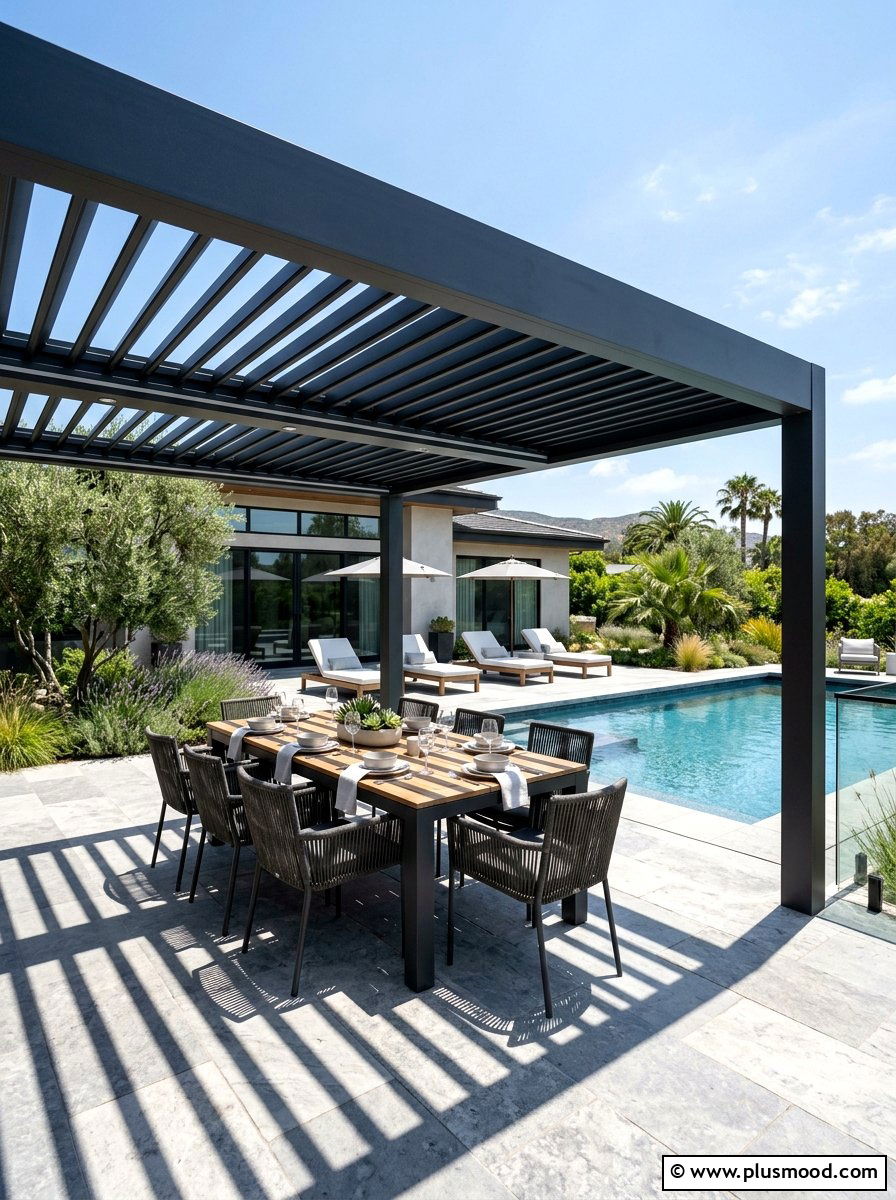
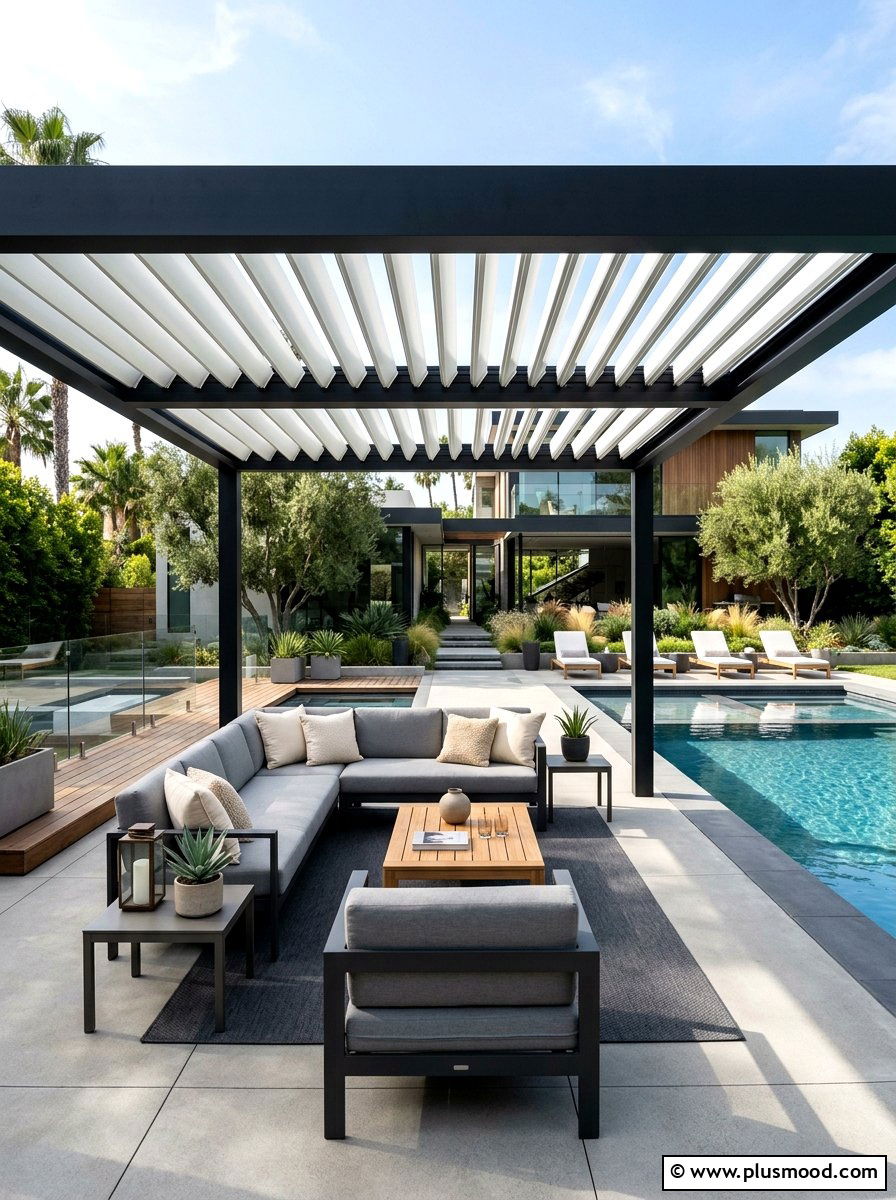
    11. Modern Pool Pergola

    Modern Pool Pergola

    A contemporary poolside pergola offers both shelter from the sun and a striking architectural contrast to the flat expanse of your patio and pool. Characterized by clean, sharp lines and minimalist designs, these pergolas often use sleek materials such as powder-coated aluminum or richly stained wood. Advanced models may incorporate adjustable louvers, giving you the flexibility to tailor the shade to your preference as the sun moves. This design creates a distinct outdoor living area, perfect for unwinding or entertaining while staying cool and comfortable. Accented with flowing outdoor drapes or climbing plants, it transforms your poolside into a chic and inviting sanctuary.

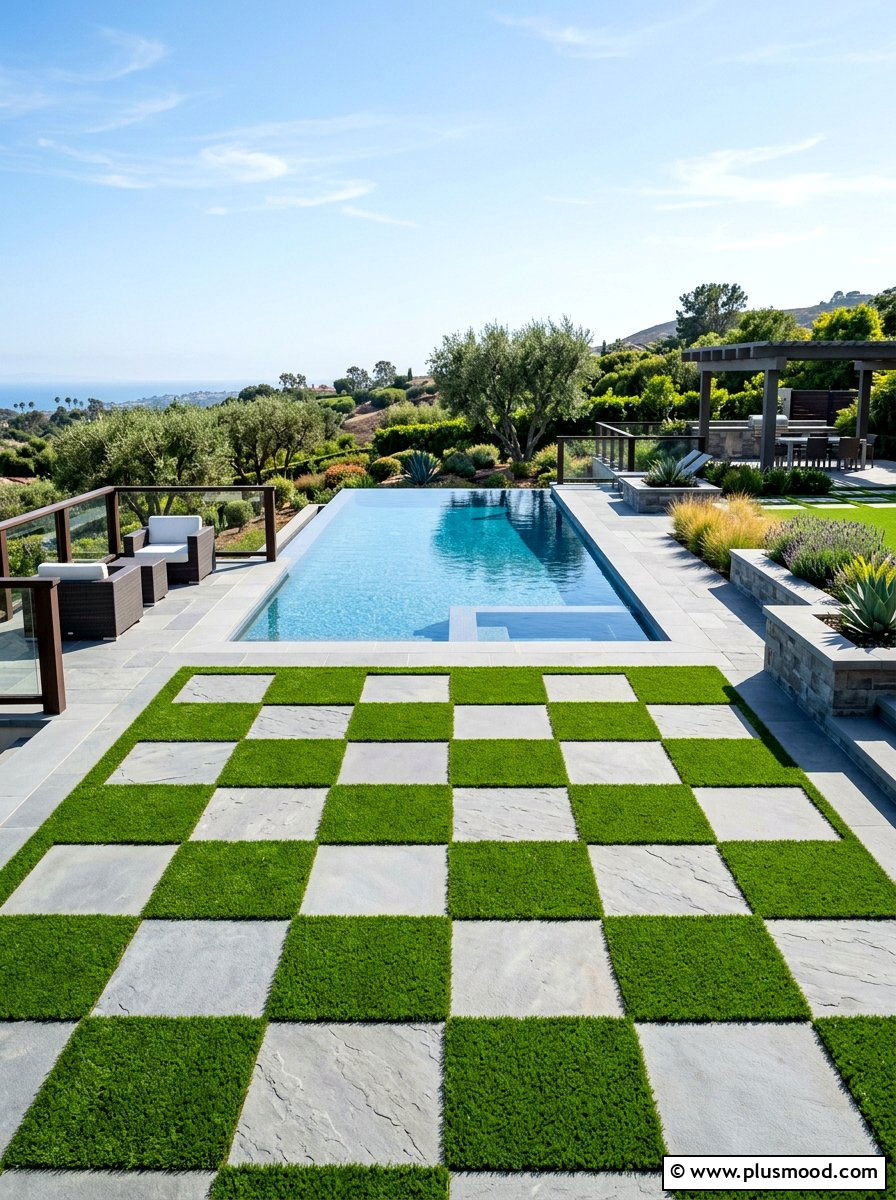
    12. Poolside Turf And Stone

    Poolside Turf And Stone

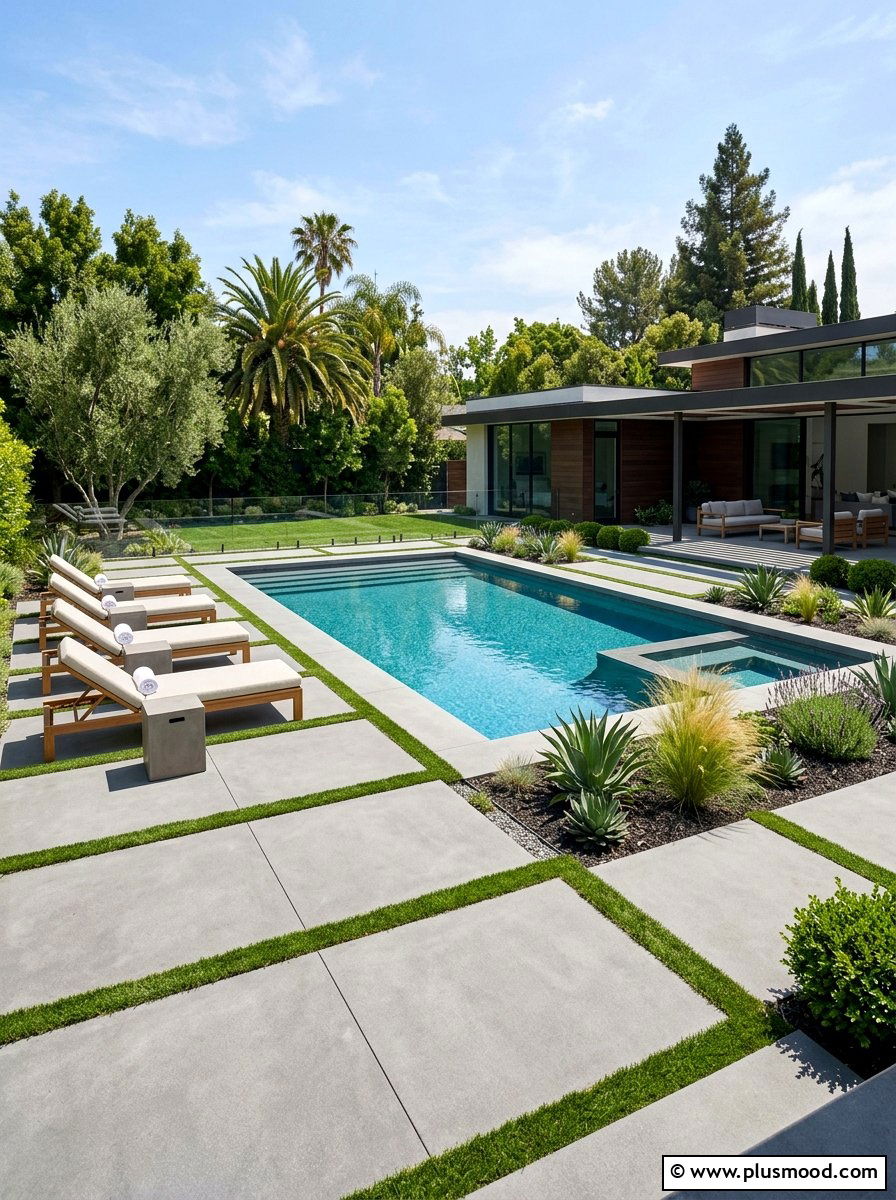
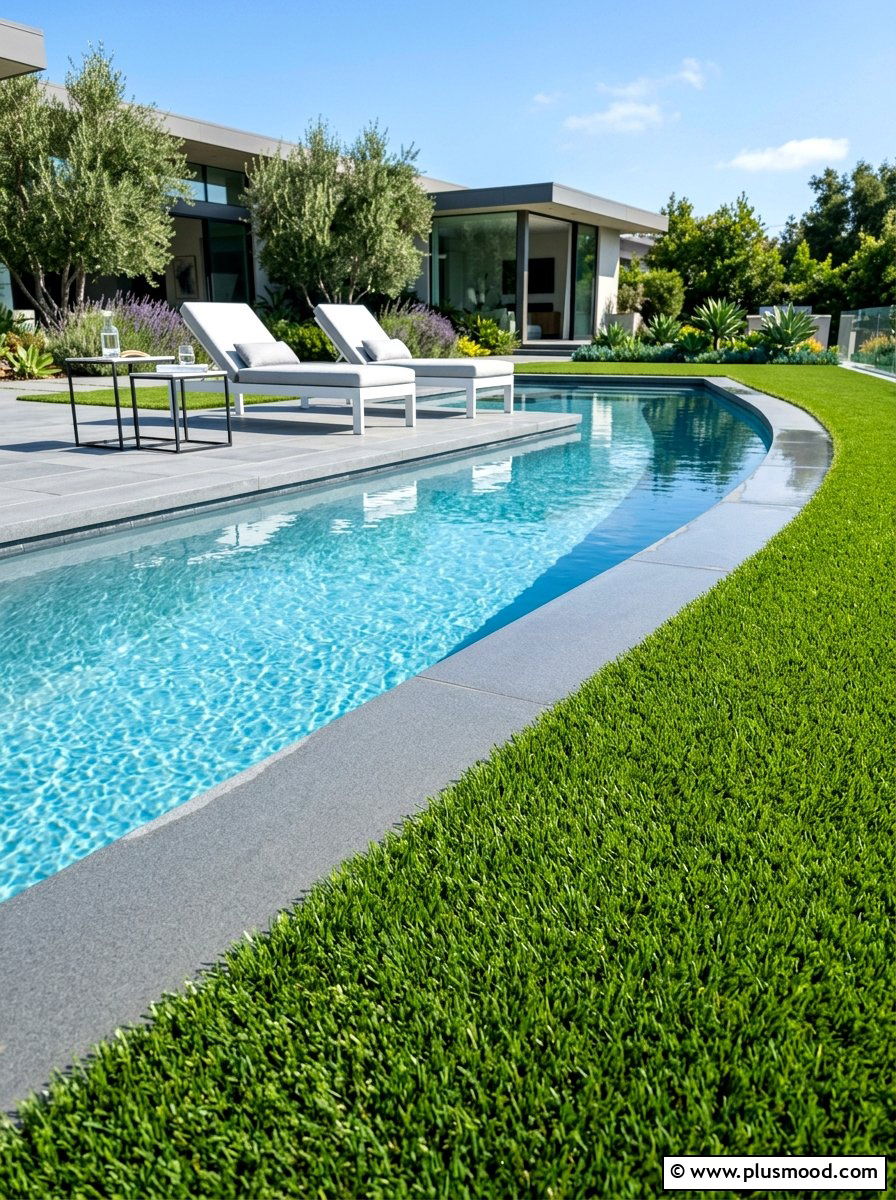
    Blending synthetic turf with natural stone offers a striking, polished look that remains lush and refined year-round. Large stone slabs can be placed in a precise layout, with vibrant green turf filling the gaps, creating an eye-catching pattern. This design introduces a modern geometric flair that has gained widespread popularity among design enthusiasts online. The gentle texture of the turf contrasts beautifully with the firmness of the stone, adding warmth and comfort to the poolside environment. Additionally, this pairing enhances water drainage and maintains a cooler surface compared to traditional solid stone or concrete patios.

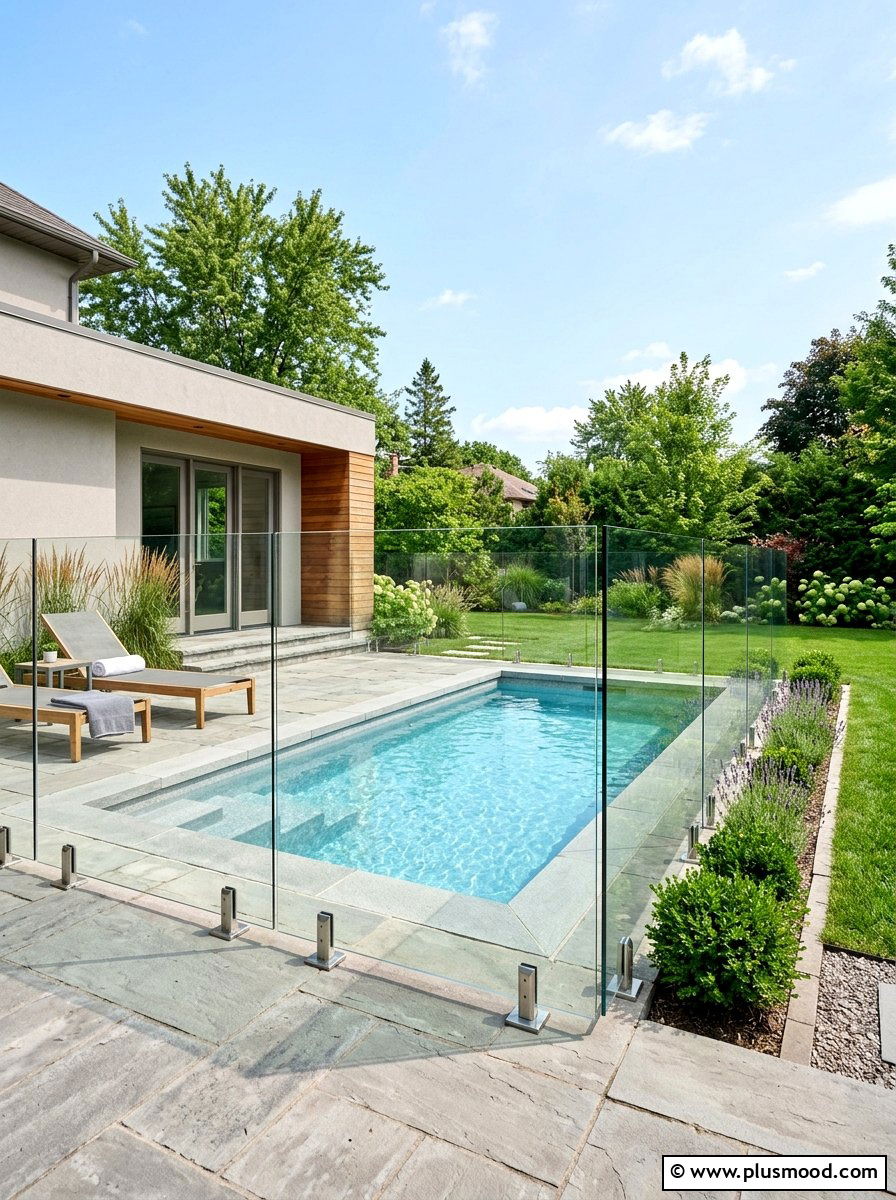
    13. Glass Pool Fence

    Glass Pool Fence

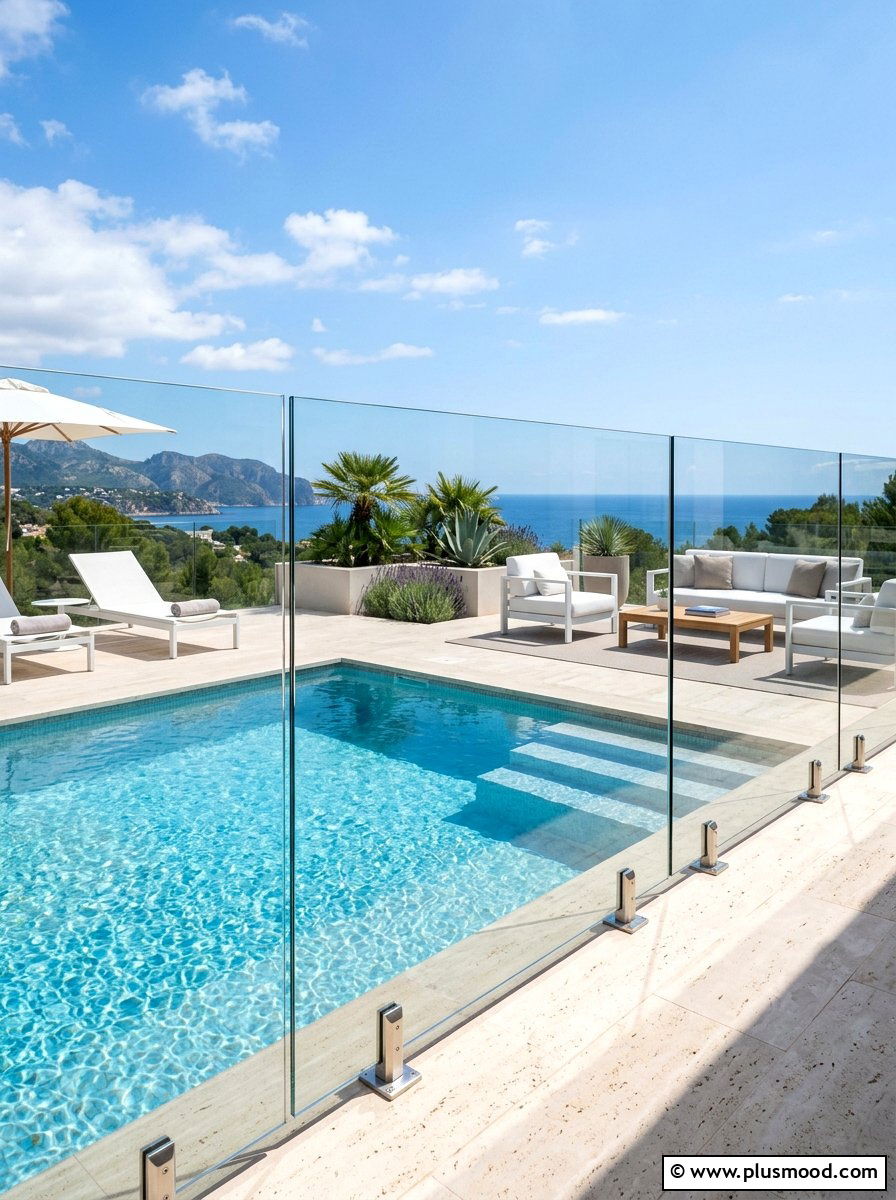
    A frameless glass pool fence offers an elegant way to keep safety in place without blocking your view of the water and garden. Unlike conventional fences made from wood or metal, glass panels blend seamlessly into the outdoor setting, creating a sense of openness and continuity. This contemporary option ensures peace of mind for families while enhancing the sleek, upscale aesthetic of modern homes. Slim stainless steel fittings secure the glass, lending a subtle industrial charm to the overall design. Easy to maintain, this style of fencing visually expands your outdoor area, making it feel more connected to nature.

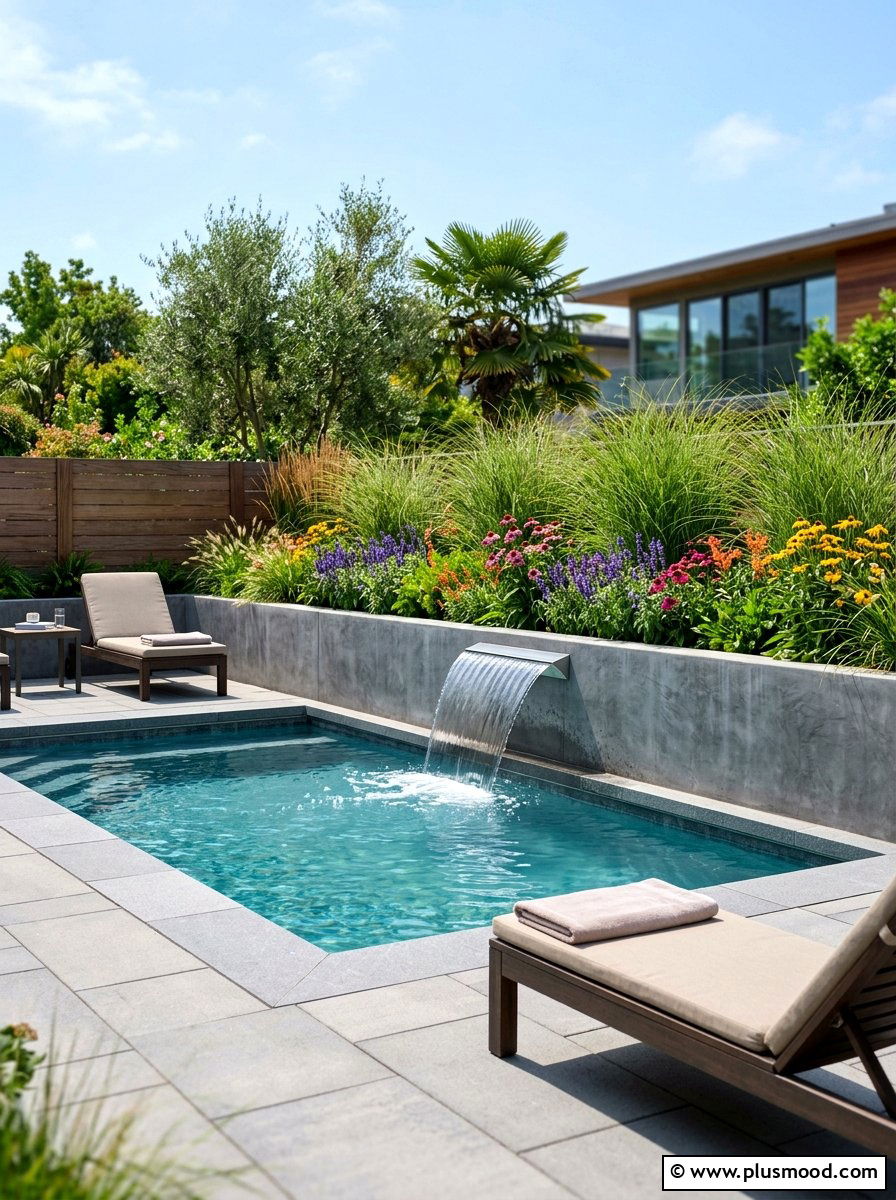
    14. Pool Waterfall Feature

    Pool Waterfall Feature

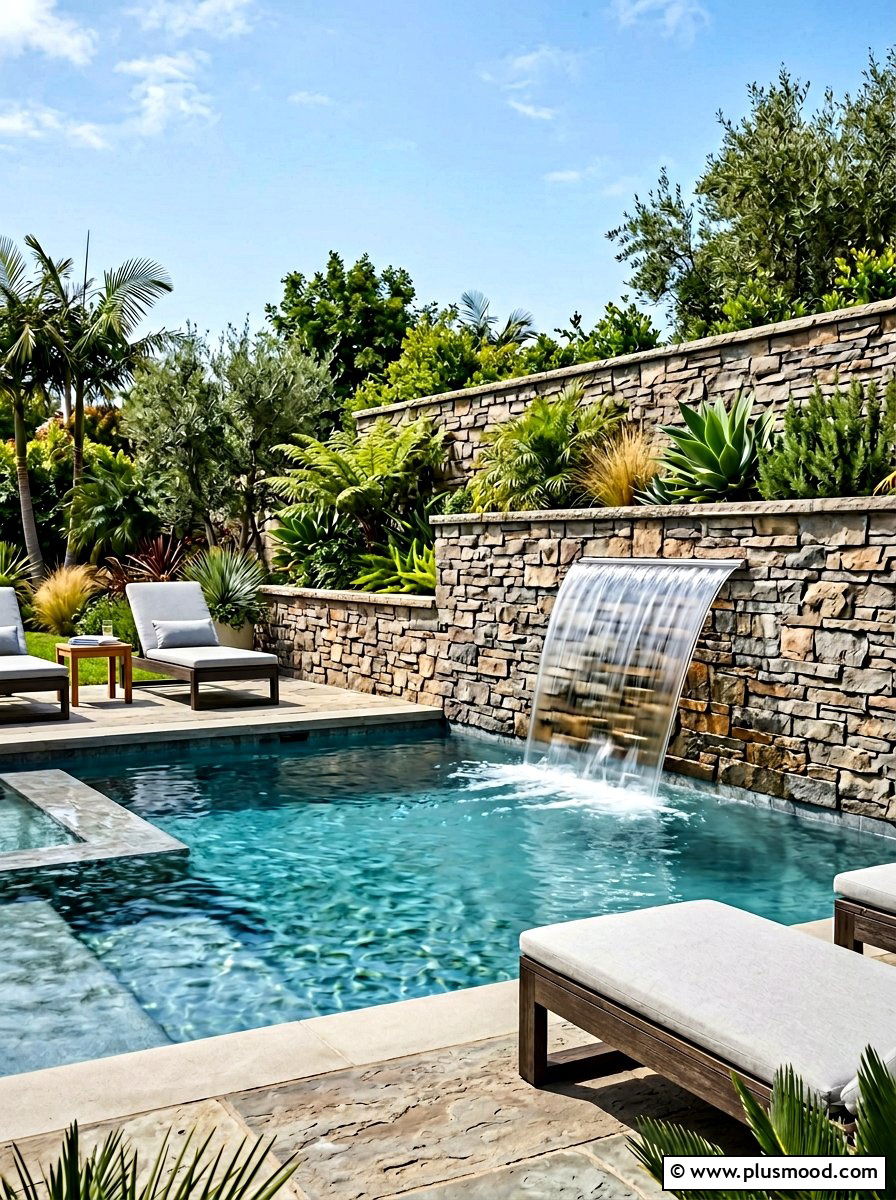
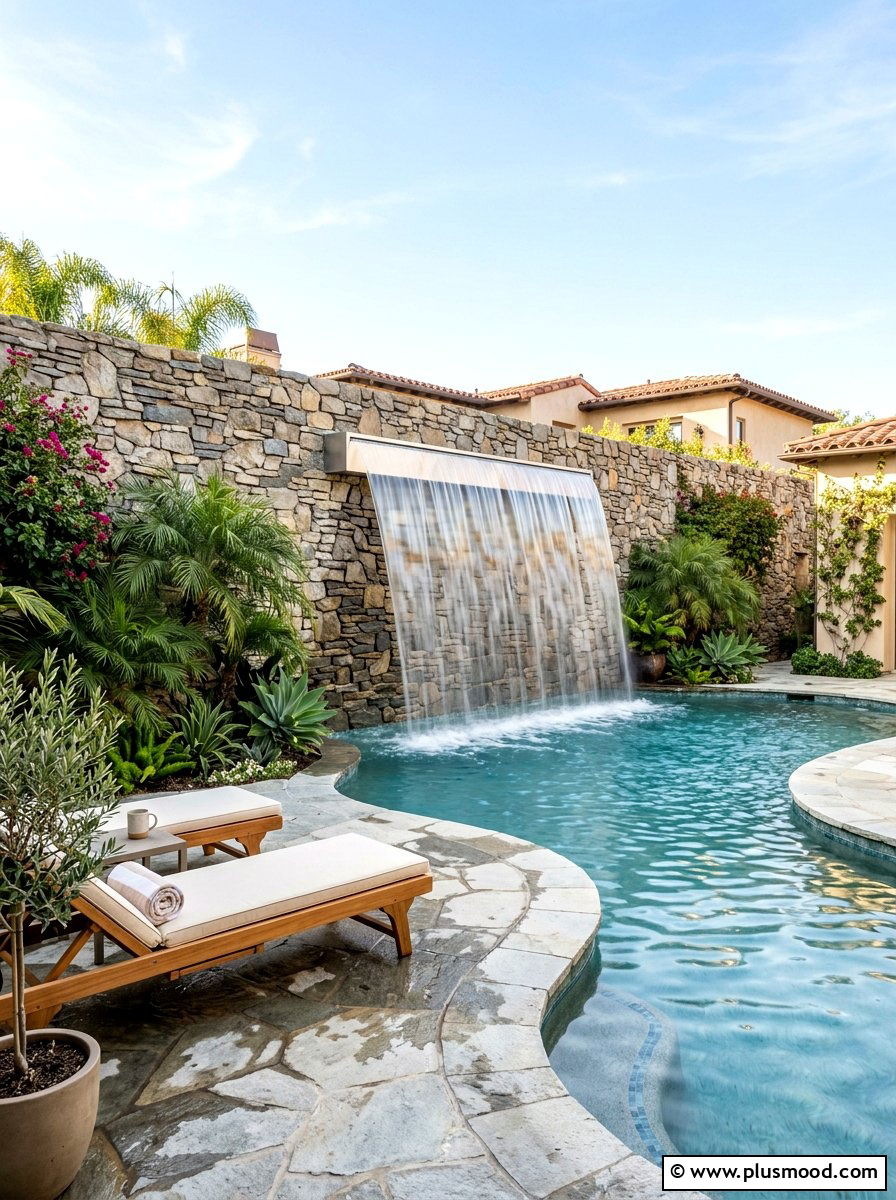
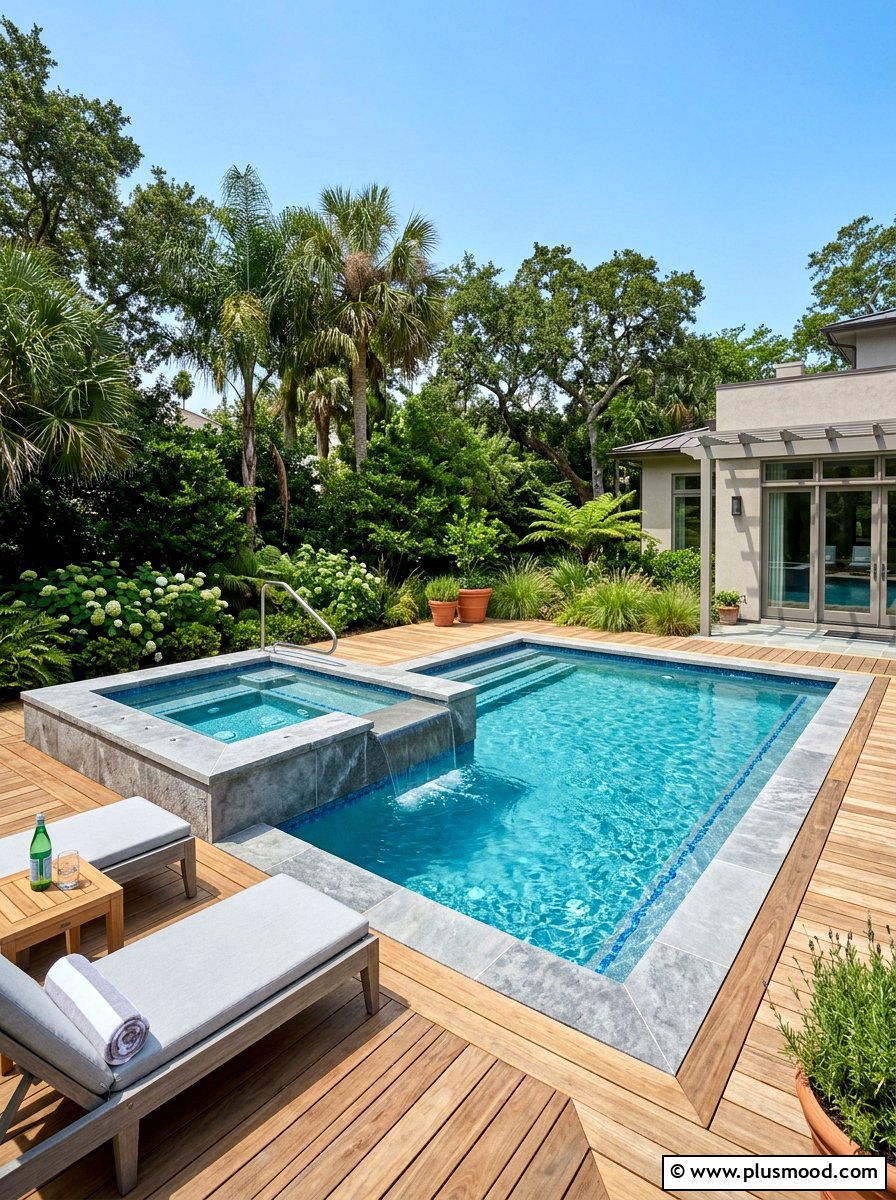
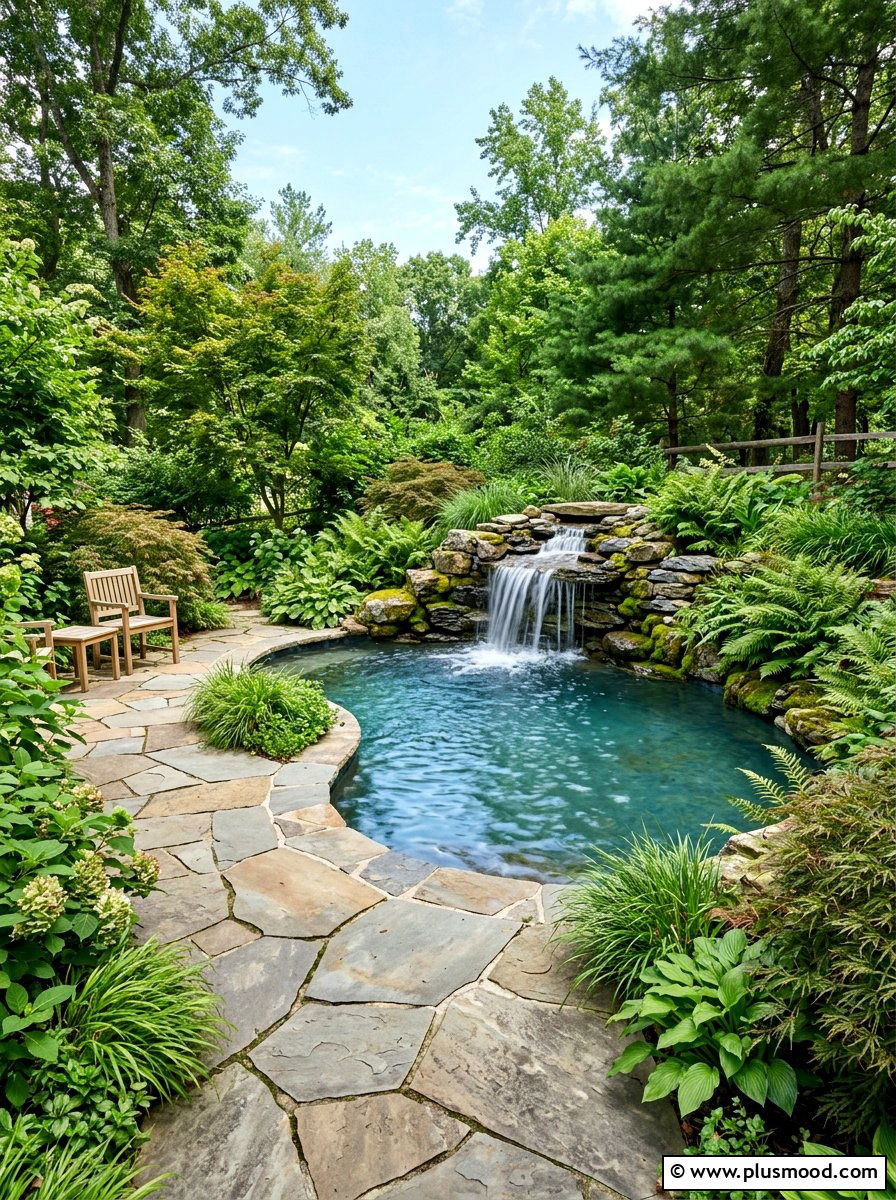
    A contemporary pool waterfall often showcases a smooth, broad stream of water flowing gracefully from a minimalist stone surface. This approach produces a delicate, crystal-clear cascade that adds a refined and sculptural element to the pool’s design. The gentle murmur of the water creates a soothing ambiance, helping to drown out surrounding noises and fostering a tranquil retreat. Unlike traditional rock waterfalls, these modern water features are seamlessly built into the pool structure or elevated planters for a clean, integrated look. Incorporating such a feature enhances the backyard atmosphere, infusing it with energy, sophistication, and serenity.

    15. Vertical Garden Pool Wall

    Vertical Garden Pool Wall

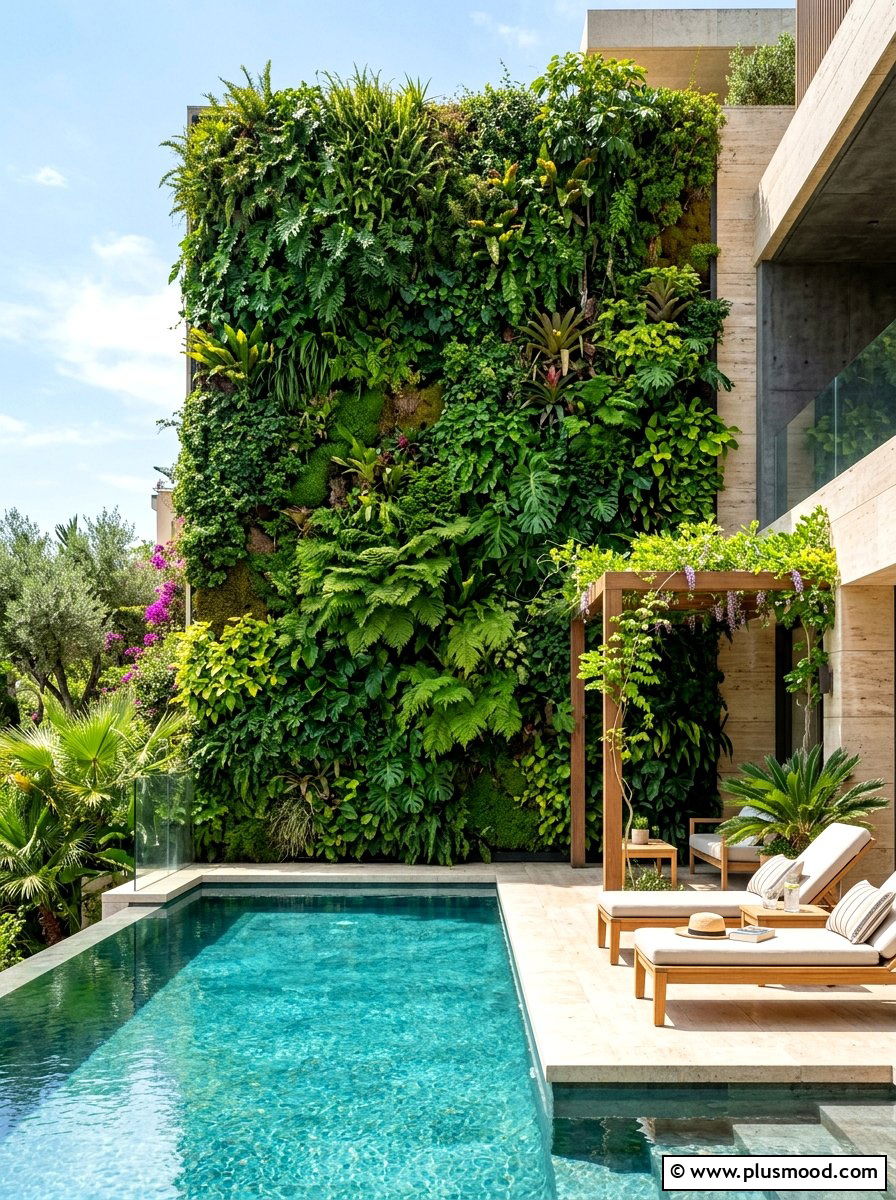
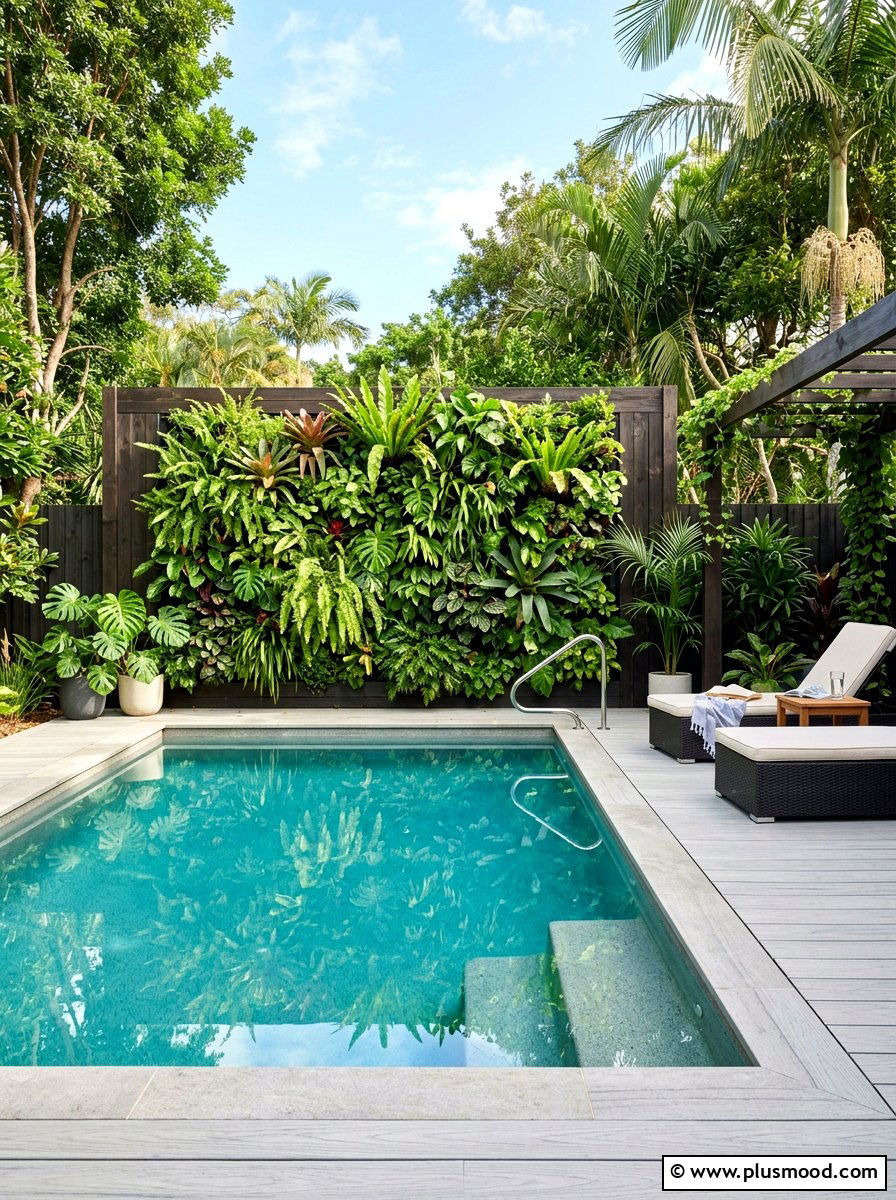
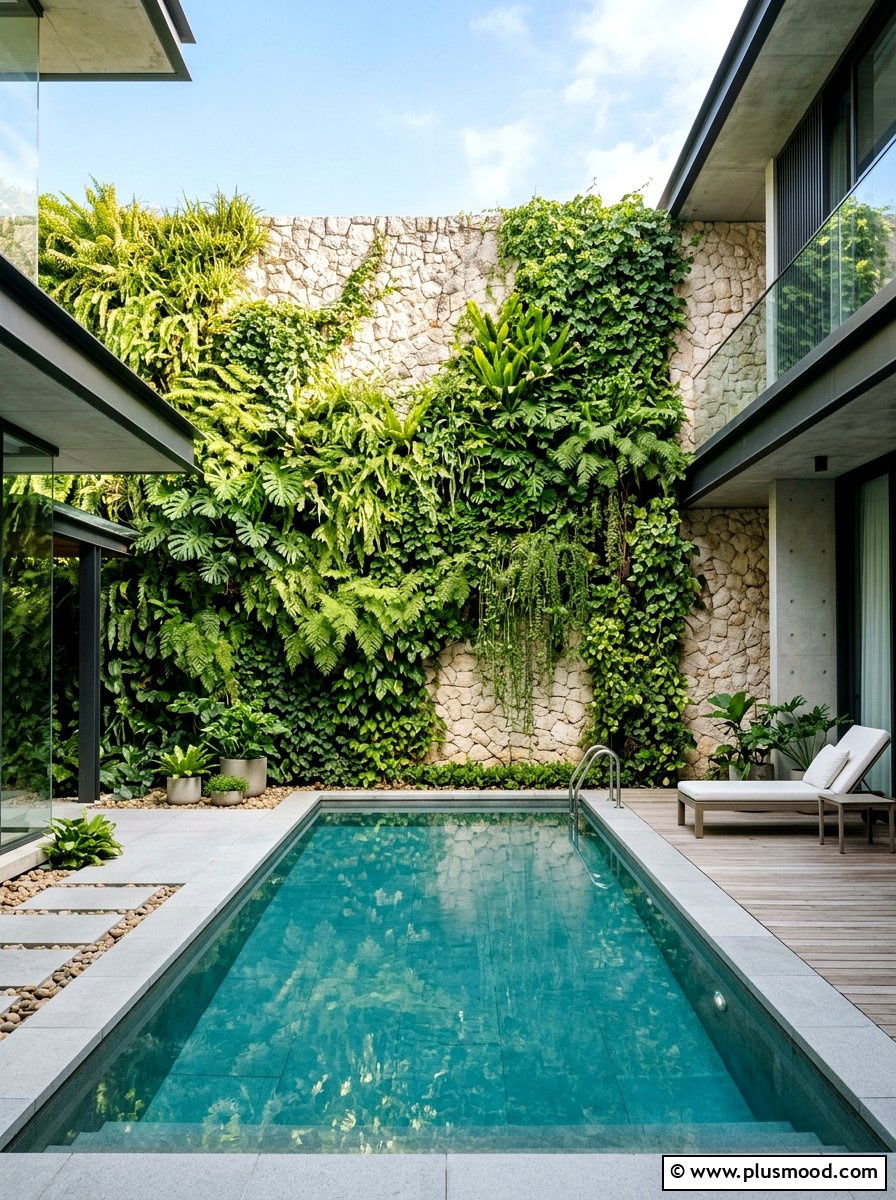
    Incorporating a vertical garden on a poolside wall is an excellent method to bring vibrant greenery into a compact outdoor space without sacrificing valuable ground area. By mounting a customizable panel system, you can showcase an array of plants such as ferns, succulents, or cascading vines, crafting a stunning natural feature. This living wall not only enriches the visual appeal with its varied textures and colors but also enhances the ambiance by muffling surrounding noise. Acting as a striking centerpiece, it softens the sleek lines of contemporary design while creating a cozy, intimate feel around the pool. Ensuring a reliable watering solution is essential for maintaining the health of plants in this moisture-rich setting.

    16. Drought Tolerant Pool Plants

    Drought Tolerant Pool Plants

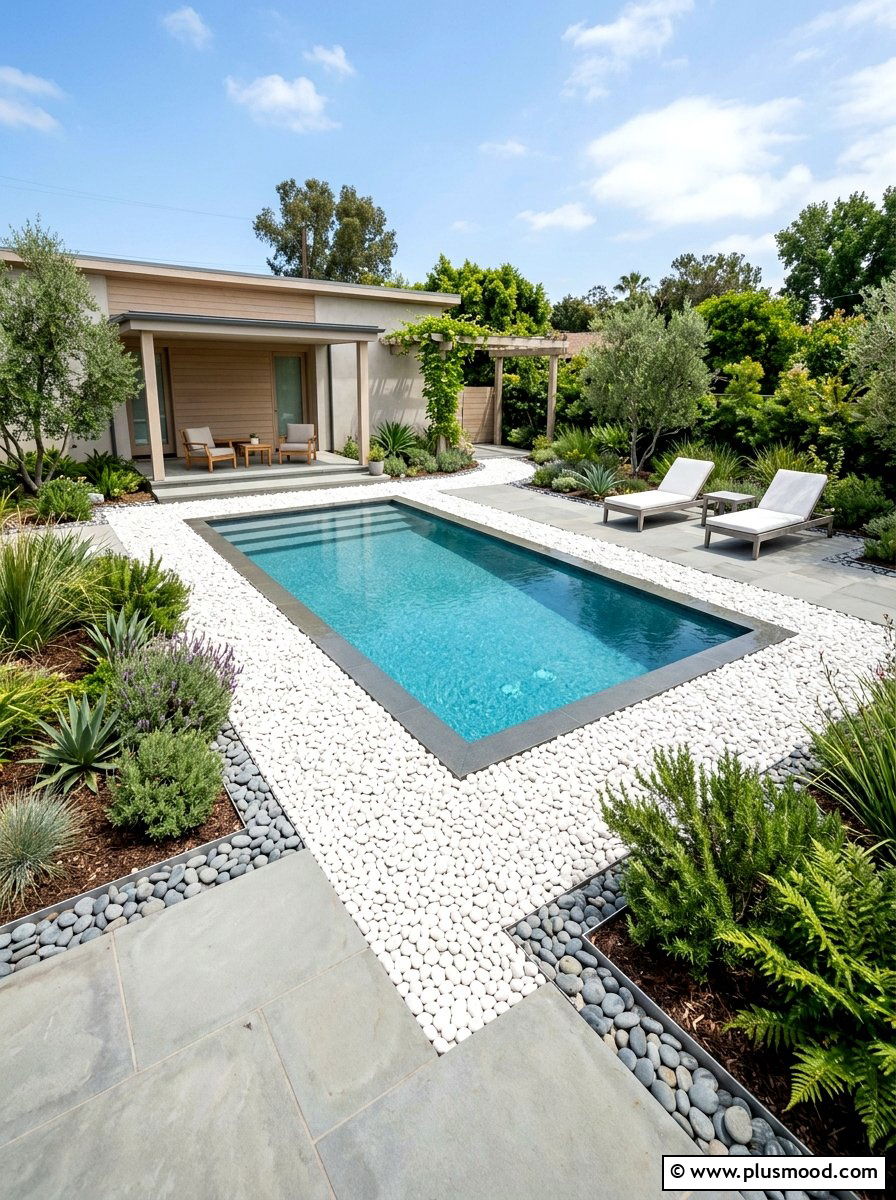
    Choosing drought-resistant plants for poolside landscaping is an excellent way to combine style with water efficiency, particularly in sun-soaked regions where every drop counts. Varieties like succulents, yuccas, and lavender bring unique textures and vibrant hues while thriving with minimal irrigation and upkeep. Their bold, architectural forms complement the sleek, streamlined aesthetic favored in modern pool environments. Incorporating decorative stones such as crushed gravel or smooth river rocks around these plants not only enhances visual appeal but also supports a low-water, sustainable garden design. This method guarantees a fresh, well-curated outdoor space that remains resilient and attractive through the driest seasons.

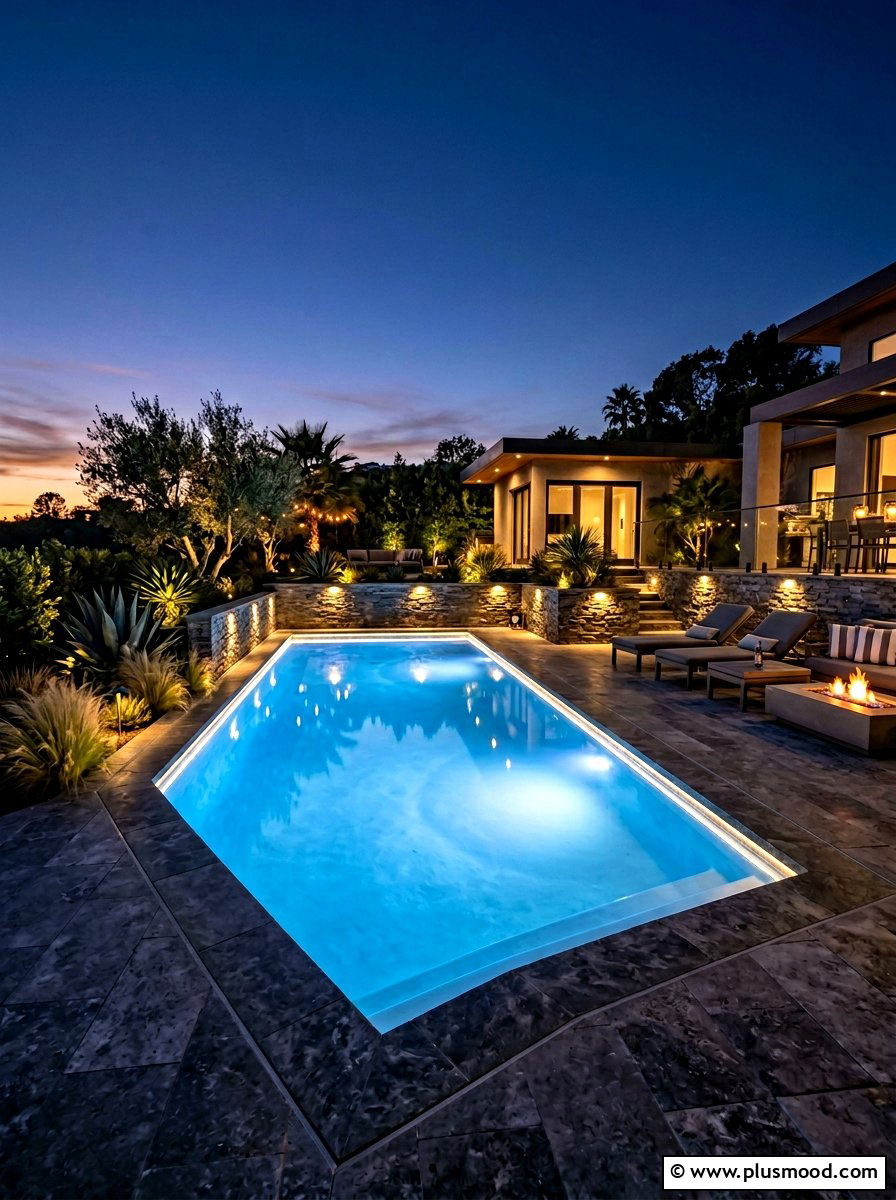
    17. Modern Pool Lighting

    Modern Pool Lighting

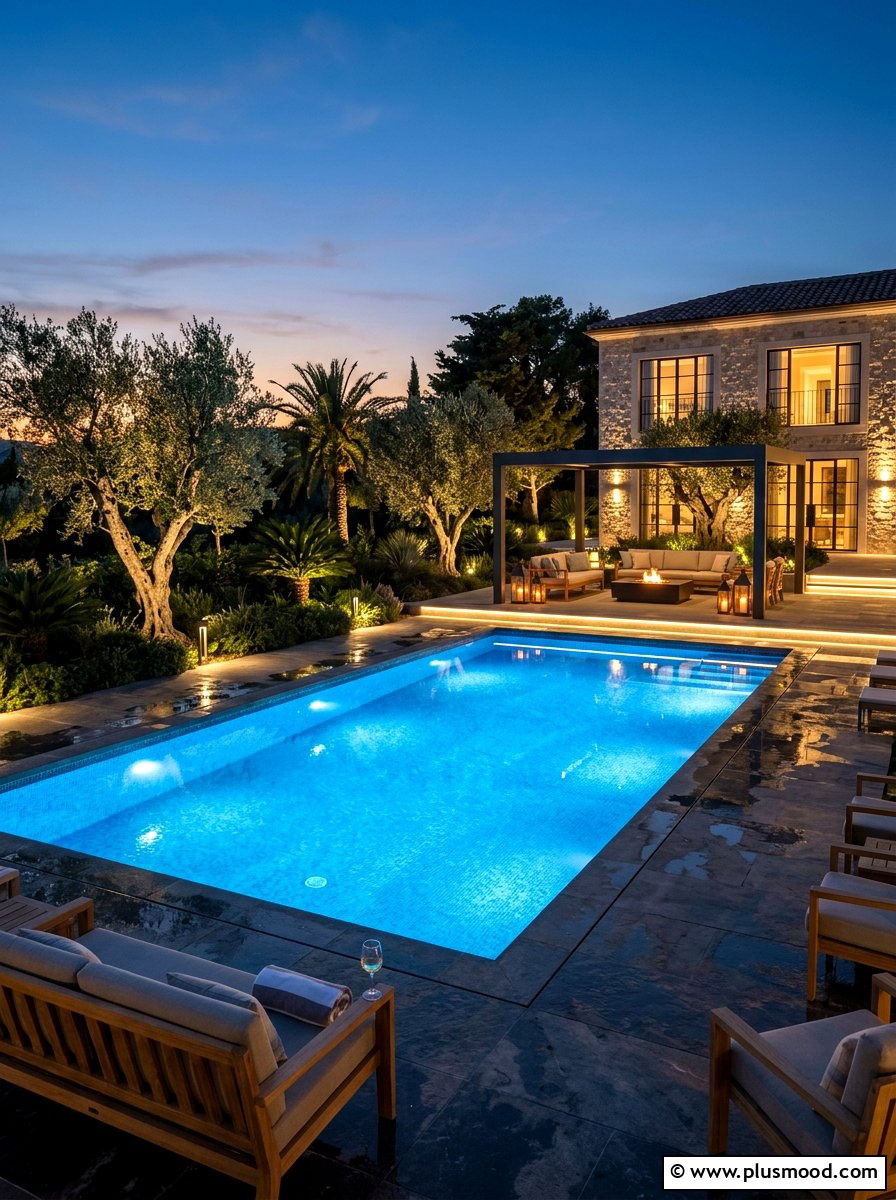
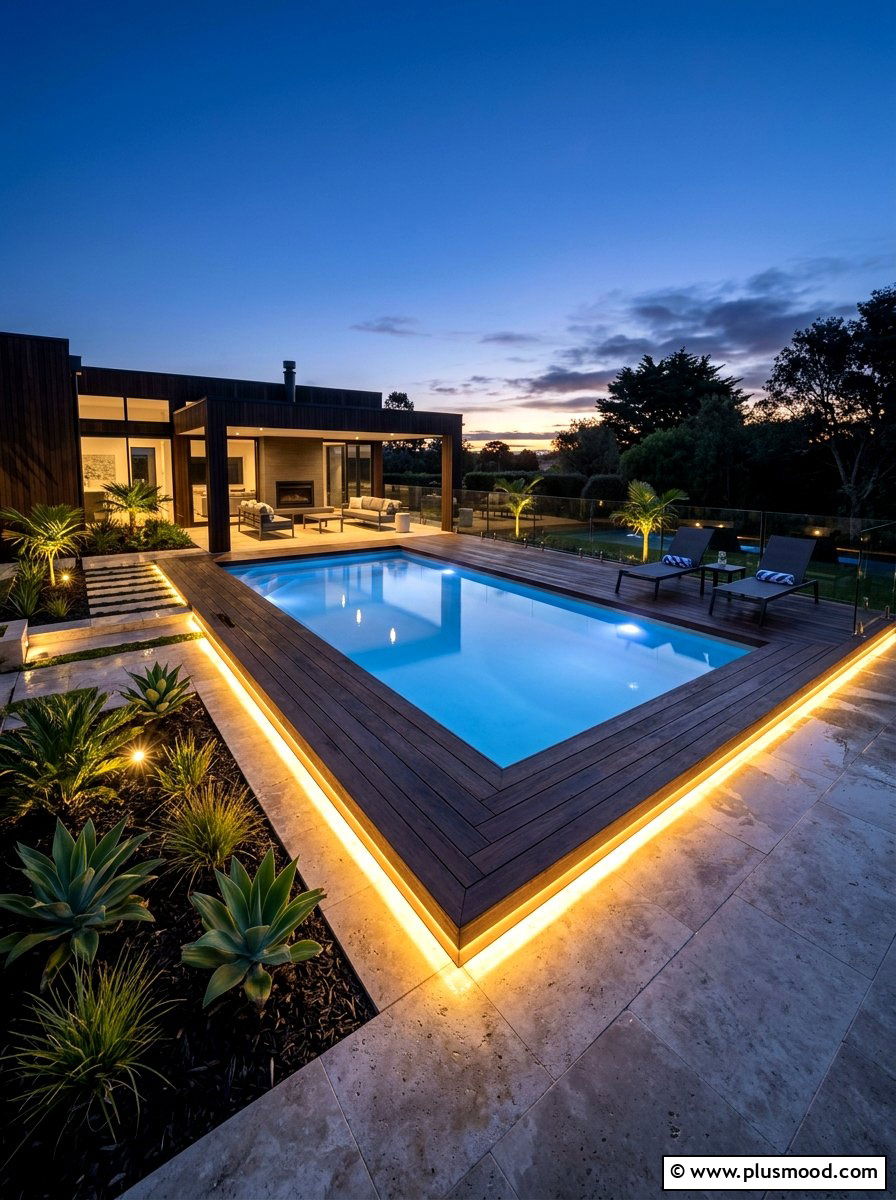
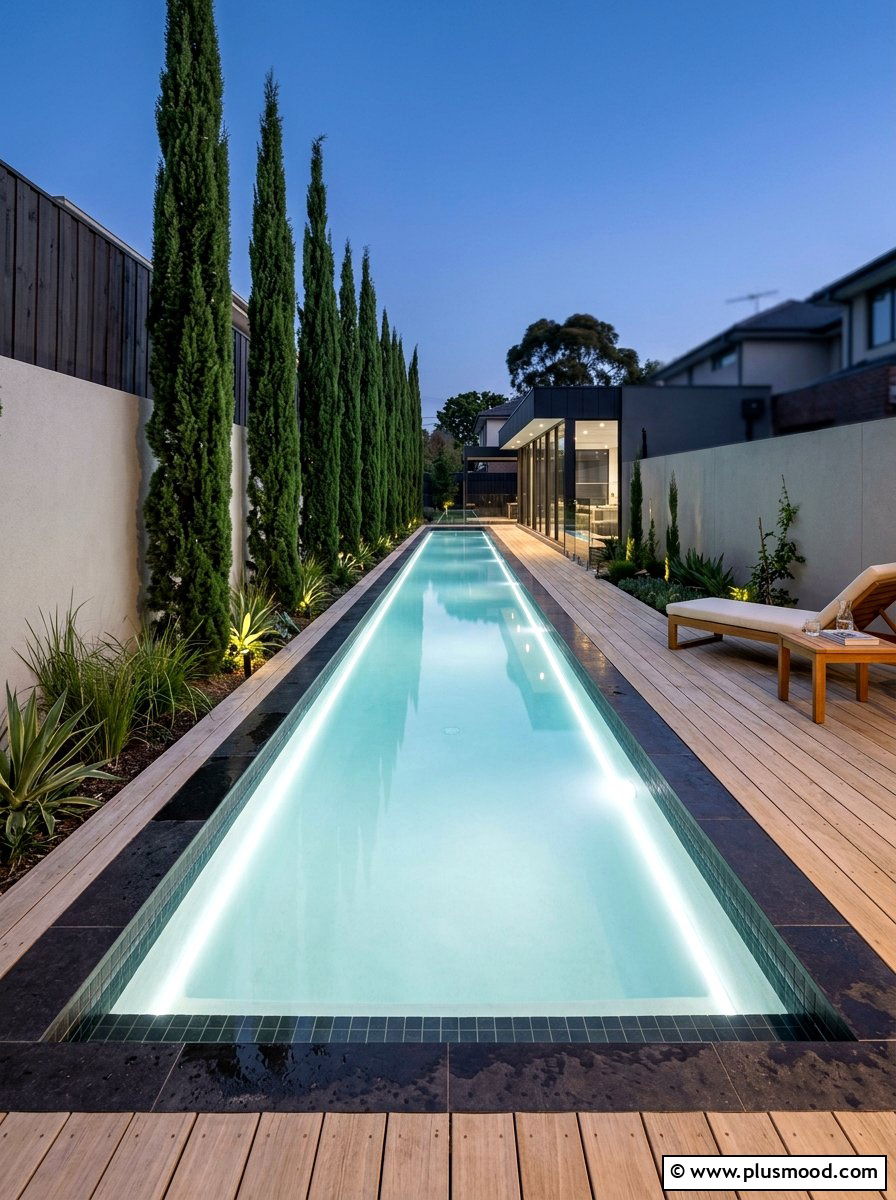
    Innovative pool lighting can turn your outdoor space into a captivating retreat after dark, blending beauty with functionality for safer nighttime swims. Contemporary designs frequently incorporate discreet LED fixtures embedded beneath the pool edge or integrated into nearby landscaping to produce a gentle, inviting ambiance. Color-shifting lights allow you to customize the atmosphere, whether you prefer a soothing navy hue or a lively violet shade for celebrations. Illuminating surrounding architectural features like plants and textured stonework adds layers of visual interest and sophistication. Thoughtfully arranged lighting emphasizes the pool’s sleek contours, keeping the water as the centerpiece well into the evening hours.

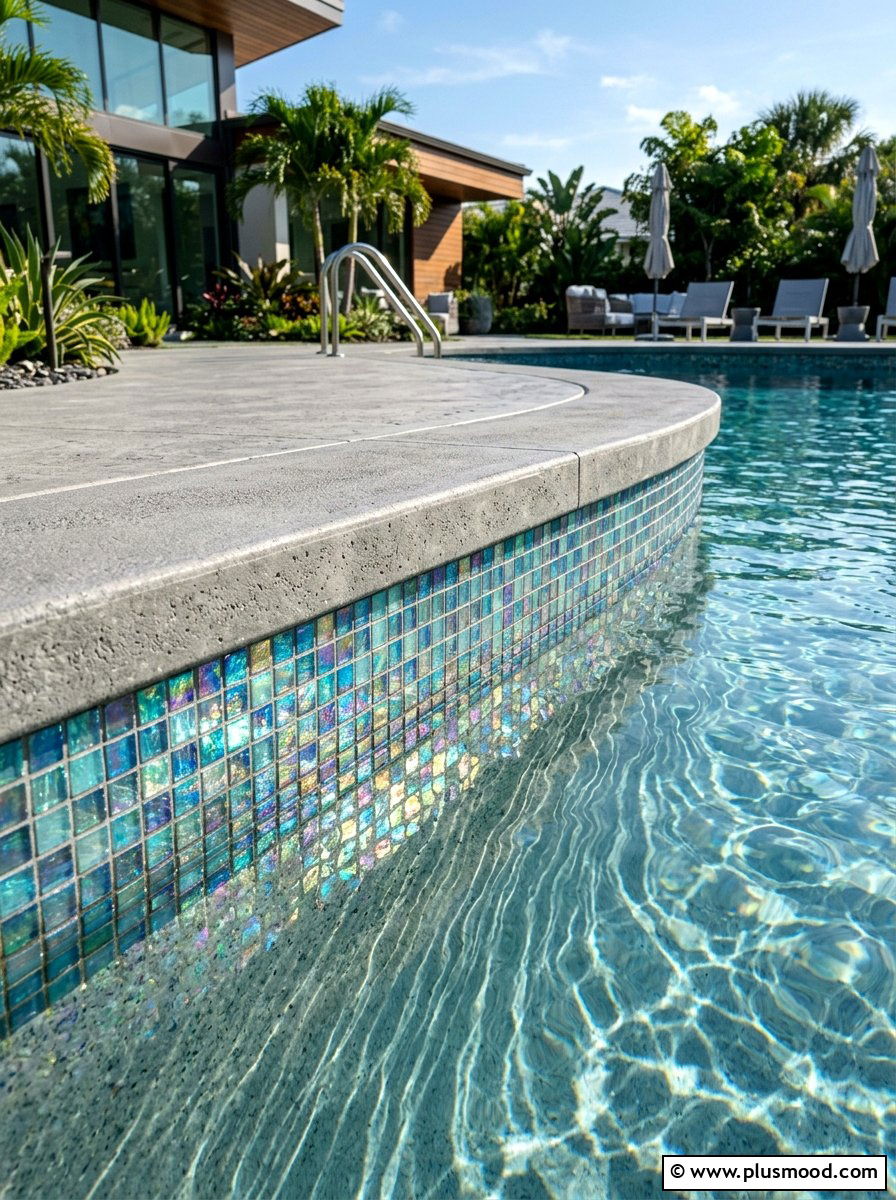
    18. Modern Pool Tile

    Modern Pool Tile

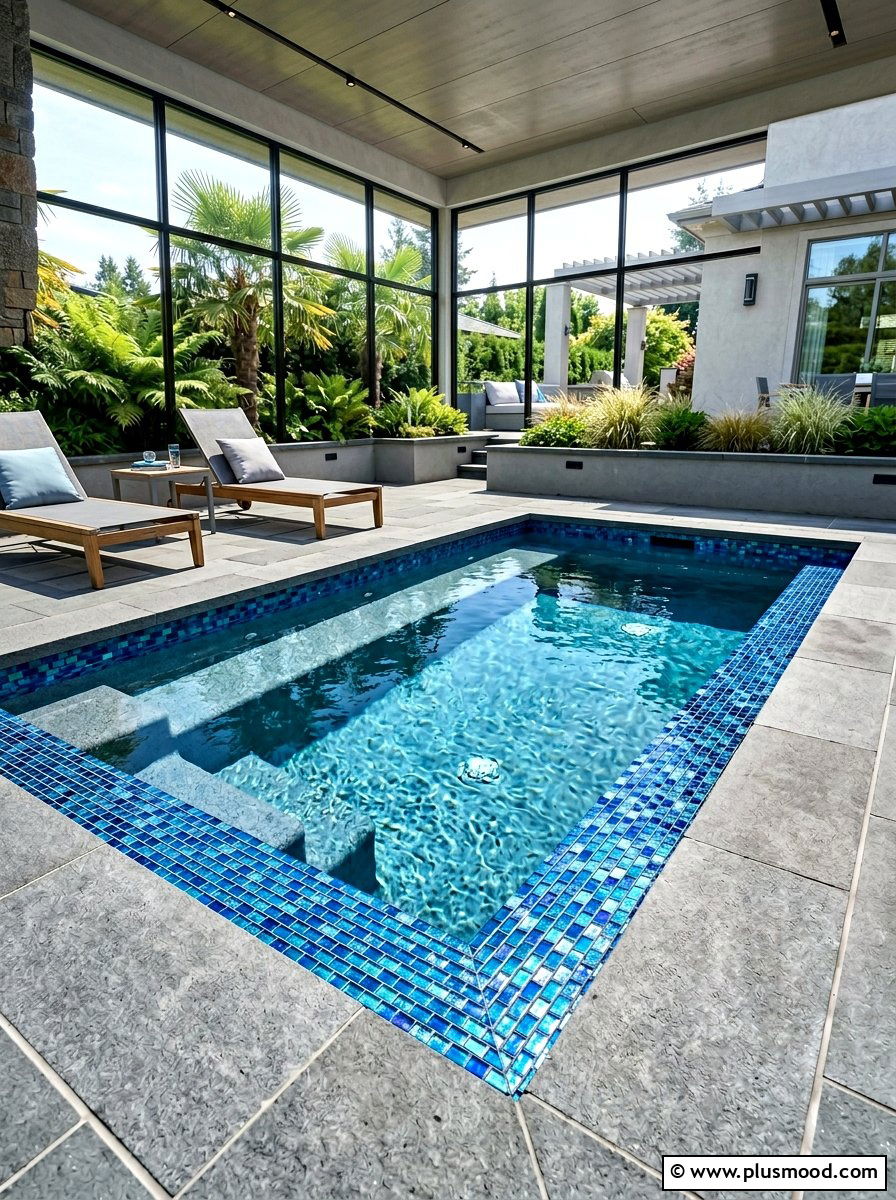
    Selecting the right tile for your pool’s interior or waterline plays a crucial role in defining the style and ambiance of your outdoor retreat. Contemporary trends frequently highlight glass mosaic tiles in rich hues like deep teal, smoky gray, or pearly white, offering a sleek and luminous finish. Another favored option is large porcelain tiles, which provide a clean, uninterrupted surface that simplifies maintenance and elevates the pool’s modern appeal. Opting for a tile color that contrasts with your patio can make the pool edge a striking focal point, whereas using a coordinating shade ensures a harmonious and understated aesthetic. Investing in premium tiles not only boosts your pool’s elegance but also contributes lasting durability and value to your property.

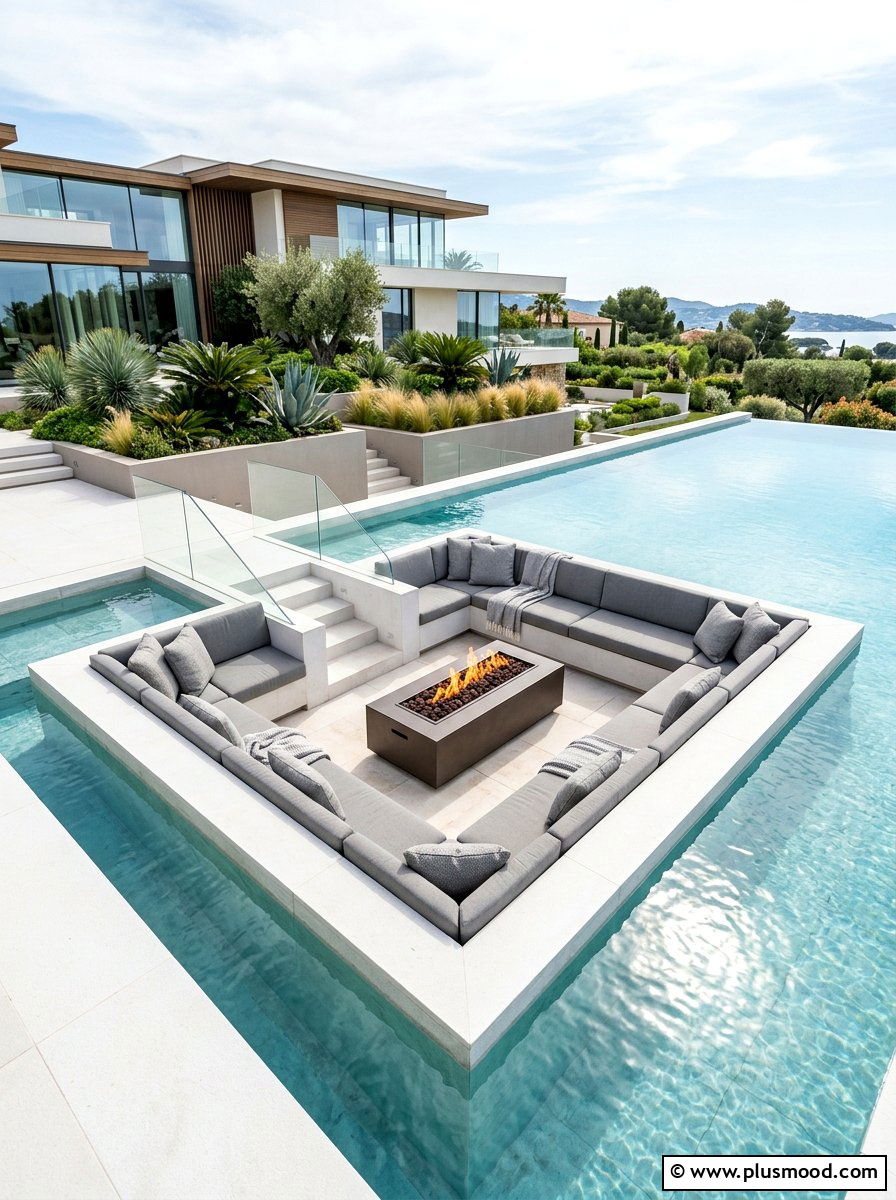
    19. Sunken Pool Lounge

    Sunken Pool Lounge

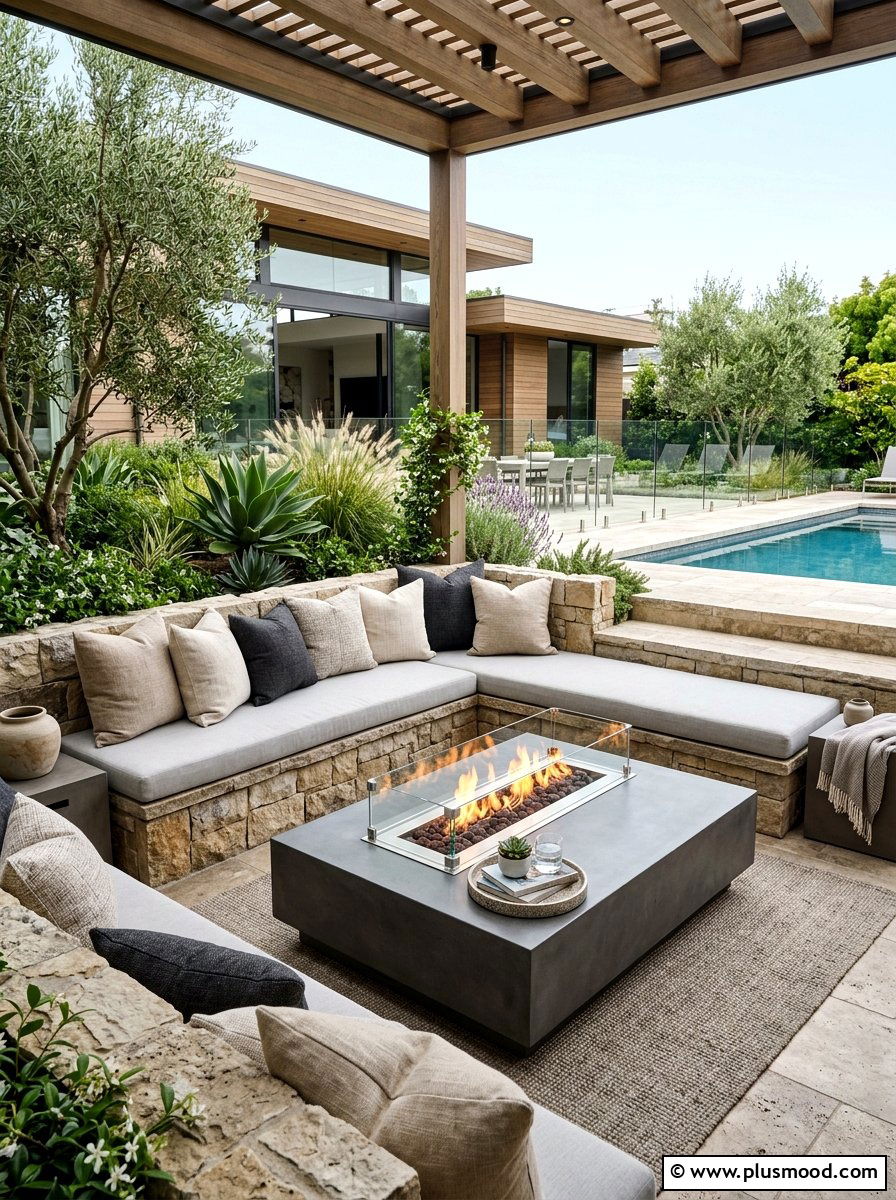
    A recessed lounge integrated seamlessly into the pool deck offers a stylish and inviting spot for unwinding and socializing. This design allows you to enjoy a distinctive vantage point, sitting just below or alongside the water’s edge while staying comfortably dry. Contemporary versions often include cushioned built-in benches crafted from weather-resistant materials, paired with a fire feature to enhance the atmosphere. It creates a clear division between the swimming zone and the gathering area, making it ideal for hosting without obstructing sightlines. The sleek, minimalist aesthetic of a sunken lounge complements modern outdoor spaces, bringing an elegant and sophisticated touch to your backyard retreat.

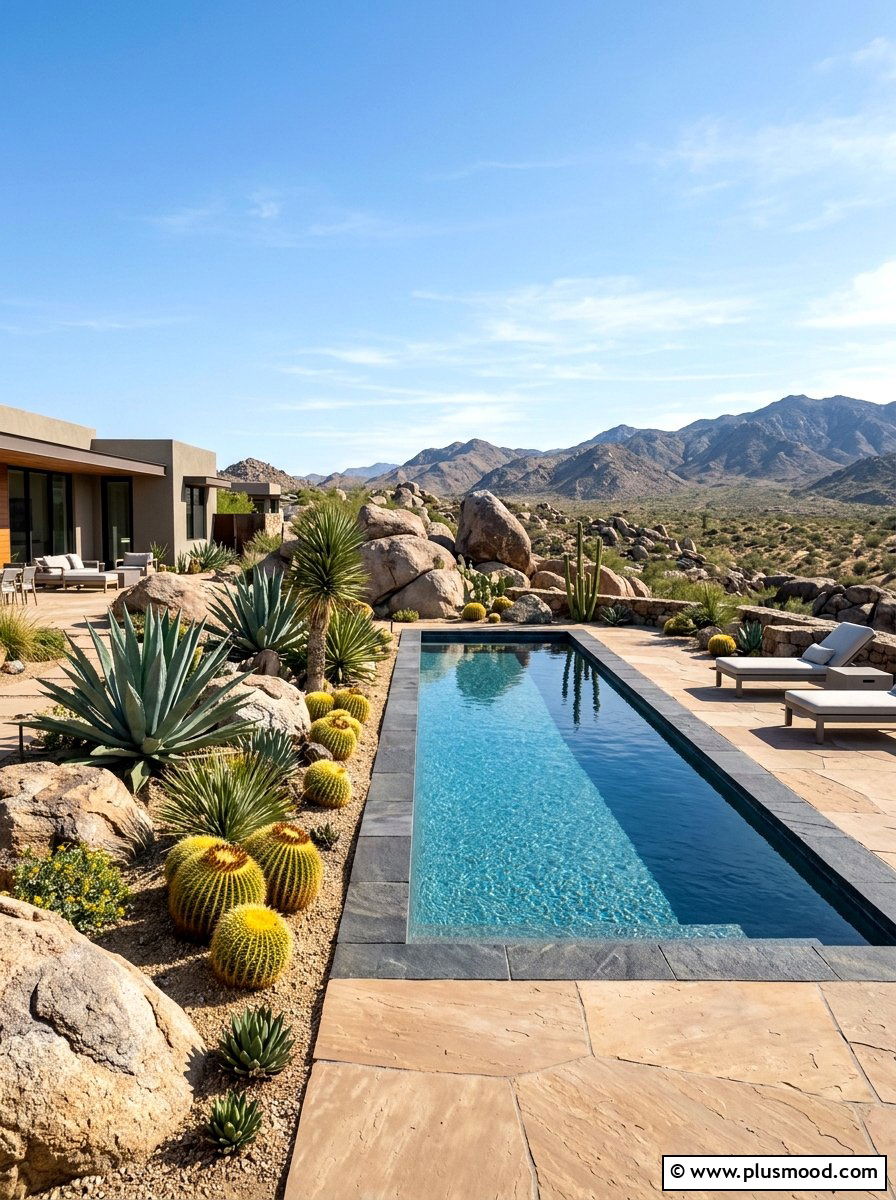
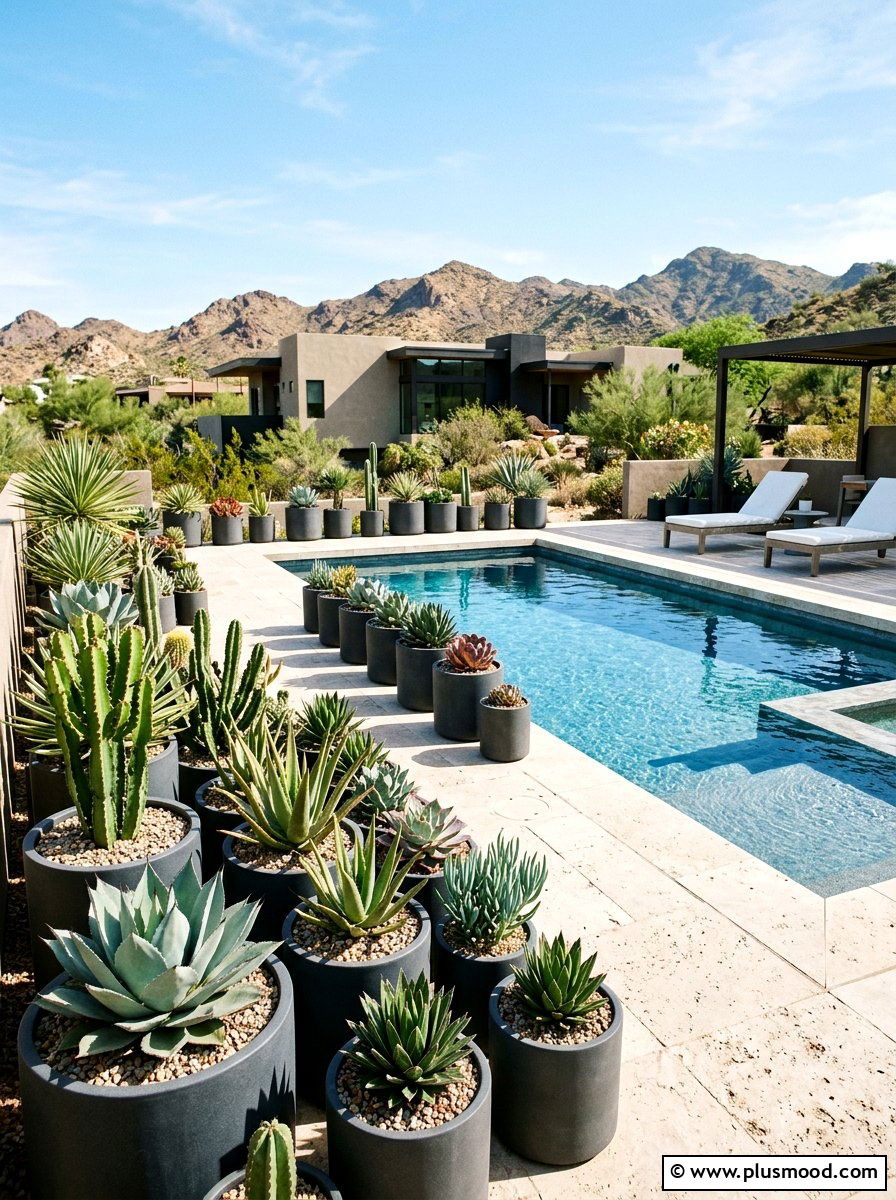
    20. Desert Modern Pool Landscape

    Desert Modern Pool Landscape

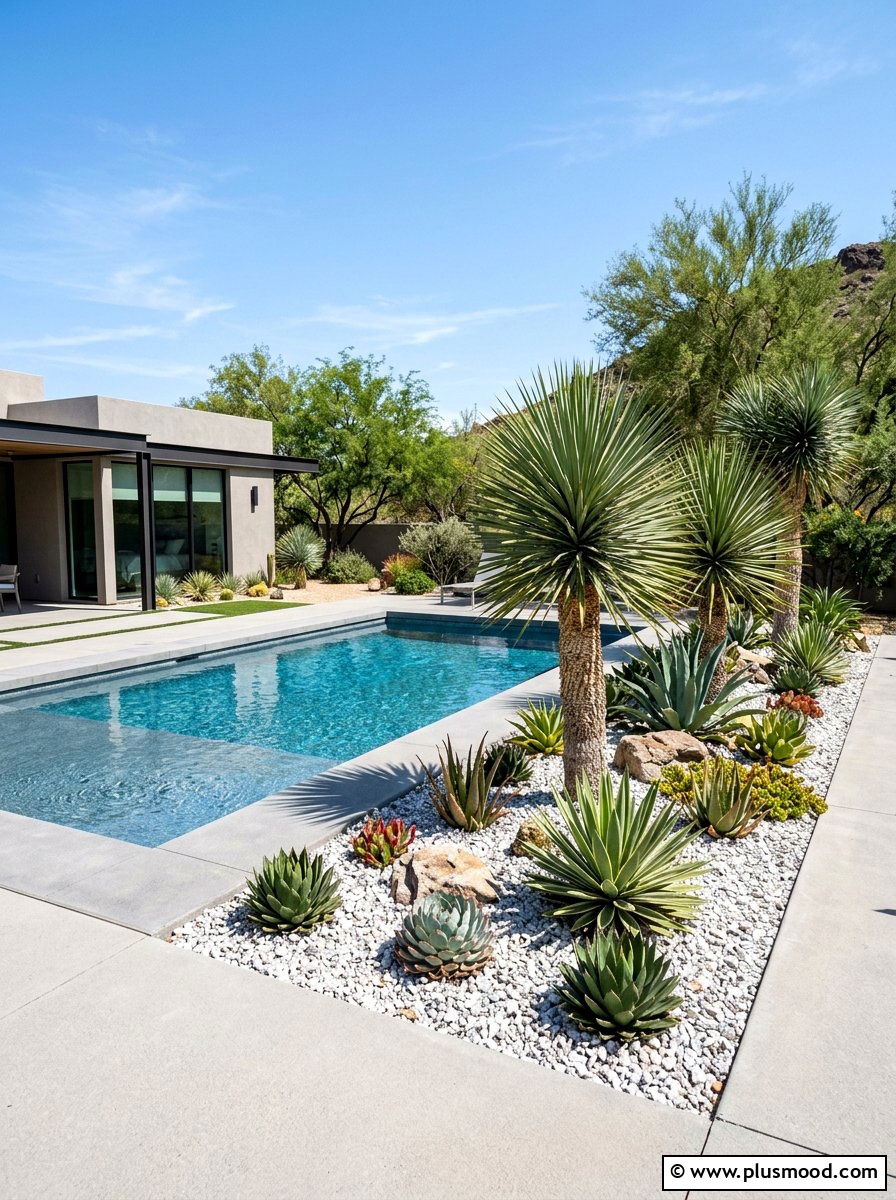
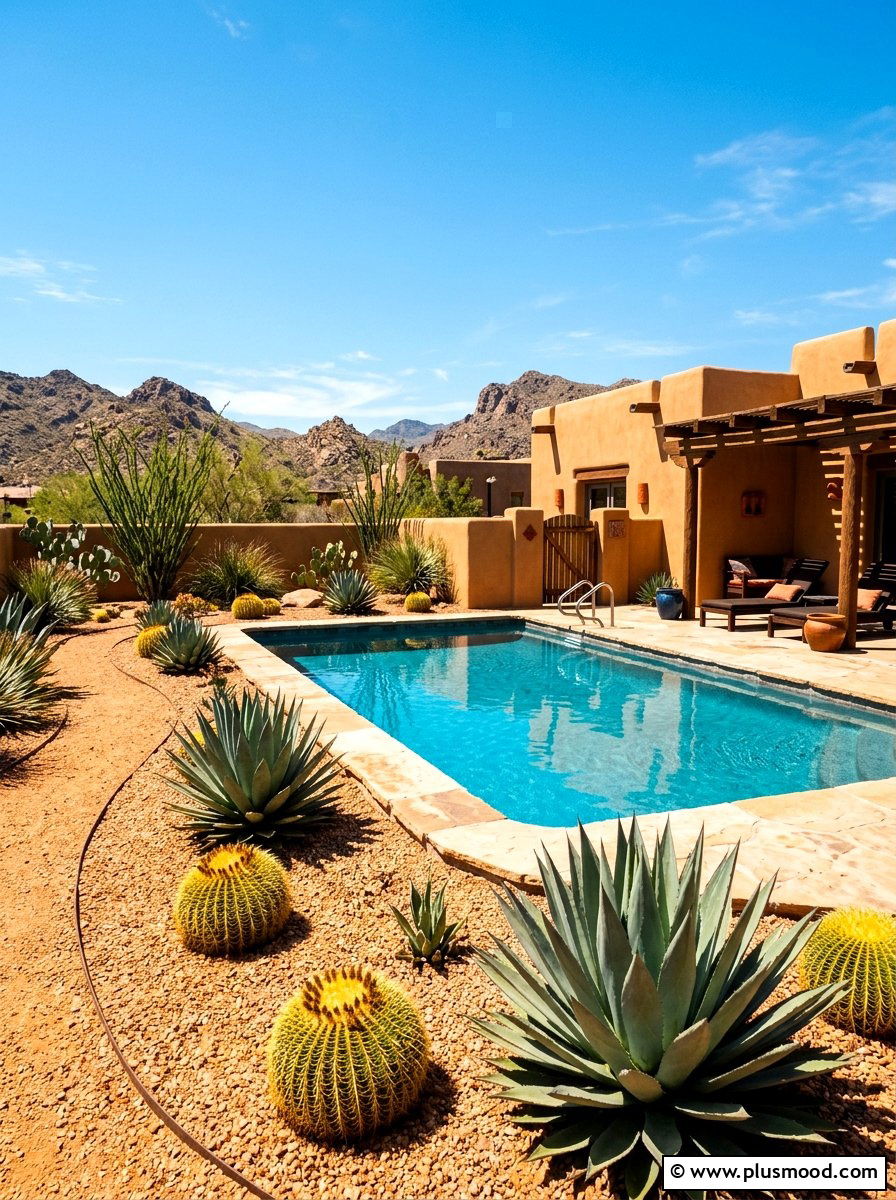
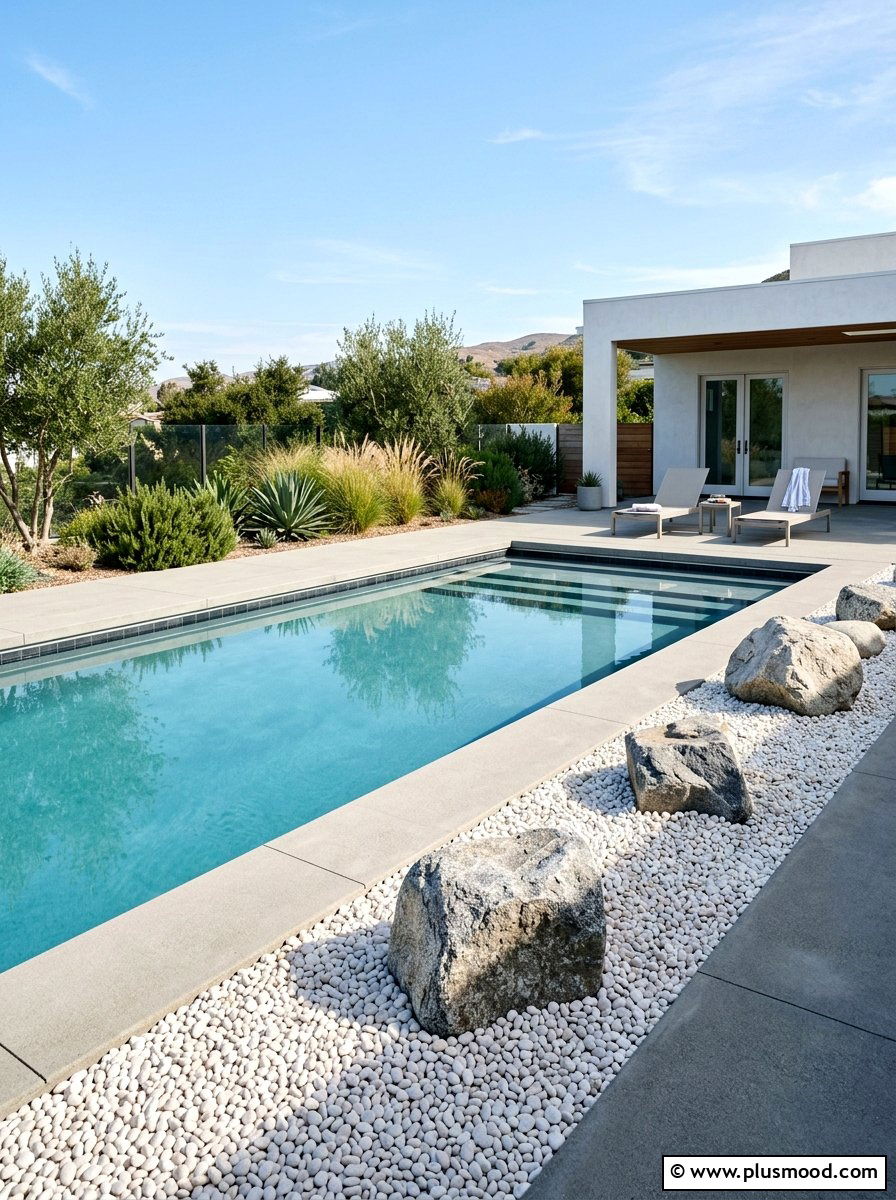
    A desert modern pool landscape highlights the striking simplicity of drought-tolerant plants such as agave and yucca, set against a backdrop of smooth crushed stone. This design embraces the bold, geometric forms of cacti, offering a captivating contrast to the sleek, horizontal lines of the pool area. Carefully positioned large rocks introduce texture and a grounded, natural element to the overall setting. The color scheme typically features warm earth tones like ochre, tan, and muted green, which harmonize beautifully with the sun-drenched surroundings. This approach delivers an elegant, eco-friendly aesthetic that suits dry climates where water conservation is essential.

    21. Minimalist Pool Garden

    Minimalist Pool Garden

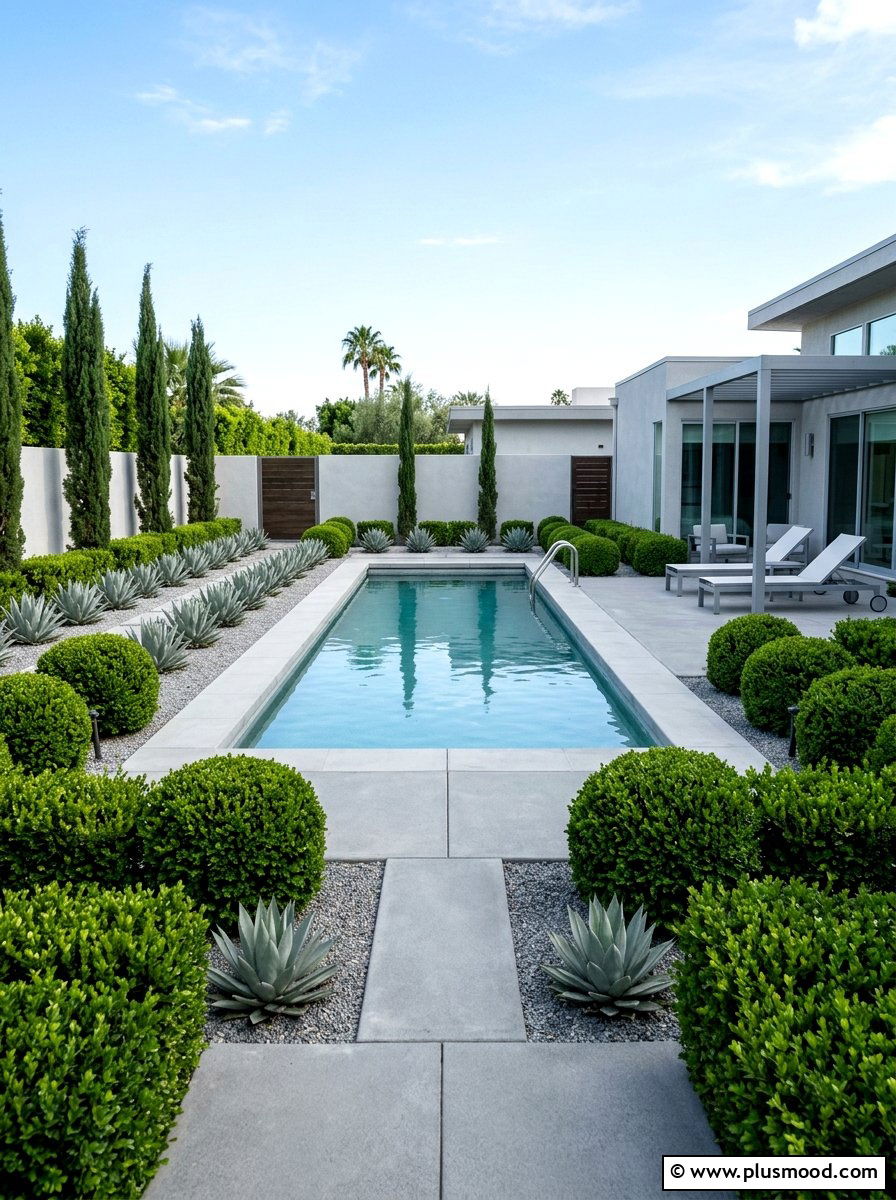
    A minimalist pool garden emphasizes simplicity by using a carefully chosen selection of plants and materials to evoke tranquility and structure. Rather than crowded floral displays, it features uniform clusters of a few plant types that deliver a harmonious and steady visual flow. Often, neatly arranged evergreens or sculptural succulents line the poolside in balanced formations, subtly enhancing the space. This design philosophy prioritizes ease of upkeep, allowing the pool and surrounding architecture to remain the focal points. Ultimately, the garden achieves a sleek, uncluttered ambiance that resonates with the clean lines and calm aesthetics of contemporary living.

    22. Ornamental Grasses For Pool

    Ornamental Grasses For Pool

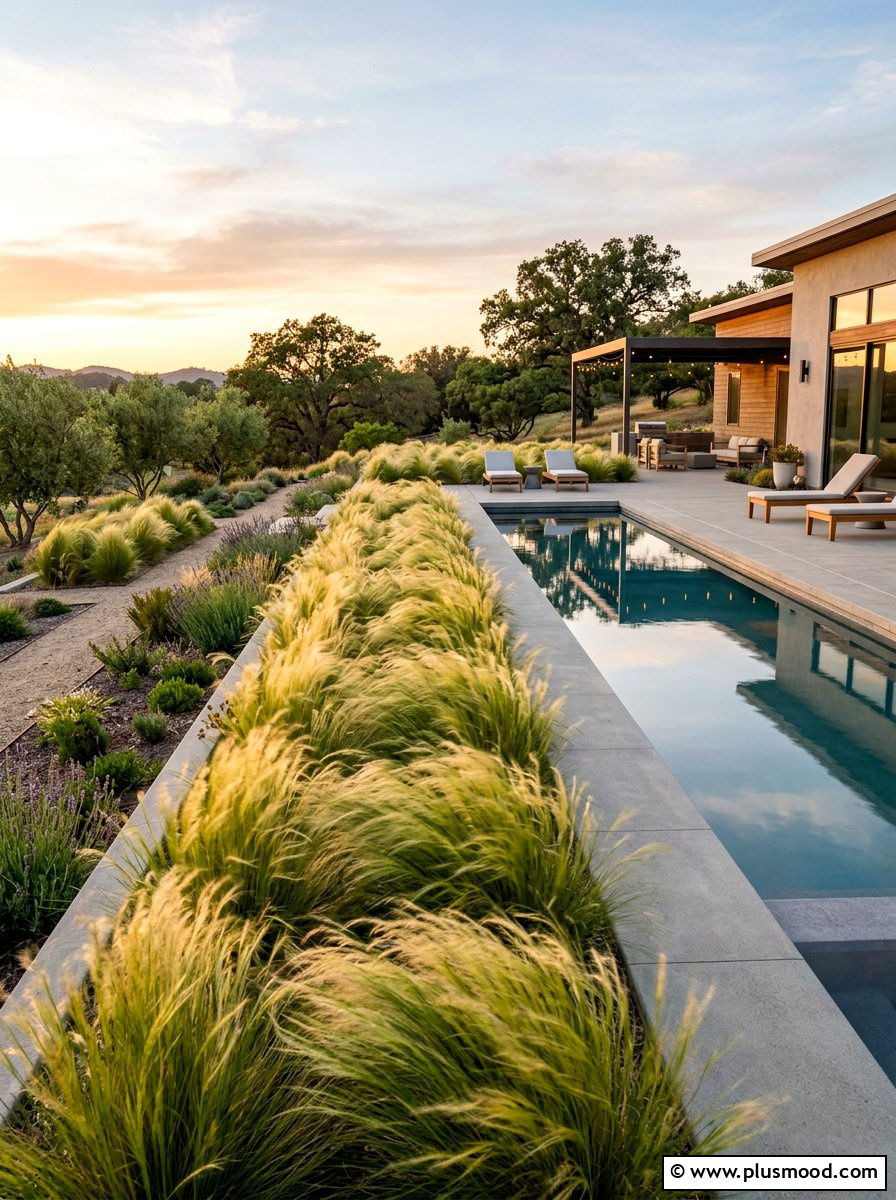
    Ornamental grasses have become a popular choice in contemporary poolside landscaping due to their ability to introduce graceful movement and rich texture to sleek, modern settings. Varieties such as Fountain Grass and Mexican Feather Grass gently flutter with the breeze, creating a lively contrast against calm pool water. These plants are often drought-resistant and low-maintenance, ideal for homeowners seeking effortless elegance. Arranged in extended linear patterns around a rectangular pool, they offer a delicate layer of privacy without feeling dense or overwhelming. Their natural green and golden tones glow beautifully when illuminated by soft evening lights or warm sunlight, enhancing the overall ambiance.

    23. Concrete Pavers Around Pool

    Concrete Pavers Around Pool

    Expansive concrete pavers bring a contemporary and refined vibe to any poolside area, perfectly complementing modern outdoor designs. Their generous size enhances the feeling of spaciousness, giving compact yards a more open and orderly appearance. Arranging these pavers with carefully chosen fillers like smooth gravel or lush artificial grass creates a clean, geometric layout that accentuates the pool’s sharp lines. Known for its durability, concrete also offers excellent heat resistance and a textured surface that ensures safety around wet zones. Opting for subtle gray shades allows the vibrant blue of your pool to stand out beautifully, crafting a stunning visual balance.

    24. Infinity Edge Pool

    Infinity Edge Pool

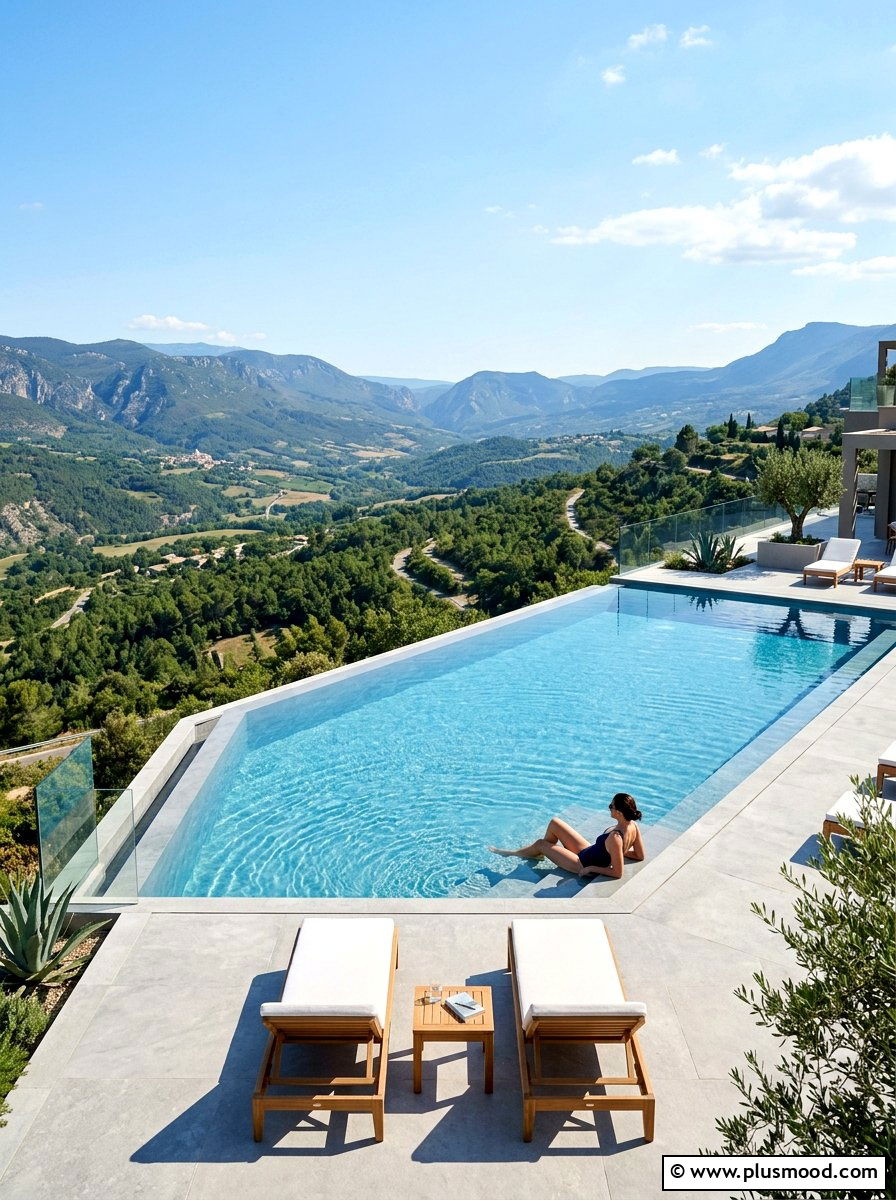
    An infinity edge pool offers a stunning effect where the water appears to blend seamlessly into the distant horizon or sky. Ideal for homes with picturesque views, this elegant design eliminates the visible edge, creating a continuous flow between the pool and its surroundings. Water gracefully spills over one side into a concealed basin, producing a calming cascade that enriches the tranquil setting of your outdoor space. Often associated with upscale resorts and contemporary luxury, this pool style delivers a clean, sophisticated aesthetic. To maximize its impact, a simple, uncluttered patio design complements the striking visual of the flowing water.
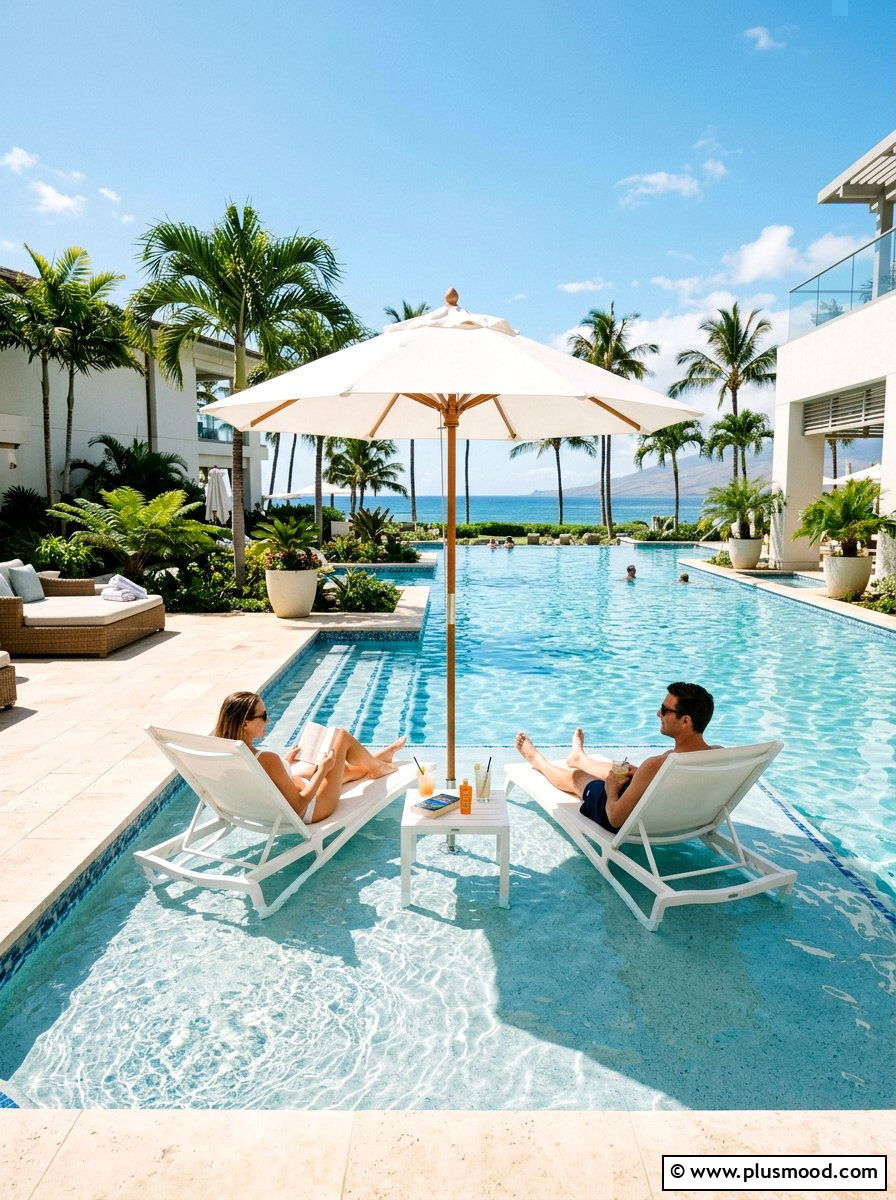
    25. Pool Baja Shelf

    Pool Baja Shelf

    A pool Baja shelf is a broad, shallow platform built into the pool, offering a comfortable space for relaxation. It serves as an excellent spot to set lounge chairs partially underwater, blending comfort with refreshing coolness. This gentle depth also makes it a safe and enjoyable play area for children, provided adults are nearby. Contemporary designs often integrate the shelf seamlessly with matching tile or plaster to create a cohesive, stylish appearance. Incorporating an umbrella holder into the shelf enhances comfort by providing shade while you unwind in the water.
    Conclusion

    Crafting a contemporary pool space is an opportunity to blend your personal style with the natural world, transforming your backyard into a serene retreat. Embracing sleek designs or organic textures allows you to create a seamless flow between your home and outdoor oasis, where every element works together to evoke peace and sophistication. Thoughtful choices in materials and landscaping can turn an ordinary pool area into a captivating haven that invites relaxation and admiration.

    Let this vision inspire you to reimagine your outdoor living space as a reflection of your modern aesthetic and love for nature. When functionality meets enduring elegance, your pool area becomes more than just a place to swim—it becomes a sanctuary that enriches your lifestyle and offers lasting joy for years to come.

  • 25 Stylish Courtyard Pool Designs to Elevate Your Outdoor Space

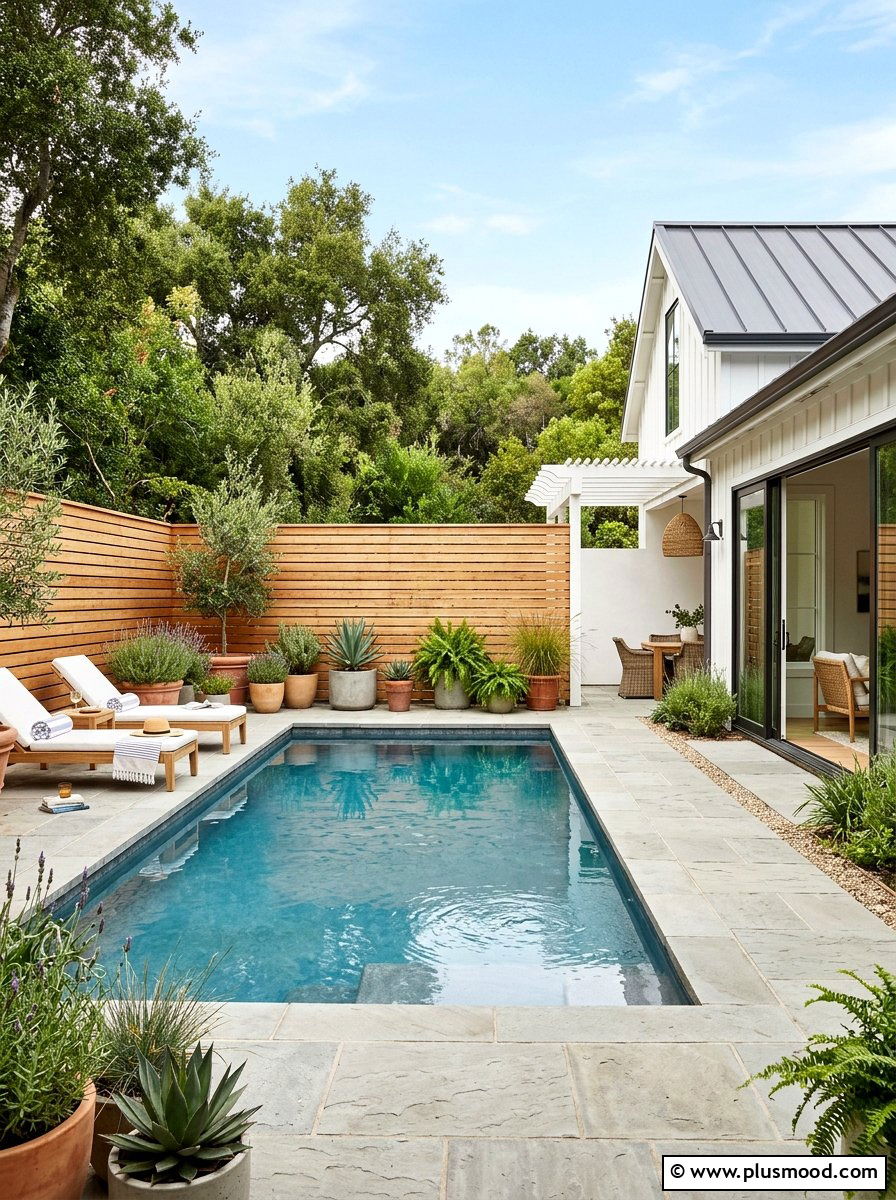
    Transforming your courtyard into a serene oasis begins with thoughtful pool landscaping that elevates both beauty and functionality. Whether you’re aiming for a tranquil retreat or a vibrant gathering spot, the right design choices can make your small outdoor space feel expansive, inviting, and uniquely yours. Courtyard pool landscaping offers the perfect blend of natural elements and stylish features, creating an environment where you can unwind, entertain, and enjoy a slice of paradise right at home.
    In this article, you’ll discover 25 inspiring courtyard pool landscaping ideas tailored to various tastes and spaces. From lush greenery and sleek modern accents to cozy lighting and artistic stonework, these concepts will help you envision and craft a poolside haven that complements your lifestyle. Dive in to explore creative ways to maximize your courtyard’s potential and bring your dream poolscape to life with flair and finesse.

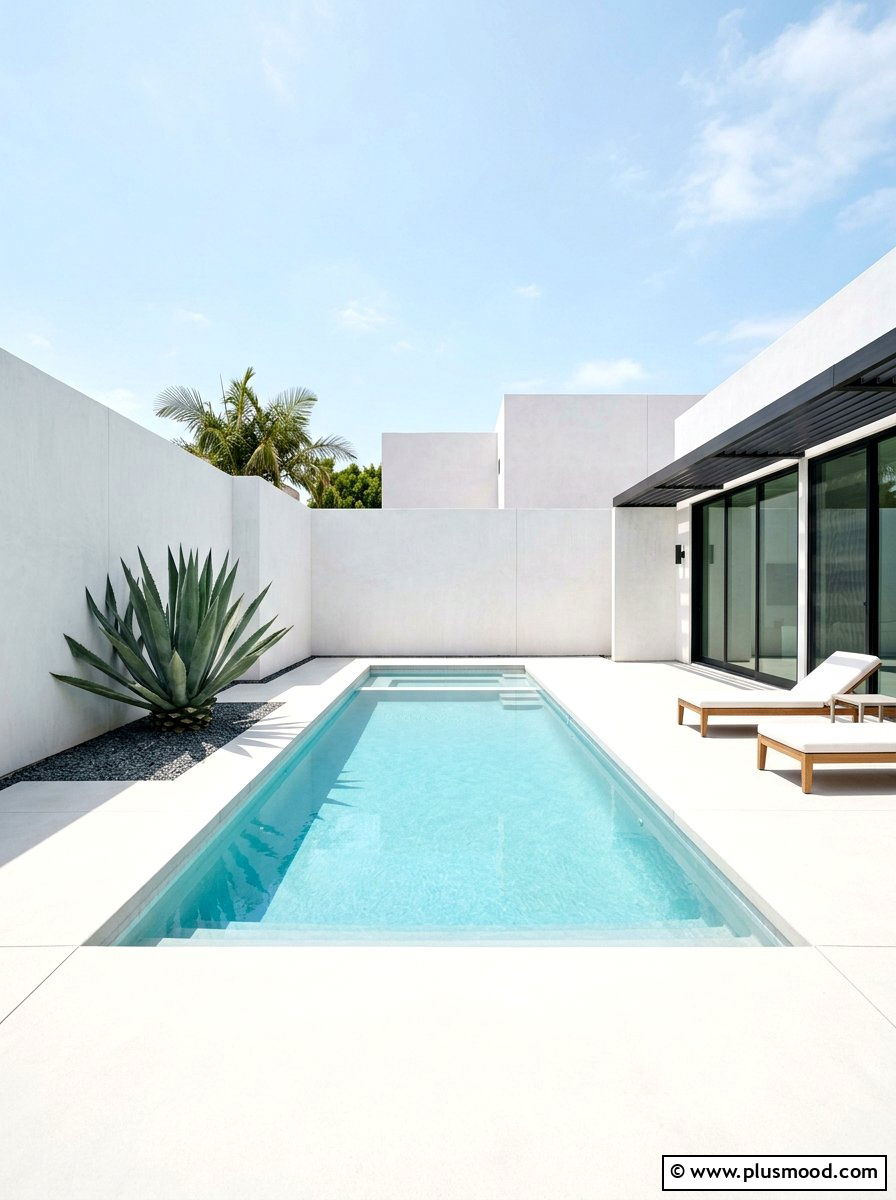
    1. Sleek and Serene Pool Design

    Sleek and Serene Pool Design

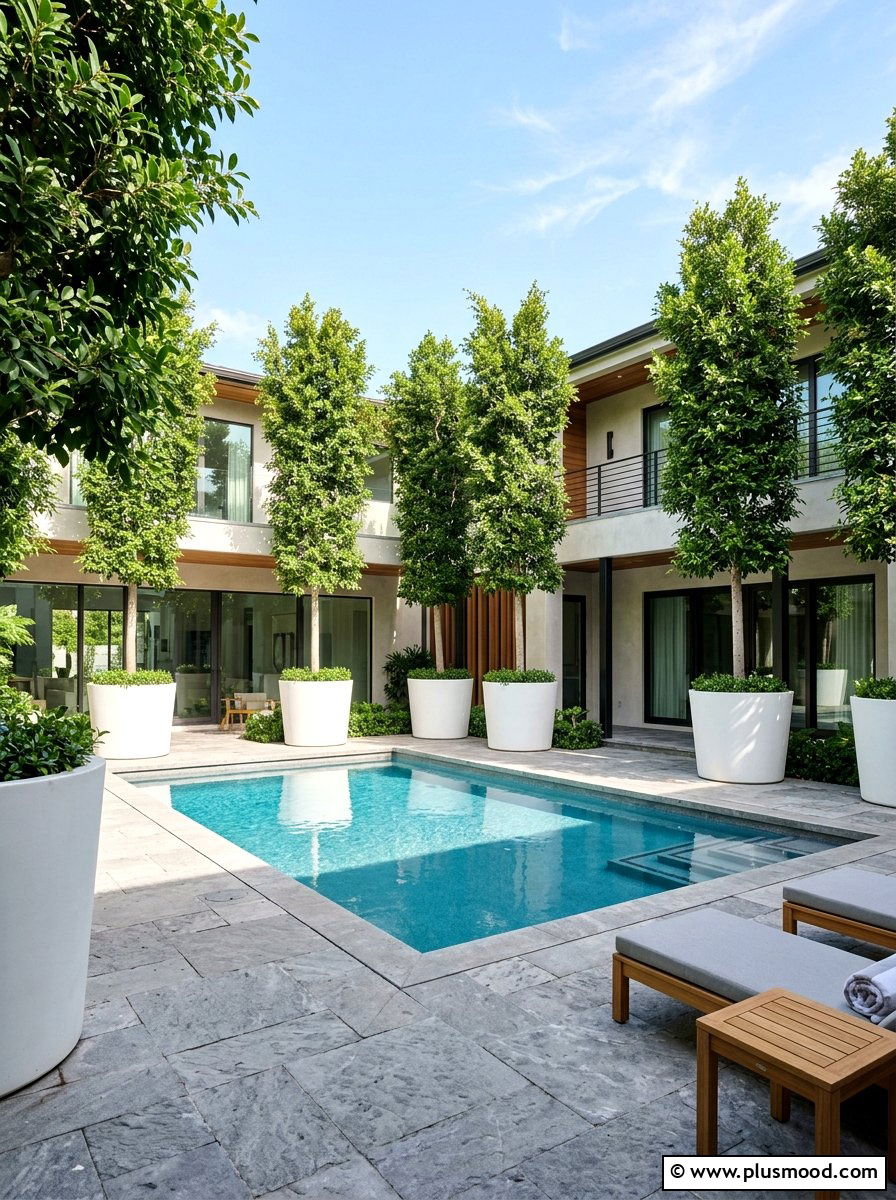
    Embracing simplicity, a sleek and serene pool area highlights clean geometry, subdued hues, and premium finishes. This approach works wonderfully in compact outdoor spaces, ensuring the area feels open and airy rather than cramped. Opting for a restrained color scheme—think soft whites, slate grays, and deep charcoals—sets a tranquil and elegant tone. Instead of crowding with numerous small plants, select a few bold, sculptural specimens to maintain balance and visual interest. Choose streamlined, practical furniture that complements the minimalist vibe without overwhelming the surroundings. This design philosophy allows the pool’s natural beauty to take center stage, offering a calm retreat that aligns perfectly with modern architectural tastes. The result is a sophisticated sanctuary that invites relaxation and quiet reflection.

    Key Design Elements

    • Stick to a neutral color scheme to enhance a calm atmosphere.
    • Incorporate a few large, striking plants rather than many smaller ones.
    • Choose simple, functional furniture with clean lines and minimal decoration.

    Pro Tip: Pro Tip: Use textured materials like smooth stone or matte finishes to add subtle depth without cluttering the space.

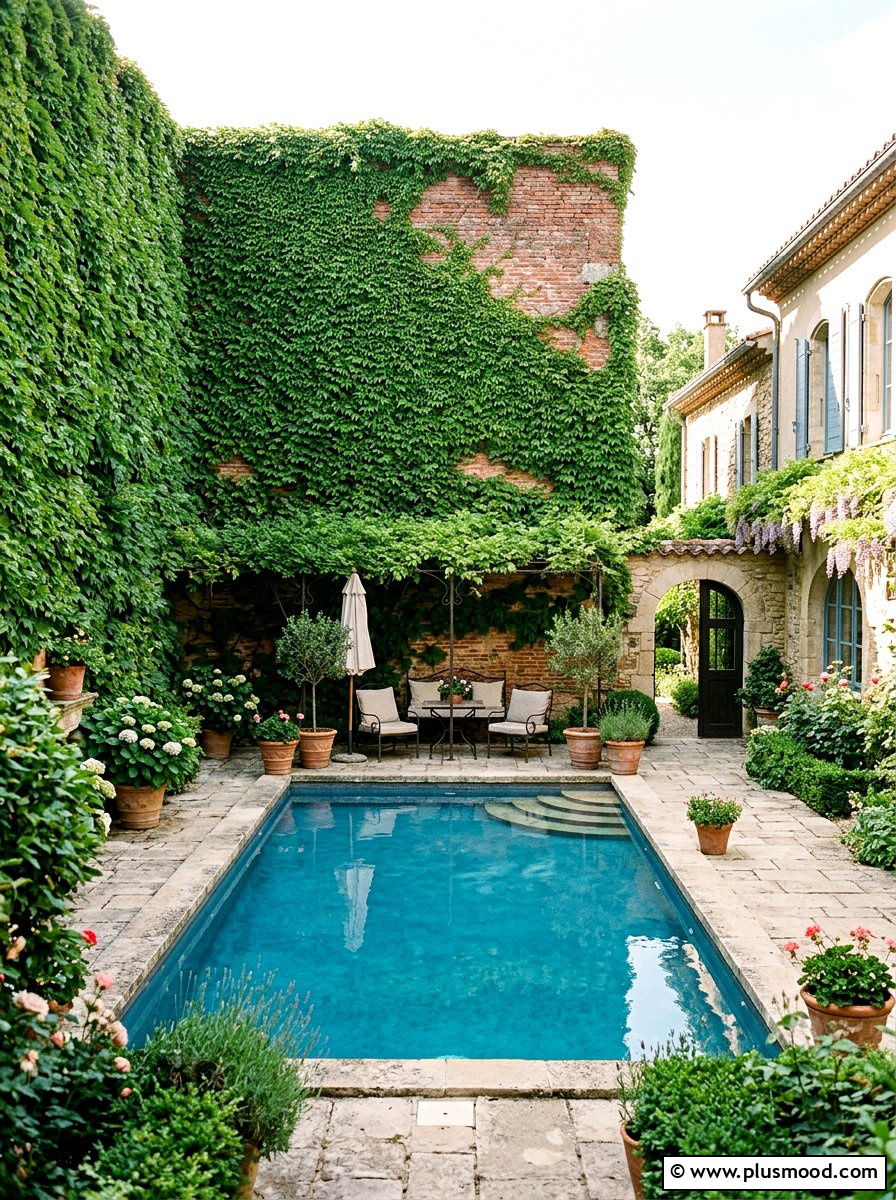
    2. Enchanting Ivy-Covered Walls for Your Poolside Oasis

    Enchanting Ivy-Covered Walls for Your Poolside Oasis

    Incorporating climbing ivy into your poolside landscaping creates a timeless and enchanting atmosphere, perfect for adding charm and character to the area. Ivy spreads rapidly, effortlessly blanketing wood or brick surfaces with rich greenery, transforming ordinary walls into inviting natural features. This leafy coverage not only enhances the aesthetic appeal but also acts as a natural sound absorber, fostering a more peaceful and serene pool environment. Whether you guide the ivy to form elegant shapes or allow it to grow freely for a lush, cottage garden vibe, it adapts beautifully to your design preferences. Its minimal space requirements make it ideal for smaller patios or courtyards where maximizing area is essential. The vibrant green foliage pairs beautifully with the blue tones of the pool and serves as a striking contrast to light-colored outdoor furnishings. Best of all, this greenery provides a cost-effective way to elevate your pool’s visual impact dramatically.

    Key Design Elements

    • Train ivy along trellises or wires to customize growth patterns.
    • Ensure proper pruning to maintain healthy, dense foliage.
    • Choose shade-tolerant ivy varieties for optimal growth near pools.

    Pro Tip: Pro Tip: Regularly inspect your ivy for pests and trim back overgrowth to keep your pool area safe and visually appealing.

    3. Chic Succulent Display for Your Poolside Retreat

    Chic Succulent Display for Your Poolside Retreat

    Creating a succulent arrangement in pots is an excellent way to bring elegance to poolside courtyards while requiring very little maintenance. Succulents offer a stunning variety of shapes, textures, and hues, ranging from gentle pastels to rich purples and vibrant greens. Arranging them in matching containers can give the space an artful, gallery-like ambiance along pool edges or steps. These resilient plants thrive in warm conditions and can easily withstand heat from nearby stone surfaces without losing their charm. Their unique, sculptural appearance lends a contemporary and refined vibe, complementing minimalist or desert-inspired outdoor designs. Plus, their portability allows you to effortlessly rearrange or replace them, keeping your pool area feeling fresh and inviting throughout the year.

    Key Design Elements

    • Choose uniform pots to create a cohesive, stylish look around your pool.
    • Select a variety of succulent species for visual interest and color contrast.
    • Place pots in spots with plenty of sunlight, but protect from intense midday heat.

    Pro Tip: Pro Tip: Incorporate a layer of decorative gravel on top of the soil to enhance drainage and add texture to your succulent pots.

    4. Luxurious Timber Pool Decking

    Luxurious Timber Pool Decking

    Crafting your pool area with high-quality hardwoods such as Ipe or Teak infuses the space with a warm, inviting ambiance. This natural material offers a gentle, comfortable feel underfoot, and its surface tends to remain cooler compared to many stone alternatives. The deep, earthy hues of hardwood beautifully complement the surrounding water and lush greenery, enhancing the overall visual appeal. Expertly designed wooden decks can be aligned perfectly with indoor flooring, providing a smooth, uninterrupted flow from inside the home to the outdoor oasis. Additionally, timber decking can incorporate discreet drainage solutions, ensuring the surface stays dry and slip-resistant. Although periodic treatment is needed to preserve its vibrant color and durability, the luxurious appearance and cozy atmosphere it brings are well worth the upkeep.

    Key Design Elements

    • Choose dense hardwoods like Ipe or Teak for durability and rich color.
    • Install drainage channels beneath the deck for a safer, drier surface.
    • Apply protective oil treatments regularly to maintain wood’s natural beauty.

    Pro Tip: Pro Tip: Seal your hardwood deck annually to extend its lifespan and enhance resistance to moisture and UV damage.

    5. Serene Stone Sanctuary

    Serene Stone Sanctuary

    Transform your poolside into a tranquil haven with a serene stone sanctuary inspired by classic Japanese aesthetics. This approach highlights the artful placement of smooth boulders, meticulously raked gravel patterns, and select evergreen plants to evoke calm and mindfulness. The minimalist design offers a peaceful counterbalance to the lively atmosphere of the swimming area, inviting quiet contemplation. Ideal for shaded spots where traditional greenery may not thrive, this landscaping option requires minimal upkeep since it avoids frequent watering and trimming. Incorporating elements like a bamboo water feature or a subtle stone basin can elevate the sense of calm. This elegant arrangement turns your outdoor space into a soothing retreat away from everyday hustle.

    Key Design Elements

    • Position large stones strategically to create natural focal points and balance.
    • Use fine gravel or sand to form gentle, raked patterns that promote relaxation.
    • Select hardy evergreen plants that require little care and thrive in shade.

    Pro Tip: Pro Tip: Incorporate subtle water elements like a bamboo spout to amplify the peaceful ambiance without adding maintenance complexity.

    6. Elevate Your Backyard with a Stunning Pool Waterfall

    Elevate Your Backyard with a Stunning Pool Waterfall

    Adding a waterfall to your pool area brings an inviting blend of visual charm and soothing sounds that enhance your outdoor oasis. The tranquil rush of water can mask unwanted noises from nearby streets, offering a more private and serene environment. Whether you prefer a sleek, contemporary water curtain or a naturalistic cascade over stones, waterfalls add a touch of elegance and relaxation. Beyond aesthetics, these features improve water circulation, promoting a cleaner and healthier pool. Space-saving designs allow integration into retaining walls or elevated planters, ideal for compact yards. Illuminating the waterfall at night transforms your poolside into a captivating centerpiece, enriching your entire outdoor living space.

    Key Design Elements

    • Select a waterfall style that complements your pool’s design, from modern to rustic.
    • Incorporate LED lighting to highlight the water feature after dark.
    • Install the waterfall in a way that enhances water flow for better pool circulation.

    Pro Tip: Pro Tip: Use natural stone materials around your waterfall to seamlessly blend it into your landscaping.

    7. Evergreen Elegance with Artificial Turf Borders

    Evergreen Elegance with Artificial Turf Borders

    Incorporating artificial turf around your pool offers a consistently lush, vibrant appearance that stays flawless year-round with minimal upkeep. Unlike natural grass, which can struggle in shaded courtyards or suffer from chlorine exposure, synthetic grass remains resilient and visually appealing. This low-maintenance option eliminates the need for mowing, watering, or fertilizing, making it an ideal choice for busy homeowners. Its soft texture provides a comfortable, slip-resistant surface for bare feet right next to the pool. The vivid green turf beautifully complements the cool tones of the pool water, adding a refreshing pop of color. Strategically placing artificial grass around pool edges or between stone tiles can soften hardscapes and introduce a natural element to urban outdoor spaces.

    Key Design Elements

    • Choose high-quality turf with UV protection to prevent fading under sunlight.
    • Install synthetic grass with proper drainage to avoid water pooling near the pool.
    • Combine turf with stone or pavers to create visually appealing contrast and texture.

    Pro Tip: Pro Tip: Select turf designed specifically for outdoor use to ensure durability and a natural look even in high-traffic pool areas.

    8. Elevate Your Pool Area with Authentic Stone Pavers

    Elevate Your Pool Area with Authentic Stone Pavers

    Incorporating natural stone pavers such as granite, slate, or flagstone adds timeless elegance to your poolside setting. These stones offer a warm, earthy aesthetic that blends seamlessly with outdoor environments, contrasting beautifully with synthetic materials. Each stone’s unique texture and hue create a personalized and distinctive appearance for your pool area. Beyond their visual appeal, natural stone pavers are exceptionally sturdy, handling frequent use and pool chemicals without losing charm. Opting for larger pavers can visually expand a limited courtyard by minimizing visible joints. They also provide a stable foundation for comfortable seating and dining arrangements, turning your poolside into a versatile retreat. Choosing premium stone means investing in a poolscape that remains both stunning and functional for years to come.

    Key Design Elements

    • Select large-format stones to create an illusion of more space in compact areas.
    • Seal stone pavers regularly to protect them from staining and pool chemicals.
    • Arrange pavers with slight spacing to allow for drainage and prevent water pooling.

    Pro Tip: Pro Tip: Combine different stone types and sizes for a more dynamic and natural pool deck design.

    9. Brighten Your Poolside with a White Stone Edge

    Brighten Your Poolside with a White Stone Edge

    Creating a border around your pool using white stones offers a clean and refreshing visual that instantly uplifts the surrounding area. These polished pebbles catch sunlight beautifully, illuminating shaded spots and enhancing the water’s clarity. Beyond aesthetics, they provide excellent drainage by allowing rainwater to filter naturally into the ground, preventing puddling and runoff. This natural barrier also suppresses unwanted weeds, helping maintain a neat appearance without frequent upkeep. The crisp white stones provide a striking contrast against lush greenery or dark paving, lending a contemporary and polished vibe to your outdoor space. Whether filling tricky corners or outlining the entire pool deck, this approach brings an elegant and cohesive finish. It’s a cost-effective method to elevate the look and function of compact backyard retreats.

    Key Design Elements

    • Choose smooth, uniformly sized white stones for a consistent and polished look.
    • Install a weed barrier fabric underneath pebbles to maximize weed prevention.
    • Combine with native plants to enhance natural drainage and complement the stone border.

    Pro Tip: Pro Tip: Use edging materials like metal or plastic to keep the pebble border neatly contained and prevent stones from spilling onto the pool deck.

    10. Elevate Your Poolside Ambiance with Towering Container Trees

    Elevate Your Poolside Ambiance with Towering Container Trees

    Incorporating tall trees in large pots is an excellent strategy to introduce height and privacy around a courtyard pool without committing to permanent planting. These sizable containers allow you to strategically position greenery to provide shade or create natural barriers where needed. Popular choices like citrus trees, ficus, or slender palms thrive in containers and offer the flexibility to be relocated if you decide to refresh your poolside arrangement. Beyond their greenery, the pots themselves contribute to the aesthetic by adding bursts of color or unique textures to your pool deck corners. This method is especially advantageous when your courtyard sits atop a solid base where traditional planting isn’t an option. Container trees help scale down the feeling of a dense forest, making your backyard feel intimate and inviting while crafting a private, leafy haven around your pool.

    Key Design Elements

    • Choose tall, narrow tree varieties suited for container growth to maximize vertical impact.
    • Select decorative pots that complement your outdoor decor and withstand weather exposure.
    • Position pots strategically to create shade and privacy without obstructing pool access.

    Pro Tip: Pro Tip: Rotate your potted trees periodically to ensure balanced sunlight exposure and even growth.

    11. Elevated Step Stones: A Stunning Pool Pathway

    Elevated Step Stones: A Stunning Pool Pathway

    Elevated step stones create a captivating visual effect by hovering just above the water’s surface, offering a unique and elegant way to navigate your pool area. These large, flat pavers give the illusion of walking on water, adding charm and a contemporary touch to your outdoor space. They provide convenient access to various sections of the pool or courtyard without the need to walk around, promoting fluid movement throughout the area. This design seamlessly connects seating zones to the pool, enhancing the flow between indoor and outdoor living spaces. When combined with sleek, minimalist landscaping, elevated steps emphasize clean architectural lines and create a sophisticated ambiance. Beyond their practicality, these floating stones serve as a striking focal point and spark conversation among visitors. This distinctive feature transforms even a modest pool into a chic, designer-worthy retreat.

    Key Design Elements

    • Position pavers just above the water for a floating illusion.
    • Use neutral tones to complement minimalist garden designs.
    • Ensure stones are securely anchored for safety and durability.

    Pro Tip: Pro Tip: Incorporate underwater lighting beneath the steps to enhance the floating effect and add nighttime ambiance.

    12. Elevated Garden Beds for Dynamic Poolside Appeal

    Elevated Garden Beds for Dynamic Poolside Appeal

    Incorporating elevated garden beds around a pool area adds dimension and vibrant greenery to an otherwise flat space. Raising plants closer to eye level enhances visual interest and creates a more engaging outdoor oasis. These beds can be crafted from materials like stone, brick, or wood that complement your pool surroundings for a unified aesthetic. Besides beautifying the space, they help keep soil and mulch contained, reducing debris in the water after storms. Elevated garden beds also offer improved soil quality and drainage, ideal for cultivating a variety of plants that may struggle in native soil conditions. When built to the right height, their walls can double as comfortable seating, blending function and style seamlessly along the pool’s edge.

    Key Design Elements

    • Choose materials for beds that harmonize with your pool deck for a polished look.
    • Build beds with adequate height to serve as casual seating around the pool.
    • Use raised beds to control soil composition for healthier, more vibrant plants.

    Pro Tip: Pro Tip: Incorporate a mix of textures and heights in your raised beds to create a visually captivating poolside garden.

    13. Lush Tropical Greenery for Your Poolside Oasis

    Lush Tropical Greenery for Your Poolside Oasis

    Incorporating tropical plants around your pool instantly transforms your outdoor space into a serene getaway reminiscent of exotic resorts. Plants with broad leaves, such as hibiscus, bird of paradise, and various palm species, add bold textures and a sense of grandeur that smaller greenery simply can’t achieve. These plants flourish in the warm, humid environment typical near swimming pools, offering striking foliage colors that beautifully complement the water’s blue tones. Grouping tropical plants together not only frames your pool area elegantly but also cleverly conceals pool equipment and structural features. Additionally, their dense foliage provides welcome shade, making poolside relaxation more comfortable during intense sunlight. The vibrant blossoms and dramatic leaves help create an inviting atmosphere that captivates year-round.

    Key Design Elements

    • Choose large-leafed tropical plants to enhance visual impact and scale around your pool.
    • Cluster plants strategically to mask pool machinery and define the pool perimeter.
    • Ensure tropical species selected are suited for humid, sun-exposed environments near water.

    Pro Tip: Pro Tip: Incorporate a mix of flowering and foliage tropical plants to maintain color and texture throughout every season.

    14. Seamless Seating Solutions for Poolside Comfort

    Seamless Seating Solutions for Poolside Comfort

    Incorporating built-in seating around your pool area is an excellent way to optimize limited space while enhancing functionality. These permanent benches, crafted from materials such as wood or concrete, can be cleverly integrated into surrounding walls or planter edges. This design keeps the central patio area open, ensuring plenty of room for movement and activities. Adding weather-resistant, vibrant cushions can elevate both comfort and aesthetic appeal. Additionally, many built-in seats offer hidden storage underneath, perfect for stashing pool accessories and cleaning tools. This approach creates an inviting nook for guests to lounge and enjoy the water’s edge, transforming your outdoor space into a cozy and practical retreat.

    Key Design Elements

    • Build benches along pool borders to maximize floor space.
    • Use durable materials like concrete or treated wood for longevity.
    • Incorporate storage compartments beneath seating to reduce clutter.

    Pro Tip: Pro Tip: Choose cushions with quick-dry, fade-resistant fabrics to keep your built-in seating looking fresh season after season.

    15. Sleek Pergola Oasis by the Pool

    Sleek Pergola Oasis by the Pool

    Incorporating a sleek pergola near your pool instantly elevates your outdoor living area by providing much-needed shade and acting as a captivating design centerpiece. Crafted from modern materials like aluminum or natural wood, these pergolas showcase clean, streamlined designs that complement contemporary landscapes. They create a clearly defined area perfect for relaxing or enjoying meals al fresco, bringing a sense of order and intention to your backyard. Enhancements such as retractable canopies or lush climbing plants offer additional sun protection and natural beauty. Adding lightweight outdoor curtains can create a cozy, private retreat while softening the structure’s lines. As evening falls, string lights or a stylish hanging fixture transform the space into a warm and inviting spot for gatherings, blending comfort with modern elegance.

    Key Design Elements

    • Choose durable, weather-resistant materials like powder-coated aluminum for longevity.
    • Incorporate retractable shades or fast-growing vines to adjust sunlight exposure as needed.
    • Install soft outdoor lighting to extend usability into the evening hours.

    Pro Tip: Pro Tip: Opt for neutral-colored fabrics and lighting to keep the pergola feeling airy and versatile throughout the seasons.

    16. Graceful Grasses: Enhancing Your Poolside Oasis

    Graceful Grasses: Enhancing Your Poolside Oasis

    Adding ornamental grasses around your pool area introduces a dynamic flow and gentle texture that contrasts nicely with the pool’s clean lines. Varieties such as fountain grass, maiden grass, and blue fescue dance subtly with the breeze, fostering a serene atmosphere. These grasses are hardy and require minimal upkeep, easily withstanding occasional splashes from pool water. They work wonderfully to soften the spaces between larger plants or to define pathways with a natural, inviting edge. In the fall, many of these grasses transform into rich shades of amber and copper, adding seasonal charm. Their vertical growth offers a sense of privacy while still maintaining an open, airy feel. By integrating ornamental grasses, you bring a touch of nature’s elegance and calmness to your backyard retreat.

    Key Design Elements

    • Choose drought-tolerant ornamental grasses for easy care and sustainability.
    • Plant grasses in clusters to create a fuller, more naturalistic look.
    • Use grasses to frame walkways or pool edges for a soft, inviting boundary.

    Pro Tip: Pro Tip: Position ornamental grasses where they can catch the wind to maximize their graceful movement and enhance your poolside ambiance.

    17. Elegant and Durable Travertine Pool Surround

    Elegant and Durable Travertine Pool Surround

    Opting for a travertine pool surround is an excellent choice for anyone seeking a blend of resilience and natural elegance. This limestone variety stands out for its ability to stay comfortably cool, even during scorching afternoons, making it ideal for poolside comfort. Its textured surface not only enhances safety by reducing slip risks but also adds a tasteful, organic feel to your outdoor space. Available in a spectrum of warm, earthy shades, travertine effortlessly complements both traditional and modern home designs. Each piece features unique patterns and hues, giving your decking a distinct, upscale look that surpasses plain concrete. Beyond its visual appeal, travertine ages beautifully over time and demands minimal upkeep, making it a smart, long-lasting investment.

    Key Design Elements

    • Select travertine tiles with a honed finish for optimal slip resistance.
    • Combine different shades to create a natural mosaic effect around your pool.
    • Seal the stone periodically to protect against staining and enhance longevity.

    Pro Tip: Pro Tip: Installing travertine with proper drainage and spacing will prevent water pooling and prolong the life of your pool deck.

    18. Timeless Elegance with Layered Stone Walls

    Timeless Elegance with Layered Stone Walls

    Incorporating a layered stone wall into your pool area introduces a natural, enduring charm that enhances the overall ambiance. These walls are crafted from slender pieces of natural stone carefully arranged to create a captivating texture that plays beautifully with light and shadow. Ideal for use as a retaining structure, a striking water feature backdrop, or a cozy outdoor fireplace surround, layered stone walls seamlessly complement various plants and decking styles with their earthy hues. This approach exudes a sophisticated, custom-crafted feel while grounding the space in nature’s beauty. The durability of natural stone ensures your installation remains vibrant and intact through the years, standing strong against wear and fading. By anchoring your landscaping design, a stone wall offers both visual stability and a sense of refuge, making it a timeless addition to your outdoor space.

    Key Design Elements

    • Select stones with varied textures and shades for added visual interest.
    • Incorporate the stone wall near water features to highlight its natural beauty.
    • Seal the stone surface periodically to protect against weathering and maintain vibrancy.

    Pro Tip: Pro Tip: Use stacked stone walls to create defined zones within your pool area, enhancing both function and style.

    19. Sun-Kissed Mediterranean Pool Oasis

    Sun-Kissed Mediterranean Pool Oasis

    Designing a Mediterranean-inspired pool area calls for elements that capture the warmth and charm of Southern Europe’s coastal retreats. Incorporate earthy terracotta accents paired with crisp white walls to create a bright, inviting atmosphere reminiscent of the Greek isles or Italian coast. Introducing vibrant blue touches adds a lively splash of color that complements the serene water. Surround the pool with fragrant, drought-resistant plants such as lavender, rosemary, and olive trees housed in rustic clay pots to bring authentic Mediterranean flair and soothing aromas. This style emphasizes natural light and understated elegance, often featuring details like curved archways or delicate wrought ironwork to evoke the feeling of a timeless villa courtyard. The result is an idyllic, peaceful setting perfect for unwinding or hosting alfresco gatherings.

    Key Design Elements

    • Use terracotta tiles and whitewashed surfaces to recreate Mediterranean architecture.
    • Plant aromatic herbs and olive trees in terracotta pots for natural fragrance and texture.
    • Add cobalt blue accents through cushions, tiles, or decor to enhance coastal vibes.

    Pro Tip: Pro Tip: Position your pool to maximize sunlight exposure, enhancing the sparkling clarity and warmth characteristic of Mediterranean retreats.

    20. Luminous Blue Mosaic Accents for Stunning Poolscapes

    Luminous Blue Mosaic Accents for Stunning Poolscapes

    Incorporating blue mosaic tiles into your pool design adds a timeless elegance and a captivating sparkle to the water’s surface. These tiny glass or ceramic tiles catch and reflect sunlight beautifully, creating a dynamic shimmer that enhances the pool’s visual appeal. By blending various shades of blue, you can craft a unique gradient or artistic pattern that complements your outdoor space perfectly. Beyond their aesthetic charm, mosaic tiles are highly durable, resistant to algae buildup, and simple to maintain, ensuring your pool stays pristine. Extending the tilework above the waterline onto surrounding walls can unify your design and elevate the overall ambiance. This approach transforms even compact pools into glistening focal points, offering a luxurious and inviting retreat that stands the test of time.

    Key Design Elements

    • Combine multiple blue tones to create a personalized gradient or design.
    • Use glass mosaic tiles for enhanced light reflection and durability.
    • Continue tile patterns beyond the pool edge for a seamless look.

    Pro Tip: Pro Tip: Seal your mosaic grout regularly to prevent discoloration and keep your pool sparkling longer.

    21. Transform Your Pool Area with Stunning LED Lighting

    Transform Your Pool Area with Stunning LED Lighting

    Incorporating LED lighting into your pool landscape elevates the ambiance and usability of your outdoor space well past sunset. These eco-friendly lights can be submerged within the pool to create a shimmering water effect or arranged around the garden to accentuate trees, pathways, and other features. With customizable color settings, you can easily switch from calming whites for intimate evenings to lively colors for celebrations. Highlighting architectural elements like stonework or towering palms adds visual interest and depth to smaller yards. Thoughtful lighting enhances safety by clearly defining pool edges and steps, minimizing nighttime hazards. Overall, LED lighting enhances the atmosphere, making your poolside an inviting retreat at any hour.

    Key Design Elements

    • Install waterproof LED fixtures inside the pool for radiant water illumination.
    • Use colored LED lights around landscaping to create mood-enhancing effects.
    • Position uplights to emphasize structural elements and tall plants.

    Pro Tip: Pro Tip: Opt for dimmable LED lights to easily adjust brightness and create the perfect evening vibe.

    22. Elevate Your Poolside Privacy with Bamboo Screens

    Elevate Your Poolside Privacy with Bamboo Screens

    Incorporating bamboo screens around your pool area is a sustainable and elegant solution for creating privacy while introducing natural textures. Bamboo’s rapid growth and remarkable durability make it a perfect choice for outdoor barriers that resist weathering. Its slender, vertical stalks naturally guide the gaze upward, giving smaller spaces a more open and airy feel. The soft hues of bamboo—ranging from pale beige to fresh green—blend seamlessly with lush landscaping and shimmering pool water. Lightweight and versatile, bamboo panels can be mounted onto existing structures or stand alone as focal points. This approach not only fosters a tranquil, spa-like atmosphere but also complements both modern and tropical outdoor aesthetics without breaking the bank.

    Key Design Elements

    • Select treated bamboo panels for enhanced weather resistance and longevity.
    • Install panels with secure fasteners to maintain stability during windy conditions.
    • Pair bamboo screens with leafy plants to boost privacy and enrich the natural vibe.

    Pro Tip: Pro Tip: Seal your bamboo panels annually to preserve their vibrant color and protect them from moisture damage.

    23. Lush Living Walls for Poolside Privacy

    Lush Living Walls for Poolside Privacy

    Transform limited courtyard space by incorporating a vibrant vertical garden wall near your pool area. This innovative approach maximizes greenery without sacrificing valuable floor space, creating an inviting and secluded oasis. Choose an assortment of moisture-loving plants such as ferns, philodendrons, and trailing vines to craft a rich, textured tapestry that breathes life into any dull surface. Beyond aesthetics, this verdant wall naturally purifies the air and helps lower the temperature through the cooling effect of transpiration. It effortlessly converts plain fences or bare walls into eye-catching highlights of your outdoor design. When paired with a built-in irrigation system, upkeep becomes streamlined, enabling your garden wall to thrive with minimal effort. Overall, this solution fosters a serene, private retreat reminiscent of a hidden tropical haven.

    Key Design Elements

    • Select plants suited for high humidity and shade to ensure lush growth.
    • Integrate an automatic watering system to maintain consistent moisture levels.
    • Regularly prune and rotate plants to maintain density and visual interest.

    Pro Tip: Pro Tip: Install a drip irrigation system with a timer to keep your vertical garden healthy without daily attention.

    24. Elegant Wooden Privacy Panels for Your Pool Retreat

    Elegant Wooden Privacy Panels for Your Pool Retreat

    In neighborhoods where homes sit close together, incorporating wooden privacy panels around your courtyard pool can transform your space into a secluded oasis. These panels act as natural barriers, shielding your pool area from prying eyes while still welcoming fresh air and dappled sunlight. Choosing rich, warm woods such as cedar, teak, or ipe introduces a cozy, organic touch that complements the sleek surfaces of pools and patios. Whether installed with horizontal slats for a contemporary flair or vertical ones to enhance verticality, these screens bring style and function together seamlessly. They also offer a perfect framework for climbing vines or hanging charming lights, adding personality to your outdoor space. A thoughtfully designed wooden panel not only enhances privacy but also creates an intimate atmosphere reminiscent of an outdoor sanctuary.

    Key Design Elements

    • Opt for durable, weather-resistant woods like cedar or teak to ensure longevity.
    • Install panels with adjustable spacing to balance privacy and airflow.
    • Incorporate climbing plants to soften the look and add natural beauty.

    Pro Tip: Pro Tip: Treat your wooden screens with a protective sealant annually to maintain their vibrant color and prevent weather damage.

    25. Striking Desert-Inspired Poolscapes

    Striking Desert-Inspired Poolscapes

    Creating a poolside oasis with desert-inspired landscaping is perfect for dry regions or anyone aiming for a bold, architectural aesthetic. This approach highlights hardy, water-wise plants such as agave, yucca, and various cacti, which flourish with minimal irrigation. Their unique, sculptural forms serve as natural art, especially when set against simple, neutral backdrops. Incorporating decomposed granite or sandy-toned gravel underfoot helps reinforce the warm, southwestern ambiance. This landscaping style demands very little upkeep and stands up well to the intense heat often experienced in enclosed outdoor spaces. The vibrant contrast between fiery-hued foliage and refreshing pool water delivers a stunning visual harmony. It’s a contemporary, sustainable method to elevate your pool area while honoring local environmental conditions.

    Key Design Elements

    • Choose drought-resistant plants that add texture and height around the pool.
    • Use natural stone or gravel ground covers to enhance the desert aesthetic.
    • Design with heat-tolerant materials to ensure long-lasting beauty in hot climates.

    Pro Tip: Pro Tip: Incorporate subtle lighting to highlight the unique shapes of desert plants and create a captivating nighttime poolscape.

    Conclusion

    Transforming your courtyard pool area into a stunning retreat is truly within reach when you explore creative landscaping ideas. Whether you’re drawn to lush greenery, elegant stone accents, or cozy seating nooks, the right design choices can turn your space into a personal oasis that refreshes both body and soul. Don’t hesitate to experiment with textures, colors, and lighting to create a harmonious environment that reflects your unique style.

    Now is the perfect time to roll up your sleeves and bring your vision to life—each thoughtful detail adds to the overall magic of your courtyard sanctuary. Embrace the possibilities, and watch how a thoughtfully landscaped pool area can elevate your home’s ambiance and offer endless moments of relaxation. Your dream oasis awaits just beyond your doorstep!

  • Creative Pool Landscaping Solutions to Maximize Space in Compact Backyards

    Even the most modest backyard can become an inviting oasis with thoughtful pool landscaping designed specifically for small spaces. Crafting a pool area on a limited lot demands careful planning that harmonizes practicality with stylish design, allowing you to enjoy a cool escape without feeling cramped. By incorporating vertical gardens, versatile furnishings, and carefully selected materials, a compact outdoor area can be transformed into a sophisticated and functional retreat.

    Whether you prefer a modern plunge pool or an intimate cocktail-style pool, the surrounding landscape plays a crucial role in defining the ambiance. Clever use of greenery and hardscape elements can open up the space, creating a sense of airiness and flow even in tight quarters. This overview delves into innovative techniques to optimize your small backyard, ensuring it reflects your unique taste while making the most of every inch available.

    1. Elevated Pool Surroundings for Uneven Landscapes

    Elevated Pool Surroundings for Uneven Landscapes

    When dealing with sloped yards or restricted digging areas, a semi-inground pool offers a practical swimming solution. Enhancing its appeal with a tailored deck made from natural wood or durable composites not only conceals the pool’s sides but also establishes a smooth surface perfect for relaxing or entertaining. Incorporating tiered decking can separate spaces for sunbathing and dining, creating a dynamic outdoor living area. Wide, shallow steps can double as extra seating, fostering a welcoming atmosphere. This design cleverly mimics the elegance of a fully inground pool while keeping installation costs and complexity lower. By thoughtfully integrating the decking, the pool becomes both a functional feature and an attractive focal point, harmonizing with the surrounding landscape.

    Key Design Elements

    • Choose weather-resistant decking materials to ensure long-lasting beauty and safety.
    • Design multi-level decks to create distinct zones for different activities around the pool.
    • Add broad, gentle steps to enhance accessibility and provide informal seating options.

    Pro Tip: Incorporate built-in lighting under the deck edges to highlight the pool area and improve nighttime ambiance.

    2. Elevate Your Poolside Ambiance with Thoughtful Lighting

    Elevate Your Poolside Ambiance with Thoughtful Lighting

    Lighting plays a crucial role in transforming a compact pool area into an inviting nighttime retreat. Integrate soft, warm-toned LED fixtures beneath seating areas or steps to create subtle illumination while adding functional charm. Accent uplights aimed at surrounding foliage or architectural details give depth and interest after dark. Incorporating waterproof color-changing lights within the pool allows you to easily switch moods—from vibrant celebrations to serene relaxation. Hanging delicate fairy lights or lanterns overhead brings a whimsical, intimate vibe perfect for evening gatherings. Beyond aesthetics, clear illumination along pool edges and pathways ensures every step is safe and secure. By layering various lighting elements, even the smallest outdoor space can feel like a luxurious getaway.

    Key Design Elements

    • Install LED step lights to enhance safety and ambiance simultaneously.
    • Use uplights to emphasize trees or garden sculptures for added visual appeal.
    • Add color-changing submerged lights for customizable pool moods.

    Pro Tip: Mix different light temperatures and intensities to create dynamic, multi-dimensional illumination that adapts to any occasion.

    3. Sleek Stone Edging for Pool Surrounds

    Sleek Stone Edging for Pool Surrounds

    Using a stone edging around a compact pool offers an affordable yet elegant way to define its boundaries. Selecting polished river rocks or light-colored pea stones enhances a contemporary aesthetic with their smooth surfaces and neutral tones. This technique promotes excellent drainage by allowing rainwater to filter effortlessly between the stones and into the soil below. Additionally, stone borders create a distinct division between the swimming area and adjacent landscaping, minimizing dirt and debris migration. Incorporating a few sculptural boulders or sculpted succulents adds vertical interest and breaks the uniformity. This method demands minimal upkeep, helping maintain a neat appearance while preventing erosion during heavy downpours. Overall, stone edging balances function and style for poolside landscaping.

    Key Design Elements

    • Choose rounded stones in light hues to complement modern pool designs.
    • Install the stone border slightly sloped for optimal water drainage.
    • Add occasional larger rocks or decorative plants to increase visual appeal.

    Pro Tip: Lay a weed barrier fabric beneath the gravel to reduce unwanted growth and keep the area looking pristine.

    4. Transforming Your Pool Area with Bamboo Privacy Screens

    Transforming Your Pool Area with Bamboo Privacy Screens

    Incorporating bamboo screens around your pool area can instantly evoke a serene, island-inspired retreat, perfect for enhancing privacy. Bamboo is an eco-friendly material that brings a soothing natural feel and rich texture to your outdoor space. Its upright stalks naturally draw the eye upward, creating a sense of openness even in smaller yards. Pairing bamboo with lush plants or vibrant blooms can further enrich the tranquil ambiance. Installing bamboo panels over existing fencing is a straightforward way to refresh your poolside décor without starting from scratch. Thanks to its resistance to moisture and humidity, bamboo remains a reliable and long-lasting option in wet environments. This approach fosters a calm, spa-like environment where relaxation is effortless.

    Key Design Elements

    • Choose treated bamboo for increased durability in humid poolside conditions.
    • Layer bamboo screens with climbing vines or hanging plants for added privacy and greenery.
    • Use modular bamboo panels that can be easily cut and shaped to fit irregular fence lines.

    Pro Tip: Seal bamboo fencing with a water-resistant finish annually to maintain its color and prevent weathering.

    5. Elevated Pool Pathways for Sleek Outdoor Spaces

    Elevated Pool Pathways for Sleek Outdoor Spaces

    Elevated pathways made from substantial stone or concrete slabs create a striking visual appeal around pools by giving the impression that the steps are gently hovering above the surface. These paths not only guide swimmers seamlessly to the poolside but also preserve an open, airy atmosphere in the surrounding landscape. Incorporating natural elements like smooth pebbles or compact ground cover around the platforms enhances their floating illusion. This approach complements minimalist and modern garden themes by emphasizing simplicity and geometric form. When executed thoughtfully, these suspended steps add sophistication and a custom touch, making even limited spaces feel expansive and intentionally designed.

    Key Design Elements

    • Select durable, weather-resistant materials to ensure long-lasting elevated steps.
    • Use low-profile plants or gravel around the steps to maintain a clean, unobstructed look.
    • Align the steps with the pool’s shape and surrounding architecture for cohesive design.

    Pro Tip: Incorporate subtle lighting beneath or around the steps to accentuate their hovering effect during evening hours.

    6. Synthetic Turf Solutions for Poolside Spaces

    Synthetic Turf Solutions for Poolside Spaces

    Choosing synthetic turf around your pool creates an attractive and hassle-free landscape, especially ideal for compact yards. Unlike traditional lawns, this option requires no watering, trimming, or fertilizing, making upkeep simple and efficient. Its cushioned texture provides a comfortable surface for walking barefoot, while also minimizing dirt and grass clippings from entering the pool. The lush green turf contrasts beautifully with the shimmering blue water and stone decking, enhancing the overall visual appeal. Advances in turf technology mean it looks natural and dries quickly after rain or splashes, maintaining a fresh appearance year-round. This option transforms small pool areas into polished, inviting retreats without demanding constant care.

    Key Design Elements

    • Opt for high-quality synthetic turf with efficient drainage to prevent puddles.
    • Install edging to keep the turf neatly contained and avoid fraying.
    • Regularly rinse the turf to remove debris and maintain its fresh look.

    Pro Tip: Incorporate infill materials like sand or rubber to add softness and improve durability underfoot.

    7. Creating Secluded Spaces Around Your Pool

    Creating Secluded Spaces Around Your Pool

    In compact yards where neighboring homes are within close range, maintaining a sense of privacy around your pool can be challenging. Installing stylish barriers crafted from materials like woven reed panels, slatted cedar, or perforated metal offers an elegant solution that balances concealment and airflow. These structures not only shield your pool area from prying eyes but also help segment the outdoor space into functional zones, such as a lounge corner or a sunbathing spot. Opting for designs inspired by organic shapes or sleek contemporary lines can enhance the overall aesthetic of your garden. Thoughtfully placed, these privacy elements transform your poolside into a tranquil retreat, allowing you to relax comfortably without feeling exposed.

    Key Design Elements

    • Select durable materials suited to your climate for long-lasting privacy screens.
    • Incorporate climbing plants on wooden slats to blend natural greenery with screening.
    • Arrange screens to create distinct areas while maximizing airflow and light.

    Pro Tip: Position privacy panels to block direct sightlines from neighboring windows while still allowing breezes to pass through, ensuring comfort and seclusion.

    8. Designing a Lush Tropical Poolscape for Compact Spaces

    Designing a Lush Tropical Poolscape for Compact Spaces

    Transforming a small pool area into a vibrant tropical retreat can be achieved by carefully selecting plants that thrive in limited spaces. Opt for specimens with bold foliage, such as elephant ear or croton, to introduce eye-catching shapes and colors without overwhelming the area. Grouping these plants in tight clusters adds depth and a sense of abundance, making the space feel more immersive. To maximize room, choose slender palm varieties like areca or ponytail palms that grow upward rather than sprawling outward, offering both shade and vertical interest. Complementing these green accents with natural wood decking or stone paving enhances the overall exotic ambiance. This approach creates a lively, rejuvenating atmosphere perfect for small outdoor nooks. Thoughtful layering and texture contrast ensure your poolside garden feels both spacious and inviting.

    Key Design Elements

    • Pick tropical plants with upright growth habits to conserve horizontal space.
    • Plant in dense groupings to build a rich, layered landscape effect.
    • Incorporate natural materials like stone or wood to unify the tropical theme.

    Pro Tip: Use fast-draining soil and mulch to keep tropical plants healthy and vibrant in tight planting areas.

    9. Maximizing Small Yards with Corner Pool Designs

    Maximizing Small Yards with Corner Pool Designs

    Situating your pool in a corner of a compact yard is a smart strategy to make the most of limited outdoor space. This arrangement frees up the rest of your yard for versatile uses like a dining nook, flower bed, or play area. Pools with angular shapes, such as L-forms or rectangles, seamlessly fit into corners and can be enhanced with privacy screens like tall shrubs or decorative fencing. Walls nearby offer a perfect canvas for hanging creeping vines, murals, or outdoor lighting to enrich the atmosphere. This setup often cultivates an intimate, secluded vibe, turning the pool into a serene retreat. By thoughtfully combining design and function, you maintain ample room for other outdoor pursuits while enjoying a stylish swimming area.

    Key Design Elements

    • Choose angular pool shapes to efficiently occupy awkward corner spaces.
    • Incorporate vertical elements like tall plants or fencing to boost privacy.
    • Utilize adjacent walls for decorative features or vertical gardens to add visual interest.

    Pro Tip: Opt for multi-functional seating around the pool’s edge to save space and create a social spot.

    10. Stylish Stonework Patio for Compact Pools

    Stylish Stonework Patio for Compact Pools

    Creating a patio with carefully arranged natural stone offers both elegance and resilience around a compact pool setting. The unpredictable contours of quarried stones soften the rigid edges of contemporary pool designs, blending nature with modernity. Between the stones, consider planting low-growing ground covers or using fine gravel to enhance texture and visual appeal. This flooring choice is highly resistant to wear and provides a safe, non-slip surface ideal for areas prone to moisture. Selecting stones in earthy tones like warm beige or slate blue can enrich the overall ambiance and add subtle complexity. A skillfully installed stone patio not only anchors the pool area but also elevates the outdoor space, making it inviting and refined.

    Key Design Elements

    • Arrange stones with intentional spacing to incorporate natural elements like moss or gravel.
    • Opt for stones with varied hues to create visual interest and depth.
    • Ensure the patio surface has ample slip resistance for safety near water.

    Pro Tip: Use polymeric sand between stones to prevent weed growth while maintaining drainage.

    11. Integrated Seating Solutions for Pool Areas

    Integrated Seating Solutions for Pool Areas

    Incorporating built-in seating around your pool is an excellent strategy to maximize space without overwhelming a compact yard with extra furniture. Whether fashioned from stone, brick, or treated wood, these benches can be seamlessly attached to retaining walls or planter borders, helping to maintain an open and tidy environment. Elevating comfort with waterproof cushions and vibrant outdoor pillows transforms the bench into a cozy retreat for swimmers and guests alike. Additionally, designing hidden compartments beneath the seating offers convenient storage for pool accessories, preventing clutter. This clever combination of seating and storage creates a functional, attractive zone perfect for social gatherings and lounging, all while preserving valuable open space in a smaller outdoor area.

    Key Design Elements

    • Choose durable materials like stone or treated wood for longevity and style.
    • Incorporate built-in storage compartments to keep pool essentials organized.
    • Use weatherproof cushions to enhance comfort and brighten the seating area.

    Pro Tip: Ensure the bench height complements standard poolside furniture to maintain a cohesive look and comfortable seating experience.

    12. Elegant Shade Structures for Cozy Pool Spaces

    Elegant Shade Structures for Cozy Pool Spaces

    In compact pool settings, adding a stylish shade structure can transform the ambiance while offering relief from the sun. Consider installing a minimalist, contemporary canopy above a lounge corner or partially over the pool itself to create a cool retreat. Incorporating fragrant vines such as honeysuckle or clematis can soften the framework and introduce gentle scents to the area. This vertical addition not only enhances the visual appeal but also helps delineate the pool zone, turning the backyard into an inviting outdoor living space. For added comfort and seclusion, lightweight drapes or woven shades can be suspended from the structure. Whether crafted from durable metal or natural timber, these installations bring a refined and intimate atmosphere to smaller pool landscapes.

    Key Design Elements

    • Choose climbing plants that thrive in your climate for natural shade and aroma.
    • Select materials that complement your pool’s style—wood offers warmth, metal provides modernity.
    • Use detachable fabric panels to adjust privacy and sunlight exposure as needed.

    Pro Tip: Position your shade structure to maximize afternoon shade when the sun is strongest for optimal comfort.

    13. Creating the Perfect Deck Around Your Small Pool

    Creating the Perfect Deck Around Your Small Pool

    Surrounding a compact pool with a thoughtfully designed deck enhances both its functionality and aesthetic appeal, blending outdoor comfort with stylish practicality. Opting for pale-toned hardwood or durable composite decking not only brightens the space but also helps moderate heat underfoot. Elevating the deck slightly can cleverly conceal pool mechanics, preserving a tidy and uncluttered environment even in tighter yards. To maintain an airy and inviting atmosphere, choose streamlined seating like a pair of narrow loungers paired with a petite side table. This arrangement maximizes space without overwhelming the area, offering a cozy spot to unwind. Additionally, selecting decking materials with textured finishes ensures safety by minimizing slips around wet zones. The overall effect is a harmonious, elegant retreat that complements the refreshing allure of your pool.

    Key Design Elements

    • Choose light-hued decking materials to keep surfaces cool and inviting.
    • Build a raised platform to discreetly store pool equipment out of sight.
    • Limit furnishings to essential pieces to maintain a spacious feel.

    Pro Tip: Incorporate slip-resistant textures or coatings on deck surfaces to enhance safety without sacrificing style.

    14. Cozy Fire Features for Intimate Pool Areas

    Cozy Fire Features for Intimate Pool Areas

    Adding a fire feature close to a modest-sized pool transforms the space into an inviting retreat during chilly nights. Opting for a propane fire bowl is ideal since it offers clean flames without smoke and can be ignited at a moment’s notice. Positioning the fire element on a small patio or beside the pool edge enhances the contrast between flickering firelight and shimmering water. Custom designs that incorporate materials matching the pool surround provide a polished and cohesive look. This addition not only elevates the ambiance but also extends outdoor enjoyment well into cooler seasons. The warm glow created by the fire feature invites relaxation and encourages socializing, making your backyard feel both elegant and welcoming. Thoughtful placement ensures safety while maximizing visual impact.

    Key Design Elements

    • Choose smoke-free propane fire bowls for easy operation and clean use.
    • Place fire features near the water’s edge to highlight the fire-water contrast.
    • Match fire pit materials to pool finishes for a unified aesthetic.

    Pro Tip: Install a dimmable lighting system around the fire pit to create adjustable moods that complement both firelight and pool reflections.

    15. Intimate Pool and Overflow Hot Tub Design

    Intimate Pool and Overflow Hot Tub Design

    An intimate plunge pool is perfect for cooling off and mingling without the need for extensive swimming space. Incorporating an overflow hot tub alongside it elevates the ambiance by delivering a continuous stream of water that flows smoothly into the pool, creating a calming auditory and visual backdrop. This design is especially beneficial for limited outdoor areas, offering dual water experiences without sacrificing precious square footage. Positioning the hot tub strategically, such as in a corner, maximizes open space for seating and social areas. Together, they transform compact yards into stylish, multifunctional retreats that blend relaxation with entertainment effortlessly.

    Key Design Elements

    • Choose materials for the spillover edge that complement your backyard’s theme for a cohesive look.
    • Use LED lighting under the water flow to enhance the nighttime atmosphere.
    • Incorporate built-in seating around the pool to encourage social interaction.

    Pro Tip: Integrate automated water temperature controls to maintain perfect spa warmth without manual adjustments.

    16. Enhancing Small Pools with Decorative Tile Features

    Enhancing Small Pools with Decorative Tile Features

    Incorporating decorative tile elements into a compact pool can transform it from a simple water feature into a striking centerpiece. Using vibrant ceramic or glass tiles to create a border or an artistic focal point adds character without sacrificing space. Even a modest strip of reflective tiles can play beautifully with sunlight, creating dazzling underwater sparkle. Selecting a tile palette that complements nearby landscaping or patio furnishings helps unify the outdoor environment. Beyond aesthetics, premium tiles contribute to easier upkeep by resisting stains and grime buildup. This subtle yet effective upgrade elevates both the look and functionality of a small swimming area.

    Key Design Elements

    • Choose tiles with colors that echo your garden or outdoor decor for harmony.
    • Opt for waterproof, stain-resistant tiles to simplify cleaning routines.
    • Install a tile border around the pool edge to add definition without clutter.

    Pro Tip: Select iridescent glass tiles to maximize light reflection and create captivating water effects throughout the day.

    17. Sleek Glass Barriers for Limited Pool Spaces

    Sleek Glass Barriers for Limited Pool Spaces

    For pools nestled in tighter yards, transparent glass barriers are an excellent way to maintain safety without making the area feel confined. Unlike bulky wooden or metal fences that can visually shrink your outdoor space, glass panels create a seamless boundary that enhances openness. This design choice invites sunlight to flood the poolside and nearby greenery, brightening the entire environment. Frameless glass installations boast a clean, contemporary vibe, while options with slim frames add subtle structure without overwhelming the view. Regularly wiping down the glass keeps your backyard looking pristine and ensures safety standards are upheld, all while letting your pool shine as the centerpiece.

    Key Design Elements

    • Opt for frameless glass panels to maximize a minimalist, open feel.
    • Place plants near the barrier to take advantage of increased natural light.
    • Schedule routine cleaning to maintain transparency and safety compliance.

    Pro Tip: Selecting tempered, high-quality glass not only boosts durability but also enhances overall safety around your pool area.

    18. Dual-Purpose Pool Cover Decks for Compact Yards

    Dual-Purpose Pool Cover Decks for Compact Yards

    For homeowners with limited outdoor area, a pool cover that transforms into a deck offers a clever way to optimize space. When closed, the durable surface glides seamlessly over the pool, providing a solid platform ideal for seating or outdoor activities. This multifunctional design allows your backyard to effortlessly switch between a relaxation zone and a pool area, enhancing usability without expanding the footprint. Besides offering extra living space, the cover protects water quality by keeping debris out and helps maintain warmth, reducing heating expenses. Many models are equipped with electric mechanisms to simplify operation and can be crafted from materials like natural wood or weather-resistant composites to blend with your landscape. This smart, space-conscious option is especially suited for urban environments where every square foot counts.

    Key Design Elements

    • Choose motorized covers for quick and easy transformation between pool and deck.
    • Opt for weather-resistant decking materials to ensure longevity and minimal upkeep.
    • Regularly clean the cover surface to maintain safety and aesthetic appeal.

    Pro Tip: Integrate LED lighting into the deck cover edges to create ambiance and improve visibility during evening use.

    19. Elevated Garden Walls for Poolside Ambiance

    Elevated Garden Walls for Poolside Ambiance

    Creating an elevated garden barrier alongside your pool can enhance both the aesthetics and functionality of a compact backyard. Such structures not only define the pool area but can double as comfortable seating or a natural privacy screen. Raising the planting beds helps protect greenery from pool water and harsh chemicals, ensuring healthier plants. Consider using bold foliage like elephant ears or bamboo for a lush, vertical effect that also shields the pool from neighboring views. Adding gentle water cascades or small fountains into the wall design introduces calming sounds and dynamic movement. This approach brings order and elegance to your outdoor space, making it feel thoughtfully designed and inviting.

    Key Design Elements

    • Use durable materials like stone or concrete for the planter wall to withstand moisture and poolside wear.
    • Select drought-tolerant, low-maintenance plants suitable for your climate and pool environment.
    • Incorporate integrated seating ledges into the planter wall for extra functionality and social space.

    Pro Tip: Install subtle LED lighting within the planter wall to highlight plants and water features, creating a captivating nighttime atmosphere.

    20. Elevate Your Poolside with Stylish Planters

    Elevate Your Poolside with Stylish Planters

    When yard space is tight around your pool, using decorative planters is a clever way to introduce greenery without needing garden beds. Opt for a mix of sizable pots filled with a range of plants, such as fragrant herbs, compact shrubs, or bright blooms, to bring life and color to your pool surroundings. Arranging these containers at varying elevations can give your pool area a dynamic, multi-dimensional feel that draws the eye. The portability of planters means you can easily rearrange your setup to refresh the ambiance or shelter sensitive plants during colder months. Coordinating your planter colors and styles with existing outdoor furniture and finishes enhances the overall harmony of the space. This adaptable approach allows you to cultivate a vibrant oasis by the pool, even when soil is scarce. With minimal effort, you can transform a limited outdoor zone into a lush retreat filled with texture and shade.

    Key Design Elements

    • Select pots in different sizes and materials to create depth and contrast.
    • Use lightweight containers for easy repositioning throughout the year.
    • Incorporate both flowering and leafy plants for continuous visual appeal.

    Pro Tip: Group containers on stands or shelves to maximize vertical space and create a striking focal point.

    21. Designing Greenery for Slim Lap Pools

    Designing Greenery for Slim Lap Pools

    When working with a slim lap pool, emphasizing sleek, elongated design elements enhances both function and aesthetics. Incorporate narrow decking materials or linear stone pathways that mirror the pool’s length, creating a cohesive flow around the space. Lining the pool’s edge with tall, narrow plants or bamboo can offer seclusion without crowding the swim zone. Subtle, recessed lighting along the poolside can cast a gentle glow, highlighting its streamlined form during evening swims. This approach not only optimizes exercise space but also transforms a constricted yard into an elegant, modern retreat. Thoughtful plant choices and clean lines help maintain an open atmosphere, making the pool area feel more expansive and inviting.

    Key Design Elements

    • Choose decking materials that emphasize length, such as long, slim planks or stones.
    • Plant vertical foliage like bamboo or columnar trees to provide privacy without reducing space.
    • Install understated lighting along edges to accentuate the pool’s shape at night.

    Pro Tip: For a seamless look, coordinate the color tones of decking and plant containers with the pool’s tiles to unify the entire design.

    22. Enhancing Small Pools with a Natural Stone Cascade

    Enhancing Small Pools with a Natural Stone Cascade

    Incorporating a natural stone cascade into a compact pool area introduces a peaceful ambiance through the gentle rush of water. Even a modestly sized stone arrangement can become a captivating centerpiece, drawing the eye and elevating the overall design. The sound of flowing water can effectively drown out nearby distractions, fostering a serene retreat right in your backyard. Positioning the cascade in a corner or built atop a raised bed helps maximize limited space without overwhelming the area. Adding lush greenery like ferns or creeping moss around the stones enhances the illusion of an organic feature seamlessly blending with the surroundings. Beyond aesthetics, the movement of water promotes better circulation and oxygenation, supporting a healthier pool environment. This addition combines practicality with elegance, delivering a subtle yet luxurious upgrade.

    Key Design Elements

    • Choose compact, layered stones to create a waterfall that suits small spaces.
    • Place the feature in a corner or on a raised planter to optimize your pool’s layout.
    • Incorporate shade-loving plants like ferns or moss to enhance the natural vibe.

    Pro Tip: Use a recirculating pump to keep the water flowing continuously, ensuring the waterfall remains both attractive and functional without wasting water.

    23. Elevated Greenery Ideas for Compact Pool Areas

    Elevated Greenery Ideas for Compact Pool Areas

    In limited outdoor spaces, adding greenery vertically can dramatically enhance the ambiance without sacrificing precious ground area. Mounting a plant-covered structure on a poolside wall or fence brings a refreshing splash of nature into tight quarters. Opt for resilient, moisture-tolerant species such as ivy, succulents, or air plants to ensure a thriving, colorful display. This upward arrangement not only maximizes space but also crafts a natural shield that offers privacy from neighboring views. With an assortment of foliage shapes and shades, the garden wall injects depth and a dynamic visual appeal that harmonizes beautifully with the pool’s reflective surface. Such living installations transform small patios into serene, inviting retreats reminiscent of lush, tropical hideaways.

    Key Design Elements

    • Choose plants that thrive in humid, splash-prone environments to ensure longevity.
    • Incorporate a variety of textures and colors to create a balanced and eye-catching display.
    • Secure a drip irrigation system to maintain consistent moisture with minimal effort.

    Pro Tip: Install lightweight, modular panels for your vertical garden to simplify maintenance and allow seasonal plant swaps.

    24. Sleek Limestone Flooring for Compact Pool Areas

    Sleek Limestone Flooring for Compact Pool Areas

    Using limestone for poolside flooring brings a sophisticated and airy feel, perfect for cozy, modern pool settings. Its pale, natural hues help keep surfaces pleasantly cool even on the warmest days, enhancing comfort for bare feet. Opting for oversized limestone slabs minimizes grout lines, making limited spaces feel more open and seamless. Whether arranged in a straightforward grid or a staggered pattern, these pavers contribute to a chic, contemporary vibe. The stone’s gentle texture contrasts nicely with the pool’s glossy water, adding depth to the overall design. Beyond aesthetics, limestone is resilient and simple to care for, making it a smart choice for a stylish yet low-maintenance landscape.

    Key Design Elements

    • Choose large limestone slabs to reduce grout lines and expand visual space.
    • Lay pavers in either a grid or staggered style for a modern appearance.
    • Select lighter tones to keep the surface cooler during sunny weather.

    Pro Tip: Seal the limestone periodically to preserve its color and protect against stains.

    25. Artistic Tile Accents for Compact Pools

    Artistic Tile Accents for Compact Pools

    Incorporating a decorative tile design along the floor or walls of a small pool brings a distinctive flair to your backyard oasis. Whether you opt for minimalist shapes or intricate motifs like marine creatures or celestial symbols, this addition creates a captivating centerpiece that elevates the overall ambiance. Positioned beneath the water’s surface, these artistic accents enhance the space without encroaching on your outdoor area. Selecting tiles with reflective or vibrant finishes can create a dynamic play of light, giving the pool a lively, ever-changing appearance throughout the day. This approach not only adds visual interest but also infuses the pool environment with personality and sophistication, making it a memorable spot for relaxation and entertaining.

    Key Design Elements

    • Pick tile designs that complement the surrounding landscape or color scheme.
    • Use waterproof adhesive and grout to ensure durability under water.
    • Incorporate reflective or metallic tiles for shimmering effects with sunlight.

    Pro Tip: Design your mural with gradual color transitions to enhance depth perception and make the pool feel larger than it is.

    Conclusion

    Transforming a compact pool area into a beautiful haven is all about thoughtful design and imaginative use of space. Embracing vertical greenery, versatile furnishings, and harmonious hues can turn a limited footprint into an inviting sanctuary that radiates elegance and comfort. By carefully selecting features that enhance openness and privacy alike, you can craft an outdoor setting that feels expansive and serene.

    Small yards don’t have to limit your vision; with intentional choices and quality details, they can blossom into enchanting escapes that elevate your home’s ambiance and appeal. When designed with care, even the tiniest pool surroundings can offer a refreshing retreat where enjoyment and tranquility beautifully coexist.

  • Elevate Your Space: Inspiring Minimalist Dining Room Designs for Modern Living

    Step into a dining space where simplicity meets sophistication, and every element breathes calm and clarity. Minimalist dining room decor is more than just a design trend—it’s a lifestyle choice that embraces intentionality, functionality, and serene beauty. In today’s fast-paced world, creating a dining area that feels open, uncluttered, and effortlessly elegant offers a refreshing escape from chaos and invites meaningful moments around the table.

    The appeal of minimalist dining rooms lies in their timeless charm and adaptability; they effortlessly balance comfort with style, making the space feel both welcoming and refined. As more homeowners seek environments that nurture connection and mindfulness, the understated allure of clean lines, muted palettes, and thoughtfully curated furnishings continues to captivate design enthusiasts. In the ideas ahead, you’ll discover inspiring ways to transform your dining area into a tranquil retreat that celebrates simplicity without sacrificing personality—proof that less truly can be more.

    1. Elegant Minimalism in Dining Spaces

    Elegant Minimalism in Dining Spaces

    Embrace a refined dining atmosphere where simplicity meets sophistication. Opting for a neutral-toned dining set creates a serene backdrop that allows bold lighting fixtures to become the room’s focal point without overwhelming the senses. This approach ensures a balanced, inviting space perfect for both everyday meals and special gatherings.

    Key Design Elements

    • Choose muted colors for furniture to maintain a calm and cohesive aesthetic.
    • Incorporate statement lighting, such as sculptural chandeliers or pendant lights, to add character and visual interest.
    • Keep decorative elements minimal to highlight the room’s clean lines and open feel.

    Pro Tip: Use layered lighting to create ambiance and highlight key design features while maintaining a clutter-free environment.

    2. Versatile Elegance

    Versatile Elegance

    This refined dining area balances simplicity with sophistication, featuring deep blue walls that introduce a serene splash of color while complementing the sleek marble surfaces. Thoughtfully designed with layered lighting, the space effortlessly transitions between dining, productivity, and relaxation, fostering a calming atmosphere ideal for both work and leisure.

    Key Design Elements

    • Incorporate layered lighting to create adaptable moods suitable for dining and focused tasks.
    • Choose a rich, soothing color palette to enhance tranquility without sacrificing style.
    • Select durable, easy-to-clean materials like marble to maintain elegance and practicality.

    Pro Tip: Use multifunctional furniture pieces that can seamlessly shift from workspace to dining setup, maximizing the room’s flexibility.

    3. Airy Elegance with Minimalist Charm

    Airy Elegance with Minimalist Charm

    This dining space captures effortless sophistication by embracing natural light and uncluttered design. Framed by a stunning terrace backdrop, the room harmonizes subtle decor elements—like a sleek light fixture and carefully chosen greenery—to create a serene yet inviting atmosphere. Perfect for compact areas, this style proves that simplicity paired with modern accents can make any space feel open and refined.

    Key Design Elements

    • Incorporate neutral shades to enhance the feeling of spaciousness and calm.
    • Select statement lighting that complements rather than overwhelms the table setting.
    • Use a single, well-placed plant to introduce a refreshing touch of nature without clutter.

    Pro Tip: Maximize natural light by opting for sheer window treatments that maintain privacy without sacrificing brightness.

    4. Sleek Custom Cabinetry for a Serene Dining Space

    Sleek Custom Cabinetry for a Serene Dining Space

    Embracing a crisp white and warm wood palette, this dining area exudes understated elegance and modern simplicity. Thoughtfully designed lighting enhances the clean lines without overpowering the ambiance, while large windows invite abundant natural light, creating an airy connection to the outdoor surroundings. This seamless blend of natural elements and minimalist design fosters a refreshing and tranquil dining experience.

    Key Design Elements

    • Incorporate custom cabinetry with flat-panel doors to maintain a streamlined, clutter-free appearance.
    • Choose ambient lighting fixtures with subtle profiles to complement minimalist interiors without drawing too much attention.
    • Position the dining area adjacent to outdoor spaces or large windows to maximize natural light and ventilation.

    Pro Tip: Opt for matte finishes on cabinetry to reduce glare and enhance the room’s calm, sophisticated vibe.

    5. Minimalist Elegance

    Minimalist Elegance

    Embracing simplicity can elevate your dining area to a space of refined sophistication. This design thrives on clean lines and a neutral palette, making it perfect for modern apartments or upscale penthouses where understated beauty is key. By prioritizing quality furnishings over excessive decoration, the room feels open, inviting, and effortlessly chic.

    Key Design Elements

    • Choose sleek, streamlined dining tables and chairs that emphasize form and function.
    • Utilize natural light to enhance the airy atmosphere and highlight subtle textures.
    • Keep accessories to a minimum, focusing on a few statement pieces or natural elements.

    Pro Tip: Opt for furniture with light finishes and slim profiles to maintain an uncluttered and spacious feel.

    6. Sleek Monochrome Elegance

    Sleek Monochrome Elegance

    Embrace the timeless allure of a monochromatic dining space where simplicity meets sophistication. This airy dining area features clean lines and understated furnishings that harmonize effortlessly with expansive glass windows, while warm copper pendant lighting introduces a refined metallic accent. The overall effect is a minimalist sanctuary elevated by carefully curated details that bring depth and character.

    Key Design Elements

    • Choose a dining set with streamlined silhouettes to maintain a cohesive monochrome palette.
    • Incorporate metallic light fixtures to add warmth and a subtle luxe dimension.
    • Leverage natural light through large windows to enhance the room’s airy and open ambiance.

    Pro Tip: Layer textures within the monochrome scheme—such as matte finishes and reflective metals—to create visual interest without disrupting the color harmony.

    7. Elegant Open-Concept Dining

    Elegant Open-Concept Dining

    This dining space embraces a minimalist aesthetic with a harmonious blend of natural wood and crisp white elements, creating an inviting yet sophisticated atmosphere. Thoughtfully chosen blue and white wall art injects subtle color, while a simple floral arrangement in a rustic vase introduces a gentle touch of nature and personality. The overall design balances clean lines and warm textures for a timeless appeal.

    Key Design Elements

    • Select furniture with streamlined silhouettes and natural finishes to maintain an airy feel.
    • Incorporate art pieces that complement the room’s color palette to enhance visual interest without overwhelming.
    • Add organic elements, like fresh flowers or greenery, to soften the space and create a welcoming vibe.

    Pro Tip: Use mixed materials—such as wood and fabric—to add depth and warmth while preserving a clean, uncluttered look.

    8. Sleek Modern Minimalism

    Sleek Modern Minimalism

    Embracing clean lines and thoughtful simplicity, this dining space exudes refined elegance with its striking lighting and artful metallic planters. The neutral palette lays a calm foundation, allowing accent pieces to shine as focal points that elevate the overall ambiance. This style perfectly balances contemporary flair with subtle, creative details that invite a sophisticated yet welcoming atmosphere.

    Key Design Elements

    • Choose a muted dining set to create a versatile backdrop for bold statement accessories.
    • Incorporate unique metallic accents to add warmth and visual interest without overwhelming the space.
    • Opt for a sculptural light fixture to serve as both functional illumination and artistic centerpiece.

    Pro Tip: Use contrasting textures like metal and matte finishes to enhance depth while maintaining minimalism.

    9. Welcoming and Practical Family Dining Spaces

    Welcoming and Practical Family Dining Spaces

    Designed to balance functionality with warmth, this dining area embraces a clean and airy aesthetic that encourages togetherness. Thoughtfully chosen furniture pairs seamlessly with subtle decorative elements like floral arrangements and statement lighting, creating an inviting atmosphere for everyday family gatherings. Emphasizing intentional details can transform a simple room into a cherished communal space.

    Key Design Elements

    • Opt for durable, easy-to-clean materials to withstand daily use while maintaining style.
    • Incorporate layered lighting, combining ambient and focused fixtures to set the perfect mood.
    • Use tasteful accents such as fresh flowers or sculptural decor to add personality without clutter.

    Pro Tip: Prioritize versatile lighting options that can shift from bright family meals to soft, intimate dinners effortlessly.

    10. Captivating Illumination

    Captivating Illumination

    This dining area exudes elegance through its carefully curated lighting fixtures, where a trio of sleek, gold geometric pendants serve as the focal point. The refined interplay between the lighting, furniture, and wall treatments creates a harmonious, contemporary ambiance that elevates the entire space. Thoughtful accessories further enhance the room’s cohesive and polished aesthetic.

    Key Design Elements

    • Choose pendant lights with bold shapes and metallic finishes to add a modern touch.
    • Ensure lighting complements the color palette and textures of your dining furniture and walls.
    • Balance statement fixtures with subtle decorative elements to maintain visual harmony.

    Pro Tip: Use dimmable lighting to adjust the mood and highlight your dining space’s architectural features.

    Final Thoughts

    Embracing minimalist dining room decor is a powerful reminder that less truly is more—by choosing intentional, thoughtful pieces, you create a space that feels calm, inviting, and effortlessly elegant. Stripping away excess allows the beauty of simplicity to shine through, making every element in your dining area purposeful and meaningful. This approach not only elevates the aesthetics but also fosters a peaceful atmosphere where memorable moments with loved ones can unfold naturally.

    Now is the perfect time to reimagine your dining space with clarity and focus. Start small, trusting your instincts to guide you toward simplicity and function. As you curate your environment with intention, you’ll discover the joy of a room that breathes balance and harmony. Let this transformation inspire you beyond your dining room—embrace minimalism as a lifestyle that celebrates quality over quantity, and watch how it uplifts your everyday living.

  • Embrace Autumn’s Charm: Stylish and Inviting Fall Table Decor Inspirations

    As the air turns crisp and the leaves paint the world in shades of amber and gold, there’s a special kind of magic that fills our homes during fall. It’s a season that invites us to slow down, gather with loved ones, and celebrate the beauty of change. One of the most delightful ways to capture this cozy spirit is through your table decor — transforming your dining space into a warm haven where every meal feels like a cherished moment.

    Whether you’re hosting an intimate dinner or a festive gathering, fall table decor offers endless possibilities to blend nature’s rich hues with personal touches. From rustic wood accents and glowing candlelight to delicate touches of seasonal foliage, these elements come together to create a welcoming ambiance that feels both timeless and effortlessly elegant. Let’s dive into some inspiring ideas that will help you bring the enchanting essence of autumn right to your table.

    1. Harvest Charm: Crafting a Cozy Rustic Pumpkin Centerpiece

    Harvest Charm: Crafting a Cozy Rustic Pumpkin Centerpiece

    Bring the comforting essence of autumn to your table with a rustic pumpkin centerpiece that blends natural textures and warm hues. Imagine a cluster of small, weathered pumpkins nestled among sprigs of dried wheat and cinnamon sticks, filling your space with subtle earthiness and a hint of spice. This display not only invites a tactile, cozy vibe but also celebrates the simplicity and beauty of fall’s bounty.

    Key Design Elements

    • Choose pumpkins with varied sizes and muted, natural tones like cream, sage, or soft orange for a more organic feel.
    • Intersperse dried elements like wheat stalks, acorns, and cinnamon sticks to add texture and depth.
    • Use a wooden tray or a burlap runner as a base to enhance the rustic, farmhouse aesthetic.

    Pro Tip: Before arranging, lightly dust your pumpkins with matte finish spray paint or chalk paint to tone down shine and create a beautifully weathered, matte surface that ties the whole centerpiece together.

    2. Golden Glow: Crafting an Enchanting Candlelit Harvest Table

    Golden Glow: Crafting an Enchanting Candlelit Harvest Table

    Transform your fall gatherings with a warm, inviting glow by layering candles of varying heights amidst rich autumnal blooms and rustic accents. The flickering candlelight dances off amber glassware and casts soft shadows on textured linens, creating a cozy atmosphere that invites intimate conversation and celebration. This setup works beautifully to highlight the season’s bounty while evoking the comforting essence of harvest evenings.

    Key Design Elements

    • Mix pillar candles, votives, and taper candles in warm tones like burnt orange, deep gold, and creamy ivory to add depth and visual interest.
    • Intersperse candlelight with natural elements like mini pumpkins, dried wheat bundles, and colorful leaves to enhance the harvest feel.
    • Use a wooden or woven table runner as a base to ground the arrangement and complement the warm flicker of candlelight.

    Pro Tip: Place candles in sturdy holders or on heat-resistant trays and always leave enough space between flames and flammable decor to ensure both safety and an uninterrupted glow.

    3. Golden Harvest: Rustic Dried Wheat and Sunflower Elegance

    Golden Harvest: Rustic Dried Wheat and Sunflower Elegance

    Bring the warmth of autumn fields right to your table with a dried wheat and sunflower arrangement that radiates natural beauty and cozy charm. The golden stalks of wheat paired with vibrant sunflower blooms create a textured, sun-kissed centerpiece that evokes crisp fall mornings and rustic farmhouse vibes. This combination’s earthy hues and tactile contrast invite guests to linger and appreciate the simple, timeless essence of the season.

    Key Design Elements

    • Use a mix of varying wheat stalk lengths to add dimension and a wild, organic feel to your arrangement.
    • Incorporate sunflowers with slightly browned petals for a naturally aged, vintage look that enhances autumnal warmth.
    • Place the arrangement in a weathered terracotta vase or a burlap-wrapped mason jar to amplify the rustic farmhouse aesthetic.

    Pro Tip: To keep your dried wheat stems sturdy and upright, lightly mist them with hairspray before arranging; this prevents shedding and maintains their crisp texture throughout your fall gatherings.

    4. Cozy Rustic Charm: Layering a Plaid Table Runner with Natural Pinecones

    Embrace the warmth of fall by draping a soft, plaid table runner across your dining table, its rich reds and deep oranges evoking crisp autumn evenings by the fire. Nestle clusters of pinecones along the runner to add texture and a woodland touch, filling the air with a subtle, earthy aroma that invites guests to slow down and savor the season. This combination creates a harmonious blend of pattern and nature, perfect for a casual yet refined fall gathering.

    Key Design Elements

    • Choose a table runner in traditional tartan hues like cranberry, burnt sienna, or mustard to echo fall foliage.
    • Group pinecones in varying sizes together instead of scattering them randomly to create intentional focal points.
    • Intersperse sprigs of eucalyptus or dried wheat with the pinecones to add layers of greenery and height.

    Pro Tip: Lightly dust your pinecones with metallic gold or bronze spray paint on the tips for a subtle shimmer that catches candlelight and elevates the rustic vibe without overpowering the natural look.

    5. Gleaming Harvest: Elevate Your Fall Table with Copper and Gold Radiance

    Gleaming Harvest: Elevate Your Fall Table with Copper and Gold Radiance

    Infuse your autumn table setting with the warm shimmer of copper and gold metallic accents that catch the soft glow of candlelight and bring a cozy, luxurious vibe to your gathering. These rich, lustrous tones mirror the season’s natural palette—think amber leaves and golden sunsets—adding depth and a festive sparkle that feels both modern and timeless. The tactile shine of hammered copper chargers paired with brushed gold flatware invites guests to linger, savoring not just the meal but the radiant ambiance.

    Key Design Elements

    • Layer copper candle holders of varying heights with gold votives to create a dynamic, glowing centerpiece.
    • Incorporate textured copper napkin rings paired with mustard or deep burgundy linen napkins for a striking contrast.
    • Use a gold-rimmed glassware set to reflect light beautifully and elevate everyday drinks into celebratory sips.

    Pro Tip: For a cohesive, polished look, mix matte and polished metallic finishes—pair brushed gold utensils with hammered copper serving bowls—to add visual interest without overwhelming the senses.

    6. Enchanted Forest Feast: A Woodland Mushroom and Moss Tablescape

    Enchanted Forest Feast: A Woodland Mushroom and Moss Tablescape

    Transform your dining space into a cozy, magical woodland retreat with a tablescape that celebrates the earthy charm of fall. Soft green moss cushions the table, creating a lush carpet that contrasts beautifully with clusters of delicate mushrooms—real or faux—that bring a whimsical, forest-floor vibe. This natural, textured arrangement evokes crisp autumn walks and invites guests to savor the season’s quiet beauty.

    Key Design Elements

    • Layer patches of preserved moss along the center of your table to create a soft, verdant base that feels alive and inviting.
    • Incorporate a mix of ceramic, wooden, or hand-painted mushroom figurines in varying sizes for visual interest and a touch of fairy-tale whimsy.
    • Add warm amber-hued candles nestled amongst the moss to mimic the glow of fireflies and enhance the intimate, woodland ambiance.

    Pro Tip: To ensure your moss stays fresh and vibrant throughout your gathering, lightly mist it with water before setting the table and keep it away from direct heat sources.

    7. Nature’s Tiny Treasures: Scattering Mini Gourds and Acorns for Rustic Charm

    Nature’s Tiny Treasures: Scattering Mini Gourds and Acorns for Rustic Charm

    Transform your fall table into a tactile autumnal wonderland by scattering mini gourds and acorns along the centerpiece runner. The mix of smooth, glossy acorns and textured, colorful gourds invites guests to touch and admire the natural beauty, while their warm, earthy tones perfectly complement candles and wood accents. This simple yet enchanting scatter brings a cozy, woodland vibe that feels both organic and intentional.

    Key Design Elements

    • Choose a variety of mini gourds in muted oranges, deep greens, and soft yellows to create visual depth and color contrast.
    • Mix in an assortment of acorns, some with caps on and some without, to add diverse shapes and natural authenticity.
    • Lay the scatter loosely along a burlap or linen table runner to enhance the rustic feel without overcrowding the table.

    Pro Tip: To keep your scatter in place and prevent rolling, use a thin line of double-sided tape or museum gel under key gourds — this ensures your arrangement stays beautifully put throughout your gathering.

    8. Glowing Amber Oasis: A Cozy Candleholder Cluster to Warm Your Fall Evenings

    Glowing Amber Oasis: A Cozy Candleholder Cluster to Warm Your Fall Evenings

    Create an inviting autumnal centerpiece by grouping amber glass candleholders in varying heights and shapes, letting their warm, golden glow flicker softly across your table. The rich amber tones amplify the cozy feeling of fall, casting a gentle light that complements the season’s vibrant foliage and rustic textures. This clustered arrangement not only adds warmth but also creates an intimate ambiance perfect for gatherings as daylight fades.

    Key Design Elements

    • Mix different sizes and styles of amber candleholders to add visual interest and depth to your cluster.
    • Use unscented or subtly spiced candles like cinnamon or clove to enhance the cozy autumnal atmosphere without overpowering the table’s natural scents.
    • Anchor your candleholder cluster on a natural material base like a wooden tray or a burlap runner to tie the look together with earthy textures.

    Pro Tip: Balance your amber candleholder cluster by spacing candles to avoid overcrowding; this ensures each candle’s glow shines distinctly while creating a harmonious, warm cascade of light across your fall table.

    9. Lush Burgundy and Cream Blooms: A Cozy Harvest Table Statement

    Create a captivating fall tablescape with a rich burgundy and cream floral centerpiece that evokes warmth and elegance. The deep, velvety reds paired with soft, creamy blooms invite guests to linger, while the contrasting hues add depth and softness to your arrangement. This combination beautifully mirrors autumn’s fading light and cozy evenings, making your table feel both inviting and refined.

    Key Design Elements

    • Incorporate seasonal flowers like dahlias, chrysanthemums, and roses in burgundy tones alongside cream-colored ranunculus or hydrangeas for texture contrast.
    • Use a rustic vase or wooden box to ground the arrangement and enhance the fall harvest vibe.
    • Add sprigs of greenery like eucalyptus or dusty miller to bring a muted, silvery element that balances the rich colors.

    Pro Tip: Before arranging, soak floral foam thoroughly and position taller blooms in the center, gradually working outward with cream flowers and greenery to create a natural, flowing silhouette.

    10. Rustic Elegance: Layered Linen Napkins Bound with Soft Twine for Cozy Fall Feasts

    Rustic Elegance: Layered Linen Napkins Bound with Soft Twine for Cozy Fall Feasts

    Create a warm, inviting atmosphere on your fall table by layering linen napkins in varying autumnal shades—think burnt orange, deep cranberry, and soft cream—and tying them together with natural jute twine. The tactile softness of the linens paired with the earthy texture of twine evokes a comforting, harvest-time charm that guests can both see and feel. This simple yet thoughtful detail adds depth and warmth, beautifully complementing seasonal centerpieces and glowing candlelight.

    Key Design Elements

    • Choose linen napkins in warm fall tones and layer two to three contrasting shades for visual interest.
    • Wrap a piece of natural jute or cotton twine around the napkins and tie it into a loose, rustic bow for an understated yet elegant finish.
    • Add a small sprig of dried lavender, cinnamon stick, or a tiny autumn leaf tucked under the twine for an extra sensory touch.

    Pro Tip: To keep the twine securely in place without damaging delicate linen fibers, gently tie a small double knot first and then create your bow, ensuring it’s snug but not too tight to maintain a relaxed, organic look.

    11. Glow and Gather: Rustic Vintage Lanterns Framed by Autumn Leaves

    Transform your fall table into a cozy sanctuary with vintage lanterns casting a warm, flickering glow amid a bed of crisp, colorful leaves. The soft light dances on the rich reds, golds, and burnt oranges of surrounding foliage, evoking the nostalgic charm of an autumn evening spent outdoors. This display invites both warmth and texture, creating an intimate ambiance perfect for family dinners or quiet moments of reflection.

    Key Design Elements

    • Choose lanterns with a weathered patina or distressed metal finish to enhance the vintage feel.
    • Layer a mix of freshly fallen leaves and dried ones beneath and around the lanterns for depth and natural variation.
    • Incorporate small sprigs of cinnamon sticks or pinecones around the base for added fragrance and tactile interest.

    Pro Tip: Place battery-operated candles inside the lanterns to safely maintain a steady, flickering light throughout your gathering without worry of open flames.

    12. Rustic Warmth: Cinnamon Stick and Apple Centerpiece with Spiced Elegance

    Rustic Warmth: Cinnamon Stick and Apple Centerpiece with Spiced Elegance

    Bring the crisp scents and cozy hues of autumn right to your table with a charming cinnamon stick and apple arrangement. The rich, woody aroma of cinnamon pairs beautifully with the fresh, subtly sweet fragrance of apples, creating a sensory centerpiece that invites guests to linger. This natural, tactile decor not only adds a splash of seasonal color but also evokes the comforting feel of a fall harvest gathering.

    Key Design Elements

    • Use a mix of red, green, and yellow apples to bring a vibrant, layered look that catches the eye.
    • Bundle cinnamon sticks with twine or raffia to add height and texture, then nestle them among the apples for a balanced composition.
    • Incorporate sprigs of fresh rosemary or dried wheat stalks to introduce greenery and a touch of rustic charm.

    Pro Tip: For an inviting glow, weave a string of warm white fairy lights subtly through the arrangement—this adds depth and a magical flicker that enhances the natural warmth of the cinnamon and apples.

    13. Luxurious Velvet Pumpkin Place Settings for a Cozy Autumn Feast

    Luxurious Velvet Pumpkin Place Settings for a Cozy Autumn Feast

    Transform your fall table into an inviting haven with plush velvet pumpkins nestled at each place setting. Their soft texture and rich jewel tones add warmth and tactile charm, creating a sensory feast that complements the crisp autumn air. These elegant accents not only serve as festive decor but also double as charming keepsakes for guests to take home.

    Key Design Elements

    • Choose velvet pumpkins in deep hues like burnt orange, emerald green, or plum to echo the season’s natural palette.
    • Pair each pumpkin with a personalized name tag tucked into the stem for a thoughtful, customized touch.
    • Arrange pumpkins atop rustic chargers or woven placemats to enhance the contrast between soft fabric and natural textures.

    Pro Tip: Mist your velvet pumpkins lightly with a subtle cinnamon-infused spray to add a gentle, inviting scent that elevates the entire table ambiance.

    14. Crisp Citrus and Lush Eucalyptus: A Refreshing Fall Garland for Your Table

    Crisp Citrus and Lush Eucalyptus: A Refreshing Fall Garland for Your Table

    Bring a festive burst of autumn freshness to your table with a garland combining aromatic eucalyptus leaves and dried orange slices. The cool, silvery-green foliage contrasts beautifully with the warm, sun-kissed citrus rings, filling the air with a subtle, invigorating scent that evokes crisp fall mornings. This natural, textured centerpiece adds a vibrant yet understated charm that complements both rustic and modern settings.

    Key Design Elements

    • Dry orange slices slowly in a low oven to preserve their color and prevent brittleness.
    • Use floral wire or natural twine to string eucalyptus sprigs and orange slices, spacing them evenly for a balanced look.
    • Incorporate small cinnamon sticks or star anise pods between elements to enhance the aroma and add visual interest.

    Pro Tip: To keep your garland fresh throughout your gathering, lightly mist the eucalyptus with water every morning and store the garland in a cool place before decorating.

    15. Rustic Charm: Warm Terracotta Pot Succulent Centerpiece for Cozy Fall Tables

    Rustic Charm: Warm Terracotta Pot Succulent Centerpiece for Cozy Fall Tables

    Bring a touch of earthy elegance to your fall table with a terracotta pot succulent centerpiece that combines rugged texture and vibrant greenery. The warm, sunbaked tones of the pot create a comforting contrast with the plump, fleshy leaves, evoking a serene autumnal vibe. This low-maintenance arrangement infuses your space with natural warmth and subtle color, perfect for intimate dinners or festive gatherings.

    Key Design Elements

    • Choose succulents with rich autumn hues like deep burgundy, dusty green, and golden yellow to echo fall’s palette.
    • Nestle dried wheat stalks or cinnamon sticks around the pot’s base to introduce seasonal scents and add height variation.
    • Use a mix of small and medium-sized terracotta pots grouped together for a layered, textured display that feels inviting.

    Pro Tip: Lightly dust your terracotta pots with a bit of cinnamon powder before arranging the succulents to subtly enhance the fall aroma and tie the centerpiece into your seasonal theme.

    16. Glowing Harvest Moon Tablescape: Warmth and Ambiance by Candlelight

    Glowing Harvest Moon Tablescape: Warmth and Ambiance by Candlelight

    Transform your fall dining experience with a Harvest Moon tablescape bathed in the soft flicker of candlelight. Imagine rich amber hues, rustic textures, and the gentle glow of pillar candles mingling with the golden tones of autumn leaves, evoking the cozy magic of a crisp harvest evening. This look works beautifully by balancing natural elements with warm lighting, creating an inviting ambiance that encourages lingering conversations and comfort.

    Key Design Elements

    • Use a mix of pillar candles and votives in varying heights to mimic the rising moon’s glow and add depth to your table.
    • Incorporate natural elements like dried wheat, mini pumpkins, and copper-toned leaves to enhance the harvest theme and add texture.
    • Choose a warm, neutral table runner or placemats in linen or burlap to ground the look and allow candlelight to shimmer softly.

    Pro Tip: Place unscented candles strategically around reflective surfaces like copper trays or amber glass holders to amplify their warm glow without overpowering the natural scents of your centerpiece.

    17. Harvest Warmth: A Rustic Woven Basket Bread Centerpiece

    Harvest Warmth: A Rustic Woven Basket Bread Centerpiece

    Bring the cozy essence of fall to your table with a woven basket filled with an assortment of artisan breads, from crusty sourdough to soft pumpkin rolls. The natural textures of the basket paired with the golden hues of freshly baked bread create an inviting centerpiece that’s as much a feast for the eyes as it is for the palate. This simple yet soulful decor sparks warmth and hospitality, setting the perfect tone for autumn gatherings.

    Key Design Elements

    • Choose a basket with a natural, earthy weave to complement fall’s rustic charm.
    • Include a variety of breads in warm tones—like cinnamon swirl, rye, and cornbread—to add visual interest and seasonal flavor.
    • Line the basket with a linen napkin in burnt orange or deep burgundy to enhance color contrast and absorb crumbs.

    Pro Tip: Warm the breads slightly before placing them in the basket to release comforting aromas that will entice guests the moment they sit at the table.

    18. Golden Glow: Scattering Maple Leaves Around Flickering Taper Candles

    Golden Glow: Scattering Maple Leaves Around Flickering Taper Candles

    Transform your fall table into an enchanting woodland retreat by gently scattering vibrant maple leaves around slender taper candles. The soft, flickering candlelight dances over the warm reds, oranges, and golds of the leaves, creating a cozy, inviting ambiance that evokes crisp autumn evenings. This combination adds both texture and warmth, making every dinner feel like a seasonal celebration.

    Key Design Elements

    • Choose a mix of fresh and dried maple leaves to balance vivid color with lasting durability.
    • Select tapered candles in warm hues like deep amber, cinnamon, or soft cream to complement the leaves’ palette.
    • Arrange the leaves loosely around candle holders, ensuring enough space for safe candle burning without smothering the flames.

    Pro Tip: To avoid wax drips on your leaves, place each taper candle in a sturdy holder with a wide base and use a small glass or ceramic plate underneath the scattered leaves for easy cleanup and extra safety.

    19. Earthy Elegance: Layering Warmth with a Bohemian Macramé Table Runner

    Earthy Elegance: Layering Warmth with a Bohemian Macramé Table Runner

    Transform your fall table into a tactile feast by layering a handcrafted macramé runner that brings cozy texture and organic charm to your autumnal spread. The intricate knots and fringe catch the soft glow of candlelight, creating inviting shadows that evoke the warmth of the season. Paired with rustic accents, this boho-inspired runner grounds your decor with natural fibers, making every meal feel like a cozy gathering around the harvest.

    Key Design Elements

    • Choose a macramé runner in natural cotton or jute tones to complement warm fall hues like burnt orange, deep reds, and golden yellows.
    • Layer the runner atop a wooden or earth-toned tablecloth to enhance the textured effect and maintain a grounded, organic aesthetic.
    • Accentuate with dried botanicals such as pampas grass or wheat stalks woven gently into the fringe for an added seasonal touch.

    Pro Tip: To keep your macramé runner pristine, place a clear glass or acrylic tray in the center to hold candles or dishes—this preserves texture while allowing the runner’s artisanal beauty to shine.

    20. Enchanted Twilight: Crafting a Dark Moody Gothic Fall Tablescape

    Enchanted Twilight: Crafting a Dark Moody Gothic Fall Tablescape

    Embrace the haunting beauty of autumn nights with a dark moody gothic fall table that evokes mystery and elegance. Deep hues of black, burgundy, and plum blend with flickering candlelight, textured velvet, and antique metallic accents to create a rich, immersive atmosphere. This dramatic setting balances the season’s warmth with a touch of gothic romance, making every dinner feel like a spellbinding ritual.

    Key Design Elements

    • Use a black velvet tablecloth or runner to set a sumptuous, shadowy base.
    • Incorporate dark red and purple foliage—think burgundy dahlias, blackened eucalyptus, and plum-hued leaves—for natural, moody texture.
    • Add vintage brass or pewter candlesticks with tall, dripping black or deep red candles to cast flickering, warm shadows.

    Pro Tip: Layer different textures—matte ceramics, glossy glassware, and plush textiles—to add depth and intrigue, ensuring the dark palette never feels flat or heavy.

    21. Snuggle Up with a Cozy Knit Pumpkin Vignette: Textured Warmth for Your Fall Table

    Snuggle Up with a Cozy Knit Pumpkin Vignette: Textured Warmth for Your Fall Table

    Transform your fall table into a tactile haven by arranging soft, hand-knit pumpkins in warm autumnal hues. The intricate stitches and plush textures invite guests to reach out and touch, adding a comforting, homey vibe that contrasts beautifully with natural elements like crisp leaves and rustic wood. This vignette not only radiates seasonal charm but also brings a unique, handmade warmth that elevates any Thanksgiving or harvest gathering.

    Key Design Elements

    • Choose a mix of pumpkin sizes in shades of burnt orange, creamy beige, and deep rust for visual depth.
    • Intersperse your knit pumpkins with natural accents like acorns, cinnamon sticks, or dried eucalyptus sprigs to balance softness with organic elements.
    • Place the vignette on a textured runner or wooden tray to ground the arrangement and amplify its rustic appeal.

    Pro Tip: To keep your knit pumpkins looking pristine, lightly stuff them with cotton batting for a full, plump shape and use a fabric-safe spray to protect against dust and spills.

    22. Rustic Charm: Cozy Farmhouse Mason Jar Blooms for Your Fall Table

    Rustic Charm: Cozy Farmhouse Mason Jar Blooms for Your Fall Table

    Bring a touch of rustic warmth to your fall table with a farmhouse-inspired mason jar flower arrangement. Fill clear or frosted jars with a mix of vibrant sunflowers, golden chrysanthemums, and sprigs of eucalyptus, evoking the cozy essence of autumn harvests. The natural textures and earthy tones create an inviting centerpiece that feels both timeless and effortlessly charming.

    Key Design Elements

    • Choose a variety of seasonal blooms like sunflowers, mums, and dried wheat stalks to add depth and texture.
    • Wrap twine or burlap ribbon around the mason jar necks for an authentic farmhouse vibe.
    • Use water beads or small pebbles inside the jars to stabilize stems and add subtle visual interest.

    Pro Tip: Cluster several mason jars of varying heights together down the center of your table to create a layered, eye-catching arrangement that feels abundant and welcoming.

    23. Timeless Warmth: Crafting a Cozy Antique Book and Candle Vignette for Your Fall Table

    Timeless Warmth: Crafting a Cozy Antique Book and Candle Vignette for Your Fall Table

    Layer weathered, vintage books in rich, earthy tones as the foundation for a charming fall vignette that invites guests to linger. Nestle softly flickering beeswax or amber-hued candles atop the stacked volumes, their warm glow casting dancing shadows that evoke crisp autumn evenings. This combination of tactile nostalgia and gentle light brings an intimate, storybook charm to your table setting, perfect for cozy gatherings.

    Key Design Elements

    • Choose books with worn leather or fabric covers in deep browns, burnt oranges, and faded golds to enhance autumn’s palette.
    • Vary candle heights and styles—think pillar candles, votives, or even small lanterns—to add dimension and dynamic lighting.
    • Incorporate natural accents like cinnamon sticks, dried leaves, or acorns around the base for subtle, seasonal texture and scent.

    Pro Tip: Anchor the vignette by securing candles safely with a bit of melted wax or placing them on non-flammable trays atop the books, ensuring stability while maintaining the effortless, layered look.

    24. Rustic Elegance: Vibrant Berry and Twisted Branch Centerpiece

    Rustic Elegance: Vibrant Berry and Twisted Branch Centerpiece

    Bring the outdoors in with a striking centerpiece that combines clusters of deep red berries with gnarled, weathered branches. This arrangement offers a tactile contrast between smooth, glossy berries and rugged wood, evoking the crisp, earthy essence of fall. Its natural colors and textures create a warm, inviting focal point that instantly sets a cozy, autumnal mood at your table.

    Key Design Elements

    • Choose a low, wide vase or a shallow wooden bowl to showcase the spread of branches and berries without overwhelming the table.
    • Incorporate a mix of berry types—such as holly, rowan, or hypericum—to add layers of color and visual interest.
    • Add a few sprigs of dried grasses or seed pods nestled among the branches for added texture and seasonal depth.

    Pro Tip: Before arranging, lightly mist the branches and berries with water to enhance their natural shine and keep the berries looking fresh throughout your gathering.

    25. Rustic Elegance: Embracing Warmth with Earthy Linen and Handcrafted Wood

    Create a serene fall tablescape by layering soft, neutral linen with the organic textures of hand-finished wood. The natural fibers and rich grain invite a tactile warmth that feels both grounded and effortlessly elegant, evoking the quiet beauty of autumn’s changing landscape. This combination lets the subtle hues of fallen leaves and candlelight glow truly shine, making your table a cozy centerpiece for intimate gatherings.

    Key Design Elements

    • Choose linens in muted tones like oatmeal, taupe, or soft clay to maintain an earthy palette that complements wooden elements.
    • Incorporate wooden chargers, bowls, or candle holders with visible grain and imperfections to add authentic texture and visual interest.
    • Add seasonal accents like dried wheat stalks or small clusters of acorns nestled directly on the linen to enhance the natural vibe.

    Pro Tip: Opt for a linen table runner instead of a full tablecloth to let the raw wood table peek through, balancing softness with rustic charm and preventing the look from feeling too heavy.

    26. Bountiful Cornucopia Centerpiece Overflowing with Autumn’s Harvest

    Bountiful Cornucopia Centerpiece Overflowing with Autumn’s Harvest

    Create a stunning focal point with a classic cornucopia brimming with vibrant gourds, glossy apples, and rich-hued leaves that evoke the warmth of Thanksgiving. This abundant display invites guests to savor the season visually, as the textures and colors—from the rough wicker horn to the shiny cranberries—bring the spirit of fall right to your table. It works beautifully by combining natural elements that celebrate the harvest, making your setting feel cozy and festive.

    Key Design Elements

    • Choose a sturdy, rustic wicker cornucopia and position it slightly off-center to give a casual, abundant feel.
    • Fill it with a mix of mini pumpkins, Indian corn, cinnamon sticks, and clusters of faux or real berries for texture and fragrance.
    • Scatter a few autumn leaves and nuts around the base to create a seamless transition from centerpiece to table.

    Pro Tip: To keep the cornucopia looking overflowing but neat, layer heavier items like small pumpkins at the base and nestle lighter, delicate accents like dried flowers or sprigs of rosemary on top for height and dimension.

    27. Whisper of Autumn: A Minimalist Single Stem Vase to Illuminate Your Fall Table

    Embrace the serene beauty of fall with a minimalist single stem vase arrangement that lets nature’s understated elegance shine. Picture a slender amber glass vase holding a single branch of fiery maple or a delicate sprig of dried pampas grass, casting soft shadows across your rustic wooden table. This simple yet striking centerpiece invites warmth and tranquility, allowing the rich hues and textures of autumn to speak softly but powerfully.

    Key Design Elements

    • Choose a vase with warm tones like amber, terracotta, or matte white to complement fall’s earthy palette.
    • Select a single stem with interesting texture or color—a red maple branch, a golden oak leaf, or fluffy pampas grass work beautifully.
    • Place the vase slightly off-center on your table for an effortless, modern asymmetry that draws the eye.

    Pro Tip: Opt for a stem with natural movement or a curve to add dynamic flow; trimming the stem just below the water line keeps it fresh longer and enhances the overall delicate silhouette.

    28. Enchanting Autumn Ambiance: The Layered Pumpkin and Candle Pyramid

    Enchanting Autumn Ambiance: The Layered Pumpkin and Candle Pyramid

    Create a stunning centerpiece by stacking pumpkins of varying sizes into a graceful pyramid, interspersed with flickering candles that cast a warm, golden glow. This layered arrangement not only adds height and dimension to your fall table but also fills the air with the cozy scent of autumn, inviting guests to linger longer. The natural textures of pumpkin skin paired with soft candlelight evoke the perfect balance of rustic charm and elegant warmth.

    Key Design Elements

    • Choose pumpkins in complementary hues—classic orange, creamy white, and deep green—to add visual interest and depth.
    • Use flameless LED candles for safety and longevity, placing them securely between pumpkins to prevent tipping.
    • Incorporate fresh sprigs of cinnamon sticks or eucalyptus tucked around each layer to enhance aroma and texture.

    Pro Tip: Select a sturdy, flat base like a wooden tray or slate slab to anchor your pyramid securely, ensuring each pumpkin is balanced and the candles sit stable for a flawless display.

    29. Rustic Woodland Acorn and Twig Wreath: A Cozy Autumn Centerpiece

    Bring the essence of a crisp fall forest straight to your table with a handcrafted wreath centerpiece woven from delicate twigs and dotted with shiny acorns. The natural textures and earthy tones create a warm, inviting focal point that evokes the peaceful charm of woodland strolls, while the subtle crunch of dried leaves and soft scent of cedar fill the air. This centerpiece works beautifully because it blends organic simplicity with seasonal elegance, perfect for enhancing any autumn gathering.

    Key Design Elements

    • Use flexible grapevine or willow twigs to form a sturdy wreath base that’s easy to shape.
    • Gather acorns in varying sizes and shades, and attach them with hot glue or thin floral wire for a natural, layered look.
    • Add small sprigs of dried moss or cinnamon sticks tucked between twigs to introduce complementary textures and a warm fragrance.

    Pro Tip: Before assembling, gently mist the twigs and acorns with a matte sealant spray to preserve their color and prevent shedding, ensuring your centerpiece stays beautiful throughout the season.

    30. Radiant Autumn Elegance: A Glam Gold Leaf and Crystal Table Setting

    Transform your fall table into a shimmering sanctuary with the luxe combination of gilded leaves and sparkling crystal accents. This setting catches the golden glow of autumn light, creating a warm, inviting atmosphere where every place feels special. The tactile contrast between delicate gold leaf chargers and the crisp facets of crystal glassware adds a sophisticated depth that dazzles both the eye and the touch.

    Key Design Elements

    • Use real or faux gold leaf chargers as the foundation for each place setting to instantly elevate your table’s glamour.
    • Incorporate crystal glassware with intricate cuts or vintage-inspired designs to reflect candlelight and add sparkle.
    • Scatter small clusters of gold-painted leaves and amber-hued votive candles down the center of the table for a cohesive, glowing vignette.

    Pro Tip: To ensure your gold leaf elements stay pristine, apply a clear matte sealant spray before placing them on the table—this prevents flaking and keeps your setting flawless throughout the evening.

    Conclusion

    Fall table decor is more than just setting a place at the table; it’s about creating an experience that invites warmth, connection, and gratitude. By weaving together textures, colors, and natural elements, you can craft a space that reflects the season’s heartfelt beauty and your own unique style. Don’t be afraid to mix rustic charm with modern touches or to incorporate unexpected pops of color — the joy is in making it your own.

    So this season, embrace the art of fall decorating and let your table tell a story of comfort and celebration. Gather your favorite pieces, add a sprinkle of creativity, and watch as your home transforms into a cozy sanctuary where memories are made and shared. Happy decorating!

  • 24 Genius Stacked Laundry Room Designs to Maximize Any Space

    Creating an efficient and stylish laundry room can feel like a daunting challenge, especially when space is limited. Fortunately, stacked washer and dryer units offer a smart solution that transforms even the smallest nooks into highly functional workspaces. By vertically aligning your appliances, you free up precious floor space, opening the door to innovative storage options, enhanced organization, and a cleaner, more streamlined look. Whether you’re working with a compact apartment closet or a spacious utility room, embracing stacked laundry designs can dramatically improve both the aesthetics and usability of your home.

    Beyond saving space, stacked laundry units also bring a sense of modernity and sophistication to one of the most utilitarian rooms in your house. These setups encourage creative design choices, allowing you to integrate shelving, countertops, or cabinetry seamlessly around your appliances. The result is a laundry room that not only meets your practical needs but also complements your overall interior style. In the following post, we’ll explore 24 genius stacked laundry room designs that maximize every inch, proving that no matter the size of your space, you can create a laundry area that’s both beautiful and brilliantly efficient.


    1. Industrial Pipe Shelving Accent

    Industrial Pipe Shelving Accent

    The Industrial Pipe Shelving Accent brings a rugged yet stylish edge to your stacked laundry room, combining metal pipes with reclaimed wood for a striking contrast. This design is not only visually appealing but also highly durable, perfect for holding detergents, baskets, and decor. To maximize space, opt for adjustable pipe shelves that can be customized to fit your laundry needs. Readers should consider this idea to add character and functionality without compromising on storage.

    • Use galvanized or black iron pipes for a sturdy, authentic industrial look.
    • Incorporate reclaimed wood shelves to soften the metal and add warmth.
    • Install adjustable brackets so you can easily modify shelf heights as needed.

    💡 Pro Tip: Seal the wood shelves with a water-resistant finish to protect against humidity and prolong their lifespan.

    2. Glass-Front Cabinet Doors

    Glass-Front Cabinet Doors

    Glass-front cabinet doors add a touch of elegance and openness to any stacked laundry room, making the space feel larger and more organized. By showcasing neatly folded linens or stylish storage baskets behind clear or frosted glass, you create a visually appealing yet functional storage solution. This design not only elevates the room’s aesthetic but also helps you quickly identify contents, saving time during busy laundry days.

    • Choose frosted or textured glass to obscure clutter while maintaining a sleek look.
    • Use matching baskets or containers inside cabinets to create a cohesive and tidy appearance.
    • Install interior lighting to highlight the contents and enhance visibility.

    💡 Pro Tip: Apply removable vinyl decals on the inside of glass doors for a customizable, seasonal touch without permanent commitment.

    3. Shiplap Wall Treatment

    Shiplap Wall Treatment

    The Shiplap Wall Treatment adds a timeless, coastal charm to your stacked laundry room, making the space feel warm and inviting. Its clean lines and subtle texture create visual interest without overwhelming the small area, enhancing both style and function. To maximize impact, pair shiplap with light paint colors and open shelving for a bright, organized environment that turns chore time into a moment of inspiration.

    • Choose moisture-resistant paint or sealant to protect your shiplap from laundry room humidity.
    • Install floating shelves on the shiplap wall for extra storage and easy access to detergents.
    • Use horizontal shiplap boards to visually widen narrow laundry spaces.

    💡 Pro Tip: Opt for white or soft pastel shiplap to reflect light and make your laundry room feel larger and fresher.

    4. Stacked Units with a Sink

    Stacked Units with a Sink

    Stacked laundry units paired with a sink create a sleek and space-saving solution perfect for small or multi-functional laundry rooms. This design maximizes vertical space while providing a dedicated area for hand-washing and pre-treating stains, making laundry tasks more efficient. Consider placing the sink right next to the stacked machines for easy access and adding storage above the sink to keep detergents and cleaning supplies organized.

    • Choose compact, front-loading washer and dryer models that stack securely to save floor space.
    • Install a deep utility sink with a high-arc faucet to accommodate various cleaning needs effortlessly.
    • Incorporate open shelving or cabinets above the sink for convenient storage of laundry essentials.

    💡 Pro Tip: Use waterproof and easy-to-clean materials around the sink area to prevent water damage and maintain a fresh look.

    5. Wicker Basket Storage System

    Wicker Basket Storage System

    The Wicker Basket Storage System adds a warm, natural touch to your stacked laundry room while keeping essentials neatly organized. These baskets are lightweight, durable, and easy to pull out, making laundry day smoother and more stylish. By labeling each basket for sorting clothes or storing cleaning supplies, you can maximize space and reduce clutter effortlessly. This design is perfect for anyone seeking a blend of functionality and rustic charm in a compact laundry area.

    • Choose baskets with handles for easy access and transport to other rooms.
    • Use uniform-sized baskets to maintain a clean, cohesive look and fit snugly between stacked units.
    • Line baskets with removable fabric liners to protect delicate items and simplify cleaning.

    💡 Pro Tip: Stack baskets on custom-built shelves that fit perfectly between your washer and dryer to optimize your vertical space.

    6. Stacked Laundry in a Bathroom

    Stacked Laundry in a Bathroom

    Incorporating a stacked laundry setup within a bathroom maximizes space without sacrificing functionality, making it perfect for smaller homes or apartments. This design keeps your washing and drying essentials conveniently close, streamlining your daily routine while maintaining a sleek, organized look. By carefully selecting moisture-resistant materials and ensuring proper ventilation, you can create a practical and stylish multitasking space that elevates both laundry and bathroom experiences.

    • Choose a front-loading washer and dryer stack to save floor space and fit seamlessly into tight bathroom corners.
    • Install waterproof cabinetry or shelving above the units to store detergents, towels, and toiletries efficiently.
    • Add a sliding or bi-fold door to conceal the laundry stack when not in use, preserving a clean bathroom aesthetic.

    💡 Pro Tip: Incorporate a vent fan with a humidity sensor to prevent moisture buildup and protect your laundry appliances from damage.

    7. Mudroom-Laundry Combo

    Mudroom-Laundry Combo

    The Mudroom-Laundry Combo is a clever design that maximizes space by combining two essential home areas into one functional zone. This setup streamlines daily routines by allowing you to drop off dirty clothes and clean them right away, while also providing a space to store shoes and coats. It’s perfect for busy households looking to keep messes contained and laundry tasks efficient.

    • Install a stacked washer and dryer to save floor space and keep the room organized.
    • Add built-in cubbies or hooks for shoes, backpacks, and outerwear to keep clutter at bay.
    • Use durable, easy-to-clean flooring that can withstand mud, water, and detergent spills.

    💡 Pro Tip: Incorporate a countertop above the stacked units to create a convenient folding station.

    8. Subway Tile Backsplash Detail

    Subway Tile Backsplash Detail

    The Subway Tile Backsplash Detail brings a timeless, clean look to your stacked laundry room, instantly elevating the space with its classic appeal. Its glossy surface not only reflects light, making the room feel brighter and larger, but also makes cleaning up detergent splashes and water drips effortless. This backsplash is a smart choice for those wanting a stylish yet practical upgrade that withstands daily laundry room wear and tear.

    • Choose white or light gray grout to keep the look fresh and minimize visible stains.
    • Opt for a beveled subway tile to add subtle texture and depth without overwhelming the space.
    • Extend the backsplash up to the ceiling behind stacked appliances for maximum protection and impact.

    💡 Pro Tip: Use peel-and-stick subway tiles for an easy, budget-friendly installation that doesn’t require grout or professional help.

    9. Maximalist Boho Laundry Room

    Maximalist Boho Laundry Room

    The Maximalist Boho Laundry Room transforms a functional space into a vibrant, inspiring retreat full of color, texture, and personality. Layered patterns, woven baskets, and eclectic art create a cozy atmosphere that makes laundry day feel less like a chore. Practical touches like open shelving and decorative storage solutions keep essentials organized while maintaining the room’s carefree, bohemian vibe. Readers should consider this design to infuse creativity and warmth into a typically overlooked space.

    • Mix and match colorful textiles, such as rugs and curtains, to add depth and visual interest.
    • Incorporate natural materials like rattan baskets and wooden shelves for both beauty and organization.
    • Use bold, patterned wallpaper or wall hangings to create an eye-catching focal point behind your stacked washer and dryer.

    💡 Pro Tip: Keep frequently used items in decorative, labeled containers to blend style with functionality.

    10. Farmhouse-Style Stacked Washer and Dryer

    Farmhouse-Style Stacked Washer and Dryer

    The Farmhouse-Style Stacked Washer and Dryer combines rustic charm with space-saving efficiency, making it perfect for cozy homes with limited laundry areas. Featuring natural wood accents, vintage-inspired hardware, and soft, neutral colors, this design brings warmth and character to a typically utilitarian space. Practical yet stylish, it’s ideal for those who want a functional laundry setup without sacrificing aesthetic appeal.

    • Use reclaimed wood shelves or cabinetry to enhance the farmhouse feel while providing extra storage.
    • Incorporate woven baskets and mason jar containers for organizing supplies in a charming, cohesive way.
    • Choose neutral tones like cream, sage green, or soft gray to keep the space light and inviting.

    💡 Pro Tip: Add a sliding barn door to your laundry nook for a true farmhouse touch that also saves space.

    11. Compact Closet Laundry Nook

    Compact Closet Laundry Nook

    The Compact Closet Laundry Nook transforms a small, often overlooked space into a highly functional laundry area by stacking your washer and dryer vertically. This design is perfect for apartments or homes with limited square footage, allowing you to maximize floor space while keeping your laundry essentials neatly organized. Incorporate sliding doors or bi-fold panels to conceal the nook when not in use, creating a seamless look that blends effortlessly with your décor.

    • Choose a slim, stackable washer and dryer unit to fit snugly within a standard closet space.
    • Install open shelving or pull-out baskets above the machines to store detergents and cleaning supplies.
    • Use moisture-resistant lighting and ventilation to prevent mildew and keep the space fresh.

    💡 Pro Tip: Add a fold-down ironing board inside the closet door to save space and increase functionality.

    12. Laundry Room with Hanging Rod

    Laundry Room with Hanging Rod

    A Laundry Room with Hanging Rod maximizes space by combining functionality and convenience, making it perfect for air-drying delicate clothes or hanging freshly ironed garments straight out of the dryer. This design keeps your laundry area organized and clutter-free, while providing a dedicated spot to avoid wrinkles and speed up your routine. Consider installing the rod above your stacked washer and dryer for easy access without sacrificing valuable floor space.

    • Install the hanging rod at least 6 feet above the floor to accommodate long garments.
    • Use a sturdy metal rod to ensure it can support heavy or wet clothing.
    • Add hooks or clips nearby for hanging smaller items like socks or delicates.

    💡 Pro Tip: Mount the rod on adjustable brackets so you can change the height depending on your drying needs.

    13. Pedestal Drawer Storage Upgrade

    Pedestal Drawer Storage Upgrade

    The Pedestal Drawer Storage Upgrade transforms your stacked laundry units into a streamlined powerhouse of organization and convenience. By elevating your washer and dryer on sturdy pedestal drawers, you gain valuable storage space for detergents, dryer sheets, and cleaning supplies right at your fingertips. This design not only saves space but also reduces the need to bend, making laundry day easier and more efficient—perfect for maximizing small laundry rooms.

    • Choose pedestal drawers with soft-close mechanisms to prevent noise and wear.
    • Opt for drawers with divided compartments to keep laundry essentials neatly separated.
    • Ensure the pedestals are compatible with your specific washer and dryer models for safety and stability.

    💡 Pro Tip: Customize the drawer fronts to match your cabinetry for a seamless, built-in look that elevates your laundry room’s style.

    14. Built-In Cabinet Surround

    Built-In Cabinet Surround

    The Built-In Cabinet Surround transforms your stacked laundry machines into a sleek, cohesive centerpiece by framing them with custom cabinetry. This design not only maximizes vertical storage but also conceals clutter, creating a clean and organized space. Ideal for small areas, it offers a seamless look while keeping detergents, linens, and other essentials within easy reach—making laundry day feel less like a chore and more like a streamlined routine.

    • Choose moisture-resistant materials like MDF with a waterproof finish to ensure longevity in a humid laundry environment.
    • Incorporate adjustable shelves inside the cabinets to accommodate various laundry supplies and bulky items.
    • Add integrated lighting above or inside the cabinetry to brighten the workspace and enhance functionality.

    💡 Pro Tip: Install soft-close hinges on cabinet doors to reduce noise and prolong hardware life in your busy laundry room.

    15. Colorful Patterned Floor Tile

    Colorful Patterned Floor Tile

    A colorful patterned floor tile instantly transforms a stacked laundry room from a mundane space into a vibrant, eye-catching area. This design idea adds personality while cleverly disguising dirt and wear, making it both stylish and practical. To maximize the impact, pair bold tiles with neutral walls and streamlined cabinetry to keep the space balanced and inviting.

    • Choose tiles with a mix of bright and muted colors to create visual interest without overwhelming the space.
    • Opt for durable, water-resistant materials like ceramic or porcelain to withstand laundry room moisture and traffic.
    • Use geometric or floral patterns to add a playful yet sophisticated touch that complements your home’s style.

    💡 Pro Tip: Seal grout lines properly to prevent staining and maintain the vibrant look of your patterned floor tiles over time.

    16. Stacked Units in a Hallway Closet

    Stacked Units in a Hallway Closet

    Stacked units in a hallway closet transform underutilized narrow spaces into efficient laundry hubs, perfect for small homes or apartments. This design keeps your washer and dryer neatly tucked away, freeing up valuable floor space while maintaining easy access. By adding shelves or hooks nearby, you can maximize storage for detergents and linens, making laundry day a breeze. Consider this smart solution if you want to blend functionality with a clean, minimalist look.

    • Measure your closet carefully to ensure stacked units will fit comfortably with proper ventilation.
    • Install adjustable shelving above or beside the units for detergents, fabric softeners, and laundry baskets.
    • Use sliding or bi-fold doors to save space and allow easy access without obstructing hallway traffic.

    💡 Pro Tip: Choose front-loading machines with quick-connect hookups to simplify installation in tight closet spaces.

    17. Neutral Linen and Wood Tones

    Neutral Linen and Wood Tones

    The ‘Neutral Linen and Wood Tones’ stacked laundry room design combines calming, earthy hues with natural textures to create a serene and inviting space. This palette not only softens the compactness of stacked laundry units but also adds warmth and sophistication. Practical elements like wood shelving and linen baskets enhance organization while keeping the aesthetic cohesive, making it an ideal choice for those seeking both style and functionality in a small area.

    • Incorporate floating wood shelves above the washer and dryer for accessible storage without crowding the space.
    • Use woven linen baskets to keep laundry essentials tidy while adding texture and softness to the room.
    • Choose matte or satin finishes in neutral tones for cabinetry to complement wood elements and reduce glare.

    💡 Pro Tip: Install under-shelf LED lighting to brighten the space and highlight natural wood grain details.

    18. Bright White Minimalist Stacked Setup

    Bright White Minimalist Stacked Setup

    The Bright White Minimalist Stacked Setup transforms your laundry room into a clean, airy space that feels larger and more inviting. By stacking your washer and dryer, you maximize vertical space, making it perfect for small areas without sacrificing functionality. This sleek design promotes organization and simplicity, helping you maintain a clutter-free environment while adding a modern touch to your home.

    • Choose all-white appliances and cabinetry to enhance brightness and create a seamless look.
    • Incorporate open shelving above the stacked units for easy access to detergents and essentials.
    • Use minimalist hardware and hidden storage solutions to maintain a clean, streamlined aesthetic.

    💡 Pro Tip: Install under-cabinet LED lighting to brighten the workspace and add a stylish, functional element.

    19. Bold Wallpaper Accent Wall

    Bold Wallpaper Accent Wall

    A Bold Wallpaper Accent Wall transforms a stacked laundry room from purely functional to fabulously stylish. This design idea adds personality and depth to a small space, instantly making laundry day feel less mundane. Opt for moisture-resistant wallpaper with vibrant patterns that reflect your style, and complement it with sleek storage solutions to keep the area organized and chic. It’s an easy way to inject color and character without overwhelming the room.

    • Choose wallpaper with durable, washable material to withstand humidity and frequent cleaning.
    • Pair bold patterns with neutral cabinetry and flooring to maintain balance and avoid visual clutter.
    • Use floating shelves or slim cabinetry on the accent wall to maximize storage without hiding the design.

    💡 Pro Tip: Select a wallpaper pattern that coordinates with your existing color palette to create a cohesive and inviting laundry space.

    20. Stacked Washer-Dryer Behind Barn Doors

    Stacked Washer-Dryer Behind Barn Doors

    Maximize your laundry space with a stacked washer-dryer cleverly concealed behind rustic barn doors. This design not only adds a charming farmhouse touch but also keeps your laundry area neat and accessible without sacrificing style. Perfect for small spaces, it allows you to hide appliances instantly while maintaining easy access for your weekly chores.

    • Choose sliding barn doors to save swinging space in tight laundry rooms.
    • Opt for lightweight materials and smooth hardware to ensure easy door operation.
    • Add interior shelving or hooks behind the doors for extra storage of detergents and linens.

    💡 Pro Tip: Install soft-close barn door hardware to prevent noise and protect your walls during laundry day.

    21. Open Shelving Above the Machines

    Open Shelving Above the Machines

    Open shelving above stacked laundry machines creates an airy, accessible storage solution that maximizes vertical space in tight laundry rooms. This design keeps detergents, fabric softeners, and cleaning supplies within easy reach while adding a stylish, organized look. Consider using sturdy, moisture-resistant materials and grouping items in decorative baskets to maintain a clean and clutter-free environment. Adding labels and varying shelf heights can further enhance functionality and aesthetic appeal.

    • Use waterproof or laminated wood shelves to withstand humidity and spills.
    • Incorporate baskets or bins to group smaller items and reduce visual clutter.
    • Adjust shelf heights to accommodate taller bottles alongside smaller containers.

    💡 Pro Tip: Install under-shelf lighting to brighten the workspace and highlight your neatly organized supplies.

    22. Floating Countertop Folding Station

    Floating Countertop Folding Station

    A Floating Countertop Folding Station is a stylish and space-saving solution perfect for stacked laundry rooms. By mounting a countertop directly above your stacked washer and dryer, you create a dedicated surface for folding clothes without sacrificing floor space. This design keeps your laundry area organized and visually open, making chores feel less cluttered and more efficient. Consider using durable, easy-to-clean materials that complement your laundry room’s aesthetic for a seamless look.

    • Choose a sturdy material like butcher block or laminate that withstands moisture and frequent use.
    • Install the floating countertop at a comfortable height to reduce back strain while folding.
    • Add under-counter storage baskets or hooks for easy access to laundry essentials.

    💡 Pro Tip: Leave a small gap between the countertop and dryer to ensure proper ventilation and easy appliance access.

    23. Dark and Moody Laundry Room

    Dark and Moody Laundry Room

    A Dark and Moody Laundry Room transforms a typically overlooked space into a stylish and calming retreat. Using deep hues like charcoal or navy adds depth and sophistication, while sleek, stacked appliances maximize floor space, making the room both functional and fashionable. Incorporate warm lighting and matte finishes to create a cozy ambiance that turns laundry day into a more enjoyable task.

    • Choose matte black or dark wood cabinetry to complement the deep wall colors and add texture.
    • Install under-cabinet LED lighting to brighten work areas without disrupting the moody atmosphere.
    • Use open shelving with baskets to keep essentials organized and maintain the room’s sleek look.

    💡 Pro Tip: Opt for moisture-resistant paint and finishes to keep your dark walls looking fresh and prevent wear in this high-humidity environment.

    24. Small Apartment Laundry Closet

    Small Apartment Laundry Closet

    The Small Apartment Laundry Closet is a game-changer for maximizing limited space without sacrificing convenience. By stacking your washer and dryer vertically, you free up precious floor area that can be used for additional storage or folding space. This design is perfect for compact living, offering a tidy, efficient laundry solution that blends seamlessly into any apartment layout. Consider incorporating sliding doors or curtains to keep the area discreet yet accessible.

    • Choose a stackable washer and dryer set with compact dimensions to fit snugly in narrow closets.
    • Install adjustable shelving above the appliances to store detergents, fabric softeners, and laundry baskets.
    • Ensure proper ventilation by leaving space around the machines and using louvered doors or vented panels.

    💡 Pro Tip: Use magnetic or adhesive hooks on the inside walls of the closet for hanging small laundry tools like brushes and lint rollers.


    Expert Tips for Styling a Stacked Laundry Room

    Optimize Vertical Space

    Stacked appliances free up floor space by utilizing height, so make the most of that vertical area. Add shelves or cabinets above or next to your units to keep detergents, cleaning products, and laundry baskets organized. Wall-mounted hooks are also great for hanging ironing boards or air-drying garments, keeping your laundry room tidy and efficient.

    Keep it Bright and Airy

    To prevent your stacked laundry setup from feeling too bulky, brighten the space with light-colored paint or playful wallpaper that adds personality and openness. Ensuring plenty of natural light or installing effective artificial lighting will enhance the airy atmosphere, making the room feel more spacious and welcoming.

    Create a Folding Station

    When possible, add a dedicated surface for folding laundry, such as a pull-out shelf or a wall-mounted fold-down table. These options provide a convenient workspace that can be easily stowed away, keeping your laundry area neat and functional.

    Incorporate Stylish Storage Solutions

    Elevate your laundry space by integrating chic baskets, bins, and containers that corral clutter effortlessly. Opt for storage pieces that not only keep things tidy but also complement your personal style and enhance the room’s overall design.

    Add Personal Touches

    Bring personality into your laundry nook by incorporating vibrant artwork, a cheerful plant, or a playful rug. These small details transform the space from purely functional to inviting, making it feel seamlessly connected to the rest of your home.

    Utilize Multi-Functional Pieces

    Choose furniture and storage solutions that pull double duty, such as a bench that hides extra storage beneath the seat or a laundry cart that also functions as a sorting area. These multi-functional pieces maximize your space without sacrificing convenience.


    Mistakes to Avoid When Installing a Stacked Laundry Room Unit

    Ignoring Weight and Stability Concerns

    When stacking your washer and dryer, it’s crucial to consider the total weight pressing down on your floor. Ensure the surface beneath is sturdy enough to handle the load, and always use a stacking kit to keep the units safely fastened and stable.

    Overlooking Ventilation and Airflow

    When stacking laundry machines, it’s important not to block ventilation paths. Ensure there’s ample clearance around the units to keep heat and humidity from accumulating, and regularly inspect the dryer vent to keep it free of obstructions.

    Not Measuring the Space Properly

    Before purchasing and setting up your stacked laundry units, take the time to carefully measure the area. Make sure to account not only for the combined height of both machines but also for adequate ventilation clearance to keep them running safely and efficiently.

    Neglecting Maintenance Access

    When stacking your washer and dryer, ensure that controls and maintenance points remain within easy reach. Don’t block access to lint traps or service panels, so routine upkeep stays simple and hassle-free. Prioritizing accessibility helps keep your laundry setup running smoothly.

    Forgetting About Noise and Vibration

    Improperly balanced stacked washers and dryers can lead to excessive noise and disruptive vibrations. To keep your laundry space quiet and stable, place the units on a firm, even floor and consider adding anti-vibration pads to minimize movement.

    Skipping a Water Leak Plan

    Place a drip pan beneath your washer and make sure a water shut-off valve is within easy reach. Overlooking these precautions can lead to significant water damage if a leak happens unexpectedly. Taking these simple steps helps protect your laundry space from costly mishaps.


    Final Thoughts

    Transforming your laundry room into a functional and stylish space doesn’t have to be a daunting task. With these 24 genius stacked laundry room designs, you can unlock the full potential of even the tiniest nooks, creating an organized haven that makes laundry day a little brighter. Whether you have a compact apartment or a cozy home, these ideas prove that smart design and creativity go hand in hand to maximize every inch without sacrificing comfort or charm.

    Now is the perfect time to reimagine your laundry area and embrace the beauty of stacked solutions. Take inspiration from these clever layouts and tailor them to fit your unique space and lifestyle. By making thoughtful choices, you’ll not only enhance functionality but also bring a touch of joy to your daily routine. So go ahead—dive in, get creative, and transform your laundry room into a space that truly works for you!

  • 35 Creative Small Studio Apartment Decorating Tips to Transform Your Space

    Living in a small studio apartment doesn’t mean you have to compromise on style or comfort. In fact, with a bit of creativity and thoughtful planning, even the coziest of spaces can feel like a chic urban retreat. Small spaces invite us to be intentional about every corner, turning limitations into opportunities for clever design. Embracing the challenge can lead to a home that feels both welcoming and inspiring, reflecting your unique personality in every detail.

    One of the keys to making a small studio feel truly special is choosing furniture that works hard for you. Think multifunctional pieces that offer storage or transform to serve different purposes throughout the day. Smart furniture choices not only maximize your square footage but also keep the space feeling open and uncluttered. Layered lighting plays a crucial role here, too—combining ambient, task, and accent lights can create depth and warmth, making your studio glow with a cozy, inviting atmosphere no matter the time of day.

    And let’s not forget the magic of greenery and personal touches. A few well-placed plants bring life and freshness, softening edges and adding that natural vibrancy that instantly uplifts a room. Personal mementos, artwork, and textiles infuse your space with warmth and character, reminding you that your studio is not just a place to live, but a reflection of your story. Decorating a small studio is an adventure in creativity, proving that stylish, comfortable living knows no size limits.

    1. Earthy Elements for Cozy Vibes

    Earthy Elements for Cozy Vibes

    Incorporating natural textures like wood, rattan, and linen instantly brings a sense of calm and warmth to any room. Even small accents—a woven basket here, a wooden tray there—can transform your space into a welcoming retreat. It’s all about inviting that fresh, grounded feeling indoors without trying too hard.

    Key Design Elements

    • Mix different natural textures to create depth and interest in your decor.
    • Use small natural accent pieces to add warmth without overwhelming your space.
    • Choose sustainable materials to keep your home stylish and eco-friendly.

    Pro Tip: Pro Tip: Layer natural fabrics like linen cushions with woven rugs to instantly elevate your cozy factor.

    2. Chill Vibes with Neutral Tones

    Chill Vibes with Neutral Tones

    Keep your studio calm and inviting by embracing a palette of soft neutrals like creamy whites, warm beiges, and gentle earth hues. This simple foundation creates a serene atmosphere that’s easy to refresh with little bursts of color whenever inspiration strikes.

    Key Design Elements

    • Choose a base of light neutrals to make your space feel larger and more open.
    • Mix different textures—like linen, wood, and woven fabrics—for depth without overwhelming color.
    • Swap out small accessories like pillows or artwork to inject fresh energy without repainting.

    Pro Tip: Pro Tip: Layering neutrals with varied textures keeps your space interesting and cozy!

    3. Cozy Glow Vibes

    Cozy Glow Vibes

    Harsh overhead lights can zap the warmth right out of your space, especially in a studio. Instead, embrace soft, warm lighting that wraps the room in a gentle, inviting embrace. Think twinkling fairy lights, glowing lamps, or even a touch of natural amber from a salt lamp to set the perfect mood.

    Key Design Elements

    • Choose lamps with warm-toned bulbs (around 2700K) for a soothing ambiance.
    • Drape fairy lights around mirrors or shelves to add a whimsical sparkle.
    • Place a Himalayan salt lamp on a side table to introduce a subtle, earthy glow.

    Pro Tip: Pro Tip: Layer your lighting at different heights to create depth and cozy corners.

    4. Cozy Corners with Compact L-Shaped Sofas

    Cozy Corners with Compact L-Shaped Sofas

    Maximize your living space without sacrificing comfort by choosing a sleek L-shaped sofa. It cleverly carves out a defined seating zone, invites conversation, and keeps your room feeling open and inviting. Perfect for small spaces that want to pack a big style punch!

    Key Design Elements

    • Opt for neutral colors to keep the look light and airy.
    • Place near a corner to utilize space that’s often wasted.
    • Add a slim side table or pouf for extra functionality without bulk.

    Pro Tip: Pro Tip: Choose an L-shape with built-in storage to double up on style and space!

    5. Chic & Compact Side Tables

    Chic & Compact Side Tables

    When space is tight, bulky furniture can weigh a room down. Swap that oversized coffee table for stylish side tables that offer flexibility and flair. They’re perfect for holding your morning coffee, displaying a plant, or even acting as a bedside companion.

    Key Design Elements

    • Choose lightweight materials for easy rearranging.
    • Opt for tables with built-in storage to maximize space.
    • Mix and match different heights for visual interest.

    Pro Tip: Pro Tip: Nesting side tables are a game-changer for small spaces—stack them up when you need room, spread them out when you want style.

    6. Brighten Up with a Light Sofa

    Brighten Up with a Light Sofa

    Choosing a light-colored sofa instantly breathes life into cozy rooms, making them feel more open and airy. It’s a simple way to add a fresh, stylish vibe without overwhelming the space. Plus, it pairs effortlessly with any decor style for a sleek, modern look.

    Key Design Elements

    • Opt for durable, stain-resistant fabrics to keep your light sofa looking fresh.
    • Add colorful throw pillows to inject personality and balance the softness of light tones.
    • Place your sofa near natural light sources to maximize the brightening effect.

    Pro Tip: Pro Tip: Keep a gentle upholstery cleaner handy to tackle spills before they set!

    7. Stylish Space-Saving Divider with Built-In Bed

    Stylish Space-Saving Divider with Built-In Bed

    Looking to carve out a cozy sleeping nook without shrinking your room? A custom divider that cleverly integrates a bed offers just that — a private retreat that feels open and airy, plus sneaky storage to keep clutter at bay. It’s the perfect blend of function and flair for any modern space.

    Key Design Elements

    • Choose materials and colors that complement your existing decor to keep the space cohesive.
    • Incorporate shelves or drawers into the divider for extra storage without crowding the room.
    • Opt for a design that lets natural light flow freely to maintain an open atmosphere.

    Pro Tip: Pro Tip: Use sliding or fold-away elements to maximize flexibility and room flow.

    8. Breezy Beach Vibes for Your Home

    Breezy Beach Vibes for Your Home

    Bring the serene energy of the coast into your living space with soft, airy colors and natural textures. You don’t have to transform your entire home — just sprinkle in a few seaside-inspired elements for an instant fresh and relaxing atmosphere. It’s all about feeling the calm of the ocean no matter where you are.

    Key Design Elements

    • Choose light blues and sandy beiges to create a soothing color palette.
    • Incorporate sheer curtains to let in natural light and a gentle breeze.
    • Add subtle touches like driftwood accents or marine-inspired artwork.

    Pro Tip: Pro Tip: Swap heavy fabrics for linen or cotton to keep things light and breathable!

    9. Make a Splash with a Statement Wall

    Make a Splash with a Statement Wall

    Transform any room by choosing one wall to shine with color or pattern—it’s the perfect way to inject character without going overboard. Whether you pick a striking shade, playful wallpaper, or a creative mural, this simple tweak adds instant charm and dimension, especially in cozy spaces.

    Key Design Elements

    • Pick a wall that naturally draws the eye, like behind a bed or sofa, for maximum impact.
    • Test paint samples or wallpaper swatches before committing to ensure it complements your decor.
    • Keep surrounding walls neutral to let your statement wall truly pop.

    Pro Tip: Pro Tip: Use painter’s tape to create crisp, geometric shapes for a modern accent that’s easy to DIY.

    10. Mirror Magic: Elevate Your Space with a Standing Reflection

    Mirror Magic: Elevate Your Space with a Standing Reflection

    A tall, standing mirror does more than help you check your look—it instantly brightens and opens up any room. Position it to bounce natural light around or casually lean it for a stylish, lived-in vibe that never goes out of fashion.

    Key Design Elements

    • Place your mirror opposite a window to amplify sunlight and create a lively, airy feel.
    • Lean the mirror against a textured wall to add depth and an easy, relaxed charm.
    • Use a frame that complements your decor style, from sleek modern to rustic vintage.

    Pro Tip: Pro Tip: Angle your mirror slightly to capture the best light and maximize room brightness!

    11. Embrace the Boho Vibe: Effortless Style Meets Cozy Comfort

    Embrace the Boho Vibe: Effortless Style Meets Cozy Comfort

    Dive into the world of bohemian decor where vibrant layers and natural elements create a relaxed, inviting atmosphere. Think rich textures, handcrafted details, and a jungle of greenery that breathes life into every corner. It’s all about mixing eclectic pieces that tell a story and make your space uniquely yours.

    Key Design Elements

    • Incorporate diverse textiles like macramé, kilim rugs, and tasseled throws for a rich, tactile experience.
    • Add plenty of plants in varying sizes and styles to bring freshness and a touch of nature indoors.
    • Mix patterns and colors boldly—don’t be afraid to combine florals, geometrics, and earthy tones.

    Pro Tip: Pro Tip: Layer ambient lighting with fairy lights and lanterns to amplify your boho sanctuary’s warm, welcoming glow.

    12. Shelves That Open Up Your Space

    Shelves That Open Up Your Space

    Tight on room? Open shelves are your best friend, creating storage that feels airy and inviting instead of cramped. Mix everyday essentials with a few eye-catching accents to keep your space stylish and functional.

    Key Design Elements

    • Balance books and decorative objects to avoid a cluttered look.
    • Use baskets or boxes on lower shelves to keep smaller items organized.
    • Keep color schemes consistent for a cohesive and calming display.

    Pro Tip: Pro Tip: Rotate your decor seasonally to keep your shelves fresh and inspiring!

    13. Chic & Spacious: Mastering Minimalist Apartment Style

    Chic & Spacious: Mastering Minimalist Apartment Style

    When every inch counts, embracing simplicity can transform your apartment into a serene escape. Think sleek designs, calming shades, and clever furniture that pulls double duty to open up your space and your mind. Streamlining your stuff isn’t just about looks—it’s about creating a vibe that feels effortlessly calm.

    Key Design Elements

    • Choose furniture with built-in storage to keep clutter out of sight.
    • Stick to a soft, neutral color palette to make rooms feel airy and open.
    • Opt for pieces with clean lines and simple shapes to maintain a calm aesthetic.

    Pro Tip: Pro Tip: Less is more—focus on quality over quantity to keep your space stylish and stress-free.

    14. Create Your Own Wall of Wonders

    Create Your Own Wall of Wonders

    Running low on space but craving personality? A carefully curated wall filled with your favorite art, snapshots, and quirky treasures turns any blank spot into a vibrant showcase. It’s an easy way to express your style and spark fun conversations with guests.

    Key Design Elements

    • Mix different frame sizes and styles for an eclectic, dynamic look.
    • Plan your layout on the floor first to find the perfect arrangement before hanging.
    • Incorporate meaningful items like travel souvenirs or handmade crafts to personalize the display.

    Pro Tip: Pro Tip: Use removable hooks to switch up your gallery whenever inspiration strikes!

    15. Bring Home the Tropical Vibes with a Banana Plant

    Bring Home the Tropical Vibes with a Banana Plant

    Looking to add a bold, lush statement to your space without the fuss? The banana plant offers large, eye-catching leaves that instantly elevate any room with a chic tropical flair. Plus, it’s surprisingly low-maintenance, perfect for both beginners and plant pros.

    Key Design Elements

    • Place your banana plant near bright, indirect light for vibrant growth without leaf burn.
    • Water consistently to keep the soil moist, but avoid letting it sit in water to prevent root rot.
    • Rotate the plant occasionally to encourage even leaf development and keep it looking balanced.

    Pro Tip: Pro Tip: Wipe the leaves regularly to keep them shiny and dust-free, boosting their tropical glow!

    16. Create Cozy Zones That Work

    Create Cozy Zones That Work

    Maximize every inch by carving out distinct spots for sleeping, working, and chilling—even in the tiniest spaces. Clever use of rugs, furniture arrangement, or pops of color can visually separate your areas and make your home feel roomier and more inviting. It’s all about giving your brain different ‘rooms’ to enjoy without adding walls.

    Key Design Elements

    • Lay down a rug to anchor your lounging or sleeping zone and add texture.
    • Arrange furniture to naturally guide movement and define each space.
    • Use subtle paint shades or wallpaper to hint at different functions within one room.

    Pro Tip: Pro Tip: Floating furniture away from walls creates instant separation and a sense of flow.

    17. Cozy Dining Nooks for Studio Living

    Cozy Dining Nooks for Studio Living

    Living without a dedicated dining room doesn’t mean you have to sacrifice style or comfort at mealtime. A compact bistro table or a clever fold-away wall table can transform a corner into a charming spot for meals, morning coffee, or even a quick work session. It’s all about making the most of your space without losing ease or vibe.

    Key Design Elements

    • Choose multi-functional furniture like foldable tables that tuck away when not in use.
    • Add a couple of comfy, stackable chairs that don’t overcrowd your space.
    • Enhance the nook with soft lighting or a small centerpiece to make it inviting.

    Pro Tip: Pro Tip: Opt for light-colored or transparent furniture to keep your dining area feeling open and airy.

    18. Green Your Space, Lift Your Mood

    Green Your Space, Lift Your Mood

    Adding a touch of greenery instantly transforms any studio from bland to lively. Whether it’s a tiny succulent on your desk or a lush fern in the corner, plants bring warmth and freshness that you can actually feel. Plus, they’re natural air purifiers, making your space healthier and happier.

    Key Design Elements

    • Choose low-maintenance plants like snake plants or pothos if you’re new to indoor gardening.
    • Group plants of varying heights to create visual interest and a mini indoor jungle vibe.
    • Place plants near windows for natural light but avoid direct harsh sunlight to keep them thriving.

    Pro Tip: Pro Tip: Rotate your plants weekly to ensure even growth and a balanced look!

    19. Brighten Up with Crisp White Vibes

    Brighten Up with Crisp White Vibes

    Transform your studio into a spacious, light-filled haven by embracing a predominantly white palette. Whites and soft neutrals reflect natural light beautifully, creating an open and inviting atmosphere. Keep it cozy and interesting by layering in textures through throws, rugs, and cushions that add warmth without overpowering the calm.

    Key Design Elements

    • Mix different shades of white and beige to add depth without losing the airy feel.
    • Incorporate textured fabrics like chunky knit throws or woven rugs to avoid a sterile look.
    • Use light-colored wood or metal accents to bring subtle contrast and character.

    Pro Tip: Pro Tip: Play with matte and glossy finishes in white to give your space visual dimension!

    20. Splash Some Personality

    Splash Some Personality

    Small spaces don’t have to feel dull or cookie-cutter—even with plain walls! Introducing vibrant accents like a bold pillow, striking art, or a patterned rug can instantly energize your room and make it feel uniquely yours. Think of it as an easy, affordable way to inject some fun and flair into your everyday space.

    Key Design Elements

    • Choose one or two statement colors to keep the vibe cohesive but lively.
    • Rotate colorful accessories seasonally to keep your space feeling fresh.
    • Mix textures—like velvet cushions with a woven rug—for added depth and interest.

    Pro Tip: Pro Tip: Let your accent pieces reflect your personality to make your space truly feel like home.

    21. Lighting That Speaks Volumes

    Lighting That Speaks Volumes

    Ditch the boring overhead fixture and let your lighting do the talking. Whether it’s a bold pendant, an artistic floor lamp, or chic wall sconces, the right light instantly transforms your space from ordinary to inviting. Great lighting isn’t just functional—it’s the ultimate style statement.

    Key Design Elements

    • Mix different types of lighting to layer warmth and depth in your room.
    • Choose fixtures that double as decor pieces to add personality without clutter.
    • Opt for dimmable bulbs to easily shift the mood from bright and lively to soft and cozy.

    Pro Tip: Pro Tip: Always balance your statement piece with softer secondary lights for a perfectly lit space.

    22. The Ultimate Moveable Round Coffee Table

    The Ultimate Moveable Round Coffee Table

    Say goodbye to sharp edges and hello to smooth, circular style that fits perfectly in cozy spaces. Whether rolling it over for movie marathons or pushing it aside for snack spreads, a lightweight round table makes your living room as flexible as your plans. It’s the perfect blend of function and flair that keeps up with your lifestyle.

    Key Design Elements

    • Choose a table with caster wheels for effortless mobility.
    • Opt for a compact size to avoid overcrowding your space.
    • Select materials that are easy to clean and maintain, like metal or laminated wood.

    Pro Tip: Pro Tip: Pick a table with built-in storage to stash remotes and coasters out of sight!

    23. Snuggle-Worthy Textures

    Snuggle-Worthy Textures

    Layering cozy fabrics instantly transforms any room into a welcoming retreat. Think plush throws, inviting cushions, and soft rugs that invite you to kick back and relax. These simple touches bring character and comfort, turning your space into a true haven.

    Key Design Elements

    • Mix different textures like knit, velvet, and faux fur for visual interest.
    • Choose colors that complement your decor to create a cohesive look.
    • Drape blankets casually over furniture to add an effortless cozy vibe.

    Pro Tip: Pro Tip: Rotate your throws and pillows seasonally to keep your space feeling fresh and comfy all year round.

    24. Cozy Kitchen Nooks: Your All-in-One Table Spot

    Cozy Kitchen Nooks: Your All-in-One Table Spot

    No separate dining room? No problem! A compact kitchen table becomes your go-to for meals, catching up on work, or simply enjoying a quiet coffee break. Opt for a round design to keep things open and inviting without crowding your space.

    Key Design Elements

    • Choose a table size that fits your kitchen without blocking walkways.
    • Add cushioned chairs or benches for extra comfort during long chats or work sessions.
    • Keep the tabletop clutter-free with a stylish tray or organizer to switch easily between dining and working.

    Pro Tip: Pro Tip: A round table not only saves space but encourages better conversation and flow!

    25. Smart Space Splitter: The Stylish Bookshelf

    Smart Space Splitter: The Stylish Bookshelf

    Living in a studio means making every inch count, and a bookshelf is the perfect way to divide your room without closing it off. It creates distinct zones while doubling as a showcase for your favorite reads, greenery, and quirky treasures. Plus, it keeps your space feeling open and inviting, not cramped.

    Key Design Elements

    • Choose an open-back bookshelf to maintain light flow and visibility between areas.
    • Mix books with decorative items and plants to add personality and texture.
    • Use baskets or boxes on lower shelves to hide clutter and keep things tidy.

    Pro Tip: Pro Tip: Position your bookshelf perpendicular to a window to create natural light zones on both sides.

    26. Creating Your Cozy Home Office Nook

    Creating Your Cozy Home Office Nook

    Transform a small corner into your perfect productivity zone with just a few thoughtful touches. A sleek desk, an ergonomic chair, and plenty of natural or soft lighting can make working from home feel effortless and inviting. Don’t forget to bring in a bit of greenery to brighten your space and boost your mood!

    Key Design Elements

    • Choose a desk that fits your space without crowding it—think compact but functional.
    • Invest in a comfortable chair that supports good posture during long work sessions.
    • Position your workspace near a window or add warm lighting to keep the area bright and energizing.

    Pro Tip: Pro Tip: Use vertical storage like wall shelves to keep your desk clutter-free and stylish!

    27. Elevate Your Space with a Moroccan Rug

    Elevate Your Space with a Moroccan Rug

    Bring warmth and character to any room with a Moroccan rug’s unique patterns and plush texture. These rugs not only create a cozy atmosphere but also cleverly camouflage everyday dirt and spills. It’s the perfect way to add style and function in one beautiful piece.

    Key Design Elements

    • Choose vibrant colors to instantly brighten neutral rooms.
    • Layer a Moroccan rug over hardwood floors for added texture and comfort.
    • Spot clean regularly to maintain the rug’s rich patterns and softness.

    Pro Tip: Pro Tip: Rotate your rug every few months to keep wear even and colors fresh!

    Conclusion

    Decorating a small studio apartment is more than just arranging furniture or choosing colors—it’s about creating a space that reflects who you are and how you want to live. Don’t be afraid to experiment with different layouts, textures, and accents until you find what truly resonates with you. Trust your instincts and remember that your style is as unique as you are. Whether it’s a cozy nook for reading, vibrant pops of color, or clever storage solutions, each choice adds a little piece of your personality to the space. It’s all part of the adventure in turning a compact area into a comfortable, inviting home.

    Above all, enjoy the process. Decorating a small studio is an opportunity to slow down, get creative, and make intentional decisions that bring you joy. There’s no right or wrong way to do it—only what feels right for you. Embrace the journey of transforming your apartment into a sanctuary that inspires and comforts you every day. When you pour your heart into your space, it naturally becomes a warm reflection of yourself, a place where you can relax, recharge, and truly feel at home.

  • 27 Serene Coastal Bathroom Designs to Inspire Your Next Remodel

    There’s something undeniably soothing about the gentle rhythm of ocean waves, the soft hues of sandy shores, and the crisp, refreshing scent of sea air. Bringing these coastal elements into your bathroom can transform an ordinary routine into a serene escape, creating a space that feels both relaxing and rejuvenating. Coastal bathroom design captures this essence, blending natural textures, light-filled palettes, and thoughtful details to evoke the tranquil charm of seaside living—right in the comfort of your home.

    This style has surged in popularity as more homeowners seek to create peaceful retreats that offer a breath of fresh air amidst busy daily lives. Whether you’re fortunate enough to live near the water or simply wish to infuse your space with calm coastal energy, the versatility of coastal design means it can be adapted to suit any bathroom size or aesthetic preference. In this article, we’ll explore inspiring coastal bathroom ideas—from color schemes and materials to accessories and lighting—that will help you craft your own blissful ocean-inspired oasis. Get ready to dive into a world of design possibilities that bring the spirit of the shore into your everyday routine.

    1. Natural Woven Frame Mirrors

    Natural Woven Frame Mirrors

    Incorporating mirrors framed with natural woven materials brings in a touch of coastal charm while enhancing the bathroom’s brightness and openness. These textured frames create visual interest and evoke a breezy, beach-inspired aesthetic that complements any seaside retreat.

    Key Design Elements

    • Choose frames made from materials like rattan, seagrass, or jute for an authentic coastal vibe.
    • Position the mirror to reflect natural light from windows to maximize brightness in the space.
    • Pair woven mirrors with soft, neutral tones and organic decor elements to unify the coastal design.

    Pro Tip: For added dimension, layer a woven mirror above a wooden or driftwood vanity to deepen the coastal atmosphere.

    2. Charming Shiplap Accent Walls

    Charming Shiplap Accent Walls

    Introducing a shiplap accent wall can instantly evoke a serene coastal vibe in your bathroom. Its horizontal lines provide subtle texture and a timeless, beachy aesthetic that brightens up the space.

    Key Design Elements

    • Choose a soft white or pale blue finish to keep the look light and breezy.
    • Use moisture-resistant paint or sealant to protect the wood in humid bathroom environments.
    • Install shiplap behind the vanity or bathtub to create a captivating focal point.

    Pro Tip: To enhance the coastal feel, pair your shiplap wall with natural elements like woven baskets or driftwood accessories.

    3. Beach-Toned Accents

    Beach-Toned Accents

    Bring the soothing essence of the shore indoors by selecting accessories in warm, sandy hues. These subtle touches help create a cohesive coastal vibe without overwhelming the space.

    Key Design Elements

    • Choose soap dispensers and holders in soft beige or muted tan shades to mimic natural sand.
    • Opt for bath mats and rugs with grainy textures or patterns reminiscent of beach dunes.
    • Incorporate small decorative elements like shells or driftwood in sand-inspired tones for added authenticity.

    Pro Tip: Mix different textures within the sand color palette—like smooth ceramics and woven fabrics—to add depth and tactile interest to your bathroom.

    4. Seaside-Inspired Flooring Choices

    Seaside-Inspired Flooring Choices

    Bring the calming essence of the coast beneath your feet by selecting flooring that reflects the colors and textures of the ocean. Incorporate shades reminiscent of sea glass and sandy shores to create a tranquil and refreshing bathroom atmosphere.

    Key Design Elements

    • Opt for ceramic or porcelain tiles in soft aqua, teal, or seafoam green hues to mimic coastal waters.
    • Choose rugs woven from natural fibers like jute or sisal to add a beachy texture and warmth.
    • Incorporate patterned tiles with subtle wave or shell motifs to add visual interest without overwhelming the space.

    Pro Tip: Seal natural fiber rugs to protect against moisture while maintaining their coastal charm and durability.

    5. Woven Rattan Lighting for a Breezy Ambiance

    Woven Rattan Lighting for a Breezy Ambiance

    Incorporating woven rattan light fixtures into your bathroom décor introduces an organic texture that evokes serene, seaside getaways. Their earthy, handcrafted aesthetic blends effortlessly with coastal themes, creating a warm and inviting atmosphere.

    Key Design Elements

    • Choose pendant lamps or sconces with open-weave designs to let light filter softly, mimicking natural sunlight.
    • Pair rattan fixtures with soft, neutral tones and natural materials like driftwood or stone for a cohesive look.
    • Ensure the fixture is treated for moisture resistance to maintain durability in the bathroom environment.

    Pro Tip: To enhance the coastal feel, use light bulbs with a warm glow and consider adding a dimmer switch to create soothing, customizable lighting.

    6. Seaside-Inspired Color Highlights

    Seaside-Inspired Color Highlights

    Incorporating shades of blue and turquoise brings the refreshing essence of the sea into your bathroom. These hues add vibrant, coastal energy that instantly transforms the space into a tranquil seaside retreat.

    Key Design Elements

    • Use navy or aqua towels and bath mats to introduce bold coastal color without overwhelming the space.
    • Incorporate decorative accessories like soap dishes or vases in ocean-inspired blues to enhance the theme subtly.
    • Consider painting an accent wall or cabinet in soft teal or seafoam green for a soothing marine vibe.

    Pro Tip: Balance bright aquatic tones with crisp whites and natural textures like driftwood or rattan to create a harmonious coastal bathroom ambiance.

    7. Airy Window Treatments for a Breezy Vibe

    Airy Window Treatments for a Breezy Vibe

    Opt for light and translucent window coverings that invite sunlight to filter through softly, enhancing the serene coastal ambiance. These treatments add a gentle movement to the space, echoing the soothing rhythm of ocean waves.

    Key Design Elements

    • Choose sheer linen or voile curtains to maximize natural light and maintain privacy.
    • Consider bamboo or woven wood blinds for a texture that complements seaside decor.
    • Keep curtain rods minimalistic and mount them close to the ceiling to create an illusion of higher windows.

    Pro Tip: For added functionality, install motorized sheer shades that can be easily adjusted to control sunlight while preserving the airy feel.

    8. Rustic Driftwood Feature Wall

    Rustic Driftwood Feature Wall

    Incorporating a rustic driftwood feature wall infuses your coastal bathroom with natural warmth and organic texture. This element evokes the serene vibe of the seaside, transforming your space into a welcoming, beach-inspired oasis.

    Key Design Elements

    • Select weathered wood panels or reclaimed driftwood to enhance authenticity and sustainability.
    • Seal the wood properly to protect against bathroom humidity while preserving its natural look.
    • Pair the wood accent with soft, sandy tones and ocean-inspired decor to complete the coastal ambiance.

    Pro Tip: For added dimension, arrange the wood pieces in varied patterns or thicknesses to mimic the randomness of driftwood found on the shore.

    9. Aged and Rustic Textures

    Aged and Rustic Textures

    Incorporate weathered and rustic textures to bring a natural seaside charm to your bathroom. Using items like bath mats and shower curtains that feature muted coastal hues and worn finishes can evoke the feel of driftwood and sun-bleached materials.

    Key Design Elements

    • Select bath mats made from natural fibers such as jute or sisal with distressed patterns.
    • Opt for shower curtains with faded nautical prints or soft, ocean-inspired colors to create a lived-in look.
    • Choose towels and rugs in muted tones that mimic sand, seafoam, or weather-beaten wood.

    Pro Tip: Mix and match different textured fabrics in your linens to add depth and maintain an effortlessly beachy vibe.

    10. Chic Coastal Countertop Styling

    Chic Coastal Countertop Styling

    Elevate your bathroom’s charm by styling your countertop with coastal-inspired accents that bring a breezy, beachy vibe indoors. Thoughtfully chosen decor items like natural textures and ocean-themed pieces can add personality and warmth without overwhelming the space.

    Key Design Elements

    • Incorporate elements like driftwood soap dishes or sea glass containers to subtly echo the shore.
    • Use a woven basket or a tray in light wood or rattan to corral essentials while adding texture.
    • Add a small arrangement of beach grasses or succulents in a ceramic pot for a fresh and natural touch.

    Pro Tip: Keep the countertop clutter-free by limiting decor to a few meaningful pieces that complement your overall coastal theme.

    11. Seaside Rustic Charm

    Seaside Rustic Charm

    Incorporating rustic elements into your coastal bathroom brings an inviting warmth and organic character that echoes the natural beauty of the shore. Combining weathered materials with a soft color palette enhances the laid-back, beach-inspired atmosphere.

    Key Design Elements

    • Incorporate reclaimed wood accents, such as shelving or mirror frames, to add texture and authenticity.
    • Choose vintage or distressed fixtures in bronze or brushed nickel to evoke a timeless seaside appeal.
    • Use natural fabrics like linen or cotton for shower curtains and towels to enhance tactile warmth and comfort.

    Pro Tip: Balance rustic features with light and airy coastal colors like aqua, sand, and white to maintain a bright and breezy bathroom ambiance.

    12. Warm Neutral Tones Inspired by the Shore

    Warm Neutral Tones Inspired by the Shore

    Incorporating warm, sandy neutrals into your bathroom design beautifully complements natural elements such as driftwood, wicker, and stone. These hues foster a serene, cohesive atmosphere that perfectly captures the essence of coastal living.

    Key Design Elements

    • Choose paint colors or tiles in soft beige or sandy taupe to create a soothing backdrop.
    • Pair sandy tones with textured materials like woven baskets or wooden accents for added depth.
    • Use sandy shades in towels and bath mats to subtly unify the coastal theme.

    Pro Tip: Balance sandy neutrals with crisp white fixtures to maintain a fresh and airy coastal feel.

    13. Breezy and Serene Color Palette

    Breezy and Serene Color Palette

    Embrace a soothing blend of crisp whites, gentle sky blues, and subtle sandy beiges to capture the essence of coastal tranquility. This combination not only mirrors the peacefulness of the shore but also visually expands your bathroom, creating an open and refreshing atmosphere.

    Key Design Elements

    • Use white as the primary base color to reflect natural light and enhance the room’s brightness.
    • Incorporate soft blue accents through towels, rugs, or wall art to mimic the ocean’s calming hues.
    • Add sandy neutral tones with wooden accessories or textured tiles for a grounded, beach-inspired feel.

    Pro Tip: Opt for matt finish paints and natural materials to reinforce the light, airy ambiance without overwhelming the space.

    14. Warm Metallic Accents

    Warm Metallic Accents

    Incorporating warm metallic accents, like brass, infuses your coastal bathroom with an inviting elegance. These fixtures harmonize beautifully with the natural sandy tones and gentle blues inspired by the seaside, creating a balanced and welcoming atmosphere.

    Key Design Elements

    • Choose brushed or antique brass finishes to add a subtle vintage charm.
    • Pair warm metals with neutral or muted wall colors to highlight their luster without overpowering the space.
    • Mix brass fixtures with natural materials like wood and rattan for an authentic beachside vibe.

    Pro Tip: For a cohesive look, coordinate your brass hardware across faucets, drawer pulls, and lighting fixtures to maintain a unified warm glow throughout your bathroom.

    15. Sleek and Serene Beachside Vibes

    Sleek and Serene Beachside Vibes

    Embracing a streamlined design with clean lines and essential elements helps create a tranquil coastal bathroom that feels both modern and peaceful. Prioritizing functionality while minimizing decor allows natural light and airy space to enhance the seaside ambiance.

    Key Design Elements

    • Choose simple, streamlined fixtures in light colors like white or soft neutrals to reflect the beachy theme.
    • Limit decorative accessories to a few meaningful pieces such as a shell or driftwood accent for subtle coastal charm.
    • Use open shelving or recessed storage to keep surfaces uncluttered and maintain a breezy, spacious feel.

    Pro Tip: Opt for matte or satin finishes on fixtures and cabinetry to reduce glare and add a soft, calming texture reminiscent of natural seaside elements.

    16. Serene Sandy Tones

    Serene Sandy Tones

    Embracing soft, natural hues inspired by sand and driftwood creates a tranquil coastal bathroom atmosphere. This approach maintains a light and airy feel, making the space inviting and peaceful without overpowering the senses.

    Key Design Elements

    • Use beige, off-white, and soft taupe paint or tile colors to reflect natural coastal elements.
    • Incorporate light wood or wicker accents for warmth and texture.
    • Choose linen or cotton textiles in subtle shades to enhance the soothing environment.

    Pro Tip: Add touches of matte or weathered finishes to your fixtures and accessories for an authentic beach-worn look.

    17. Embrace Earthy Textures

    Embrace Earthy Textures

    Bring the serene feel of the coast into your bathroom by using organic materials that evoke the beach environment. Integrating textures like reclaimed wood, woven bamboo, and smooth river stones creates a warm, inviting space inspired by nature’s beauty.

    Key Design Elements

    • Choose a wooden vanity with a weathered or driftwood finish to add rustic charm.
    • Accessorize with bamboo baskets, soap dishes, or shelving for subtle coastal flair.
    • Incorporate stone elements such as pebble tiles or countertops to mimic shoreline textures.

    Pro Tip: Seal wood and stone surfaces properly to protect them from moisture while maintaining their natural look.

    18. Cozy Coastal Fabrics

    Cozy Coastal Fabrics

    Incorporate plush, lightweight textiles that evoke the serene feeling of the shore. Opt for towels, rugs, and curtains featuring natural textures and hues inspired by sand and sea.

    Key Design Elements

    • Select organic cotton or linen fabrics for a breathable, airy feel.
    • Choose patterns with subtle nautical motifs or soft ocean-inspired colors like seafoam green, soft blues, and sandy beige.
    • Layer different textures such as woven rugs and fluffy towels to add depth while maintaining a relaxed vibe.

    Pro Tip: Mix and match materials with different weaves to create a tactile experience reminiscent of beach surroundings.

    19. Fresh Whites for a Beachy Vibe

    Fresh Whites for a Beachy Vibe

    Utilizing bright white towels and linens instantly elevates your bathroom’s coastal feel, evoking a sense of cleanliness and serenity. This timeless choice perfectly balances the natural textures and colors found in seaside-inspired décor.

    Key Design Elements

    • Choose high-quality, plush white towels to add a touch of luxury and comfort.
    • Mix different textures like waffle weave or terry cloth to add subtle visual interest.
    • Keep your linens impeccably clean and bright to maintain the crisp, fresh atmosphere.

    Pro Tip: Enhance the coastal vibe by adding subtle accents like seashell-shaped towel hooks or linen baskets made from natural fibers alongside your white linens.

    20. Seaside-Inspired Details

    Seaside-Inspired Details

    Incorporate gentle coastal influences through carefully chosen decor that evokes the charm of the ocean. Using maritime-inspired accessories can enhance the bathroom’s seaside vibe while maintaining a balanced and inviting atmosphere.

    Key Design Elements

    • Swap out cabinet pulls for rope-wrapped handles to introduce texture and interest.
    • Decorate with small anchor or seashell prints in artwork or textiles for a subtle maritime nod.
    • Hang a mirror framed with driftwood or resembling a ship’s wheel to serve as a captivating focal point.

    Pro Tip: Keep nautical elements understated and cohesive to avoid clutter and maintain a serene coastal ambiance.

    21. Deep Navy Feature Wall

    Deep Navy Feature Wall

    Incorporating a deep navy wall in a light, neutral bathroom instantly brings a sophisticated coastal vibe. This rich hue creates a striking focal point that enhances the room’s depth while maintaining a calming atmosphere.

    Key Design Elements

    • Choose a moisture-resistant paint finish to protect your accent wall from bathroom humidity.
    • Pair the navy wall with natural textures like driftwood or rattan to enhance the seaside feel.
    • Balance the dark tone with crisp white trim and fixtures for a fresh and airy look.

    Pro Tip: Add subtle ocean-inspired artwork or accessories on the navy wall to reinforce the coastal theme without cluttering the space.

    22. Lush Greenery for a Beachy Touch

    Lush Greenery for a Beachy Touch

    Incorporate vibrant potted greenery into your coastal bathroom to evoke the refreshing essence of the seaside. Opt for plants that thrive in moist environments to maintain a lively and effortless look.

    Key Design Elements

    • Select humidity-tolerant plants such as ferns, snake plants, or aloe vera for durability.
    • Use ceramic or woven baskets in natural tones to enhance the coastal ambiance.
    • Place plants near windows or in well-lit corners to encourage healthy growth.

    Pro Tip: Rotate your plants regularly to ensure even light exposure, keeping them lush and vibrant throughout the year.

    23. Refreshing Blue Storage Solutions

    Refreshing Blue Storage Solutions

    Incorporating a blue cabinet into your coastal bathroom instantly evokes the serene hues of the sea while offering practical storage. This splash of blue brings both functionality and a breezy, beach-inspired charm to your space.

    Key Design Elements

    • Choose a cabinet in shades like aqua, navy, or turquoise to complement your coastal palette.
    • Opt for weathered or distressed finishes to enhance the nautical, lived-in feel.
    • Use the cabinet to neatly organize toiletries while adding a focal point of color.

    Pro Tip: Pair your blue cabinetry with natural textures like wicker baskets or driftwood accents to amplify the coastal ambiance.

    24. Warm Wood Accents for a Seaside Vibe

    Warm Wood Accents for a Seaside Vibe

    Incorporating wood tones into your bathroom brings a warm, organic touch that mirrors the natural beauty of the coast. These elements evoke memories of sandy shores, weathered driftwood, and charming beach houses, enhancing the overall coastal atmosphere.

    Key Design Elements

    • Choose light or weathered wood finishes to maintain an airy, beach-inspired feel.
    • Incorporate wooden shelving or vanity pieces to add texture and warmth.
    • Use reclaimed driftwood as decorative accents or towel racks for authentic coastal charm.

    Pro Tip: Seal wooden surfaces properly to protect against moisture while keeping that natural coastal look intact.

    25. Seaside-Inspired Wall Decor

    Seaside-Inspired Wall Decor

    Incorporate artwork that captures the essence of the coast, such as prints featuring waves, driftwood, or sandy shores. This subtle touch enhances the relaxing atmosphere while giving your bathroom a unique, beachy personality.

    Key Design Elements

    • Choose frames in natural materials like distressed wood or rattan to complement the coastal theme.
    • Opt for artwork with soft blues, sandy neutrals, and seafoam greens to evoke the ocean vibe.
    • Consider waterproof or laminated prints for durability in the bathroom’s humid environment.

    Pro Tip: Mix different sizes and orientations of seaside artwork to create an engaging gallery wall that feels like a walk along the shore.

    26. Natural Wicker Storage Solutions

    Natural Wicker Storage Solutions

    Incorporate wicker baskets into your bathroom design to enhance organization while introducing natural textures that evoke a serene coastal atmosphere. These versatile pieces blend functionality with a laid-back beach-inspired charm.

    Key Design Elements

    • Select baskets in varying sizes to accommodate toiletries, towels, and smaller essentials.
    • Opt for light or whitewashed wicker to complement a breezy, coastal color palette.
    • Place baskets on shelves or under the vanity to maximize storage without cluttering the space.

    Pro Tip: Line baskets with removable waterproof liners to protect against moisture and simplify cleaning.

    27. Embrace Sunlit Spaces

    Embrace Sunlit Spaces

    Let sunlight pour into your coastal bathroom by incorporating expansive windows or strategically placed skylights. This infusion of natural light not only brightens the room but also enhances the breezy, beach-inspired atmosphere.

    Key Design Elements

    • Opt for frosted or textured glass to maintain privacy without sacrificing light.
    • Consider installing a skylight at an angle that captures the most daylight throughout the day.
    • Use light, sheer window treatments that allow sunlight to filter softly while adding a touch of elegance.

    Pro Tip: Place reflective surfaces like mirrors or glossy tiles opposite windows to amplify natural light and create a spacious feel.

    Conclusion

    Embracing a coastal theme in your bathroom is more than just a design choice—it’s an invitation to bring the soothing, rejuvenating spirit of the shore right into your home. Whether you start with subtle sandy hues and shell-inspired accents or dive into bold ocean blues and weathered wood textures, every detail can help create a serene retreat that feels like a breath of fresh sea air. Don’t be afraid to let your creativity flow and personalize your space with elements that evoke your favorite beach memories.

    Now is the perfect time to embark on your own coastal bathroom transformation. Imagine stepping into a space that instantly transports you to tranquil tides and sun-kissed shores each day. With a touch of inspiration and simple updates, you can craft a calming sanctuary that refreshes both body and mind—making every shower or bath feel like a mini-vacation. Dive in and let the coastal charm infuse your home with timeless beauty and coastal bliss.