Author: Nick Garcia

  • 30 Inspiring Side Table Decor Ideas to Transform Your End Table Styling

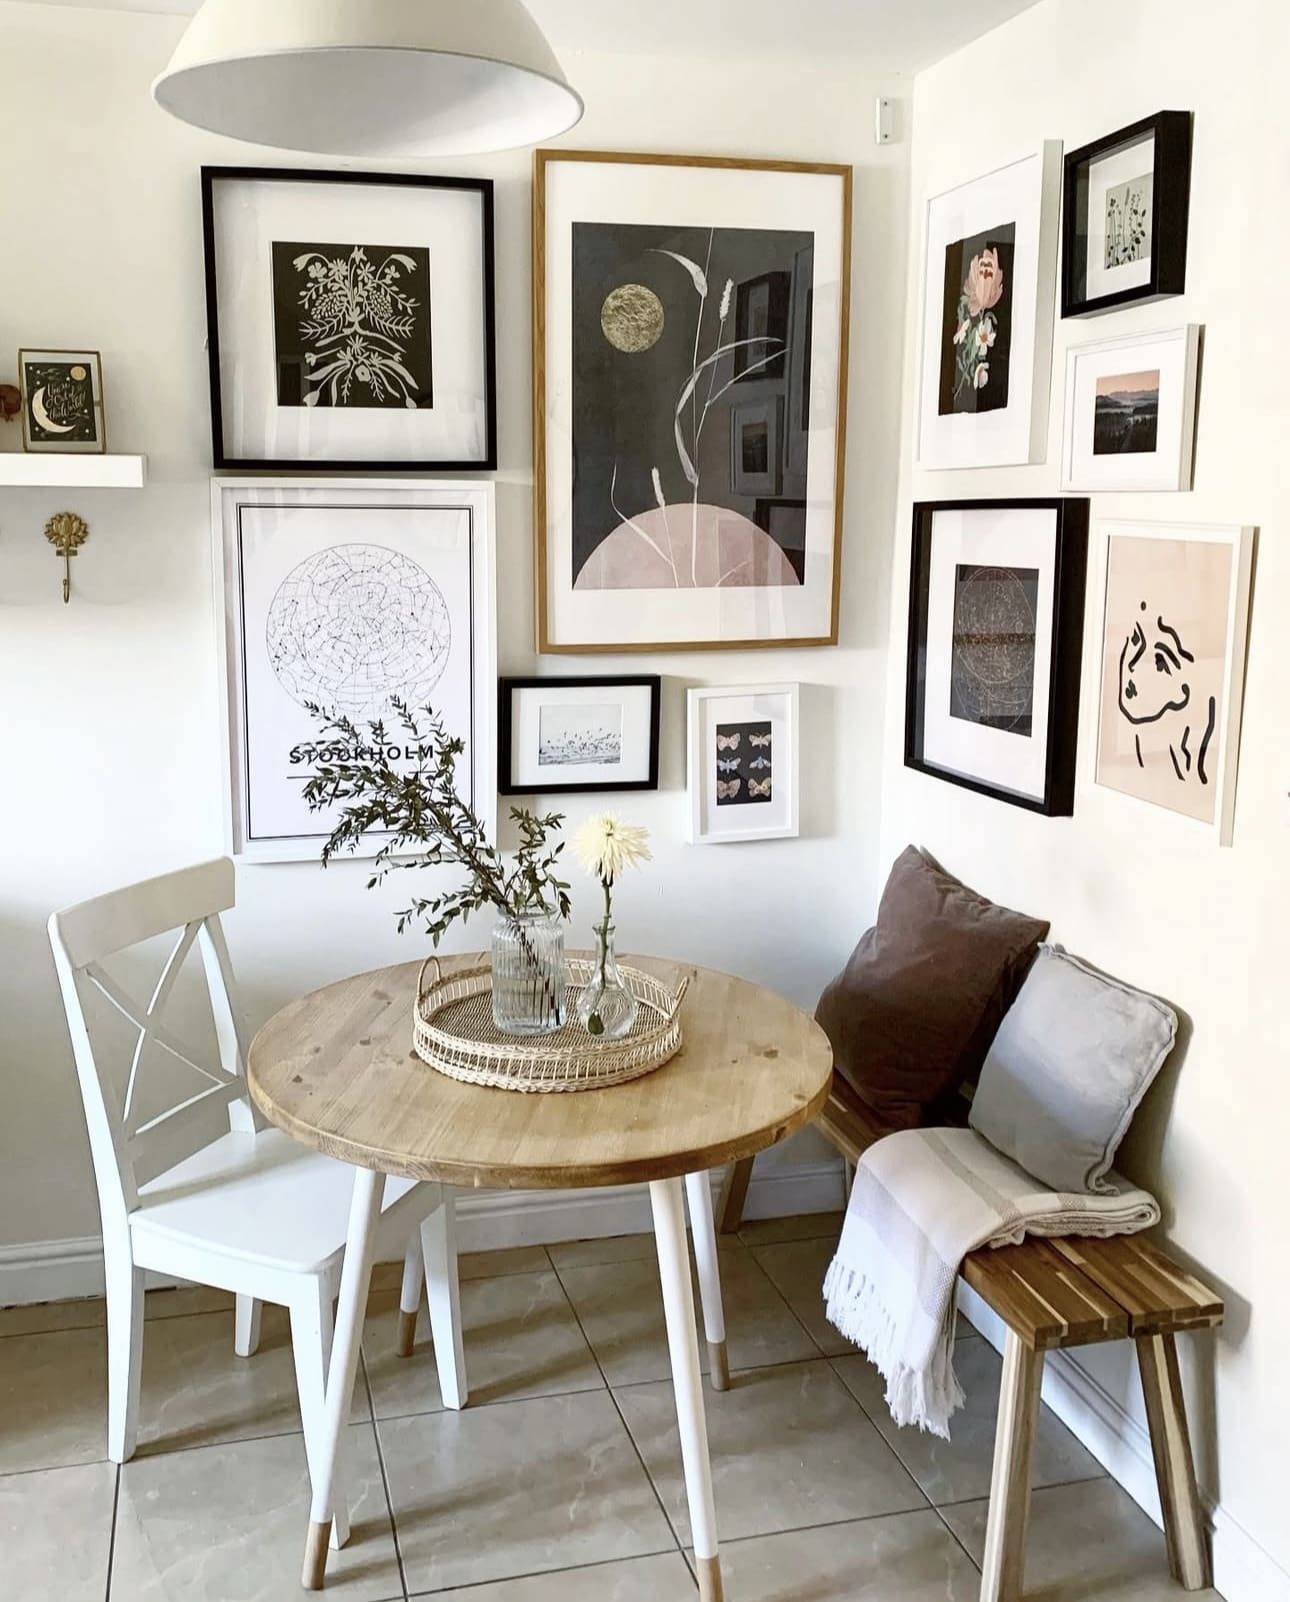
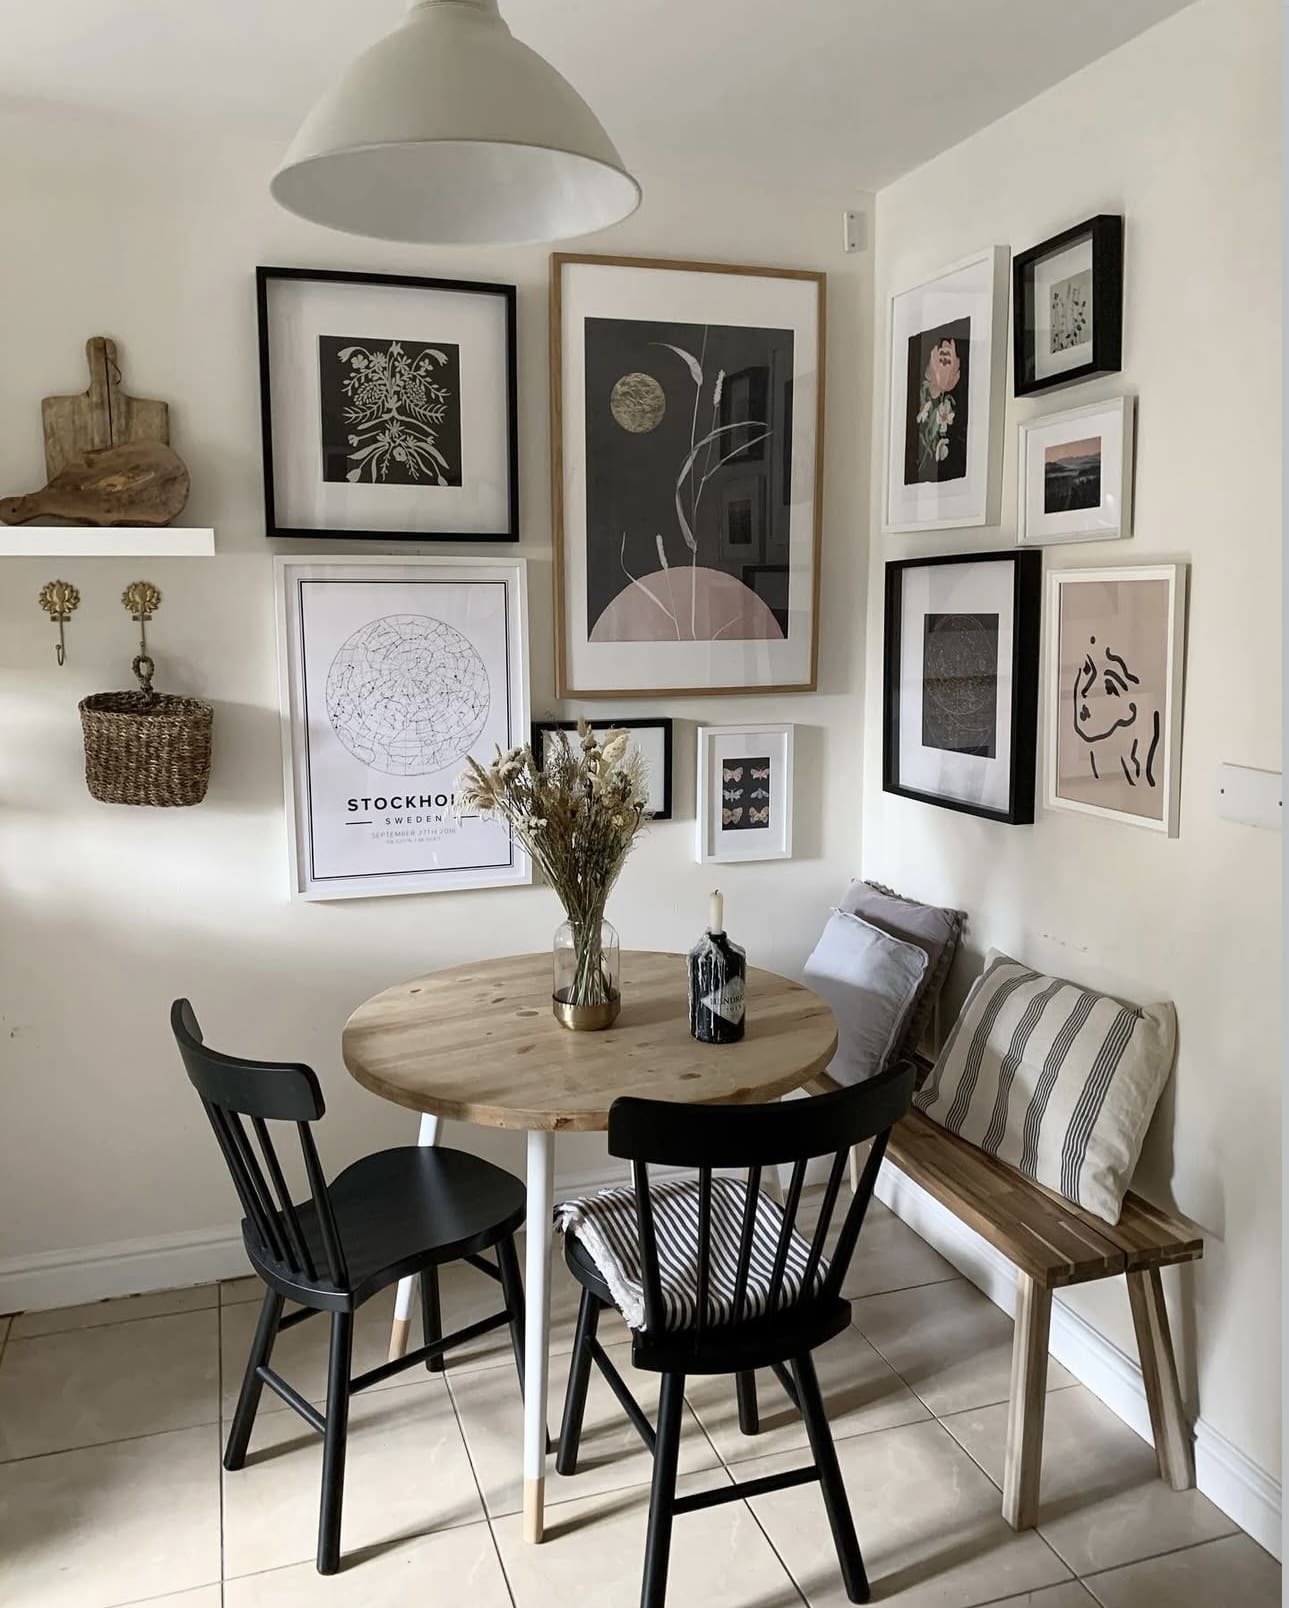
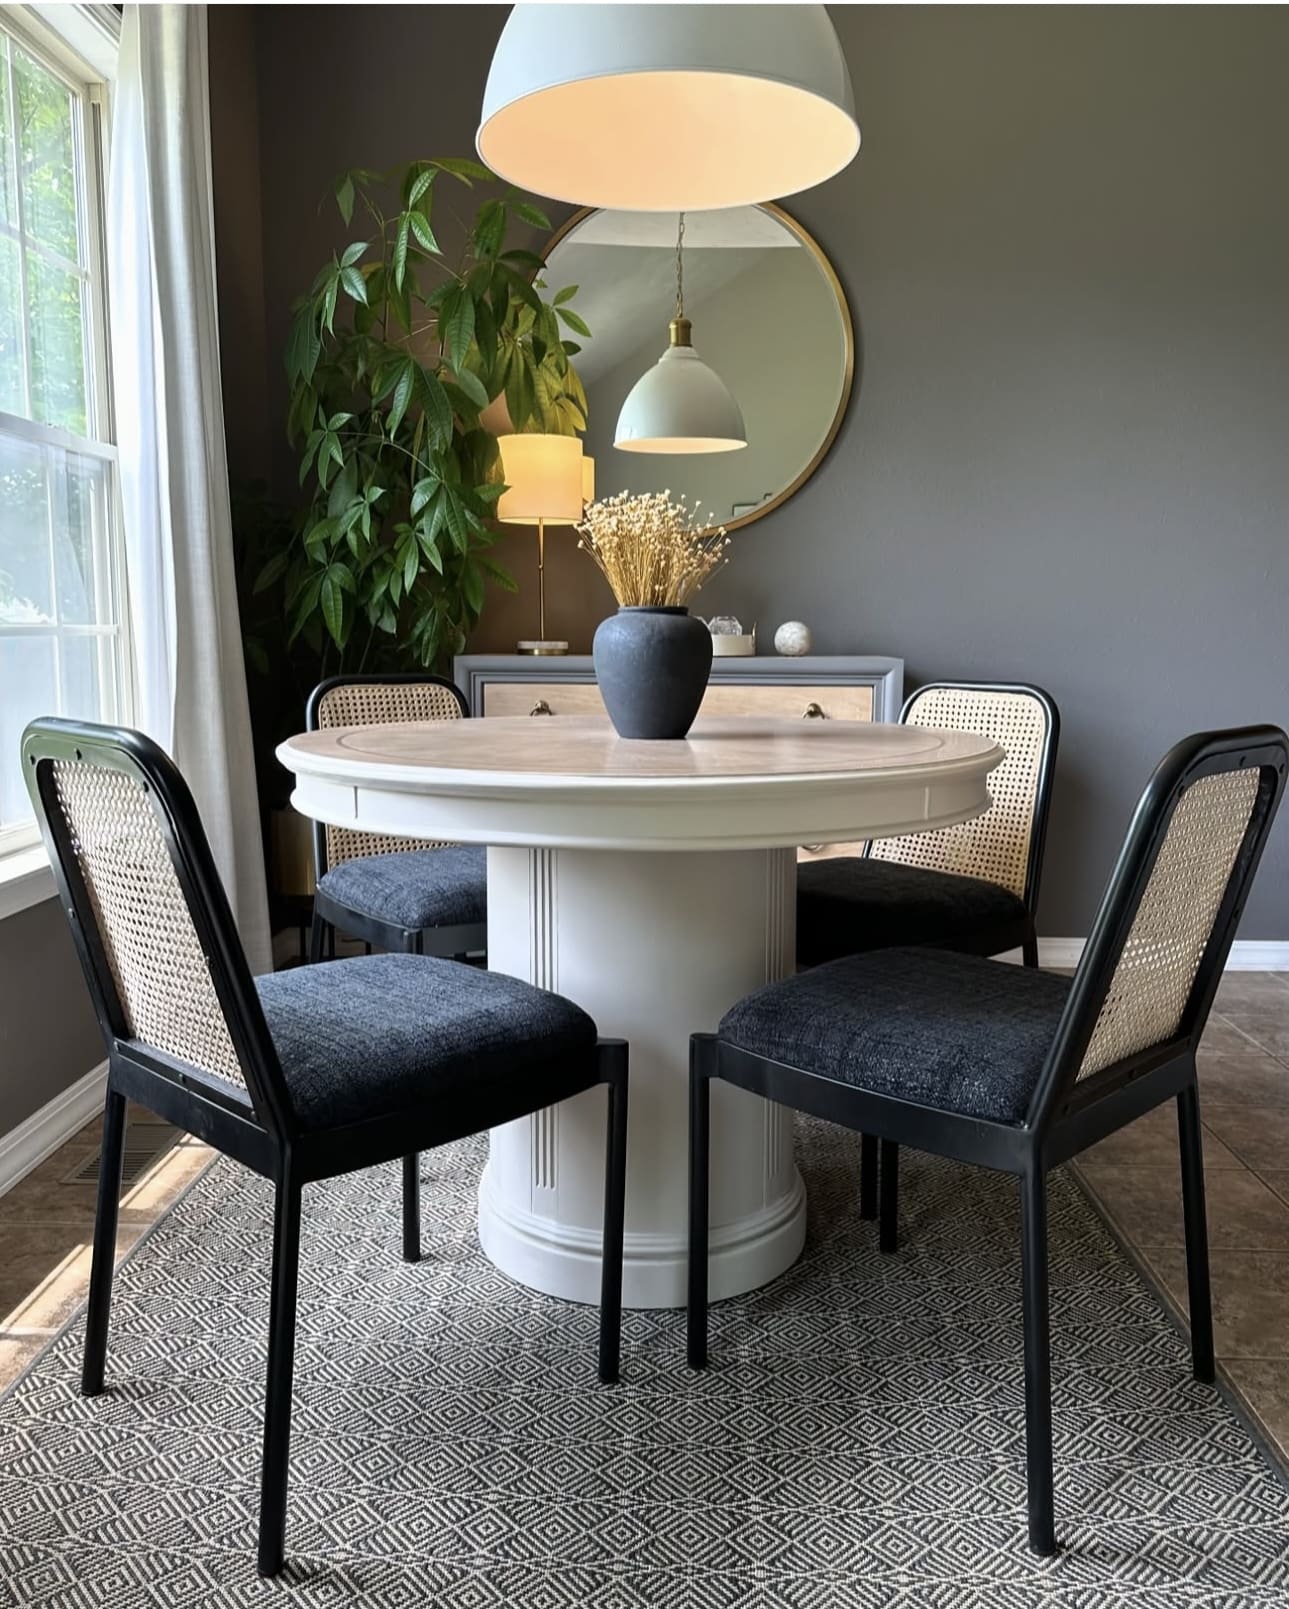
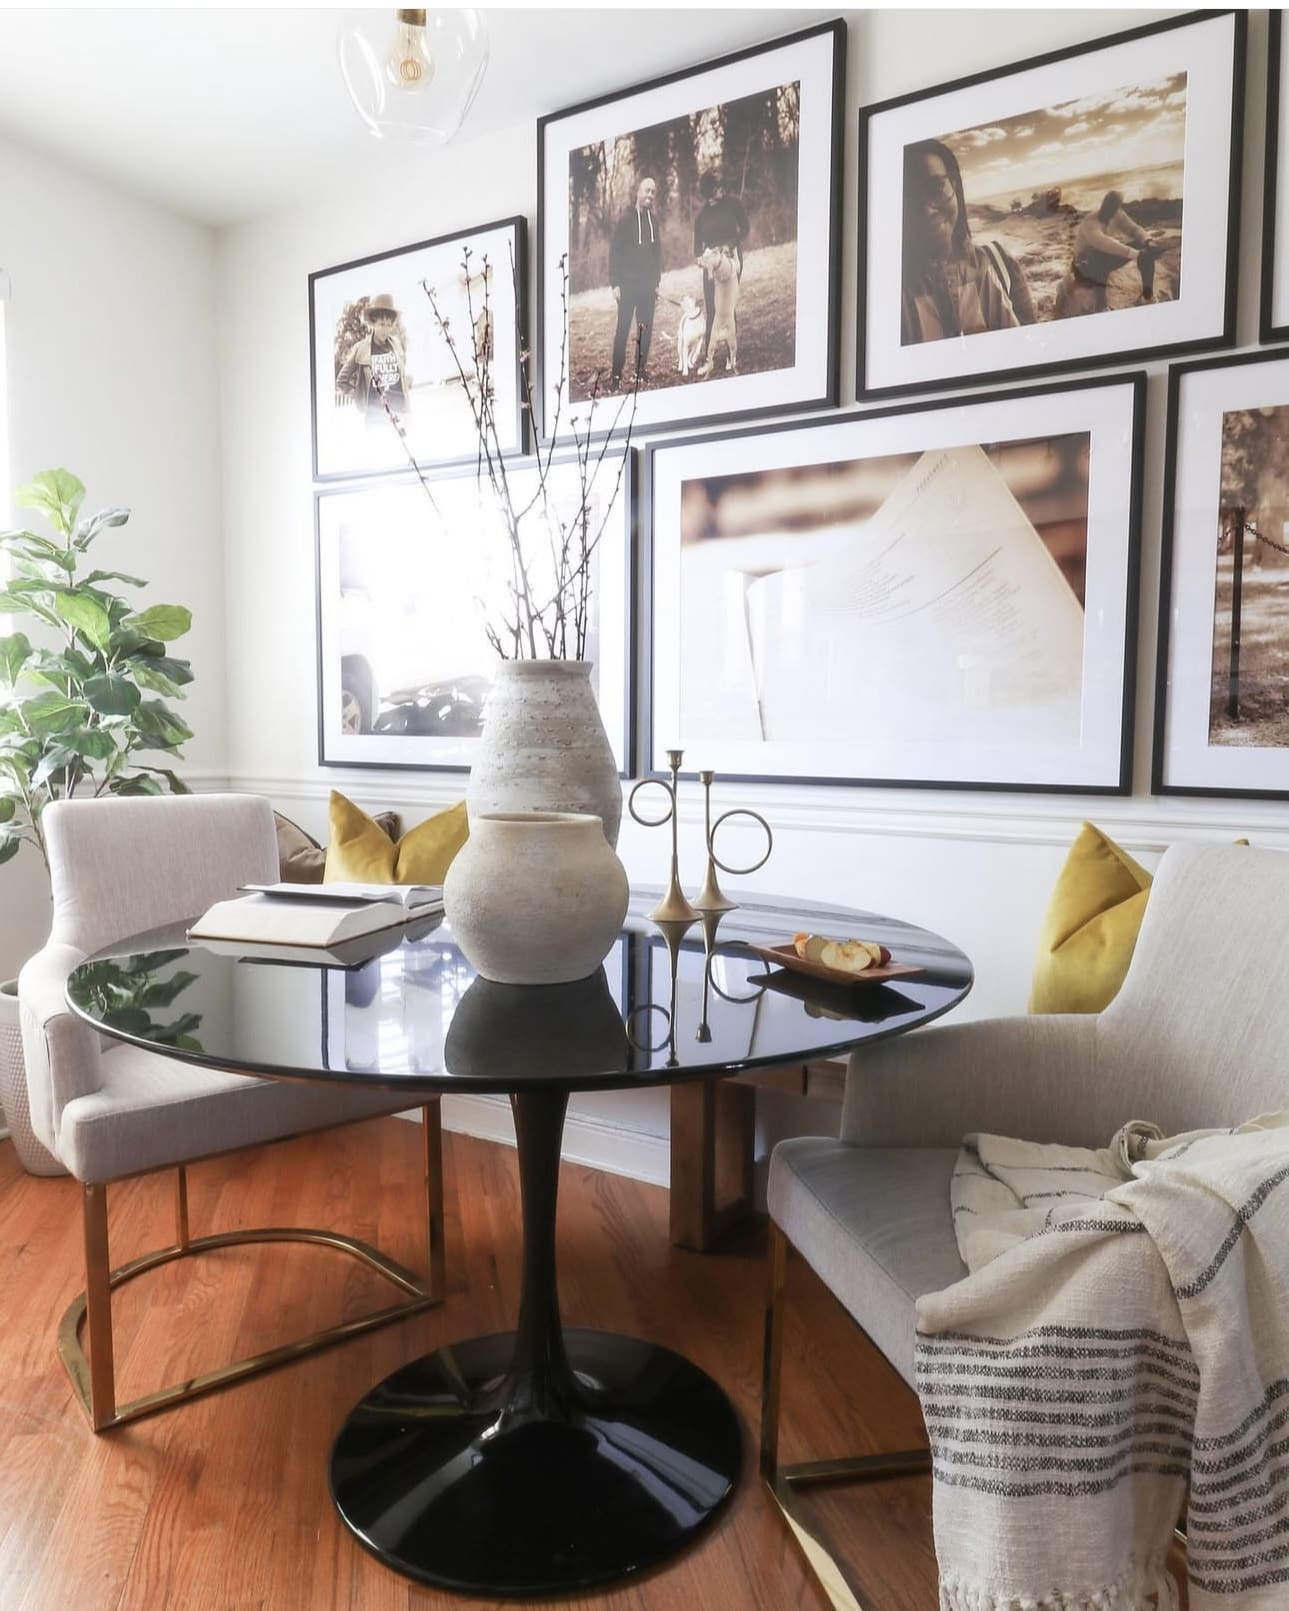
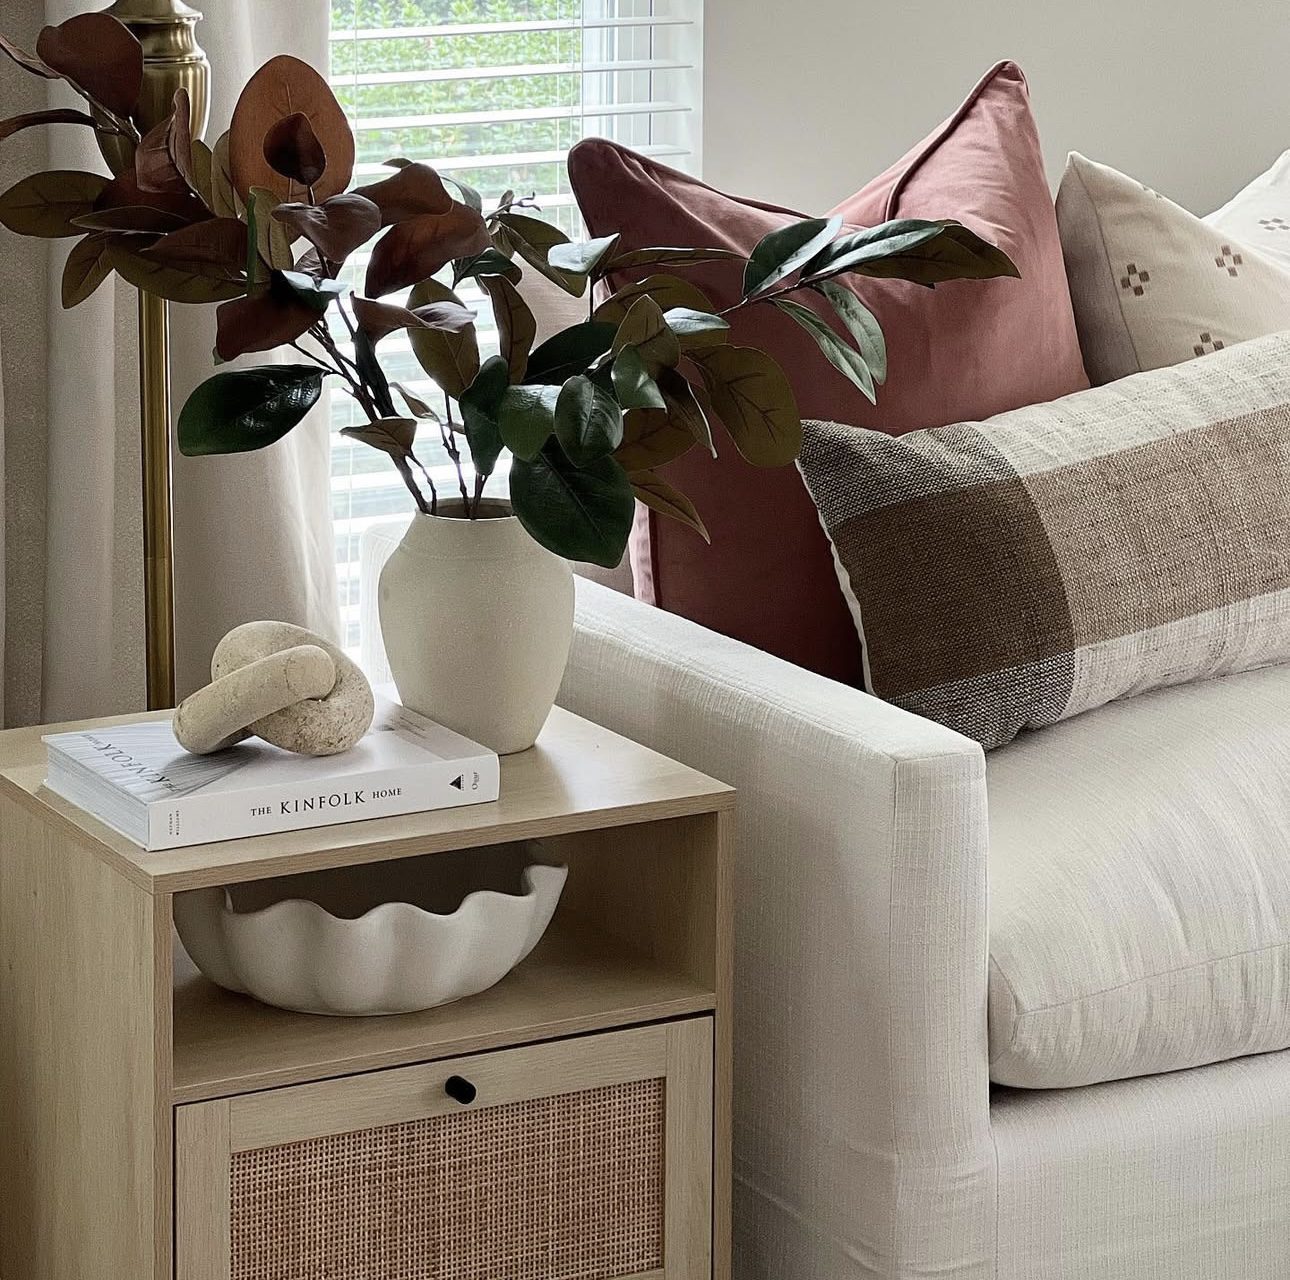
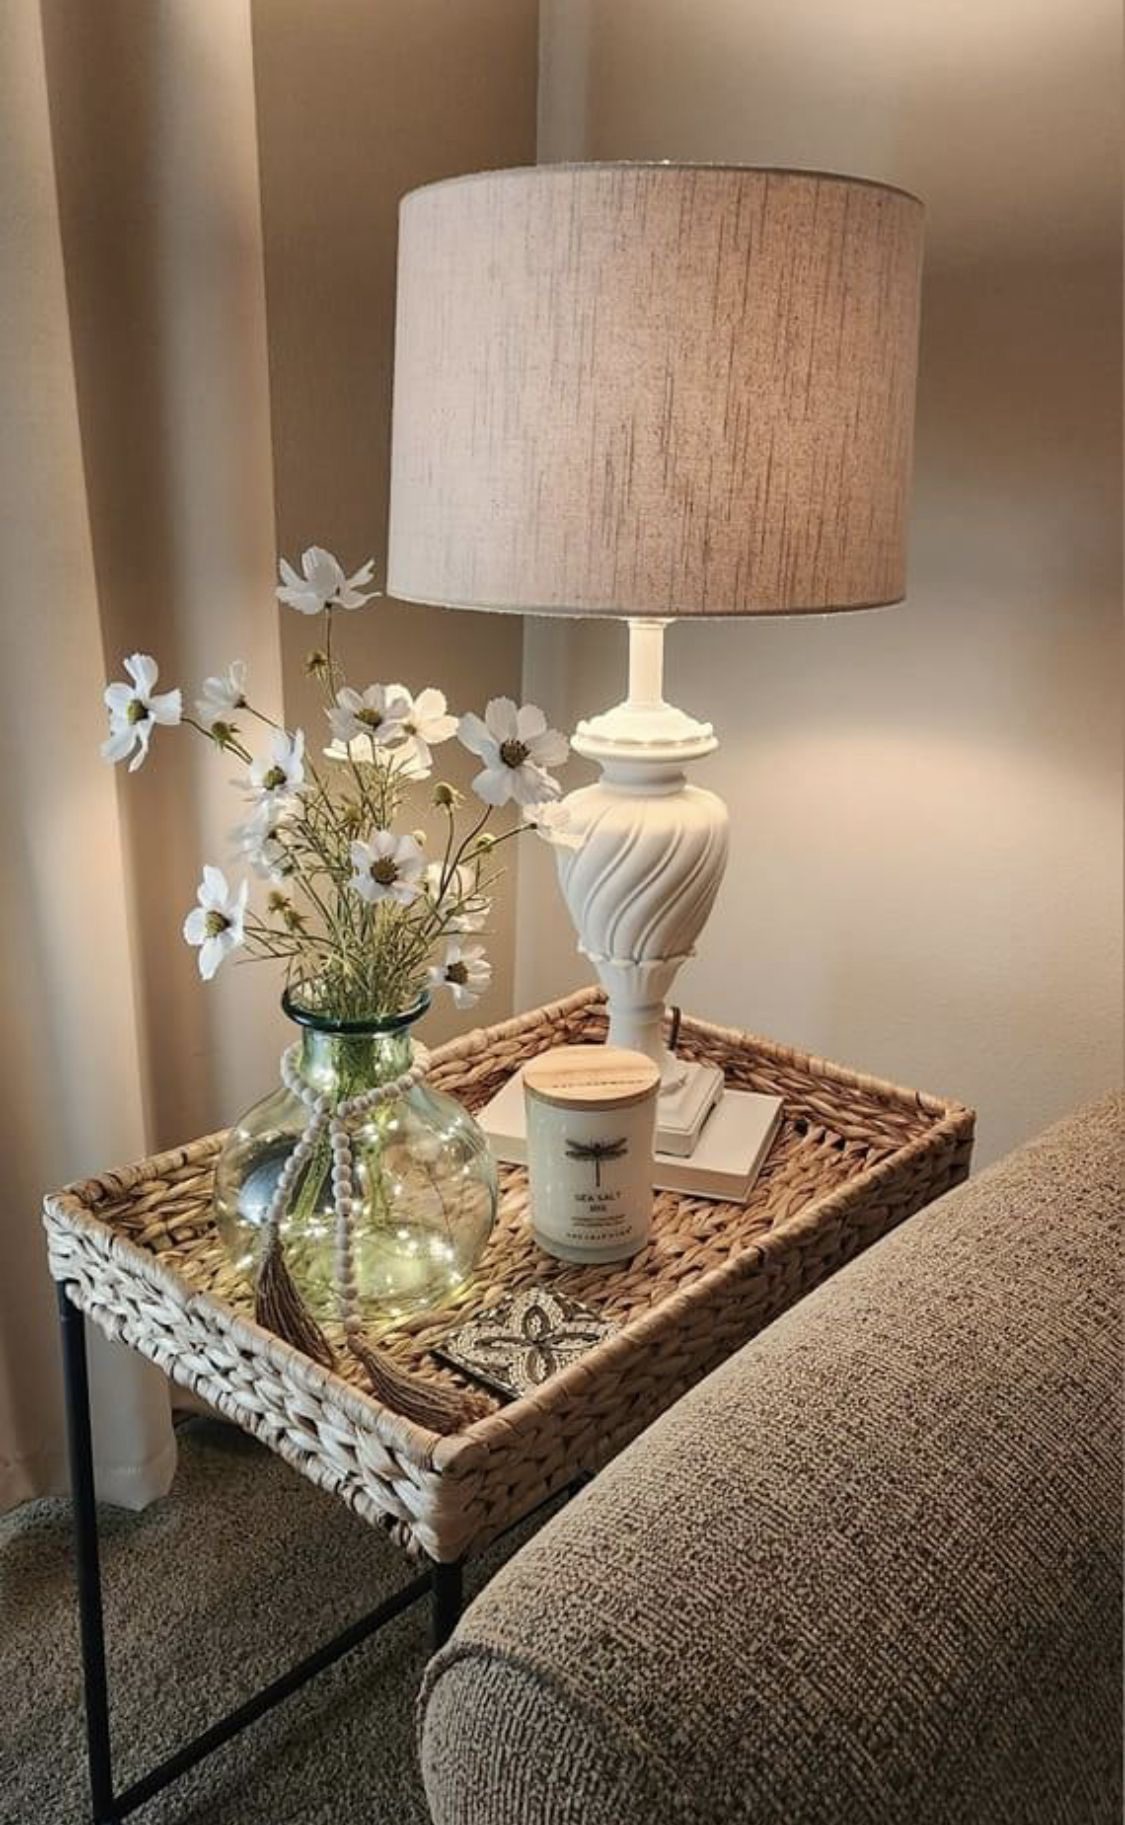
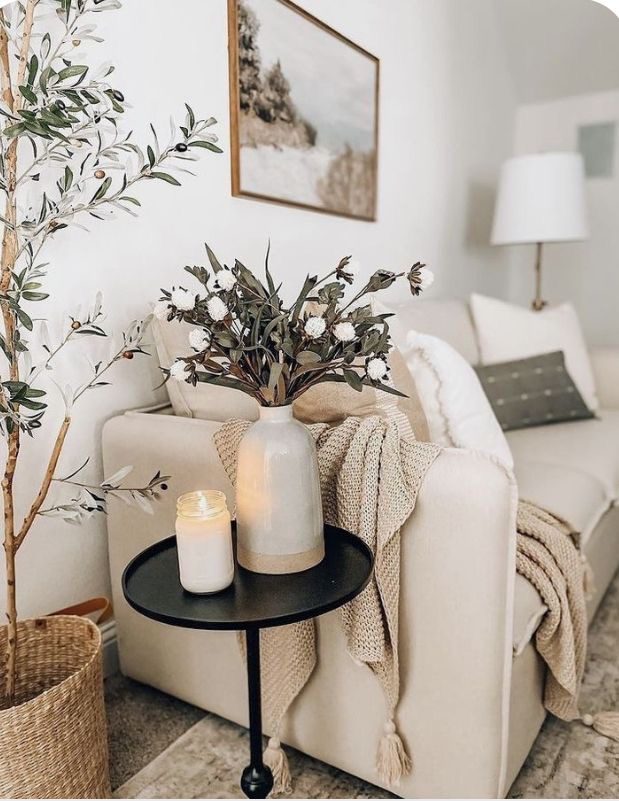
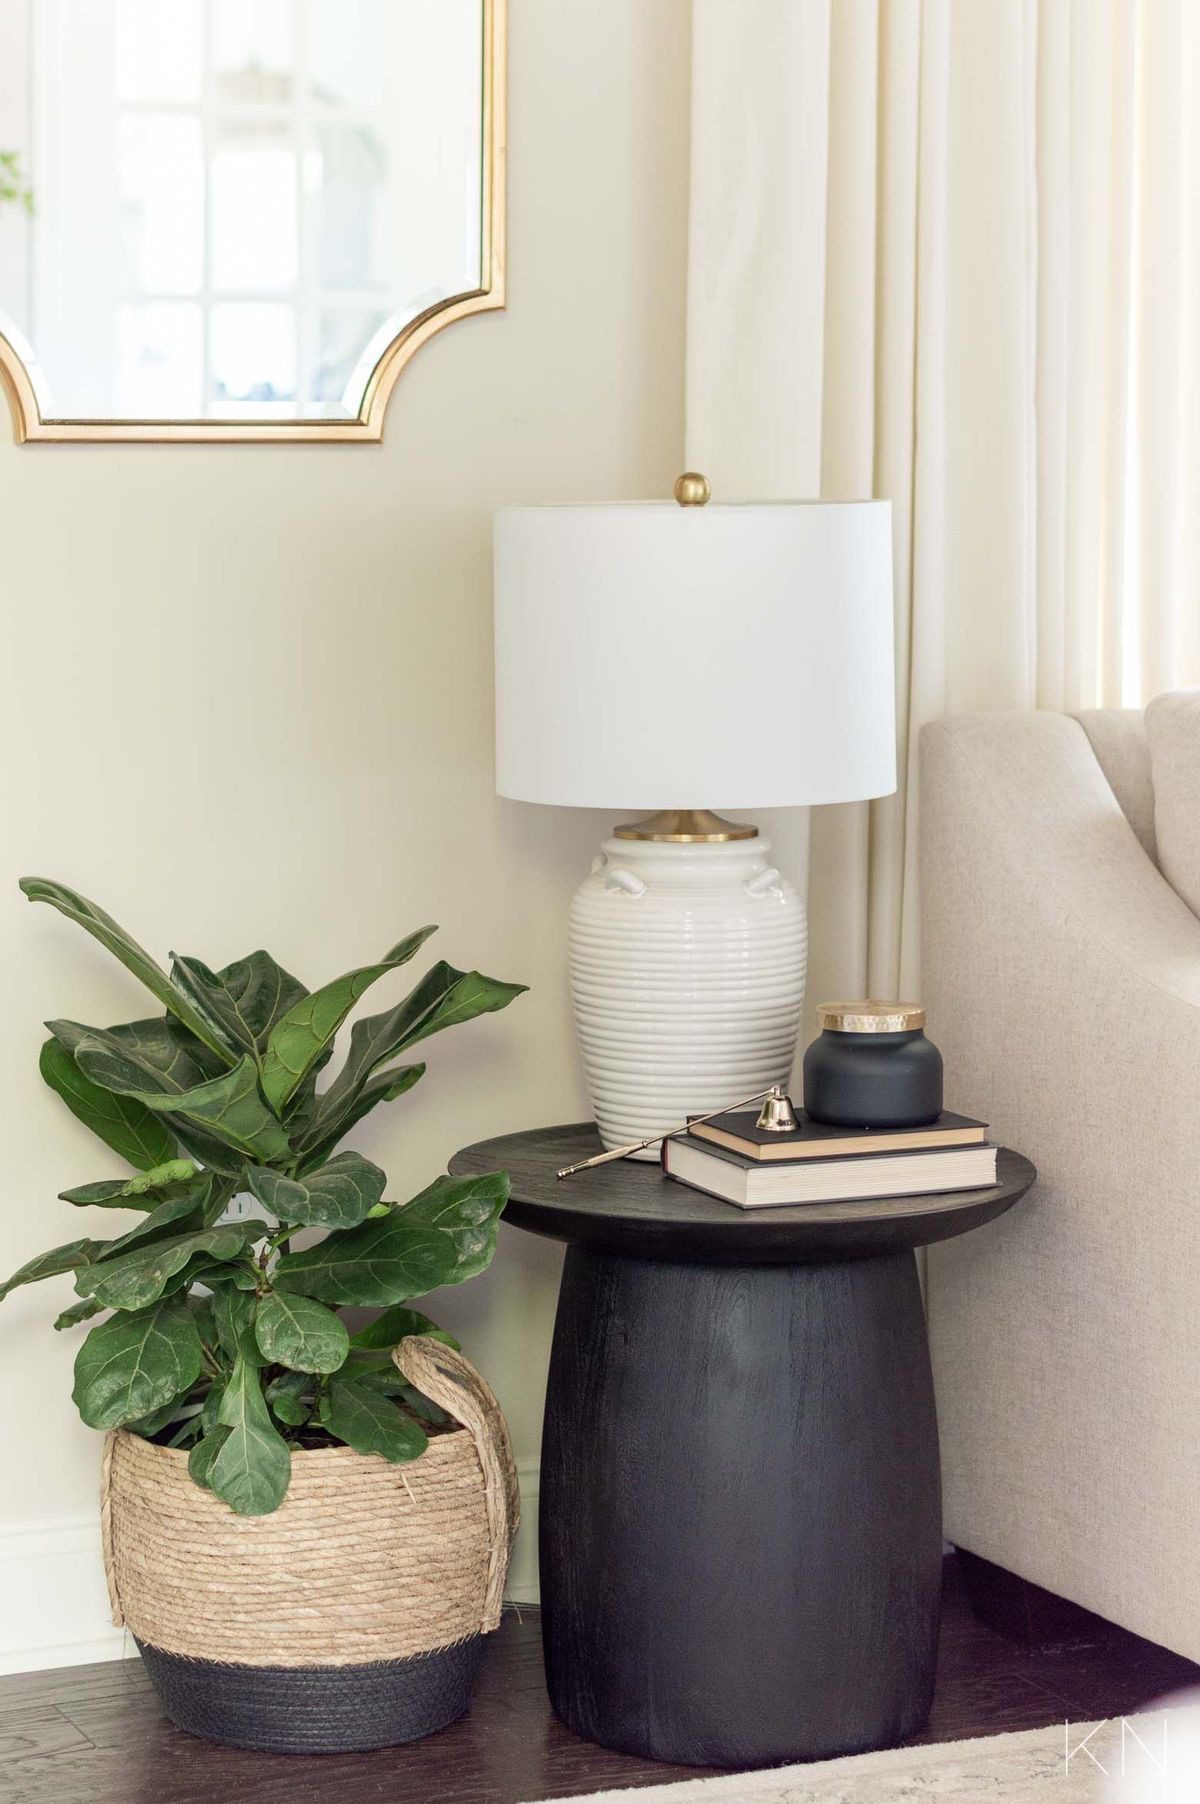
    Side tables are small surfaces with big potential. Whether nestled beside your favorite chair or acting as a functional accent in your living space, styling your side or end table thoughtfully can elevate the entire room’s vibe. From cozy touches to sleek minimalism, the right decor choices make these little tables both practical and beautiful.

    In this guide, we explore 30 fresh approaches to side table styling that blend aesthetics with everyday use. You’ll find tips for balancing textures, adding greenery, layering accessories, and creating inviting corners — all tailored to help your side table feel purposeful and styled without fuss.
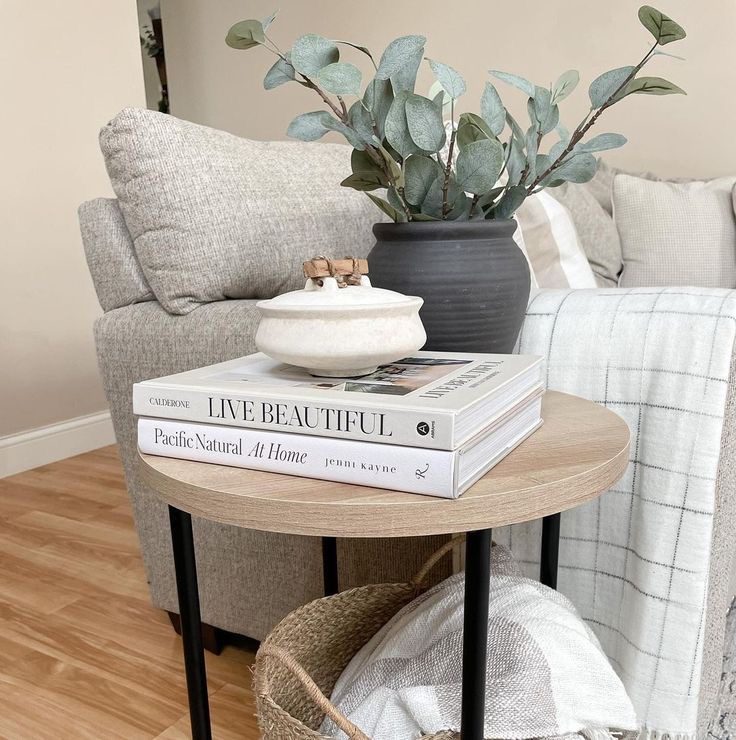
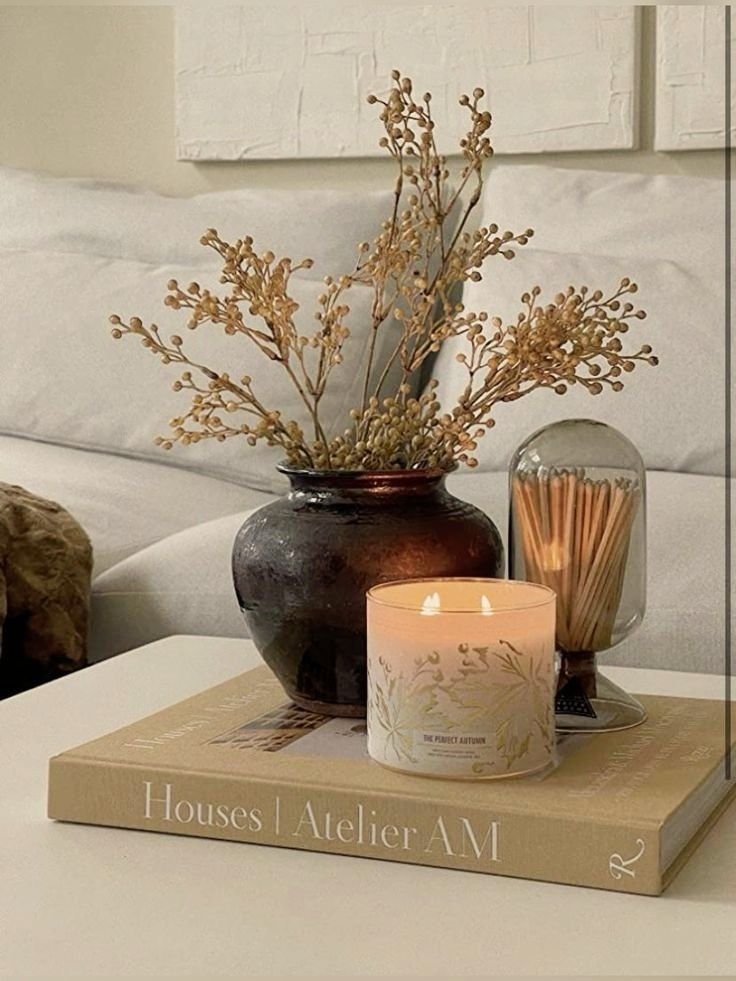
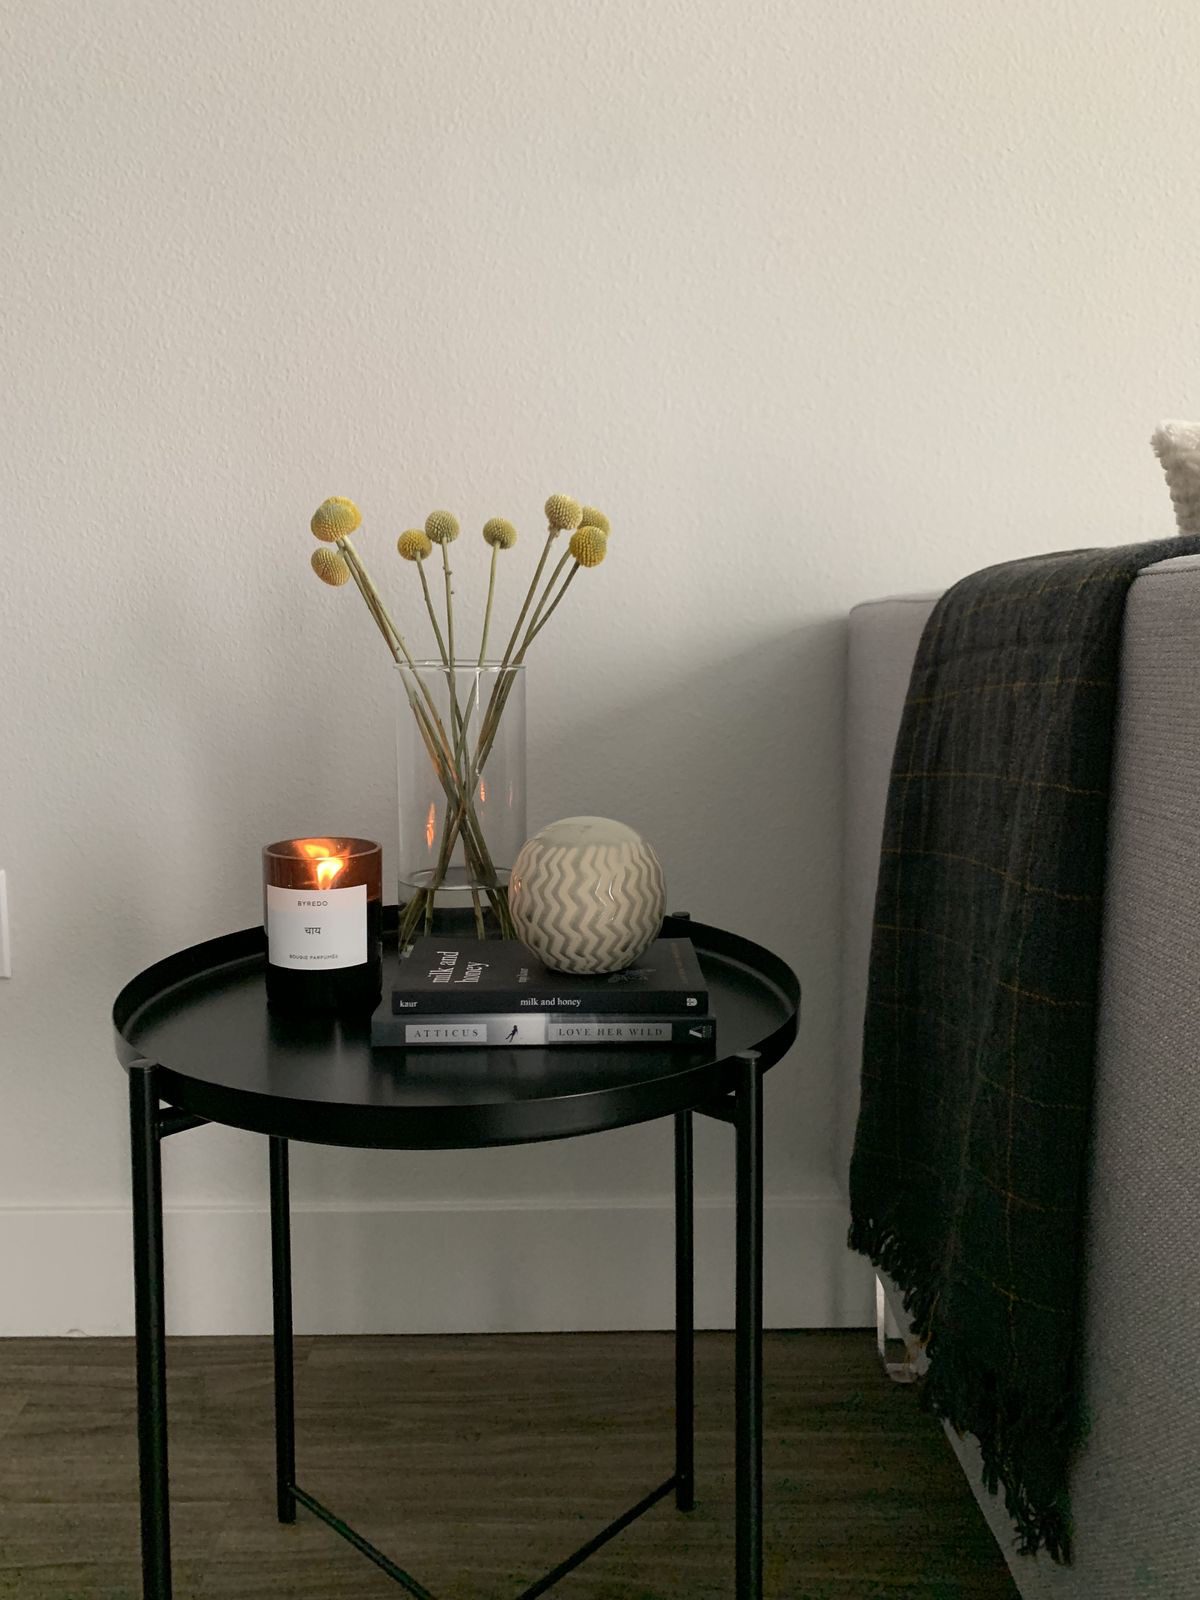
    1. Cozy Candlelight Paired with Natural Stems

    Cozy Candlelight Paired with Natural Stems

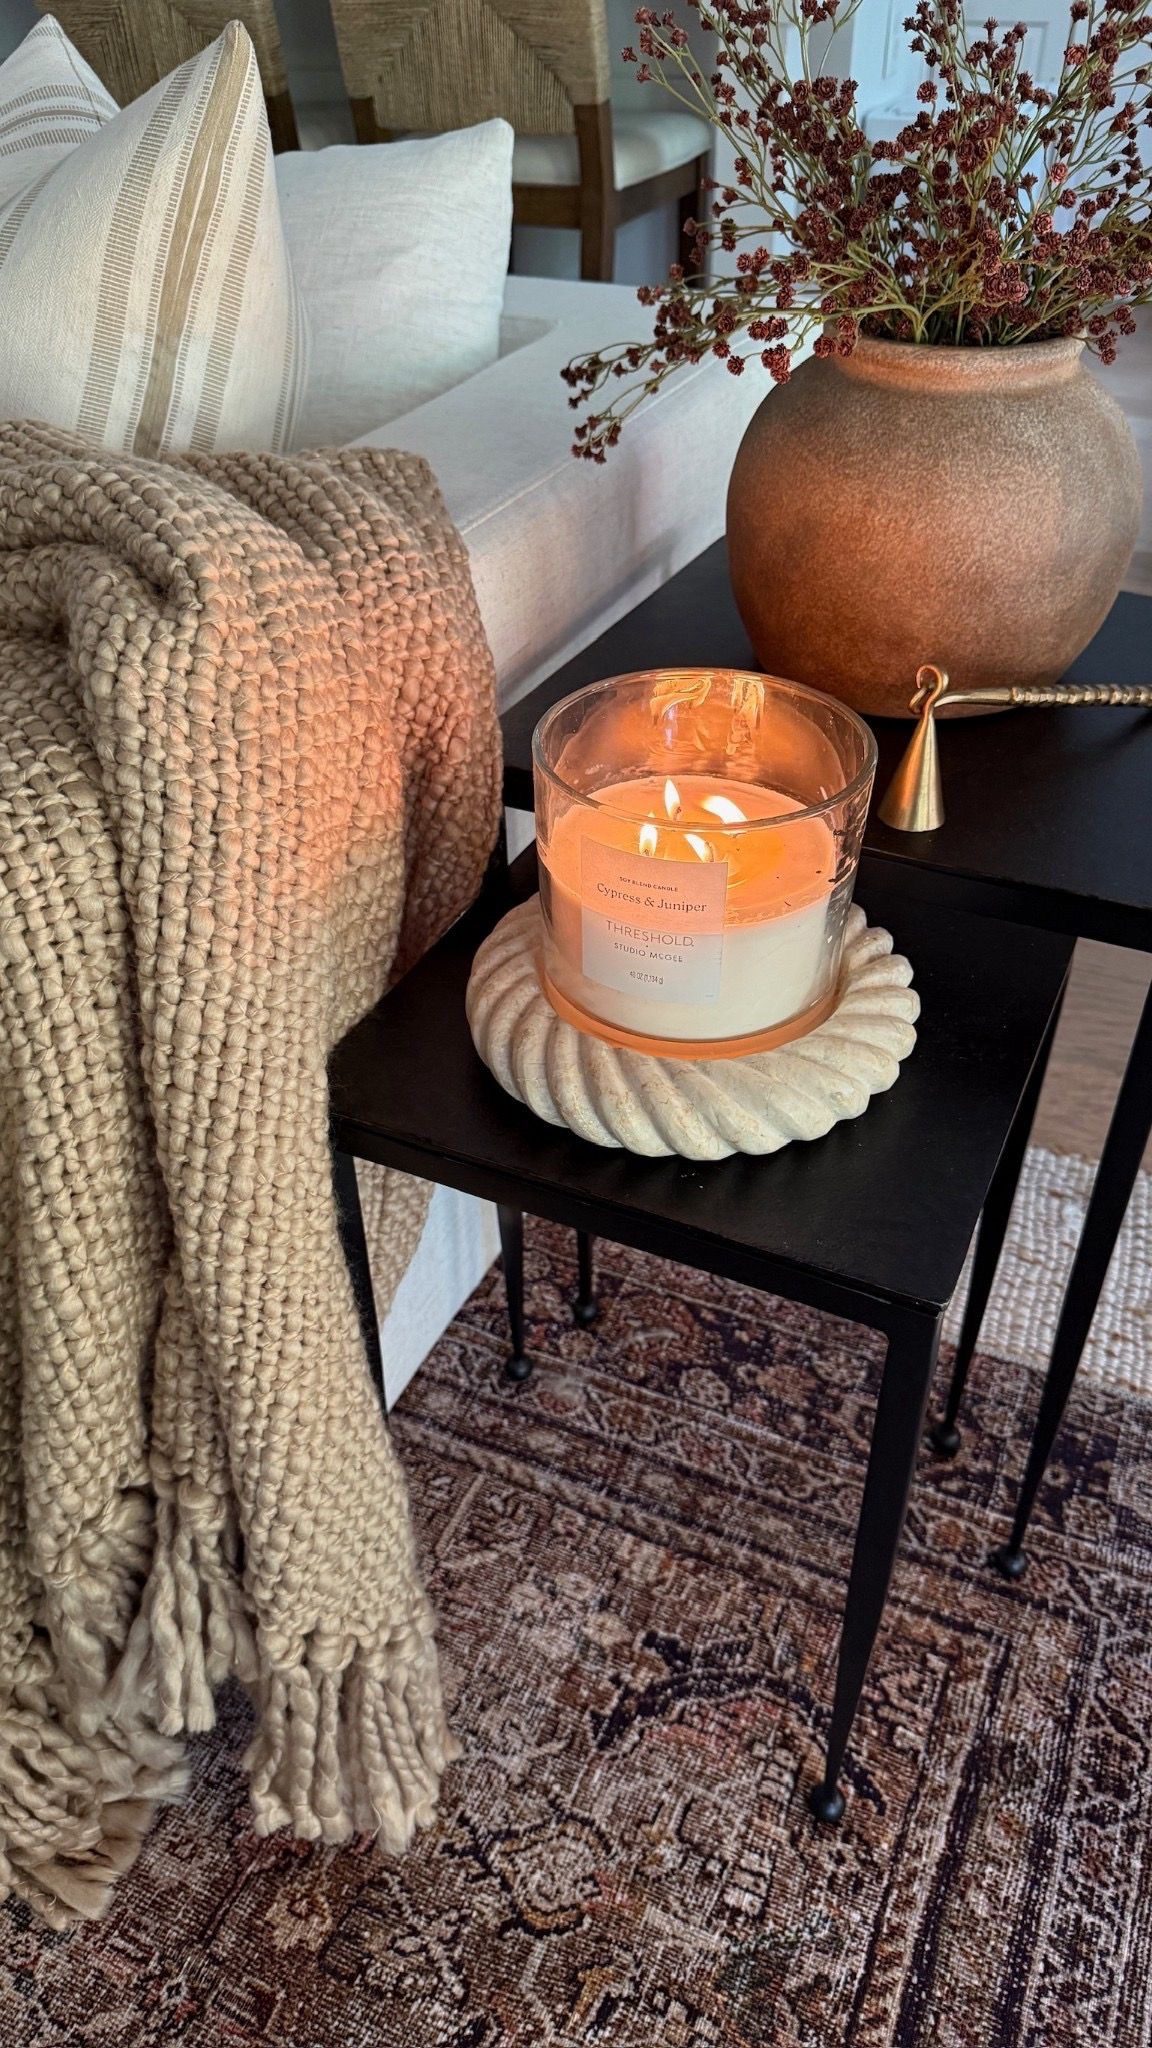
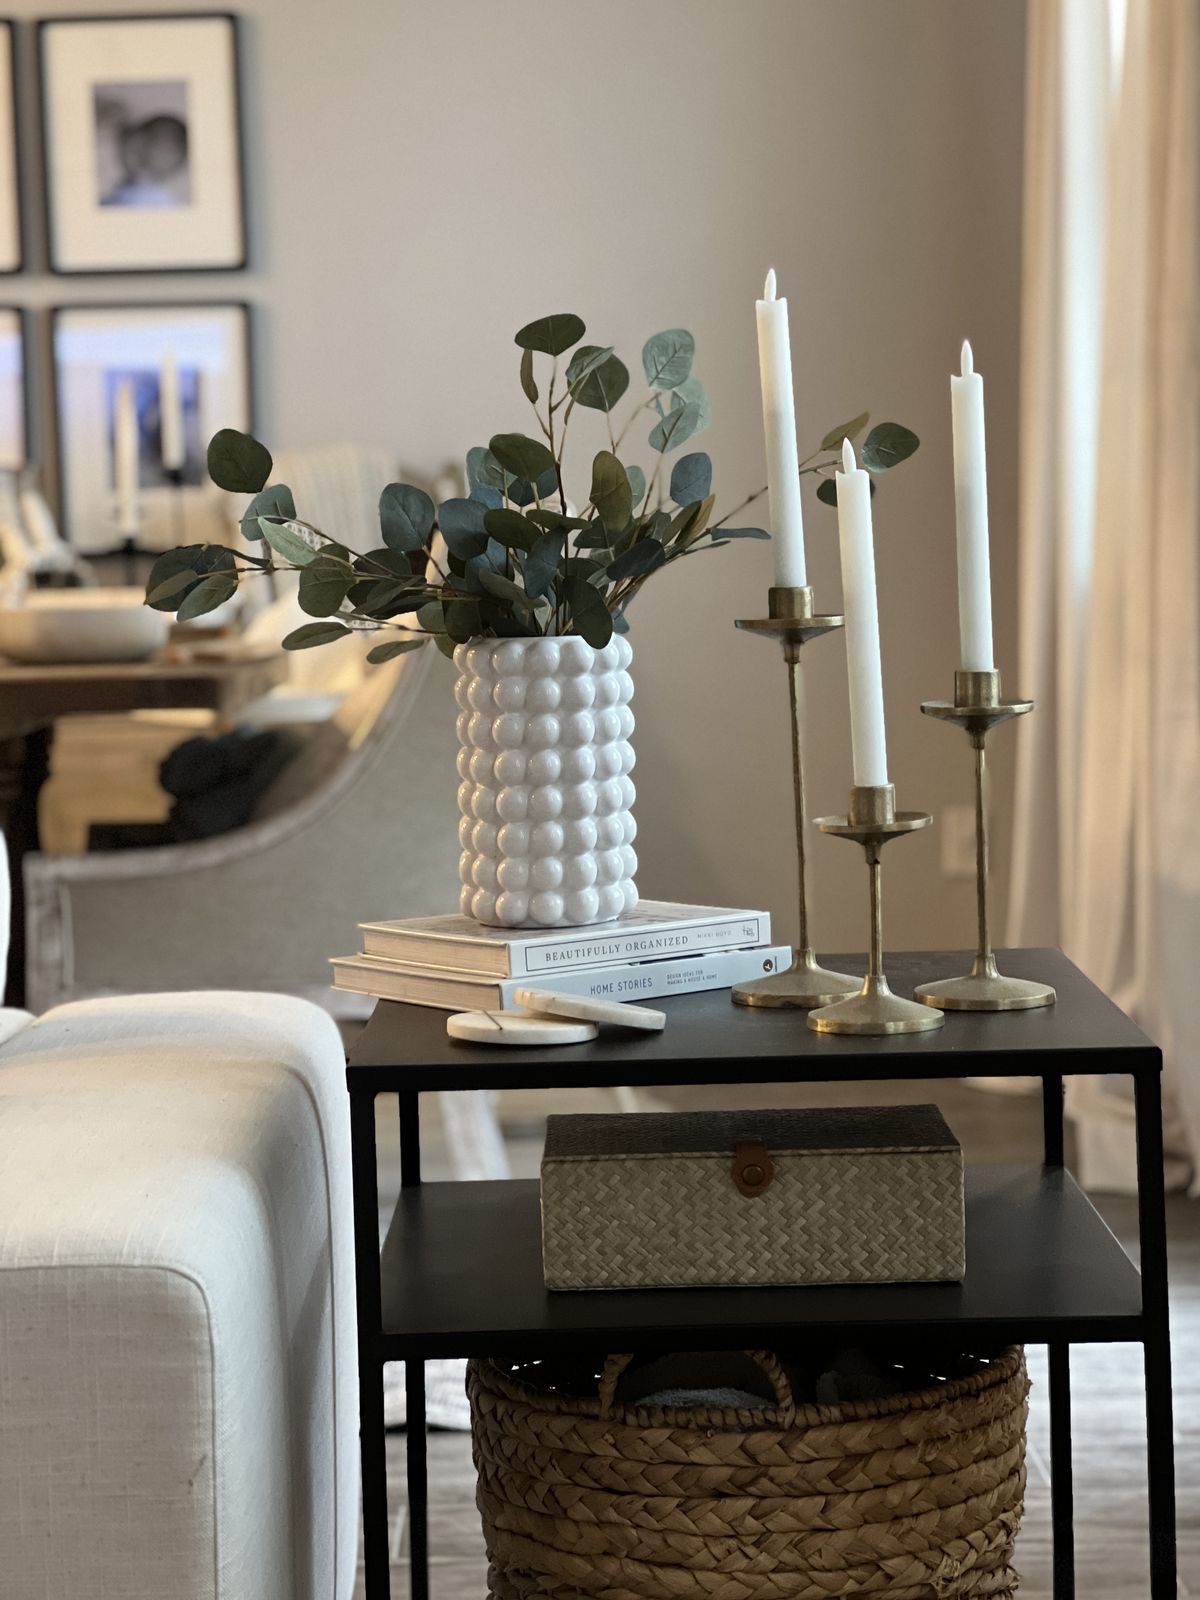
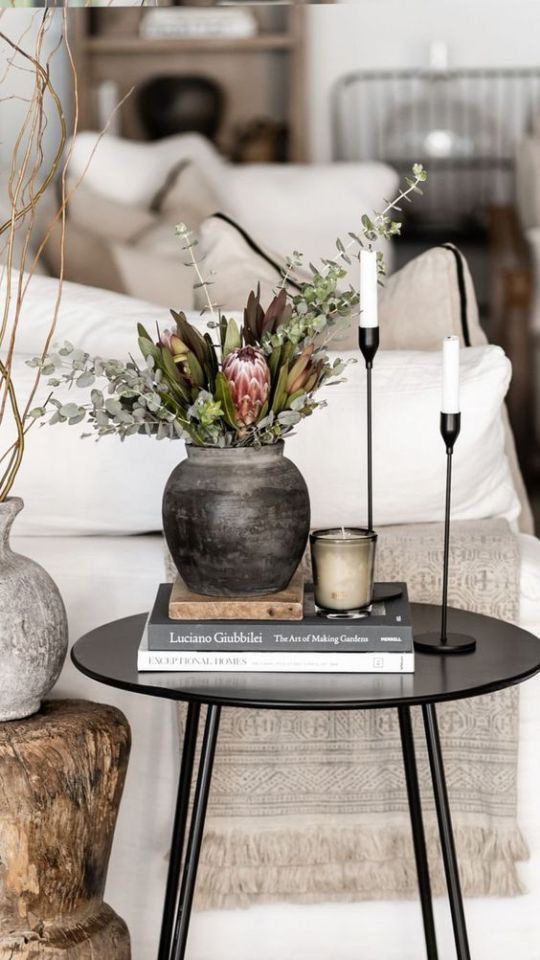
    Combining a glowing candle with simple dried stems in a vase creates an inviting atmosphere that’s both cozy and subtly styled. This look works any time of year, especially when you choose neutral tones that blend seamlessly with your existing decor.

    Key Design Elements

    • Use neutral-hued dried florals to keep the look versatile.
    • Choose unscented candles to avoid overpowering the space.
    • Swap out stems seasonally to refresh the arrangement.

    Pro Tip: Opt for flameless candles if you want to keep the ambiance without worrying about fire hazards.
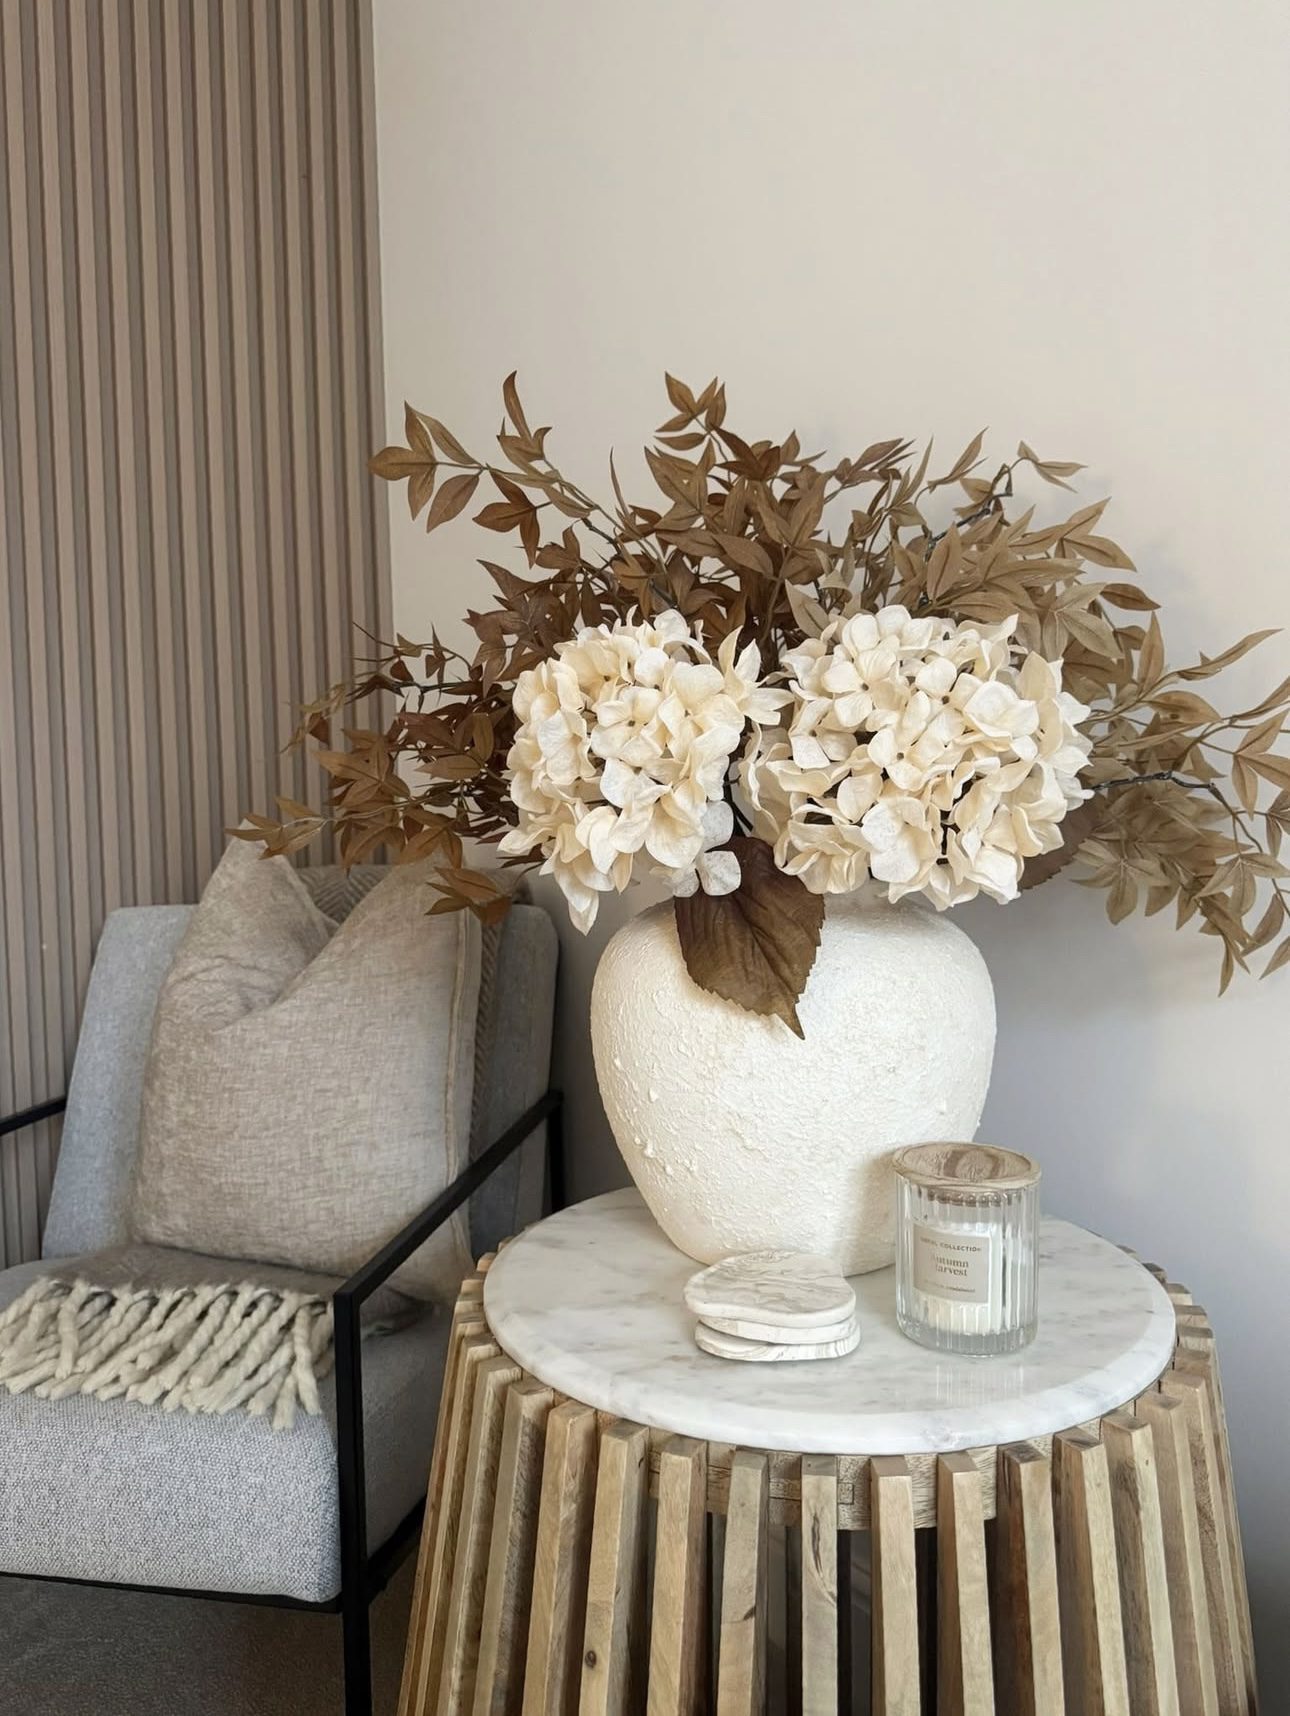
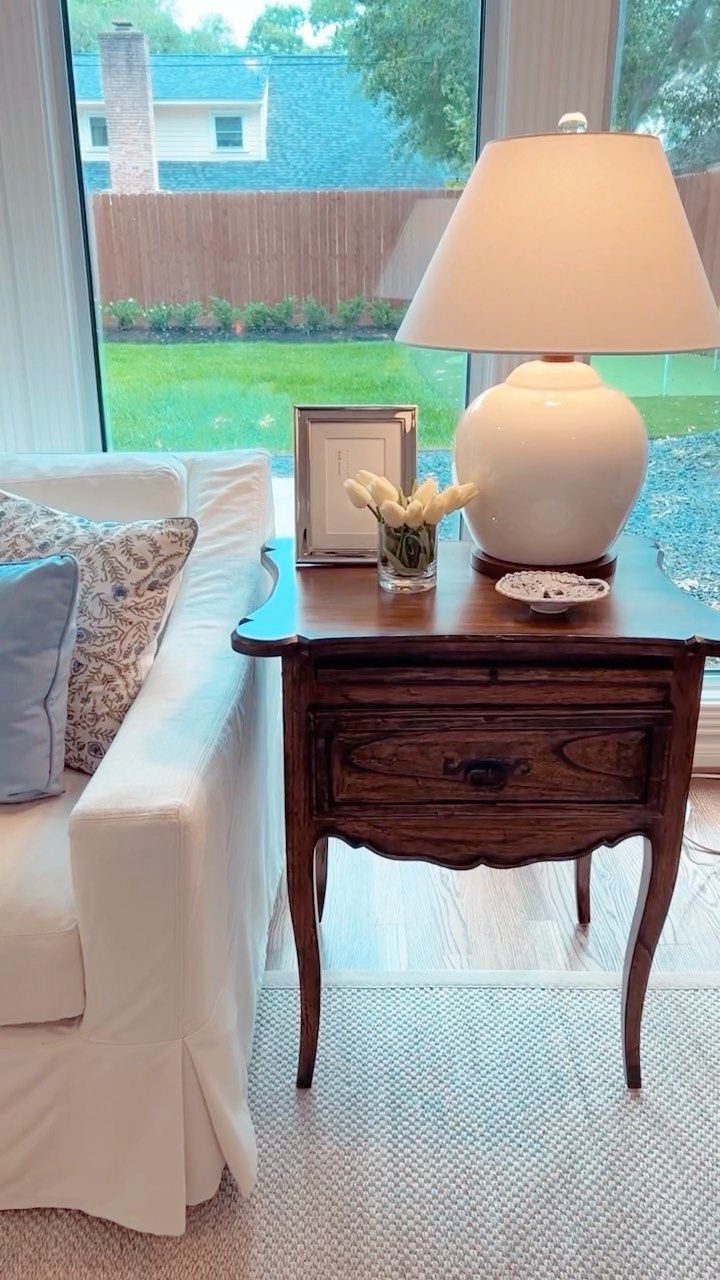
    2. Timeless Warmth from Dark Wood Pieces
    Timeless Warmth from Dark Wood Pieces

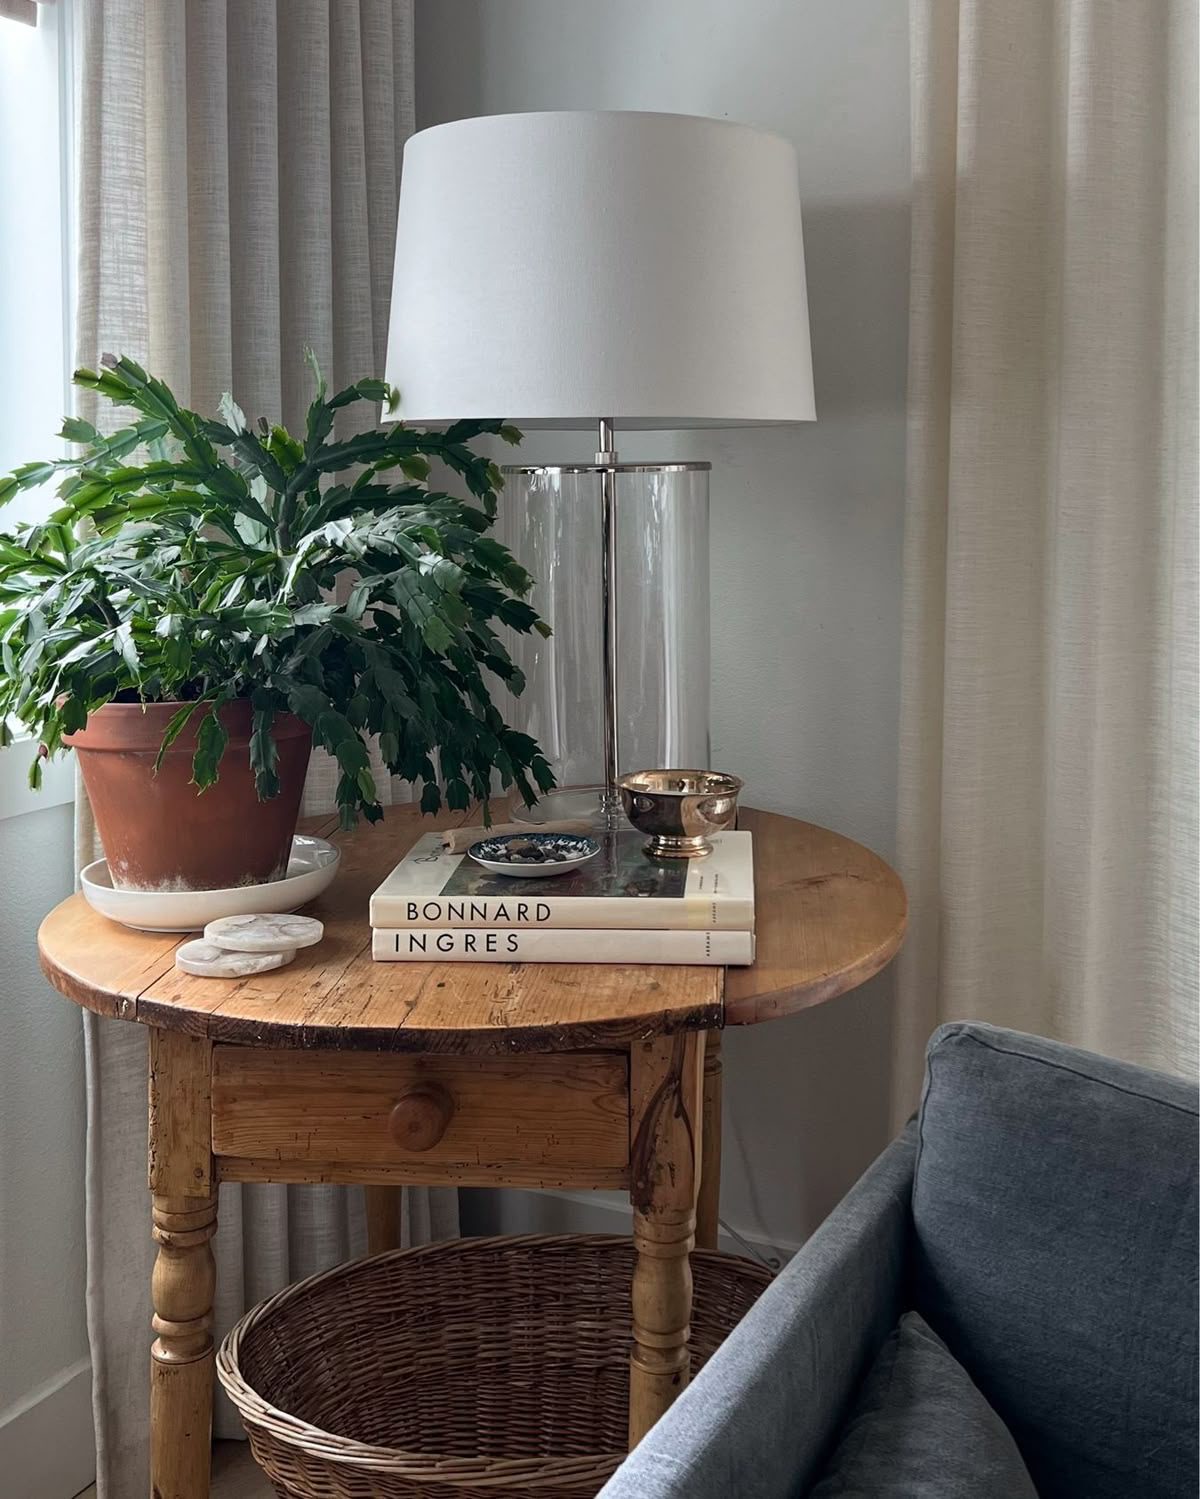
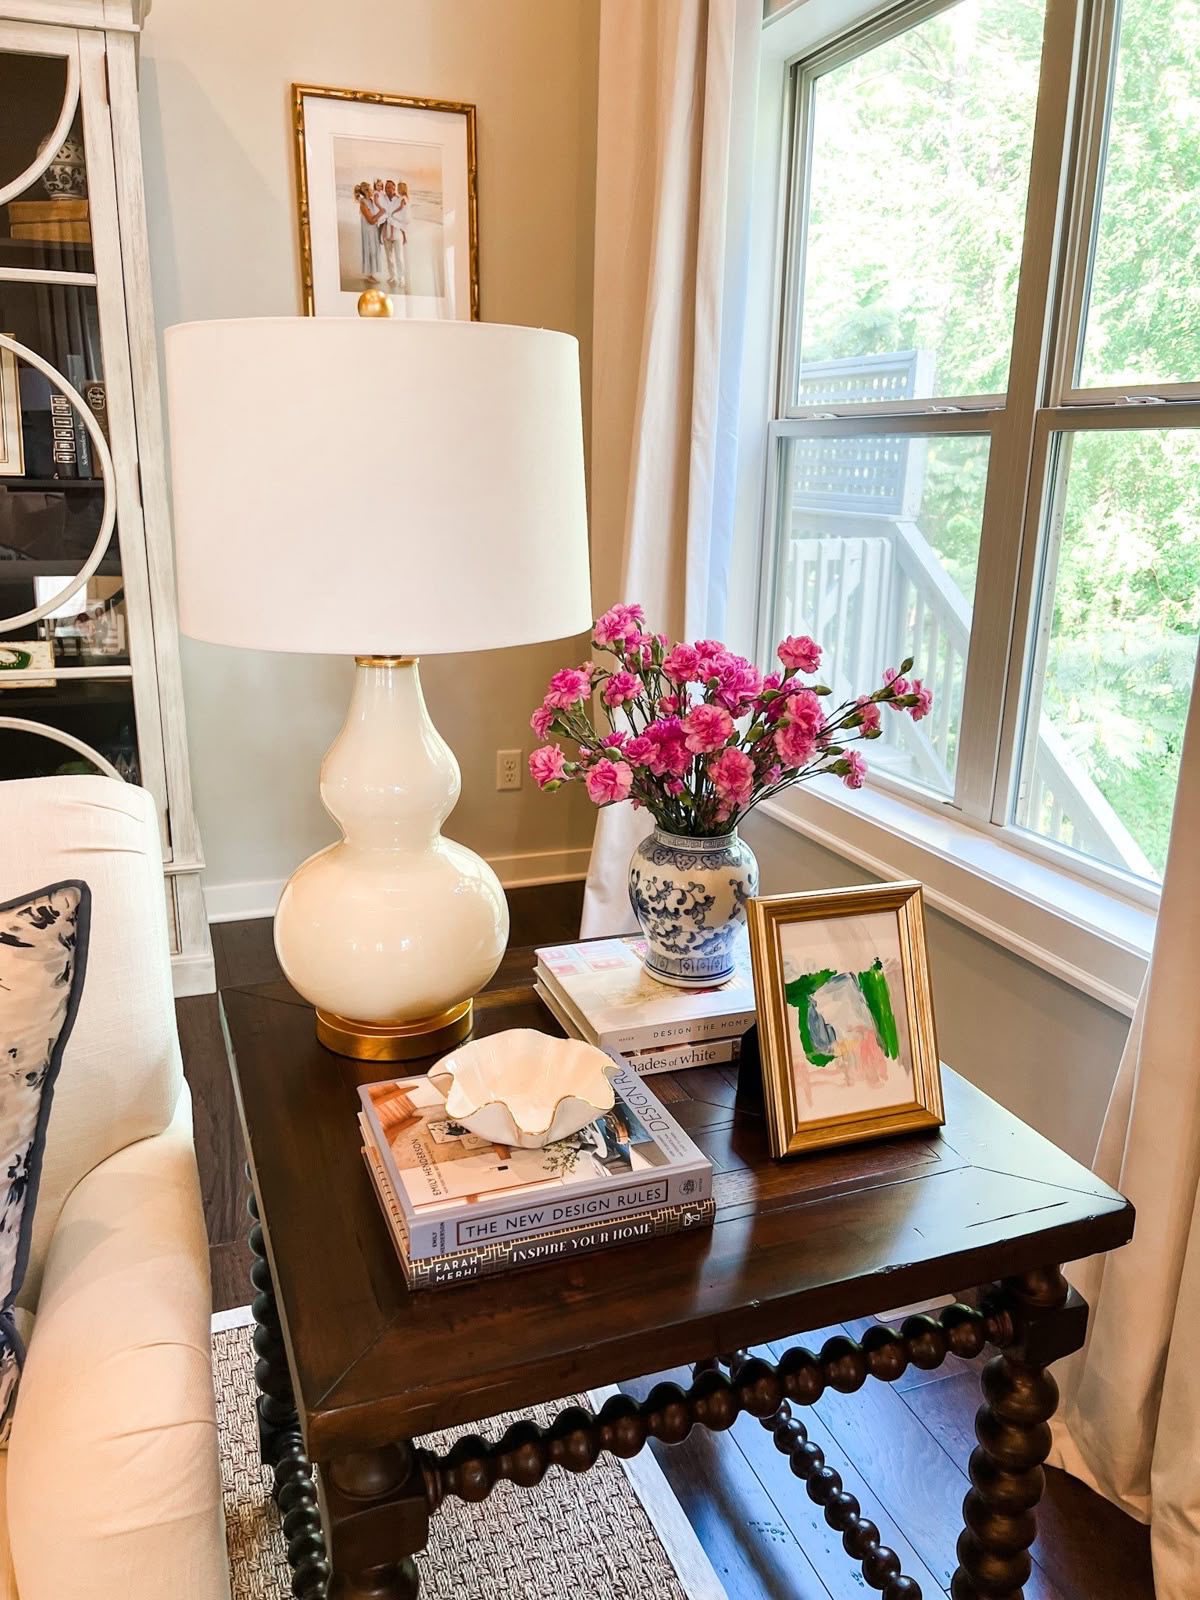
    A side table crafted from rich, dark wood instantly adds warmth and a sense of tradition to any room. When paired with a soft-toned lamp and a cherished personal item such as a framed photo, it creates a cozy, lived-in feel that never goes out of style.

    Key Design Elements

    • Select lamps with warm light bulbs to enhance cozy vibes.
    • Incorporate personal mementos to add character.
    • Keep accessories minimal to highlight the wood’s natural beauty.

    Pro Tip: Use furniture polish regularly to maintain the wood’s rich tone and prolong the table’s lifespan.

    3. Intentional Shapes and Subtle Styling

    Intentional Shapes and Subtle Styling

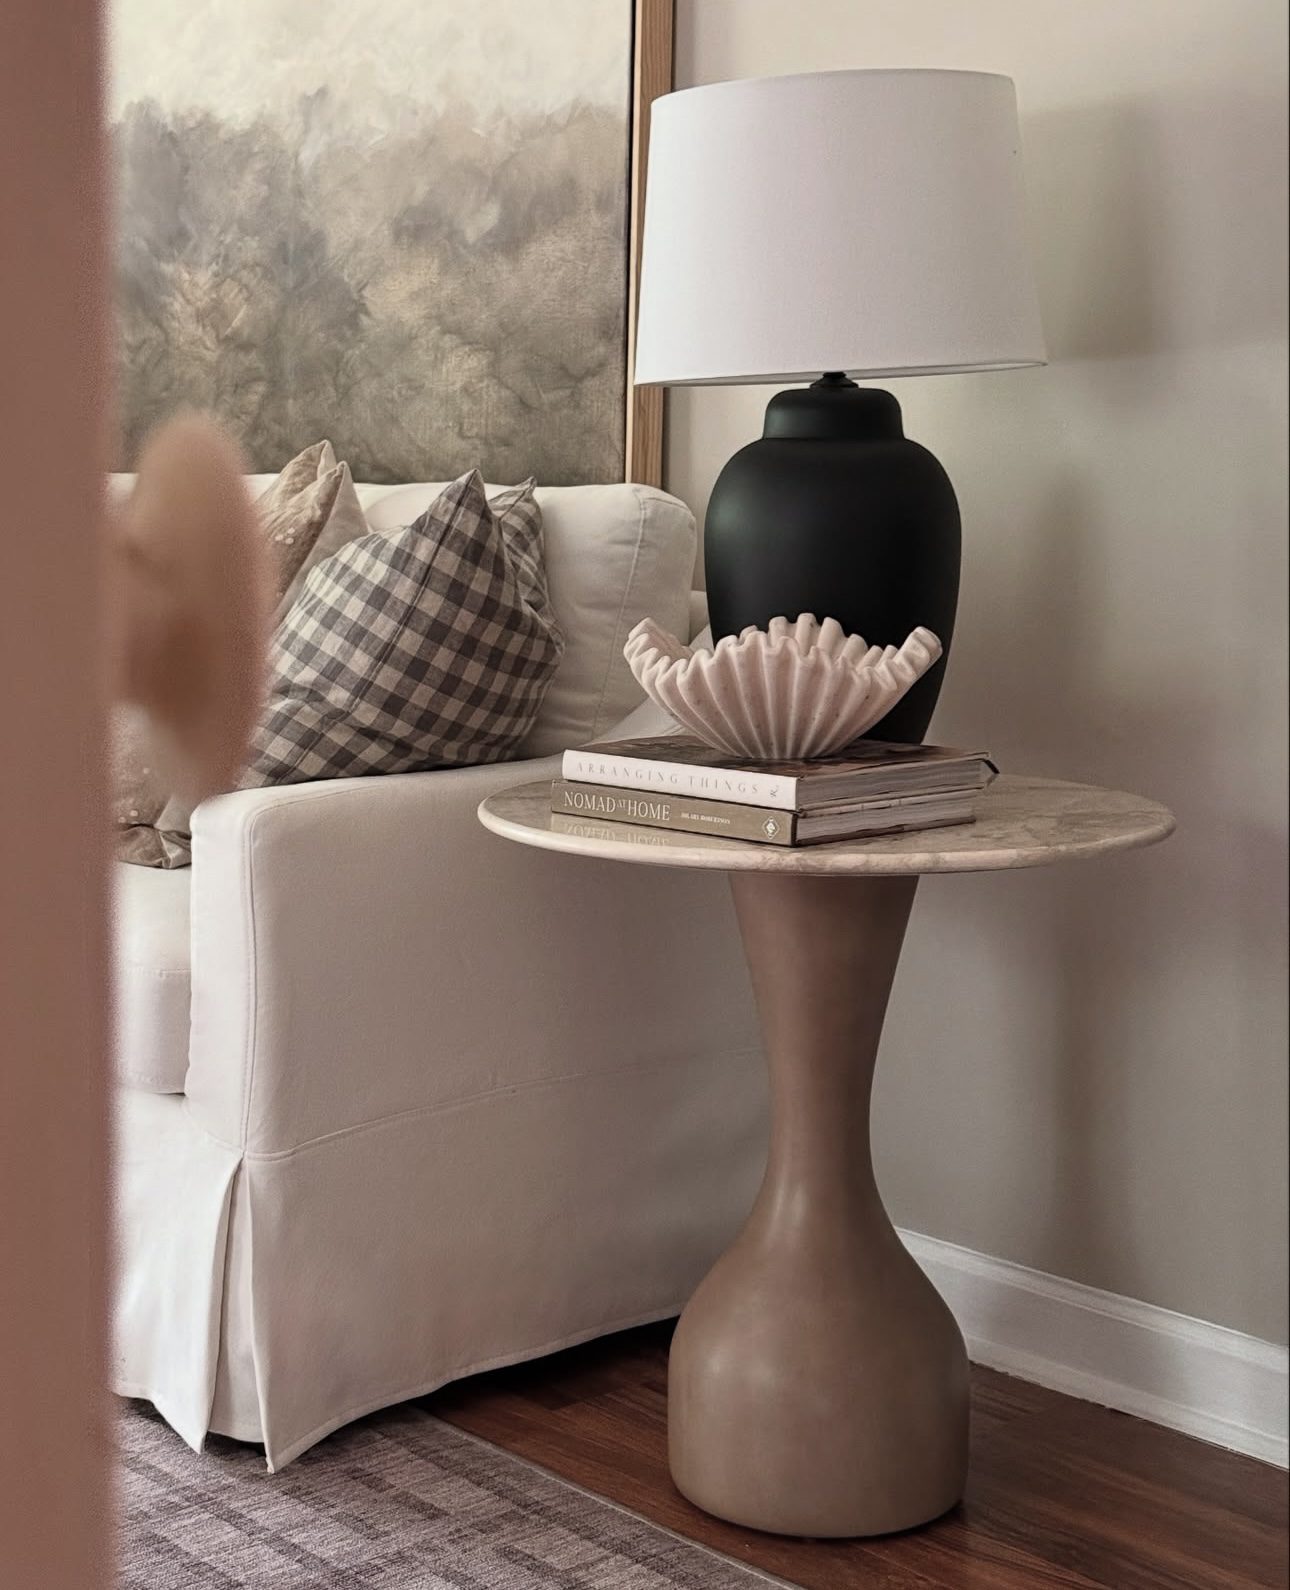
    Choosing a side table with an interesting shape can turn it into a focal point with minimal decor. Adding a small number of carefully selected pieces enhances the design without overwhelming the surface, perfect for those who appreciate style with a functional edge.

    Key Design Elements

    • Pick furniture with unique silhouettes to set the tone.
    • Limit decor to two or three statement pieces for balance.
    • Mix shapes and heights to keep visual interest.

    Pro Tip: Use items with contrasting textures on sculptural tables to amplify their visual appeal.

    4. Layering Books and Lamps for Cozy Depth

    Layering Books and Lamps for Cozy Depth

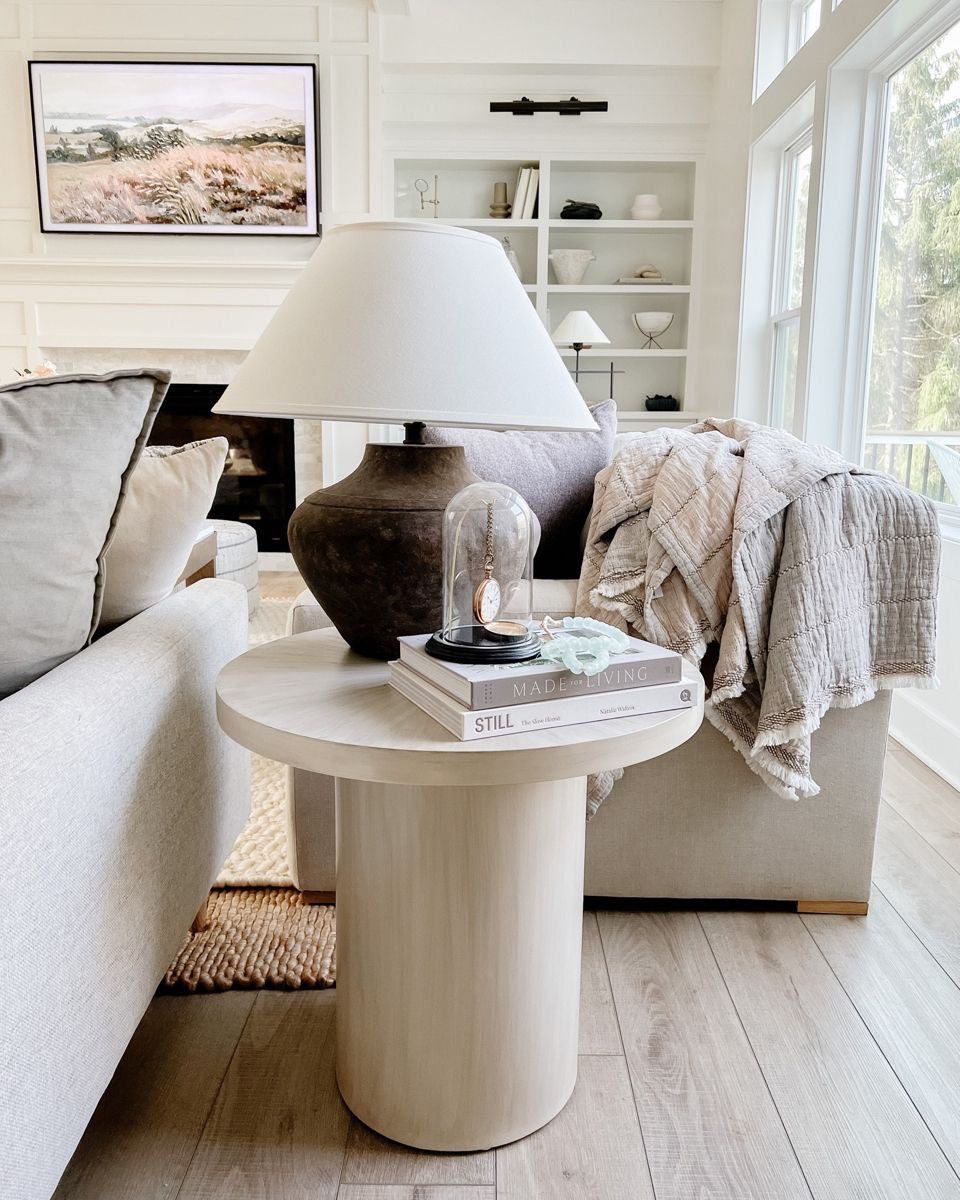
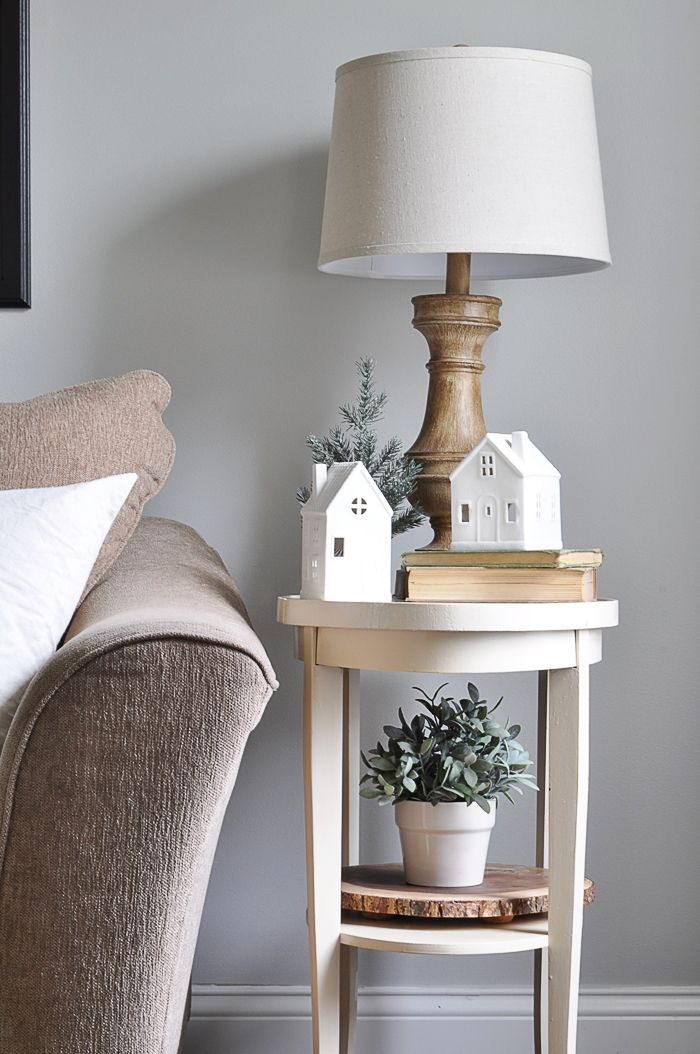
    Stacking a couple of your favorite books beneath a bedside or side table lamp is a simple styling trick that adds dimension and personality. It not only lifts the lamp for better illumination but also creates a heartfelt, welcoming vibe.

    Key Design Elements

    • Choose books with covers that complement your decor colors.
    • Use hardback books for a more polished look.
    • Keep the stack manageable to avoid clutter.

    Pro Tip: Rotate your book choices seasonally to keep the look fresh and personal.

    5. Open Shelving with Concealed Storage Solutions

    Open Shelving with Concealed Storage Solutions

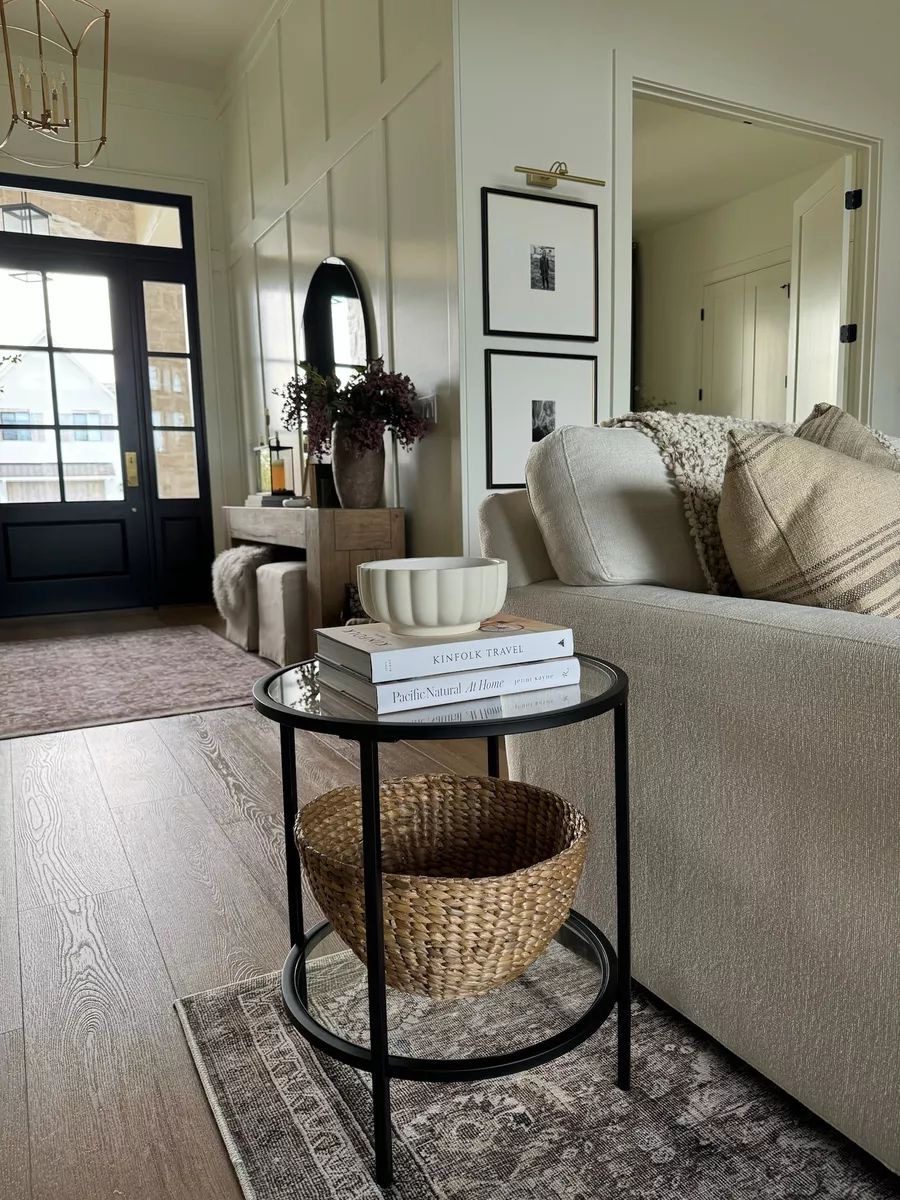
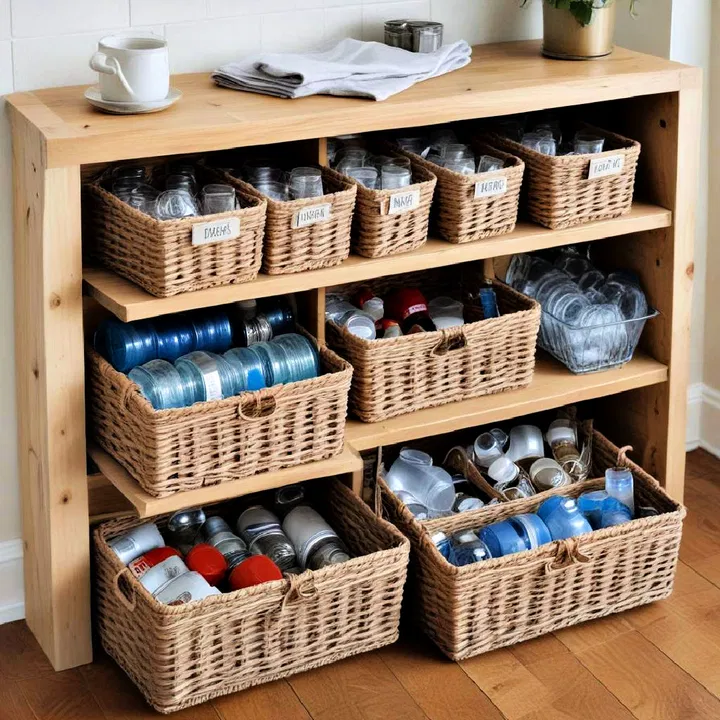
    Incorporating an open lower shelf or using a basket beneath your side table offers a smart way to hide everyday essentials while keeping the tabletop visually tidy. This approach balances style with practicality, preventing clutter while allowing for creative top-layer styling.

    Key Design Elements

    • Use woven or fabric baskets to soften the look.
    • Keep frequently used items hidden but easily accessible.
    • Style the shelf with minimal decor to maintain openness.
    Pro Tip: Label baskets or boxes on the lower shelf for easy organization and quick access.
    6. Maximized Function with Bottom Shelf Styling
    Maximized Function with Bottom Shelf Styling

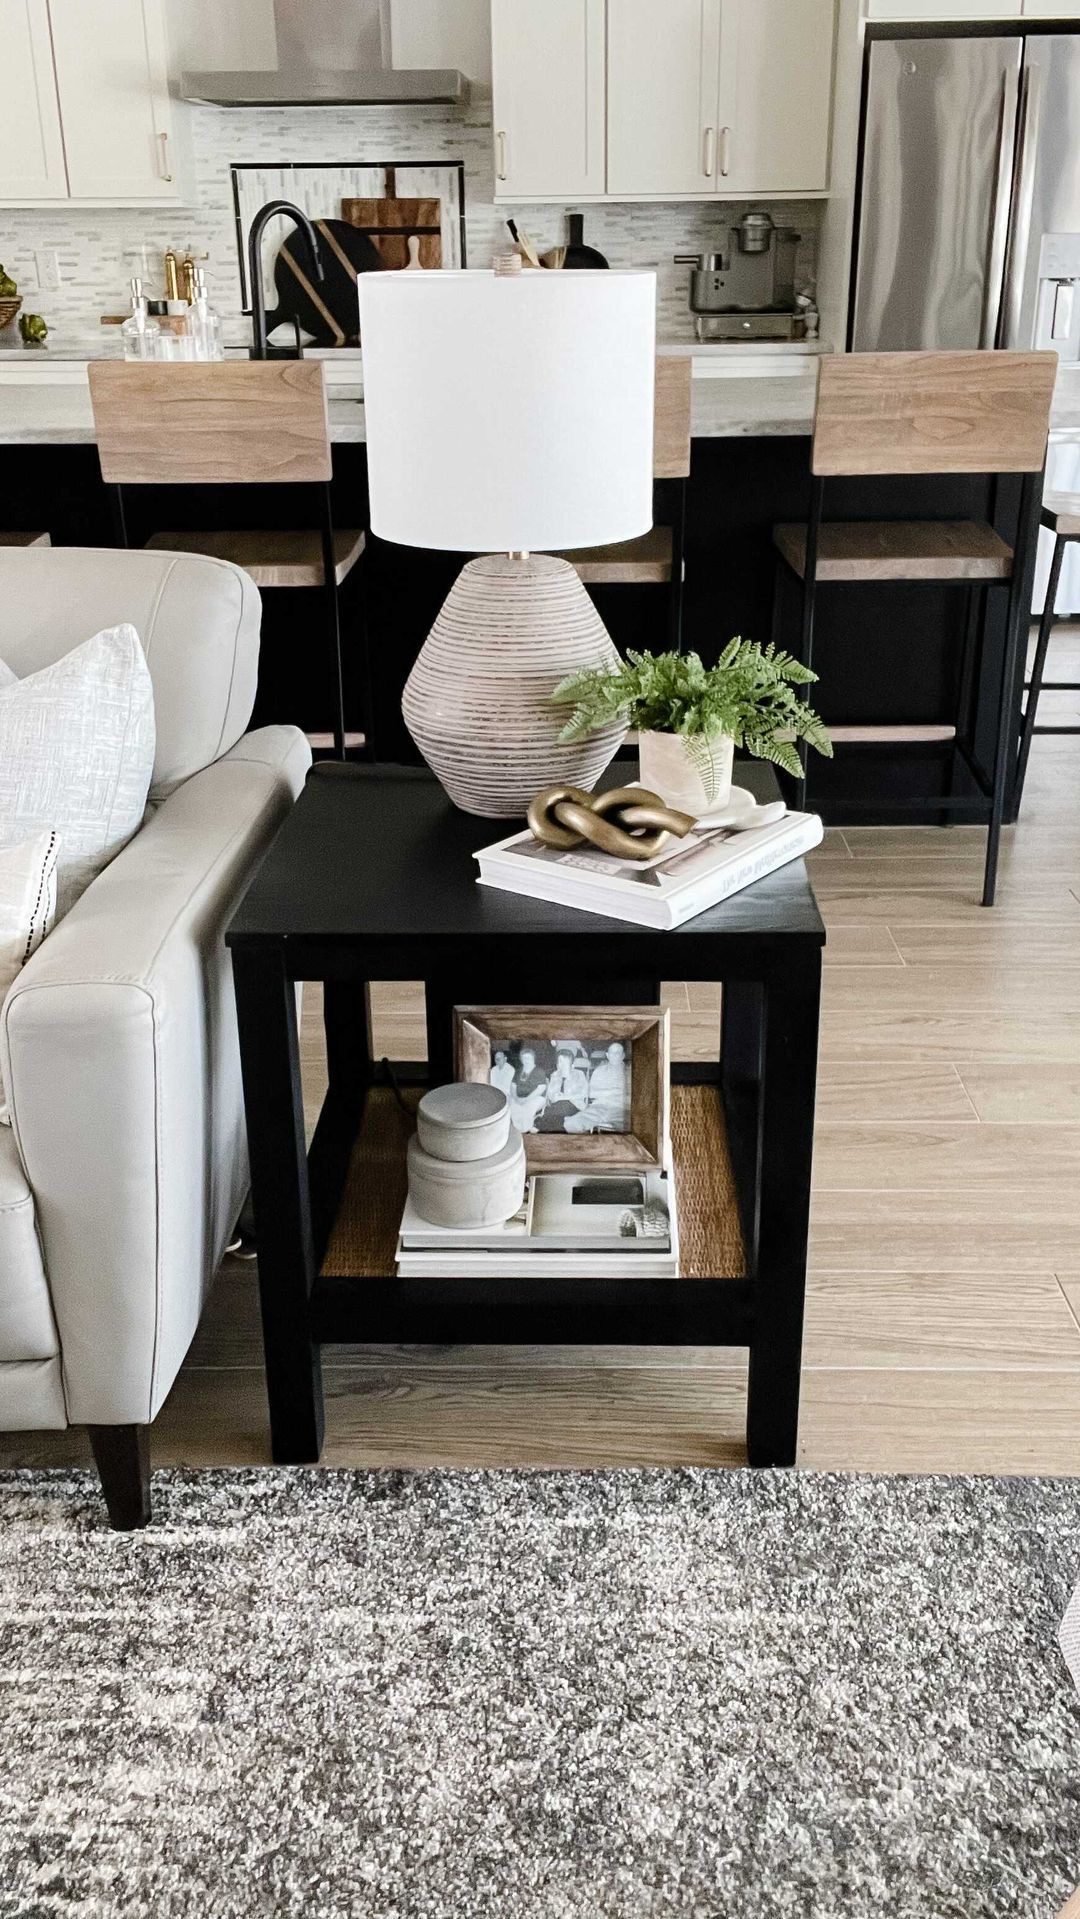
    A bottom shelf on your side table adds valuable storage space without compromising style. Store books, decorative objects, or trays below to keep the top surface uncluttered and visually pleasing, making everyday upkeep easier.

    Key Design Elements

    • Stack books horizontally for a clean, layered effect.
    • Add decorative bowls or small boxes for variety.
    • Use the shelf for seasonal or rotating decor pieces.

    Pro Tip: Keep the bottom shelf’s contents consistent in color or theme to maintain harmony.

    7. Let Plants Take Center Stage

    Let Plants Take Center Stage

    Showcasing a single, healthy plant as the main feature on your side table is one of the simplest ways to bring freshness to the space. Complementing it with a few books or minimal accessories keeps the look relaxed and effortlessly chic.

    Key Design Elements

    • Choose low-maintenance plants like succulents or pothos.
    • Pair plants with neutral pots for a modern look.
    • Limit surrounding decor to avoid visual clutter.

    Pro Tip: Rotate plants occasionally to ensure even growth and maintain vibrancy.

    8. Clean Minimalism with Personal Touches

    Clean Minimalism with Personal Touches

    Keeping a side table minimal doesn’t mean sacrificing personality. Adding one or two meaningful decorative items—like small ceramics or unique trinkets—ensures the space feels curated and inviting without appearing sparse or impersonal.

    Key Design Elements

    • Select pieces that reflect your style or memories.
    • Avoid overcrowding by sticking to a few standout items.
    • Use neutral tones to maintain a calm aesthetic.

    Pro Tip: Rotate personal items periodically to keep the decor feeling fresh and intentional.

    9. Fresh Minimalism with Subtle Natural Accents

    Fresh Minimalism with Subtle Natural Accents

    A simple side table adorned with just a small plant and a couple of understated accents can feel airy and inviting. The greenery softens the minimalism, making sure the table complements a lively room without competing for attention.

    Key Design Elements

    • Opt for compact plants to keep proportions balanced.
    • Use soft-toned accessories to add warmth.
    • Maintain clear surfaces to enhance the minimalist feel.

    Pro Tip: Place the table near a light source to help plants thrive and enhance the fresh atmosphere.

    10. Effortless Greenery for a Relaxed Vibe

    Effortless Greenery for a Relaxed Vibe

    Adding a simple sprig of greenery or a small leafy plant instantly breathes life into a side table. Pairing it with a couple of books or a small decorative item creates a natural, unpretentious look that feels both styled and easygoing.

    Key Design Elements

    • Choose greenery with interesting shapes or textures.
    • Combine organic elements with neutral decor pieces.
    • Keep the arrangement loosely placed for a natural feel.

    Pro Tip: Use plant cuttings from your garden or local florist to keep costs low and style fresh.

    11. Statement Vase in Soft Neutral Palette

    Statement Vase in Soft Neutral Palette

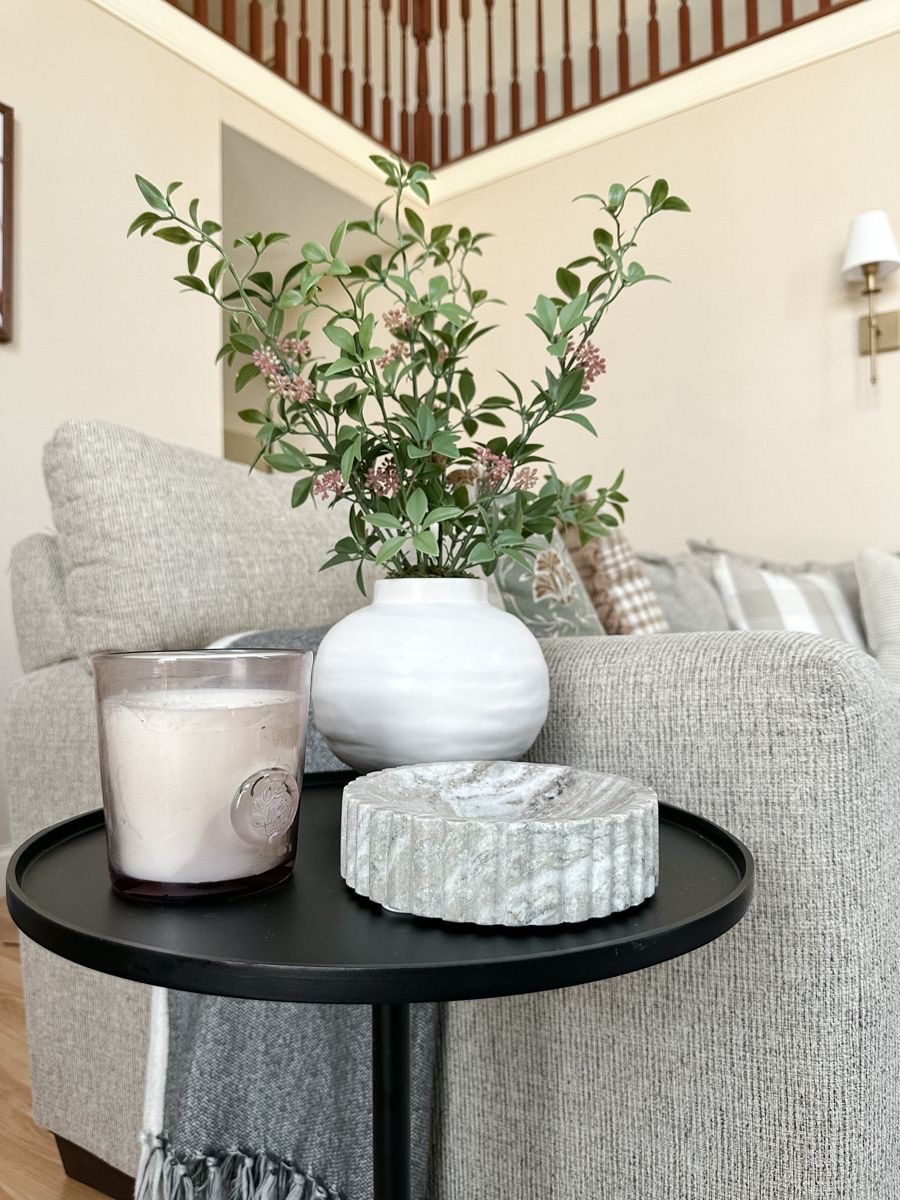
    A large, eye-catching vase in calming neutral tones can serve as the sole focal point of your side table. Pair it with a candle or a single accessory, and you’ve got a stylish arrangement that feels intentional without being overdone.

    Key Design Elements

    • Select a vase with unique texture or shape for added interest.
    • Keep surrounding decor minimal to emphasize the statement piece.
    • Choose a candle with a subtle scent to enhance ambiance.

    Pro Tip: Use dried or faux flowers in the vase to maintain a year-round display without extra upkeep.

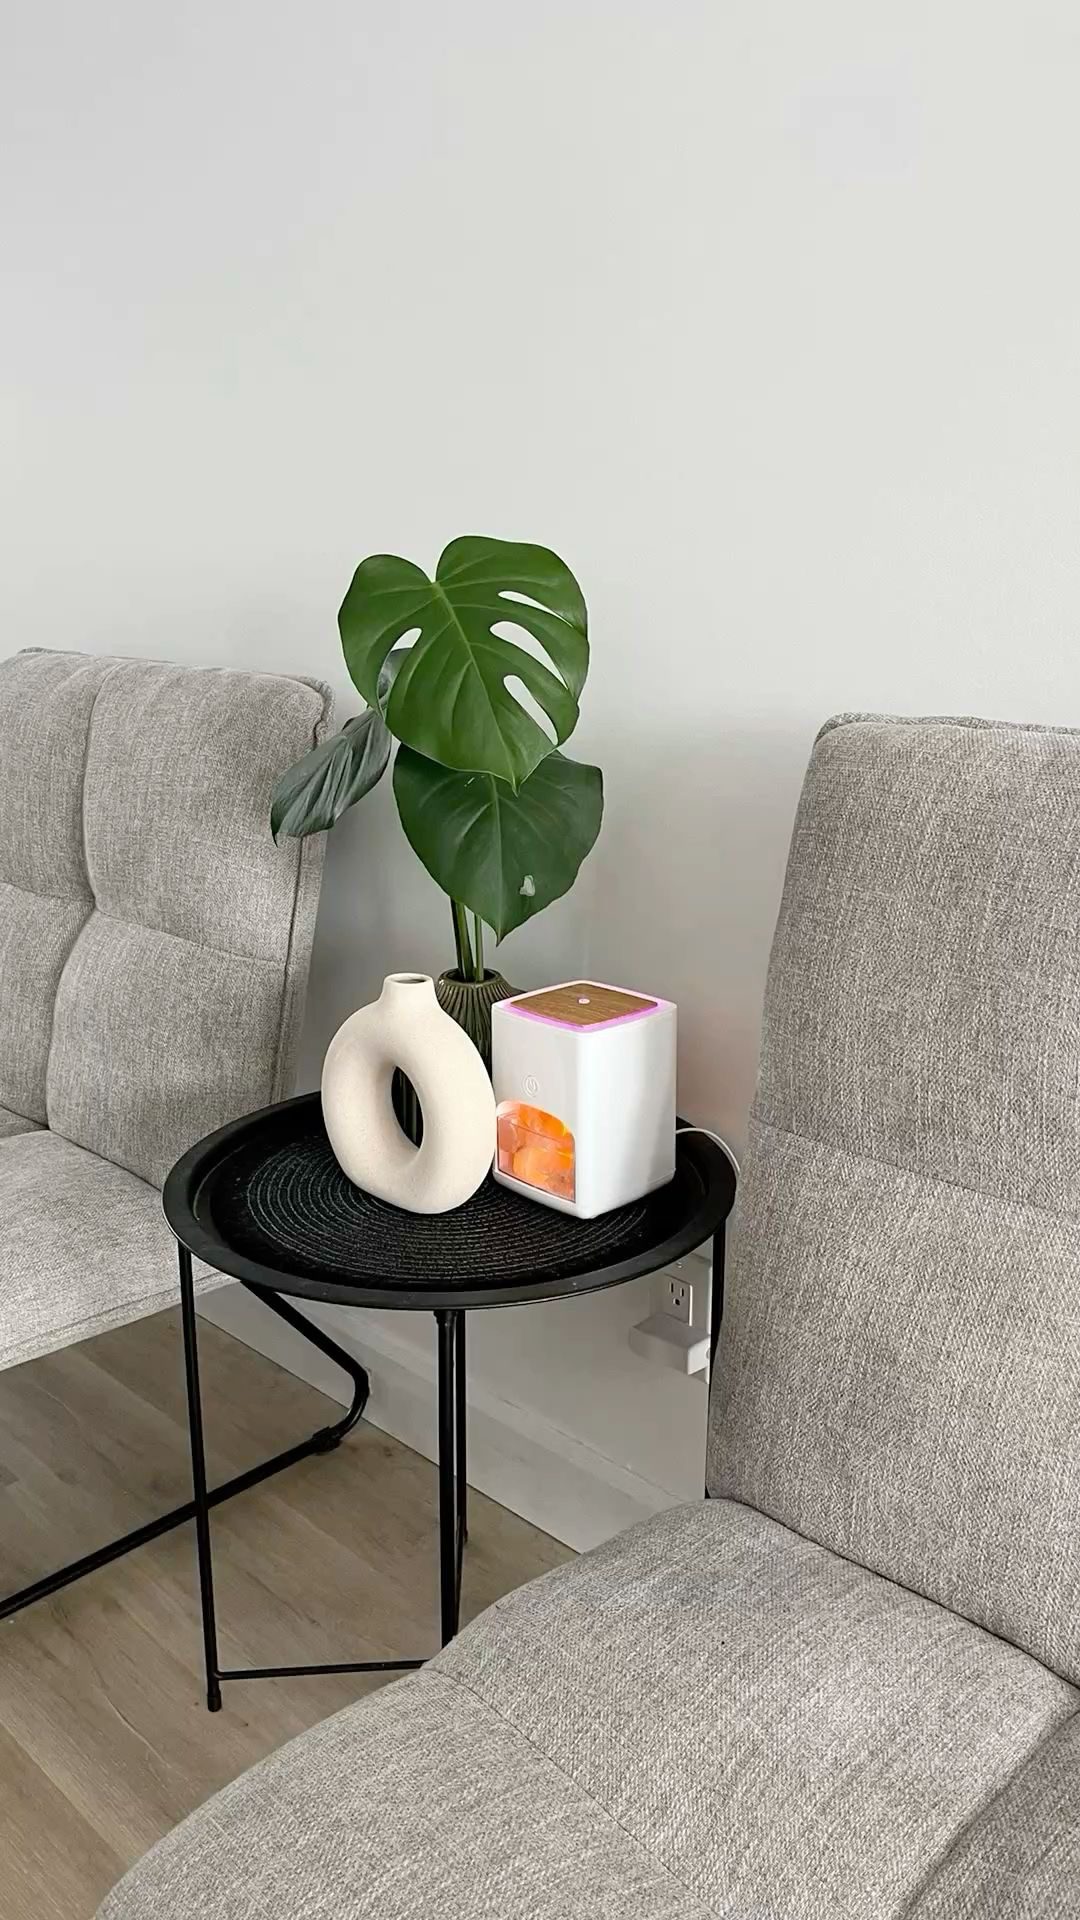
    12. Simple Tray Arrangement for Seamless Style

    Simple Tray Arrangement for Seamless Style

    Placing a small tray on your side table instantly organizes your decor and makes the entire setup look cohesive. Combining one sculptural object with softer items like a candle or plant brings harmony without demanding too much effort.

    Key Design Elements

    • Choose trays in materials that compliment your table’s finish.
    • Mix varying textures for visual appeal.
    • Limit small items to avoid overcrowding the tray.

    Pro Tip: Switch tray contents seasonally for a quick and easy style refresh.

    13. Symmetrical Arrangement Between Seating

    Symmetrical Arrangement Between Seating

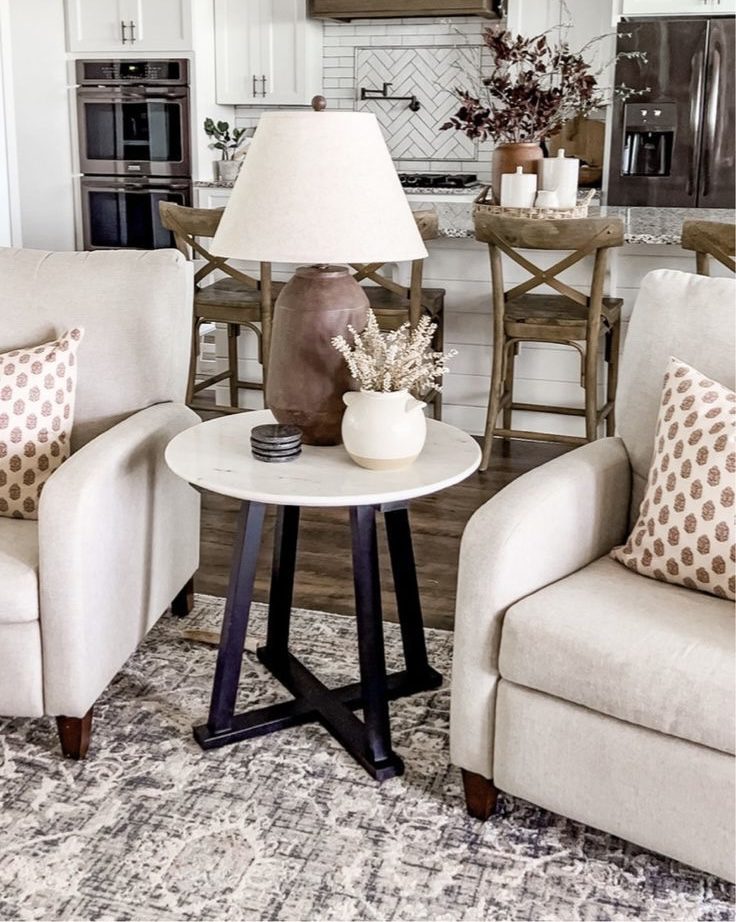
    Positioning a side table between two chairs calls for balanced styling. A centrally placed lamp flanked by a candle or small decorative piece creates symmetry that anchors the seating area without appearing too staged.

    Key Design Elements

    • Choose lamps with adjustable brightness for functional lighting.
    • Keep decorative elements simple and proportionate.
    • Use decor that complements the seating’s color scheme.

    Pro Tip: Incorporate soft textiles nearby to enhance the inviting atmosphere.

    14. Comfort-Driven Everyday Setup

    Comfort-Driven Everyday Setup

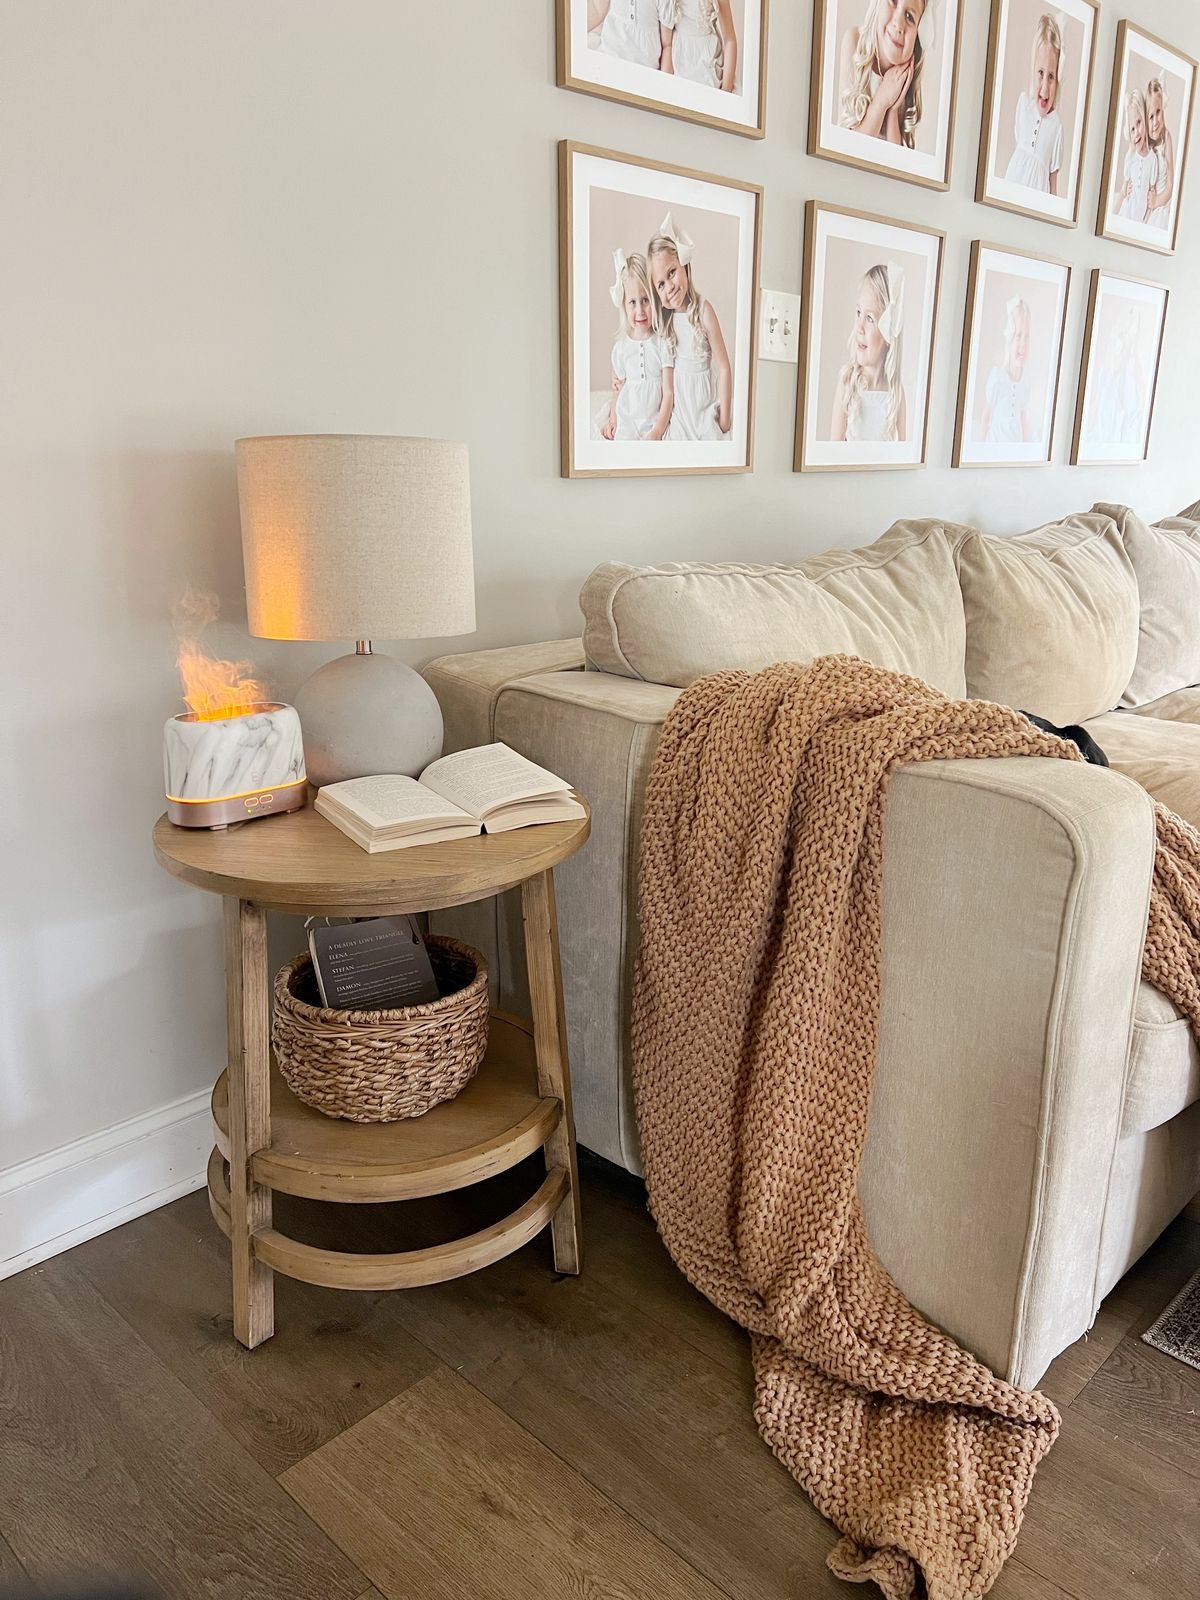
    For a side table that feels genuinely lived-in, include items like a softly glowing lamp, a casually open book, and a nearby throw blanket. This style invites use and relaxation, blurring the line between decor and daily comfort.

    Key Design Elements

    • Use warm lighting to create a cozy ambiance.
    • Keep favorite books or magazines within easy reach.
    • Add soft textures nearby to encourage lounging.

    Pro Tip: Rotate reading materials regularly to keep the space feeling fresh and welcoming.

    15. Bright and Breezy with Fresh Greenery

    Bright and Breezy with Fresh Greenery

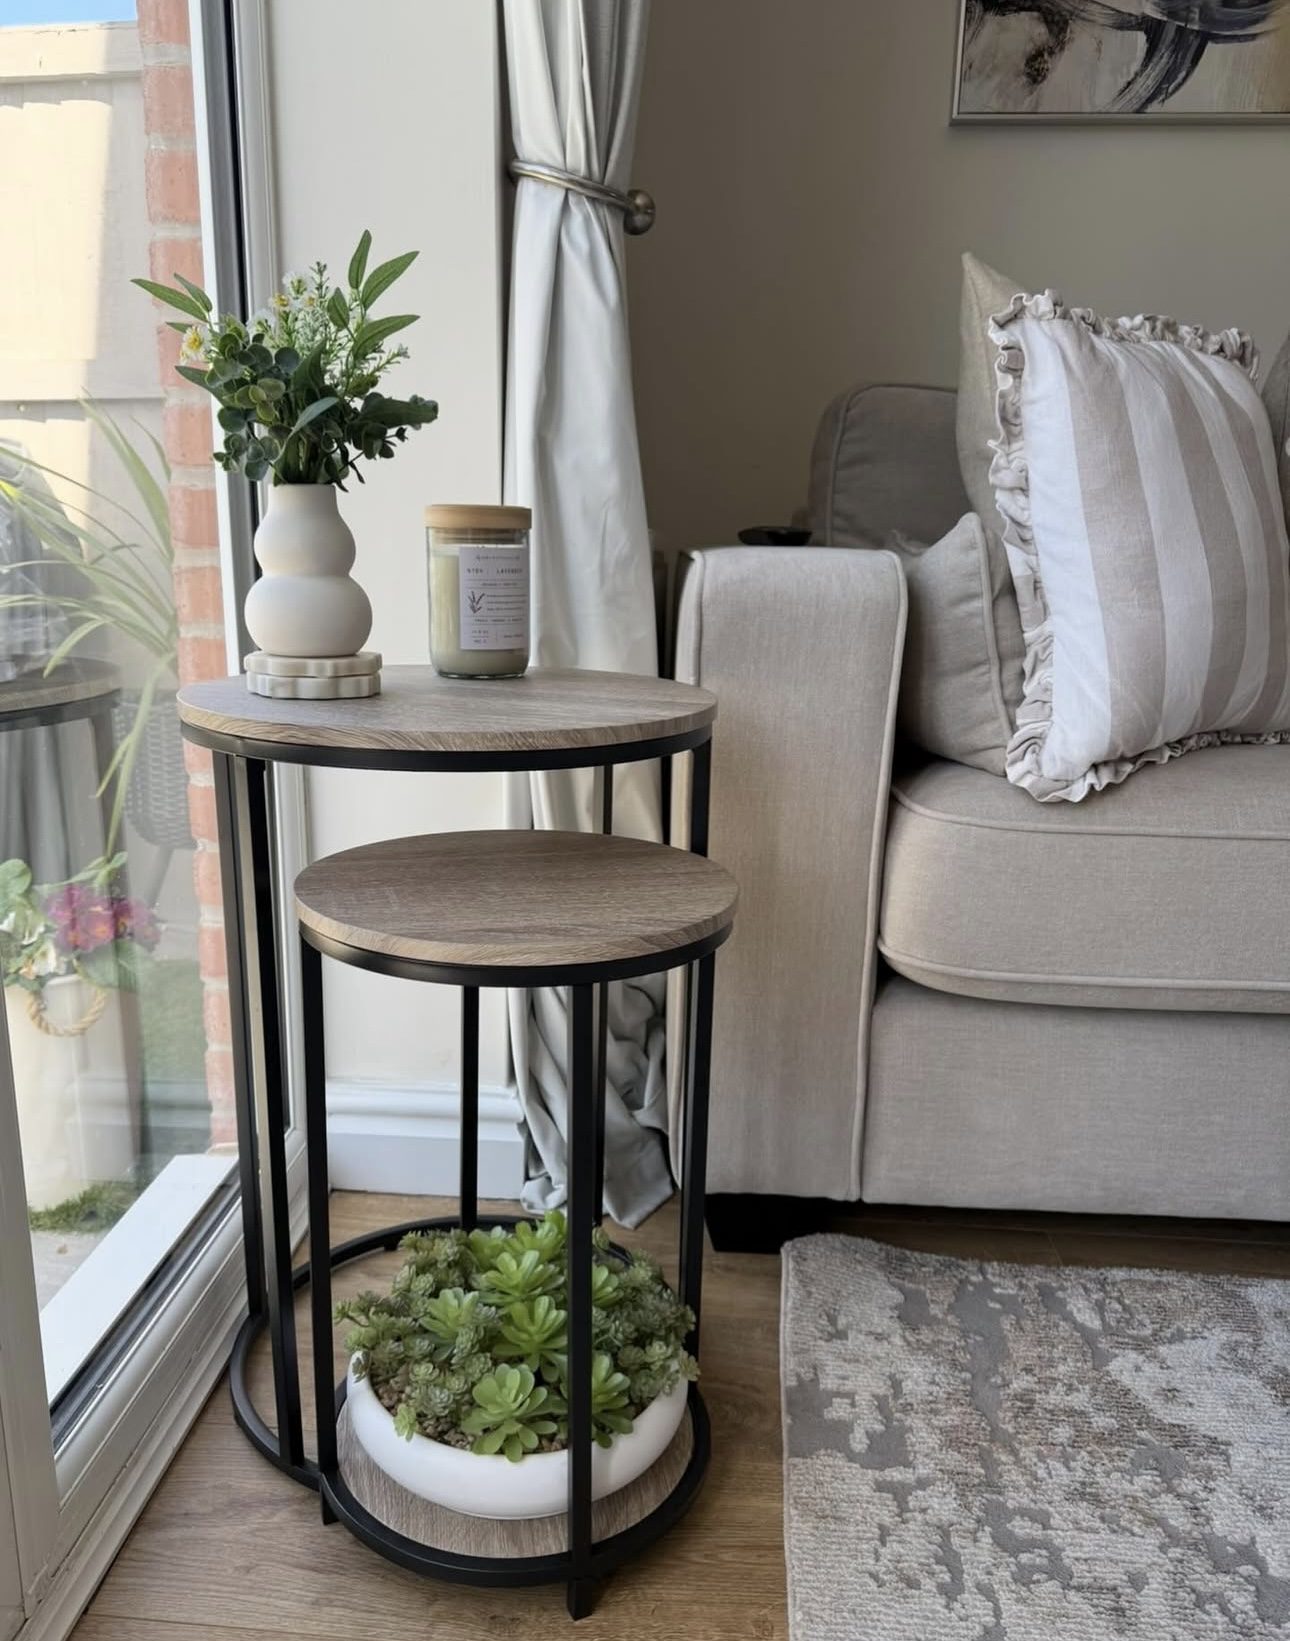
    Placing a side table near a window enhances its light and airy feel. A small plant on top with an additional one tucked underneath brings subtle life to the space without overwhelming it, keeping the overall look calm and natural.

    Key Design Elements

    • Use plants that thrive in indirect sunlight.
    • Keep decor minimal to maximize natural brightness.
    • Select light-colored furniture to enhance the airy vibe.

    Pro Tip: Position side tables where they can catch morning light to energize the space.

    16. Dual Tables for Stylish Flexibility

    Dual Tables for Stylish Flexibility

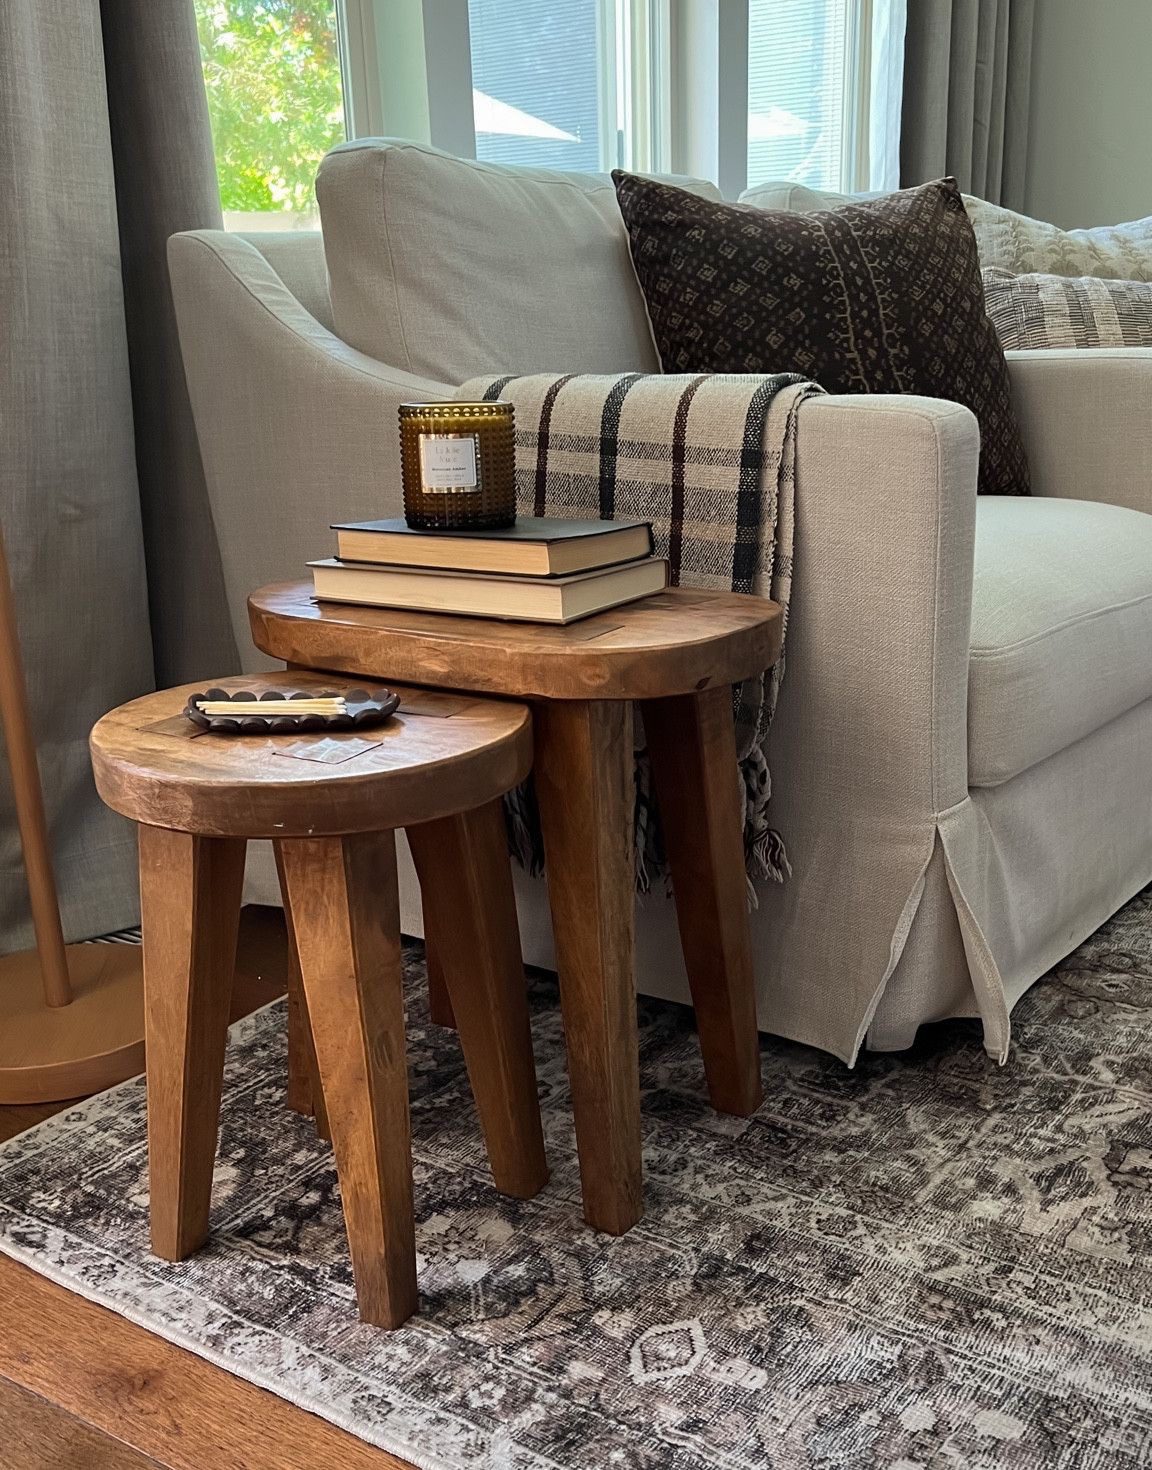
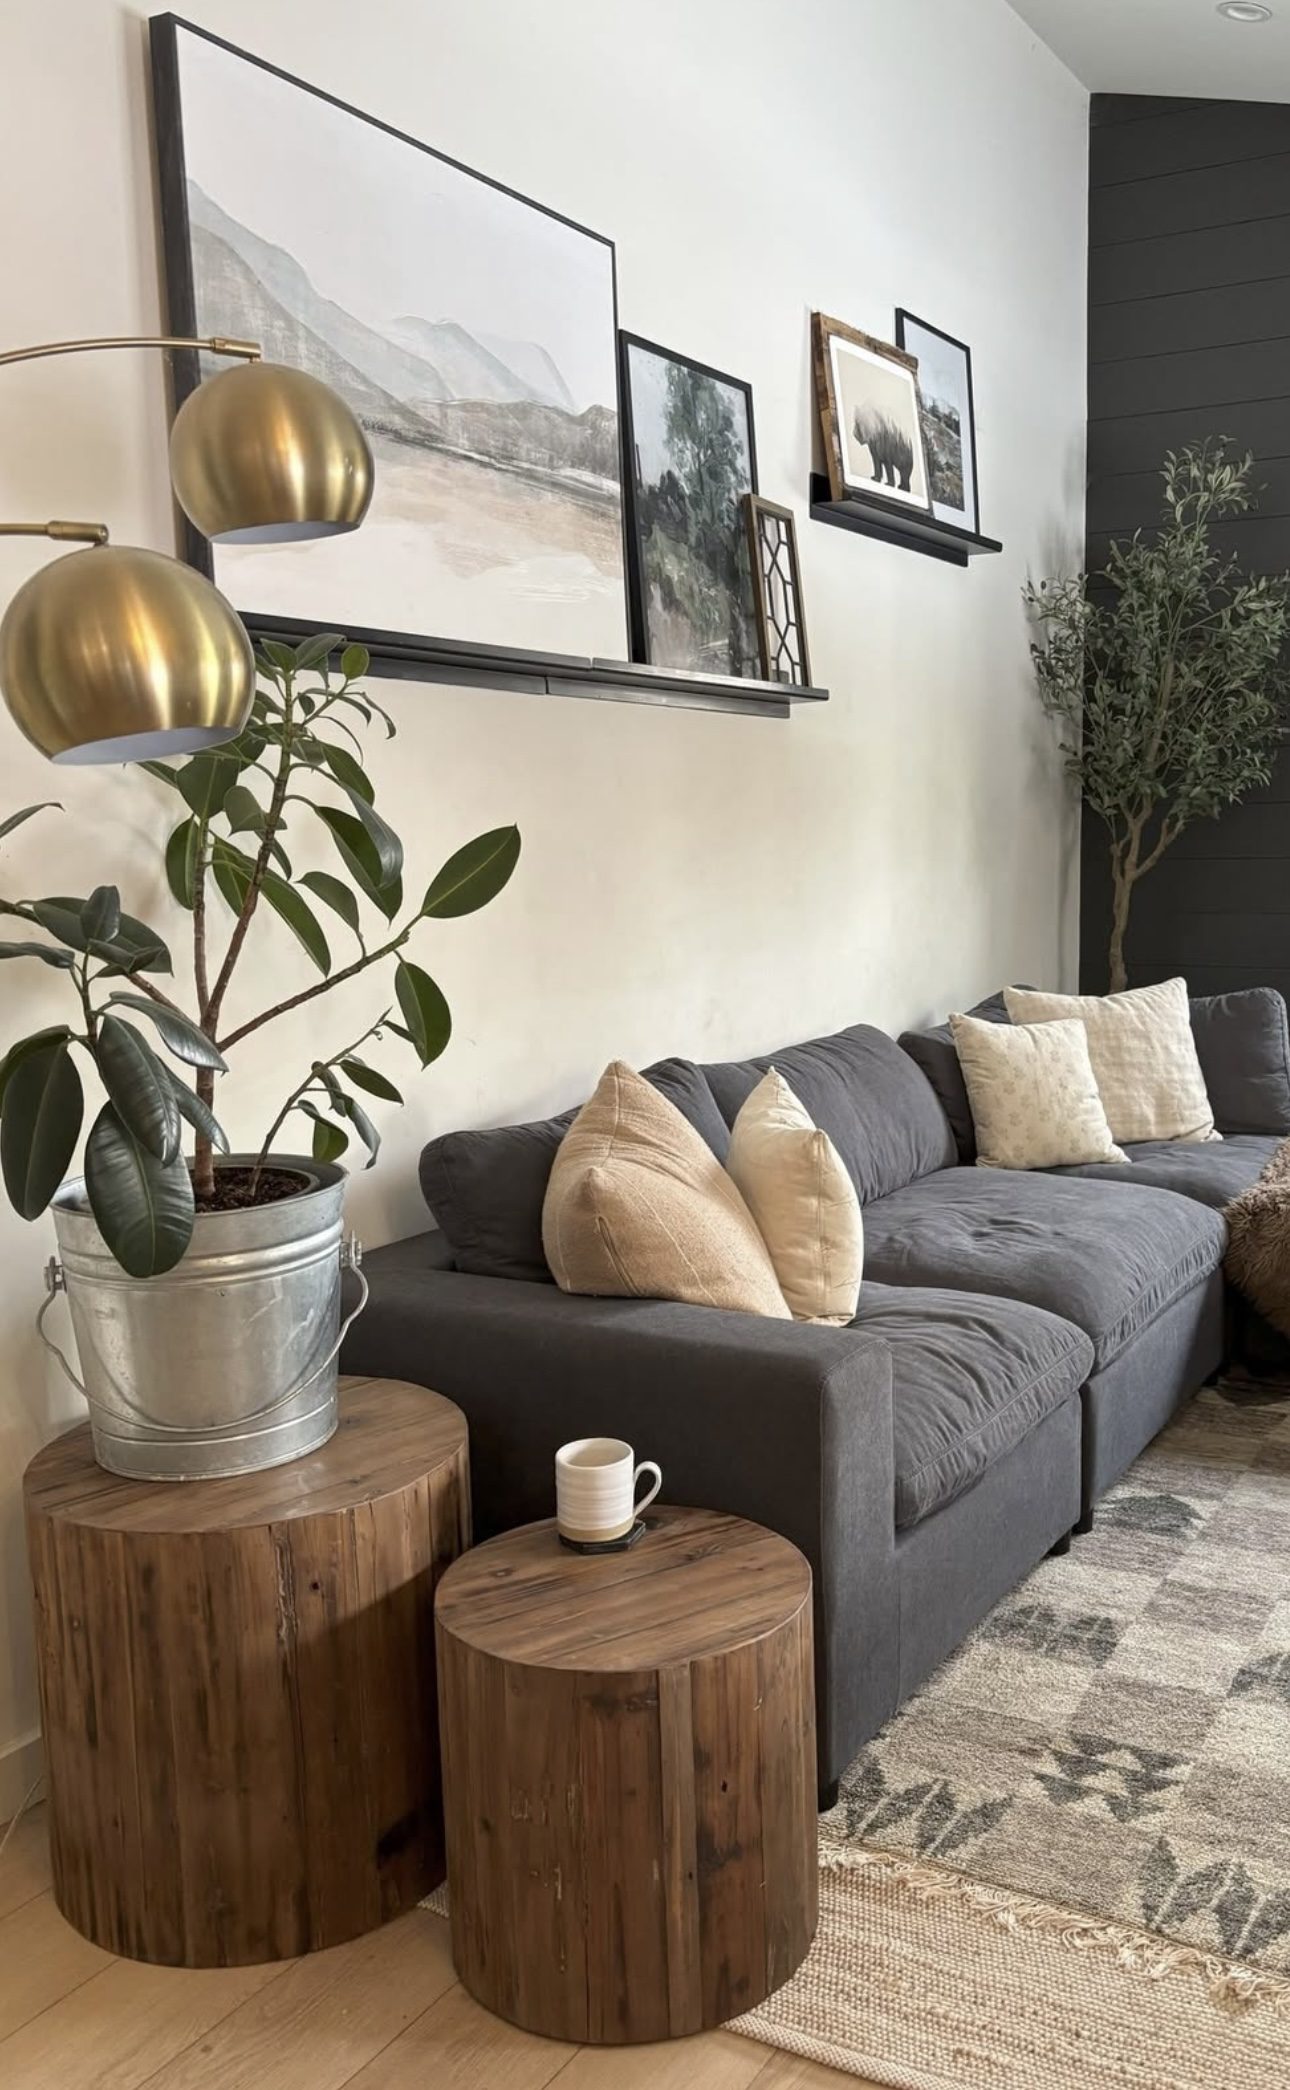
    Pairing or stacking two smaller tables offers expanded surface area without feeling bulky. This strategy helps separate decorative items from everyday essentials, creating a layered, purposeful look that’s perfect for multi-use spaces.

    Key Design Elements

    • Mix and match table shapes or heights for visual interest.
    • Use one table to showcase decor, the other for functional items.
    • Keep color palettes consistent for cohesion.

    Pro Tip: Use nesting tables to save space when not in use and pull them out as needed.

    17. Light Wood and Soft Layering

    Light Wood and Soft Layering

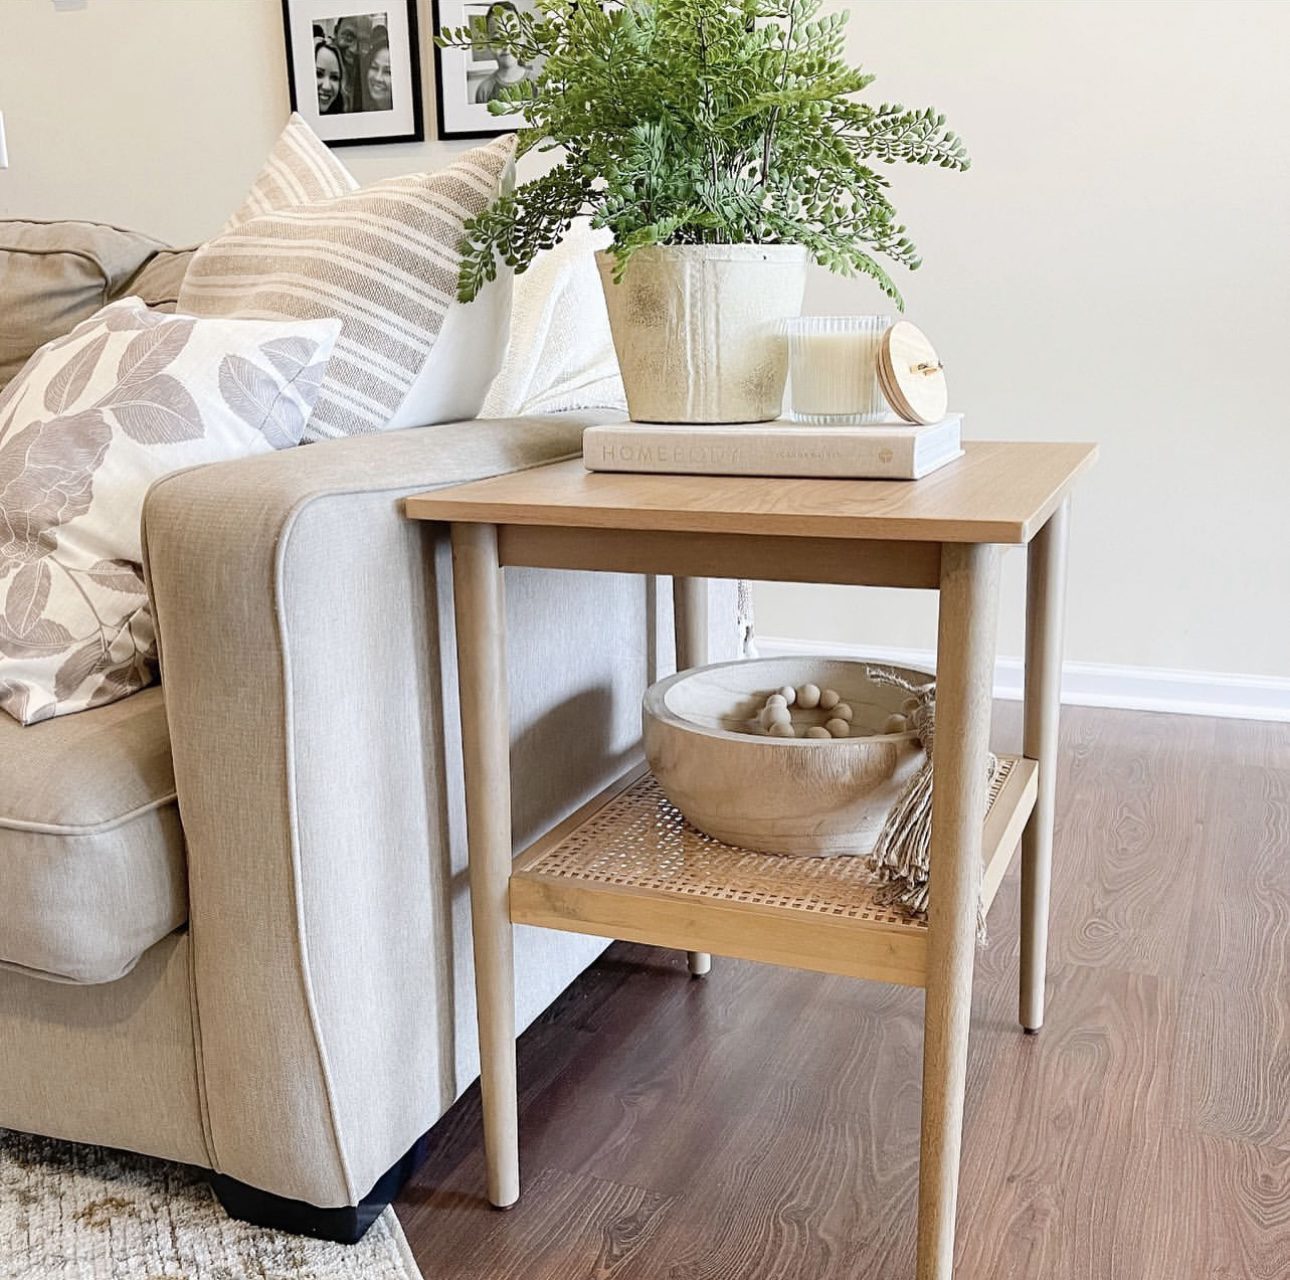
    A side table in light wood tones paired with a few soft layers underneath achieves a balanced, airy aesthetic. The additional shelf provides extra styling space, making it easier to keep the top uncluttered while still adding interest.

    Key Design Elements

    • Choose pale woods for a fresh, natural look.
    • Stack books or textiles on the lower shelf for texture.
    • Limit top decor to one or two statements for balance.

    Pro Tip: Incorporate neutral-colored accessories to keep the light and airy theme consistent.

    18. Texture-Rich Neutrals for Depth

    Texture-Rich Neutrals for Depth

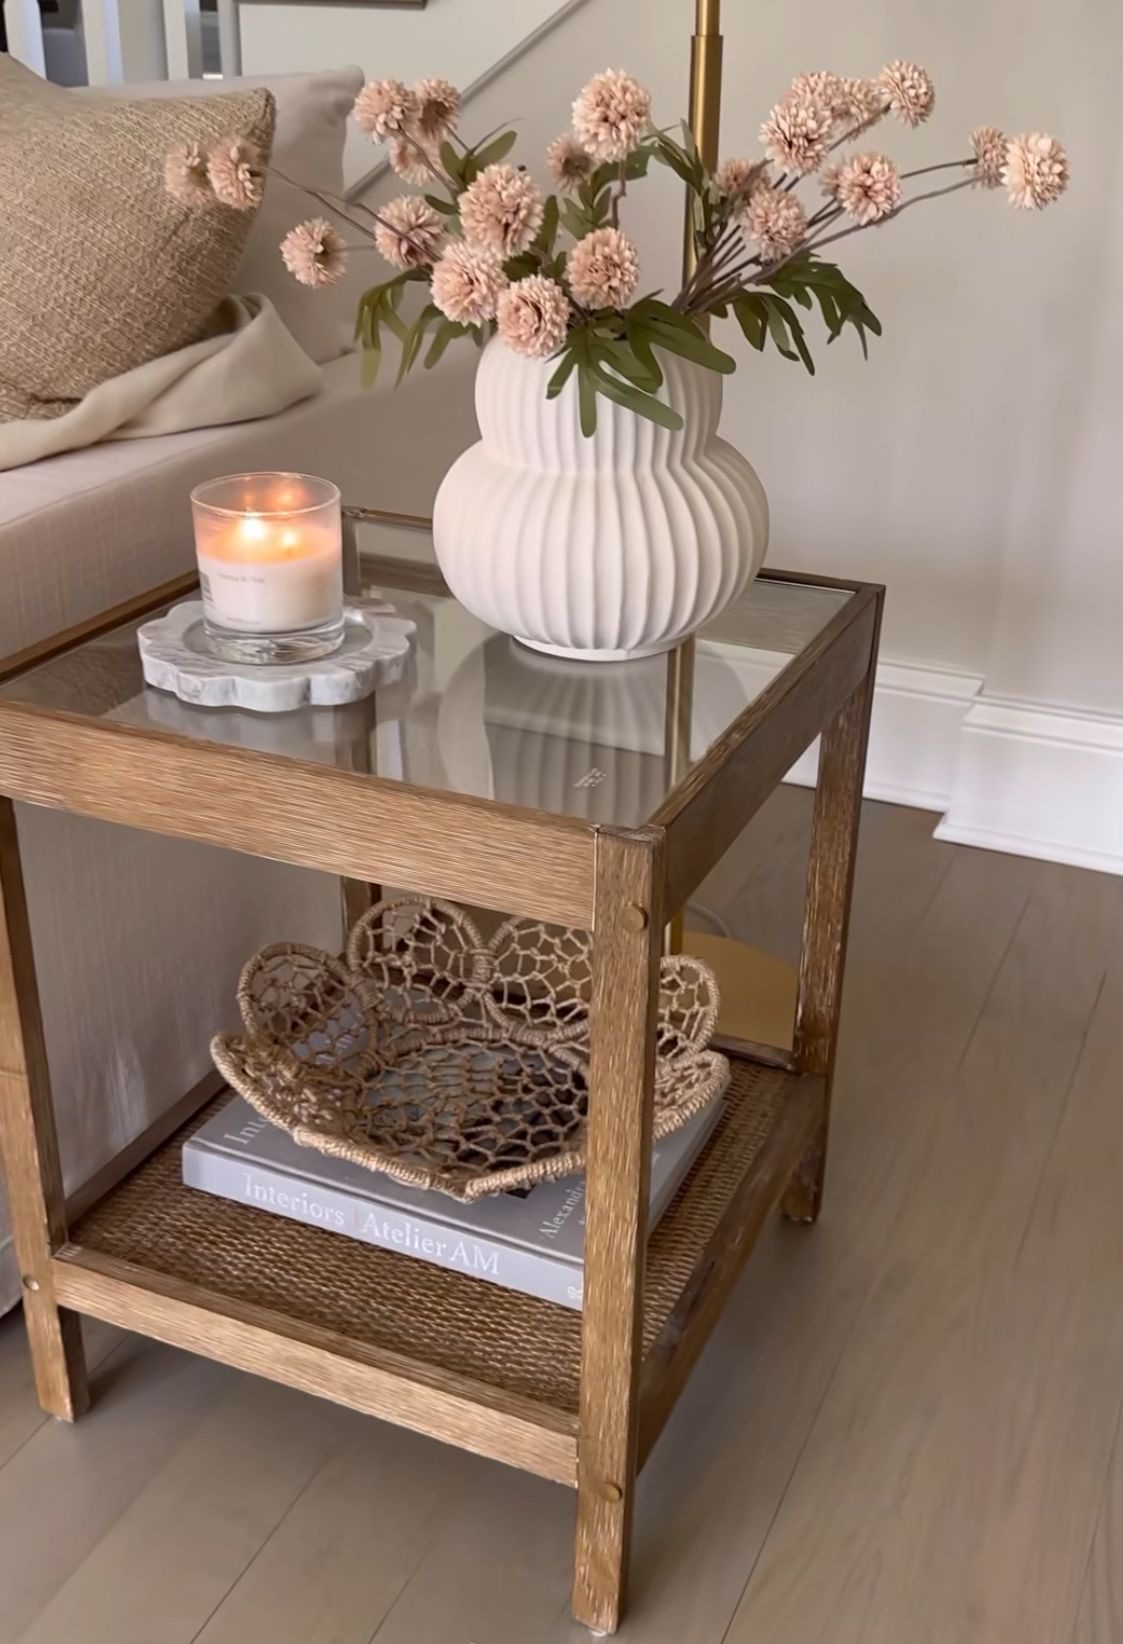
    Styling with a variety of natural materials—ceramic, linen, wood, and glass—in the same neutral color family infuses your side table with tactile interest. This approach creates a sophisticated yet understated look that feels layered without clutter.

    Key Design Elements

    • Mix matte and glossy finishes for contrast.
    • Choose soft fabrics to add warmth.
    • Incorporate handcrafted or artisan pieces for uniqueness.

    Pro Tip: Use a textured runner or small fabric piece under decor to add dimension.

    19. Organic Textures Enhanced by Simple Greenery

    Organic Textures Enhanced by Simple Greenery

    A relaxed, natural style emerges by pairing wooden elements with soft cushions and simple plants. The side table itself remains understated, allowing greenery to bring freshness and an organic feel to the corner.

    Key Design Elements

    • Opt for natural woods with visible grain for authenticity.
    • Use cushions or throws that match the table’s aesthetic.
    • Choose plants with soft, flowing foliage to complement textures.

    Pro Tip: Mix and match natural materials to create a cozy, grounded space.

    20. Effortless Candle Glow for Warmth

    Effortless Candle Glow for Warmth

    Sometimes all a side table needs is a single candle to uplift the room’s ambience. Placing a candle next to a cozy sofa or chair instantly adds warmth, especially when paired with a nearby soft throw, creating a quietly inviting nook.

    Key Design Elements

    • Choose candles in neutral holders for versatility.
    • Use flameless LED options for safety.
    • Keep matches or a lighter handy but out of sight.

    Pro Tip: Layer scents subtly by pairing candles with fresh flowers for added sensory depth.

    21. Warm Layers of Texture and Tone

    Warm Layers of Texture and Tone

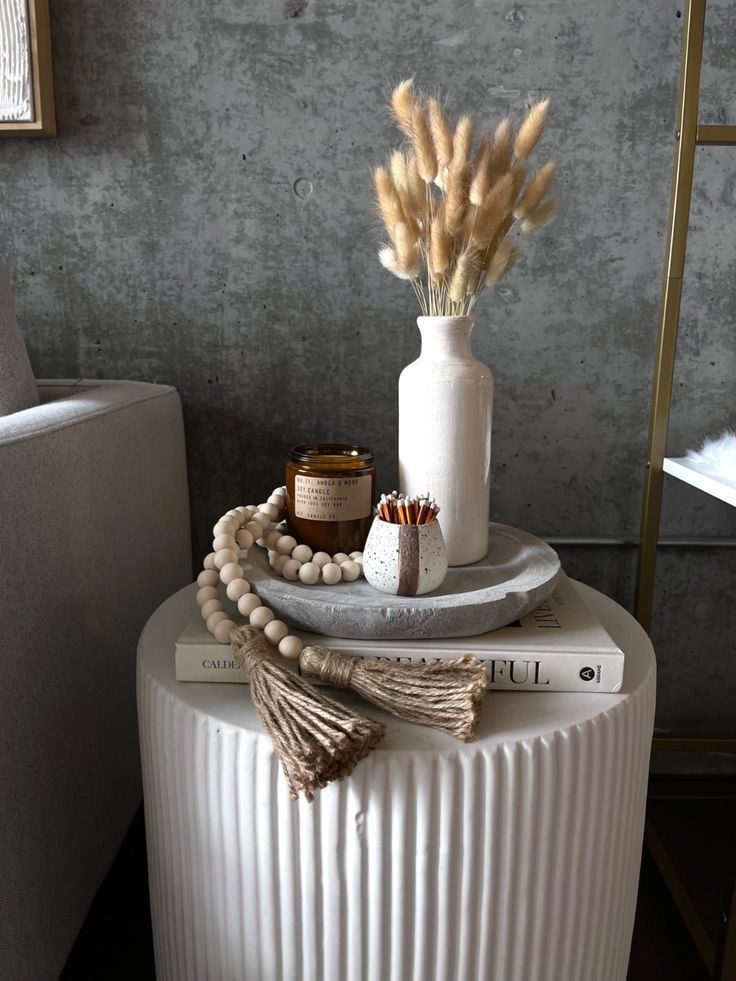
    Combining textured accessories like beads, ceramics, and trays in warm, neutral tones adds depth without clutter. This layering technique keeps your side table feeling cozy and inviting, even when sticking to a calm color palette.

    Key Design Elements

    • Mix rough and smooth textures for tactile interest.
    • Choose earthy hues to promote warmth.
    • Limit the number of pieces to maintain balance.

    Pro Tip: Incorporate natural elements like wood or stone to ground the layered look.

    22. Neutral Dried Flowers with Soft Candlelight

    Neutral Dried Flowers with Soft Candlelight

    Pairing dried floral stems with the gentle flicker of a candle creates a timeless, cozy atmosphere. Sticking with neutral shades lets this setup transition beautifully through seasons while maintaining a subtle autumnal warmth.

    Key Design Elements

    • Select dried flowers in beige, cream, or soft browns for versatility.
    • Use unscented candles to keep the mood soothing.
    • Place the arrangement where it can be appreciated up close.

    Pro Tip: Refresh your dried stems annually to prevent dust build-up and keep the display looking fresh.

    23. Compact Yet Complete Styling

    Compact Yet Complete Styling

    Even the smallest side tables can look intentional with the right elements. A simple vase, a favorite book, and a small decorative bowl below create a polished and realistic setup that fits seamlessly into everyday living.

    Key Design Elements

    • Select decor that fits the scale of the table.
    • Use multifunctional items to maximize space.
    • Embrace simplicity for clutter-free style.

    Pro Tip: Rotate items seasonally to keep the compact setup feeling fresh and relevant.

    24. Curated Tray Displays for Organized Charm

    Curated Tray Displays for Organized Charm

    Using a tray to group small decor pieces creates a curated, intentional vibe even if the items are varied. Including glassware, candles, and fresh flowers prevents the display from feeling flat and keeps your side table looking serene and collected.

    Key Design Elements

    • Choose trays with raised edges to keep items contained.
    • Mix transparent and opaque pieces for depth.
    • Limit the number of objects to avoid visual overload.

    Pro Tip: Use trays in contrasting materials like metal or wood to add subtle texture variety.

    25. Creating an Inviting Corner Vibe

    Creating an Inviting Corner Vibe

    Beyond just the side table, styling the entire corner with a candle, a decorative vase, and a soft throw encourages a welcoming spot to unwind. This layered approach makes the area feel cozy and encourages lingering with a cup of tea or a good book.

    Key Design Elements

    • Use warm lighting to set a relaxing mood.
    • Add tactile elements like soft throws for comfort.
    • Keep decor cohesive for a harmonious corner.

    Pro Tip: Include a small footstool or pouf nearby to enhance relaxation and usability.

    26. Real-Life Charm with Slightly Imperfect Details

    Real-Life Charm with Slightly Imperfect Details

    This approachable styling embraces a lived-in look with a lamp, a casually placed photo frame, and loosely arranged flowers. The relaxed imperfection adds personality and makes your side table feel authentically part of your home.

    Key Design Elements

    • Allow flowers to look natural rather than overly arranged.
    • Place personal photos for warmth and nostalgia.
    • Keep lighting soft and approachable.

    Pro Tip: Regularly swap out flowers or photos to keep the display feeling fresh yet familiar.

    27. Polished Elegance with Height and Structure

    Polished Elegance with Height and Structure

    For a more refined side table look, taller candles and a structured vase add vertical interest and sophistication. This setup feels orderly and purposeful, ideal for spaces where a touch of formality is desired without feeling rigid.

    Key Design Elements

    • Use candle holders of varying heights for balance.
    • Opt for sleek vases with clean lines.
    • Keep color palettes simple and coordinated.

    Pro Tip: Incorporate metallic accents in accessories to elevate the polished vibe.

    28. Rustic Layers for Cozy Warmth

    Rustic Layers for Cozy Warmth

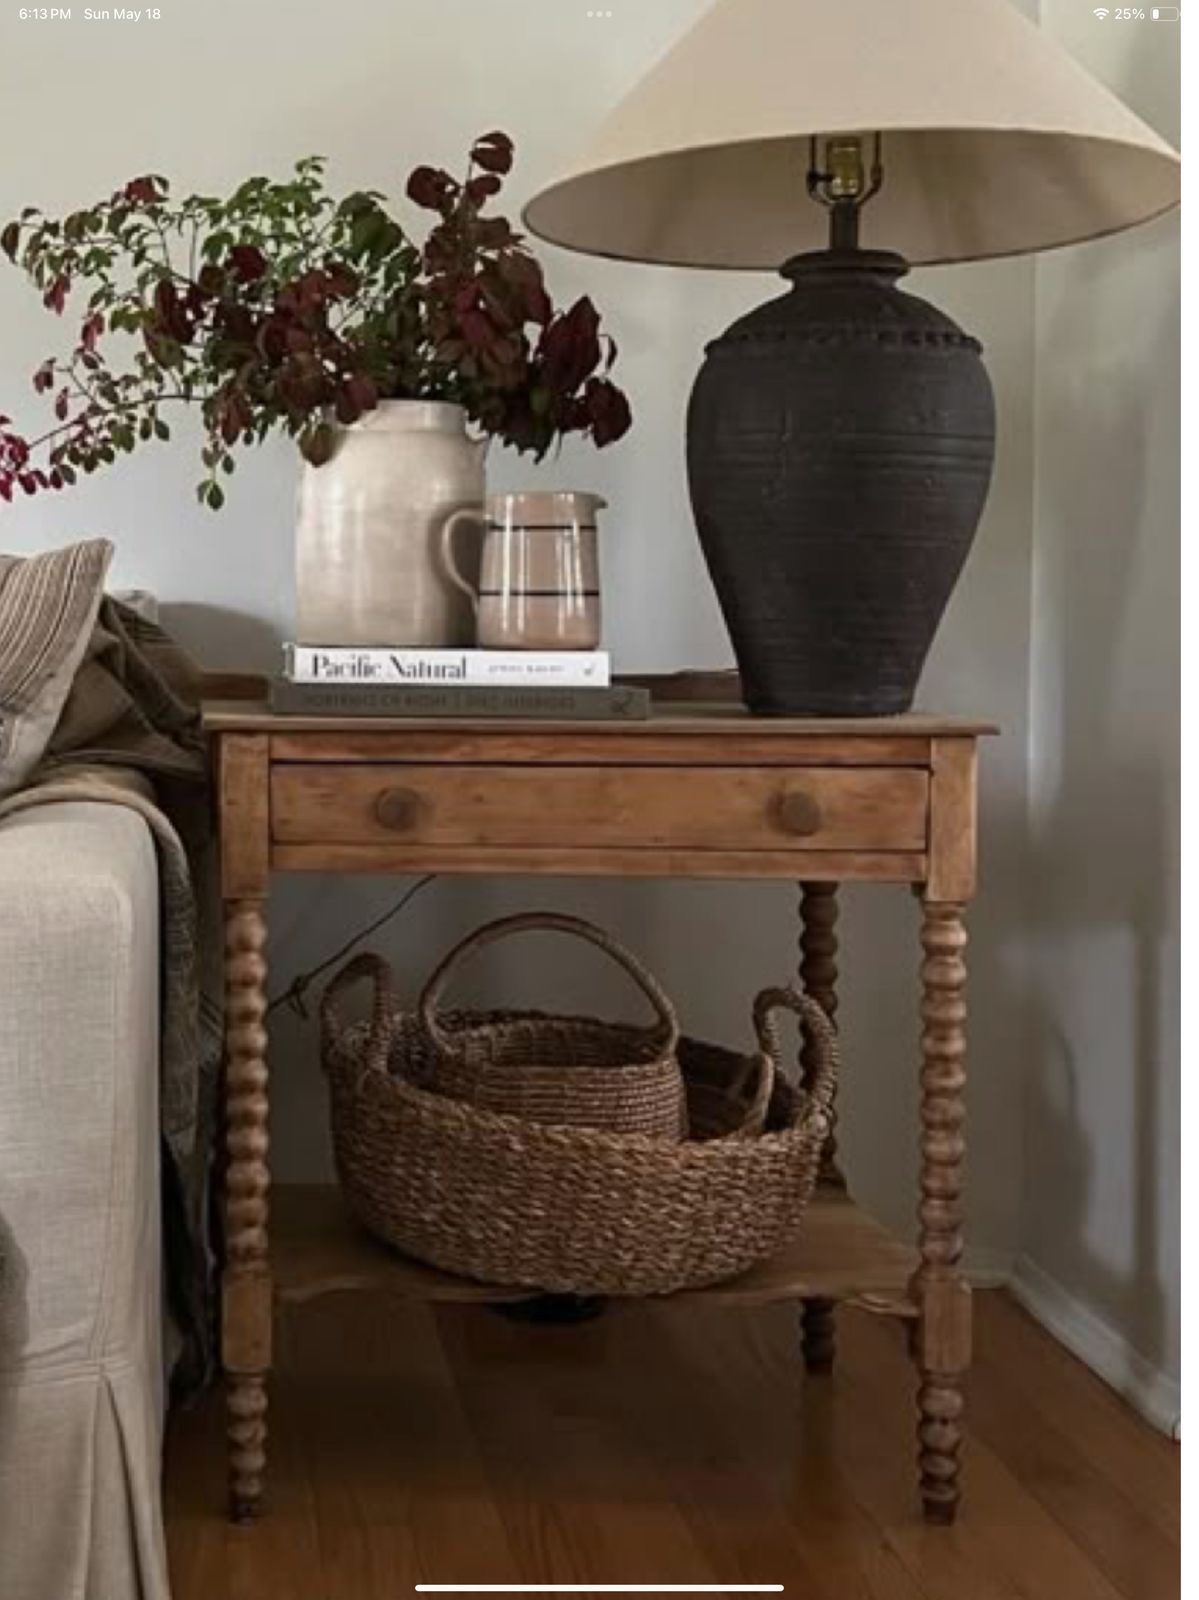
    Embracing rustic wood tones combined with textured baskets beneath creates a warm, layered effect. This slightly rugged styling feels natural and inviting, perfect for homes that favor comfort over perfection.

    Key Design Elements

    • Use natural fiber baskets for added texture.
    • Keep wood finishes matte or lightly distressed.
    • Layer soft textiles nearby to enhance coziness.

    Pro Tip: Mix and match rustic pieces with more refined elements to avoid a heavy or overly casual look.

    29. Dark Furniture Balanced with Soft Accents

    Dark Furniture Balanced with Soft Accents

    A dark-hued side table can feel imposing if left bare, but adding lighter accents such as flowers and candles creates a pleasing contrast. This balance keeps the space feeling dynamic and prevents the furniture from appearing too heavy.

    Key Design Elements

    • Pair dark tables with light-colored or metallic decor items.
    • Use soft, organic shapes to counterbalance the table’s weight.
    • Add candles for warmth and visual softness.

    Pro Tip: Incorporate reflective surfaces like glass or polished ceramics to brighten darker tables.

    30. Simple Symmetry for Easy Balance

    Simple Symmetry for Easy Balance

    When in doubt, keep your side table styling straightforward: a lamp on one side paired with a small plant or candle on the other creates a clean, balanced look. This timeless setup works well in nearly any room and never feels overthought.

    Key Design Elements

    • Choose decor pieces with complementary heights.
    • Keep color schemes neutral for versatility.
    • Maintain clear space to avoid clutter.

    Pro Tip: Use symmetry as a base but feel free to add one unexpected element to keep things interesting.

    Final Thoughts

    Styling your side table is an opportunity to bring personality, warmth, and function to a small yet impactful part of your home. Whether you prefer a cozy candlelit nook, a fresh green centerpiece, or a minimalist arrangement with a personal touch, these ideas prove that thoughtful decor can make any side table shine.

    Remember, the best styled tables are those that reflect your lifestyle and preferences while enhancing your space’s comfort and beauty. Use these tips as inspiration to create an end table setup that feels uniquely yours and effortlessly inviting.

  • 30 Brilliant Closet Organization Tips to Transform Your Space Today

    There’s something deeply satisfying about stepping into a closet that’s neat, tidy, and thoughtfully arranged. It’s more than just having a place for your clothes—it’s about creating a space that sparks joy, eases your daily routine, and reflects your personal style. If you’ve ever felt overwhelmed by a cluttered closet or struggled to find that favorite sweater, you’re not alone. The good news is that with a little planning and some smart strategies, you can transform even the most chaotic closet into an organized haven.

    Closet organization matters because it impacts more than just your wardrobe—it affects your mindset and how you start your day. A cluttered closet can lead to stress, wasted time, and even impact your choices, causing you to overlook items you truly love. On the other hand, an orderly space promotes efficiency, makes getting dressed a breeze, and helps you maintain a clutter-free lifestyle. Investing effort into organizing your closet is an investment in better mornings and a clearer mind.

    In this post, we’ll explore a range of closet organization ideas that cater to all kinds of spaces and lifestyles. From clever storage solutions and space-saving hacks to easy-to-follow routines, these tips will help you tailor your closet to your unique needs. Whether you’re starting fresh or simply looking for ways to optimize, you’ll find plenty of inspiration to make your closet a place you actually enjoy using every day.

    1. Sort Your Wardrobe by Hue for Effortless Style

    Sort Your Wardrobe by Hue for Effortless Style

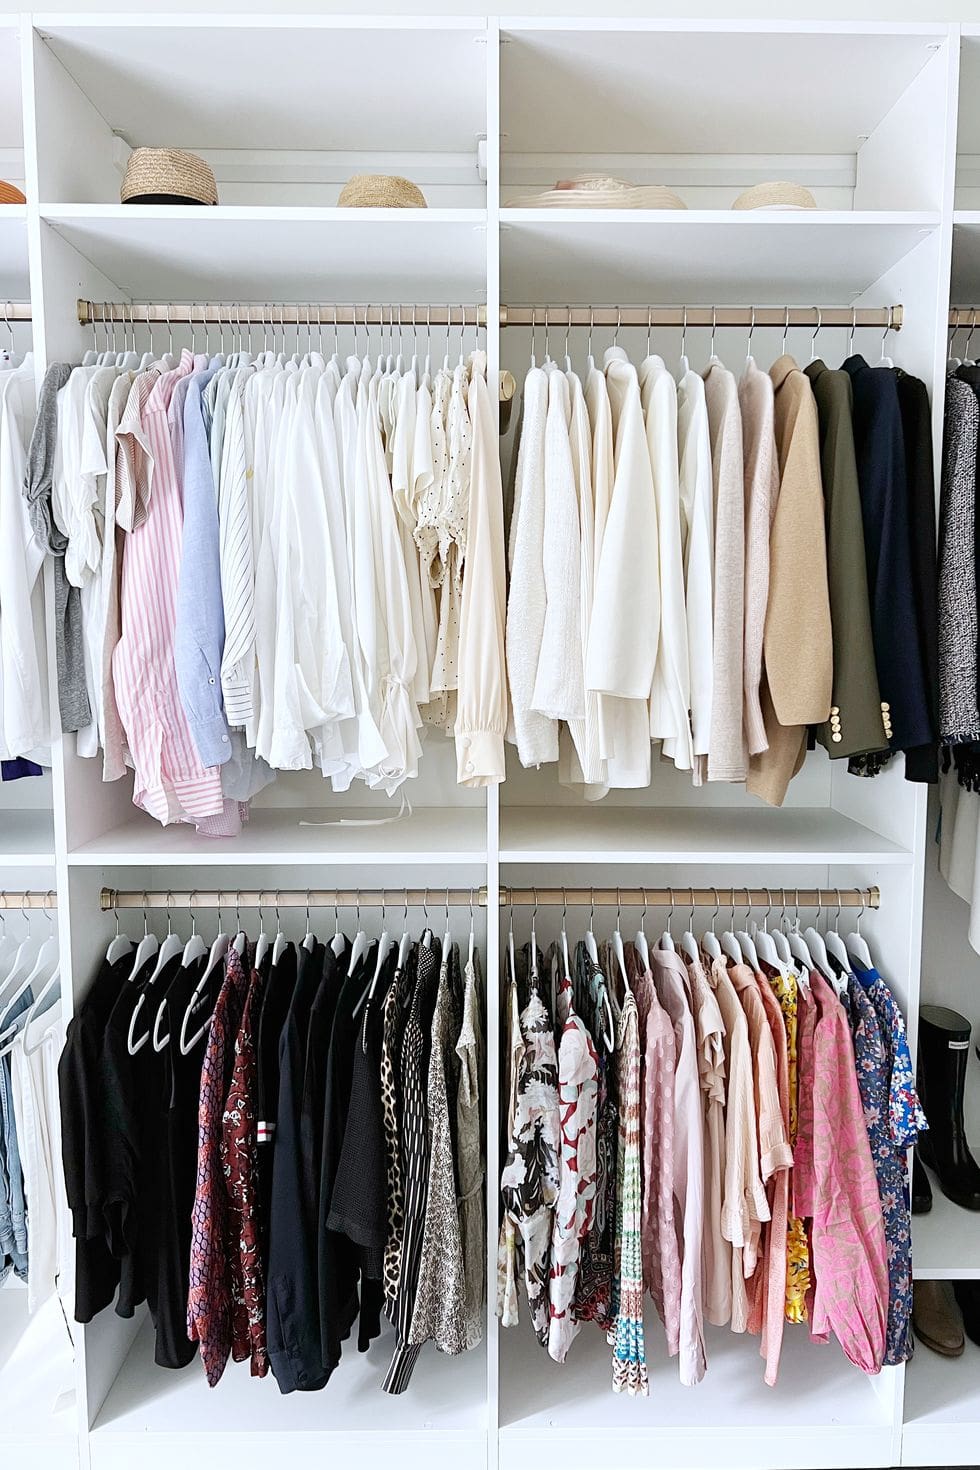
    Arranging your clothes by color isn’t just visually pleasing—it streamlines your daily routine by helping you spot exactly what you need in seconds. This colorful organization technique also reveals the overall balance of your wardrobe, making it simple to spot which shades you have plenty of and which ones need a boost. Plus, it sparks creativity when mixing and matching outfits, giving your closet a fresh, inspiring vibe.

    Key Design Elements

    • Start by grouping your garments into basic color families like neutrals, pastels, and bold tones to create clear sections.
    • Within each color group, organize items by type—such as shirts, pants, and dresses—to make browsing more efficient.
    • Use uniform hangers and consistent folding methods in each color zone to maintain a clean and cohesive look.

    Pro Tip: For an added flair, arrange colors in a gradient or rainbow sequence to turn your closet into a visually stunning, functional space.

    2. Elevate Your Closet with Stylish Finishing Touches

    Elevate Your Closet with Stylish Finishing Touches

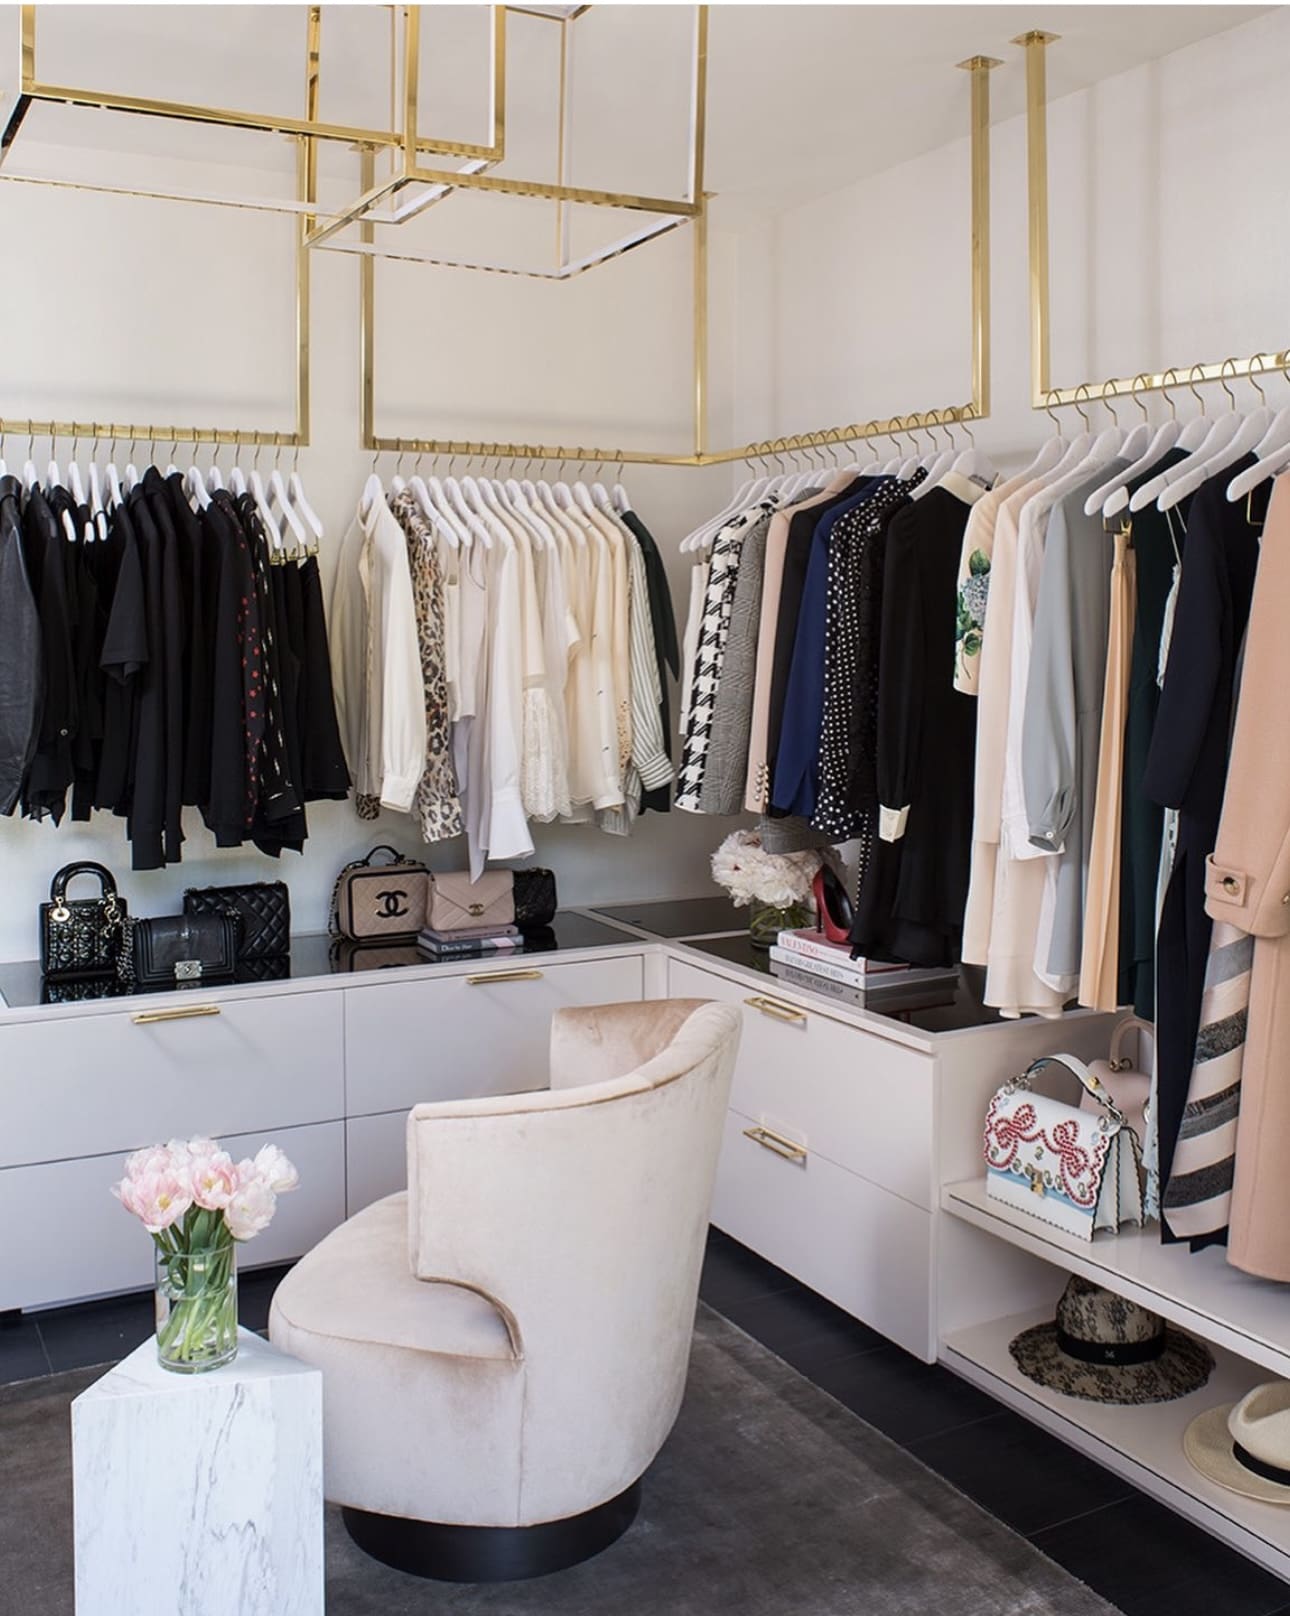
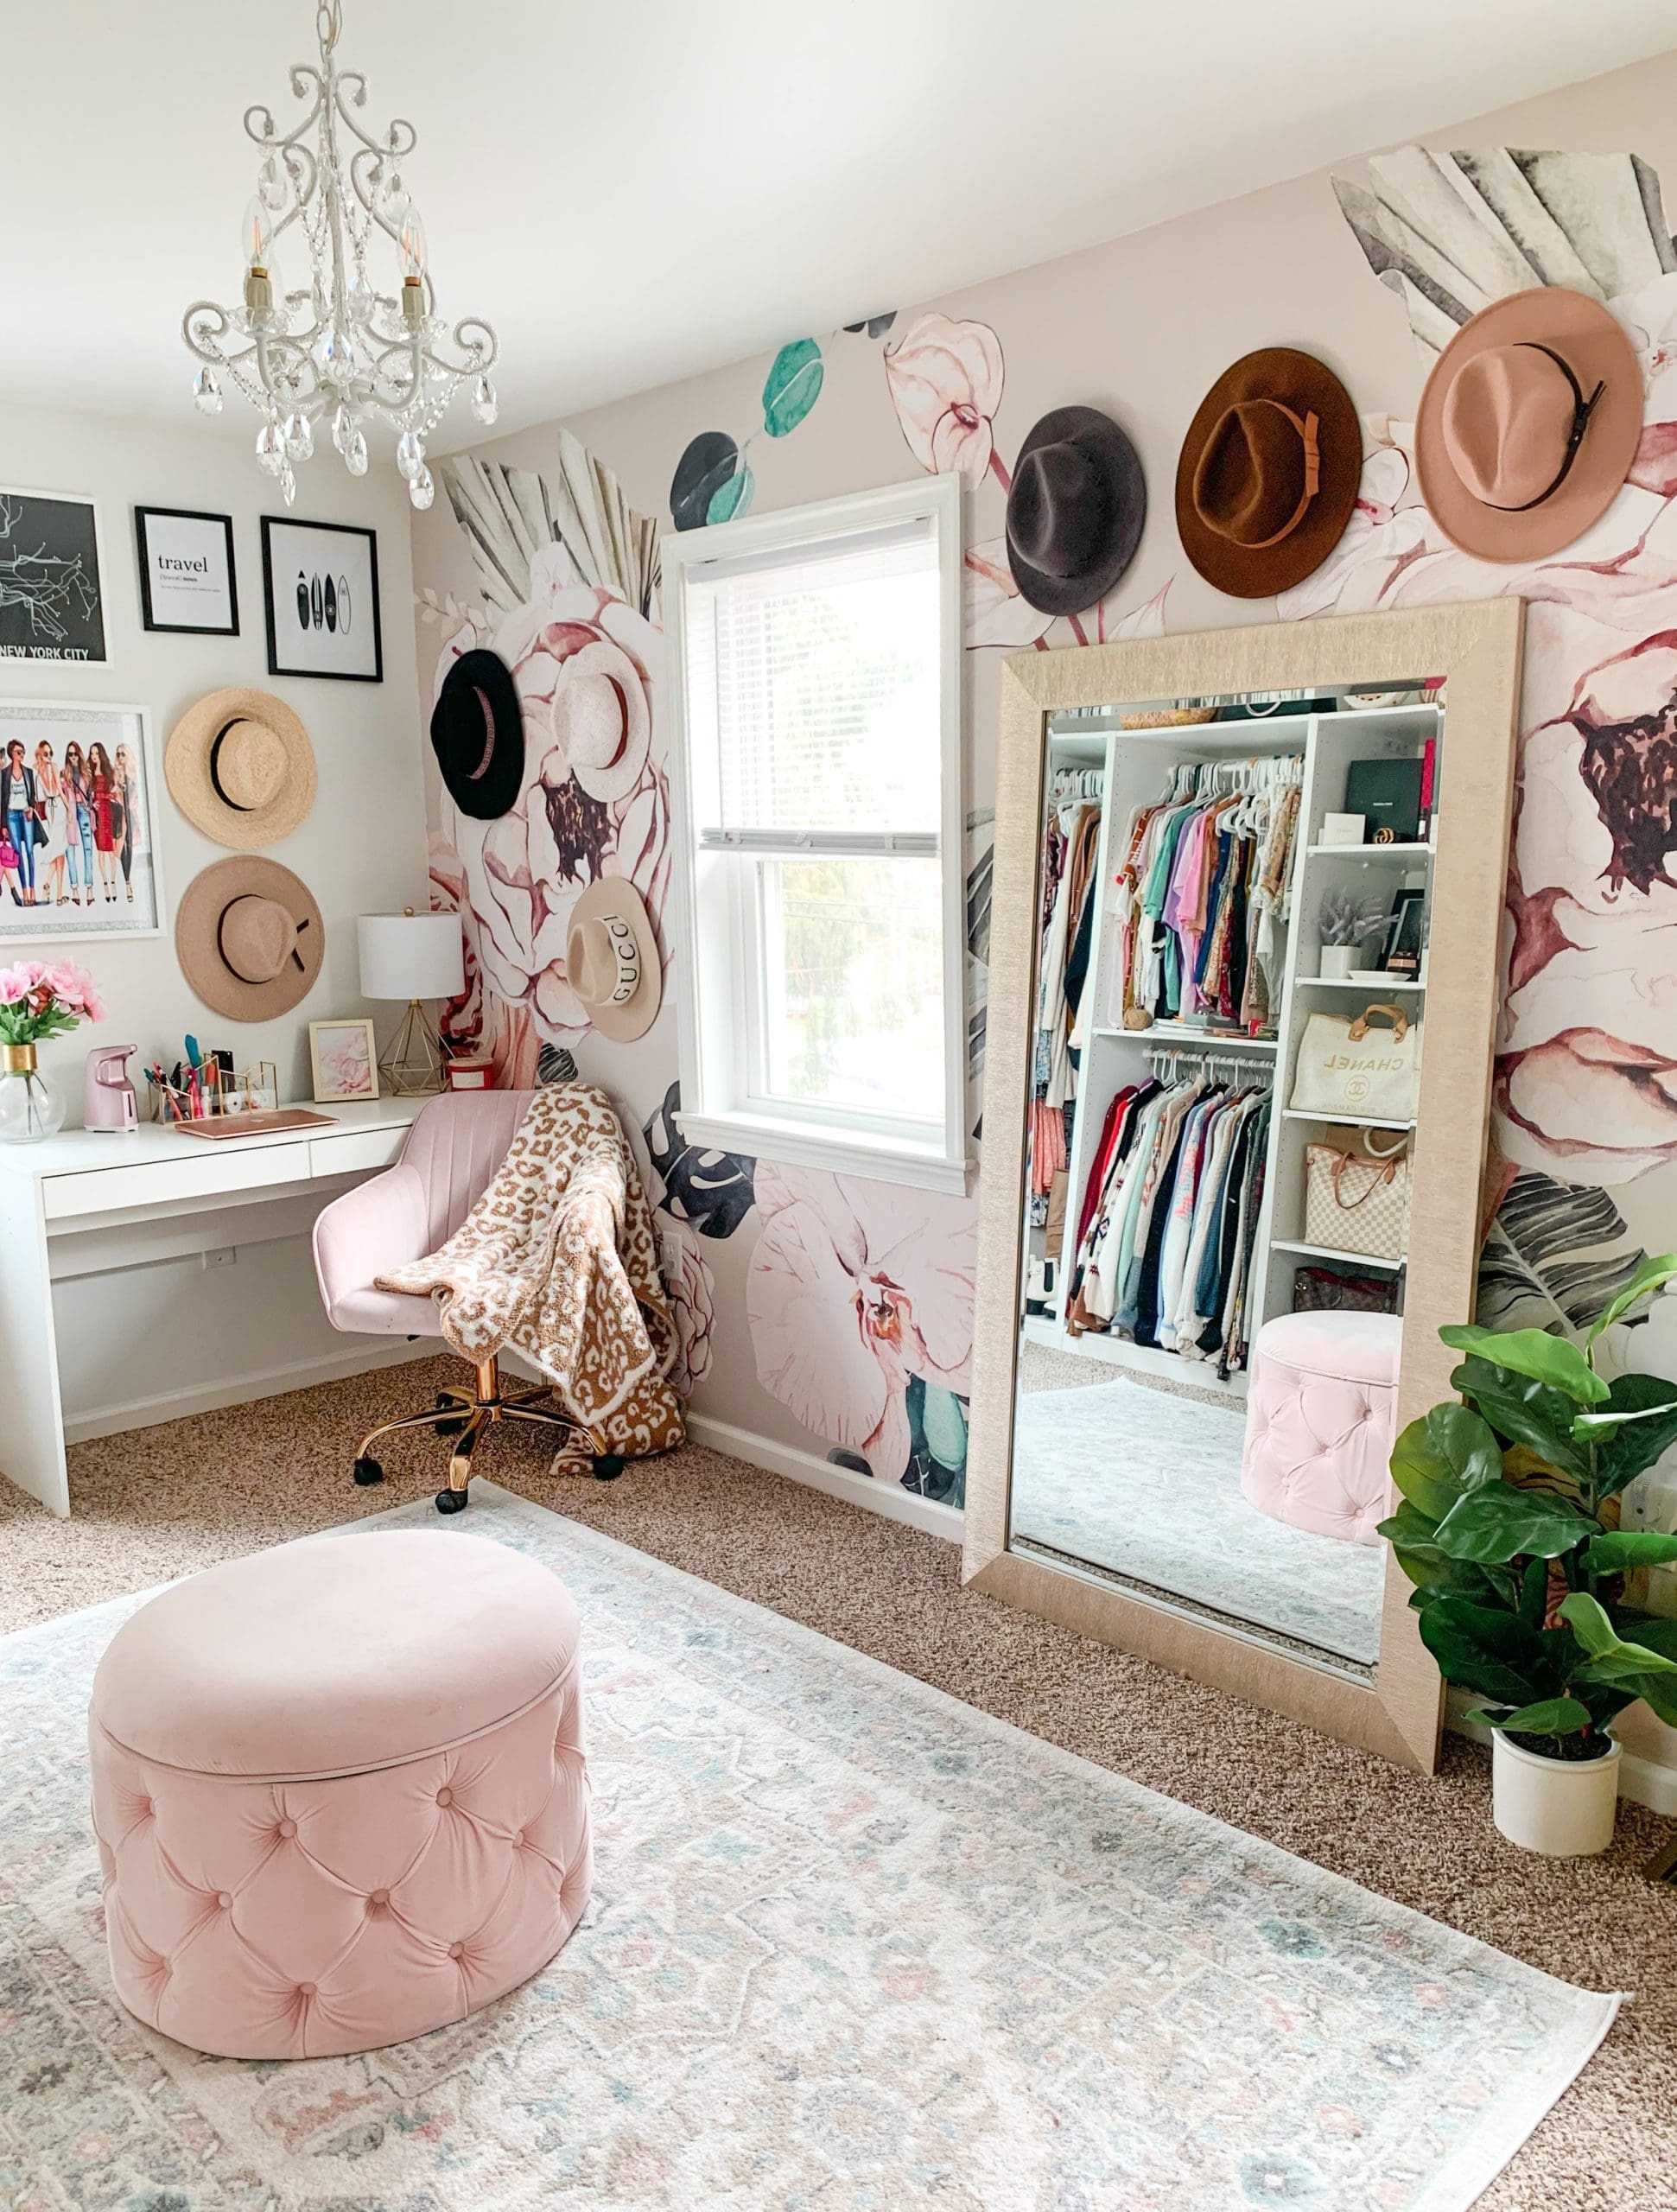
    Transform your closet from purely functional to fabulously inviting by incorporating elegant decor elements. Think beyond storage—introduce chic lighting that adds sparkle and warmth, while soft textures and curated accessories bring personality and comfort. These thoughtful additions not only please the eye but also make dressing up feel like a special occasion every day.

    Key Design Elements

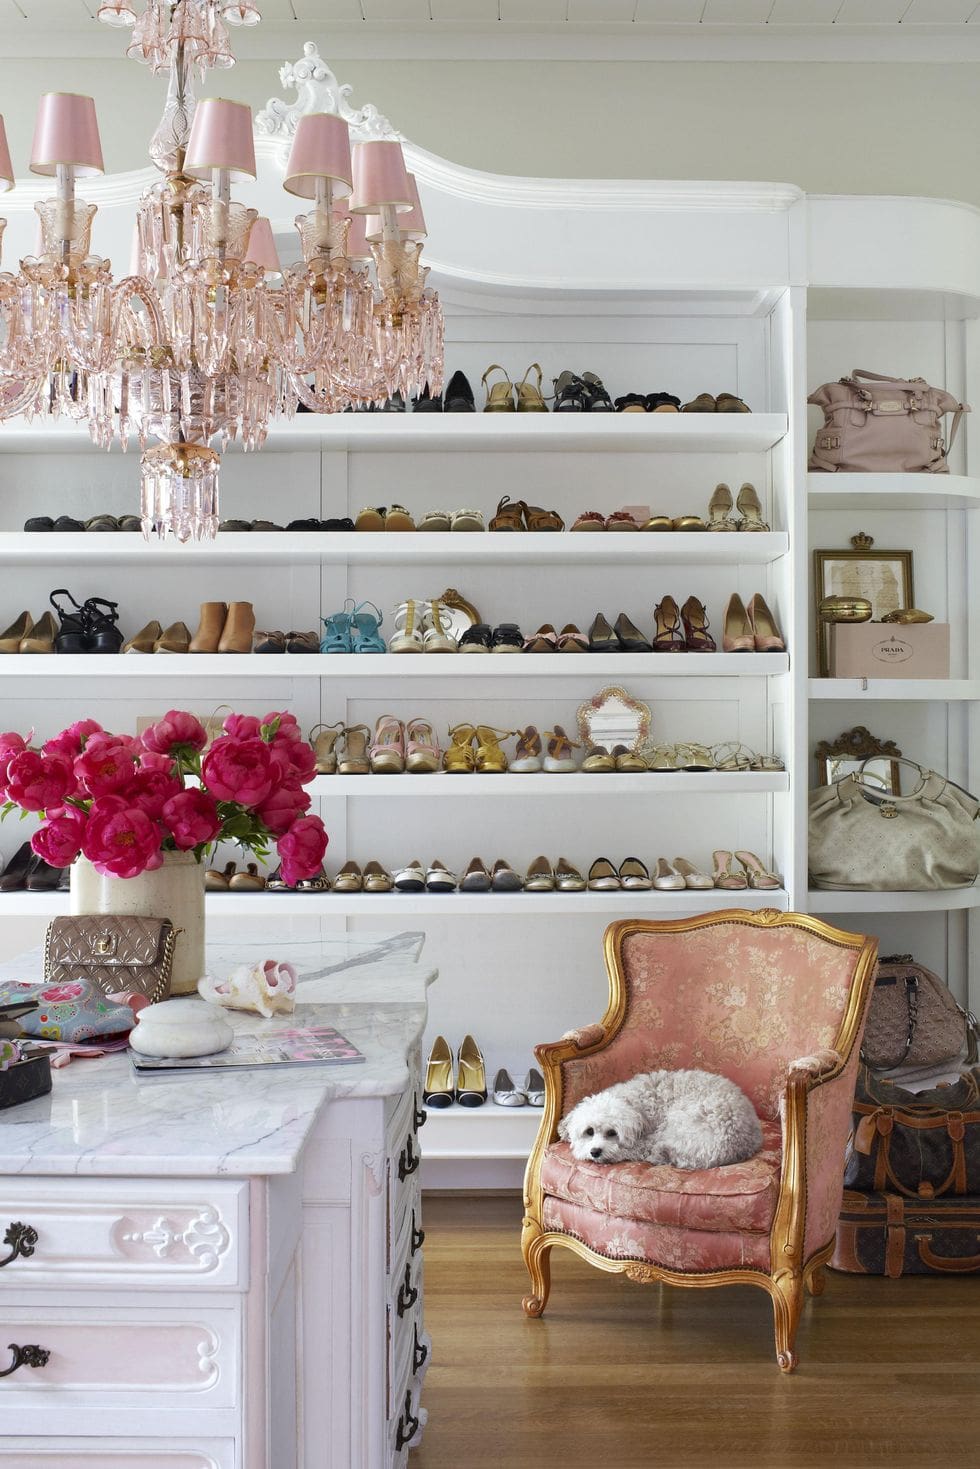
    • Install a statement lighting fixture, such as a modern pendant or a vintage-inspired chandelier, to instantly elevate the ambiance.
    • Arrange a few decorative accents like scented candles, small potted plants, or tasteful artwork on shelves or dressers for subtle charm.
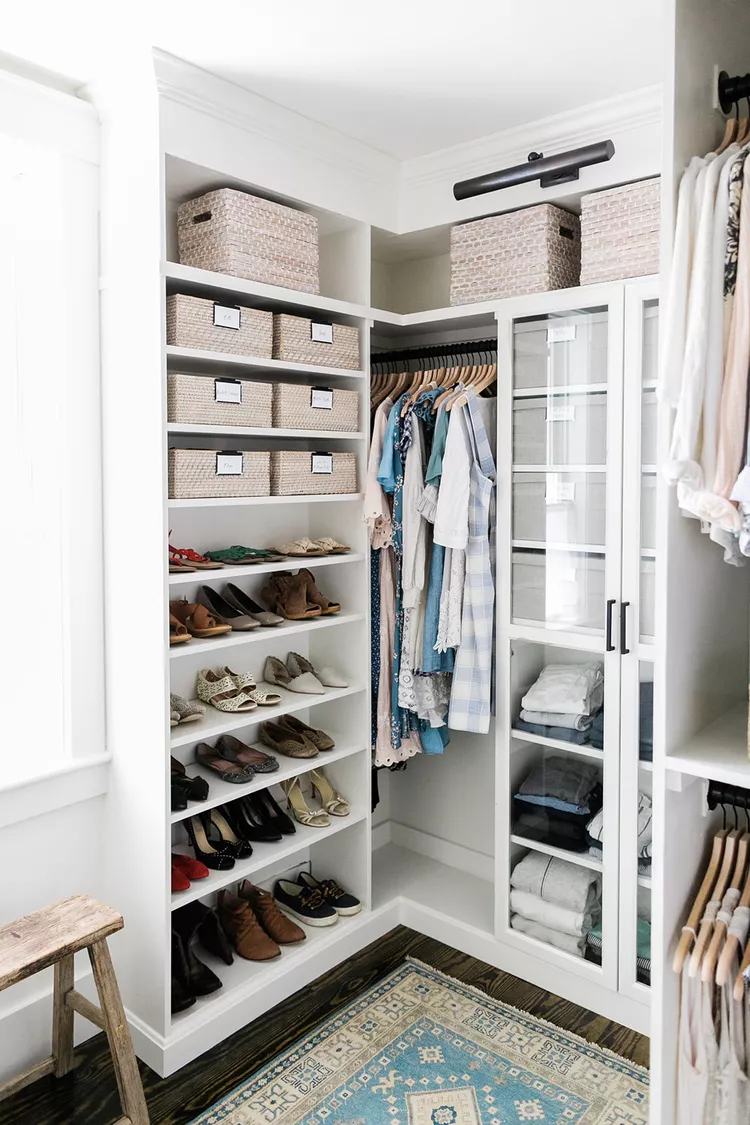
    • Lay down a plush rug in a rich texture or vibrant hue to soften the floor and create a welcoming, cozy vibe.

    Pro Tip: Choose lighting with adjustable brightness to set the perfect mood and highlight your closet’s best features.

    3. Create a Cozy Nook for Effortless Dressing

    Create a Cozy Nook for Effortless Dressing

    Incorporating a comfortable seat in your closet transforms it from a simple storage space into a personal dressing haven. Taking a moment to sit while putting on shoes or organizing accessories can ease physical strain and make your routine feel more enjoyable. This small addition encourages relaxation and efficiency during your daily wardrobe rituals.

    Key Design Elements

    • Choose a cushioned stool or small armchair that fits snugly without crowding your closet space.
    • Place the seating near shoe racks or mirrors for easy access and a clear view while dressing.
    • Add a soft throw or decorative pillow to enhance comfort and style.

    Pro Tip: Opt for a seat with built-in storage to maximize functionality in tight closet spaces.

    4. Maximize Efficiency with a Dual-Purpose Closet Office

    Maximize Efficiency with a Dual-Purpose Closet Office

    Short on space but big on productivity? Transforming your closet into a combined office and storage area can help you make the most of every square inch. This clever setup not only keeps your essentials organized but also creates a quiet, personalized nook for focused work. By blending your wardrobe and workspace, you streamline your routine and maintain a clutter-free environment.

    Key Design Elements

    • Install a compact desk or fold-down work surface inside your closet to save space when not in use.
    • Use vertical storage solutions like shelves and hooks to keep office supplies and clothing neatly separated.
    • Incorporate smart lighting options, such as LED strips or adjustable lamps, to ensure proper illumination for both dressing and working.

    Pro Tip: Choose multifunctional furniture pieces that can easily switch between office and closet uses to maximize flexibility.

    5. Maximize Every Inch: Utilize Door Space for Accessories

    Maximize Every Inch: Utilize Door Space for Accessories

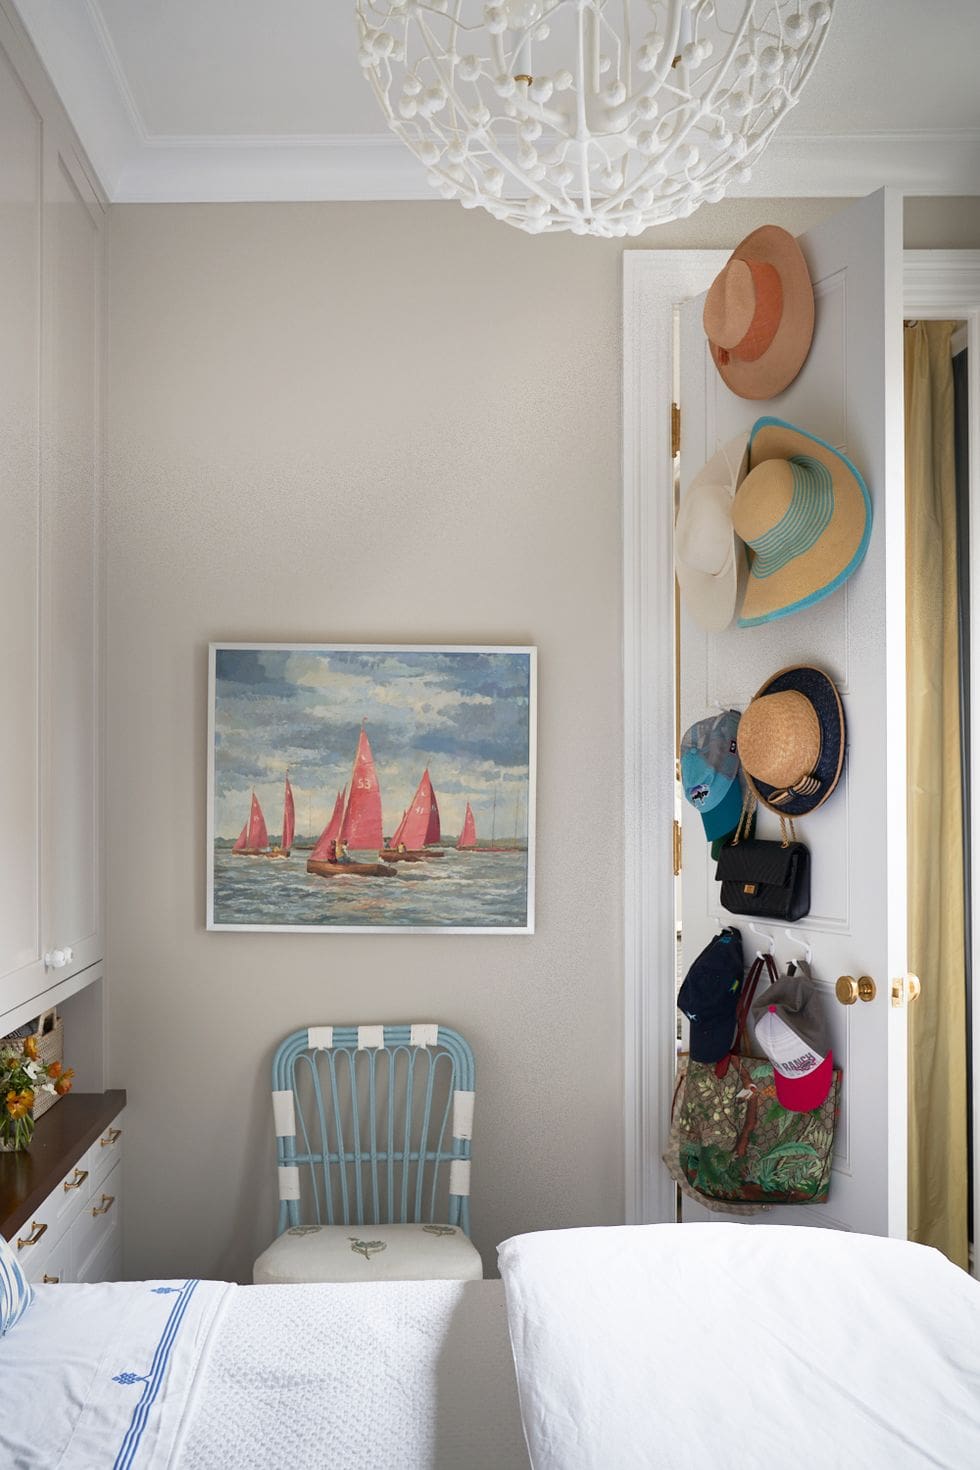
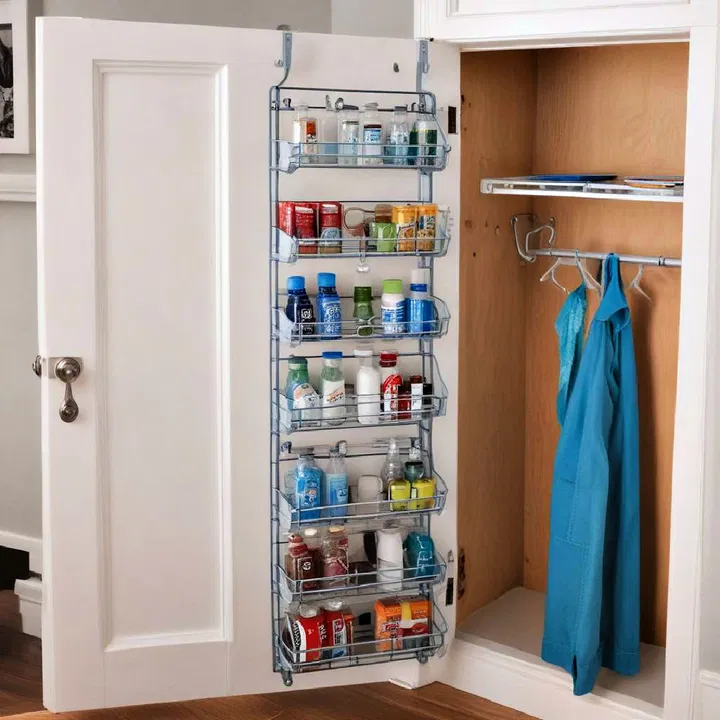
    When closet room is scarce, don’t overlook the hidden potential of your door. Turning the back of your bedroom or closet door into a dedicated zone for accessories like hats, scarves, and handbags keeps these items visible and easy to grab. This clever strategy not only frees up shelf and drawer space but also adds an orderly touch to your daily routine. With just a few hooks or a sleek rail, you can transform unused door space into an organized accessory hub.

    Key Design Elements

    • Install adhesive or screw-in hooks at varying heights to accommodate different accessory sizes.
    • Use a multi-tiered hanging organizer or a rail system to keep scarves and belts neatly separated and tangle-free.
    • Label hooks or sections to maintain order and quickly find your favorite items.

    Pro Tip: Choose slim, sturdy hardware to avoid door damage while maximizing weight capacity.

    6. Zone Your Closet for Effortless Access

    Zone Your Closet for Effortless Access

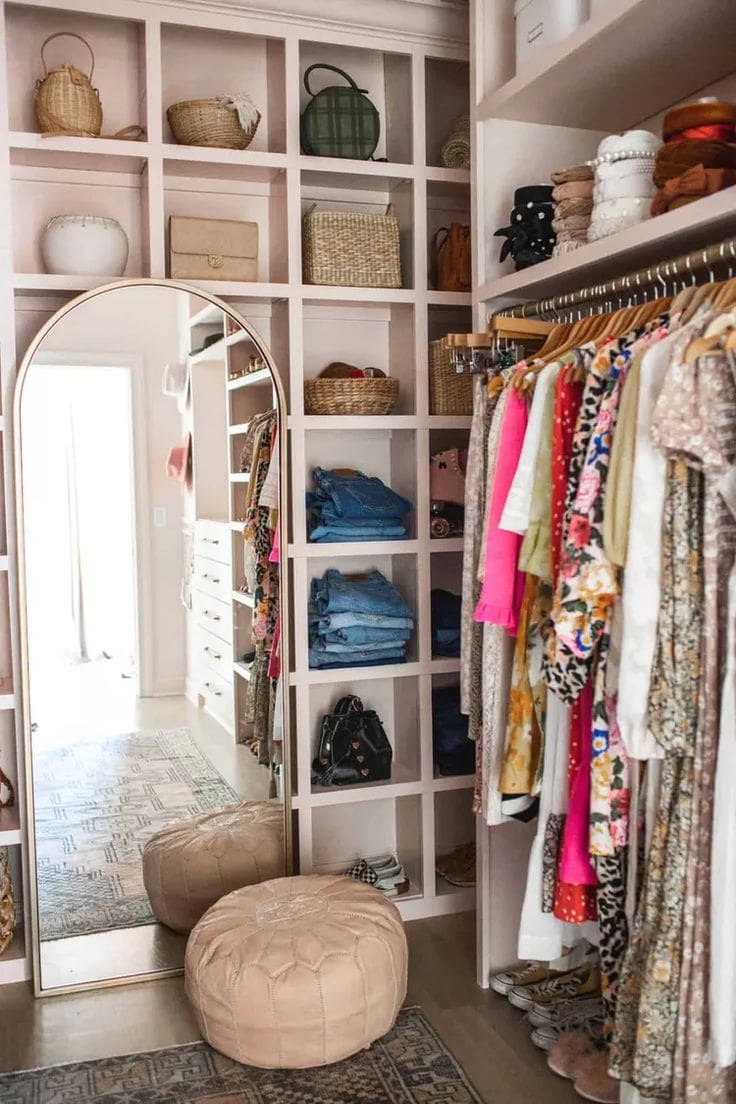
    Transforming your closet into distinct zones tailored to specific clothing and accessories can revolutionize your morning routine. By assigning clear areas for items like footwear, tops, bottoms, and seasonal gear, you create a functional flow that makes getting dressed a breeze. This method streamlines organization, reduces clutter, and ensures each piece has a predictable spot, saving you valuable time each day.

    Key Design Elements

    • Use labeled bins or baskets to corral smaller accessories within each zone for quick grabs.
    • Arrange zones by frequency of use, placing daily essentials at eye level and seasonal items out of immediate reach.
    • Incorporate matching hangers or shelf dividers to visually separate categories and maintain order.

    Pro Tip: Regularly revisit and adjust your zones as your wardrobe evolves to keep your closet both stylish and functional.

    7. Create a Dedicated Denim Display

    Create a Dedicated Denim Display

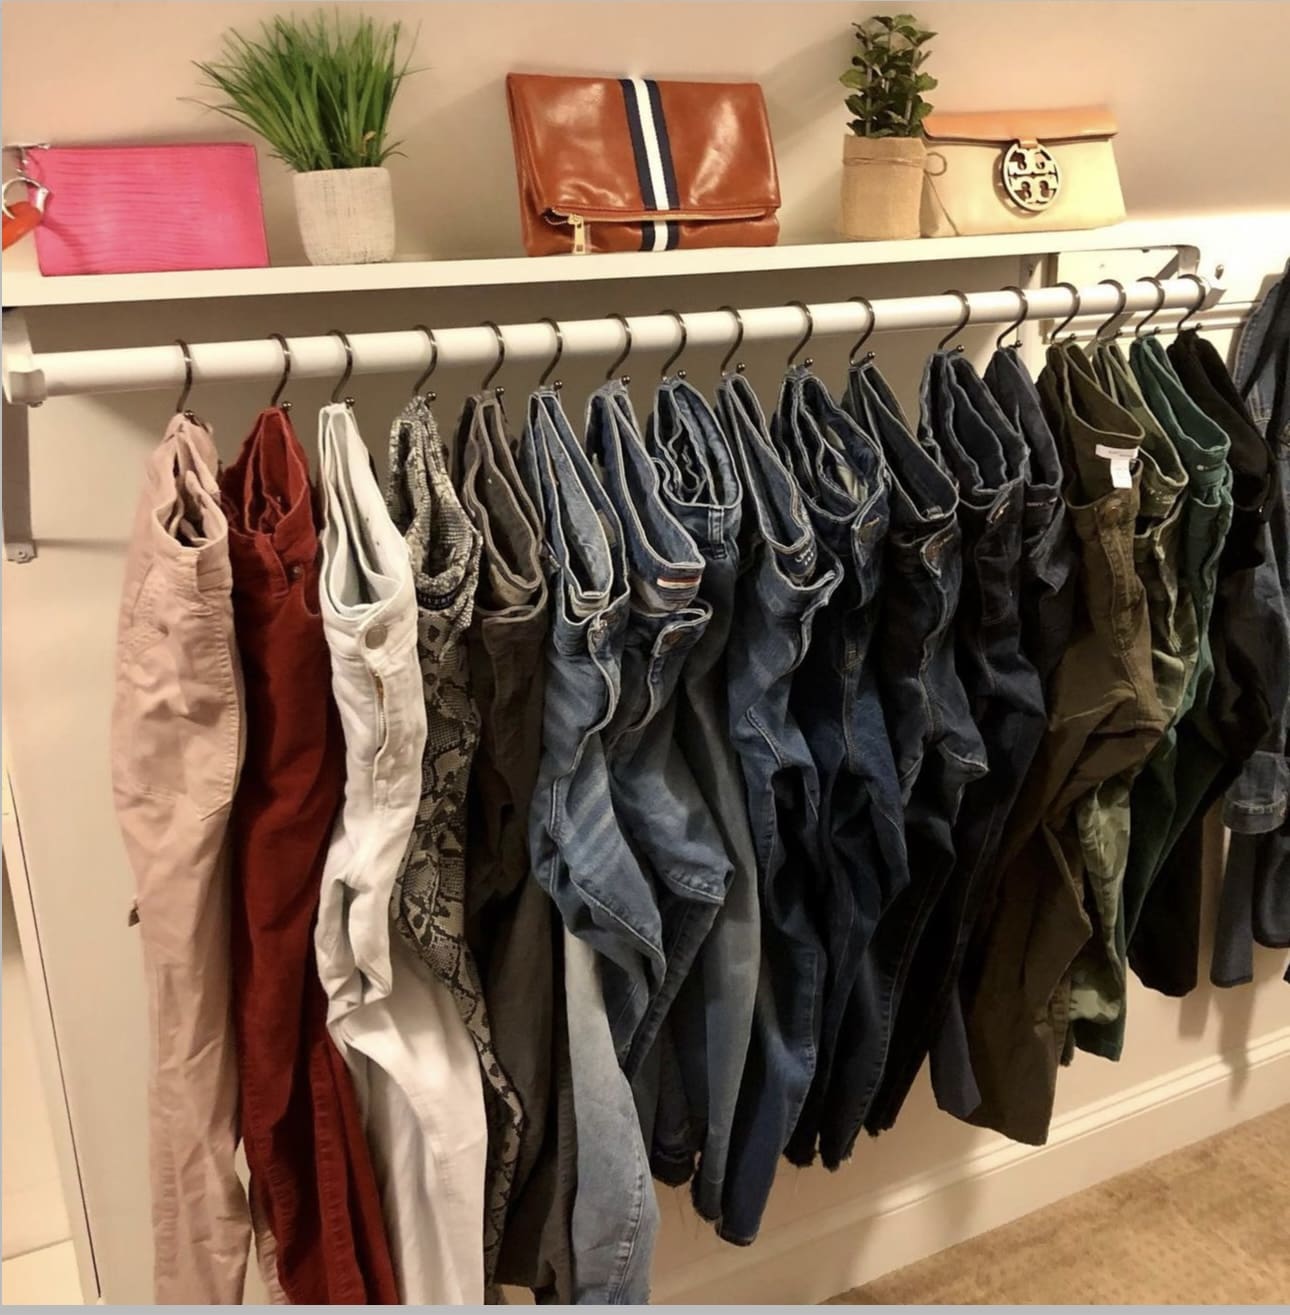
    Setting aside a special spot in your closet just for your jeans can transform the way you store and access your denim collection. Whether you install a sleek hanging rod, use adjustable shelves, or design tailored compartments, having a designated area keeps your jeans organized and easy to find. This method not only saves space but also adds a stylish, curated feel to your closet environment.

    Key Design Elements

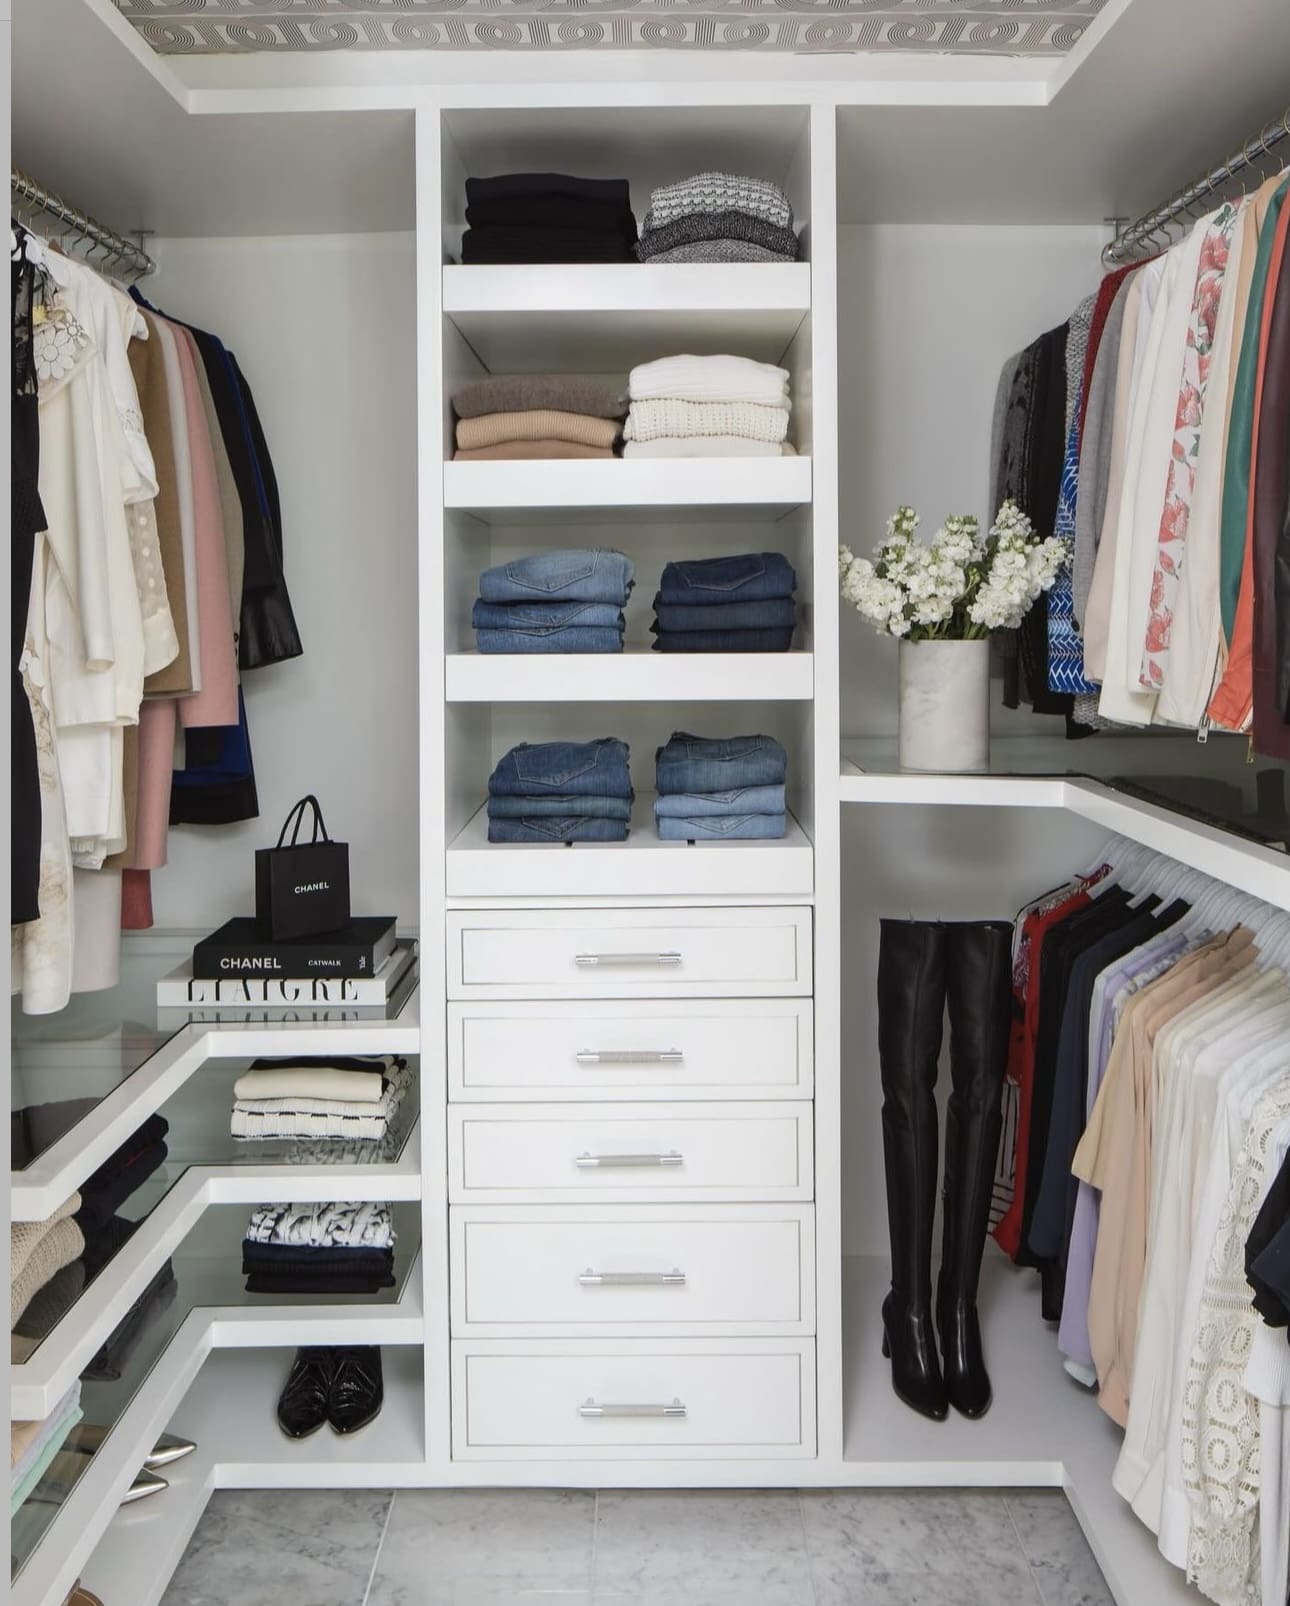
    • Use sturdy, wide hangers to prevent creases and maintain the shape of your jeans when hung.
    • Sort your jeans by style or color for quick selection and a visually pleasing arrangement.
    • Incorporate pull-out drawers or cubbies if you prefer folding over hanging, maximizing closet space.

    Pro Tip: Label sections or add shelf dividers to maintain order and make your denim collection effortlessly accessible.

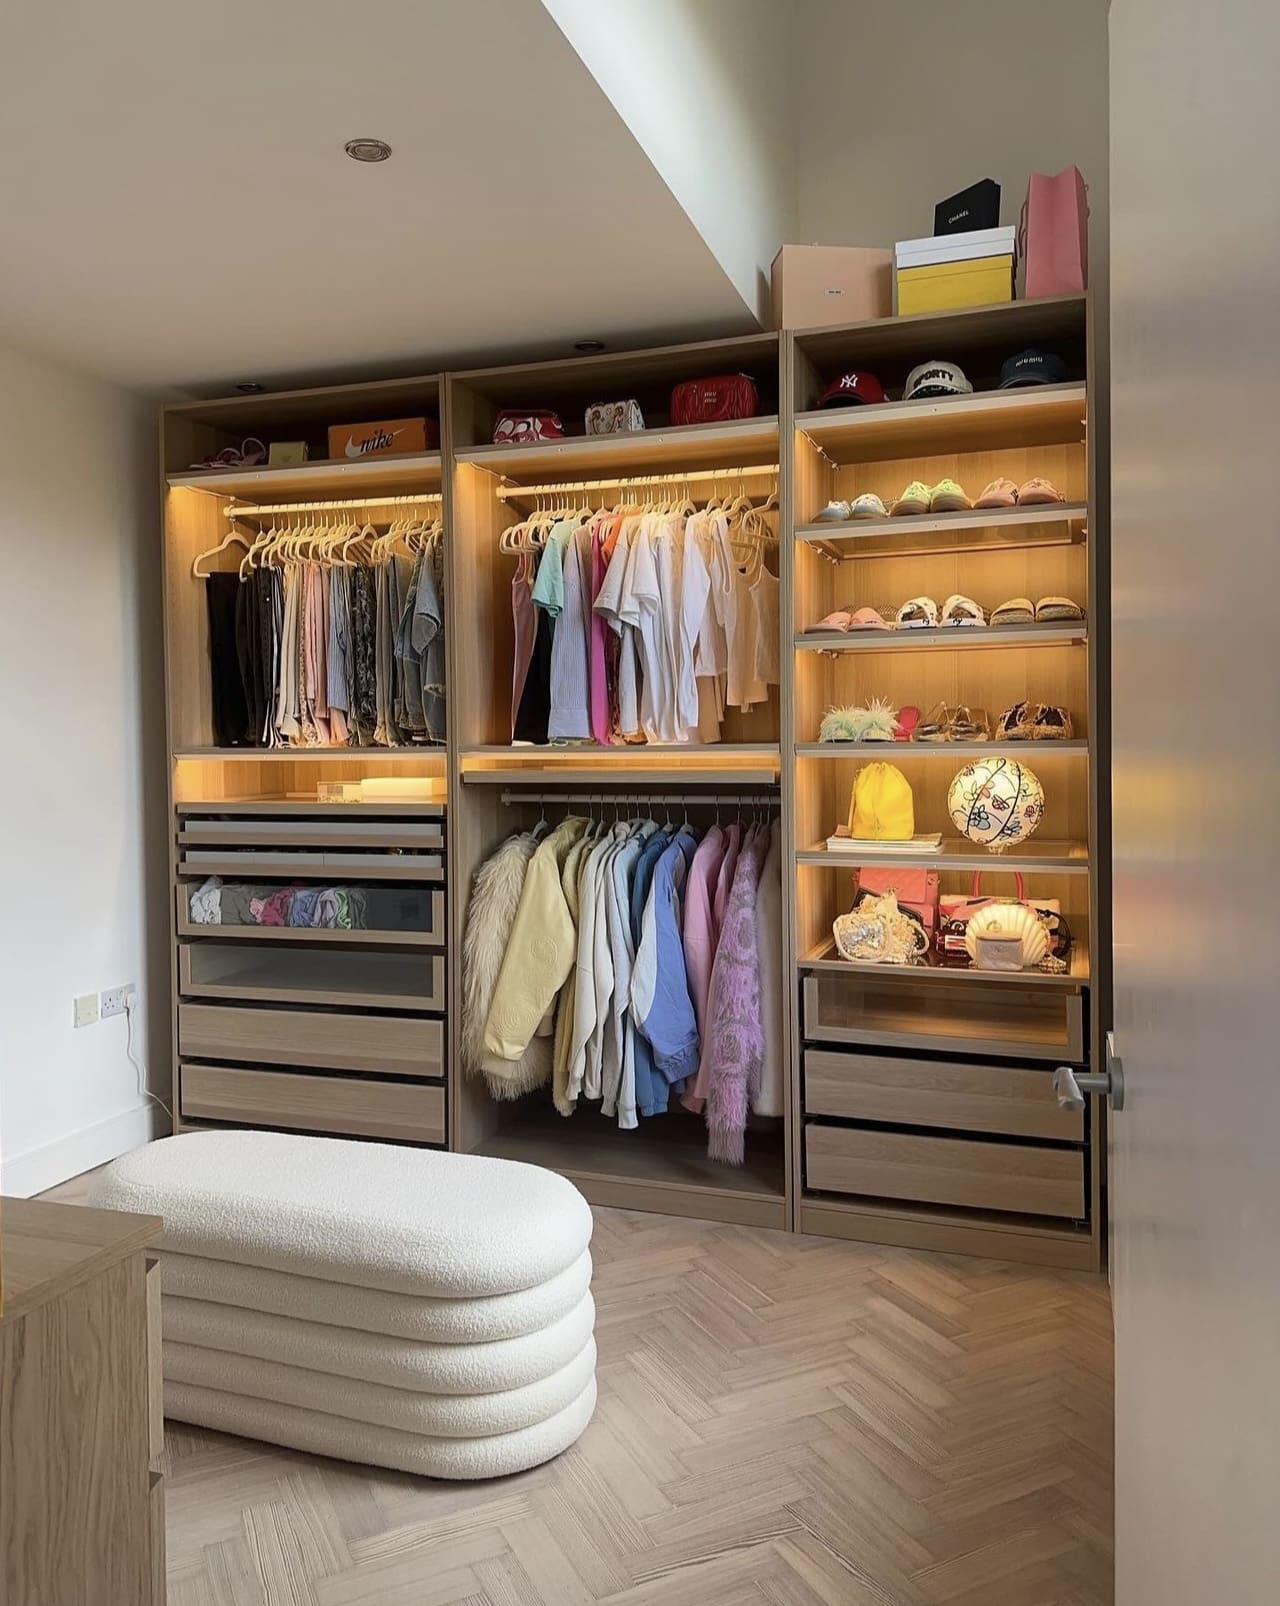
    8. Upgrade Your Shoe Storage with Dedicated Drawers

    Upgrade Your Shoe Storage with Dedicated Drawers

    Tired of cluttered shoe piles or basic racks that offer little protection? Sliding shoe drawers with separate compartments allow you to store each pair neatly, shielding them from dust while maintaining easy access. This method not only preserves your footwear’s condition but also streamlines your morning routine by keeping shoes visible and ready to grab.

    Key Design Elements

    • Choose drawers with adjustable dividers to accommodate different shoe sizes and styles effortlessly.
    • Label each compartment or use clear drawer fronts to quickly identify your shoes without rummaging.
    • Line drawer bottoms with soft fabric or cushioning to prevent shoe scuffs and maintain shape.

    Pro Tip: Install drawer slides with soft-close mechanisms to protect both your shoes and cabinetry from wear and tear.

    9. Give Your Storage Boxes a Clear Identity

    Give Your Storage Boxes a Clear Identity

    Assigning clear labels to your storage containers transforms chaos into order, making your closet a breeze to navigate. When every box announces its contents upfront, you save precious time searching and reduce frustration. This simple habit turns shelves into a well-organized system that effortlessly supports your daily routine.

    Key Design Elements

    • Use bold, easy-to-read fonts or print labels for maximum visibility.
    • Include specific details on labels, such as season or item type, to avoid guesswork.
    • Apply waterproof or laminated labels to keep them intact over time.

    Pro Tip: Color-code your labels to instantly categorize and locate items at a glance.

    10. Elevate Your Storage with Sleek Wall-Mounted Shelves

    Elevate Your Storage with Sleek Wall-Mounted Shelves

    Incorporating wall-mounted shelves into your closet design can instantly brighten and open up the space, giving it a clean and airy feel. These shelves take advantage of vertical space, allowing you to display and organize accessories or folded items without overcrowding the floor or walls. Their minimalist design eliminates the need for bulky brackets, making your closet look streamlined and modern.

    Key Design Elements

    • Install shelves at varying heights to accommodate different item sizes and create visual interest.
    • Use slim, sturdy materials like floating wood or acrylic to maintain a lightweight yet durable storage solution.
    • Combine open floating shelves with storage baskets or decorative boxes to keep smaller items tidy and easily accessible.

    Pro Tip: Secure floating shelves directly into wall studs to ensure they support heavier wardrobe essentials safely.

    11. Create a Cozy Seating Spot Right Inside Your Closet

    Create a Cozy Seating Spot Right Inside Your Closet

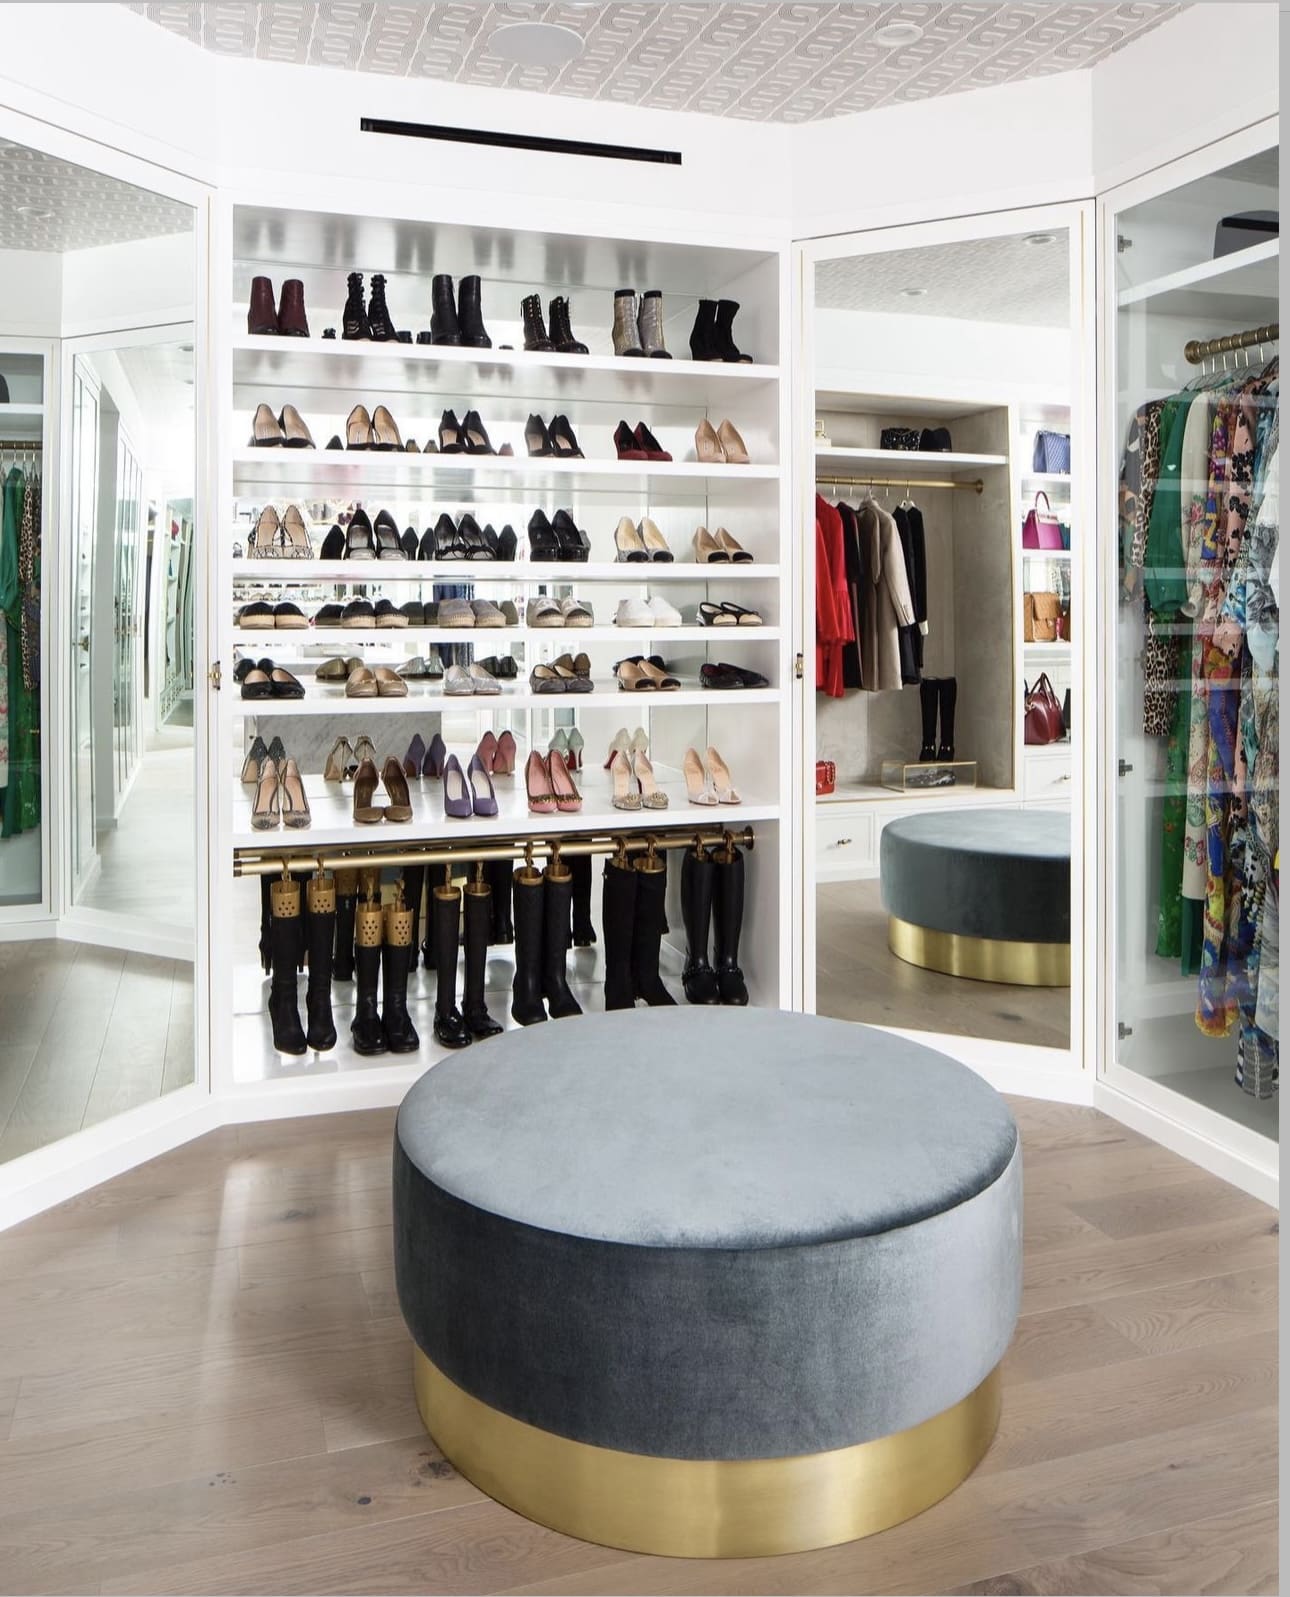
    Incorporating a stylish seat into your closet not only adds a touch of luxury but also enhances functionality. A plush ottoman or cushioned bench gives you a comfortable place to sit while slipping on shoes, organizing accessories, or simply taking a brief pause during your dressing routine. This simple addition transforms your closet into a more inviting and practical space where comfort meets style.

    Key Design Elements

    • Choose an ottoman with hidden storage compartments to maximize space efficiency.
    • Pick a fabric or material that complements your closet’s color scheme for a cohesive look.
    • Ensure the ottoman is the right size—big enough to sit on comfortably but compact enough to avoid overcrowding.

    Pro Tip: Select an ottoman with a sturdy, easy-to-clean surface to keep maintenance hassle-free.

    12. Elevate Your Closet Ambiance with a Bold Lighting Fixture

    Elevate Your Closet Ambiance with a Bold Lighting Fixture

    Transform your closet into a chic and inviting retreat by installing a bold, eye-catching light fixture. Beyond offering bright, clear illumination for easy outfit selection, a striking lighting piece can instantly upgrade the mood and style of your space. Choosing a unique fixture turns your closet from merely functional into a personal boutique experience. It’s a simple way to inject personality and sophistication right where you get dressed every day.

    Key Design Elements

    • Select a fixture that complements your closet’s style—whether modern, vintage, or glam—to create a cohesive look.
    • Opt for warm or adjustable LED bulbs to ensure flattering lighting for trying on clothes and accessories.
    • Ensure the fixture size is proportional to your closet dimensions so it doesn’t overpower or underwhelm the space.

    Pro Tip: Install a dimmer switch to customize brightness and set the perfect atmosphere for your dressing routine.

    13. Brighten Up Your Closet with Crisp, Light Hues

    Brighten Up Your Closet with Crisp, Light Hues

    Transform your closet into a luminous and inviting space by embracing light, neutral tones like white or soft creams. These shades not only reflect light beautifully but also create an airy atmosphere that makes even the smallest closets feel open and uncluttered. Switching to lighter colors on your shelves, walls, and storage units can instantly refresh the entire look and enhance visibility, making it easier to find what you need.

    Key Design Elements

    • Paint or refinish worn or dark shelving with a glossy white to instantly brighten the area.
    • Choose light-colored storage bins and baskets to maintain a cohesive and clean aesthetic.
    • Use white or pale-toned LED strip lighting to amplify the sense of openness and improve item visibility.

    Pro Tip: For a seamless look, pair white shelves with matching hardware and minimalist accents to keep the focus on brightness and simplicity.

    14. Elevate Your Closet with Chic Brass Accents

    Elevate Your Closet with Chic Brass Accents

    Brass hardware effortlessly transforms any closet into a stylish sanctuary, infusing warmth and timeless charm. Whether it’s drawer pulls, hooks, or hangers, these gleaming accents add a layer of refined elegance that complements both modern and classic designs. Incorporating brass details is a simple yet impactful way to upgrade your space without a full renovation.

    Key Design Elements

    • Mix and match matte and polished brass finishes to create depth and visual interest.
    • Install brass hooks for accessories like scarves and belts to keep everything organized and accessible.
    • Refresh old furniture or shelving with brass knobs and handles for an instant style boost.

    Pro Tip: Choose warm lighting to enhance the natural glow of brass elements and make your closet feel inviting.

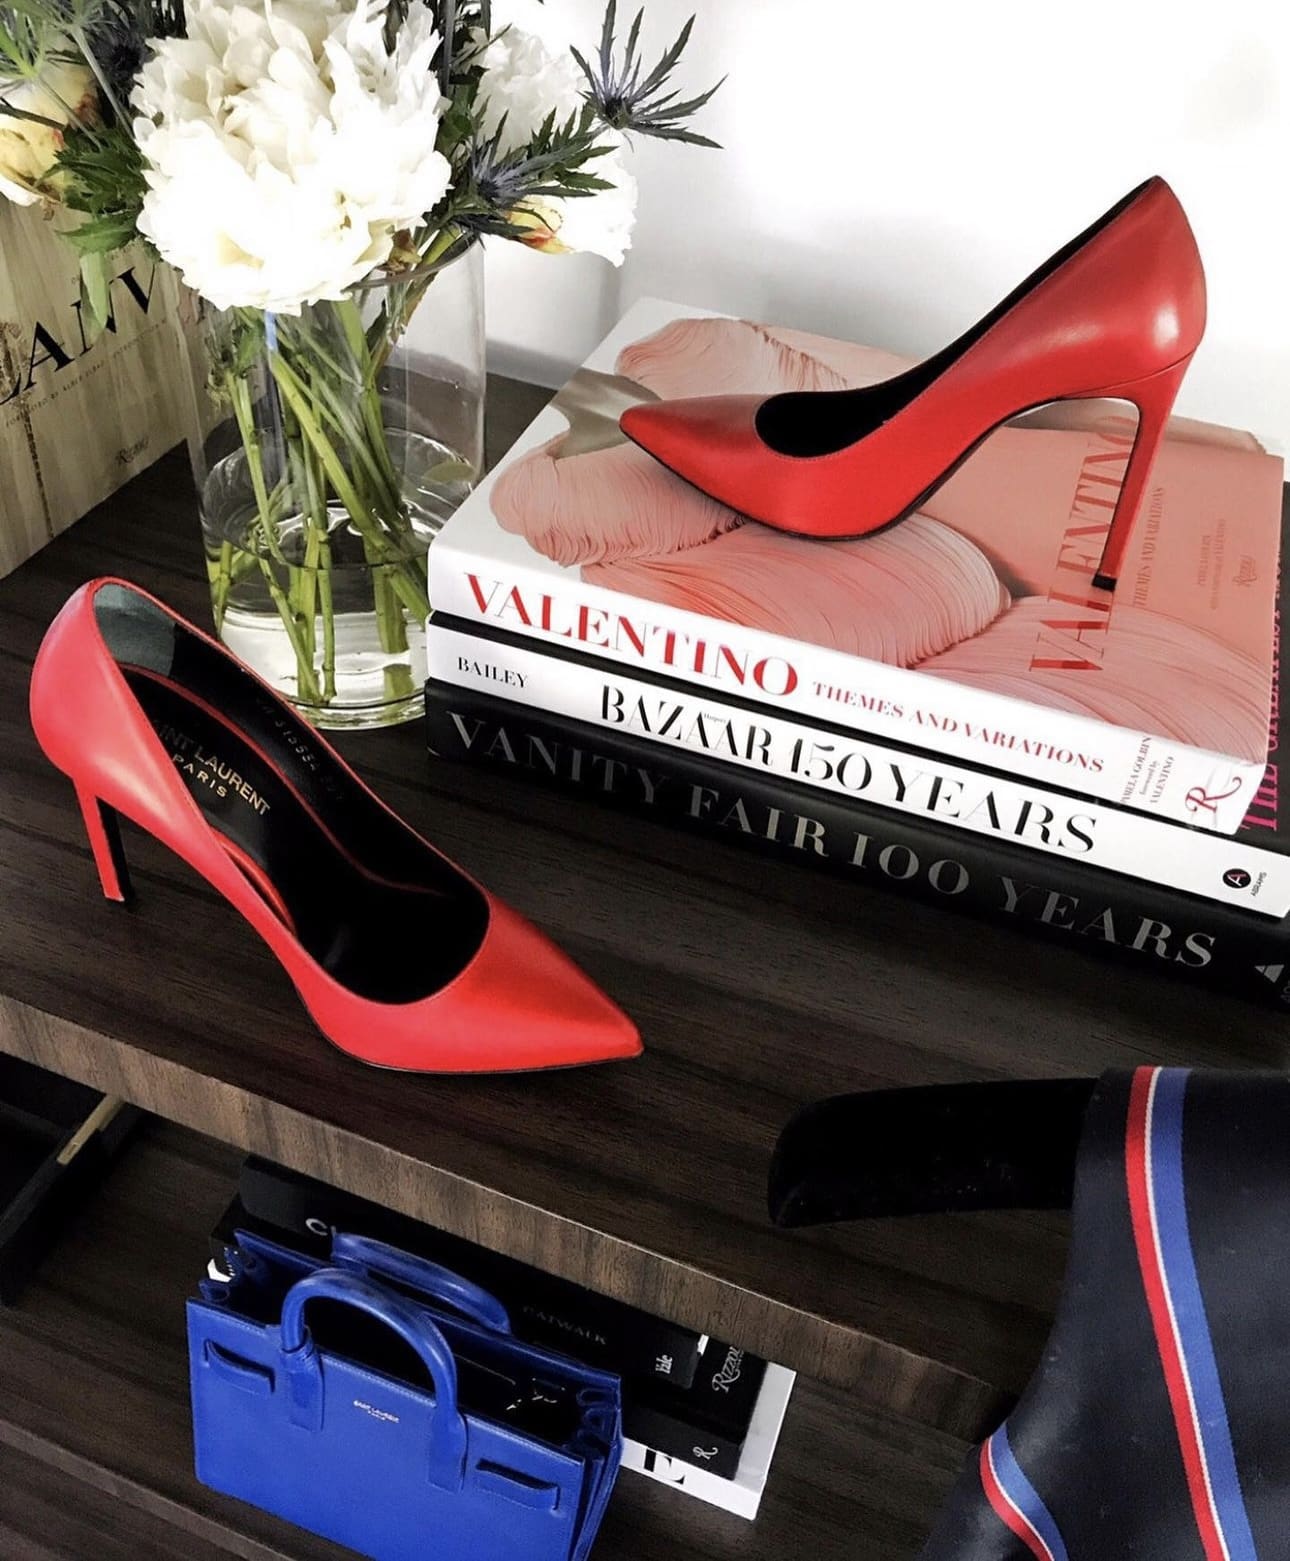
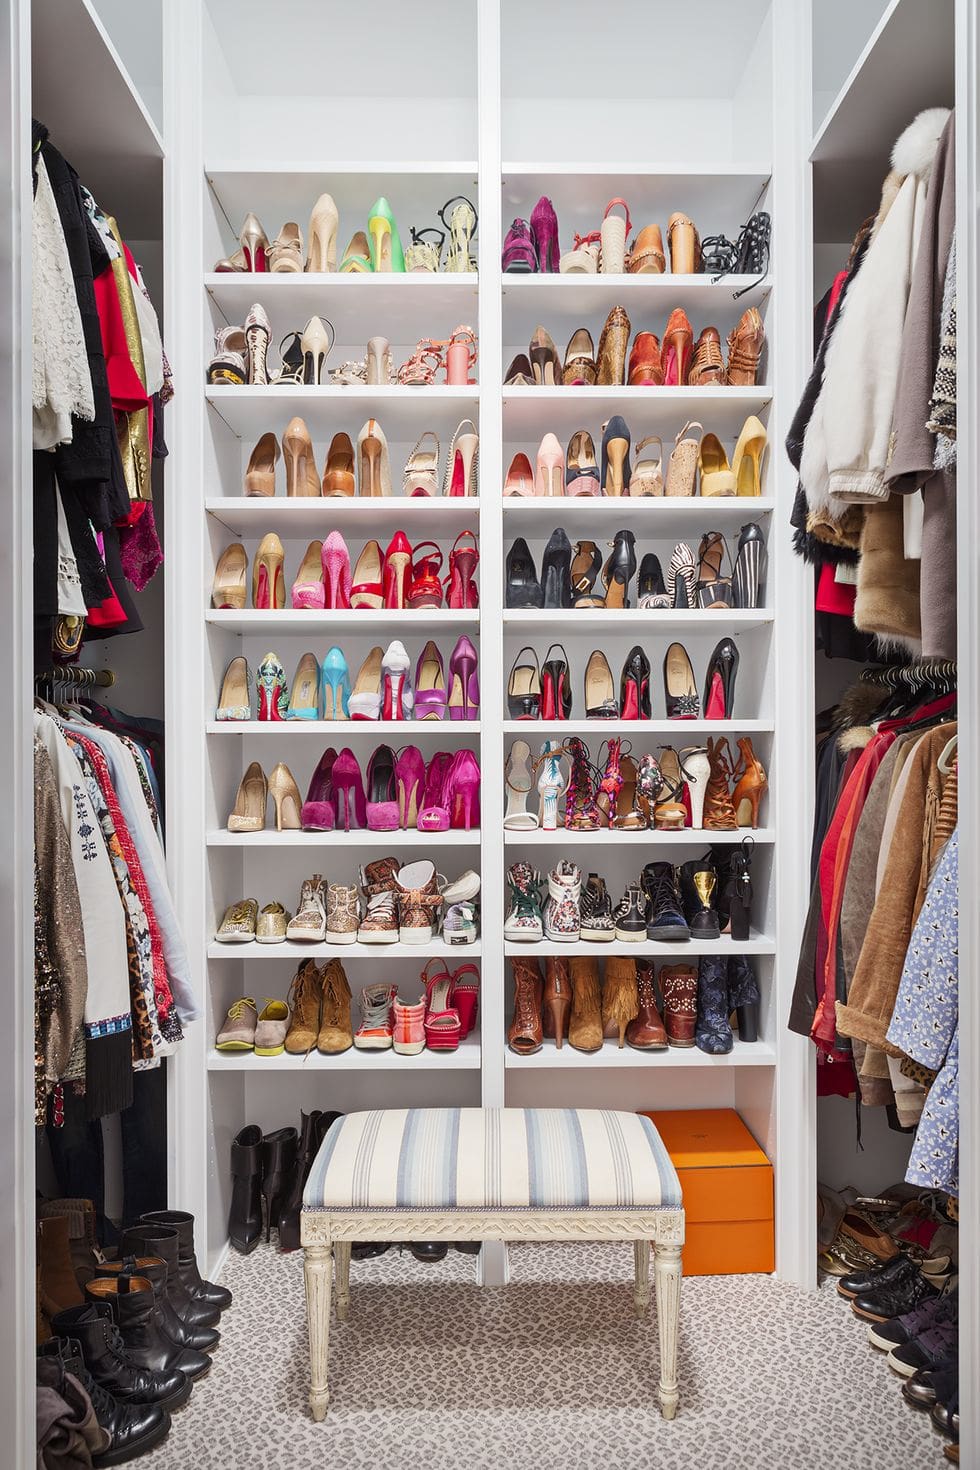
    15. Showcase Your Shoe Style as a Closet Highlight

    Showcase Your Shoe Style as a Closet Highlight

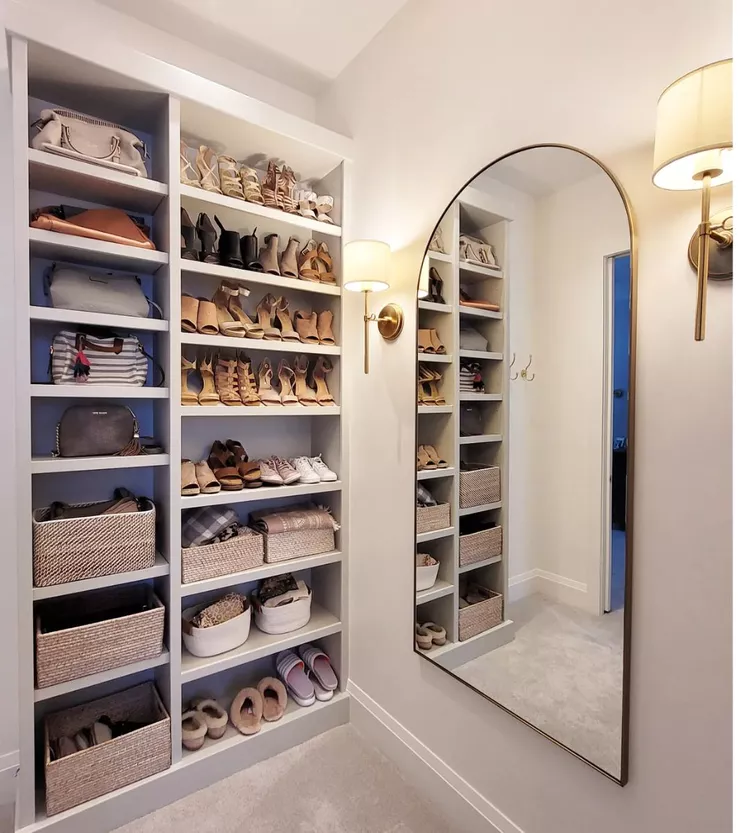
    Let your shoe collection take center stage by arranging it in a way that draws the eye and adds character to your closet. A thoughtfully curated shoe display not only celebrates your unique taste but also transforms your closet from purely functional to inspiring. By turning your footwear into a design feature, you infuse your storage space with personality and charm.

    Key Design Elements

    • Group shoes by color, style, or frequency of use to create an organized and appealing display.
    • Use open shelving or clear shoe boxes at eye level to make your favorite pairs easy to spot and admire.
    • Incorporate different heights or risers to add dimension and keep the display dynamic rather than flat.

    Pro Tip: Rotate your shoe display seasonally to keep your closet fresh and ensure your collection stays relevant.

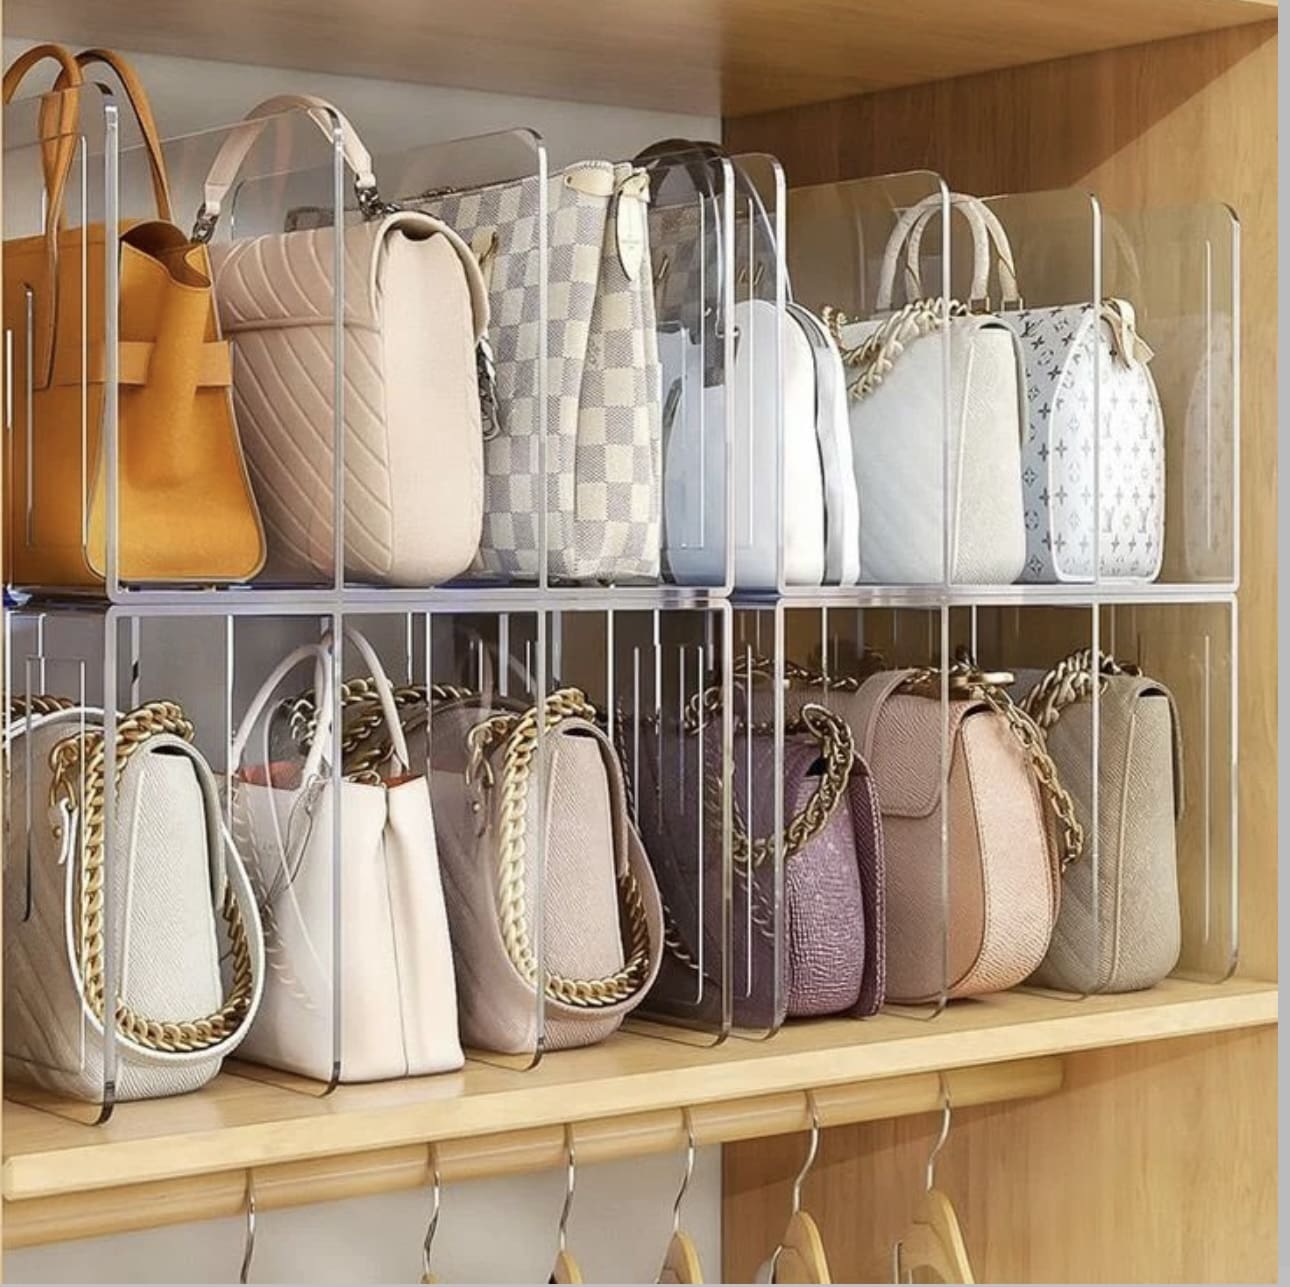
    16. Keep It Crystal Clear with Transparent Organizers

    Keep It Crystal Clear with Transparent Organizers

    Incorporating see-through dividers into your closet setup transforms chaotic piles into visually accessible sections, making it easier to locate your items without disrupting the order. These clear partitions create distinct zones that prevent clothes, accessories, or shoes from tumbling into each other. Not only do they maintain a polished, clutter-free look, but they also help maximize every inch of your closet space efficiently.

    Key Design Elements

    • Choose sturdy clear acrylic dividers that fit snugly on shelves to keep stacks of clothing neatly separated.
    • Use transparent bins with dividers for accessories like scarves or belts to quickly identify what you need.
    • Label the edges of your clear organizers for added convenience while maintaining visibility.

    Pro Tip: Opt for dividers with smooth edges to avoid snagging delicate fabrics and keep your wardrobe in pristine condition.

    17. Master the Art of Closet Zones

    Master the Art of Closet Zones

    Creating clear zones for different types of clothing transforms your closet into a streamlined, stress-free space. When you categorize items by type and purpose, finding exactly what you need becomes effortless. Whether it’s separating workwear from weekend outfits or grouping accessories neatly, this method brings harmony to your wardrobe. Adding a touch of color coordination can elevate both style and functionality.

    Key Design Elements

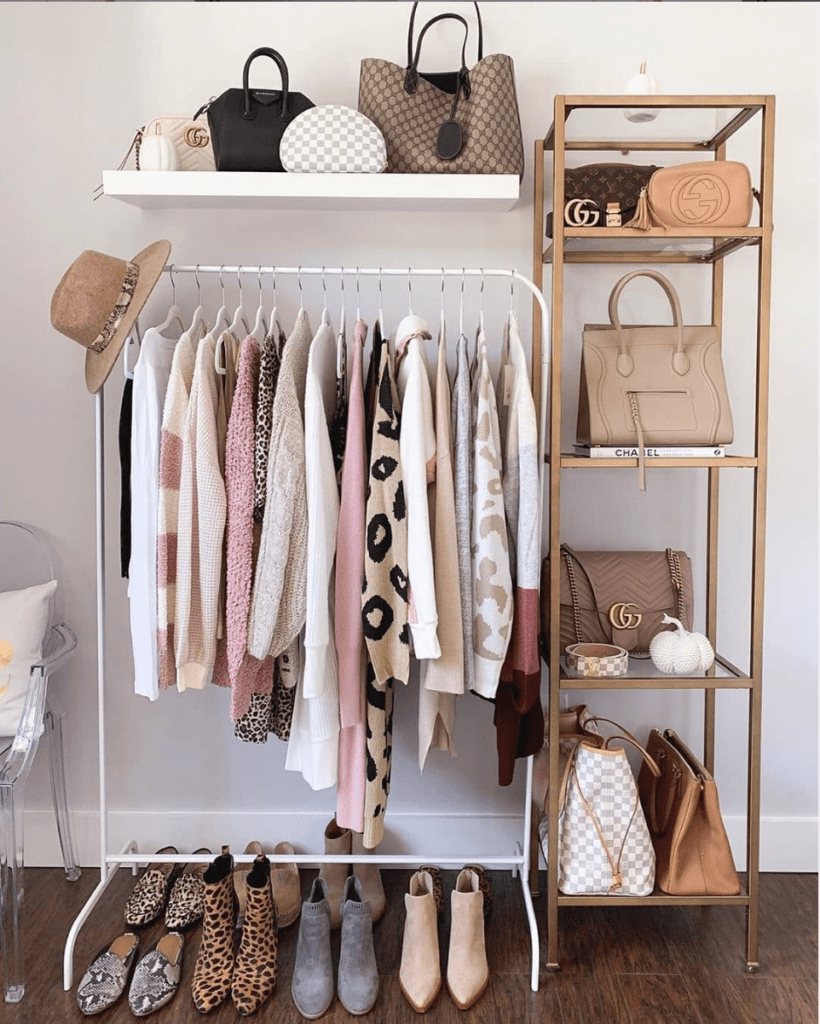
    • Designate specific sections for pants, tops, dresses, and outerwear to tailor your storage solutions efficiently.
    • Use slim hangers and vertical dividers to maximize space between zones, keeping everything visible and accessible.
    • Hang accessories like belts and handbags on hooks or specialized hangers along your rod for easy viewing and retrieval.

    Pro Tip: Incorporate clear storage bins or drawer organizers for small essentials to maintain order and avoid clutter buildup.

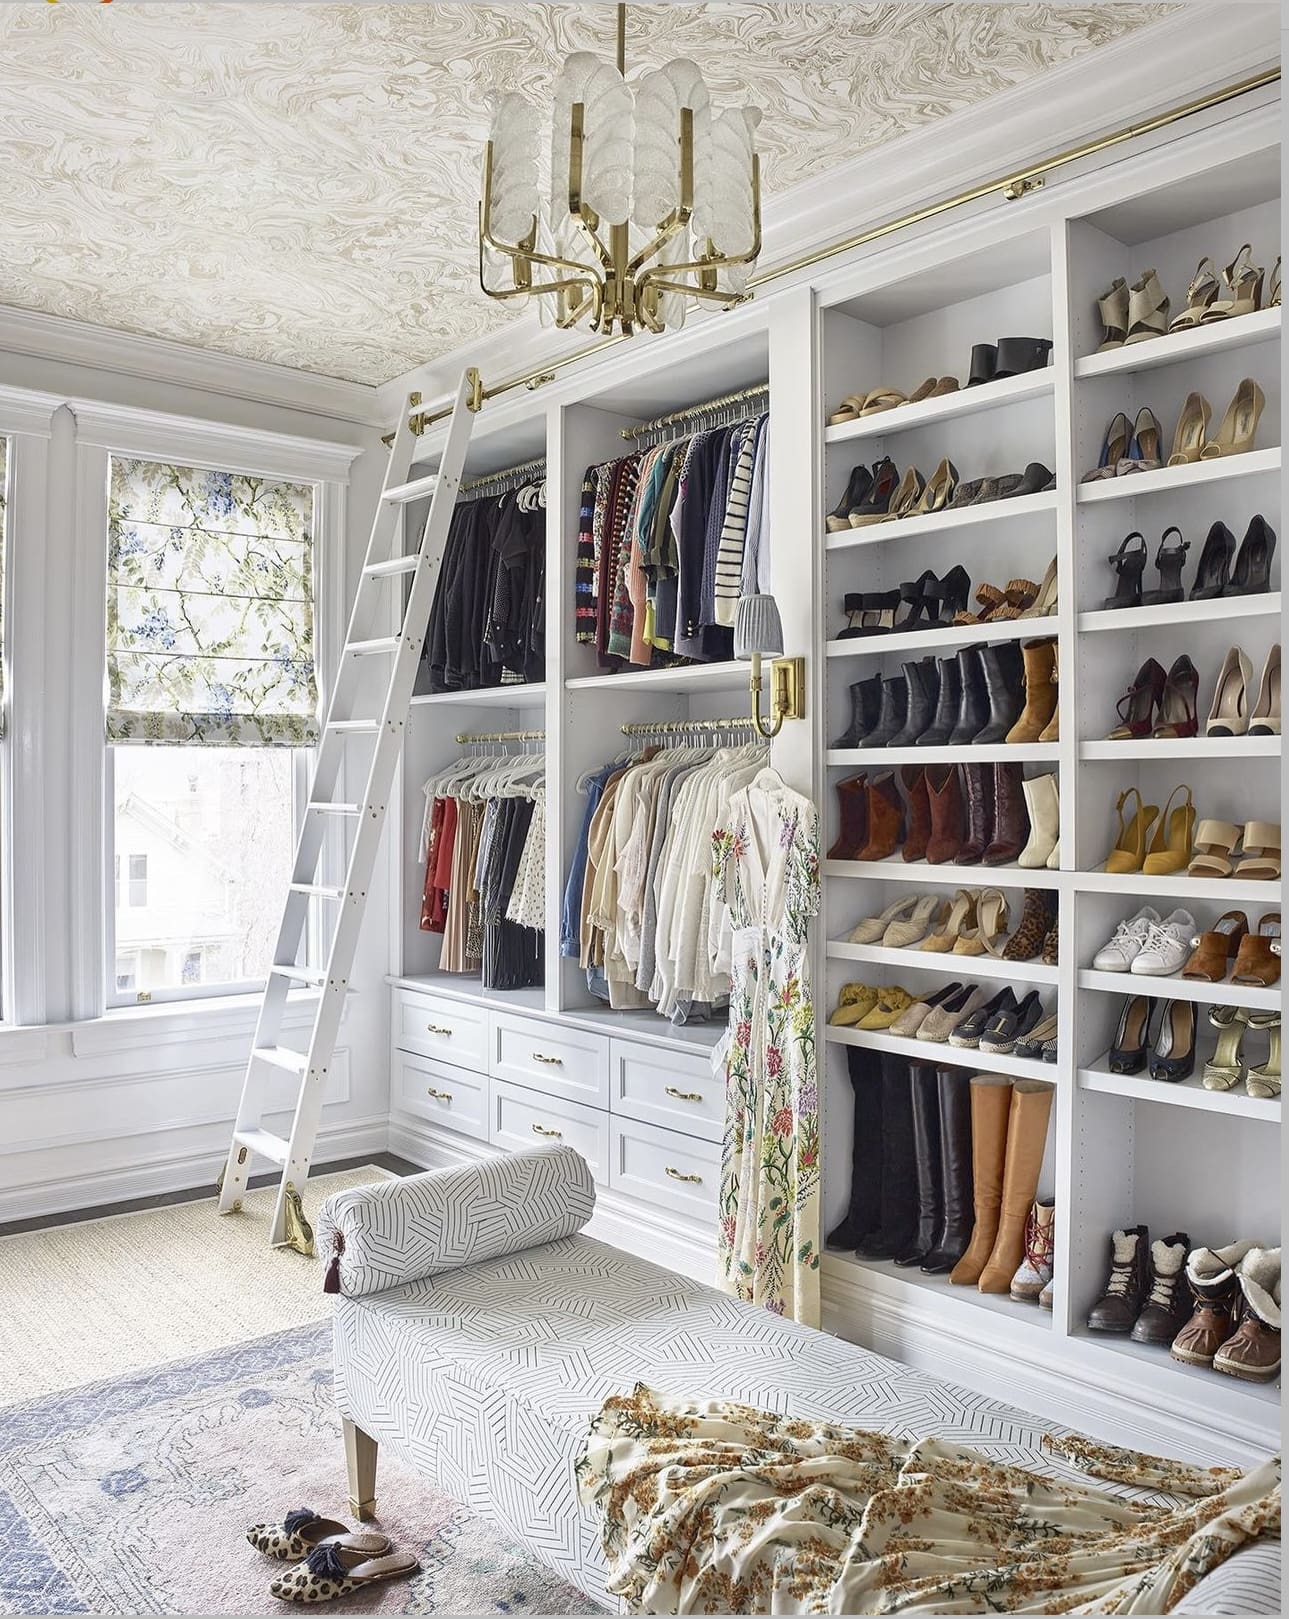
    18. Elevate Your Storage with a Sliding Ladder

    Elevate Your Storage with a Sliding Ladder

    Maximize your closet’s vertical potential by incorporating a sleek sliding ladder. This clever addition not only adds a stylish touch but also makes reaching those high-up shelves effortless and safe. Say goodbye to wobbly step stools and awkward stretching—your entire storage space becomes more accessible and organized with this simple upgrade.

    Key Design Elements

    • Choose a ladder with smooth, sturdy wheels to glide easily along a mounted rail without damaging your floor.
    • Install the ladder on a track that covers the length of your closet to access every corner with ease.
    • Opt for a ladder made from lightweight yet durable materials like aluminum or hardwood to balance mobility and strength.

    Pro Tip: Securely anchor the ladder’s track to studs to ensure stability during daily use and avoid accidents.

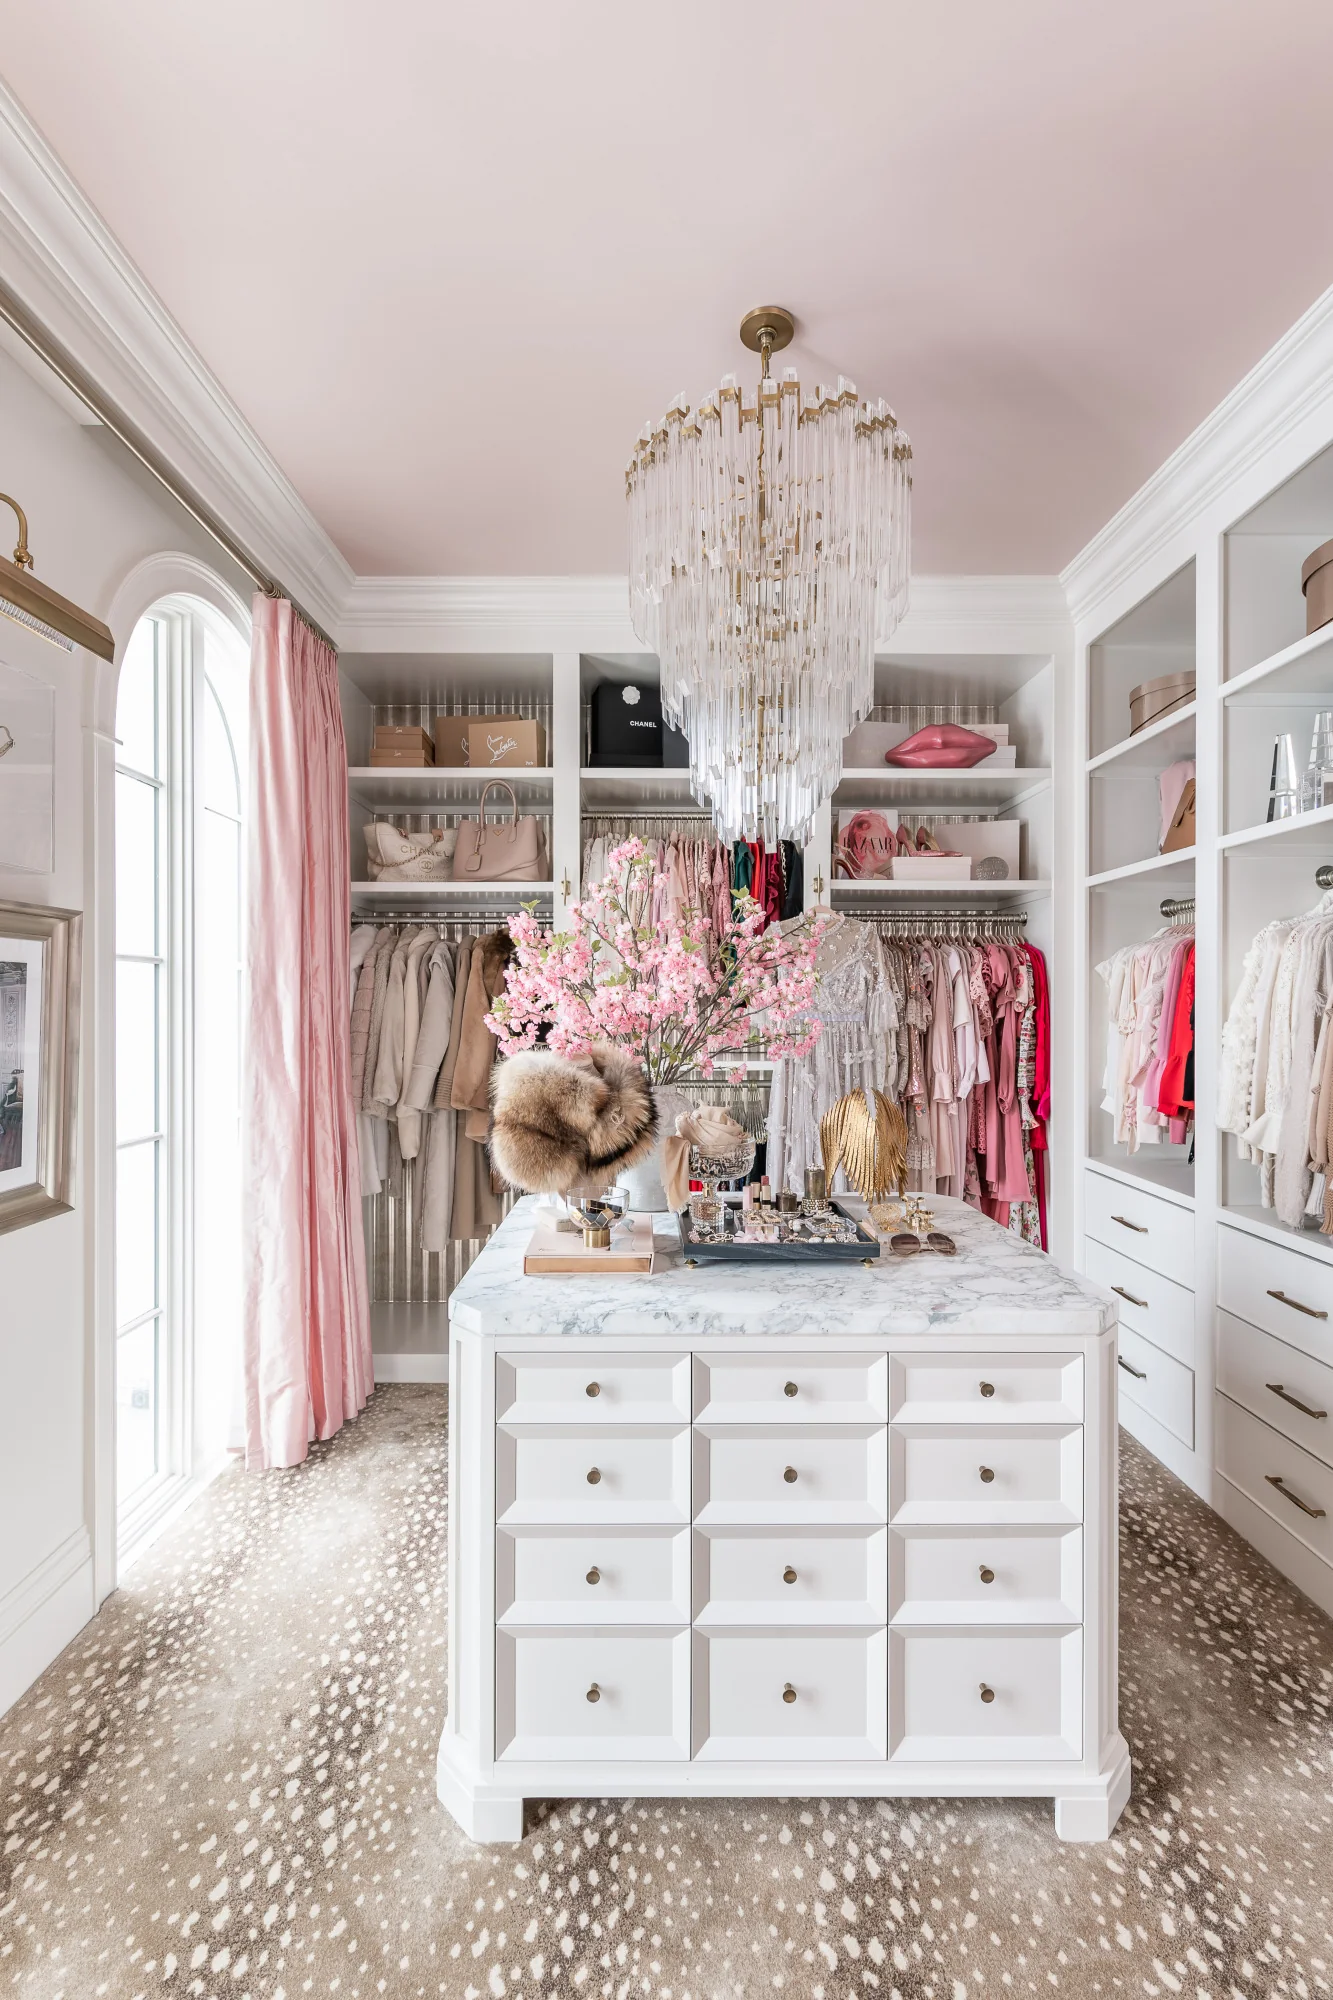
    19. Elevate Your Closet Atmosphere with a Subtle Blush Ceiling

    Elevate Your Closet Atmosphere with a Subtle Blush Ceiling

    Transform your closet into a serene sanctuary by introducing a soft blush hue to the ceiling. This gentle splash of color adds depth and warmth, creating an inviting environment that feels both cozy and sophisticated. Beyond just aesthetics, a lightly tinted ceiling can subtly brighten the space, making it a joy to organize and browse your wardrobe.

    Key Design Elements

    • Choose a pastel pink shade with warm undertones to complement your existing wall colors and decor.
    • Use a high-quality satin or eggshell finish for the ceiling paint to reflect light softly without overwhelming the space.
    • Prep the ceiling surface thoroughly by cleaning and priming to ensure smooth application and long-lasting wear.

    Pro Tip: Pair your blush ceiling with warm white LED lighting to enhance the soft ambiance and create a flattering glow.

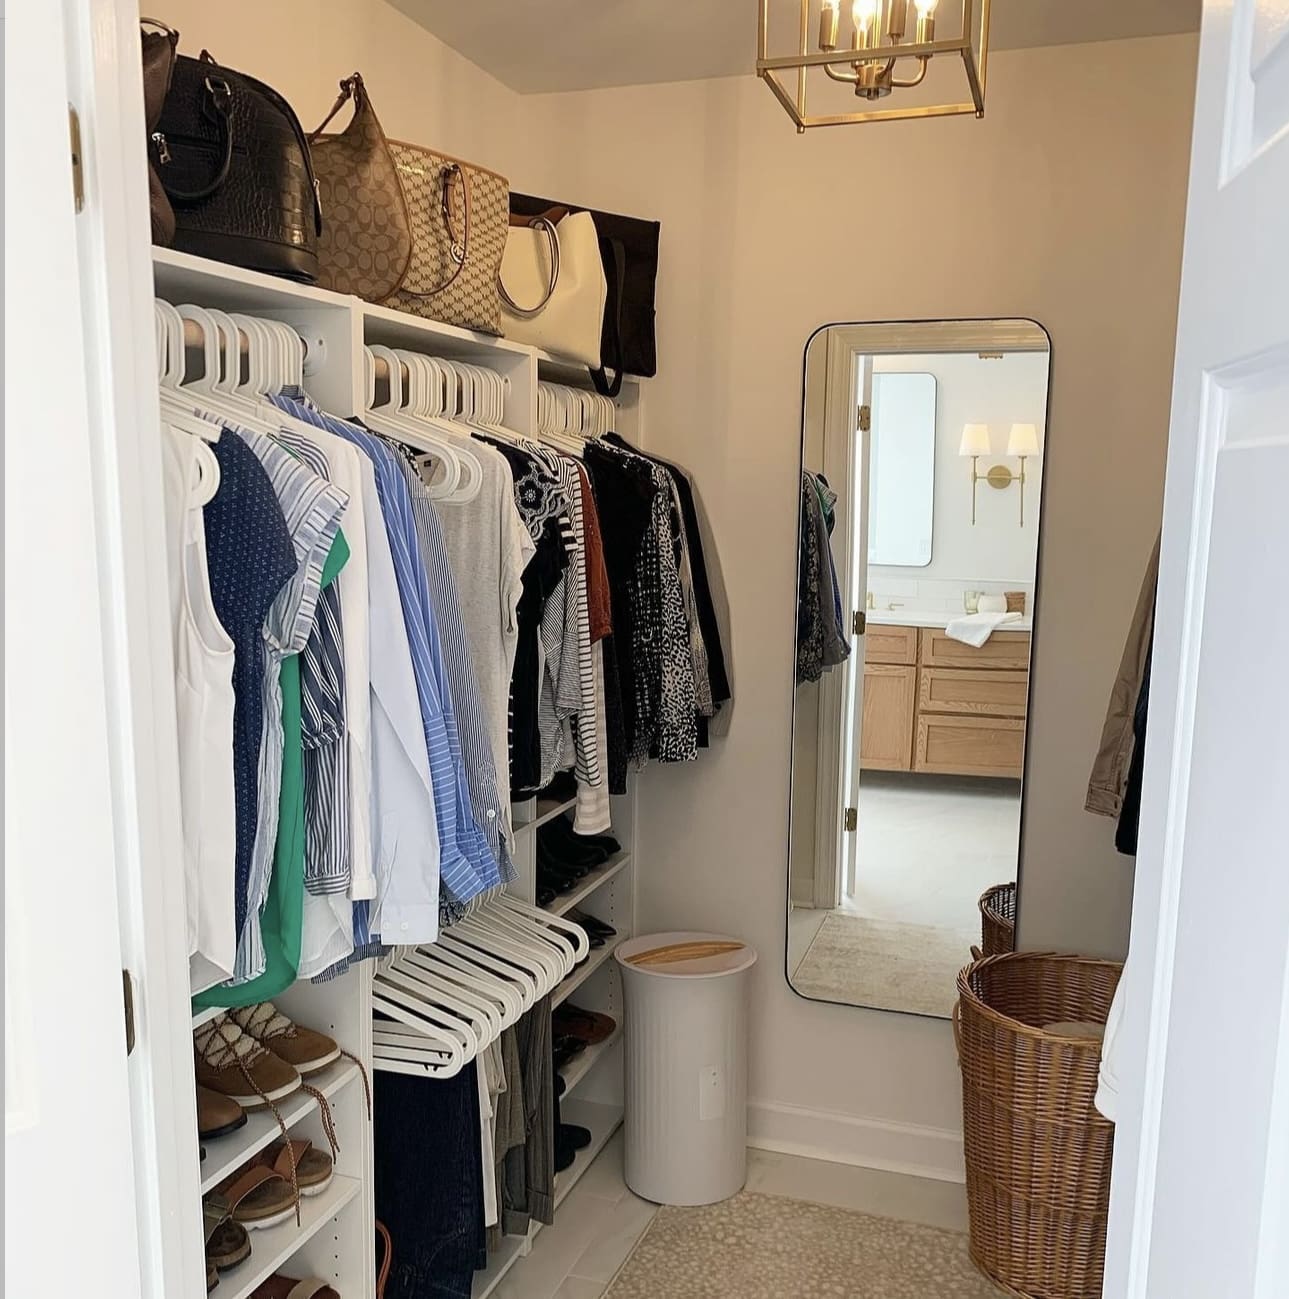
    20. Amplify Space and Style with a Strategically Placed Mirror

    Amplify Space and Style with a Strategically Placed Mirror

    Incorporating a mirror into your closet does more than help you perfect your outfit—it transforms the entire space. By reflecting light and creating depth, a well-positioned mirror makes even the coziest closet feel airy and open. Plus, having a mirror right where you dress makes outfit planning quicker and more enjoyable, encouraging you to try new looks without stepping out of your sanctuary.

    Key Design Elements

    • Choose a full-length mirror to get a head-to-toe view and maximize your closet’s functionality.
    • Mount the mirror opposite a light source or near your wardrobe to brighten the space naturally.
    • Opt for a sleek, frameless design to keep the look modern and prevent visual clutter.

    Pro Tip: For the ultimate space enhancer, angle a mirror towards your closet’s deepest corner to create the illusion of extended depth.

    21. Brighten Your Closet with Seamless Overhead Lighting

    Brighten Your Closet with Seamless Overhead Lighting

    Illuminating your closet with subtle overhead lighting transforms the space into a well-lit haven where every item is easy to spot. Unlike bulky fixtures, built-in lighting solutions provide uniform brightness without casting unwanted shadows, making your daily outfit choices effortless. Plus, a sleek lighting design adds a polished, contemporary vibe that elevates your closet’s overall aesthetic.

    Key Design Elements

    • Opt for LED recessed lights to save energy and enjoy long-lasting, bright illumination.
    • Install dimmable switches to adjust lighting levels based on the time of day or your mood.
    • Position lights strategically near shelves and hanging rods to highlight all storage zones evenly.

    Pro Tip: Choose lights with a color temperature around 3000K for a warm, inviting glow that showcases true colors.

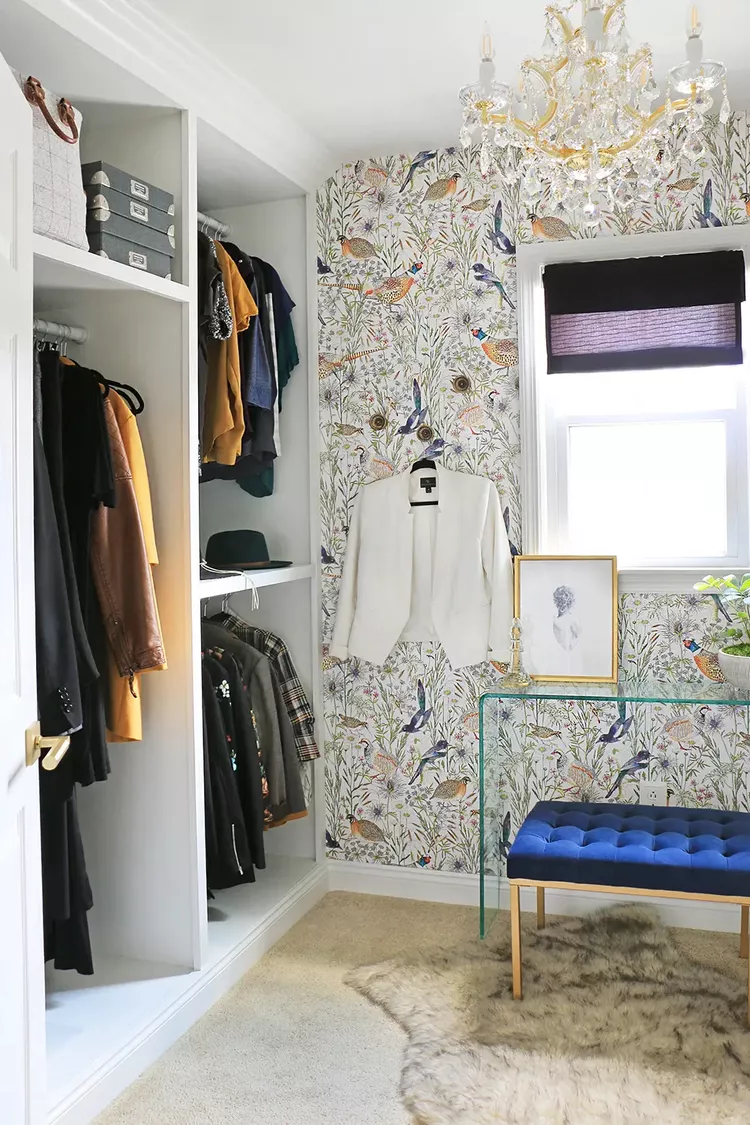
    22. Create a Striking Backdrop to Define Your Closet Space

    Create a Striking Backdrop to Define Your Closet Space

    Transform your closet from purely functional to fabulously stylish by adding a standout backdrop. Whether through vibrant paint, textured wallpaper, or a playful pattern, an eye-catching wall instantly sets the tone and makes the space feel personalized. This decorative touch not only enhances visual interest but also turns your closet into a space you’ll look forward to using every day.

    Key Design Elements

    • Choose colors or patterns that complement your overall bedroom decor for a cohesive look.
    • Consider peel-and-stick wallpaper for an easy, damage-free way to experiment with bold designs.
    • Focus the accent on the back wall behind your hanging clothes to create depth and draw attention.

    Pro Tip: Opt for moisture-resistant finishes if your closet lacks ventilation to keep your accent wall looking fresh.

    23. Create a Central Storage Hub

    Create a Central Storage Hub

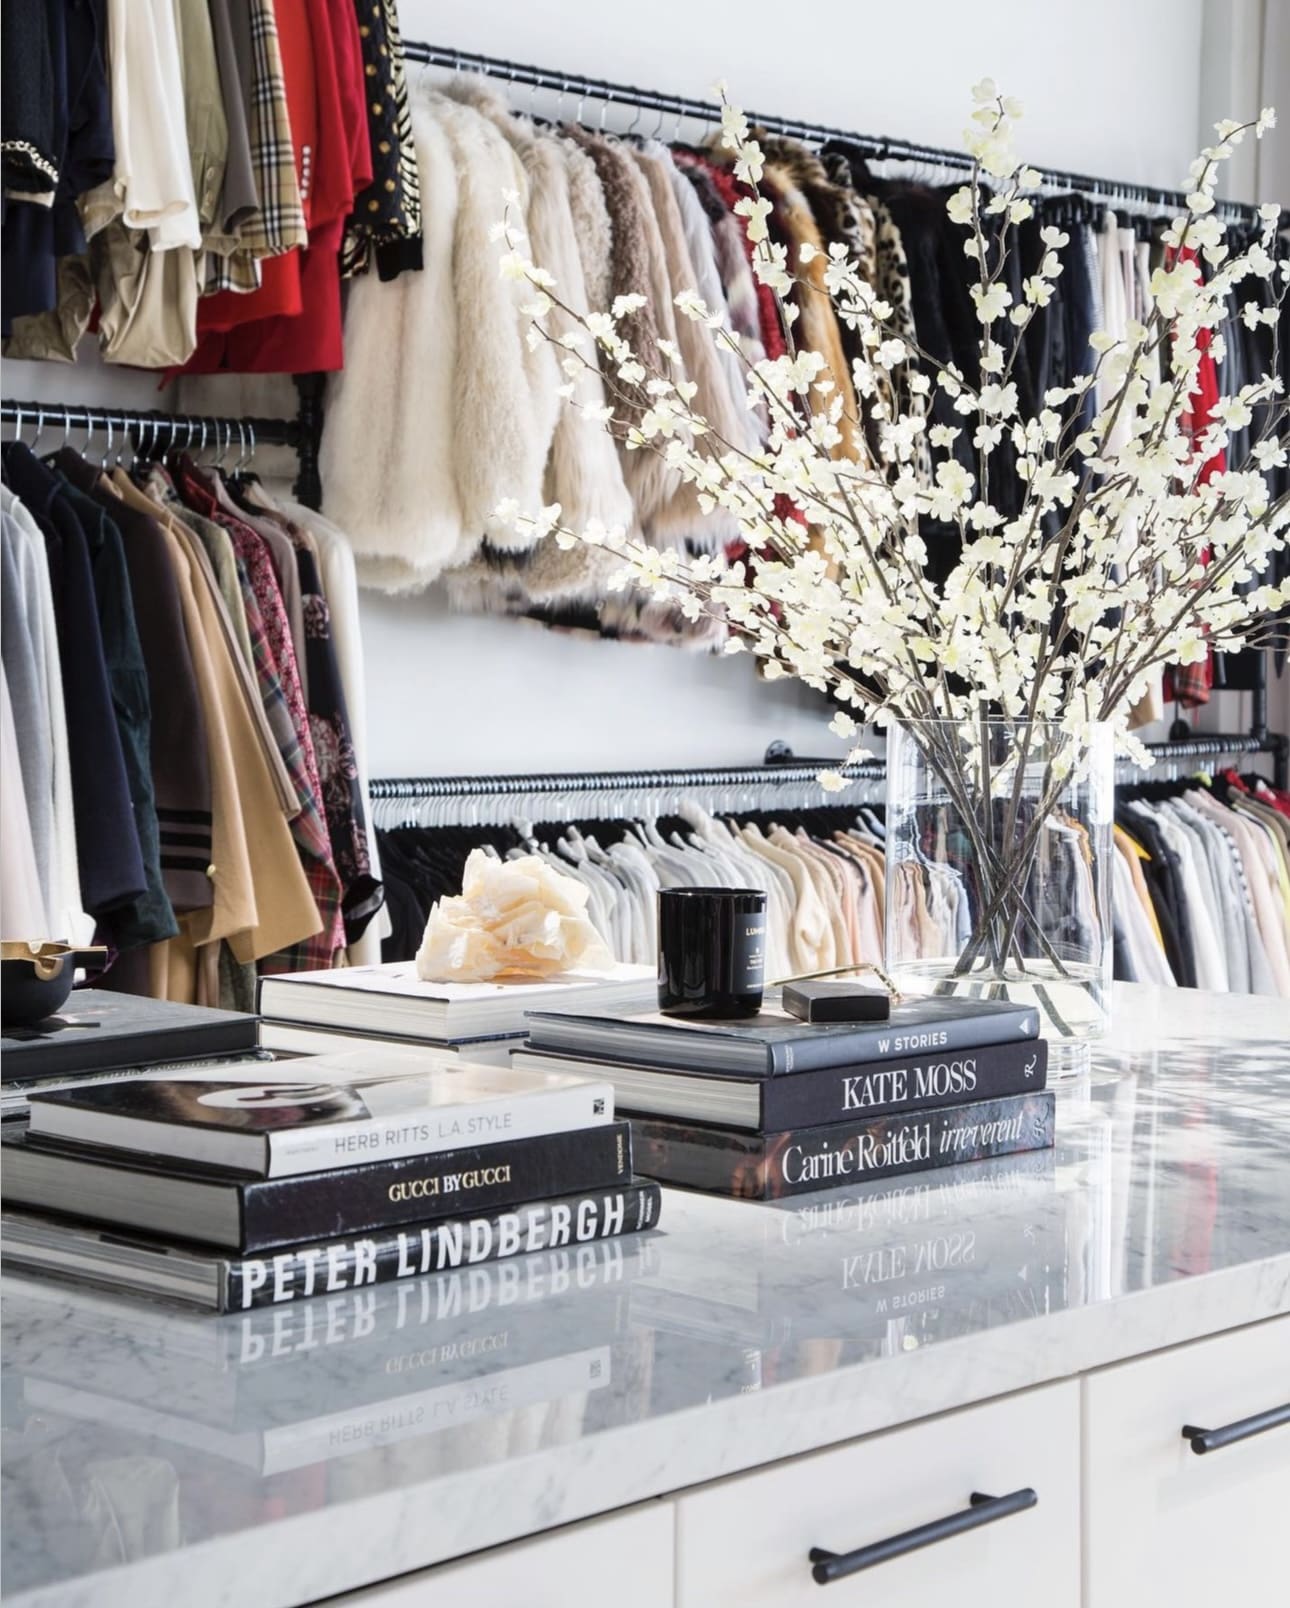
    Transform your closet by adding a central storage piece that serves both form and function. A well-designed island can dramatically increase your storage options, providing dedicated spots for everything from jewelry to folded clothes. This centerpiece not only elevates organization but also adds a touch of luxury and convenience, making your daily routine smoother.

    Key Design Elements

    • Choose an island with a combination of drawers and open shelving to accommodate different types of items.
    • Incorporate compartments or dividers inside drawers to keep smaller accessories neatly separated.
    • Opt for a countertop surface on the island to provide a convenient space for folding clothes or laying out outfits.

    Pro Tip: Select an island with built-in lighting or mirrored surfaces to enhance visibility and create a stylish focal point.

    24. Brighten Up Your Closet with Chic Accent Lighting

    Brighten Up Your Closet with Chic Accent Lighting

    Transform your closet from ordinary to extraordinary by adding stylish wall-mounted lights that spotlight your wardrobe essentials. Focused lighting not only enhances visibility, making outfit choices a breeze, but also introduces a warm, inviting ambiance. These elegant fixtures can turn even the most compact closet into a sophisticated dressing area you’ll love to use every day.

    Key Design Elements

    • Position lights above or beside shelves to highlight accessories and folded clothes for easy access.
    • Choose LED wall lights with adjustable arms to direct illumination precisely where you need it most.
    • Opt for fixtures with a dimmer switch to customize brightness depending on the time of day or mood.

    Pro Tip: Select warm-tone bulbs to create a flattering light that brings out the true colors of your clothing.

    25. Clear the Clutter for a Closet That Breathes

    Clear the Clutter for a Closet That Breathes

    Holding on to clothes that no longer fit or haven’t been worn in years can weigh down your closet—and your style. To truly maximize your space and streamline your daily routine, it’s essential to regularly sift through your wardrobe and make intentional decisions about what to keep. A clean, curated closet not only looks inviting but also makes getting dressed a joy. Start fresh by emptying your entire closet, assess each item, and give your space a good wipe-down before reorganizing.

    Key Design Elements

    • Sort your clothes into distinct piles: keep, donate, store, or toss, so you know exactly what stays and what goes.
    • Divide your wardrobe seasonally by packing away off-season items in labeled bins or vacuum-sealed bags to free up accessible hanging and shelf space.
    • Try a “one-in, one-out” rule moving forward to maintain your closet’s organization and prevent overcrowding over time.

    Pro Tip: Use uniform hangers to create visual harmony and save space, making your closet feel more spacious and ordered.

    26. Streamline Your Wardrobe with Coordinated Hangers

    Streamline Your Wardrobe with Coordinated Hangers

    Creating a cohesive look in your closet starts from the hangers up! Opting for a uniform set of slim, velvet-lined hangers not only maximizes your closet space but also ensures your garments stay securely in place. Ditch the mix-and-match collection of plastic, wood, and bulky hangers to achieve a tidy, boutique-style appearance that makes outfit selection a breeze.

    Key Design Elements

    • Choose slim velvet hangers to prevent clothes from slipping and to save precious closet space.
    • Stick to one color and material type to create visual harmony and avoid a cluttered look.
    • Use specialty hangers, like padded ones for delicate fabrics, to maintain the shape and quality of your items.

    Pro Tip: Replace your hangers all at once to instantly elevate your closet’s aesthetic and functionality.

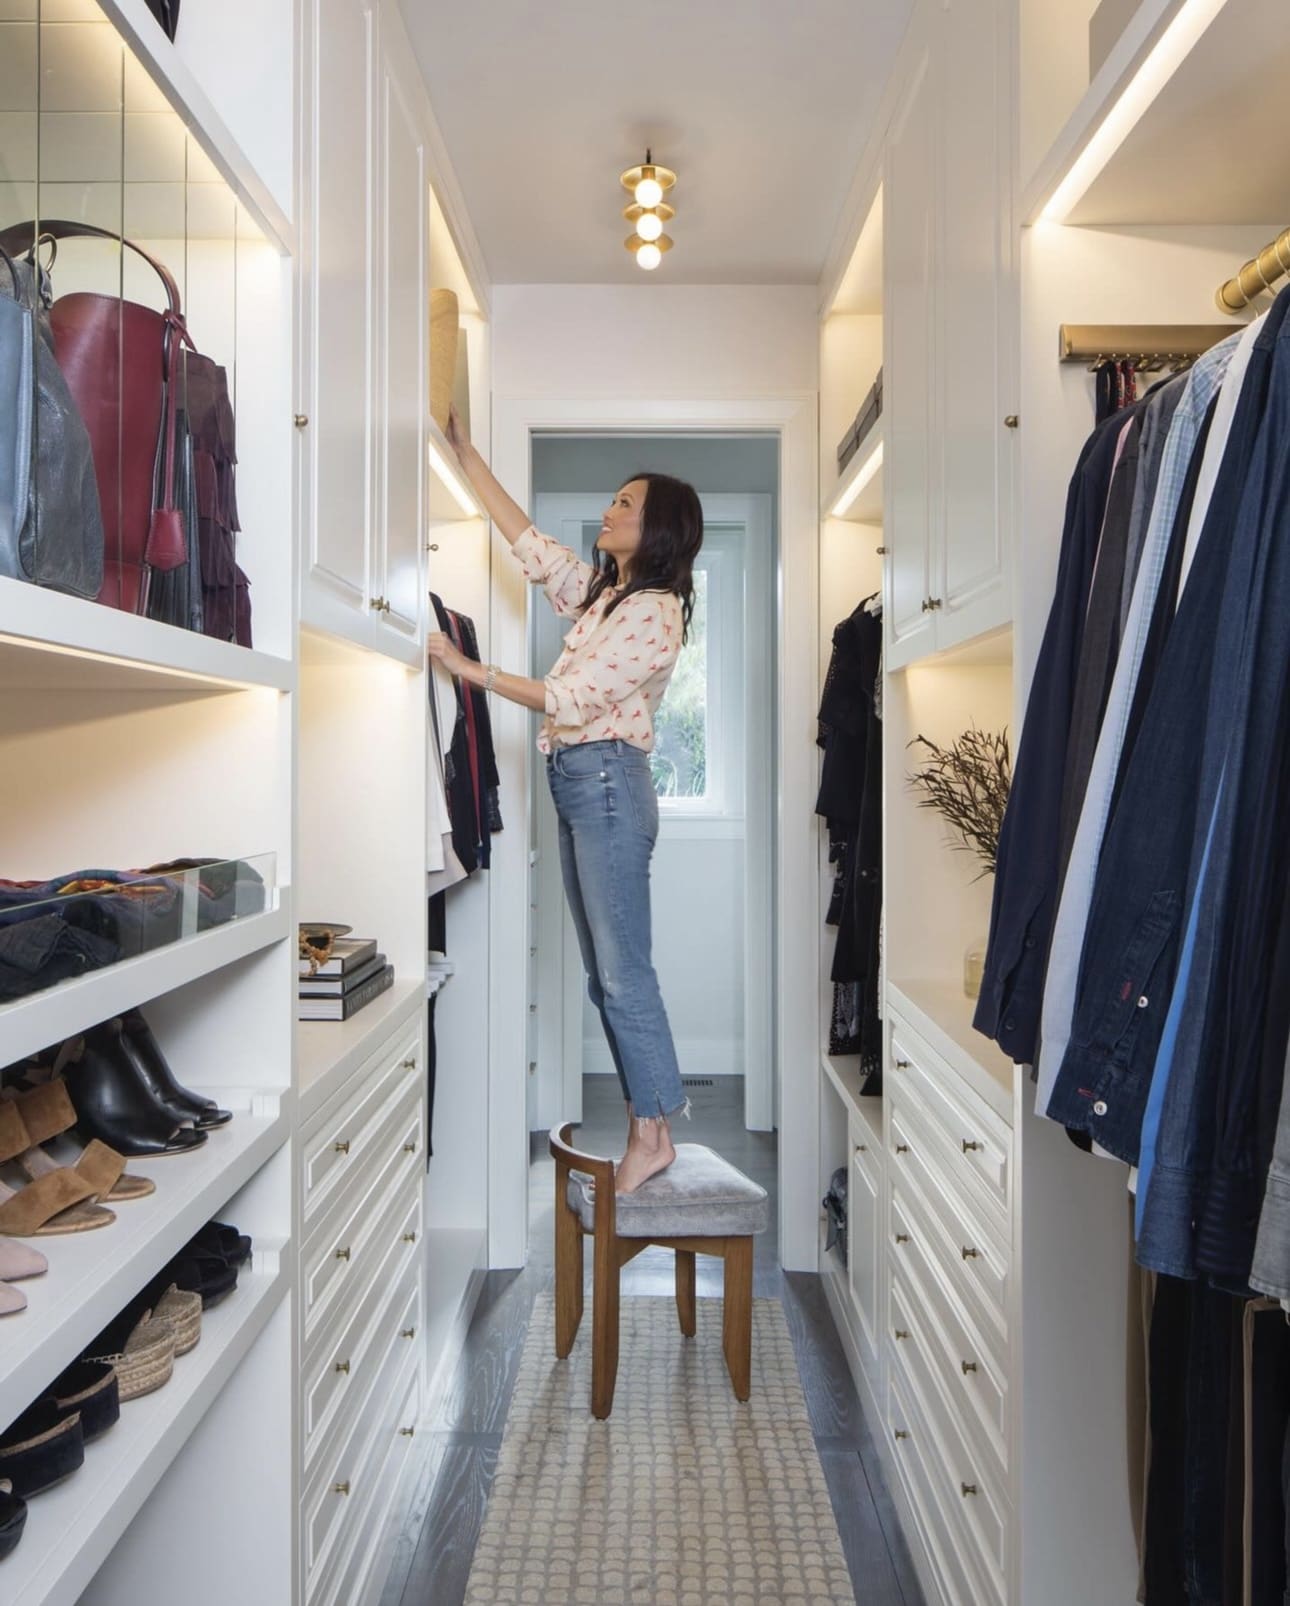
    27. Maximize Your Closet’s High Shelf for Smart Storage

    Maximize Your Closet’s High Shelf for Smart Storage

    The highest shelf in your closet is a goldmine for stashing away items you don’t need day-to-day. Think seasonal gear, special-occasion accessories, or bulky items like extra blankets and luggage. By dedicating this space to seldom-used belongings, you create more breathing room within easy reach for your everyday essentials, keeping your closet neat and accessible.

    Key Design Elements

    • Use clear, labeled bins to store off-season clothes or holiday decorations so you can quickly identify what’s inside without digging around.
    • Place lightweight but bulky items like suitcases or extra pillows up top to make efficient use of the vertical space.
    • Rotate the items stored on the top shelf seasonally to keep your closet aligned with current needs and avoid clutter buildup.

    Pro Tip: Invest in a sturdy step stool to safely reach your high shelf and minimize the hassle of accessing tucked-away items.

    Conclusion

    Transforming your closet doesn’t have to be an overwhelming task—it’s an opportunity to create a space that truly reflects your style and simplifies your daily routine. By taking small, intentional steps like decluttering, utilizing smart storage solutions, and personalizing your space, you can turn your closet into an organized sanctuary that brings you joy every time you open the door.

    Remember, the journey to a beautifully organized closet starts with a single decision to take action. Embrace the process, be patient with yourself, and imagine the peace and ease you’ll feel with a clutter-free, functional space. Your dream closet is within reach—now is the perfect time to make it happen!

  • Creative and Affordable Concrete Patio Designs to Transform Your Outdoor Space

    Transforming your outdoor space into a stylish and inviting retreat doesn’t have to come with a hefty price tag. Concrete patios offer an incredibly versatile and affordable solution that can elevate the look and functionality of your backyard without breaking the bank. Whether you’re envisioning a sleek modern lounge area, a cozy spot for family gatherings, or a charming backdrop for garden parties, concrete provides the perfect blank canvas to bring your ideas to life.

    In this post, we’ll explore creative concrete patio designs that combine practicality with aesthetic appeal. From decorative stamping and vibrant stains to clever layout ideas and budget-friendly finishes, you’ll discover how to customize your patio to suit your personal style and outdoor needs. Ready to unlock the potential of your outdoor space? Let’s dive into inspiring ideas that prove you don’t need to spend a fortune to achieve a stunning concrete patio transformation.

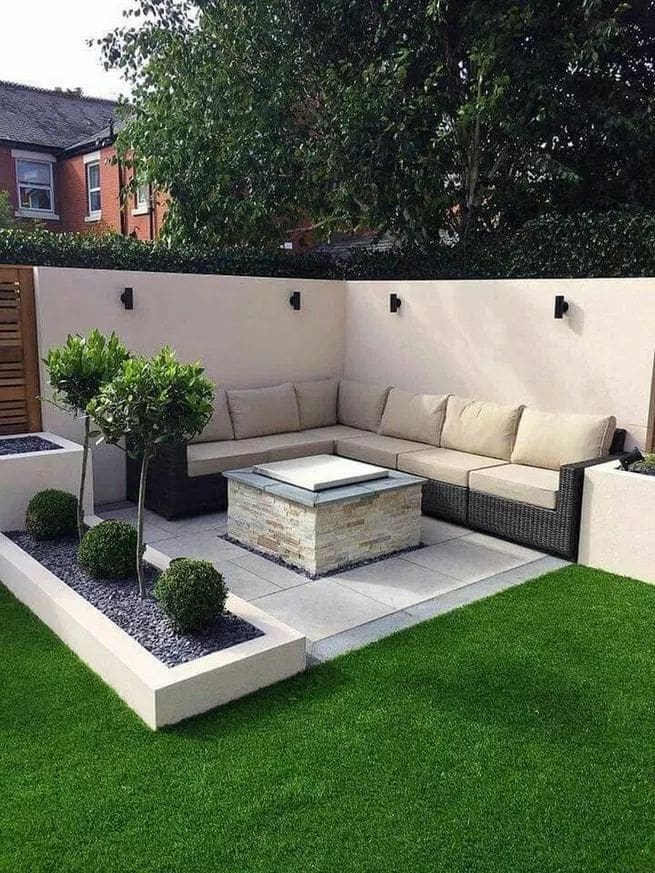
    1. Durable Concrete Firepit for Your Patio

    Durable Concrete Firepit for Your Patio

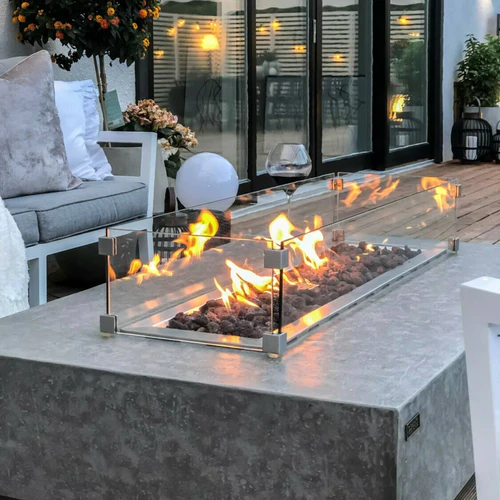
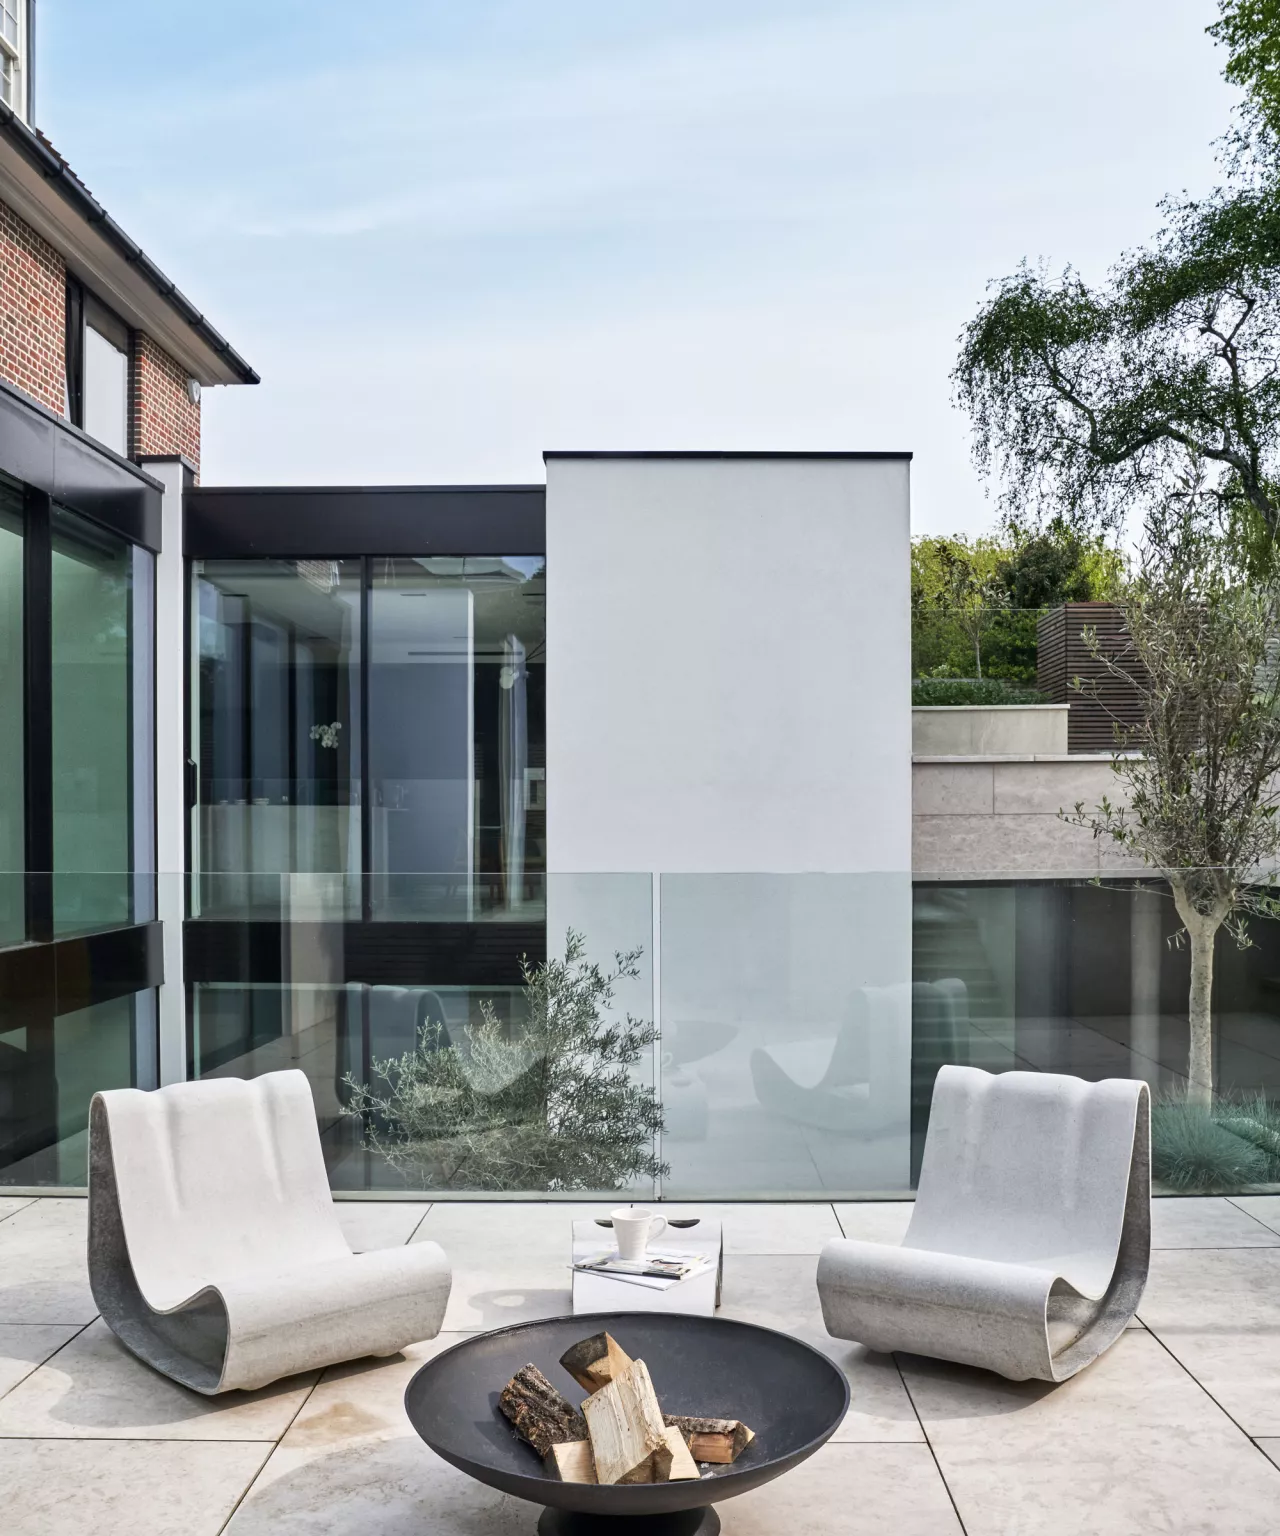
    Incorporating a concrete firepit into your outdoor space adds both style and long-lasting functionality. These firepits come in a variety of designs to complement any patio, but it’s important to select concrete that can endure intense heat to ensure safety and longevity.

    Key Design Elements

    • Offers a warm and inviting focal point for social gatherings
    • Allows you to enjoy your outdoor area even during chilly evenings
    • Comes in diverse shapes including circular, square, and customized options

    Pro Tip: Opt for firepits crafted with refractory concrete, engineered to resist high temperatures and prevent cracking over time.

    2. Round Concrete Patio Design

    Round Concrete Patio Design

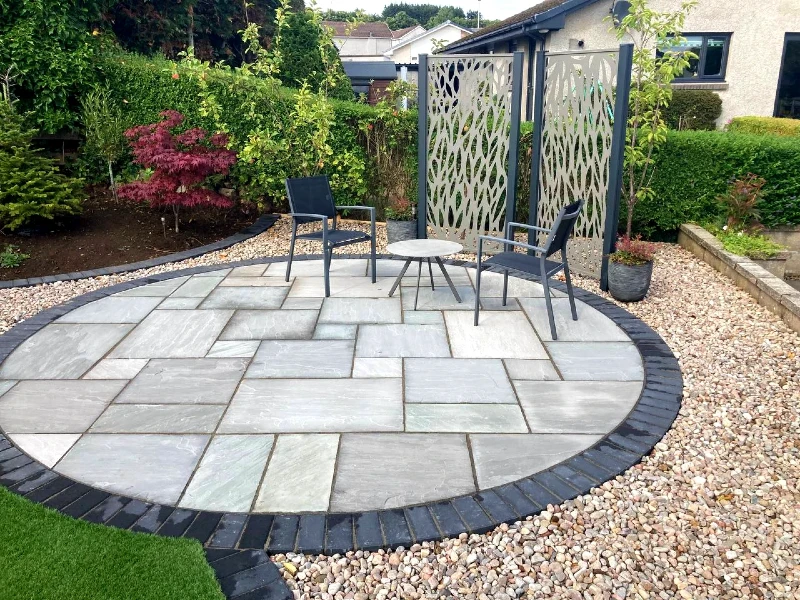
    Incorporating a round patio can transform your backyard by introducing a unique shape that draws attention. Whether serving as a dedicated spot for grilling, an inviting dining nook, or a cozy seating area, circular patios add both function and flair to your outdoor environment.

    Key Design Elements

    • Establishes a captivating centerpiece in any garden layout
    • Perfectly complements features like a fire pit or water element at its core
    • Adaptable to both expansive yards and smaller outdoor retreats

    Pro Tip: To foster lively gatherings, position curved or circular seating along the edge of the round patio, creating an intimate and inviting atmosphere.

    3. Tiered Concrete Patio Design

    Tiered Concrete Patio Design

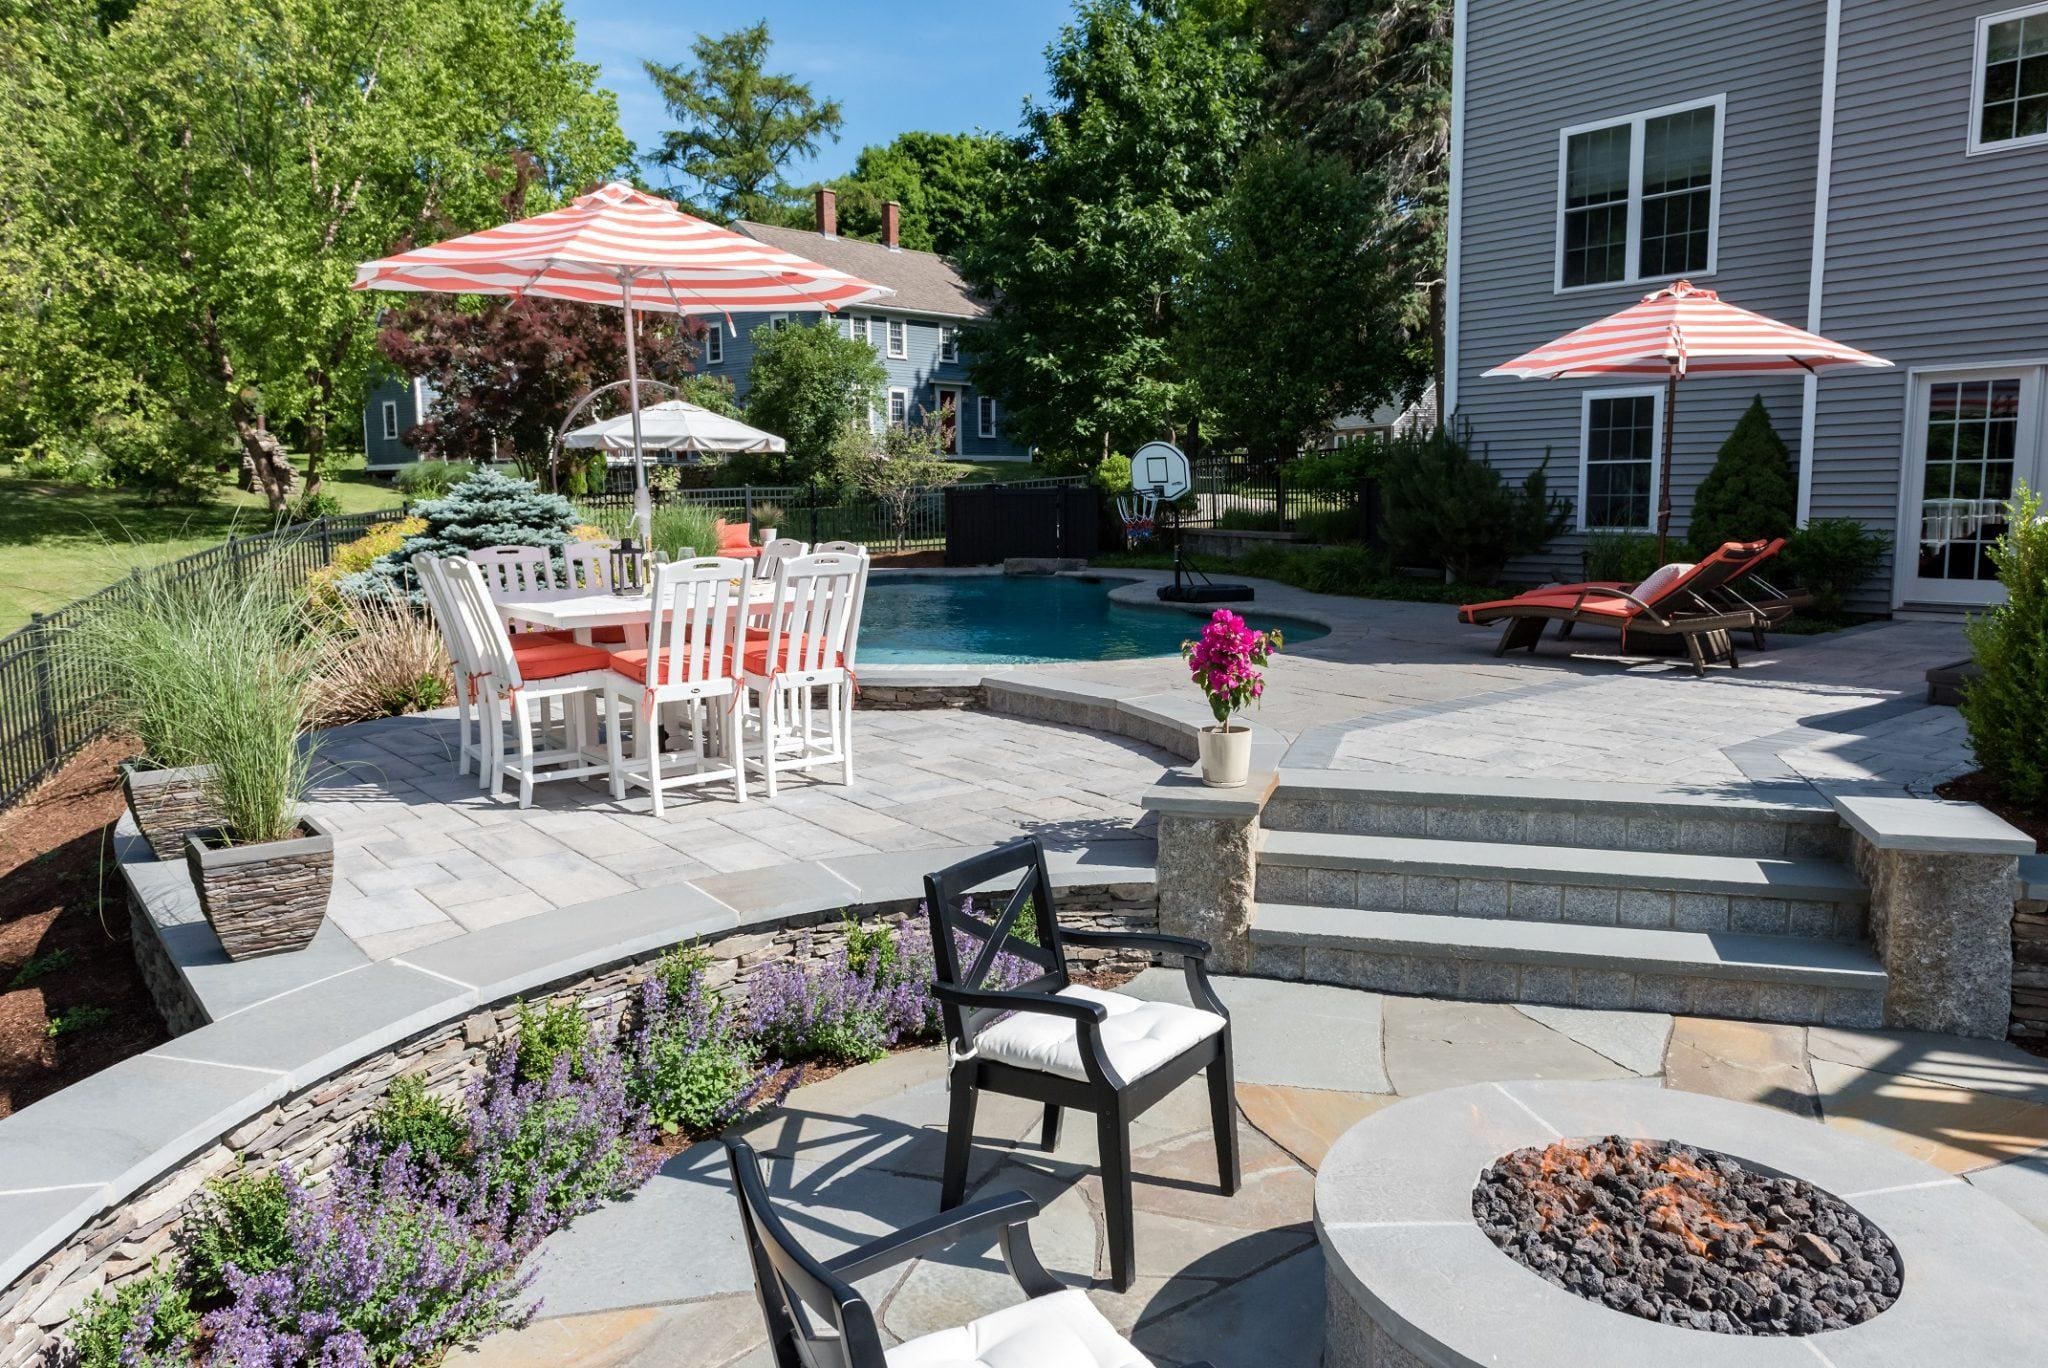
    Incorporating multiple levels into your patio design is an excellent way to expand your outdoor space while introducing unique areas for relaxing, dining, and socializing. This approach works particularly well for properties with uneven or sloping landscapes, as it seamlessly follows the natural contours of the land.

    Key Design Elements

    • Optimizes usable space on inclined or irregular ground
    • Defines separate areas for eating, lounging, and entertaining
    • Enhances visual appeal with dynamic architectural layers

    Pro Tip: Install recessed lighting along the steps and edges to improve nighttime safety and add a stylish glow that highlights each tier.

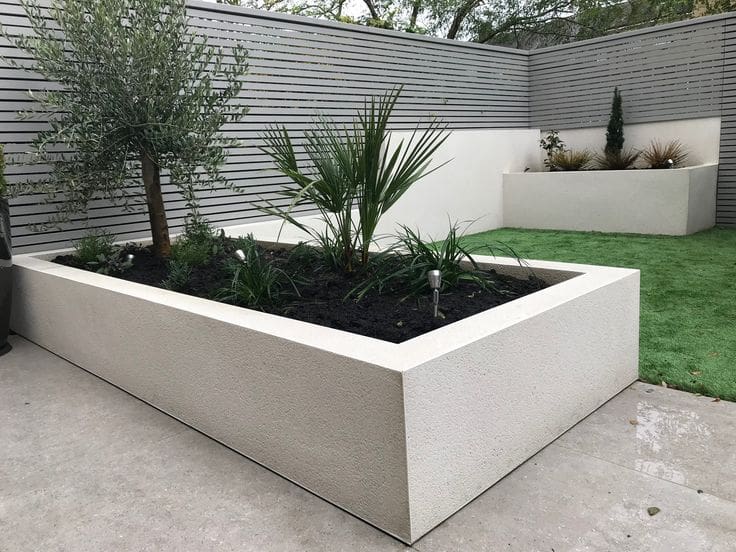
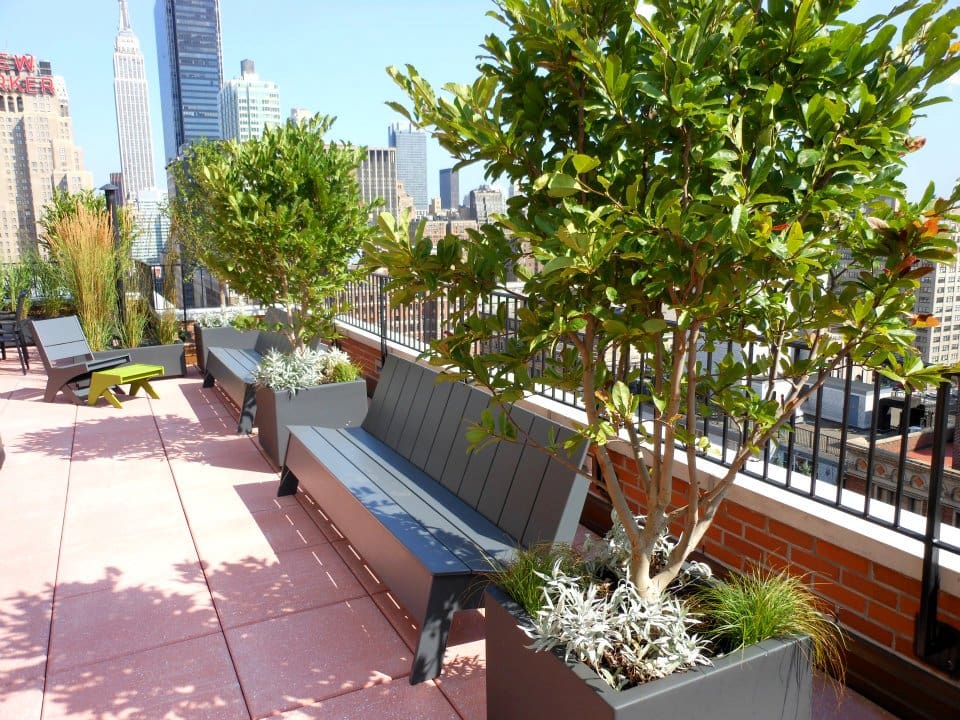
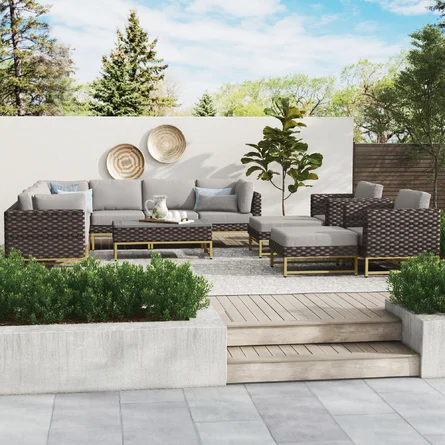
    4. Elevated Concrete Planters for Your Patio

    Elevated Concrete Planters for Your Patio

    Concrete planters raised off the ground create a sturdy and stylish space for your plants to flourish. By placing a gravel layer beneath the soil, you avoid direct contact between roots and the solid base, promoting healthier growth and better moisture control.

    Key Design Elements

    • Superior drainage helps keep roots from becoming waterlogged
    • Long-lasting and resistant to pests compared to traditional wooden frames
    • Flexible design options allow for unique shapes that complement your outdoor area

    Pro Tip: Before adding soil, install a layer of landscape fabric inside the concrete planter to enhance water flow and reduce weed growth.

    5. Blending Concrete, Pebbles, and Wood for a Stunning Patio

    Blending Concrete, Pebbles, and Wood for a Stunning Patio

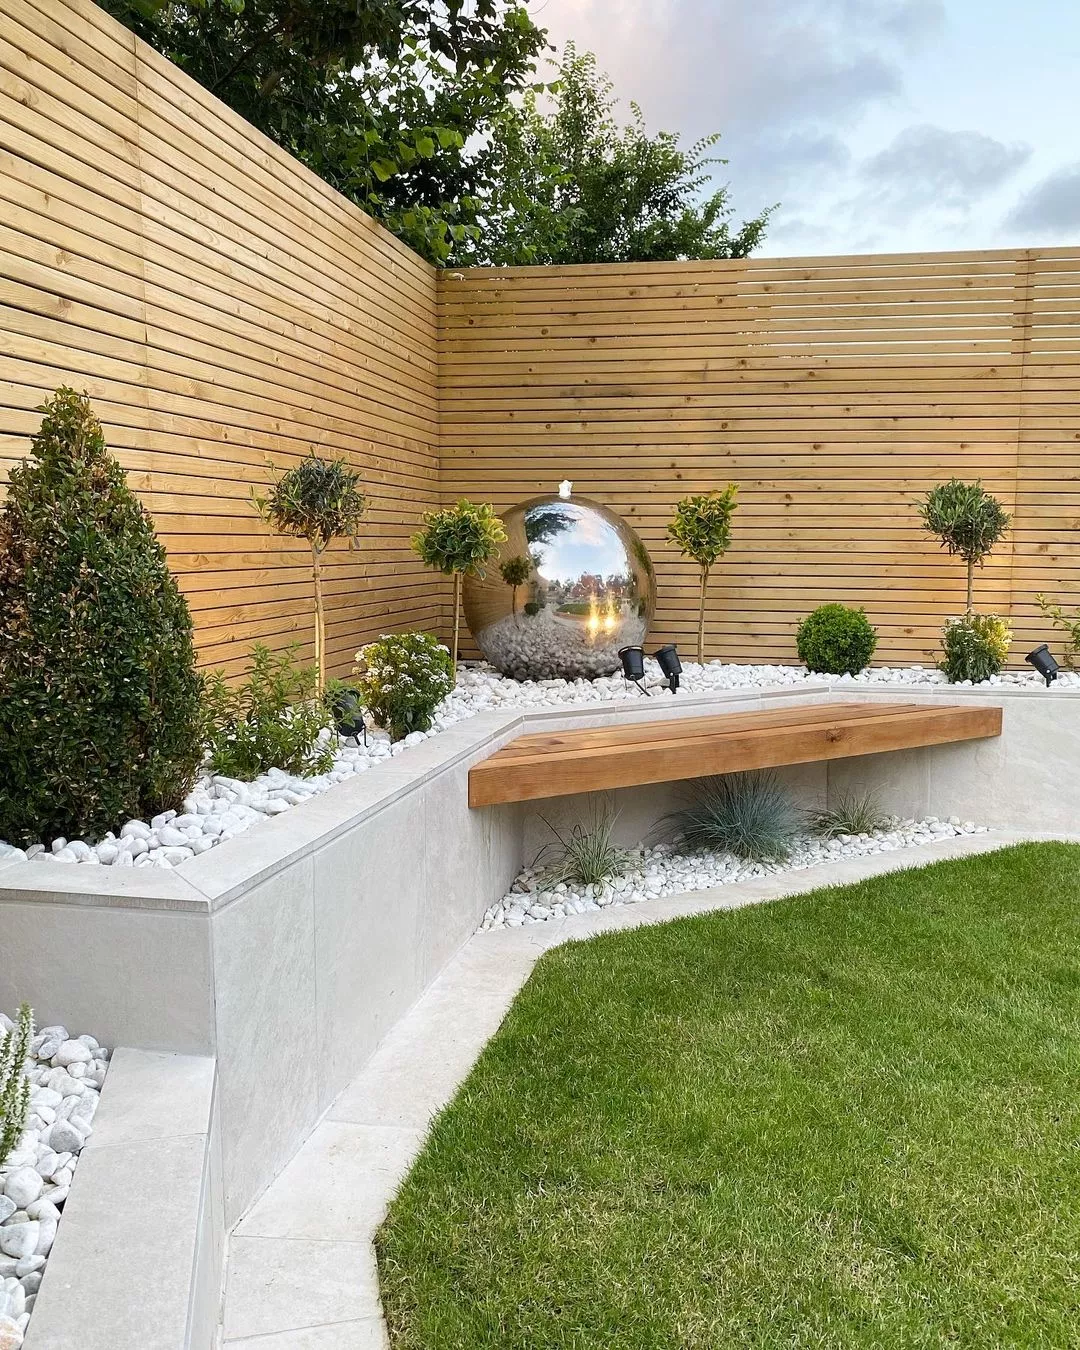
    Create a captivating outdoor space by thoughtfully combining concrete, pebble, and wood elements. This fusion of materials brings depth and charm to your patio, transforming it into a unique retreat that feels both natural and refined.

    Key Design Elements

    • Mixing textures introduces visual warmth and personality
    • Wood tones balance the sleekness of concrete surfaces
    • Pebbles enhance drainage and define distinct patio zones

    Pro Tip: Opt for pressure-treated or composite wood alongside concrete to boost longevity and reduce upkeep.

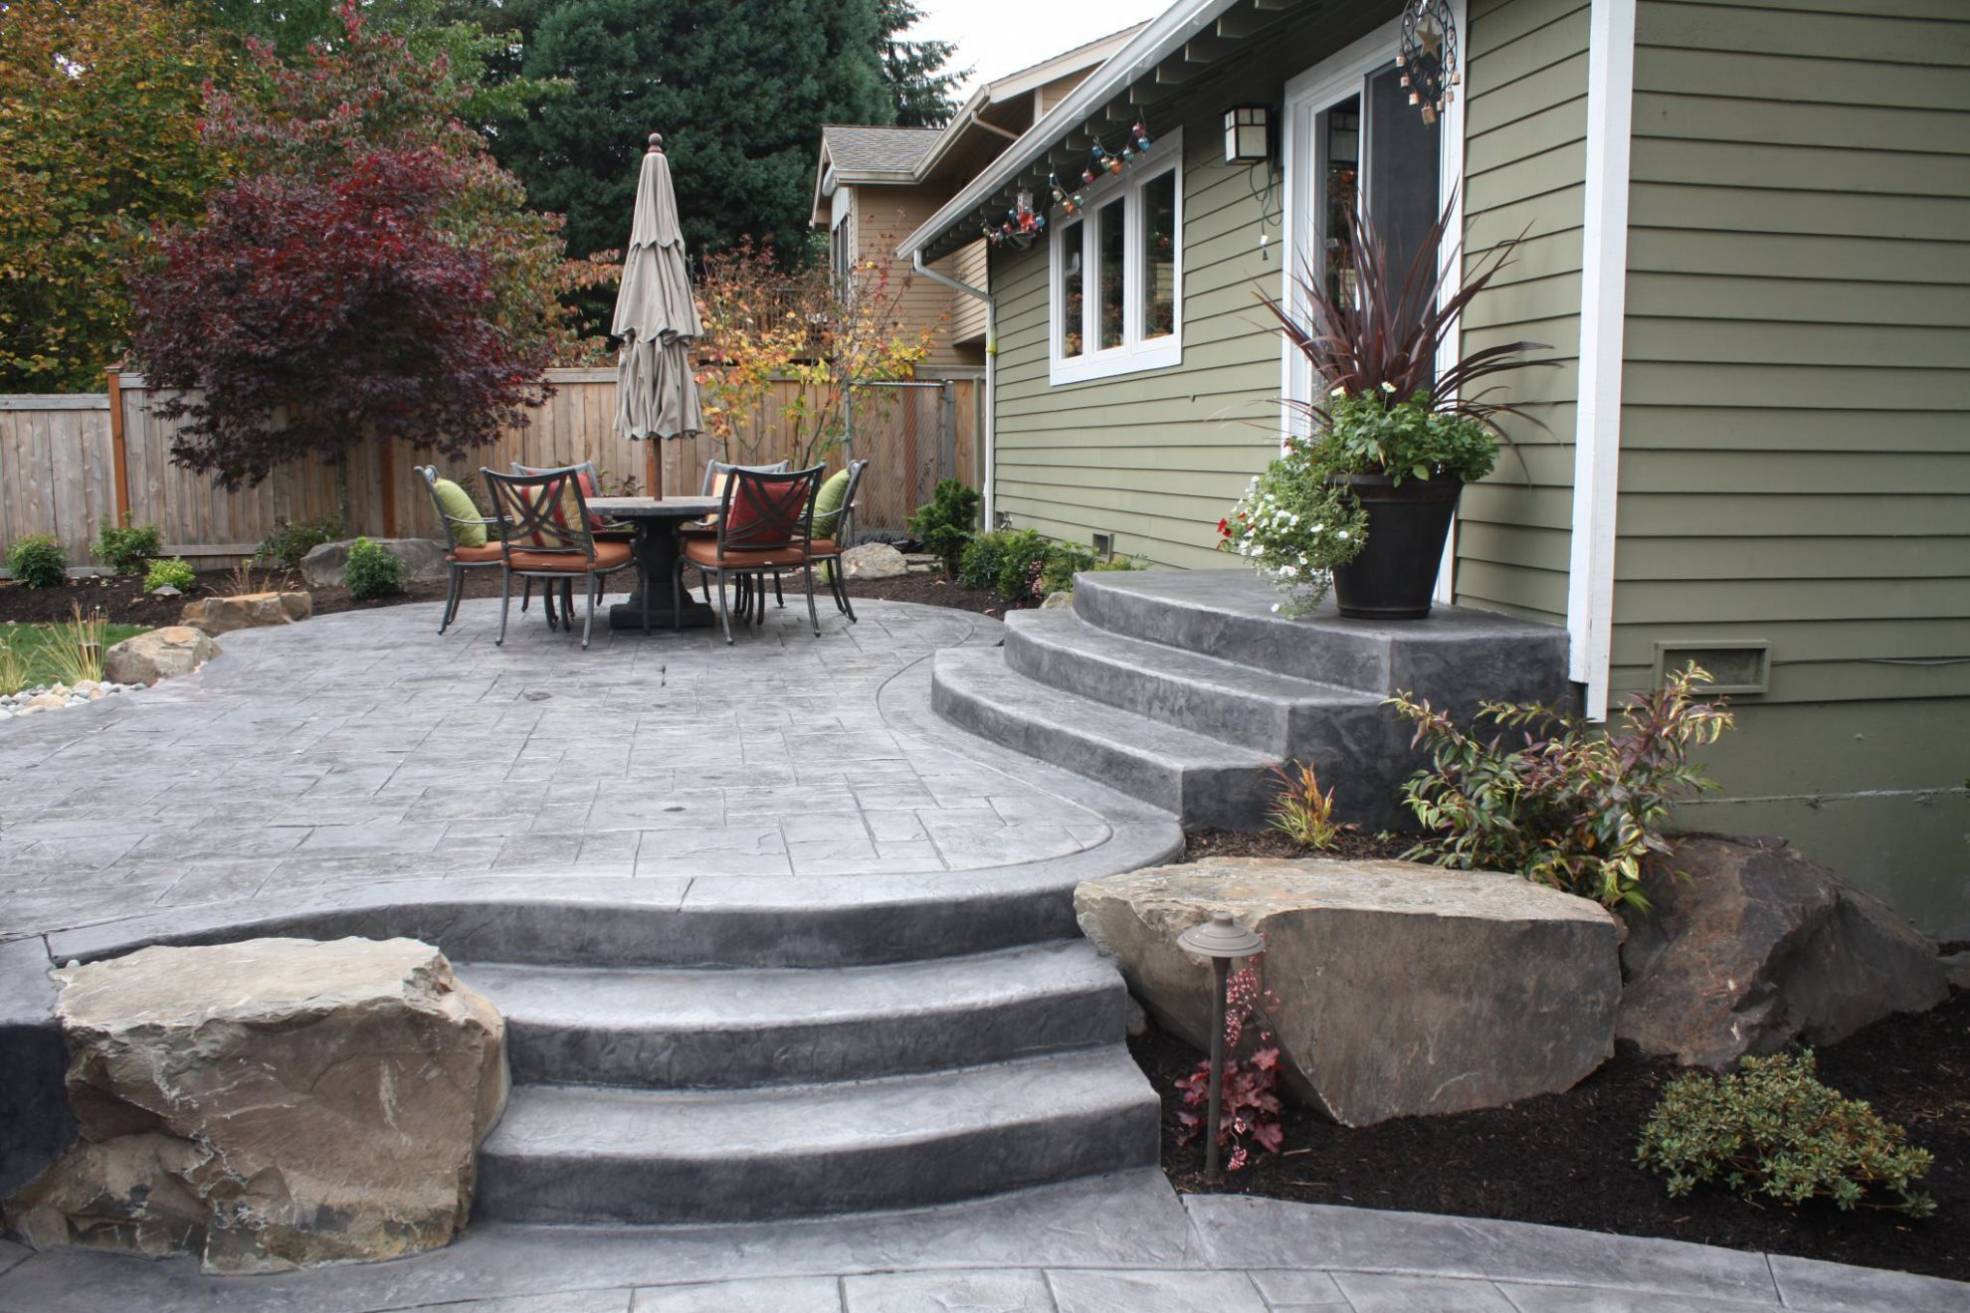
    6. Creative Stamped Concrete Patio Ideas

    Creative Stamped Concrete Patio Ideas

    Stamped concrete offers the unique ability to replicate the beauty of high-end materials like brick, tile, or natural stone by pressing intricate patterns and textures into the surface. This method delivers an elegant, custom look while maintaining the strength and budget-friendly benefits of traditional concrete.

    Key Design Elements

    • Achieves the appearance of premium materials without the hefty price tag
    • Comes in a wide variety of designs and color palettes to suit any style
    • Enhanced surface textures improve traction for safer footing

    Pro Tip: Opt for a stamped design that harmonizes with your home’s architectural features to create a seamless and polished outdoor space.

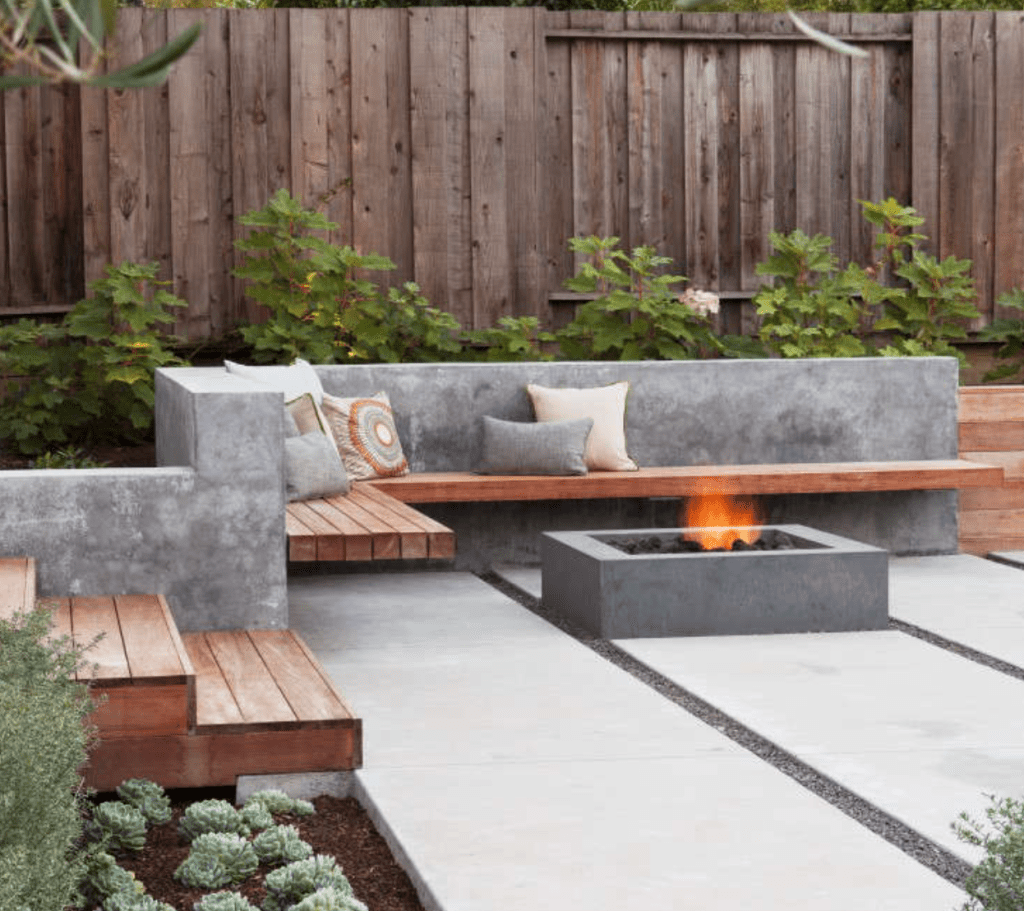
    7. Sleek Concrete Seating for Your Patio

    Sleek Concrete Seating for Your Patio

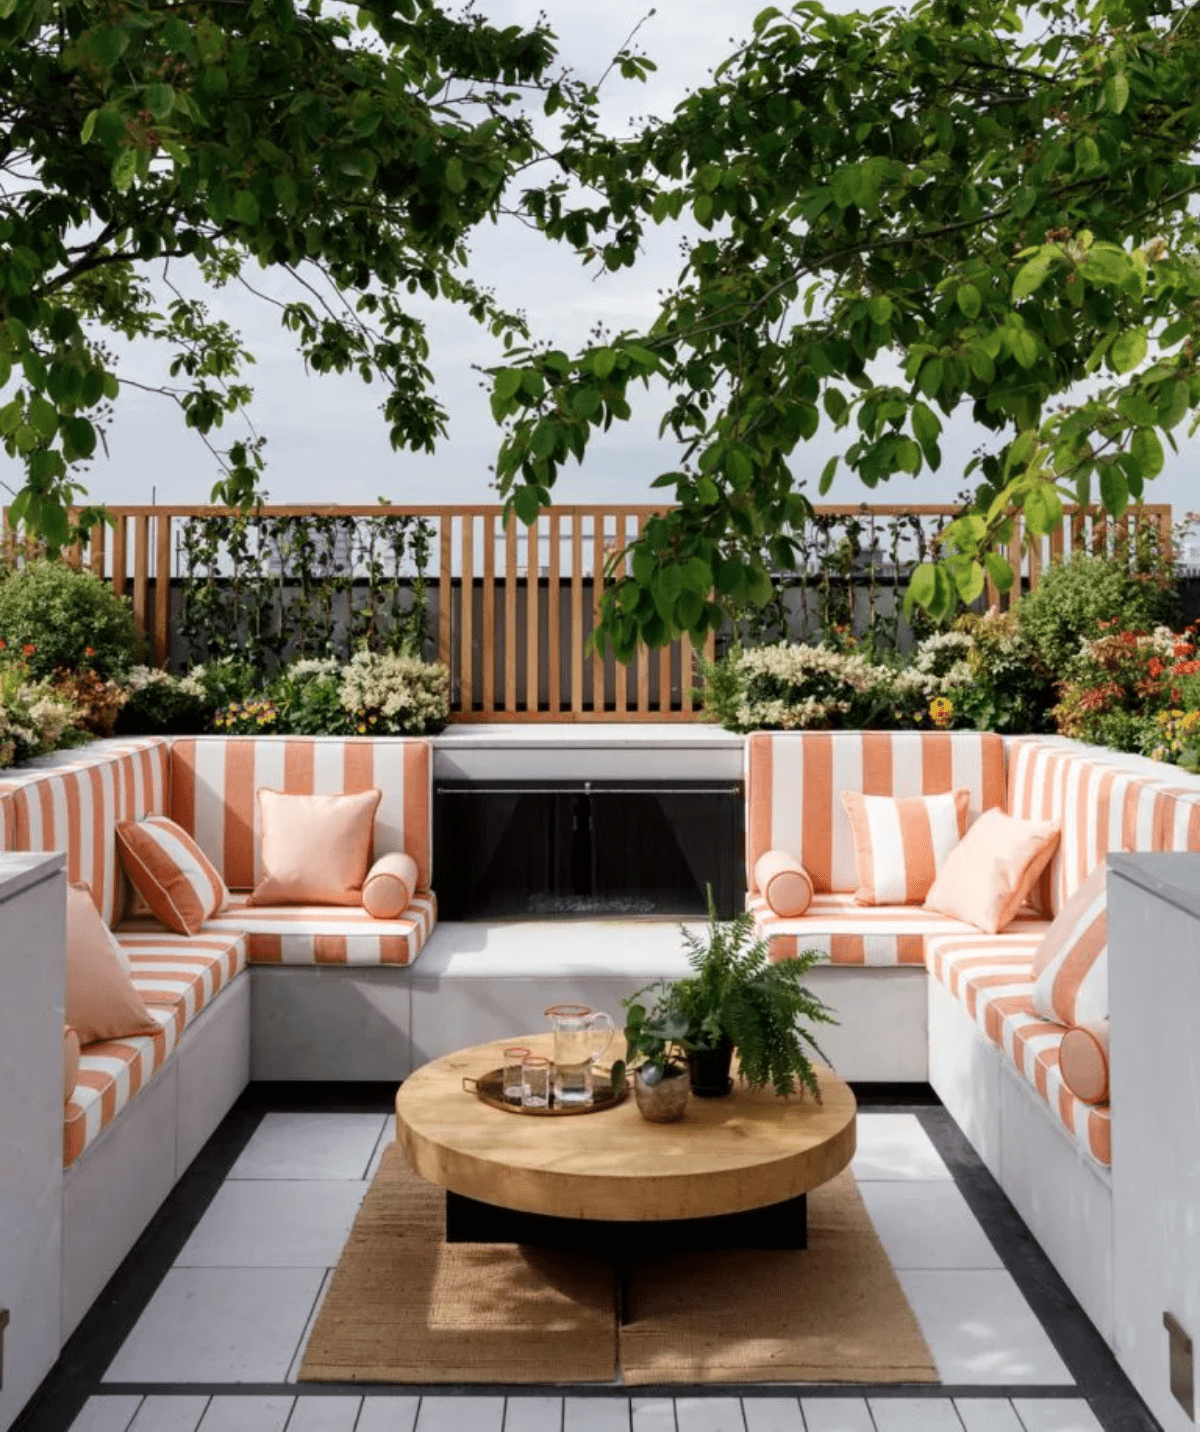
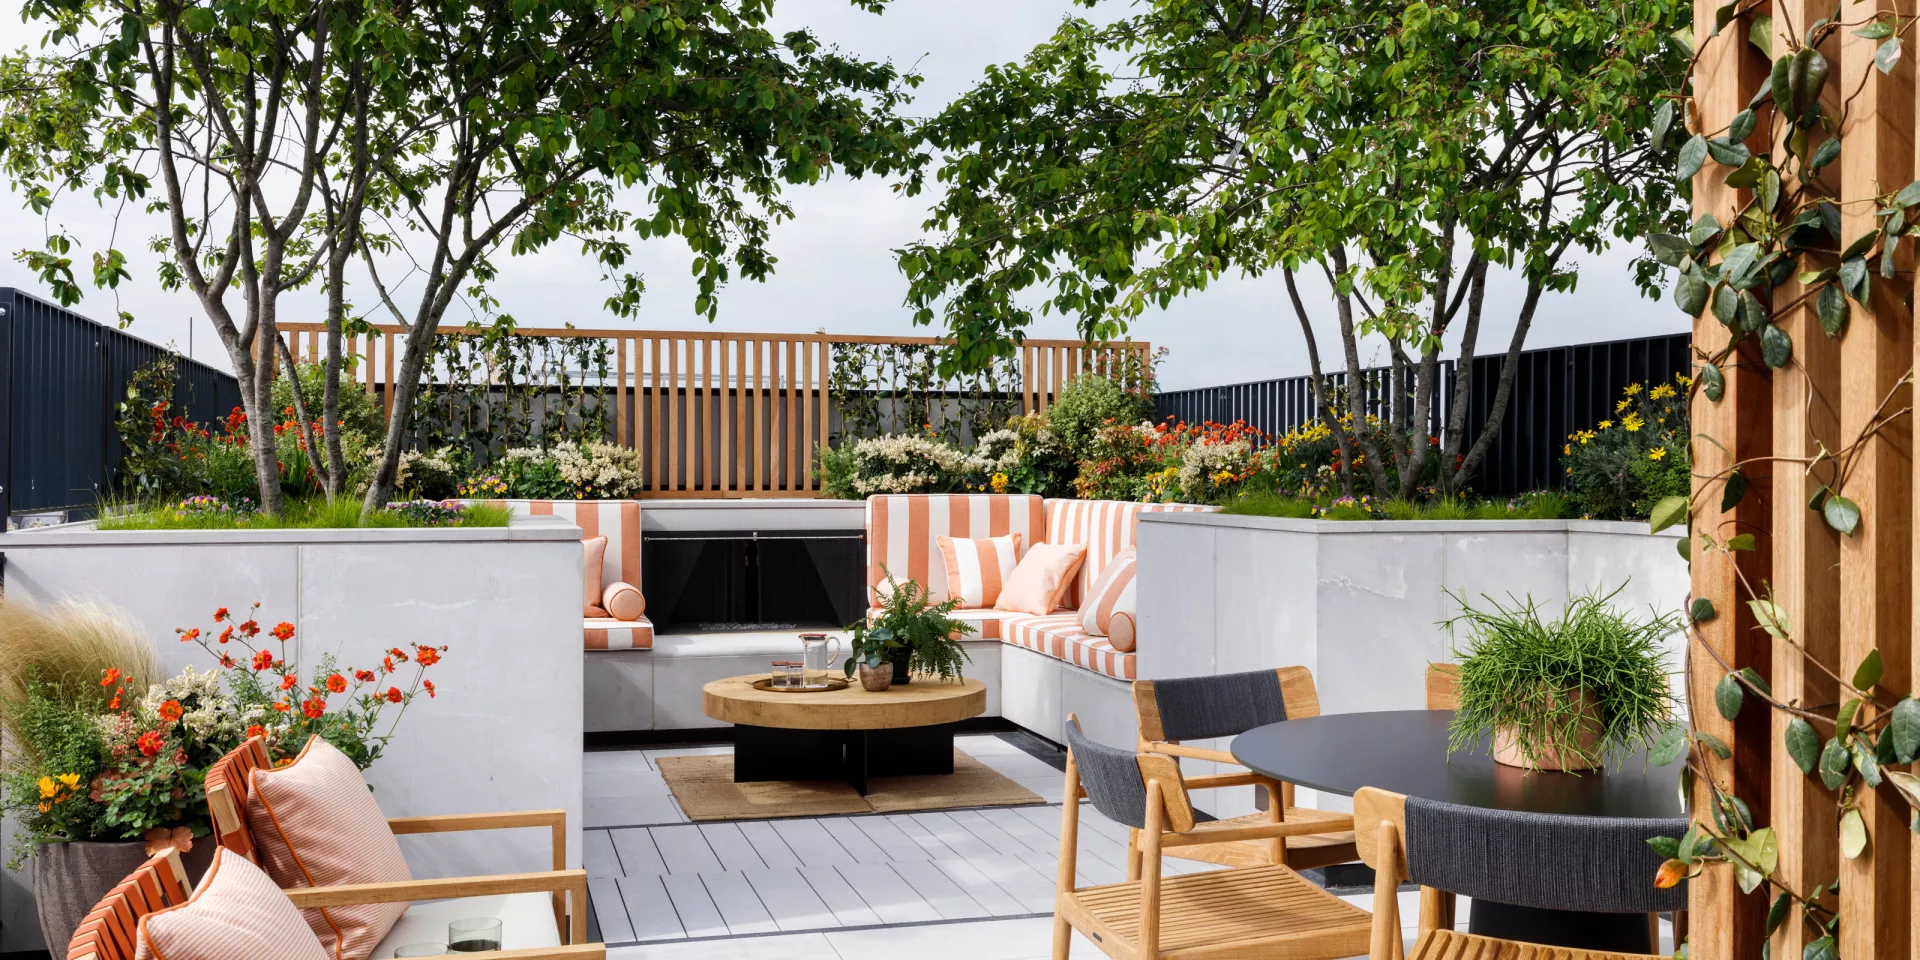
    Incorporating concrete seating directly into your patio design offers a stylish and durable solution that withstands heavy use and harsh weather conditions. This long-lasting feature removes the hassle of moving outdoor furniture while providing a streamlined, modern look.

    Key Design Elements

    • Robust and weatherproof for year-round use
    • Maximizes patio space by integrating seating into the layout
    • Easily enhanced with cushions to boost comfort and style

    Pro Tip: Use cushions made from UV-protected fabrics to ensure your concrete seating stays cozy and vibrant through sun exposure.

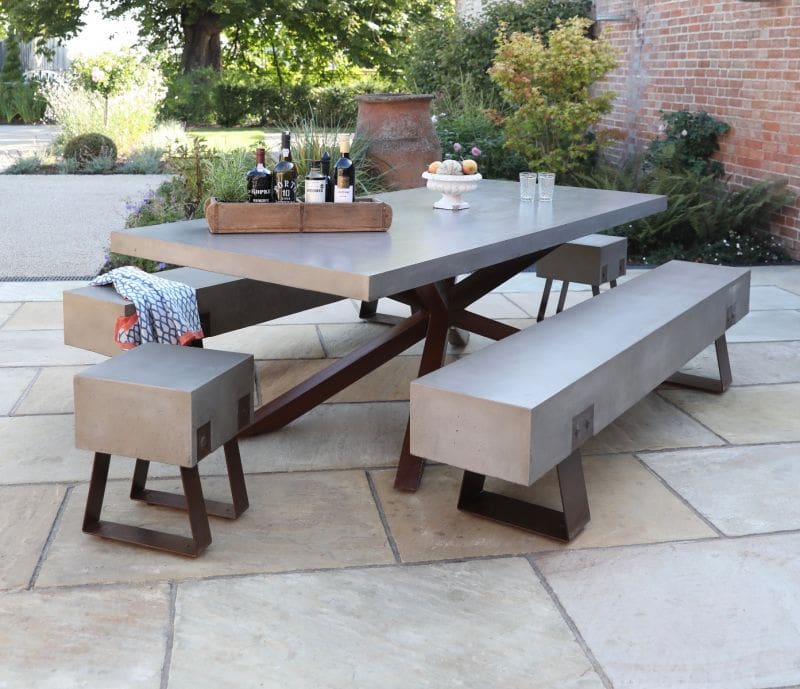
    8. Cut Costs with Long-Lasting Concrete Patio Pieces

    Cut Costs with Long-Lasting Concrete Patio Pieces

    Concrete furniture offers unbeatable strength and endurance, making it a smart investment for your outdoor area. Unlike wood or metal, it resists weathering, rust, and decay, ensuring your patio setup remains intact and attractive for years without costly replacements.

    Key Design Elements

    • Built to endure harsh weather without damage
    • Resistant to rust, rot, and fading from sunlight
    • Enhances your patio with a clean, contemporary vibe

    Pro Tip: Liven up sturdy concrete furniture with vibrant cushions and cozy throws to create a welcoming and colorful outdoor retreat.

    9. Timeless Square Concrete Patio

    Timeless Square Concrete Patio

    Patios shaped as squares or rectangles remain popular due to their straightforward design and adaptability to most yard layouts. While they may not be groundbreaking, these shapes offer a budget-friendly and functional solution that blends effortlessly with both classic and contemporary outdoor settings.

    Key Design Elements

    • Cost-efficient and uncomplicated to construct
    • Optimizes layout in yards with rectangular footprints
    • Ideal for incorporating patterned tiles or stamped designs

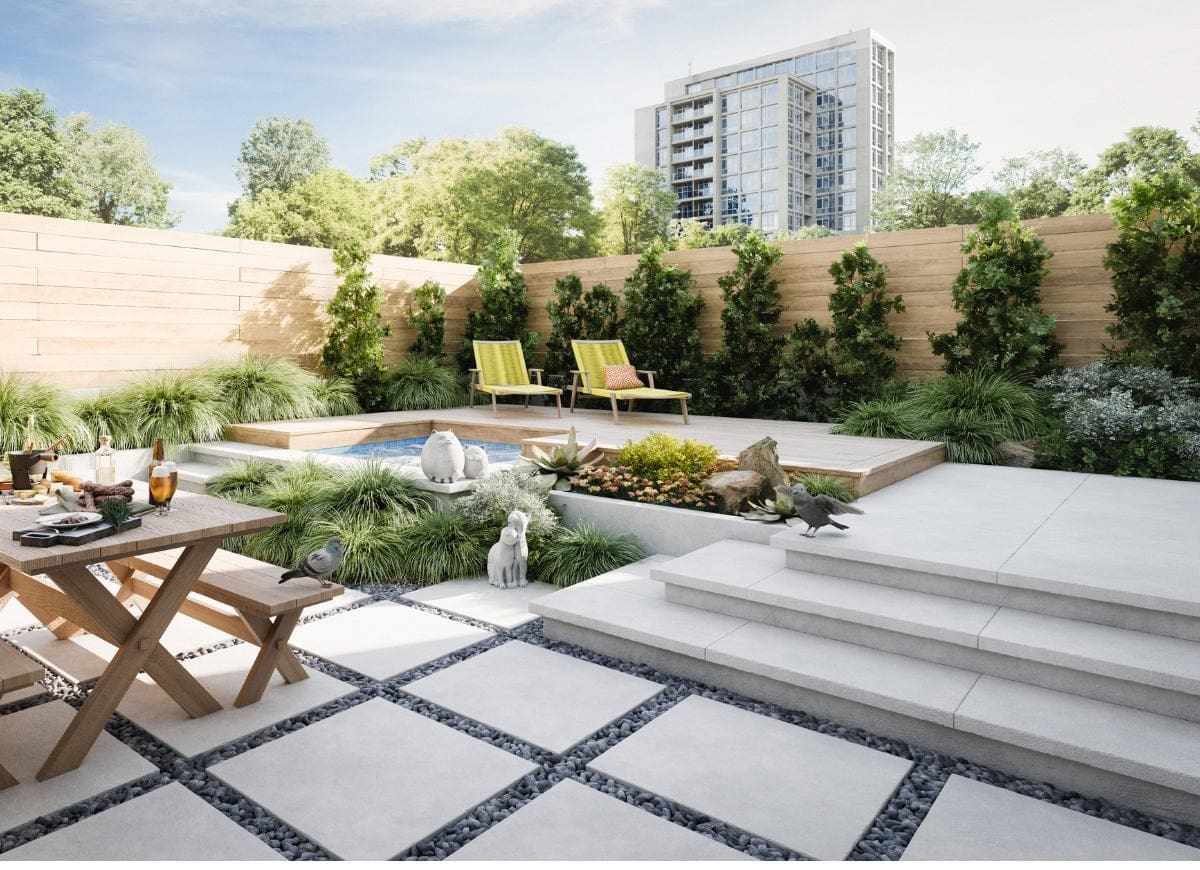
    Pro Tip: Create subtle visual appeal by spacing square concrete sections with narrow strips of grass or gravel, enhancing texture without increasing costs.

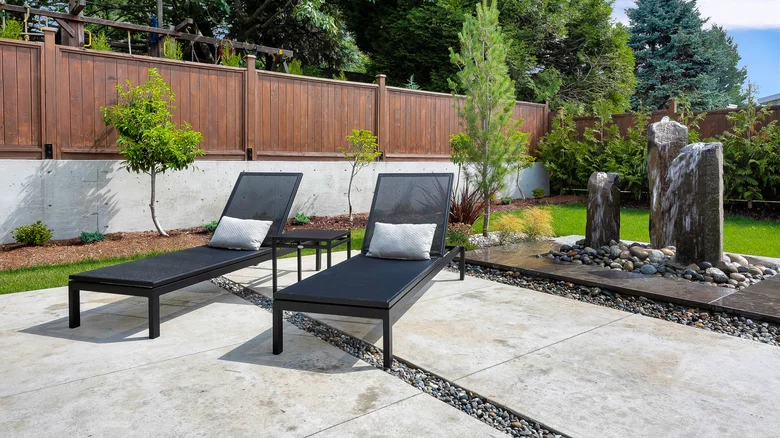
    10. Sleek Concrete Patio Framed by Pebble Accents

    Sleek Concrete Patio Framed by Pebble Accents

    Incorporating a border of small stones around your concrete patio not only enhances its visual appeal but also serves a practical purpose. These smooth pebbles act as a natural barrier that limits weed growth and shields the underlying soil from pests and erosion, maintaining the patio’s integrity and the garden’s health.

    Key Design Elements

    • Naturally discourages weed growth without the use of chemicals
    • Promotes effective water runoff and soil drainage near patio edges
    • Creates a clean, refined boundary that elevates the patio’s aesthetic

    Pro Tip: Place a durable edging material like plastic or metal between the concrete and pebble border to preserve the separation and keep the layout tidy over time.

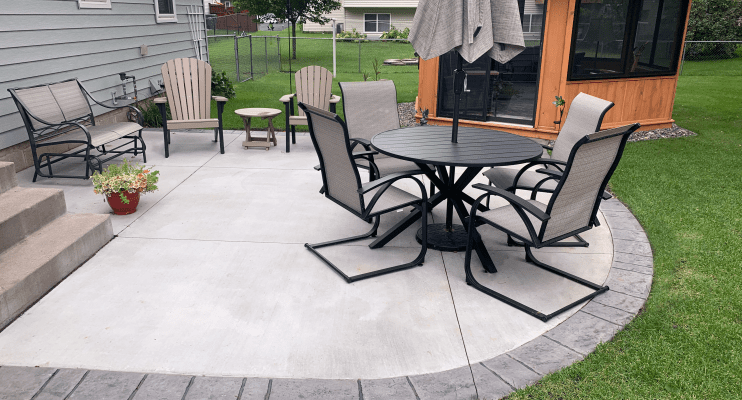
    11. Graceful Curved Concrete Patio

    Graceful Curved Concrete Patio

    Incorporating gentle curves into your patio design brings a harmonious flow that echoes nature’s own patterns. This approach not only breaks up the strict geometry of typical architecture but also fosters a welcoming atmosphere that blends seamlessly with your outdoor environment.

    Key Design Elements

    • Balances sharp architectural lines with soft, flowing shapes
    • Enhances the sense of a natural, tranquil garden retreat
    • Perfectly complements surrounding plants, trees, and water elements

    Pro Tip: Lay out your curve with a flexible garden hose before setting the concrete to achieve a smooth, elegant contour that feels effortlessly natural.

    12. Geometric Elegance: Diamond-Stamped Concrete Patio

    Geometric Elegance: Diamond-Stamped Concrete Patio

    The diamond stamping technique is a popular choice for concrete patios, offering a stylish blend of texture and design. This method not only elevates the visual impact of outdoor spaces but also provides flexibility with finishes and hues, making it a top pick for personalized decorative concrete projects.

    Key Design Elements

    • Creates a striking geometric centerpiece for any patio
    • Pairs beautifully with tinted stains to customize the appearance
    • Works seamlessly with both modern and classic outdoor designs

    Pro Tip: Seal the stamped concrete with a high-quality penetrating sealer to safeguard the design and intensify the richness of the colors.

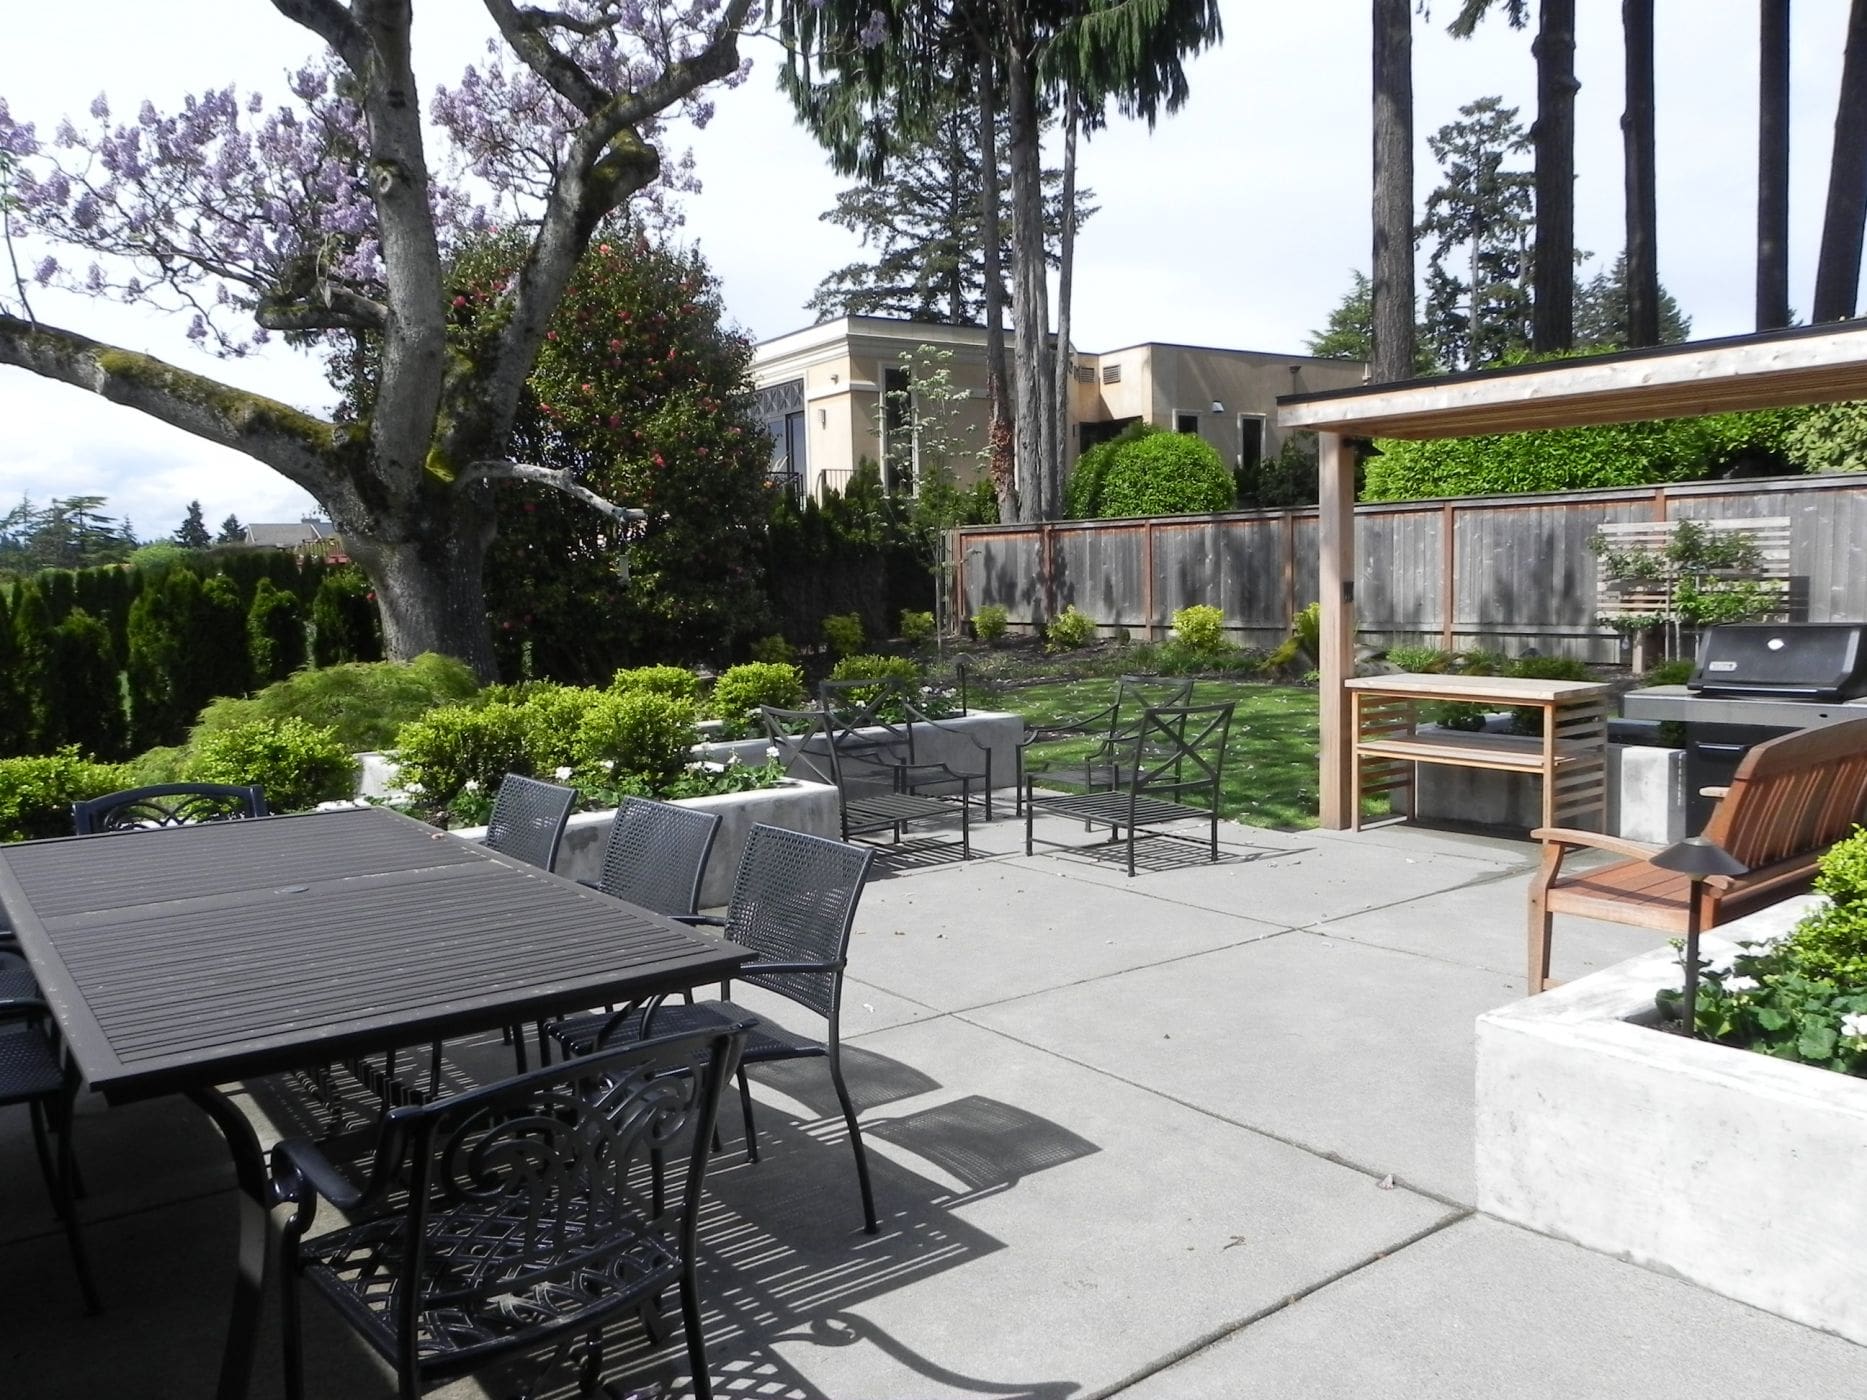
    13. Seamless Ground-Level Concrete Patio

    Seamless Ground-Level Concrete Patio

    A ground-level concrete patio sits flush with your home’s foundation, creating an inviting outdoor space perfect for single-story homes. This setup enhances your backyard’s usability by providing a smooth flow from indoors to outdoors, making it ideal for relaxing, dining, and social gatherings. It’s an excellent canvas for arranging outdoor furniture, greenery, and a grill station.

    Key Design Elements

    • Simple installation with cost-effective materials
    • Creates an effortless connection between interior and exterior spaces
    • Perfectly safe and accessible for kids and pets

    Pro Tip: Enhance your patio’s perimeter with a ring of decorative stones or compact, flowering ground cover to visually frame the area and add charm.

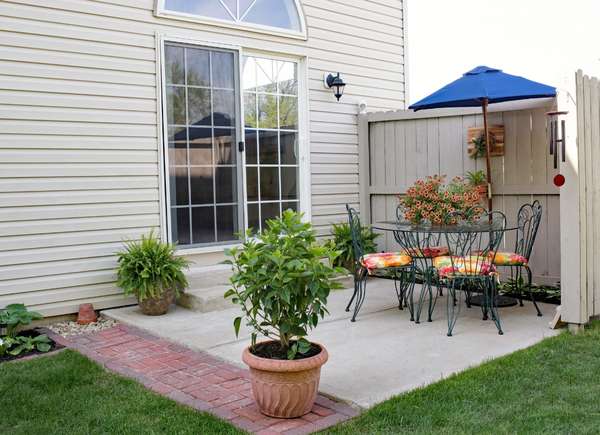
    14. Blending Concrete with Red Brick for a Stunning Patio

    Blending Concrete with Red Brick for a Stunning Patio

    Pairing concrete with red brick creates an eye-catching balance of textures and tones. This combination not only breaks up large patio areas but also introduces dynamic layers that elevate the overall design. Using both materials together brings contrast and character, transforming ordinary outdoor spaces into inviting retreats.

    Key Design Elements

    • Red brick infuses the space with cozy, timeless appeal
    • Concrete offers a sleek, contemporary backdrop
    • The mix is perfect for visually segmenting different functional areas

    Pro Tip: Incorporate red brick as edging or pathway details within a concrete layout to unify the patio’s look seamlessly.

    15. Elevated Concrete Patio Design

    Elevated Concrete Patio Design

    Perfect for homes with upper-level main living spaces, an elevated concrete patio offers a stylish outdoor retreat. Blending this raised platform with surrounding greenery and natural features enhances both its charm and functionality.

    Key Design Elements

    • Makes a bold architectural impression
    • Offers panoramic perspectives of your yard
    • Seamlessly integrates with layered garden designs and retaining structures

    Pro Tip: Enhance your elevated patio by adding built-in steps featuring contrasting textures like natural stone or warm wood to boost visual interest and uniqueness.

    16. Durable Concrete Planters

    Durable Concrete Planters

    Concrete planters provide excellent insulation during chilly seasons, helping to maintain a cozy environment for your plants’ roots. Their robust structure also acts as a safeguard, preventing water from seeping out and potentially harming your patio or the planter itself.

    Key Design Elements

    • Shields plant roots from harsh temperature fluctuations
    • Stops moisture from damaging adjacent patio areas
    • Customizable shapes and sizes to complement any outdoor layout

    Pro Tip: Create drainage holes at the bottom of your concrete planter to ensure excess water can escape, minimizing the risk of root rot.

    17. Sleek Rectangular Concrete Patio

    Sleek Rectangular Concrete Patio

    A rectangular concrete patio offers a versatile and contemporary look that fits well with a variety of garden aesthetics. This shape is particularly suited for minimalist outdoor areas, making it an excellent choice for creating comfortable dining spots or relaxing sunbathing zones.

    Key Design Elements

    • Ideal for maximizing narrow or elongated yard layouts
    • Provides ample space for outdoor dining and lounging furniture
    • Straight edges enhance the appeal of modern home designs

    Pro Tip: Align the patio’s length parallel to your home’s facade to visually expand the width of your outdoor space.

    18. Dual-Tone Concrete Pavers for Enhanced Patio Appeal

    Dual-Tone Concrete Pavers for Enhanced Patio Appeal

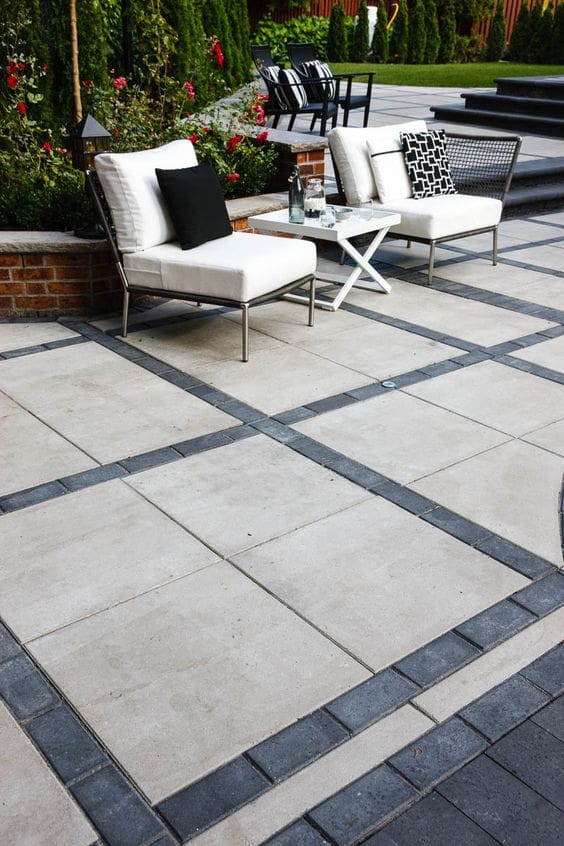
    Incorporating concrete pavers with two complementary shades elevates the patio’s aesthetic by adding subtle layers of visual intrigue. Choosing neutral hues ensures the design remains understated, allowing your outdoor furnishings and decor to shine as the central features.

    Key Design Elements

    • Creates a rich, textured surface that feels inviting yet balanced
    • Versatile color palette that pairs effortlessly with diverse furniture styles
    • Effectively conceals dirt and wear, maintaining a fresh appearance longer

    Pro Tip: For an elegant and budget-friendly flair, arrange alternating light and dark pavers in patterns like checkerboard or herringbone to instantly uplift your outdoor space.

    19. Brighten Your Outdoor Area with White Concrete Slabs

    Brighten Your Outdoor Area with White Concrete Slabs

    Incorporating white concrete slabs into your patio design instantly elevates the space with a clean, contemporary vibe. This light hue not only enhances the sense of openness but also amplifies natural light, making your outdoor area feel larger and more inviting. Just as lighter colors can transform compact indoor rooms, white paving is equally effective in creating airy, spacious outdoor retreats.

    Key Design Elements

    • Enhances the feeling of spaciousness and light
    • Complements sleek, modern, and minimalist decor styles
    • Reflects heat to keep the patio cool and comfortable

    Pro Tip: Apply a quality sealant to your white concrete slabs every year to guard against stains and maintain their pristine appearance.

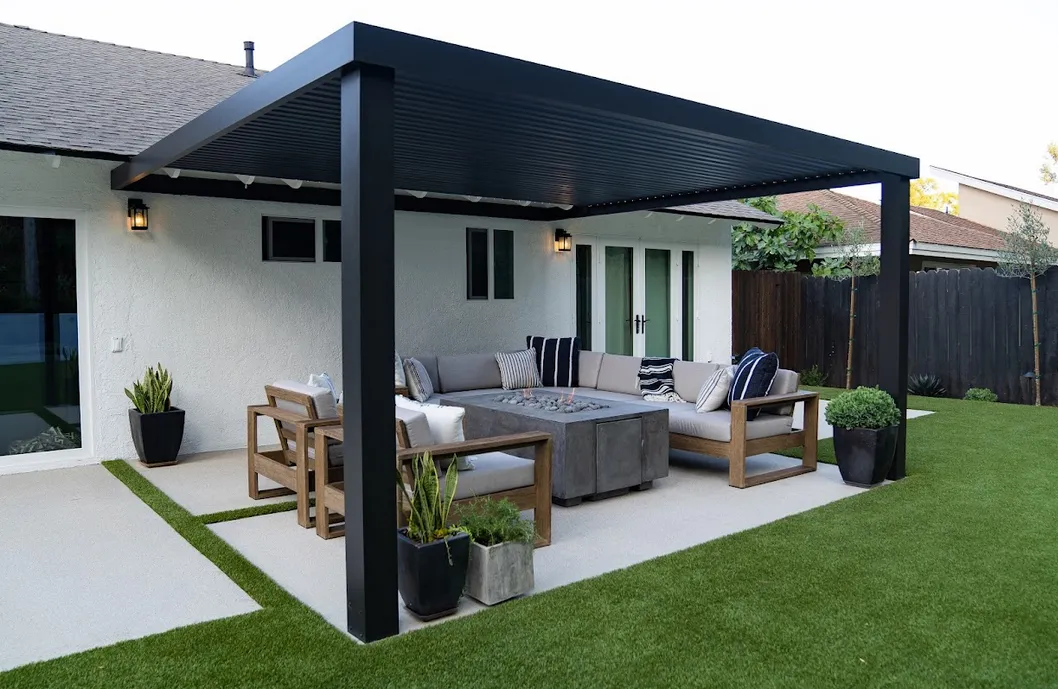
    20. Modern Patio Design with Concrete Pavers and Synthetic Grass

    Modern Patio Design with Concrete Pavers and Synthetic Grass

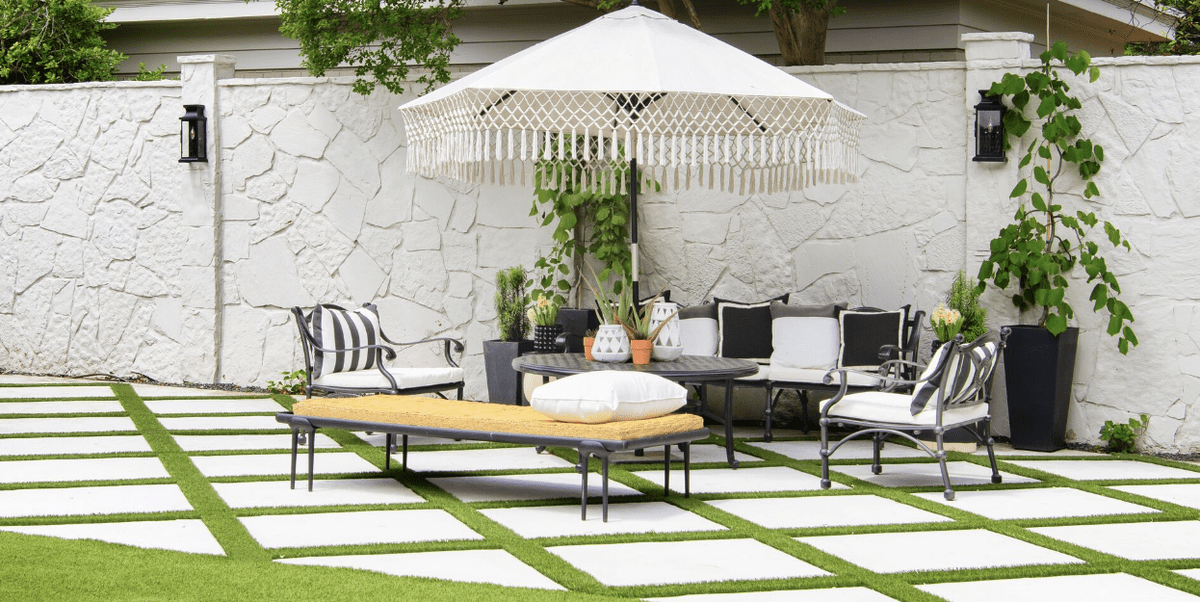
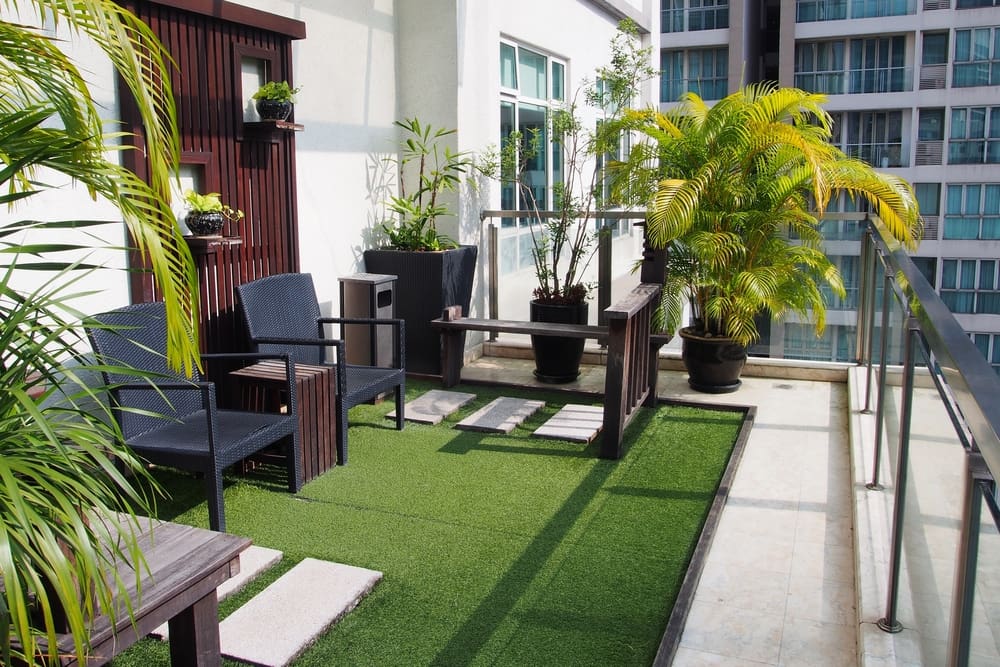
    Combining sleek concrete pavers with vibrant synthetic grass creates a stylish and inviting outdoor space. This duo offers durability, minimal upkeep, and a fresh aesthetic that transforms ordinary patios into standout retreats.

    Key Design Elements

    • Requires minimal upkeep—no need for mowing or frequent watering
    • Maintains a lush, green appearance throughout every season
    • Balances the rigidity of pavers with the softness of turf for visual appeal

    Pro Tip: Opt for synthetic grass with a pile height between 1.5 and 2 inches to achieve a natural and realistic look.

    Conclusion

    Transforming your outdoor space doesn’t have to come with a hefty price tag or endless hassle. With concrete’s incredible versatility, durability, and budget-friendly nature, you have the perfect foundation to unleash your creativity and craft a patio that reflects your unique style. Whether you prefer sleek modern lines, rustic textures, or intricate patterns, concrete can bring your vision to life while standing strong against the elements for years to come.

    Now is the time to take that first step toward elevating your backyard into a beautiful, functional retreat. Embrace the endless possibilities concrete offers and watch as your outdoor space becomes a welcoming haven for relaxation, gatherings, and memorable moments. With some inspiration and a bit of effort, you can transform your patio into a stunning extension of your home—proving that affordable, long-lasting beauty is well within your reach.

  • Top 20 Stunning Artificial Turf Designs to Elevate Your Poolside Area

    As of 2023, the United States boasts around 10.4 million residential swimming pools, highlighting their enduring popularity among homeowners. Beyond providing a refreshing retreat, pools can also enhance property values, with estimates indicating they can increase a home’s worth by as much as 7%. This investment not only elevates outdoor living but also adds tangible financial benefits.

    When it comes to installation, the average price for an in-ground pool stands at approximately $35,000, reflecting a significant commitment to creating a personal oasis. Alongside pools, many homeowners are turning to artificial turf as an appealing landscaping solution. This low-maintenance alternative offers the charm of lush greenery without the upkeep, seamlessly blending practicality with aesthetic appeal in modern backyard design.

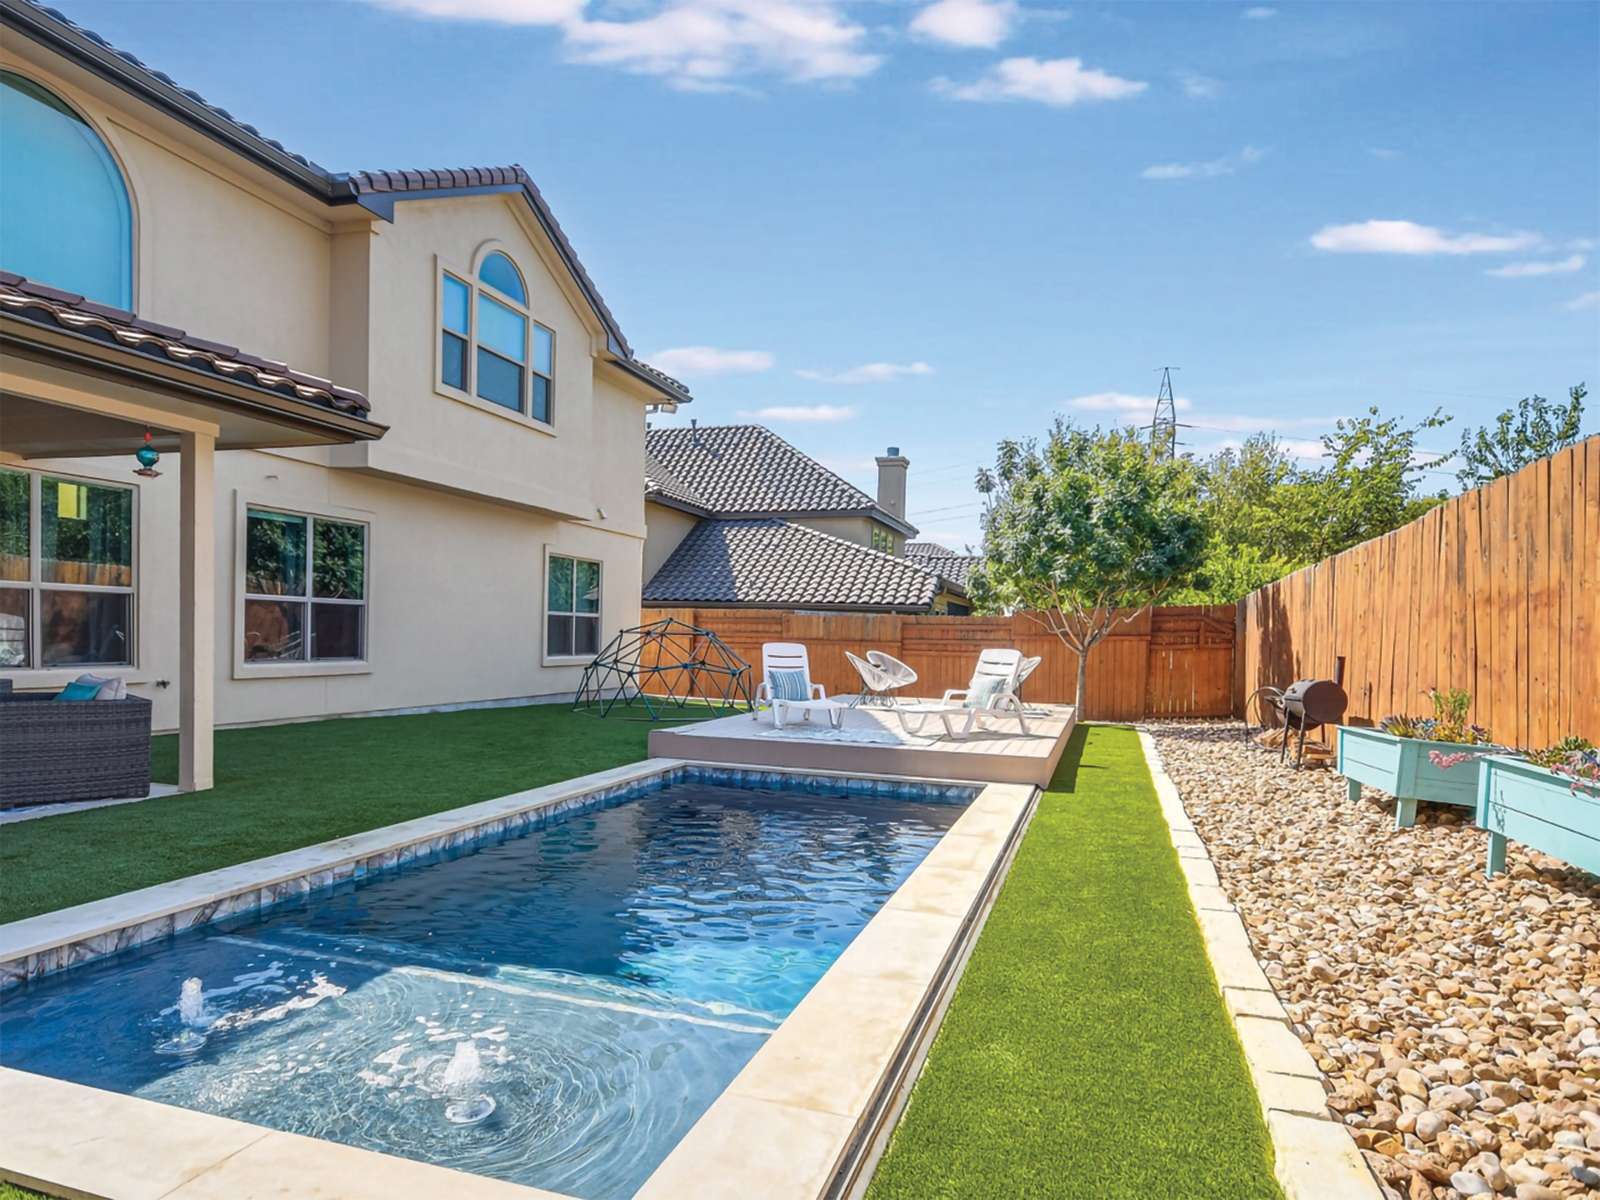
    1. Elegant Pool Surroundings Featuring Synthetic Grass and Decorative Rocks

    Elegant Pool Surroundings Featuring Synthetic Grass and Decorative Rocks

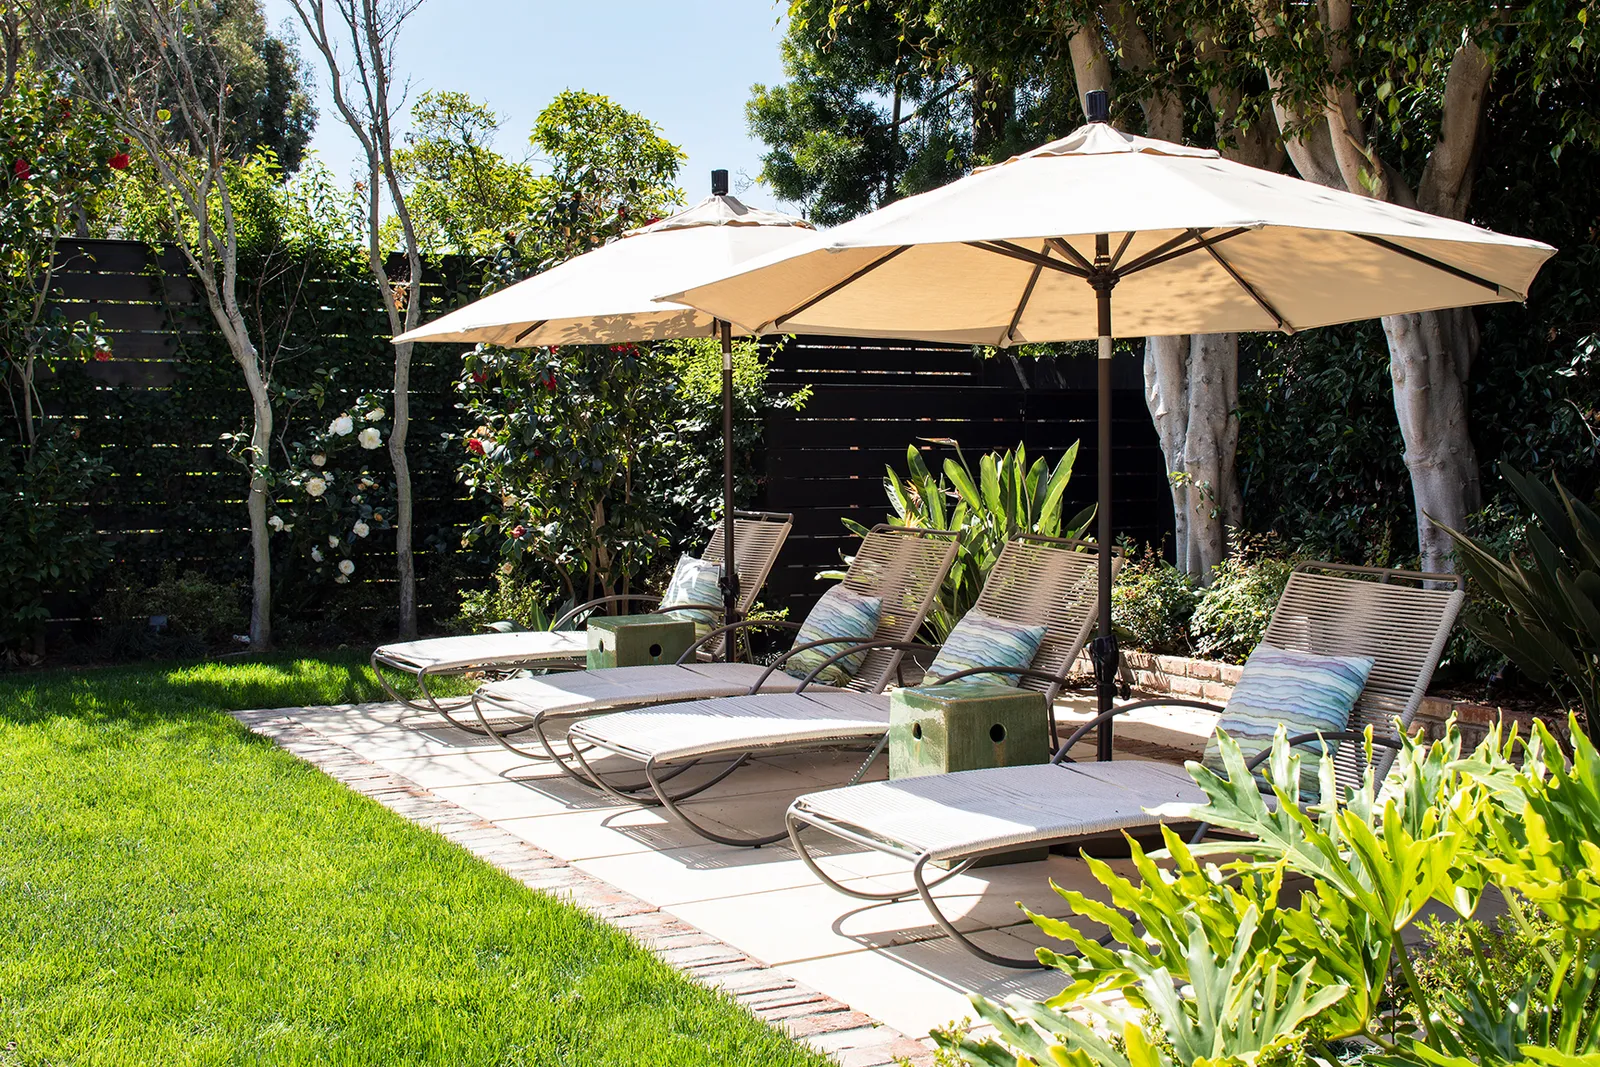
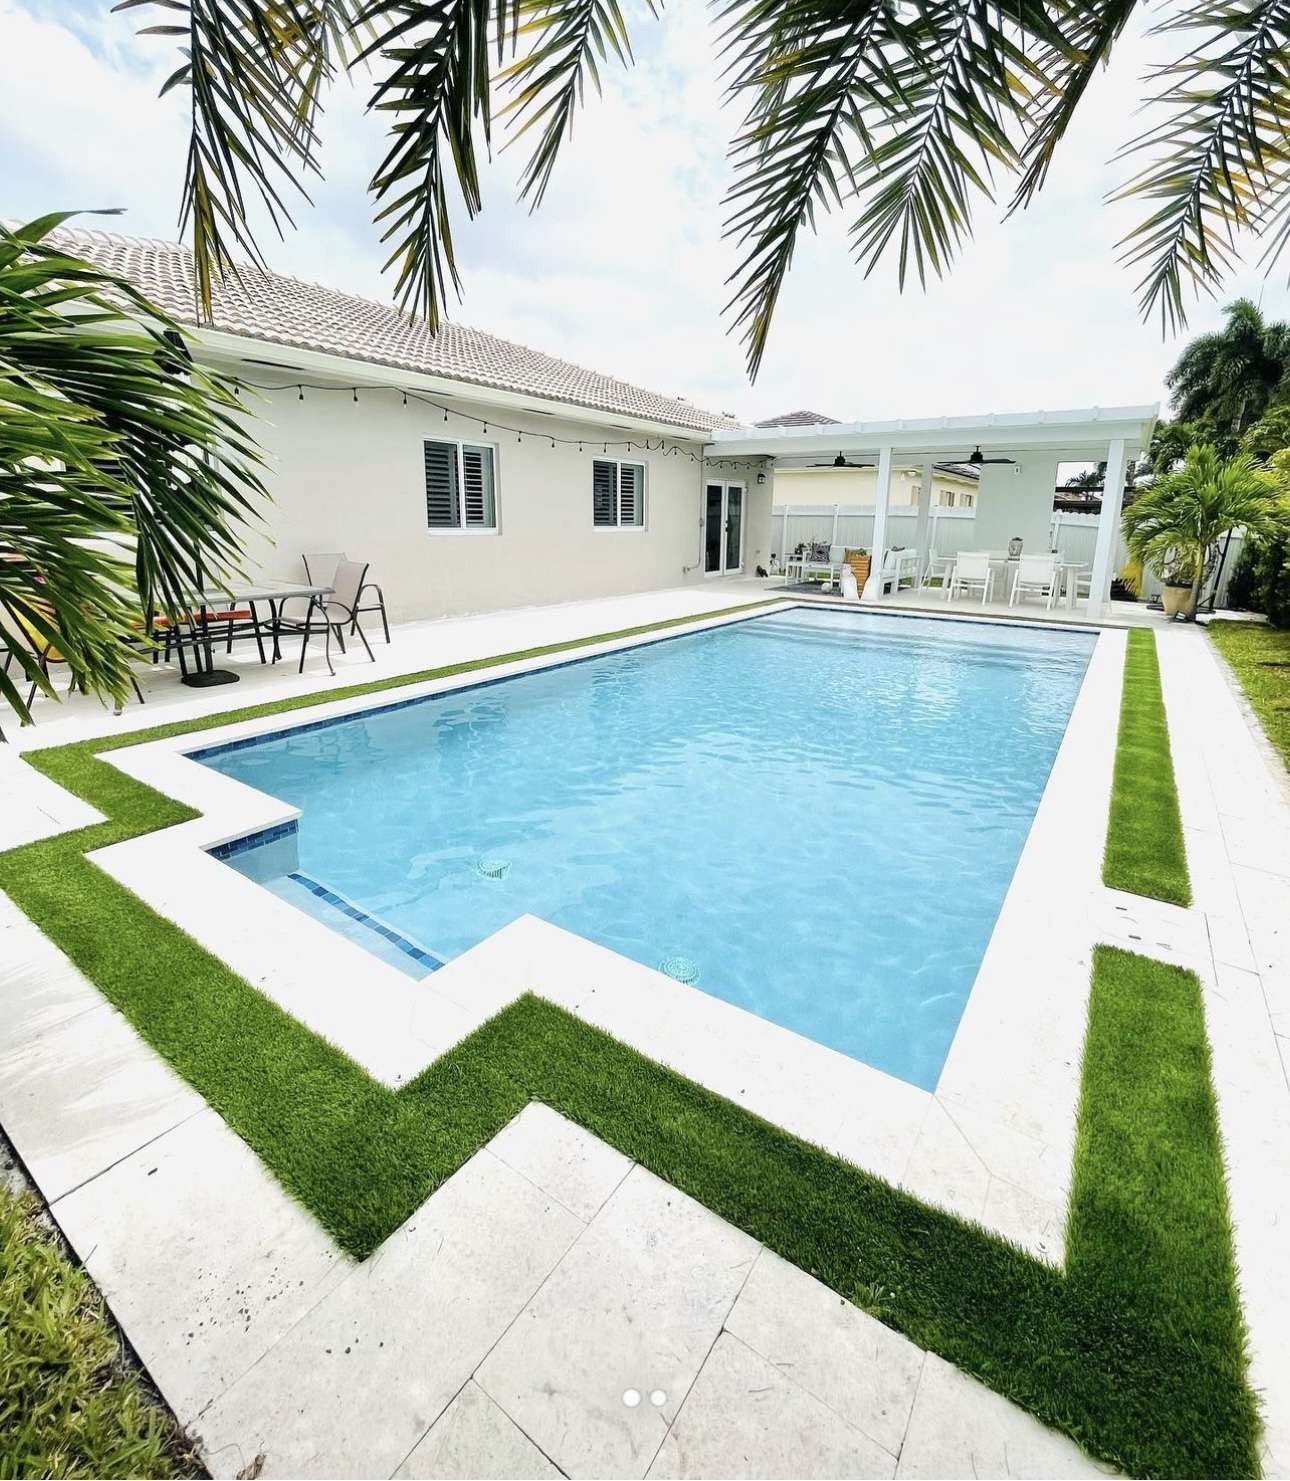
    Incorporating decorative rocks around a pool area enhances visual interest while complementing synthetic grass for a fresh, natural vibe. This design approach blends practicality with aesthetic appeal, perfect for any backyard setting.

    Key Design Elements

    • Adds a rich, natural texture to pool edges
    • Requires minimal upkeep for busy homeowners
    • Ideal for maximizing style in compact pool spaces

    Pro Tip: Opt for smooth river stones in earthy shades to seamlessly blend with various artificial turf colors.

    2. Modern Poolside Paving Concepts

    Modern Poolside Paving Concepts

    Incorporating vibrant artificial turf adds a refreshing, modern touch to pool areas. Pair it with colorful pavers and cozy seating to create an inviting outdoor retreat.

    Key Design Elements

    • Enhances pool area with vivid pavers
    • Perfect for sleek, contemporary patios
    • Incorporates inviting, comfortable seating

    Pro Tip: Opt for durable, weatherproof furniture to match the easy-care qualities of synthetic grass.

    3. Inclined Pool Paired with Artificial Grass

    Inclined Pool Paired with Artificial Grass

    Transform your sloping backyard with a pool design that combines functionality and style. This approach brings a sleek, modern vibe while addressing terrain challenges.

    Key Design Elements

    • Ideal solution for uneven or slanted landscapes
    • Synthetic grass helps prevent soil erosion on slopes
    • Creates a refined and low-maintenance outdoor space

    Pro Tip: Install an efficient drainage system under the artificial turf to avoid water accumulation and maintain turf longevity.

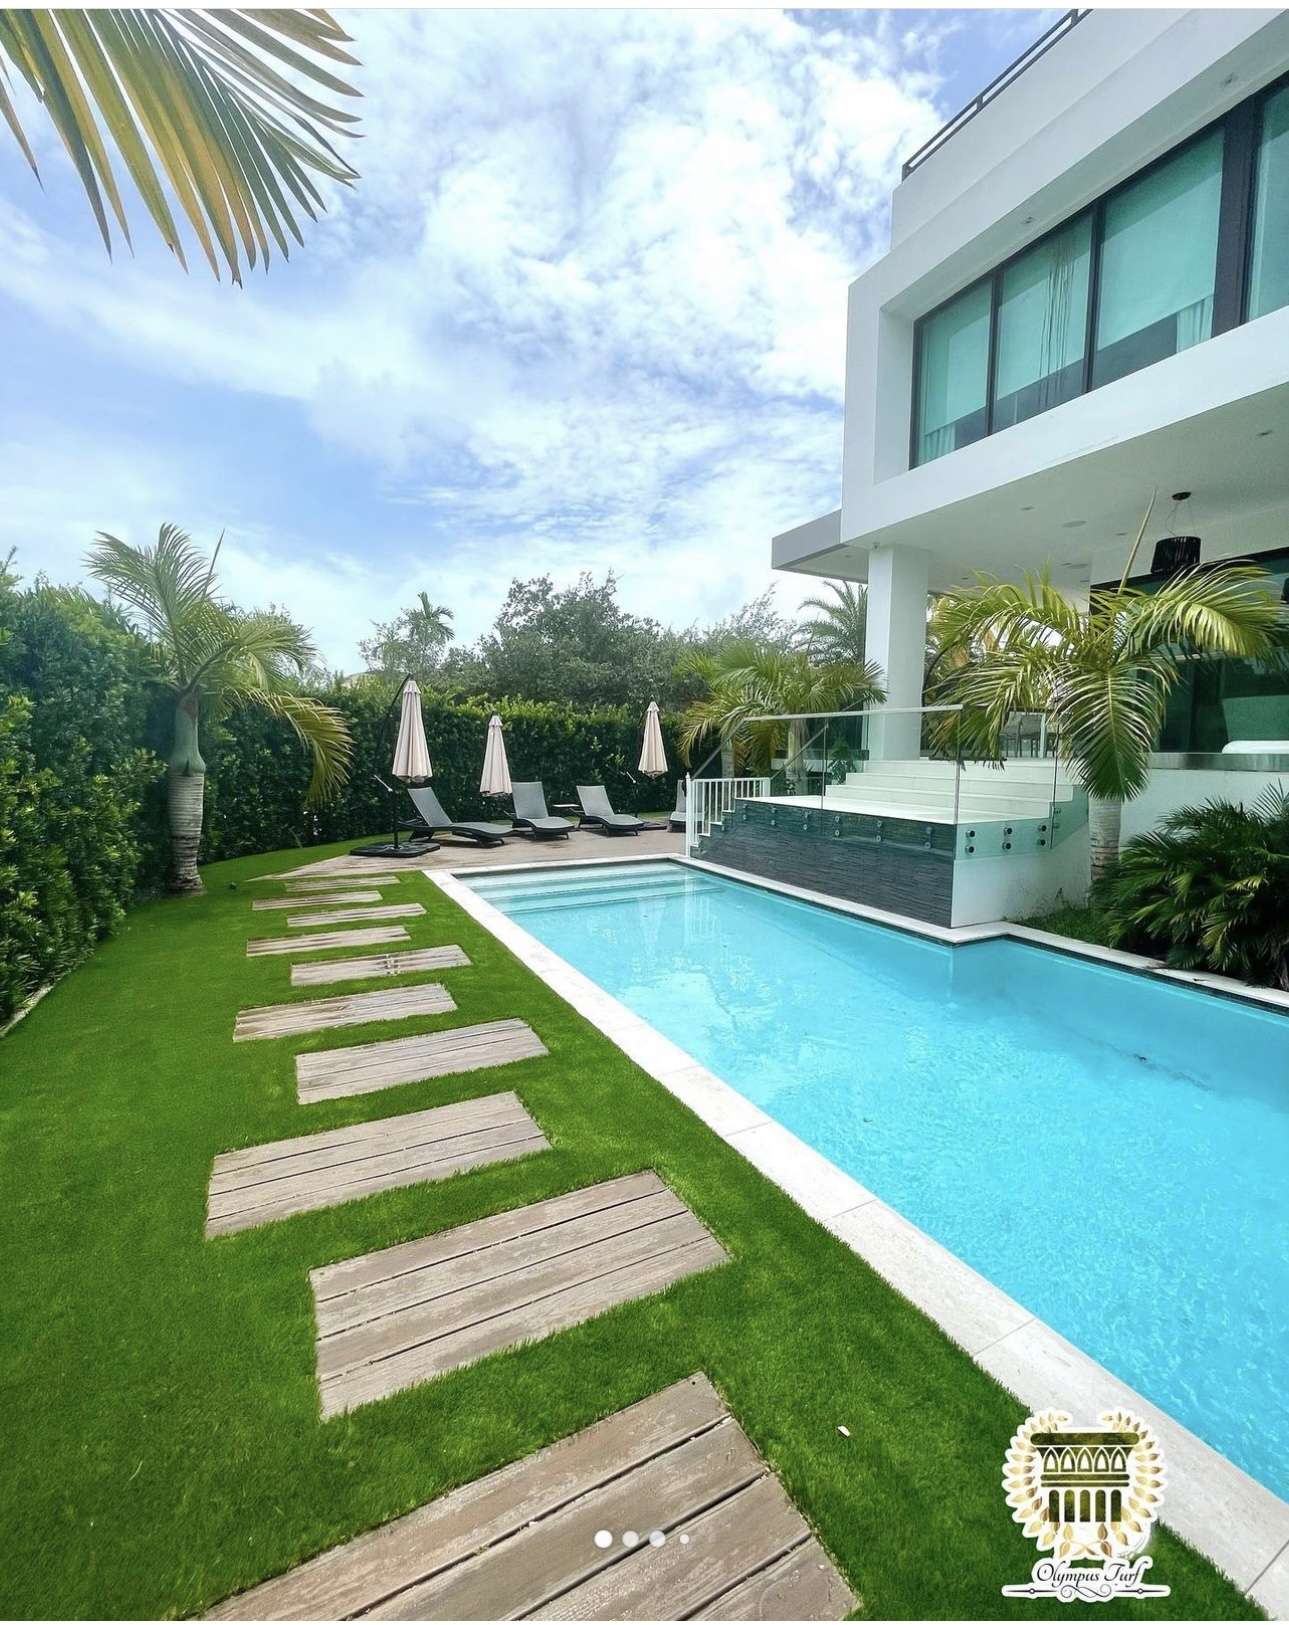
    4. Artificial Grass with Wooden Walkways

    Artificial Grass with Wooden Walkways

    Incorporate wooden pavers alongside synthetic grass to create a stunning and inviting pool area. This blend offers a cozy ambiance while ensuring easy maintenance and year-round greenery.

    Key Design Elements

    • Wooden walkways provide a rustic, warm touch
    • Synthetic turf offers a lush, green contrast
    • Harmonious fusion of natural textures and durability

    Pro Tip: Opt for composite wood materials to prevent moisture-related issues and extend the lifespan of your poolside pathways.

    5. Geometric Diamond Pattern Pool Decking

    Geometric Diamond Pattern Pool Decking

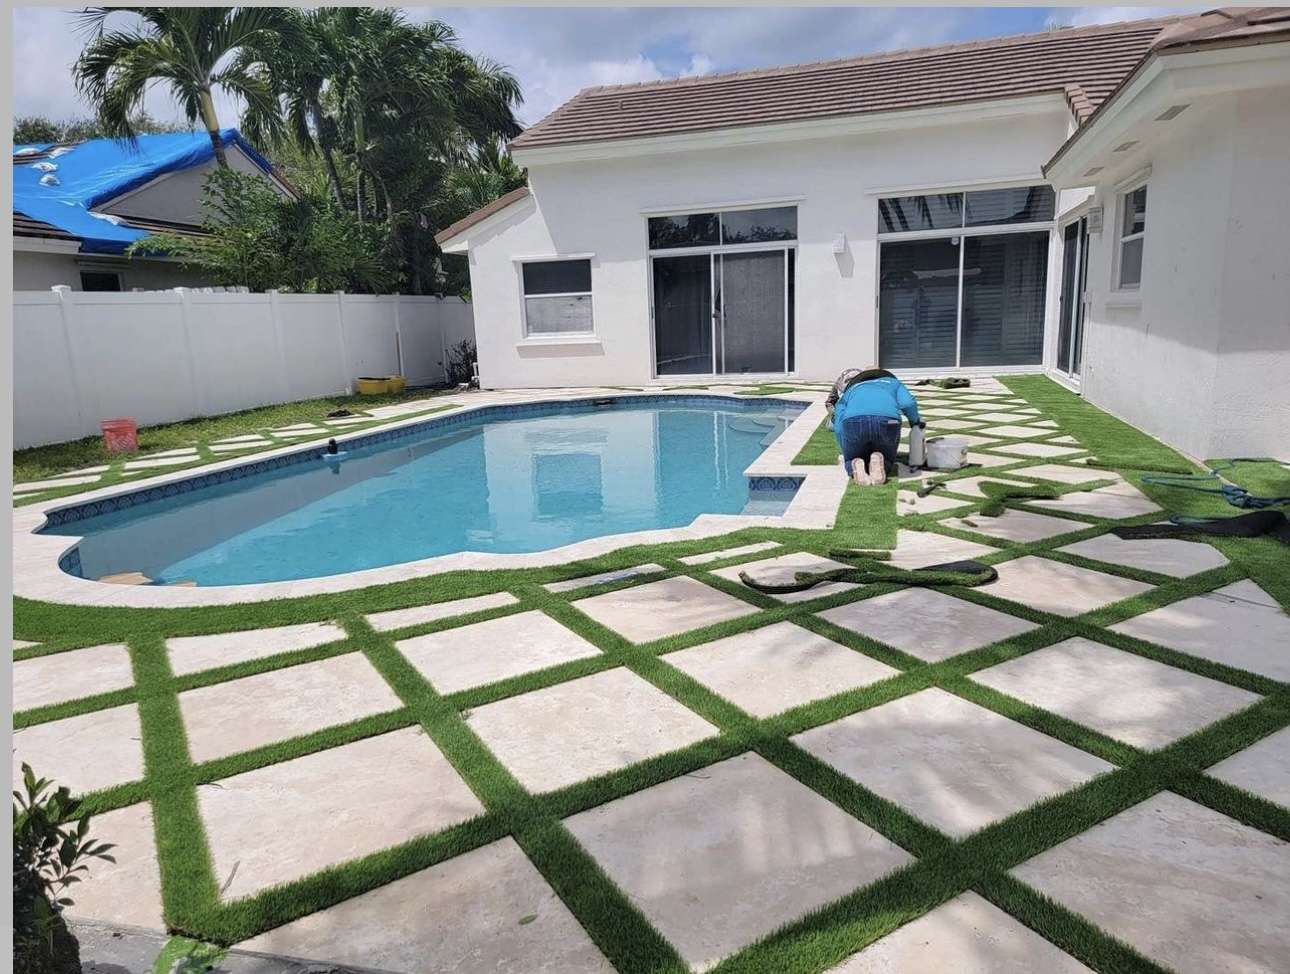
    Elevate your poolside space with a striking diamond-patterned layout that blends natural limestone and synthetic grass. This stylish design brings a contemporary vibe while ensuring hassle-free upkeep. It’s perfect for those seeking a chic yet practical outdoor area.

    Key Design Elements

    • Features a blend of natural limestone and artificial grass
    • Creates a sleek, geometric look
    • Requires minimal maintenance for long-lasting beauty

    Pro Tip: Enhance visual impact by selecting contrasting shades for the limestone and turf to highlight the diamond shapes.

    6. Contemporary Freeform Pool Design

    Contemporary Freeform Pool Design

    Incorporate unique, freeform shapes to bring character and a contemporary vibe to your outdoor space. This approach delivers a striking look that remains elegant and effortless.

    Key Design Elements

    • Natural curves create a fluid appearance
    • Landscaping complements the pool’s organic lines
    • Sophisticated design with an artistic flair

    Pro Tip: Coordinate with your landscaper to custom-trim the turf around the pool’s perimeter for a polished and cohesive look.

    7. Classic Checkerboard Pool Decking

    Classic Checkerboard Pool Decking

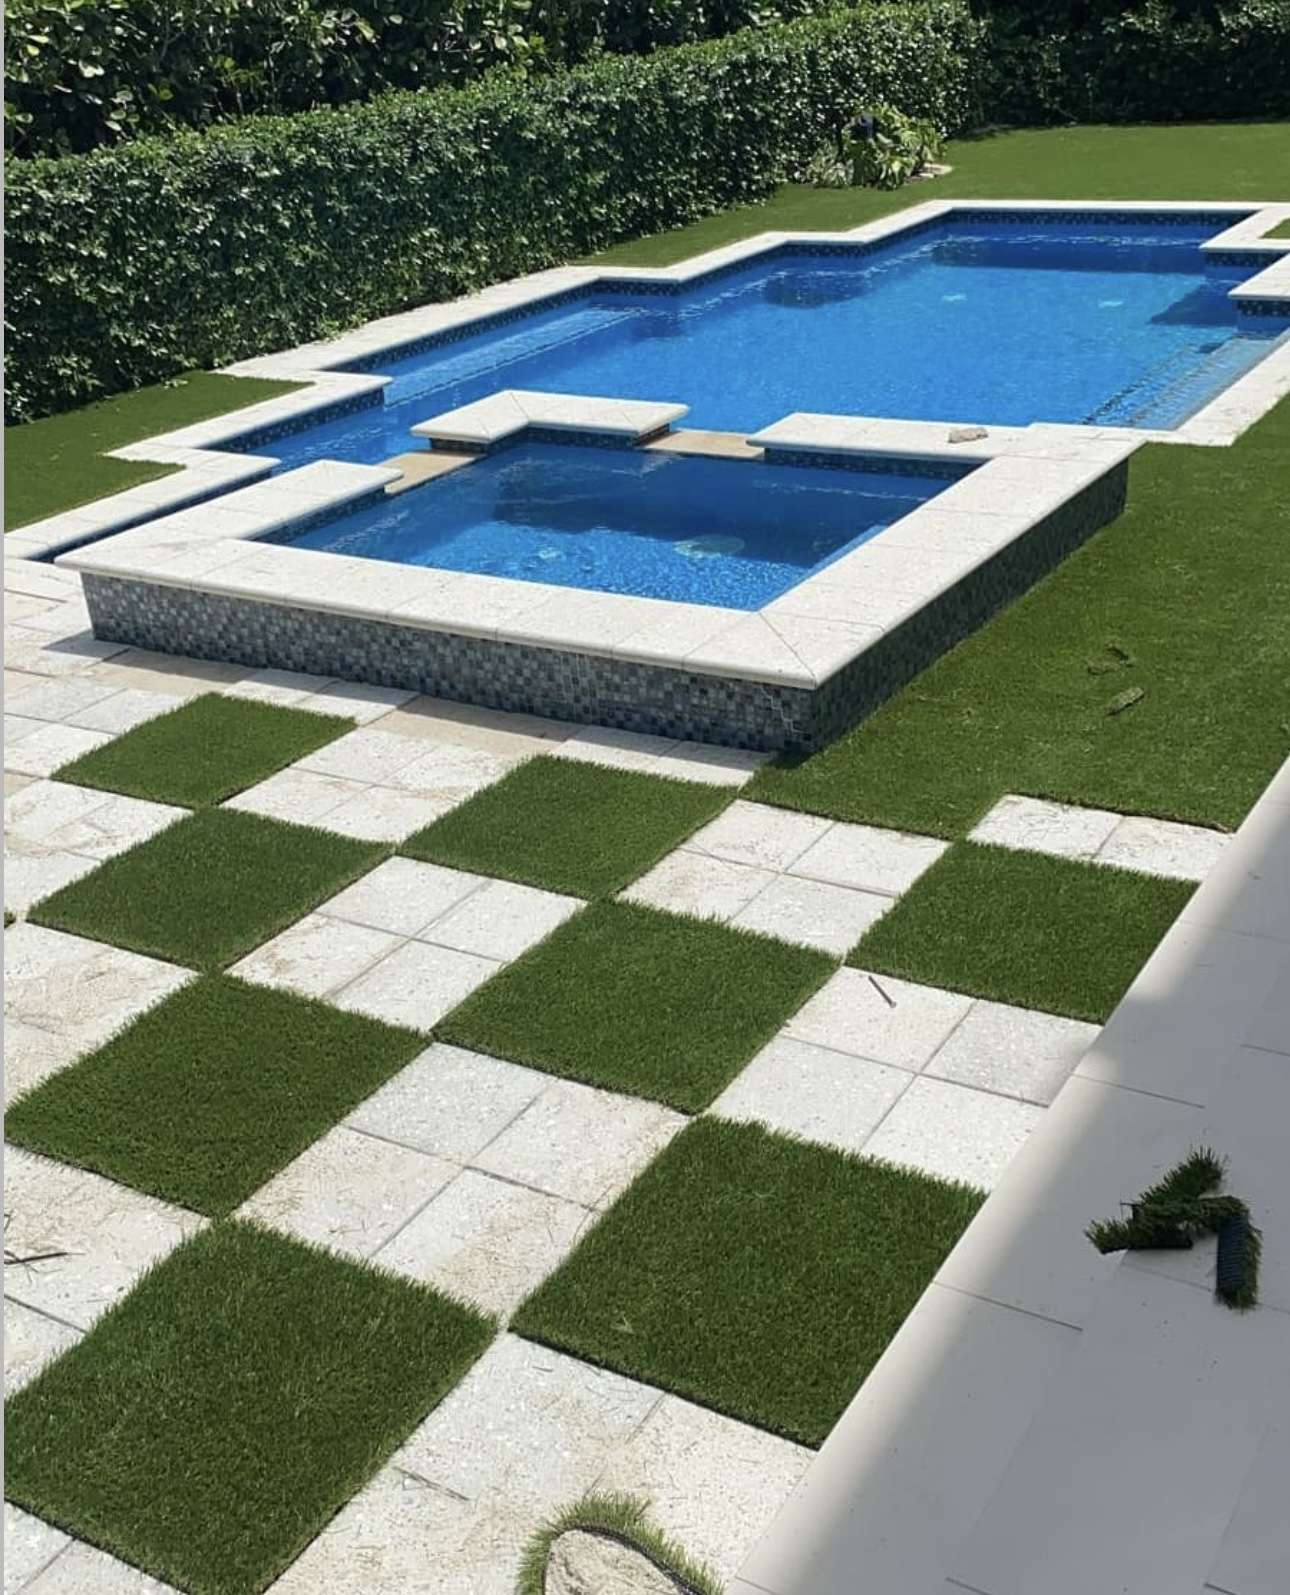
    The checkerboard design remains a popular choice due to its clean, versatile look that complements various pool styles. Its timeless appeal brings a playful yet modern touch to any outdoor space.

    Key Design Elements

    • Enduring checkerboard style fits all pool designs
    • Seamlessly combines pavers and grass for texture
    • Simple to install and customize with different materials

    Pro Tip: Choose light-colored pavers like white or pale grey to highlight the vibrant green of surrounding turf for maximum visual impact.

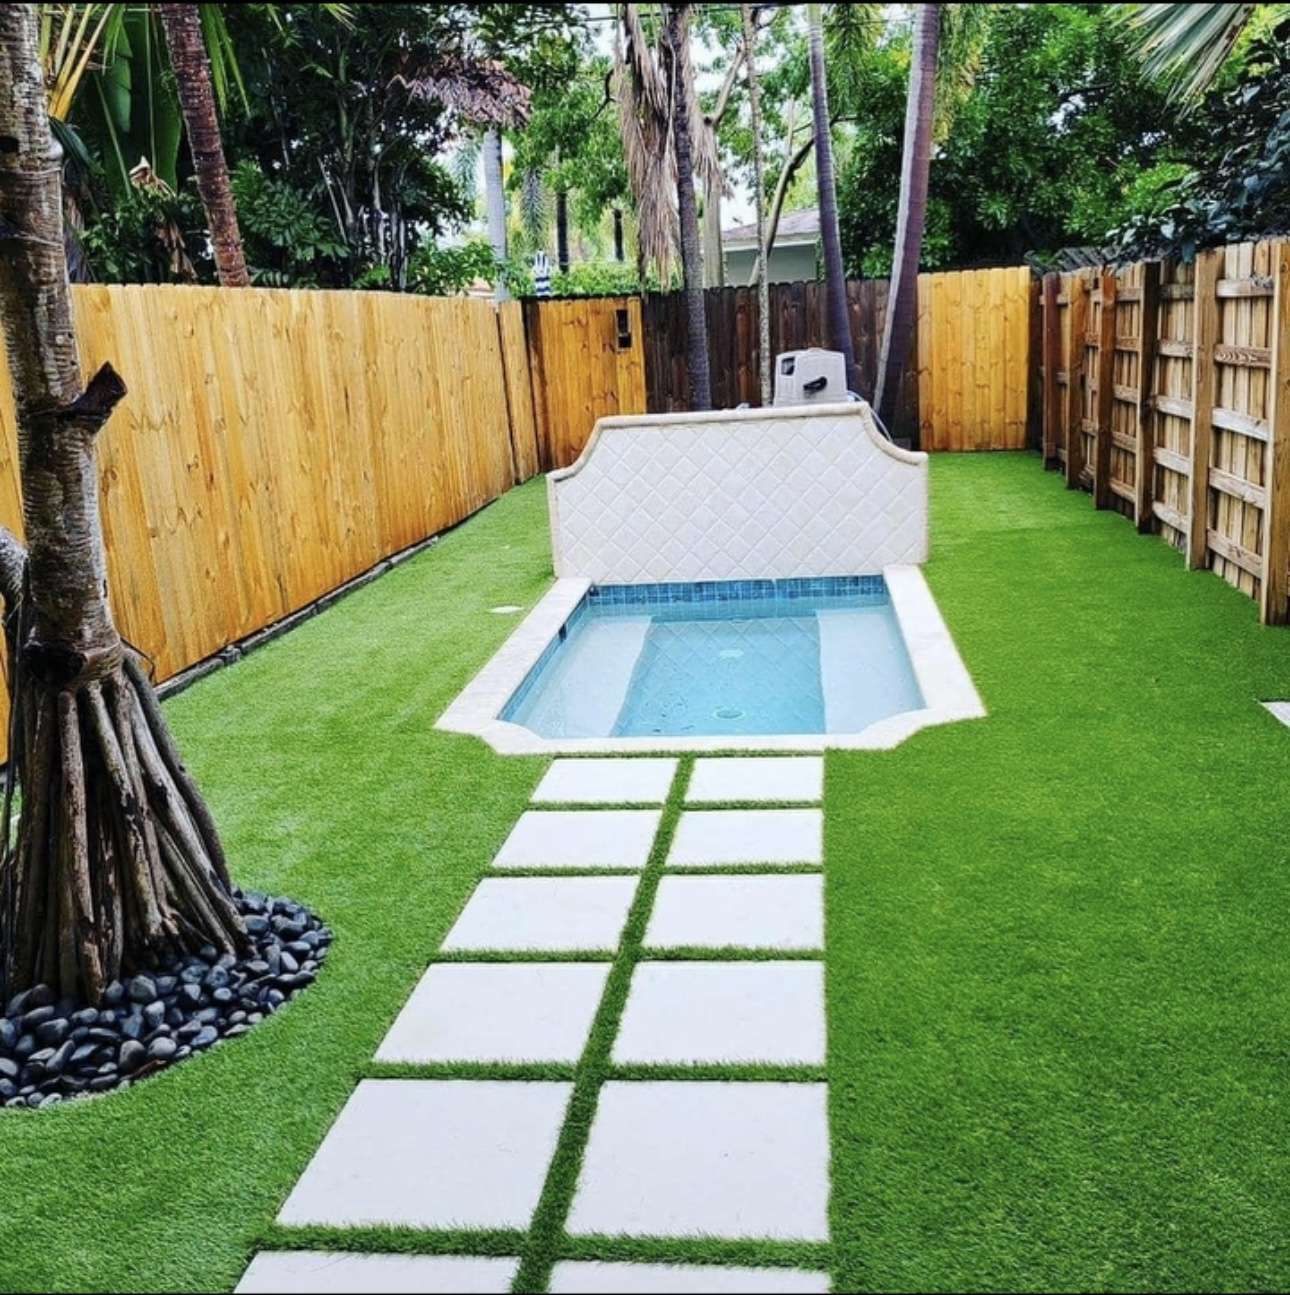
    8. Compact Backyard Pool Oasis

    Compact Backyard Pool Oasis

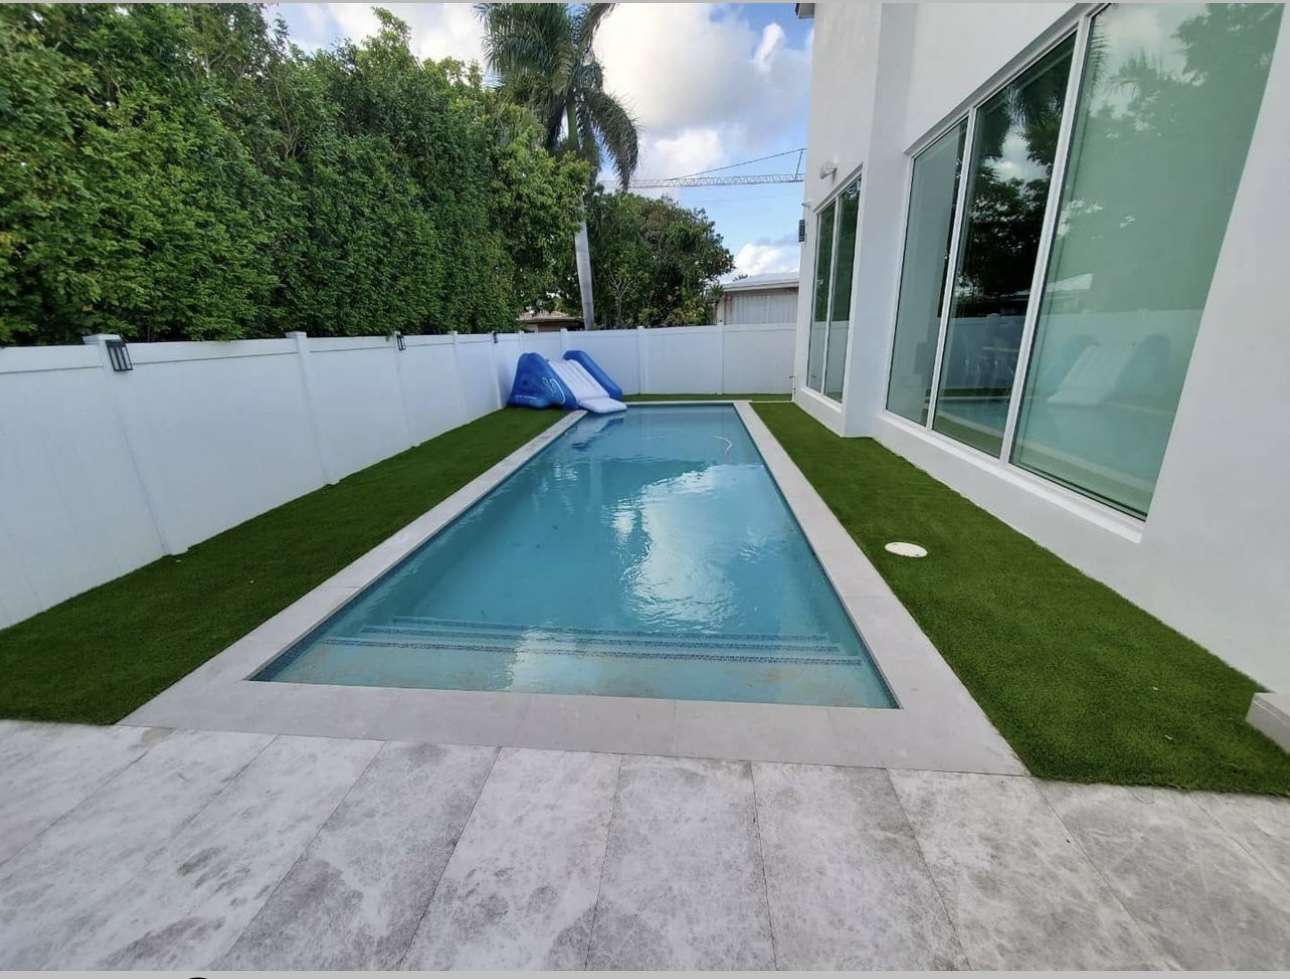
    Enhance your limited outdoor space with premium synthetic grass that delivers both style and function. This versatile option seamlessly integrates with current surfaces, including soil and concrete, transforming your small yard into a refreshing retreat.

    Key Design Elements

    • Compatible with concrete and natural ground
    • Optimizes limited outdoor areas
    • Introduces lively greenery to confined spaces

    Pro Tip: Select artificial turf with lower pile height to maintain a balanced and natural appearance in tight areas.

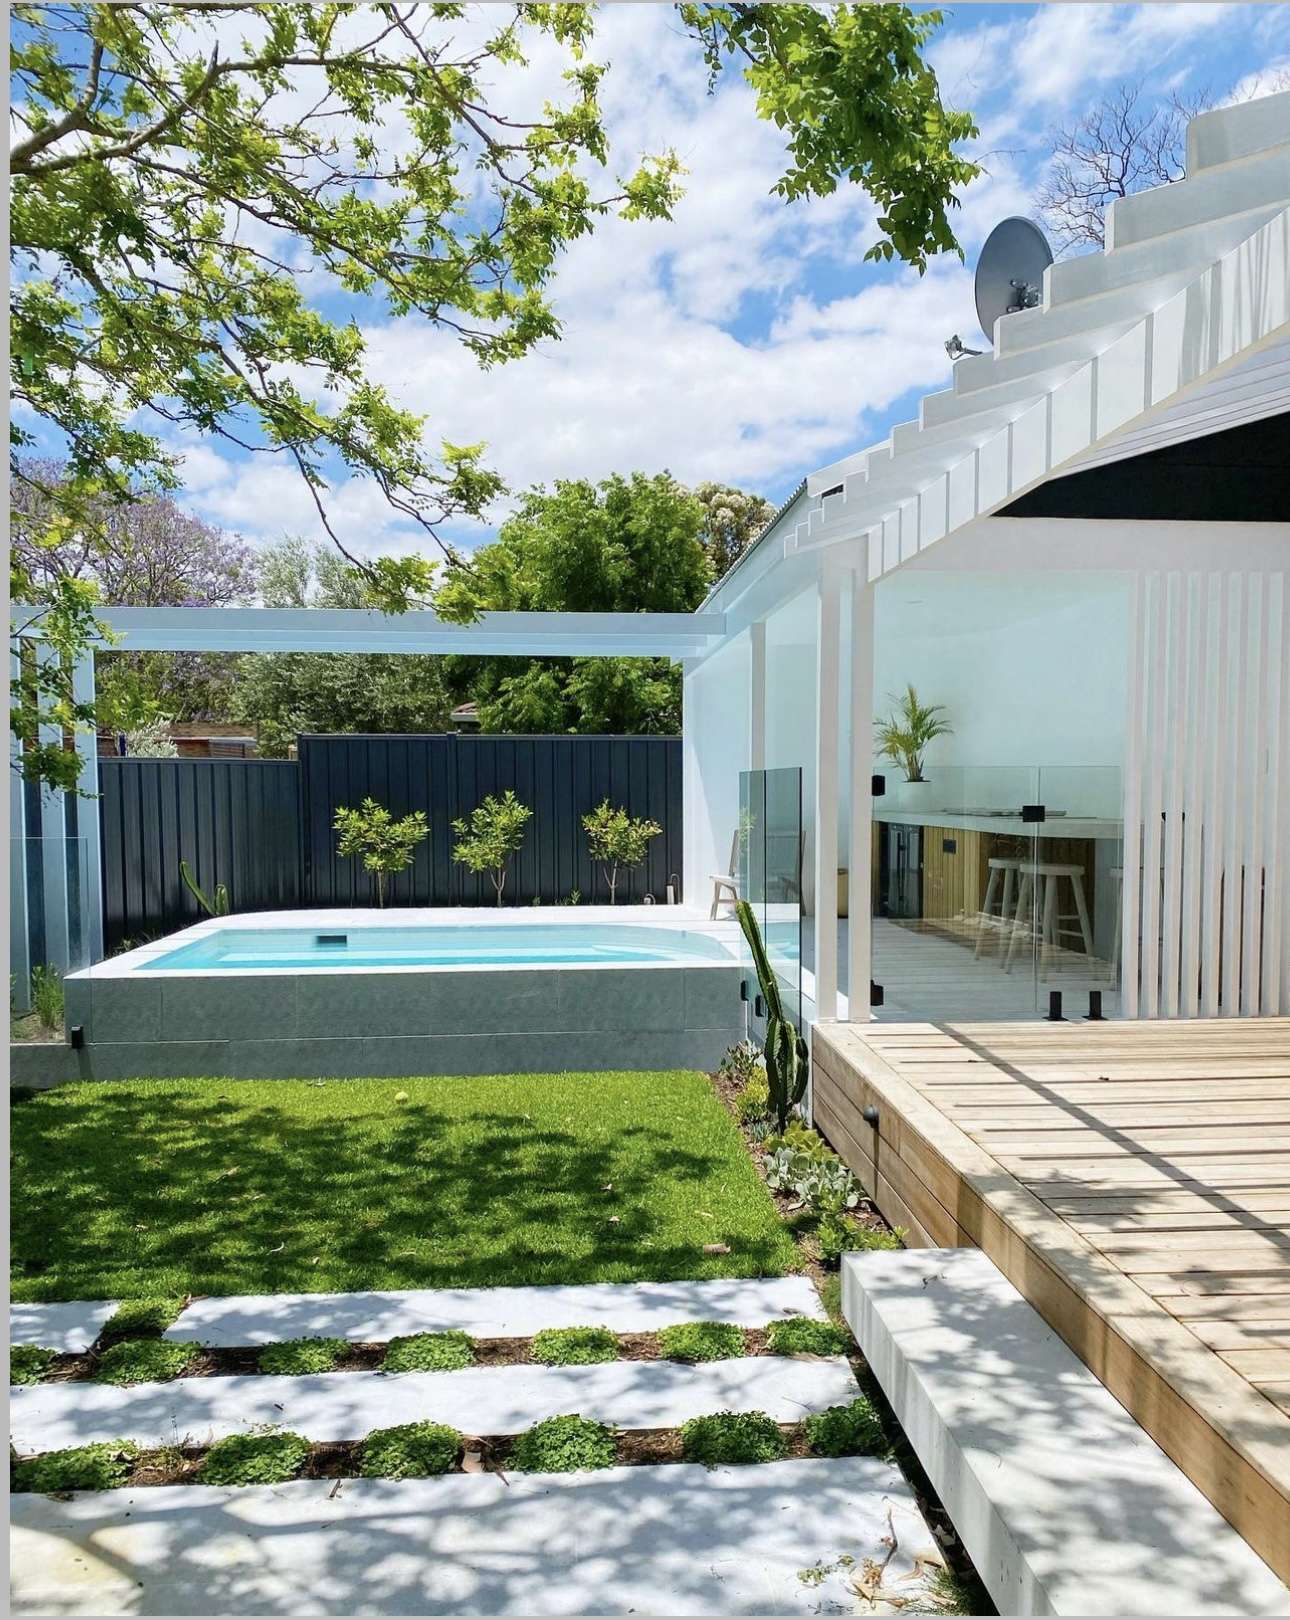
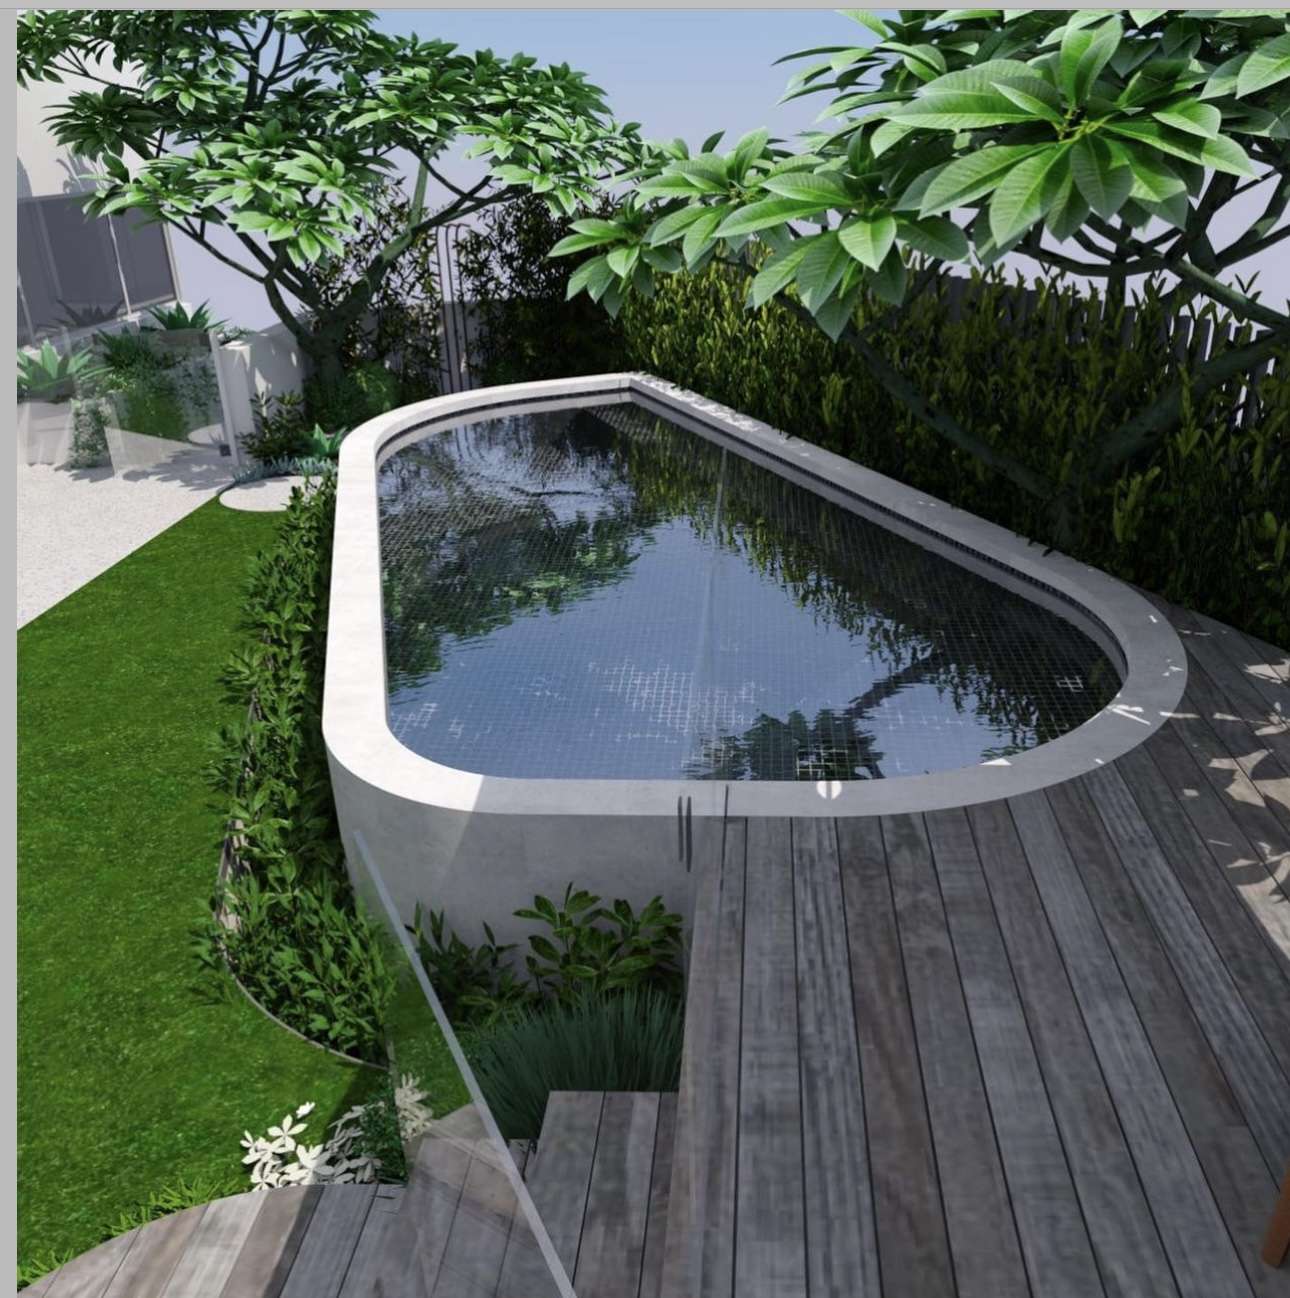
    9. Compact Zen Plunge Pool

    Compact Zen Plunge Pool

    Elevate your outdoor area with this chic Zen-inspired plunge pool featuring a raised wooden deck complemented by synthetic turf. Ideal for creating a tranquil and refined ambiance in limited spaces.

    Key Design Elements

    • Raised wooden deck combined with durable artificial turf
    • Minimalist design emphasizing calm and simplicity
    • Perfect solution for cozy outdoor environments

    Pro Tip: Incorporate tall bamboo planters around the pool to amplify the peaceful, Zen vibe.

    10. Gravel and Synthetic Turf Pool Surrounds

    Gravel and Synthetic Turf Pool Surrounds

    Combining gravel with synthetic turf creates a stylish and functional poolside environment. Gravel’s natural drainage properties prevent water buildup, ensuring a dry and safe area around your pool.

    Key Design Elements

    • Excellent drainage prevents water accumulation
    • Creates a clean, mud-free pool perimeter
    • Affordable and straightforward to lay down

    Pro Tip: Opt for pea gravel to add a cushioned feel that’s gentle on bare feet.

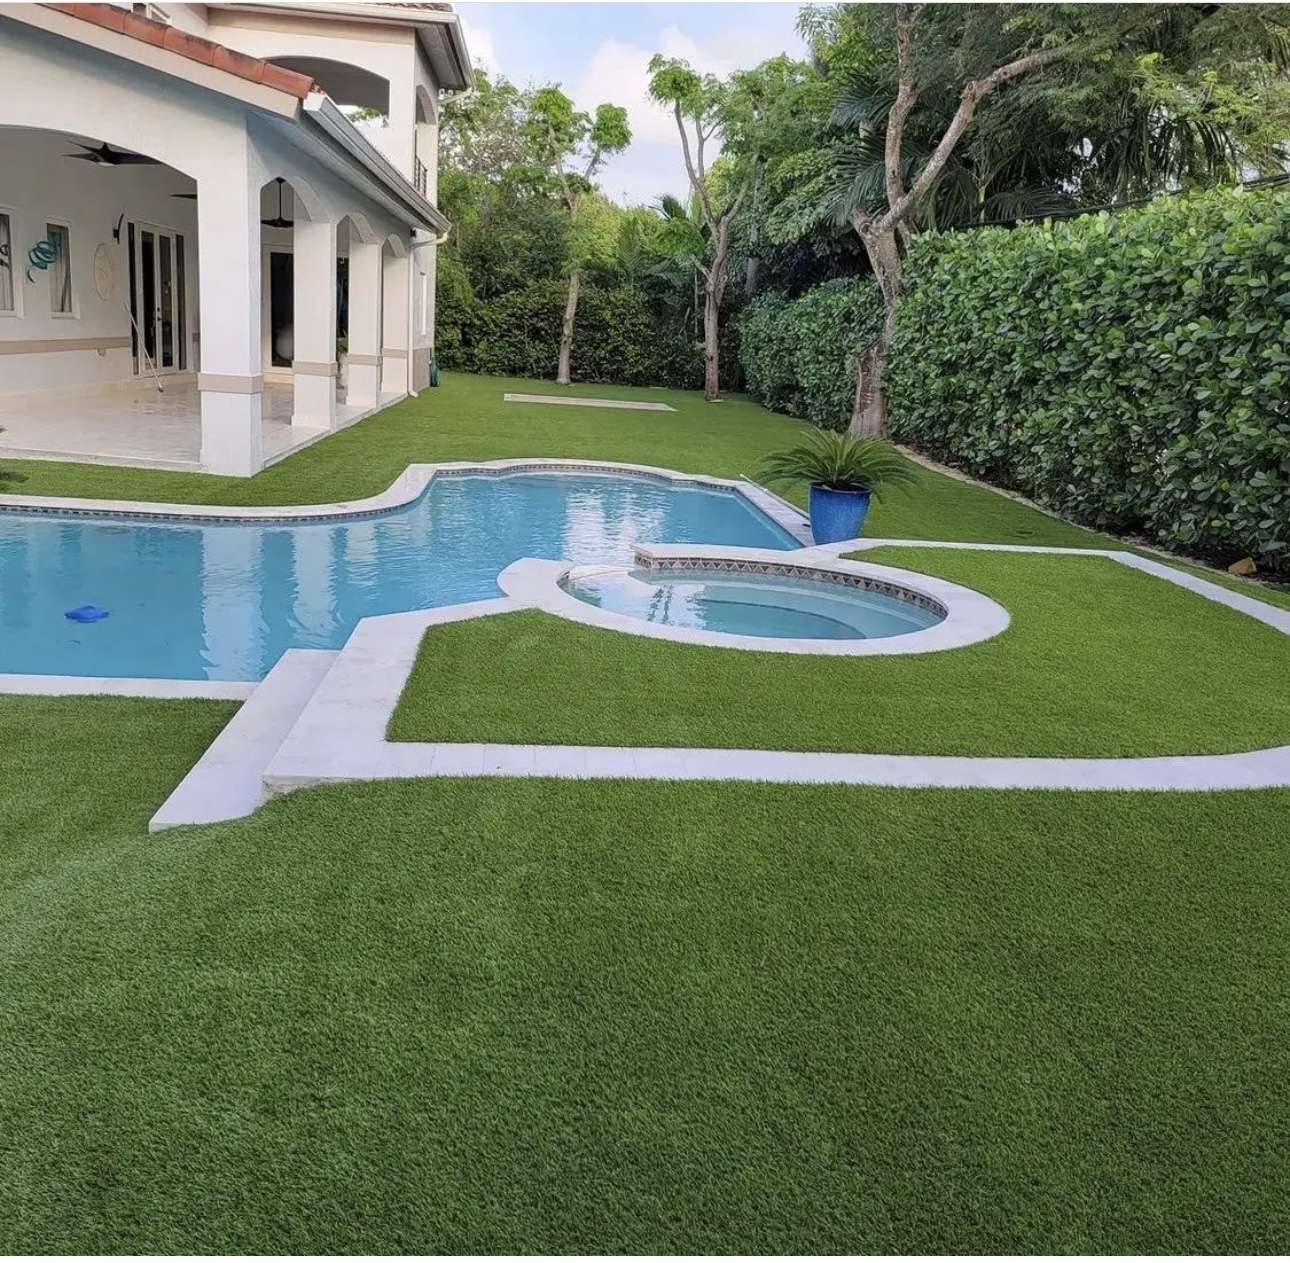
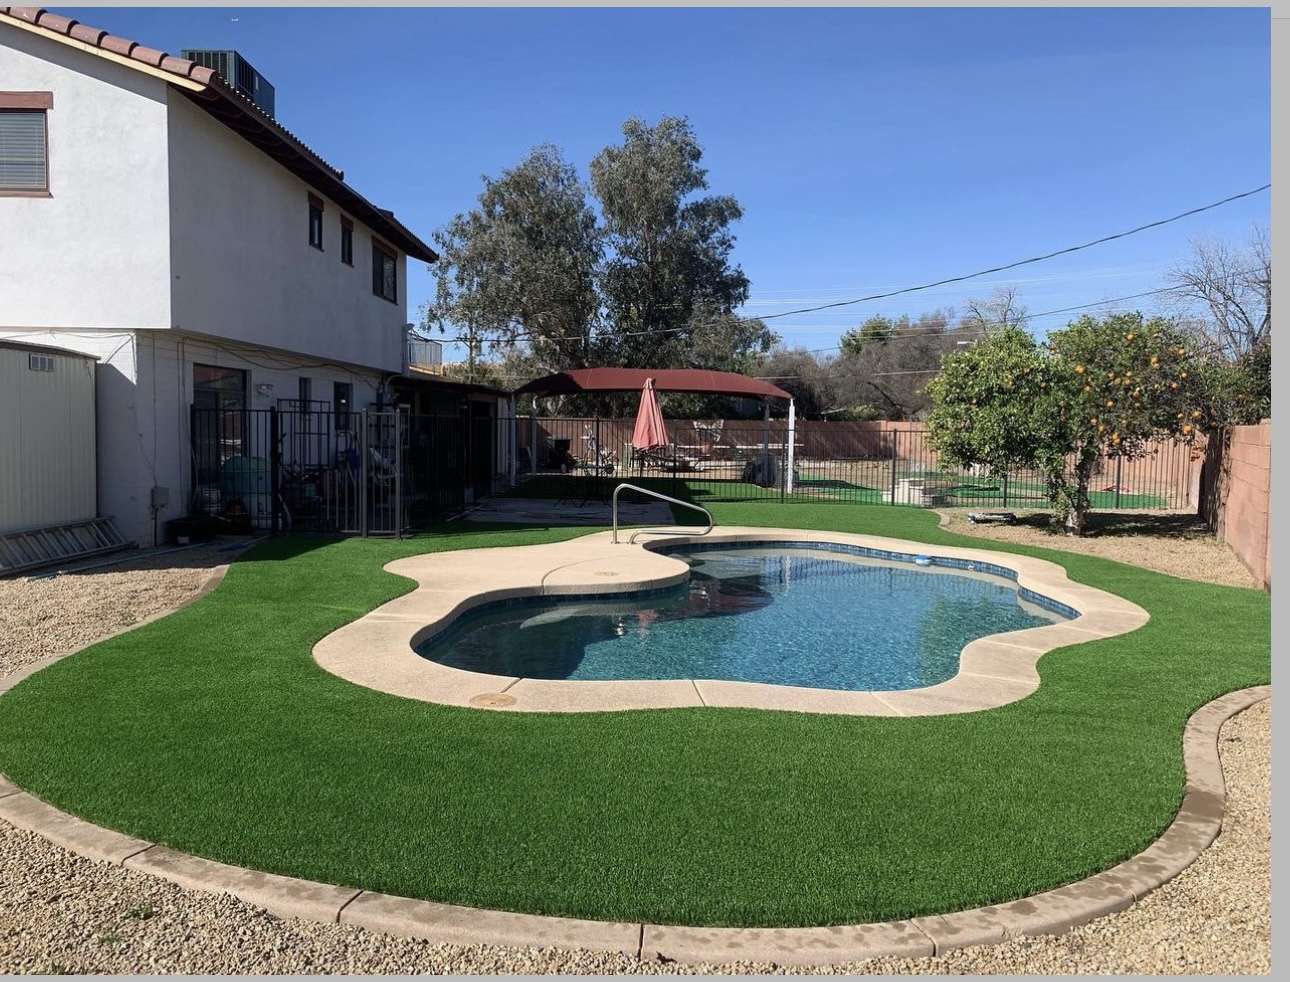
    11. Organic-Shaped Pool with Artificial Grass

    Organic-Shaped Pool with Artificial Grass

    Enhance your pool area by surrounding it with artificial grass that follows the pool’s unique contours. This approach harmonizes the landscape and adds a soft, natural touch to your outdoor space.

    Key Design Elements

    • Artificial grass tailored to match pool’s irregular outline
    • Provides seamless integration between pool and yard
    • Ideal for pools with freeform or non-traditional shapes

    Pro Tip: Choose artificial turf featuring subtle color variations to replicate the authentic appearance of natural lawn edging a serene water feature.

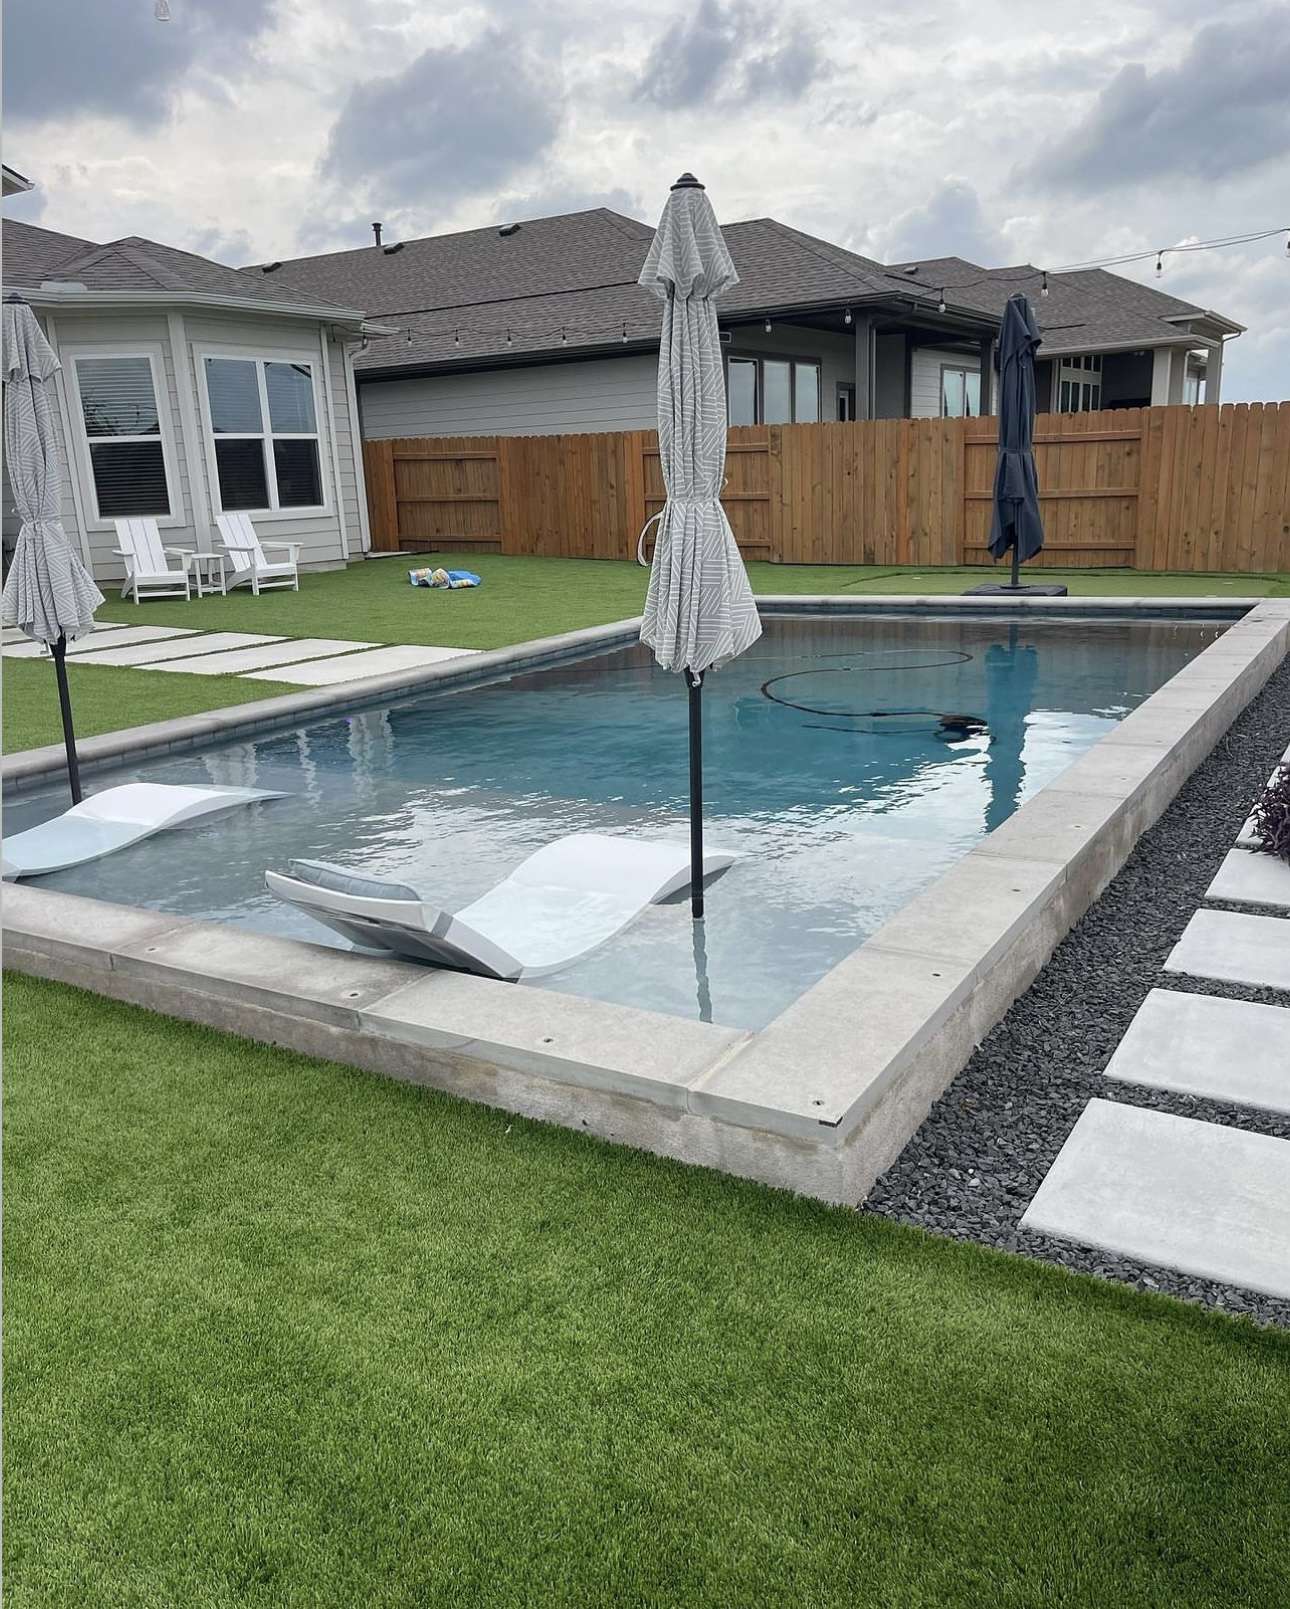
    12. Compact Pool Featuring Faux Grass and Stone Pathway

    Compact Pool Featuring Faux Grass and Stone Pathway

    Incorporating stepping stones around the pool enhances safety by offering a slip-resistant surface. The combination of synthetic turf and natural stone creates a refreshing, modern aesthetic suitable for small spaces.

    Key Design Elements

    • Slip-resistant stones improve poolside safety
    • Natural stone pairs beautifully with lush synthetic grass
    • Perfect solution for limited outdoor areas

    Pro Tip: Arrange stepping stones at consistent intervals to achieve a harmonious and inviting walkway.

    13. Elegant Villa Pool Design Featuring Artificial Turf

    Elegant Villa Pool Design Featuring Artificial Turf

    Discover a stylish villa backyard concept that blends modern elegance with natural elements. Integrate greenery and foliage to create a refreshing, tranquil environment.

    Key Design Elements

    • Incorporation of vibrant plants and mature trees
    • Elegant design inspired by luxurious villas
    • Seamless integration of synthetic grass for low maintenance

    Pro Tip: Use tall, dense shrubs along the edges to boost privacy while enhancing the relaxing ambiance.

    14. Elevated Patio Pool Oasis

    Elevated Patio Pool Oasis

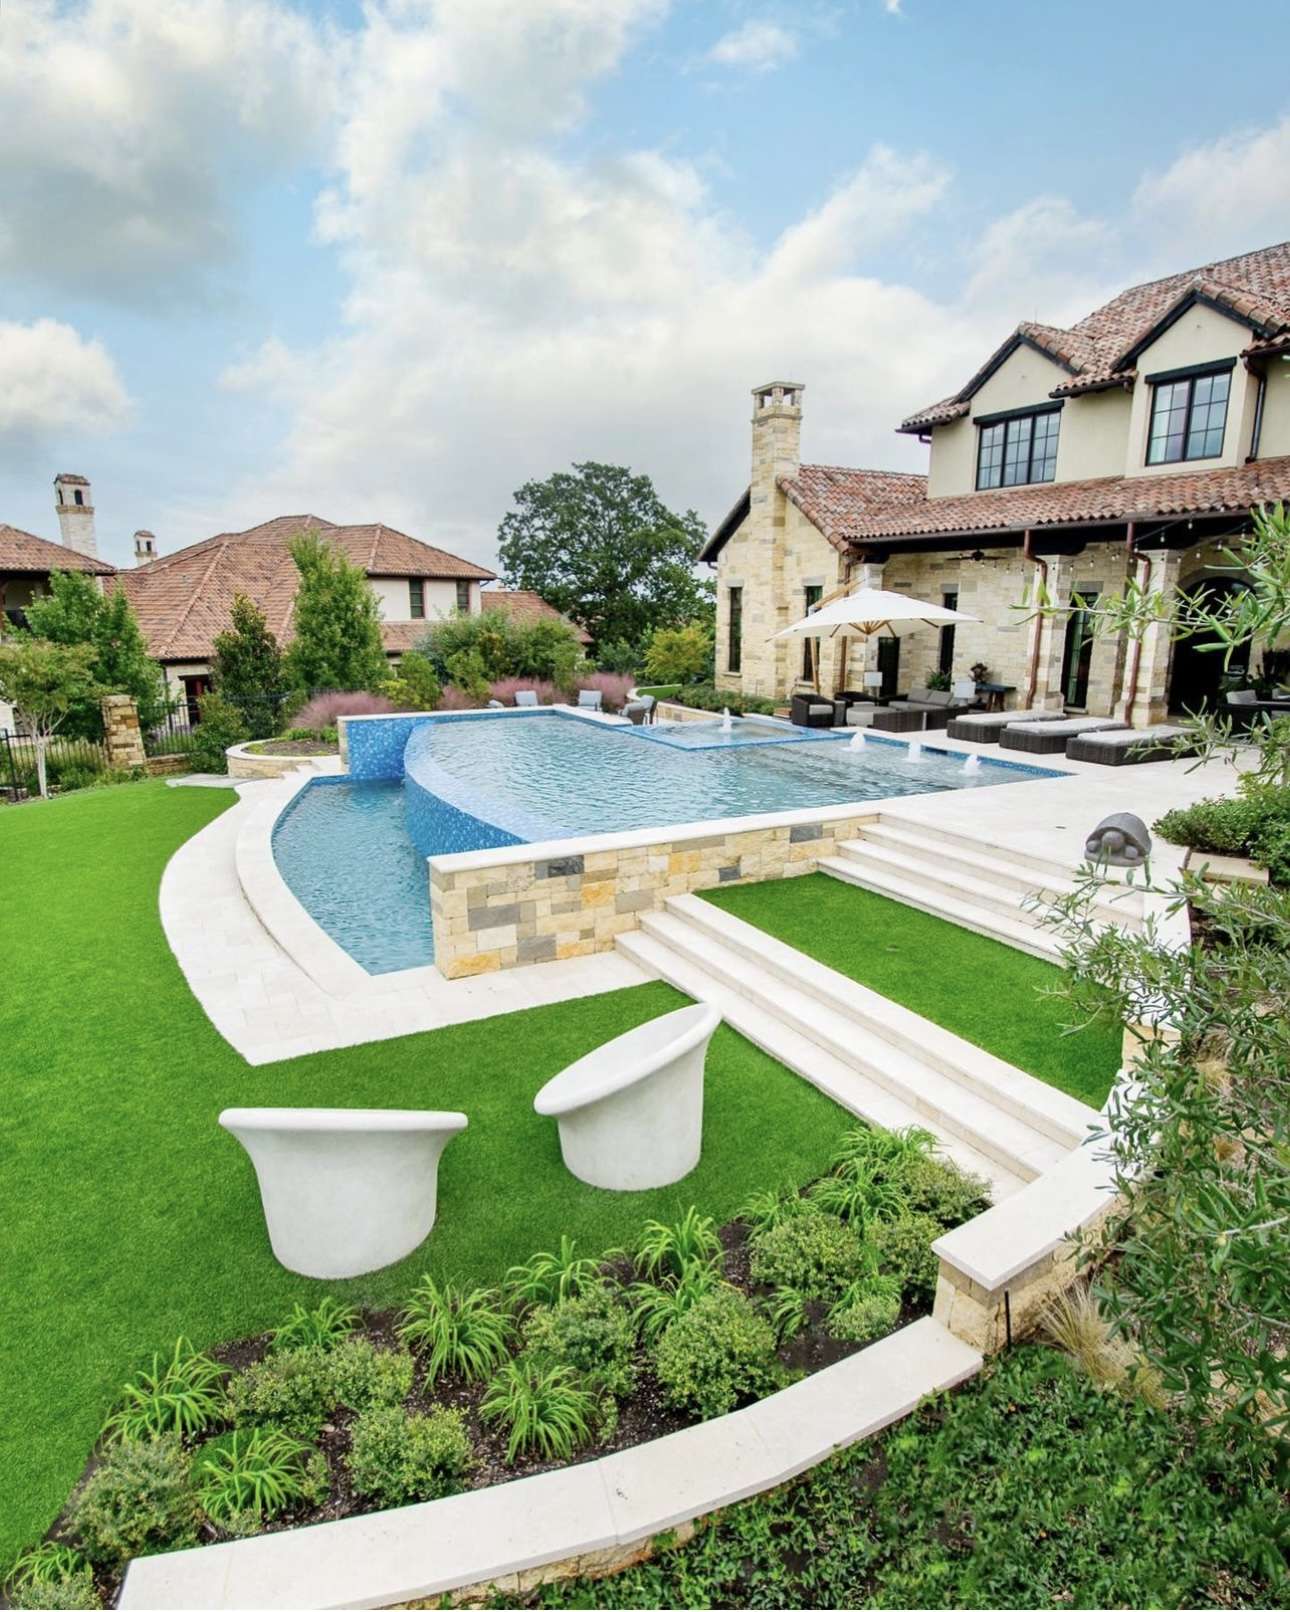
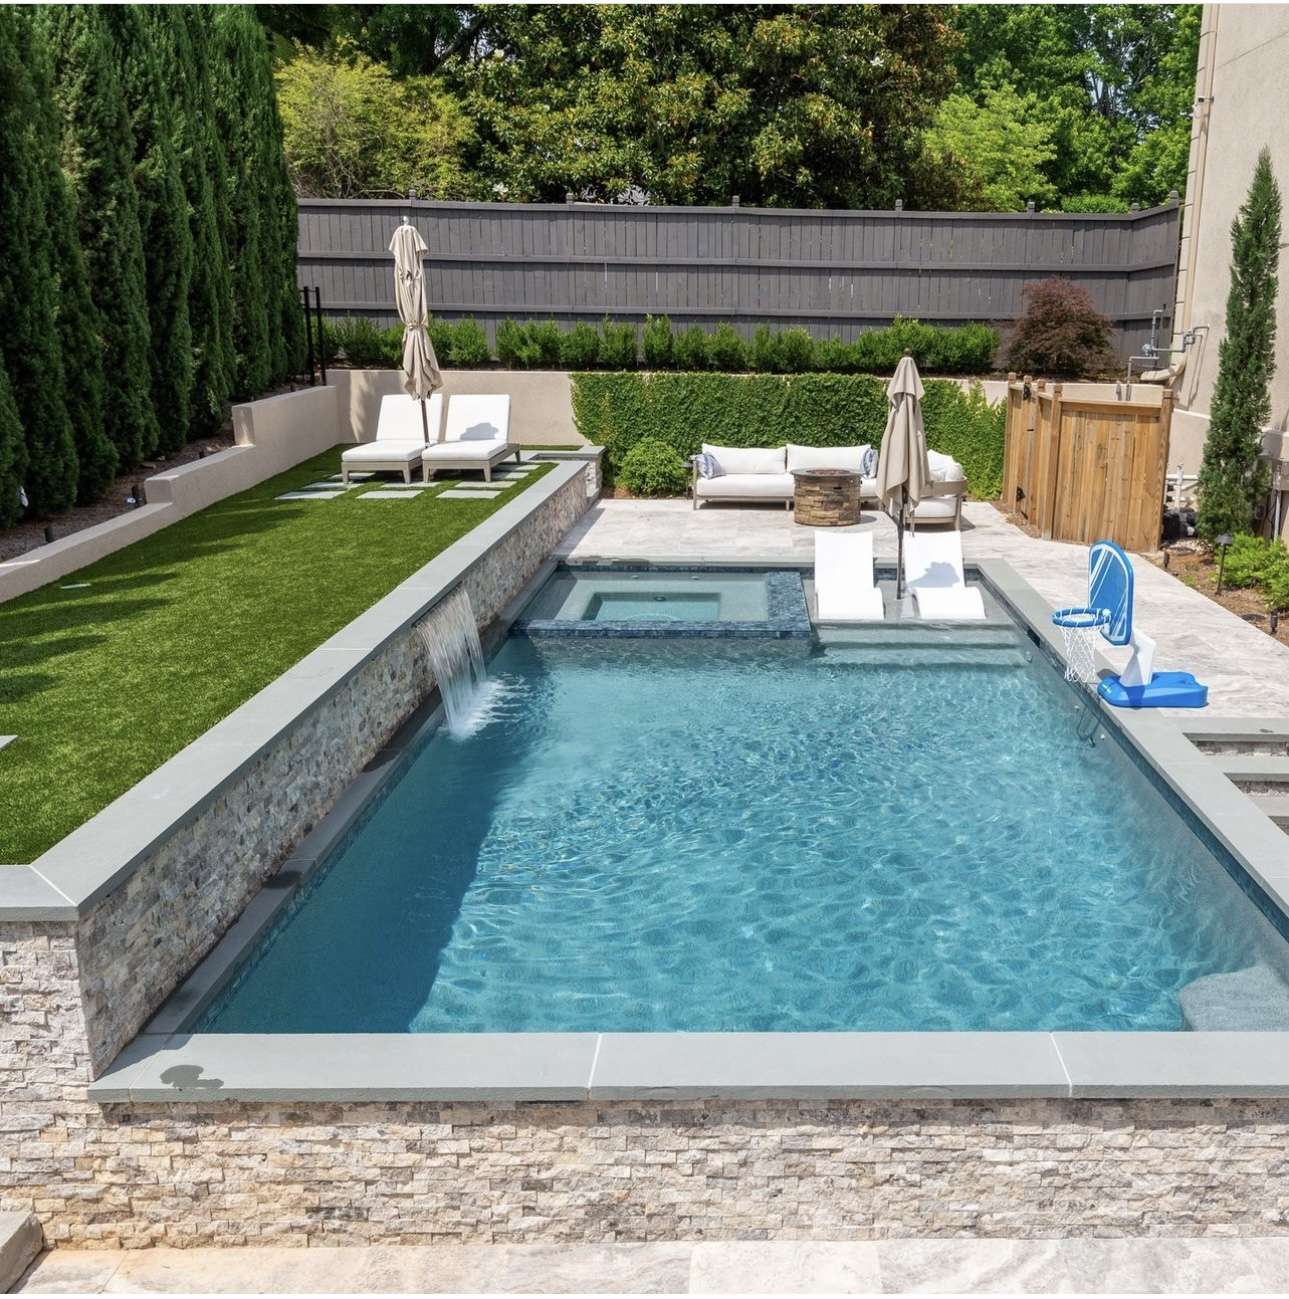
    This innovative pool concept features an elevated patio area accented with synthetic grass and a sleek wall-mounted water cascade, creating a serene and upscale atmosphere. The design blends modern elegance with tranquil elements for a perfect backyard retreat.

    Key Design Elements

    • Elevated patio brings depth and interest
    • Wall-mounted water cascade enhances relaxation
    • Modern yet peaceful backyard vibe

    Pro Tip: Add subtle LED strip lights along the patio perimeter to highlight textures and provide ambient nighttime illumination.

    15. Incorporating Artificial Turf and Loungers Around Your Pool

    Incorporating Artificial Turf and Loungers Around Your Pool

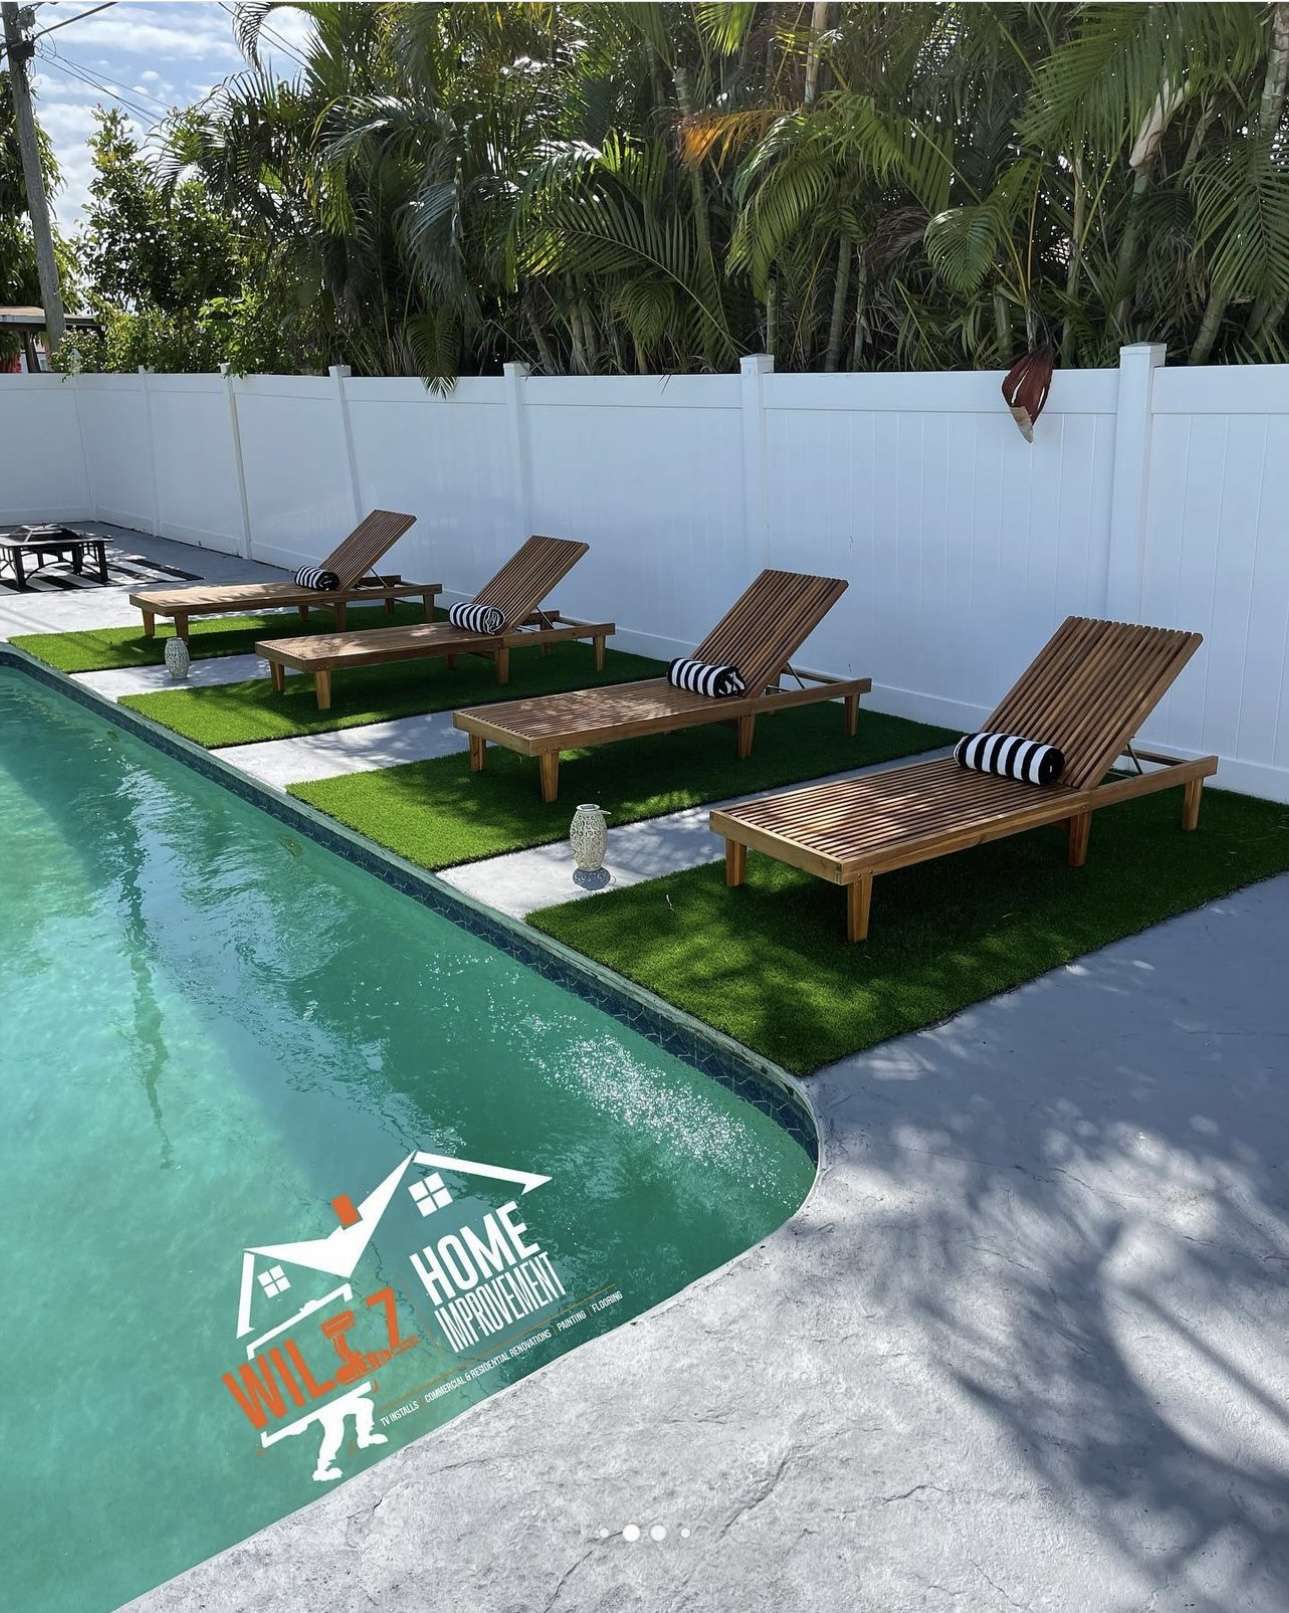
    Instead of covering the entire area with synthetic grass, use it selectively to enhance visual interest and inject vibrant color near your pool. This approach creates an inviting atmosphere without overwhelming your outdoor space.

    Key Design Elements

    • Selective turf application reduces expenses
    • Introduces lively color accents to poolside areas
    • Provides a soft and cozy base for loungers

    Pro Tip: Position strips of artificial grass beneath loungers to offer a cushioned, natural-feeling spot for relaxation.

    Conclusion

    Transforming your poolside space with artificial grass unlocks a world of effortless beauty and lasting charm. Embrace the freedom of low-maintenance luxury that stays vibrant through every season, whether you crave sleek contemporary lines or lush, natural vibes. With the perfect turf tailored to your vision and a skilled installer by your side, you’re just steps away from creating an inviting oasis where relaxation and style flourish hand in hand. Dive into this fresh approach and let your outdoor haven shine like never before.

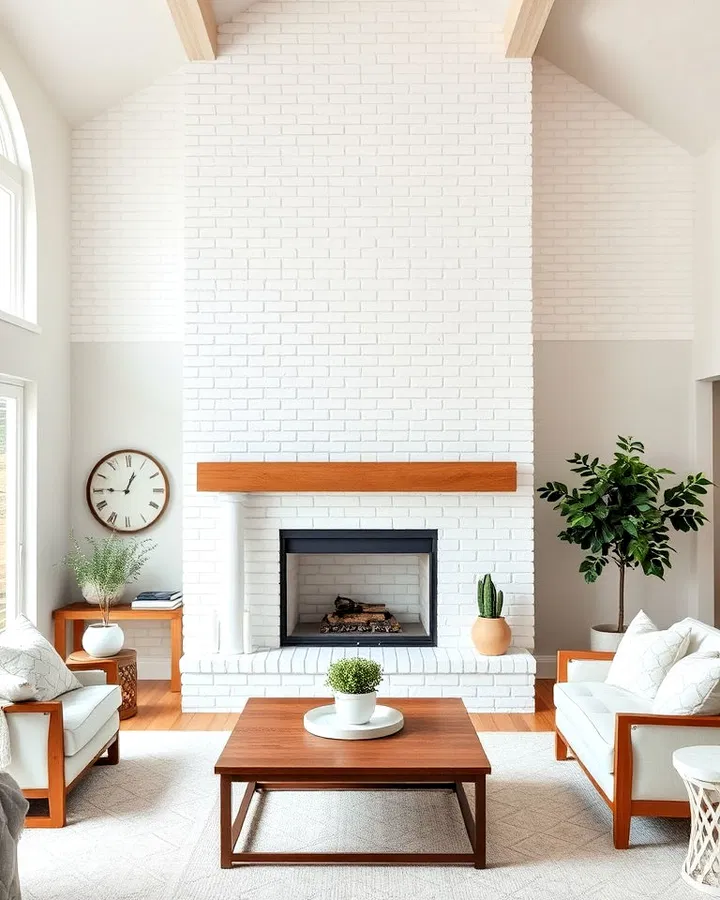
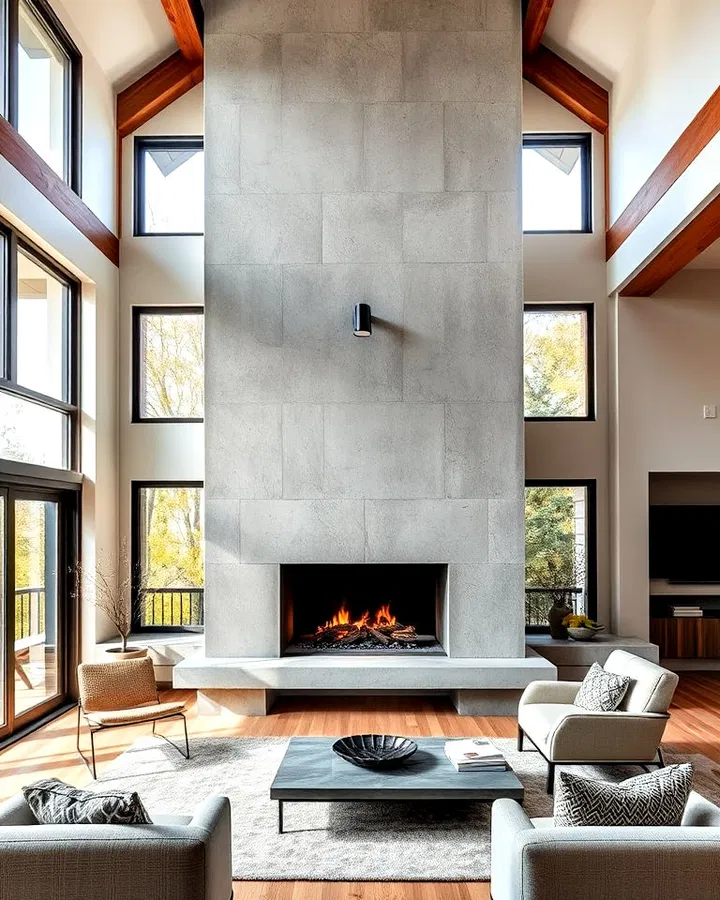
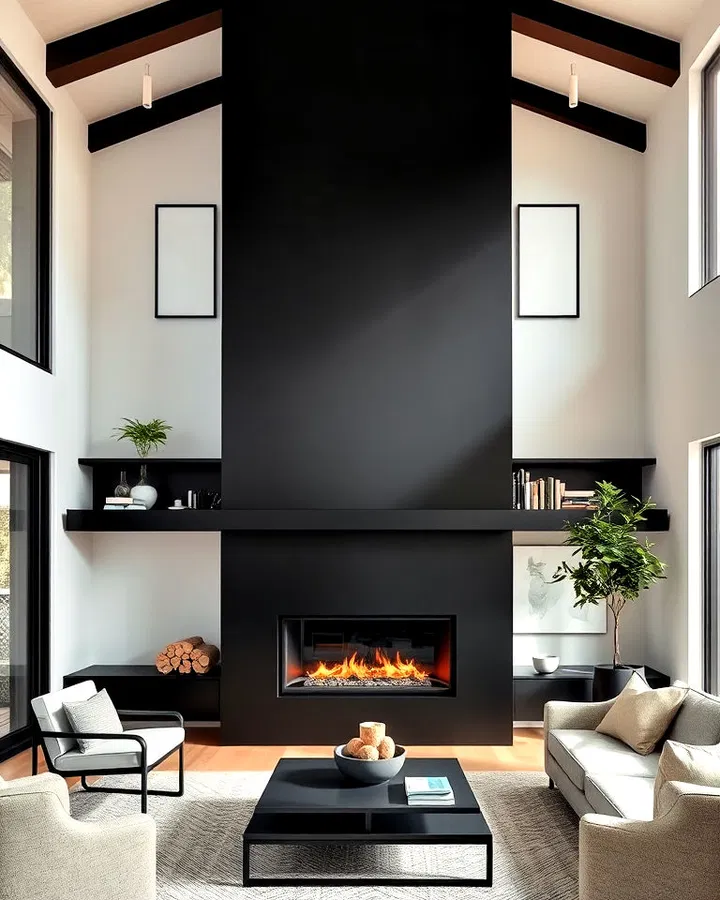
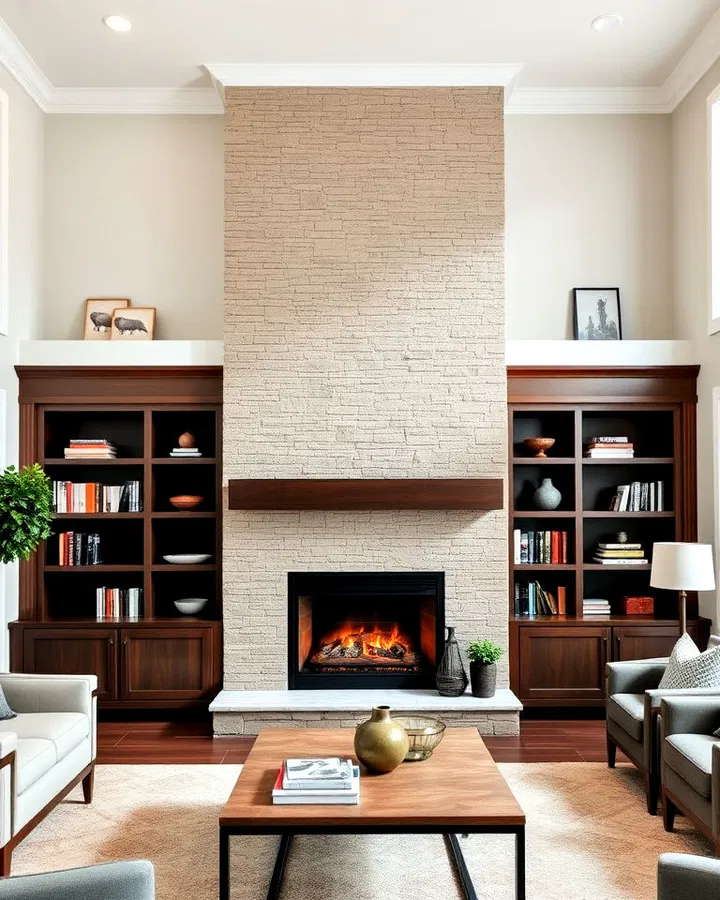
  • 20 Inspiring Two-Story Fireplace Ideas to Create a Stunning Living Space

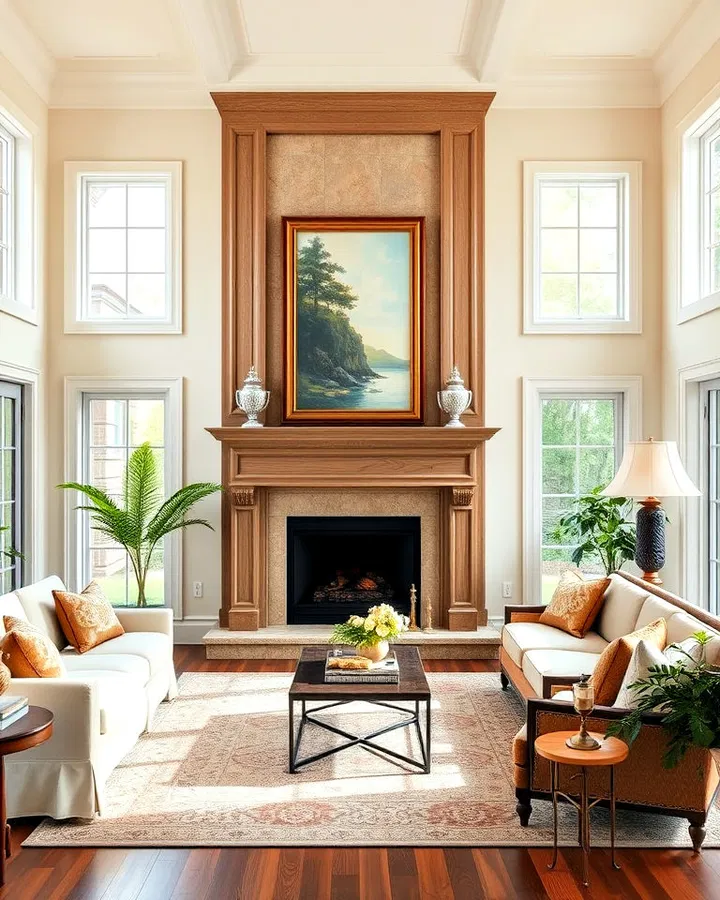
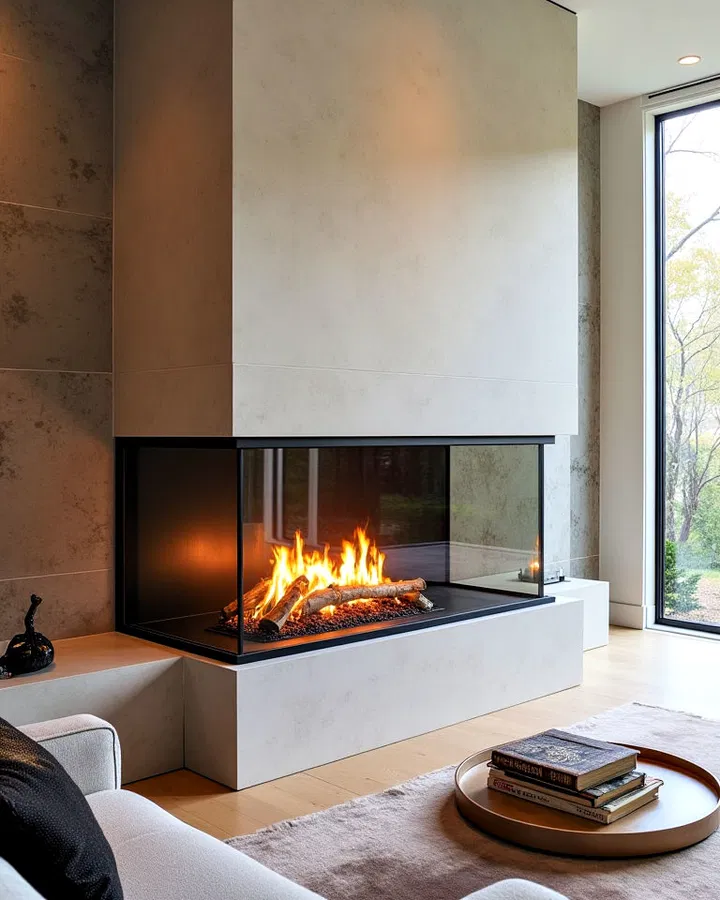
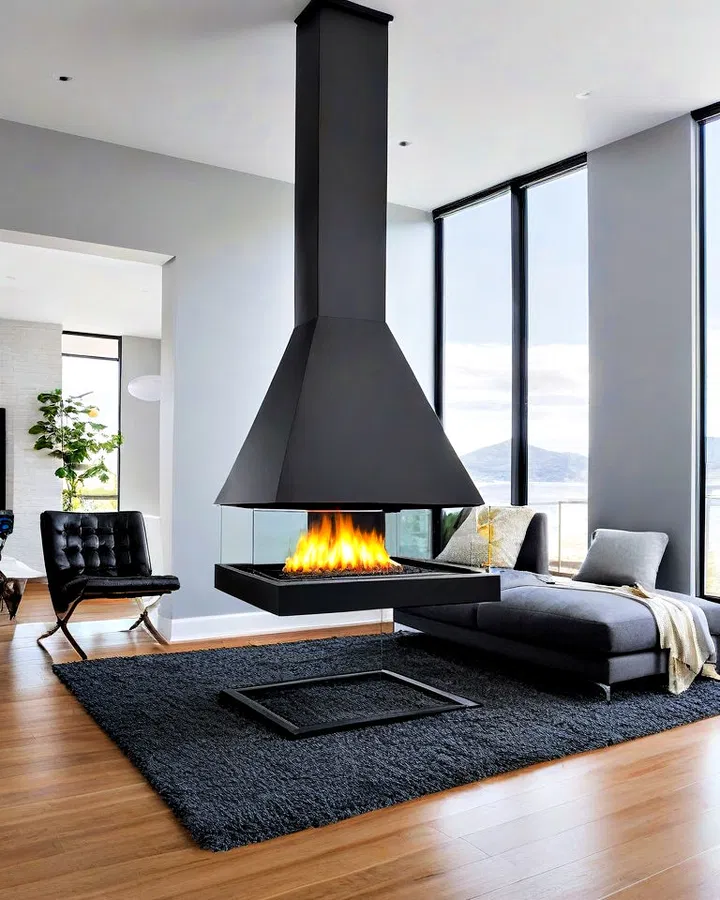
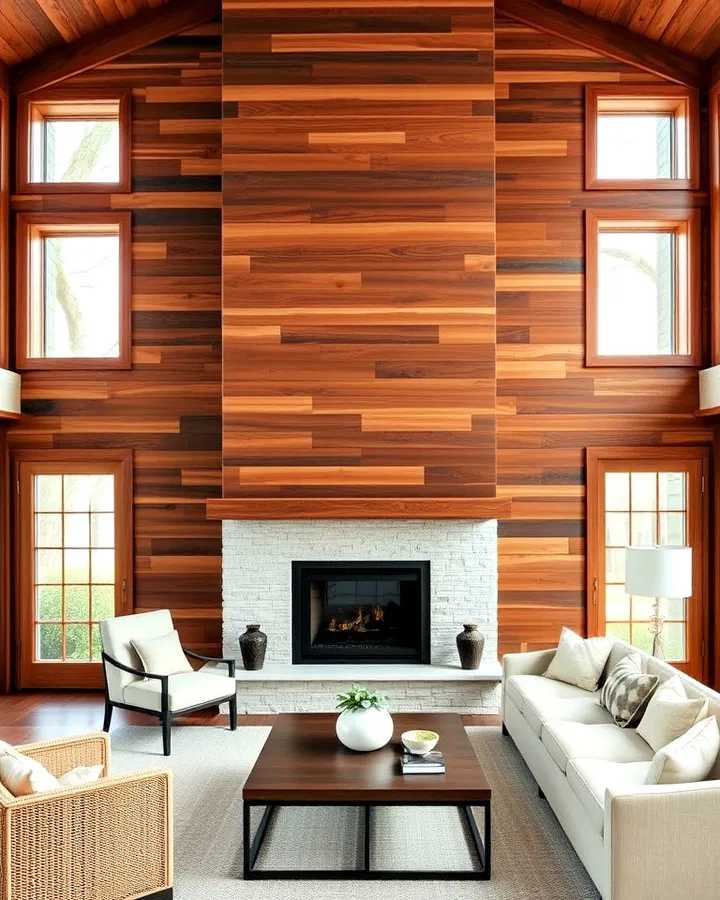
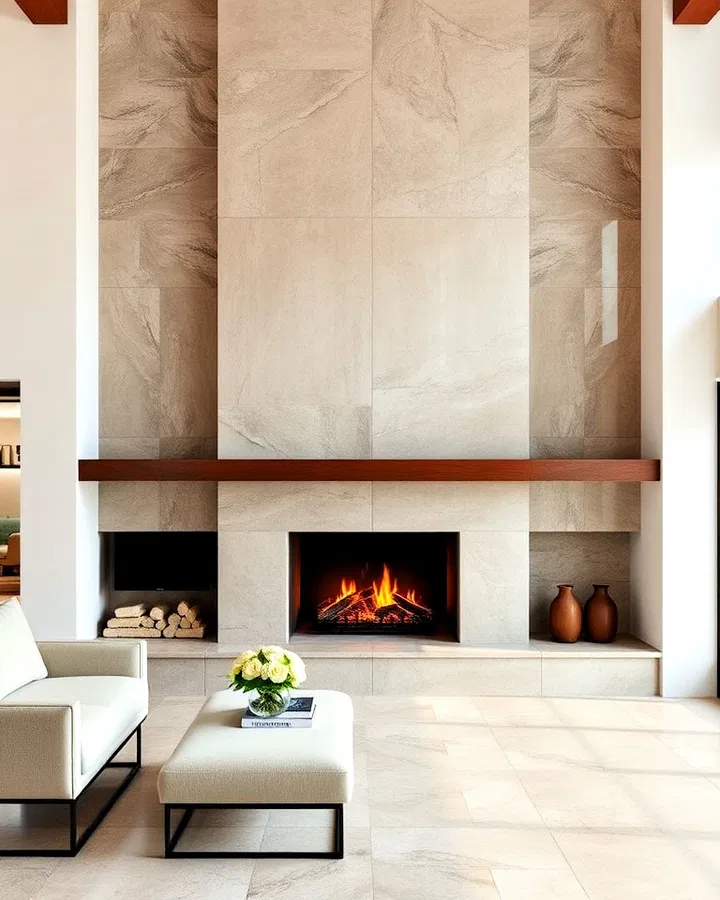
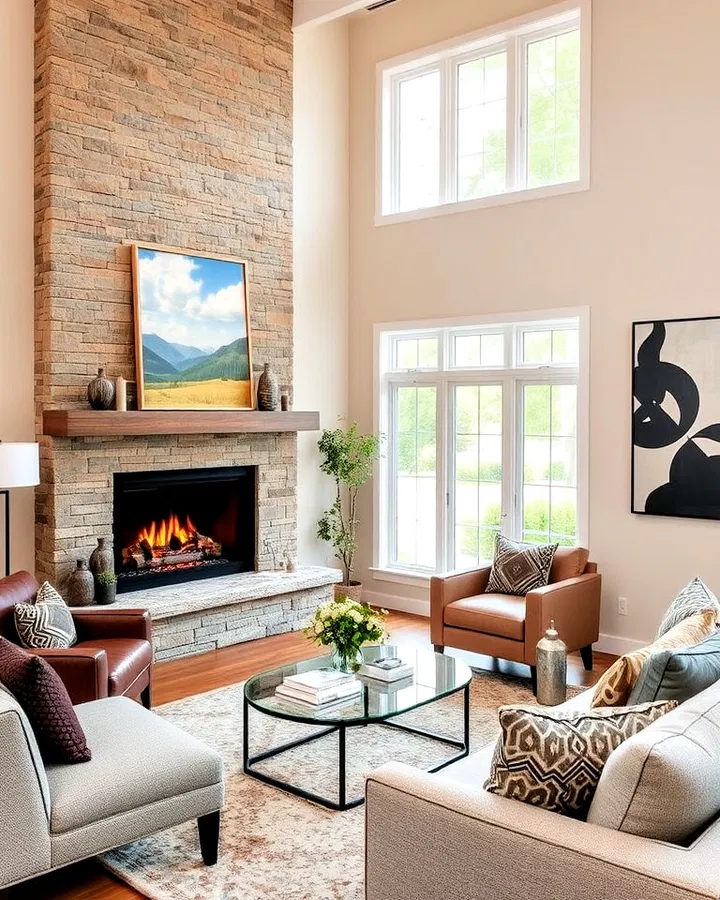
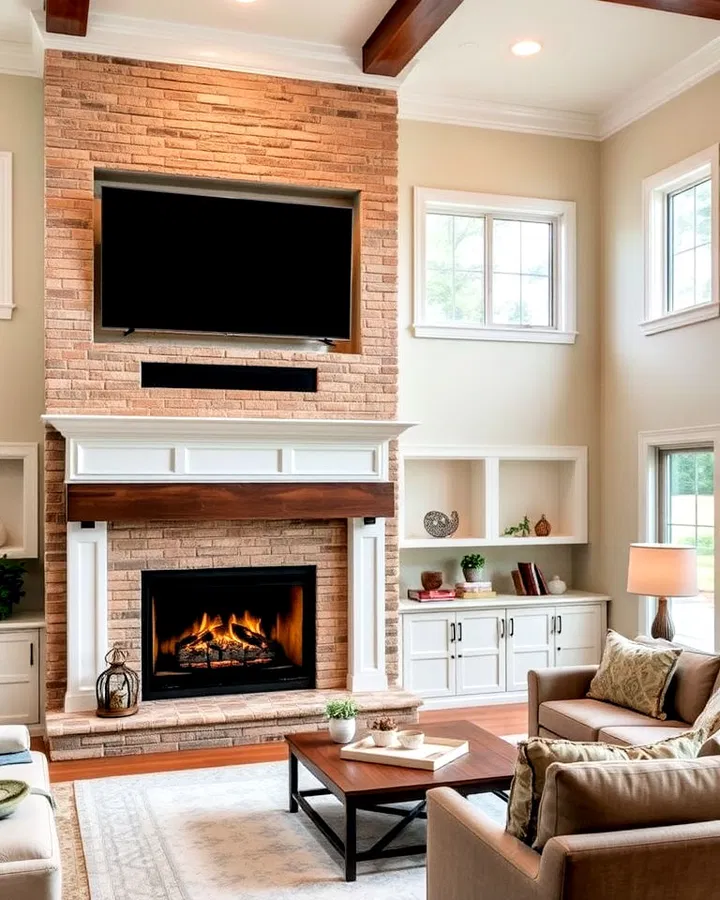
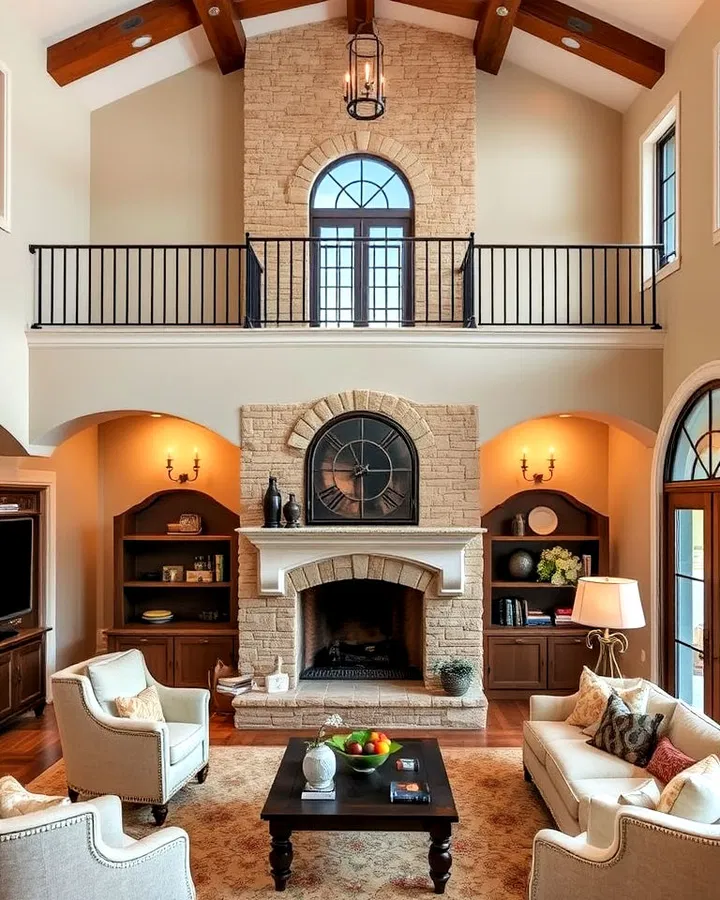
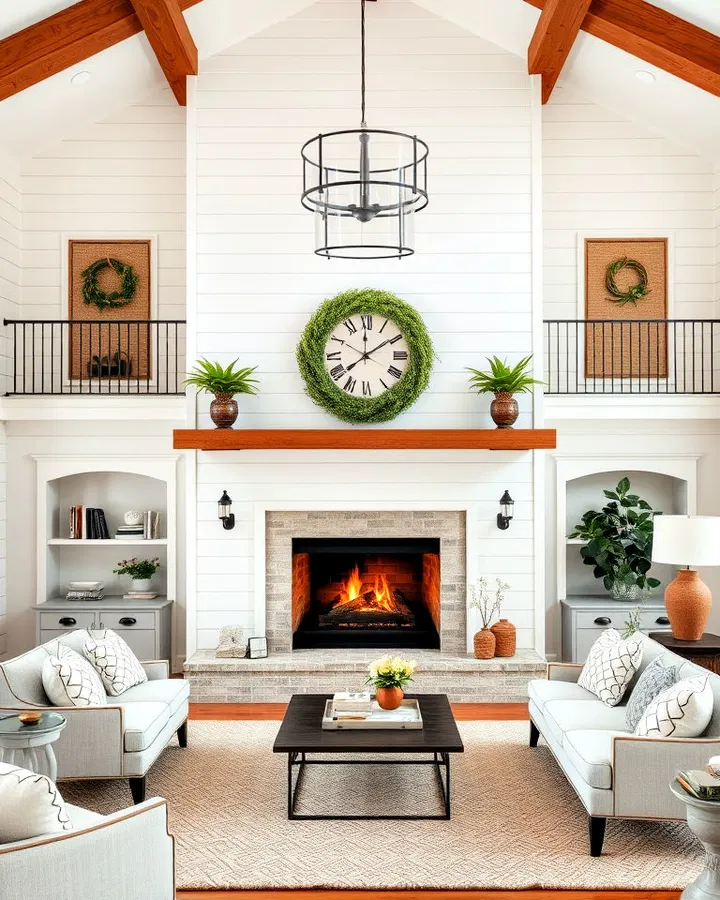
    A two-story fireplace instantly transforms an ordinary room into an architectural masterpiece. Stretching from floor to ceiling, these dramatic installations emphasize vertical space while adding warmth, texture, and personality to the home. Whether your style leans toward sleek contemporary design or cozy rustic charm, a towering fireplace can become the defining feature of your living area.

    Below are 20 creative ideas to inspire your next renovation or new construction project.

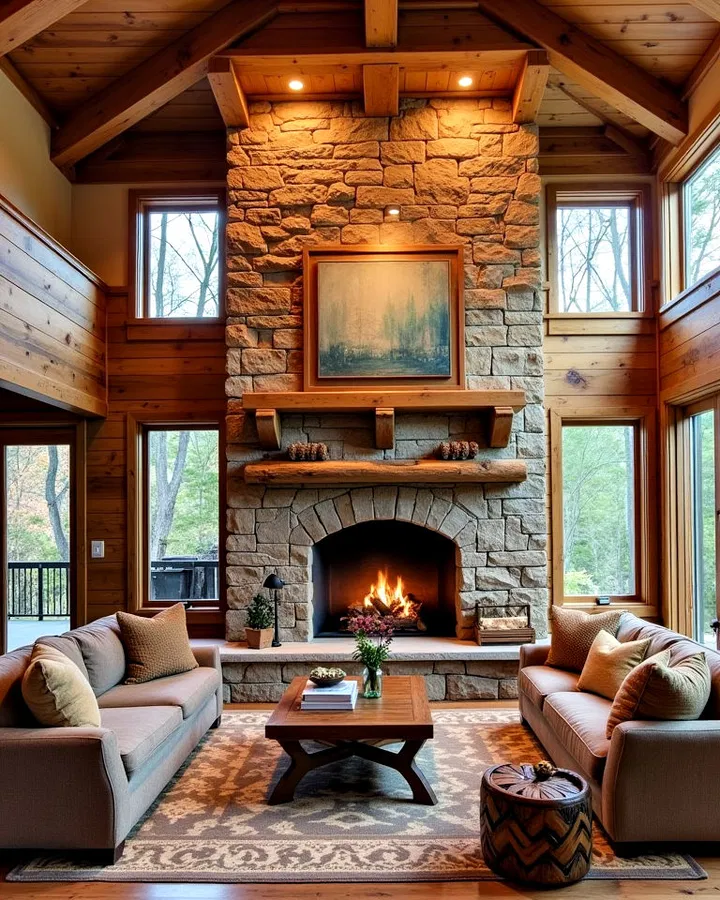
    1. Grand Floor-to-Ceiling Stone Fireplace

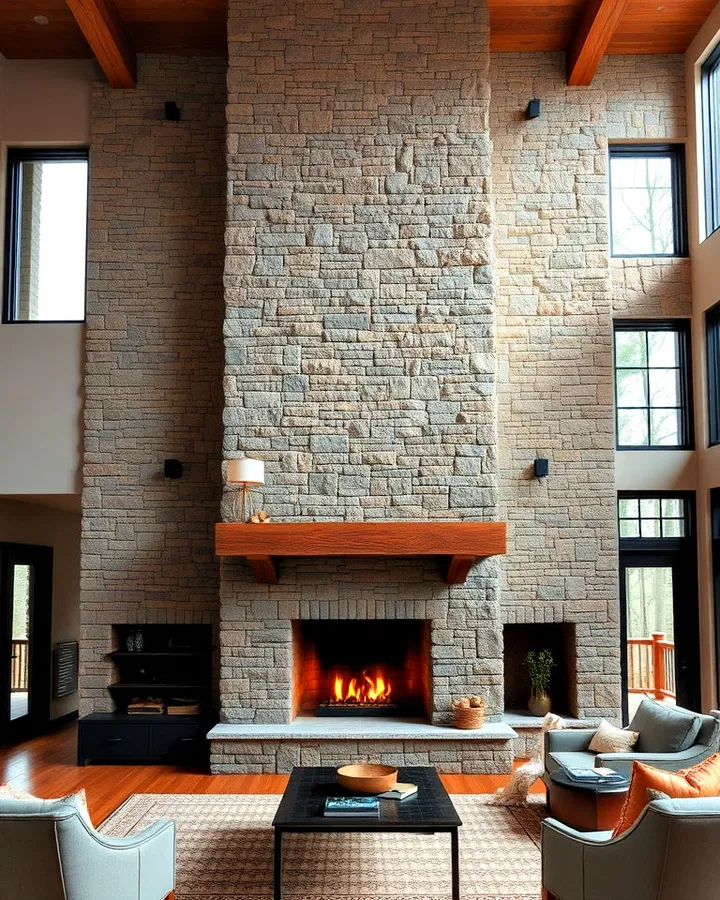
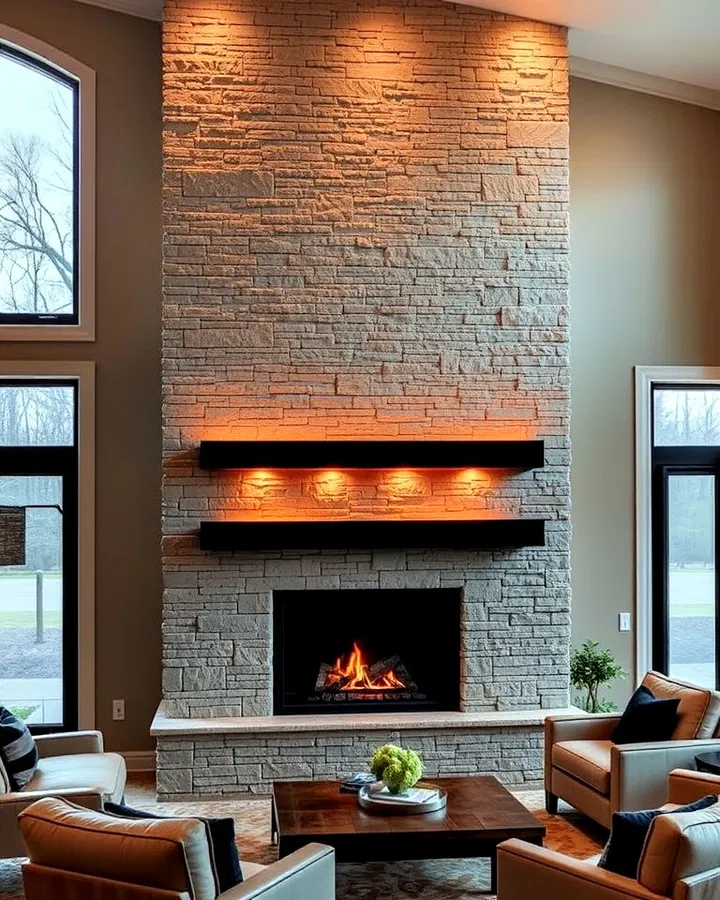
    Natural stone remains one of the most timeless choices for a double-height fireplace. Extending rugged stonework from the hearth all the way to the ceiling creates an impressive focal point that complements rustic cabins, mountain homes, and modern farmhouses alike. Varying the stone sizes and textures adds even more depth and visual appeal.

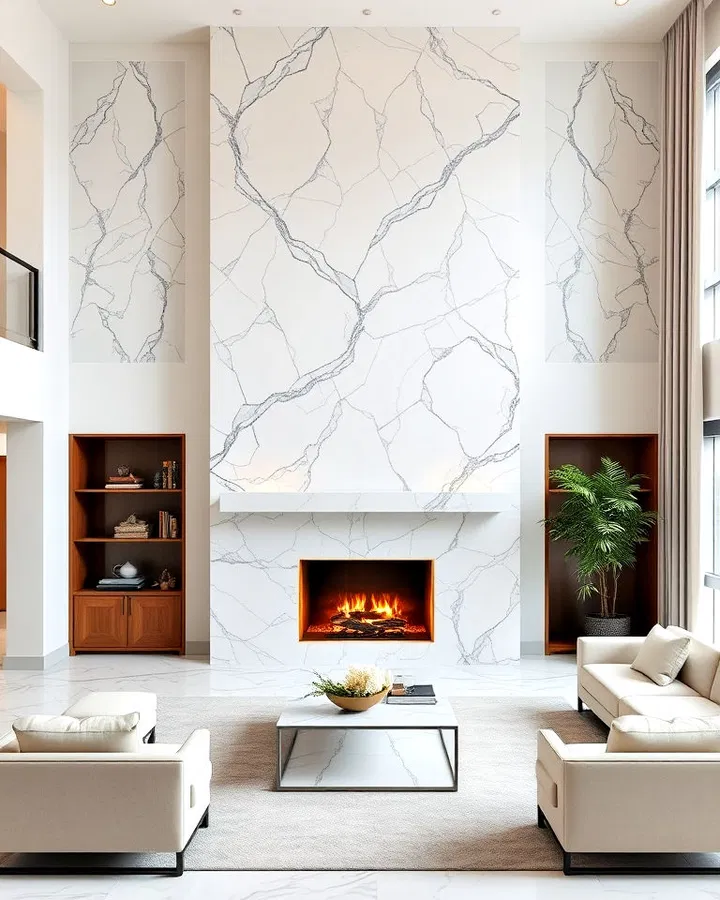
    2. Sleek Marble Statement Wall

    Covering an entire fireplace wall in marble delivers instant luxury. Dramatic veining creates natural artwork, while polished finishes reflect light beautifully throughout the room. This approach works especially well in contemporary homes seeking an upscale aesthetic.

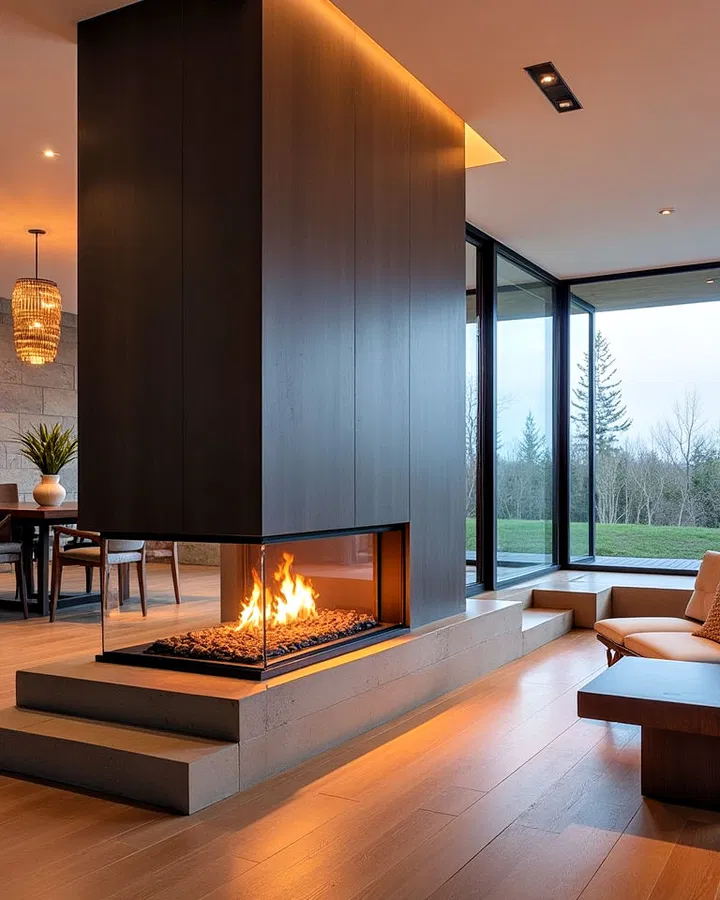
    3. Double-Sided Fireplace for Open Layouts

    A see-through fireplace can warm two adjoining spaces simultaneously, making it ideal between a living room and dining area or separating different zones in an open-concept floor plan. The transparent design maintains visual openness while providing comfort from multiple angles.

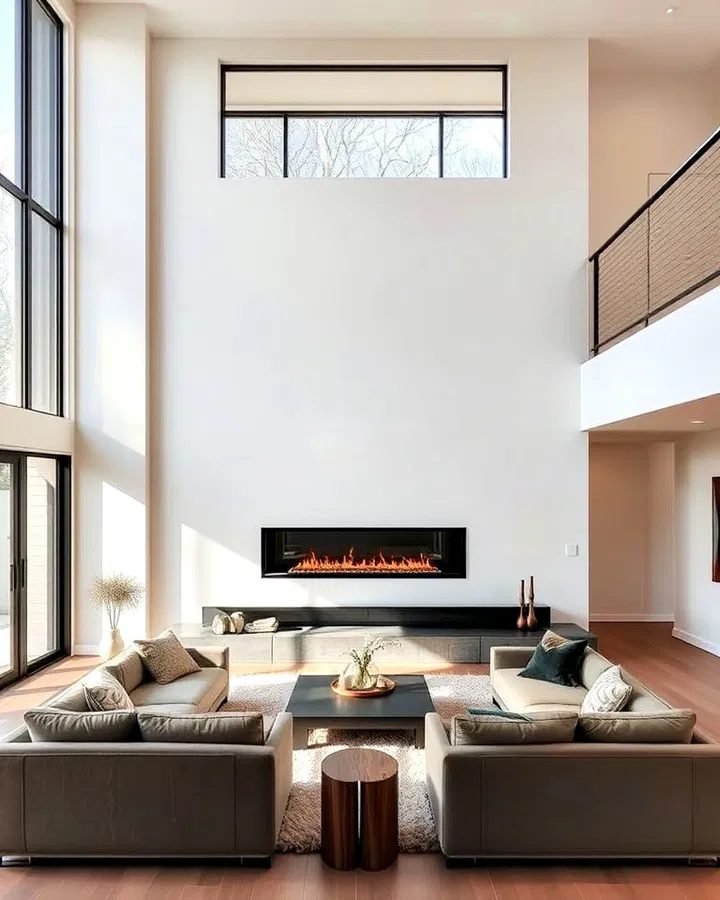
    4. Minimalist Linear Fireplace

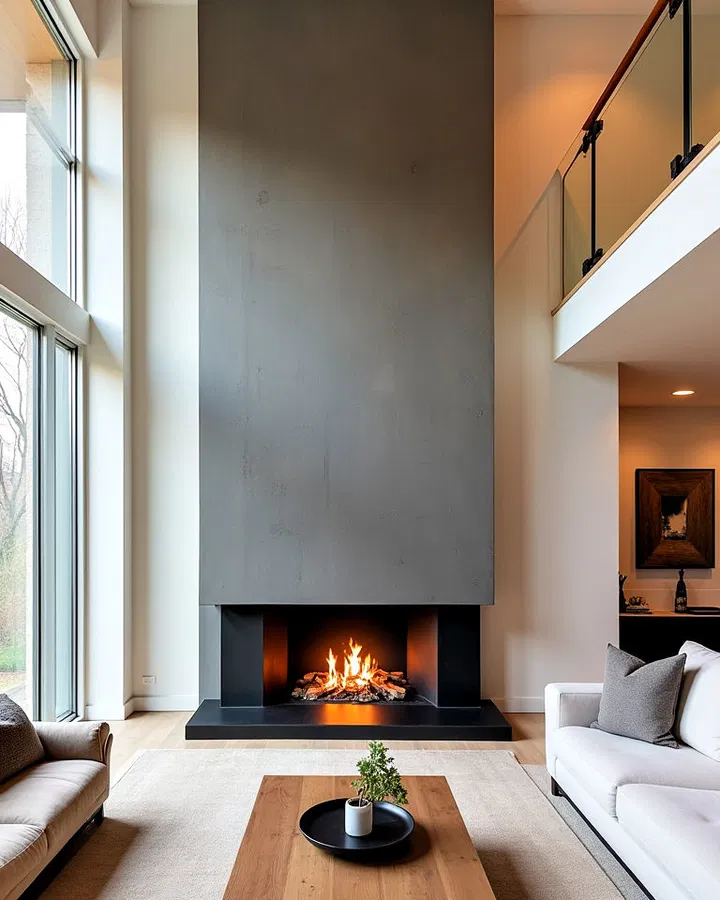
    Clean lines and understated finishes make a linear fireplace perfect for modern interiors. Built seamlessly into a tall feature wall, this design allows the architecture to shine while creating a sophisticated, uncluttered appearance.

    5. Rustic Timber and Stone Combination

    Blend reclaimed wood beams with stacked stone to create a fireplace that feels warm and inviting. The combination adds authentic character and pairs beautifully with exposed ceilings, leather furnishings, and natural décor.

    6. White Brick for Bright Interiors

    Painting brick white modernizes a traditional fireplace while preserving its texture. In two-story spaces, the light finish helps maintain an airy atmosphere and reflects natural light throughout the room.

    7. Industrial Concrete Design

    Concrete fireplaces introduce understated sophistication through clean geometry and raw textures. Their minimalist appearance fits perfectly in loft-inspired spaces featuring steel, glass, and oversized windows.

    8. Black Steel Architectural Feature

    For a dramatic visual impact, a black steel fireplace creates bold contrast against neutral walls. Its crisp edges and contemporary materials emphasize the height of the room while giving the space a refined industrial personality.

    9. Fireplace with Built-In Shelving

    Custom shelving surrounding a towering fireplace combines beauty with practicality. Display books, sculptures, plants, or family heirlooms while framing the fireplace as the centerpiece of the room.

    10. Traditional Mantel with Classic Details

    An ornate wood or stone mantel introduces timeless elegance. Crown molding, decorative trim, and carefully selected accessories complete the look, making this style ideal for homes with classic architecture.

    11. Glass-Enclosed Fireplace

    Frameless glass offers unobstructed views of dancing flames while enhancing safety. The sleek enclosure keeps attention on the fire itself and blends effortlessly into modern interiors.

    12. Floating Fireplace Installation

    Suspended fireboxes appear to hover above the floor, creating a striking illusion that instantly captures attention. This innovative style is particularly effective in homes with minimalist or futuristic design themes.

    13. Warm Wood-Paneled Fireplace Wall

    Extending wood paneling around a two-story fireplace softens the scale of the installation while adding warmth and texture. Lighter woods evoke Scandinavian simplicity, while darker species create luxurious depth.

    14. Large-Format Tile Surround

    Oversized porcelain or ceramic tiles provide a seamless appearance with fewer grout lines. Whether matte or glossy, these expansive surfaces create a clean, contemporary backdrop that highlights the fireplace’s vertical presence.

    15. Space-Saving Corner Fireplace

    Positioning the fireplace in a corner maximizes usable wall space without sacrificing style. Clever furniture placement can transform the surrounding area into a cozy conversation nook.

    16. Integrated Entertainment Wall

    Designing a fireplace with a dedicated television recess creates a multifunctional focal point. The arrangement keeps media equipment organized while preserving a polished and cohesive appearance.

    17. Elegant Arched Fireplace Opening

    Curved architectural details soften tall spaces and introduce classic charm. An arched surround crafted from stone, stucco, or brick adds timeless character inspired by Mediterranean and European homes.

    18. Coastal Shiplap Surround

    Horizontal shiplap panels provide subtle texture and a relaxed atmosphere. Painted in crisp whites or soft neutrals, they pair wonderfully with coastal, cottage, and farmhouse-inspired interiors.

    19. Fireplace Enhanced with Integrated Lighting

    LED accent lighting installed around a double-height fireplace highlights architectural details and keeps the feature visually striking after sunset. The added illumination creates ambiance even when the fire is not burning.

    20. Exposed Metal and Brick Industrial Mix

    Combine exposed steel framing with brick or concrete finishes to create a fireplace that celebrates raw materials and urban design. This bold combination pairs exceptionally well with open ceilings and warehouse-inspired interiors.

    Final Thoughts

    A two-story fireplace is much more than a heating element—it serves as an architectural centerpiece capable of defining an entire home’s character. Whether you prefer luxurious marble, rugged natural stone, sleek steel, or warm wood finishes, the right design can elevate your living space while adding comfort and long-lasting value. By selecting materials and features that complement your home’s style, you’ll create a dramatic focal point that remains impressive for years to come.

  • 25 Creative Outdoor Garden Decor Ideas With Wind Chimes to Elevate Your Backyard

    Wind chimes bring more than pleasant melodies to an outdoor space—they introduce movement, texture, and personality that can completely transform a garden. Whether crafted from bamboo, glass, metal, stone, or recycled materials, these decorative accents complement a wide range of landscaping styles while creating a relaxing atmosphere.

    If you’re searching for inspiration, these 25 outdoor garden décor ideas showcase imaginative ways to incorporate wind chimes into patios, porches, pergolas, balconies, and flower-filled retreats. Each concept offers a unique blend of visual appeal and soothing sound, helping you create a backyard that feels both inviting and memorable.

    1. Crystal Prism Porch Filled With Dancing Light

    A covered porch becomes even more enchanting when crystal wind chimes catch the morning or afternoon sun. Faceted glass or crystal prisms scatter tiny rainbows across nearby furniture and flooring while producing delicate, bell-like tones whenever a breeze passes through.

    Complete the look with white wicker seating, sheer outdoor curtains, and potted flowering plants for an elegant retreat that feels bright and peaceful. This style is especially beautiful in east-facing spaces where the early sunlight can highlight every sparkling detail.

    2. Rustic Farmhouse Arbor With Vintage Bell Chimes

    Turn a wooden garden arbor into a charming focal point by suspending weathered iron or copper wind chimes overhead. Their rich metallic notes pair perfectly with climbing roses, ivy, or fragrant jasmine that weave through the structure.

    A gravel pathway leading beneath the arbor, complemented by reclaimed wood benches and antique lanterns, enhances the countryside aesthetic. The combination of aged finishes and blooming greenery creates a timeless entrance that welcomes visitors with both beauty and sound.

    3. Solar-Powered Wind Chimes Along a Garden Path

    Blend technology with décor by installing solar-powered wind chimes beside walkways or flower beds. During daylight hours they sway gently in the breeze, while after sunset integrated LED lights illuminate the path with a soft ambient glow.

    Placing several matching chimes along a winding trail lined with shrubs or ornamental grasses creates a magical nighttime experience. It’s an easy way to improve both the appearance and functionality of your landscape without complicated wiring.

    4. Bohemian Porch With Colorful Glass Chimes

    For homeowners who enjoy eclectic styling, colorful glass wind chimes add artistic flair to an outdoor sitting area. As sunlight shines through stained or translucent pieces, vivid reflections dance across nearby walls and decking.

    Layer the space with patterned rugs, oversized floor cushions, woven baskets, macramé planters, and trailing vines to reinforce the boho vibe. The cheerful tinkling of glass complements the relaxed atmosphere and encourages leisurely afternoons outdoors.

    5. Woodland Retreat Featuring Natural Wooden Chimes

    Embrace the serenity of nature by incorporating wind chimes made from reclaimed branches, bamboo, or carved wood into a forest-inspired garden. Their mellow tones blend seamlessly with birdsong and rustling leaves rather than overpowering them.

    Surround the area with moss-covered stones, tree stumps used as seating, native ferns, and shaded pathways to create the feeling of a hidden woodland sanctuary. This understated approach celebrates organic textures and allows the surrounding landscape to take center stage.

    6. Coastal Deck Decor With Seashell Wind Chimes

    Capture the relaxed charm of the shoreline by hanging wind chimes crafted from seashells, driftwood, or capiz discs above a deck or patio. The gentle clatter resembles the calming rhythm of ocean waves and pairs beautifully with breezy outdoor spaces.

    Complete the coastal theme with whitewashed furniture, striped cushions, rope accents, and lanterns filled with sand or beach stones. Add ornamental grasses and blue flowering plants nearby to reinforce the seaside atmosphere and create a vacation-inspired escape at home.

    7. Modern Patio Highlighted by Sleek Metal Chimes

    Minimalist landscapes benefit from carefully chosen statement pieces, and oversized aluminum or stainless-steel wind chimes fit perfectly into this aesthetic. Their deep, resonant notes provide an understated soundtrack without overwhelming the clean design.

    Pair them with geometric planters, polished concrete pavers, monochromatic furniture, and architectural greenery for a sophisticated outdoor lounge. Keeping the palette simple allows the chimes to become a striking focal point.

    8. Upcycled Garden Display Made From Painted Tin Cans

    Transform ordinary household items into eye-catching décor by repurposing painted tin cans into DIY wind chimes. Different can sizes create varied sounds while bright patterns and colors inject personality into the garden.

    Display them near pallet furniture, raised beds, or container gardens for a creative and budget-friendly feature. This eco-conscious project is also a fun activity for families looking to personalize their outdoor spaces.

    9. Pergola Dining Area Enhanced With Bamboo Chimes

    A pergola offers the perfect structure for suspending multiple bamboo wind chimes above an outdoor dining table. Their mellow, hollow tones encourage relaxation and provide subtle background ambiance during meals and gatherings.

    Combine the setup with string lights, climbing vines, and natural wood furnishings to establish a warm, welcoming atmosphere that invites guests to linger well into the evening.

    10. Whimsical Garden Tree Draped With Beaded Chimes

    Turn a mature shade tree into a magical centerpiece by decorating its branches with strings of beads, small bells, and delicate wind chimes. Sunlight reflects off the colorful accents while gentle breezes create soft musical notes throughout the day.

    Install a circular bench beneath the canopy and surround the base with hostas, ferns, or flowering ground covers. The result is a charming hideaway that feels both playful and serene.

    11. Zen Meditation Garden With Stone Wind Chimes

    Design a peaceful corner dedicated to mindfulness by incorporating wind chimes carved from slate or natural stone. Their soft, muted tones blend effortlessly with the quiet surroundings, creating a soothing backdrop for meditation or yoga.

    Surround the area with raked gravel, large boulders, ornamental grasses, and simple wooden seating. Keeping the décor minimal allows the natural textures and calming sounds to become the focus, resulting in a balanced and tranquil retreat.

    12. Stained Glass Balcony Bursting With Color

    Even a compact balcony can become an artistic sanctuary when decorated with stained glass wind chimes. As sunlight filters through the colorful panels, vibrant patterns dance across walls and floors, making the small space feel lively and inviting.

    Pair the chimes with hanging baskets, compact café furniture, and brightly colored cushions to maximize visual impact. This idea works especially well for apartments where every decorative element needs to serve as a focal point.

    13. Vintage Garden Nook Featuring Repurposed Silverware

    Give antique forks, spoons, and old keys a second life by transforming them into one-of-a-kind wind chimes. Their distinctive metallic clinking adds charm while celebrating creativity and sustainability.

    Position the display near a reading bench beneath a mature tree, surrounded by mismatched flowerpots and blooming perennials. The eclectic combination creates a cottage-inspired corner full of character and conversation-worthy details.

    14. Garden Gazebo Surrounded by Harmonious Chimes

    Elevate a backyard gazebo by hanging several coordinating wind chimes around its perimeter. Selecting chimes with complementary tones allows the breeze to create layered melodies that feel balanced rather than chaotic.

    Furnish the interior with comfortable seating, outdoor rugs, and subtle lighting while allowing climbing vines to soften the structure from the outside. The result is a destination that encourages quiet reflection, entertaining, or simply enjoying nature.

    15. Butterfly Garden Accented With Decorative Metal Chimes

    Celebrate pollinators by choosing wind chimes adorned with painted butterfly motifs or fluttering metal silhouettes. Their cheerful appearance pairs naturally with flower beds designed to attract butterflies and bees.

    Plant nectar-rich blooms such as coneflowers, lantana, black-eyed Susans, and milkweed nearby to encourage wildlife throughout the season. The colorful chimes add movement above the blossoms while their gentle ringing enhances the lively atmosphere of the garden.

    16. Shepherd’s Hook Display for Flexible Garden Styling

    A simple shepherd’s hook can become an elegant way to showcase your favorite wind chime without attaching it to a structure. Place one beside a flower bed, along a winding pathway, or in the center of a landscaped island to create an eye-catching focal point.

    Choose a sturdy black metal hook and surround its base with colorful annuals or low-growing ground covers. Because the hook is portable, you can easily move the chime as your garden evolves throughout the seasons.

    17. Ceramic Courtyard With Handcrafted Hanging Accents

    Celebrate artisanal design by incorporating ceramic wind chimes into a Mediterranean-inspired patio or courtyard. Hand-glazed pieces often produce soft, distinctive tones while adding rich texture and handcrafted appeal.

    Coordinate them with terracotta pots, mosaic tiles, olive trees, and vibrant flowering containers. Warm earth tones mixed with handcrafted décor create an inviting outdoor setting that feels timeless and welcoming.

    18. Bamboo Meditation Corner Surrounded by Lush Greenery

    Transform an unused corner of your backyard into a calming sanctuary with oversized bamboo wind chimes suspended above a simple bench or meditation cushion. Their natural hollow sounds evoke the peaceful rhythm of a quiet forest.

    Enhance the space with ferns, smooth river rocks, ornamental bamboo, and subtle water features. The result is a secluded retreat where gentle breezes and natural elements encourage relaxation and reflection.

    19. Driftwood Garden Path With Organic Soundscapes

    A winding path bordered by native plants becomes even more charming when decorated with wind chimes crafted from driftwood, pebbles, and reclaimed natural materials. These understated pieces blend seamlessly into rustic landscapes while producing soft, earthy sounds.

    Add mulch walkways, weathered logs, and wildflowers to maintain the organic feel. The understated palette allows the textures of wood and stone to shine without competing with the surrounding greenery.

    20. Brass Wind Chimes Framing a Luxury Terrace

    For a refined outdoor entertaining area, install large brass wind chimes on a pergola or covered terrace overlooking the garden. Brass produces rich, lingering tones and develops a graceful patina over time, adding character as it ages.

    Pair the installation with contemporary seating, stone planters, manicured hedges, and elegant lighting to create a sophisticated atmosphere. The combination of premium materials and resonant sound makes the terrace feel polished while remaining warm and inviting.

    21. Terracotta Flower Bed Featuring Mini Pot Wind Chimes

    Bring classic garden materials into your décor by using wind chimes made from miniature terracotta pots. Their earthy appearance blends naturally with flower beds, while the gentle tapping sound creates a subtle, relaxing ambiance.

    Position the chime among blooming marigolds, lavender, daisies, or salvia to complement the warm clay tones. Pair it with larger terracotta containers and rustic garden edging for a cohesive look that feels welcoming and timeless.

    22. Agate Stone Wind Chimes Beside a Water Feature

    Introduce a touch of luxury by hanging wind chimes crafted from polished agate slices or semi-precious stones near a pond or fountain. As sunlight passes through the translucent pieces, they glow with vibrant colors while producing delicate, crystal-clear sounds.

    Enhance the display with decorative rocks, cascading water, and ornamental grasses to create a peaceful setting that balances natural beauty with artistic elegance.

    23. Wildlife-Friendly Garden With Decorative Birdhouse Chimes

    Combine functionality and charm by choosing wind chimes that incorporate decorative birdhouses or bird-inspired designs. Mounted near feeders or baths, they create a welcoming habitat for feathered visitors while adding gentle melodies to the landscape.

    Plant sunflowers, native shrubs, and berry-producing bushes nearby to attract local wildlife. This thoughtful arrangement supports biodiversity while making the garden feel lively throughout the year.

    24. Apartment Balcony Oasis With Compact Hanging Chimes

    Small outdoor spaces deserve stylish accents too. A lightweight wind chime made from wood, bamboo, or glass beads can instantly make an apartment balcony feel more inviting without overwhelming the area or creating excessive noise.

    Pair the chime with vertical planters, folding furniture, lanterns, and herb containers to maximize every square foot. The subtle movement and sound bring a refreshing sense of nature to an urban environment.

    25. Horseshoe Ranch Garden With Western Character

    Finish your outdoor retreat with a rustic wind chime crafted from vintage horseshoes and forged metal pieces. The sturdy materials produce deep, resonant tones that complement country-inspired landscapes and weather beautifully over time.

    Complete the setting with split-rail fencing, drought-tolerant grasses, wagon wheels, and reclaimed timber accents. The result is a distinctive ranch-style garden that celebrates craftsmanship, history, and the enduring appeal of repurposed materials.

    Conclusion

    Wind chimes are more than decorative accessories—they add sound, motion, and personality that can completely transform an outdoor living space. Whether your style leans toward modern minimalism, coastal charm, rustic farmhouse, or Zen-inspired simplicity, the right wind chime can become a memorable focal point while enhancing the natural atmosphere of your garden.

    Experiment with different materials, colors, and placements to find the perfect balance between aesthetics and acoustics. By thoughtfully integrating wind chimes into patios, pergolas, balconies, pathways, and flower beds, you can create an inviting backyard retreat that delights both the eyes and the ears throughout every season.

  • 15 Clever Water Bottle Storage Ideas to Keep Your Kitchen Organized

    Reusable water bottles can quickly take over cabinets, countertops, and pantry shelves if they don’t have a designated place. From insulated tumblers to sports bottles and travel flasks, these everyday essentials come in all shapes and sizes, making them tricky to organize. Fortunately, a few smart storage solutions can transform a cluttered kitchen into a streamlined and efficient space.

    1. Install Wall-Mounted Storage Racks

    Take advantage of empty wall space by mounting racks specifically designed to hold reusable bottles. This approach keeps countertops clear while turning your collection into an organized display. Wall-mounted storage works especially well in smaller kitchens where cabinet space is limited.

    2. Organize Bottles with Stackable Storage Bins

    Stackable bins make it easy to separate bottles by size, purpose, or family member while maximizing vertical shelf space. Clear containers allow you to see everything at a glance, preventing forgotten bottles from getting buried in the back of the pantry.

    3. Add a Rotating Lazy Susan

    A Lazy Susan is perfect for deep cabinets where bottles often become difficult to reach. Simply spin the platform to access any item without moving everything else around. It’s an inexpensive upgrade that adds convenience to everyday use.

    4. Use Cabinet Organizers with Dividers

    Dedicated cabinet organizers prevent bottles from tipping over or rolling around whenever the door opens. Adjustable dividers create individual compartments, making it easier to maintain a tidy arrangement and quickly grab the bottle you need.

    5. Make Use of Over-the-Door Racks

    The backs of pantry and cabinet doors provide valuable storage opportunities. Slim over-the-door racks can hold lightweight bottles while freeing up shelf space for food, cookware, or other kitchen essentials.

    6. Display Bottles on Adjustable Shelving

    Open shelving with adjustable heights accommodates bottles of various sizes and shapes. Everything remains visible and easy to access, encouraging everyone in the household to return bottles to their proper place after use.

    7. Install Sliding Under-Shelf Baskets

    Clip-on baskets that hang beneath existing shelves instantly create extra storage without requiring renovations. These hidden compartments are perfect for lightweight bottles or matching lids, maximizing every inch of vertical space.

    8. Store Extras in Decorative Wicker Baskets

    Wicker baskets combine function with style, providing an attractive way to corral reusable bottles on shelves or countertops. Their natural texture complements many decorating styles while keeping clutter under control.

    9. Keep Bottles Upright with Vertical Organizers

    Vertical bottle holders are specifically designed to store bottles securely in an upright position. Their tiered layouts save space while preventing containers from rolling or falling over inside cabinets.

    10. Convert Deep Drawers with Dividers

    Deep kitchen drawers become much more functional when fitted with adjustable dividers. Each bottle gets its own compartment, reducing noise, preventing scratches, and making organization effortless.

    11. Create a Grab-and-Go Station with Portable Totes

    Portable totes are ideal for active families who regularly head to school, work, or sporting events. Group frequently used bottles together so they’re always packed and ready for the next outing.

    12. Utilize Under-the-Sink Space

    The cabinet beneath your sink often contains unused storage potential. Sliding shelves or compact organizers can neatly hold reusable bottles while keeping them tucked away but still accessible.

    13. Invest in a Freestanding Floor Rack

    For households with an extensive bottle collection, a freestanding rack provides dedicated storage without occupying cabinet space. Place one in a pantry, laundry room, or mudroom to create an organized hydration station.

    14. Attach Magnetic Racks to Metal Surfaces

    If you have available refrigerator space or another metal surface, magnetic racks offer a flexible storage solution that requires no drilling. They’re easy to reposition and work well for lightweight bottles or insulated tumblers.

    15. Simplify Access with a Rotating Bottle Holder

    Compact rotating bottle holders keep reusable bottles organized on countertops or pantry shelves while allowing quick access with a simple twist. Their efficient design minimizes wasted space and helps maintain an orderly kitchen.

    Conclusion

    Keeping reusable water bottles organized doesn’t have to be difficult. Whether you choose wall-mounted racks, stackable bins, under-shelf baskets, or freestanding organizers, the right storage solution can eliminate clutter and make your kitchen more functional. By assigning every bottle a dedicated place, you’ll save time, maximize available space, and enjoy a cleaner, more organized home every day.

  • Innovative Rooftop Garden Design Ideas to Transform Your Urban Space

    Imagine stepping out onto your rooftop and finding a lush oasis amid the urban landscape—a vibrant space bursting with color, fragrance, and life. Rooftop gardens are more than just a trend; they are transformative sanctuaries that bring nature closer to our daily lives, offering a peaceful retreat above the city’s hustle and bustle. Whether you have a sprawling terrace or a modest balcony, turning your rooftop into a green haven can elevate your living experience in ways you might never have imagined.

    Beyond their undeniable beauty, rooftop gardens offer an array of benefits that extend well beyond aesthetics. They improve air quality, reduce urban heat, and provide essential habitats for pollinators like bees and butterflies. These gardens also promote mental well-being by fostering a direct connection to nature, helping to reduce stress and inspire creativity. In a time when sustainable living is more important than ever, cultivating a rooftop garden is a powerful step toward environmental stewardship and self-sufficiency.

    If you’re ready to transform your rooftop into a flourishing escape, this post will guide you through a carefully curated list of design ideas to spark your creativity. From clever space-saving techniques to stunning plant combinations and innovative features, these inspirations will help you craft a rooftop garden that reflects your style while maximizing functionality. Let’s dive into the possibilities and discover how you can create your own sky-high sanctuary.

    1. Create a Stylish Rooftop Bar Space

    Create a Stylish Rooftop Bar Space

    Incorporating a designated bar spot into your rooftop garden elevates the atmosphere, making it an ideal feature for anyone who enjoys hosting gatherings. Whether you opt for a sleek, mobile bar cart or invest in a custom-built outdoor bar complete with a sink and mini fridge, this addition brings both function and flair to your space.

    Beyond its practical benefits, a bar area naturally becomes a vibrant social hub, encouraging conversation and celebration under the open sky. By thoughtfully designing this element, you transform your rooftop into a lively retreat where friends and family can mingle, toast, and create lasting memories.

    Key Design Elements

    • Ideal for hosting friends and family
    • Options vary from a compact trolley to a complete open-air bar setup
    • Creates a lively and inviting ambiance for gatherings

    Pro Tip: Equip your outdoor bar with a variety of liquors, mixers, and durable glassware neatly organized in weatherproof storage.

    2. Stay Cool Beneath a Stylish Parasol

    Stay Cool Beneath a Stylish Parasol

    To make the most of your rooftop garden, consider adding a well-crafted parasol that not only shields you from harsh UV rays but also extends the usability of your outdoor area during light rain showers. With a stylish umbrella in place, your terrace becomes a comfortable retreat where you can relax regardless of the weather.

    Selecting a parasol that combines durability with aesthetic appeal enhances the overall ambiance of your garden. Beyond providing essential sun protection, it also creates a cozy, secluded nook by adding a subtle barrier from neighboring views. This dual functionality makes parasols a smart and attractive addition to any rooftop oasis.

    Key Design Elements

    • Offers shelter from harmful sun rays and creates cool shade
    • Suitable for enjoyment during bright sunshine and gentle rain
    • Enhances seclusion by introducing visual screening

    Pro Tip: Opt for an offset umbrella to provide shade precisely where you want it, free from the obstruction of a middle pole.

    3. Transform Your Roof with Easy-Care Synthetic Turf

    Transform Your Roof with Easy-Care Synthetic Turf

    When designing a rooftop garden where maintaining natural grass isn’t feasible, synthetic turf can be a fantastic alternative. It offers the vibrant appearance and soft texture of real grass, but without the need for constant upkeep like watering, mowing, or fertilizing. This makes it especially practical for urban rooftops where resources and time may be limited.

    Today’s artificial grass has come a long way in mimicking the look and feel of natural lawns, making it easier than ever to create a serene green oasis above the city streets. With just a simple installation, you can turn an empty rooftop into a refreshing, inviting space that requires minimal effort to keep looking fresh and vibrant all year round.

    Key Design Elements

    • Requires zero watering, mowing, or fertilizing
    • Mimics the appearance and texture of natural grass
    • Quickly turns an empty rooftop into a vibrant green space

    Pro Tip: Opt for tall, textured synthetic turf that features subtle color shifts to achieve a lifelike look.

    4. Embrace Vibrant Hues to Make a Striking Impact

    Embrace Vibrant Hues to Make a Striking Impact

    Opting for neutral shades in your rooftop garden is a timeless and reliable approach, but don’t be afraid to break away from the ordinary by incorporating surprising pops of color. Imagine the striking allure of deep teal, the warmth of burnt orange, or the earthy richness of terracotta. These hues can instantly transform your outdoor retreat, injecting a bold character that sets your space apart from the rest.

    Consider weaving these vibrant tones into your design through select elements like stylish furniture, eye-catching planters, or plush cushions and throws. By thoughtfully placing these colorful accents, you’ll craft a dynamic and inviting atmosphere that feels both lively and distinctive. This splash of unexpected color can turn a simple rooftop garden into a truly unforgettable haven.

    Key Design Elements

    • Rich hues like deep teal, burnt orange, and terracotta make a striking statement
    • Add pops of color using vibrant furniture pieces and decorative planters
    • Results in a distinctive and unforgettable rooftop oasis

    Pro Tip: Pair vibrant hues with abundant green plants and muted shades to create a harmonious and calming rooftop garden.

    5. Choose an Integrated Concrete Seating Solution

    Choose an Integrated Concrete Seating Solution

    Maximizing seating in a contemporary rooftop garden without sacrificing precious space can be effortlessly achieved by opting for built-in benches. These permanent fixtures blend seamlessly into the landscape, offering a sleek and functional spot to relax without cluttering the area. Choosing concrete as the material of choice adds a layer of resilience; unlike wood or metal, concrete stands strong against harsh weather conditions such as fierce winds, heavy rain, and relentless UV exposure.

    Concrete seating requires minimal upkeep, needing only a professional polish and grinding every five to eight years to maintain its smooth surface and structural integrity. While this permanence means you won’t be able to rearrange your seating like traditional outdoor furniture, the trade-off is a robust, long-lasting addition that enhances the garden’s modern aesthetic and withstands the elements with ease. This makes built-in concrete seating an excellent investment for stylish, durable rooftop retreats.

    Key Design Elements

    • Built to withstand harsh weather conditions with lasting strength
    • Requires minimal upkeep, with polishing needed only once every 5 to 8 years
    • Compact, integrated design that maximizes available space

    Pro Tip: Enhance your concrete seating by layering it with soft, weather-resistant cushions for a cozy and inviting touch.

    6. Design Distinct Areas to Welcome and Delight

    Design Distinct Areas to Welcome and Delight

    When planning your rooftop garden, take advantage of any generous space by dividing it into distinct areas tailored to various activities. While a compact rooftop might only allow room for a cozy seating nook or a quaint dining spot, larger terraces open up the possibility to incorporate multiple zones—think a relaxing lounge, an outdoor kitchen, and an inviting dining area all in one. This approach not only enhances functionality but also encourages you to savor your rooftop in diverse ways.

    As you carve out these separate sections, aim to maintain a harmonious flow throughout the entire space. To achieve this, stick to a unified design language that subtly ties the zones together. Play with a balanced mix of textures, patterns, and color palettes to cultivate a serene yet welcoming atmosphere where each area feels like a natural extension of the next. The result is a rooftop oasis that feels both thoughtfully planned and effortlessly connected.

    Key Design Elements

    • Segment the area into distinct lounge, dining, and cooking sections
    • Maintain a unified aesthetic throughout every zone
    • Combine various textures and patterns to create dynamic appeal

    Pro Tip: Place outdoor rugs to create distinct areas, adding structure and style without installing any walls or dividers.

    7. Create Your Dream Kitchen Island

    Create Your Dream Kitchen Island

    In today’s modern homes, kitchen islands have evolved into an essential feature that enhances both functionality and style. They streamline meal preparation by offering ample workspace and cleverly increase storage, keeping your cooking essentials within easy reach. Beyond practicality, kitchen islands often serve as a central hub, sometimes even accommodating a sink to further boost convenience.

    Integrating a kitchen island into your rooftop garden layout not only elevates the area’s usability but also infuses it with a touch of elegance and refinement. This addition transforms your outdoor cooking zone into a chic, inviting environment where culinary creativity and social gatherings can effortlessly unfold. With a thoughtfully designed island, your rooftop space will embody a perfect blend of modern sophistication and everyday practicality.

    Key Design Elements

    • Enhances the ease of meal preparation
    • Provides additional areas for storage and work surfaces
    • Boosts the overall sense of elegance and sophistication

    Pro Tip: Place a row of bar stools along one side of the island to establish a relaxed area for eating and gathering with friends.

    8. Elevate with Living Walls

    Elevate with Living Walls

    Incorporating vertical gardens, often called living walls, offers a clever solution for adding vibrant plant life to your rooftop without taking up precious ground area. These green installations can transform a plain wall into a captivating focal point or serve as an elegant natural barrier, enhancing both aesthetics and privacy.

    Beyond their visual appeal, living walls bring practical benefits by contributing to cleaner air and helping regulate temperature through added insulation. By climbing upwards instead of spreading out, vertical gardens maximize your outdoor space, turning even the smallest rooftop into a thriving, eco-friendly oasis.

    Key Design Elements

    • Expands plant coverage while preserving ground area
    • Serves as an organic barrier for added seclusion
    • Enhances air purity and boosts thermal regulation

    Pro Tip: Opt for hardy, water-wise plants such as succulents or ferns in your vertical garden to keep upkeep low.

    9. Add a Stylish Pergola to Your Rooftop Garden

    Add a Stylish Pergola to Your Rooftop Garden

    In contemporary rooftop garden design, pergolas have become a favorite feature for adding both style and function. These architectural frameworks, made up of vertical posts supporting horizontal beams, offer a delicate balance of shelter and sunlight. Rather than fully shading the space, pergolas filter light, allowing dappled sun to reach your plants and seating areas, creating a cozy yet open atmosphere.

    Whether positioned as a standalone centerpiece or anchored to the side of a building, pergolas help carve out a distinct outdoor living area on your rooftop. Their versatile design invites creativity—you can weave climbing vines through the beams to introduce lush greenery or string up twinkling fairy lights for a magical ambiance after dark. This combination of structure and natural elements transforms your rooftop into an inviting retreat that blends comfort with charm.

    Key Design Elements

    • Offers gentle shade while still letting sunlight through
    • Designed to stand alone or secure to a wall
    • Ideal for supporting vines and hanging twinkling lights

    Pro Tip: Add retractable shade sails or a louvered roof to your pergola so you can easily control the amount of sunlight and shade as the day progresses.

    10. Brighten Your Rooftop Oasis with Vibrant Cushions and Throws

    Brighten Your Rooftop Oasis with Vibrant Cushions and Throws

    Creating a contemporary rooftop garden calls for a thoughtful approach to color, where simplicity often reigns supreme. Embracing a restrained palette helps establish a calm, cohesive atmosphere that feels fresh and inviting. Yet, weaving in bursts of vibrant hues can elevate the space, infusing it with personality and a dynamic flair.

    To achieve this balance, consider incorporating color accents in small, deliberate touches rather than broad strokes. Accessories like cushions, blankets, and rugs offer perfect opportunities to introduce these lively pops without dominating the overall design. Even planters themselves can serve as stylish canvases, adding subtle but impactful splashes of color that catch the eye and enrich the garden’s aesthetic.

    Key Design Elements

    • Adding cushions and throws is a simple way to brighten up your space with color
    • Incorporate rugs and planter boxes to complement the overall design
    • Choose vibrant accent hues, but use them sparingly for maximum impact

    Pro Tip: Choose a couple of complementary colors and incorporate them consistently to create a unified and thoughtfully designed rooftop garden.

    11. Add a Flowing Element to Your Rooftop Oasis

    Add a Flowing Element to Your Rooftop Oasis

    Incorporating a water element into your rooftop garden can transform the space into a serene retreat, infusing it with a peaceful, meditative atmosphere. The gentle sound of flowing water not only soothes the senses but also breathes life into your garden, enhancing its overall beauty and inviting relaxation. Beyond their calming influence, water features naturally draw the eye, becoming captivating centerpieces that elevate the design.

    There’s a wealth of choices to suit any style or size of rooftop. Whether you lean toward the graceful cascade of a waterfall fountain, the artistic charm of a sculpted statue fountain, or the minimalist appeal of a wall-mounted feature, each option creates a distinct vibe. Freestanding fountains, tranquil rock ponds, and charming birdbaths also serve as wonderful alternatives, adding texture and movement to your rooftop oasis while attracting local wildlife. No matter which you choose, a water feature is sure to bring harmony and elegance to your elevated garden space.

    Key Design Elements

    • Evokes a peaceful, meditative vibe
    • Acts as an eye-catching centerpiece
    • Offers diverse design options to complement any setting

    Pro Tip: Opt for a water feature powered by the sun to reduce energy expenses and support sustainability.

    12. Set Up Sun Lounging Spots

    Set Up Sun Lounging Spots

    Transform your rooftop retreat into a sunny sanctuary by adding a stylish sun lounger. This popular piece of outdoor furniture effortlessly blends comfort and functionality, making it a staple in contemporary garden settings above the city. Whether you want to bask in the warm rays, dive into a good book, or simply take a peaceful nap, a sun lounger offers the perfect spot to unwind and recharge.

    Beyond its practical uses, a sun lounger lends a serene and inviting atmosphere to your rooftop oasis. Its sleek design enhances the visual appeal, helping to cultivate a tranquil vibe that encourages relaxation. Incorporating this versatile lounge piece will not only elevate the overall look of your garden but also create a cozy nook where you can enjoy quiet moments away from the hustle and bustle below.

    Key Design Elements

    • Ideal for soaking up the sun and unwinding
    • Serves as a cozy nook for reading or catching a quick nap
    • Brings a luxurious, vacation vibe to your rooftop space

    Pro Tip: Arrange your sun loungers so they capture either the most stunning scenery or the warmth of the afternoon sunlight for an enhanced relaxation experience.

    13. Add Transparent Floor Panels

    Add Transparent Floor Panels

    Incorporating glass flooring into your rooftop garden design can transform the atmosphere, adding a sleek and contemporary touch that instantly elevates the space. This innovative feature not only enhances the visual appeal but also creates a sense of openness, making the area feel larger and more inviting. The transparency of the glass invites natural light to flow freely, blurring boundaries and connecting different levels in a seamless, stylish way.

    Depending on your needs, you can choose between clear glass for an unobstructed view or frosted glass to maintain privacy while still enjoying the benefits of light diffusion. Either option introduces an element of sophistication and modern luxury, turning your rooftop into a striking focal point. With glass flooring, your outdoor oasis gains both functional and aesthetic advantages, effortlessly combining elegance with smart design.

    Key Design Elements

    • Creates a more spacious and airy atmosphere
    • Instantly elevates the sense of elegance
    • Opt for clear or frosted options to manage privacy effectively

    Pro Tip: Make sure the glass panels are specifically designed for exterior conditions and feature a non-slip surface to prevent accidents.

    14. Design Your Al Fresco Culinary Space

    Design Your Al Fresco Culinary Space

    Incorporating an outdoor kitchen into your rooftop garden transforms the space into a vibrant hub for socializing and culinary creativity. It not only enhances the overall look of your rooftop oasis but also provides a functional area where you can effortlessly whip up delicious meals while enjoying the fresh air. Imagine the joy of hosting friends and family, impressing them with your cooking talents as the smoky, mouthwatering scents of grilled dishes drift through the breeze.

    Beyond the sensory pleasures, an outdoor cooking area adds significant appeal and value to your home. It turns the rooftop into more than just a garden—it becomes an inviting entertainment zone that encourages gatherings and memorable moments. Whether it’s a casual barbecue or a sophisticated alfresco dinner, this feature elevates both your lifestyle and your property’s worth in one stylish, practical package.

    Key Design Elements

    • Ideal for hosting gatherings and enjoying meals under the open sky
    • Enhances the overall worth of your home
    • Simplifies and elevates the experience of cooking outdoors

    Pro Tip: Incorporate a durable countertop built to withstand the elements and add sheltered storage to keep your cooking tools safe throughout every season.

    15. Create Warmth with a Fire Pit or Fireplace

    Create Warmth with a Fire Pit or Fireplace

    Incorporating a fire pit or an outdoor fireplace into your rooftop garden can truly elevate the space, allowing you to enjoy it even as the temperatures drop. This cozy element not only provides warmth but also serves as a captivating centerpiece that naturally draws people together, fostering conversation and connection under the open sky.

    Whether your style leans toward a minimalist, contemporary fire pit or a more permanent, built-in fireplace, adding this feature transforms your rooftop into a welcoming haven regardless of the season. It’s a simple yet powerful way to extend the life of your outdoor oasis, making it a go-to spot for relaxation and gatherings throughout the year.

    Key Design Elements

    • Prolongs rooftop enjoyment through the colder seasons
    • Forms a warm, inviting spot for socializing
    • Offered in both contemporary and classic designs

    Pro Tip: Choose a bioethanol or gas fire pit for your rooftop to enjoy warmth without the hassle of smoke and ash from traditional wood fires.

    16. Boost Seclusion Using Vertical Greenery

    Boost Seclusion Using Vertical Greenery

    When your rooftop garden is nestled among nearby buildings, maintaining a sense of privacy can feel challenging. One clever solution is to incorporate climbing plants and wall-friendly shrubs along the perimeter. These vertical greens not only cover unsightly fences but also infuse your terrace with lush, vibrant foliage.

    By growing plants upward instead of outward, you maximize your limited floor area, leaving more room for seating or other garden elements. Additionally, these living walls offer valuable shade, creating a cooler, more comfortable retreat on sunny days. Embracing vertical greenery turns your rooftop into a cozy, secluded oasis that feels worlds away from the urban bustle.

    Key Design Elements

    • Create a green barrier for privacy without enclosing walls
    • Preserve precious ground area by going vertical
    • Enhance your space with vibrant plants climbing upward

    Pro Tip: Consider planting climbing roses, wisteria, or ivy to create an attractive and scented green barrier for added privacy.

    17. Set Up Your Outdoor Dining Space

    Set Up Your Outdoor Dining Space

    Outdoor dining sets offer far more than a place to enjoy meals. They create a versatile spot where you can unwind with loved ones during warm afternoons, throw lively gatherings, catch up on work, or simply soak in the views around you. Their multifunctional nature makes them an essential addition to any rooftop oasis.

    Beyond functionality, well-chosen furniture adds a striking visual element to your terrace garden. With sleek lines and contemporary designs, these pieces can become the focal point of your outdoor space, tying together the natural beauty of your plants with a modern aesthetic. In this way, your dining area not only invites comfort but also elevates the overall style of your rooftop retreat.

    Key Design Elements

    • Serves multiple purposes like eating, gathering, and unwinding
    • Functions as an eye-catching focal point
    • Offers an extensive variety of design options

    Pro Tip: Choose adjustable dining tables that easily expand to fit cozy meals or bigger groups.

    18. Incorporate Grand-Scale Planters

    Incorporate Grand-Scale Planters

    A rooftop garden truly comes alive when lush greenery takes center stage. Incorporating potted plants is an essential strategy for infusing life and style into your elevated outdoor retreat. Opting for generously sized pots allows you to introduce bold bursts of foliage and texture, instantly elevating the ambiance. To enhance a contemporary, crisp feel, consider using white containers—they brighten the space and lend a clean, modern edge.

    Renowned garden expert Chris Beardshaw suggests selecting plants that thrive in containers and bring variety to your rooftop oasis. His top picks include Alphines for their alpine charm, the broad leaves of Hostas, the fragrant appeal of Scented Pelargoniums, striking Agapanthus blooms, aromatic Lavender, vibrant Echium, and the delicate beauty of Cosmos. These selections not only offer visual interest but also create a sensory-rich environment perfect for urban gardening.

    Key Design Elements

    • Brings immediate vibrancy and natural beauty
    • Sleek white containers create a contemporary vibe
    • Top plant choices include Agapanthus, Lavender, and Hostas

    Pro Tip: Arrange containers of different sizes in clusters to build a rich, tiered arrangement that naturally leads the gaze skyward.

    19. Select a Style That Harmonizes with Your Environment

    Select a Style That Harmonizes with Your Environment

    When designing a rooftop garden in a charming neighborhood, aim to enhance the overall vibe by choosing elements that naturally align with the local aesthetic. Drawing inspiration from the colors found around you—whether it’s the soft hues of nearby buildings or the vibrant shades of surrounding greenery—can help you craft a modern garden that feels like an organic extension of the environment.

    By thoughtfully mirroring these tones and textures, your rooftop terrace will achieve a balanced and cohesive look. This approach not only creates visual harmony but also transforms your outdoor space into a tranquil retreat that integrates effortlessly with the character of your neighborhood. In doing so, your garden won’t just stand out—it will truly belong.

    Key Design Elements

    • Let the hues of the nearby environment guide your color choices
    • Harmonize your design with the architectural style of the community
    • Ensure a smooth and cohesive visual transition throughout the space

    Pro Tip: Take note of the main hues in your surrounding skyline or adjacent structures and incorporate those shades into your planters and outdoor furnishings.

    20. Create Cozy Seating Spots

    Create Cozy Seating Spots

    Spending time outside has been proven by science to boost both your physical health and mental clarity. When designing a rooftop garden, many people choose to include a cozy garden sofa or daybed as a central seating option. This not only offers a perfect spot to relax and enjoy the fresh air but also creates an inviting atmosphere for hosting friends and family.

    Adding a garden sofa elevates the overall look of your rooftop oasis, blending comfort with style seamlessly. Today’s market boasts an impressive variety of materials, designs, and hues, allowing you to pick a piece that complements your personal taste and the vibe of your outdoor space. Whether you prefer sleek modern lines or something more classic and cushy, there’s a perfect option waiting to enhance your rooftop retreat.

    Key Design Elements

    • Enhances both your body and mind’s health
    • Lounge sofas and daybeds are favored seating options
    • Comes in a diverse array of designs and fabrics

    Pro Tip: Opt for furniture made from weather-resistant rattan or powder-coated aluminum to ensure lasting strength while maintaining a chic look.

    21. Embrace a Subtle Color Palette

    Embrace a Subtle Color Palette

    Contemporary rooftop gardens tend to embrace simplicity and elegance through clean lines and understated aesthetics. One of the most effective ways to achieve this modern vibe is by incorporating a palette of neutral tones. Because gardens naturally burst with vibrant greens, adding bright or intense hues can sometimes feel overpowering, disrupting the serene atmosphere you want to cultivate.

    Instead, opting for shades like white, black, beige, soft browns, sage, greige, cream, and tan creates a harmonious backdrop that allows the natural beauty of your plants to take center stage. These muted colors not only enhance the sleek, sophisticated feel of the space but also contribute to a calming environment, making your rooftop retreat an inviting haven for rest and rejuvenation.

    Key Design Elements

    • Opt for shades like white, beige, and greige as your palette
    • Subtle neutrals beautifully highlight vibrant plant life
    • Creates a serene and peaceful environment to unwind in

    Pro Tip: Incorporate a mix of textures within a single neutral color scheme to create interest and dimension without overwhelming the space with too many hues.

    22. Create Boundaries with Decking Elements

    Create Boundaries with Decking Elements

    When planning a rooftop garden, opting for decking as your flooring can be a smart and stylish decision. Its lightweight nature makes it ideal for elevated spaces, ensuring the structure isn’t overloaded, while its robust durability stands up well to the elements. Beyond practicality, decking brings a cozy, organic touch that helps create a welcoming atmosphere, making your rooftop feel more like an outdoor oasis.

    Using decking also offers the advantage of visually organizing your garden, subtly separating seating areas, planters, and walkways without interrupting the flow. For added convenience, composite decking stands out as an excellent option—it combines the natural look of wood with enhanced resistance to weather and minimal upkeep. This means you can enjoy the beauty of your rooftop retreat without worrying about frequent repairs or treatments.

    Key Design Elements

    • Easy on rooftop structures due to its light weight
    • Creates distinct areas throughout the garden space
    • Durable composite decking requires minimal upkeep

    Pro Tip: Opt for composite decking in a pale wood shade to maintain an open, luminous atmosphere.

    23. Illuminate Your Rooftop Retreat

    Illuminate Your Rooftop Retreat

    No rooftop garden is truly finished until it’s bathed in thoughtful lighting. As the sun sets, well-placed lights transform your garden from a daytime retreat into an enchanting evening haven. Beyond mere visibility, lighting introduces an elegant ambiance that elevates the entire rooftop experience.

    When planning your illumination, explore a variety of outdoor fixtures to achieve the perfect mood and functionality. From the soft, twinkling glow of string lights to the focused brightness of spotlights, each option serves a unique purpose. Consider integrating bollard or wall lights for subtle accents, or in-ground and floodlights to highlight key features and pathways, creating layers of light that bring your rooftop garden to life after dark.

    Key Design Elements

    • Expands the time you can enjoy the garden after sunset
    • Elevates the visual appeal of your rooftop area
    • Consider choices like fairy lights, focused beams, or pathway lamps

    Pro Tip: Combine various lighting styles—soft background glows, focused task lights, and decorative highlights—to craft a cozy and welcoming ambiance after dark.

    24. Nature Meets Home: Elevate Your Rooftop Oasis

    Nature Meets Home: Elevate Your Rooftop Oasis

    Transform your rooftop into an inviting extension of your living space by incorporating the comforts typically reserved for indoors. Imagine lounging on a plush sofa as you enjoy the fresh air, with a stylish coffee table nearby to hold your favorite drink or a good book. Adding a television and soft rugs can further enhance this outdoor retreat, making it a perfect spot to unwind or entertain.

    By blending these familiar home elements into your terrace, you create a serene ambiance that balances modern aesthetics with cozy relaxation. This approach not only elevates the visual appeal of your rooftop garden but also invites you to fully embrace the space as a seamless, comfortable getaway just steps from your front door.

    Key Design Elements

    • Outdoor spaces can comfortably feature sofas, televisions, and rugs
    • Blurs the boundary between inside and outside living areas
    • Fosters a peaceful and cozy environment

    Pro Tip: Choose furniture specifically designed for outdoor use to withstand weather conditions and last longer on your rooftop garden.

    Conclusion

    Transforming your rooftop into a lush, inviting garden is an incredible way to maximize your outdoor space while enhancing your home’s beauty and environmental footprint. With thoughtful design ideas—from selecting the right plants and incorporating cozy seating to utilizing creative lighting and efficient irrigation—you can create a serene oasis above the city bustle. Remember, every rooftop has the potential to become a personal sanctuary, a place to relax, entertain, and reconnect with nature, no matter the size or shape of your space.

    Now is the perfect time to roll up your sleeves and start planning your rooftop garden. By taking small, intentional steps today, you’ll cultivate not just plants, but a lifestyle filled with tranquility and inspiration. Embrace the challenge, unleash your creativity, and watch as your rooftop transforms into a vibrant retreat that nourishes both body and soul. Your dream garden is waiting—go ahead and bring it to life!

  • 25 Striking Summer Black Front Door Ideas for a Stylish Curb Appeal Boost

    A black front door is one of the most timeless and powerful design choices for summer curb appeal. It acts as a strong visual anchor that highlights greenery, flowers, and seasonal decor beautifully. Whether your home is modern, traditional, or farmhouse-inspired, black works as a versatile neutral that elevates almost any exterior style. From finishes and architectural details to seasonal styling, these ideas will help you transform your entryway into something striking, welcoming, and unforgettable.

    1. Citrus Fresh Lemon-Inspired Entry

    Adding lemon-themed decor is a cheerful summer styling choice that instantly energizes a black front door. Bright yellow tones pop dramatically against the dark background, creating a lively and refreshing entrance. Think lemon wreaths, citrus garlands, or even faux lemon topiaries in matching planters. This playful combination brings a sunny, Mediterranean-inspired charm that feels perfect for warm weather.

    2. Soft Matte Black Elegance

    A matte black finish creates a soft, velvety appearance that feels modern and refined. Unlike glossy surfaces, it absorbs light rather than reflecting it, giving the door a calm, architectural presence. This finish is especially great for hiding fingerprints and minor wear, making it both stylish and practical for busy households.

    3. Natural Stone Framed Entrance

    Pairing a black door with a stone porch creates a grounded, natural aesthetic. The rough texture of stone contrasts beautifully with the smooth door surface, adding depth and character. In summer, this combination feels cool, earthy, and effortlessly upscale, especially when paired with lush landscaping.

    4. Light-Filled Glass Accent Door

    Glass panels soften the boldness of a black door while allowing natural light to brighten your entryway. Options like frosted or textured glass offer privacy while still feeling open and airy. This design bridges indoor and outdoor spaces, making the home feel more connected to the summer season.

    5. Lavender Garden Welcome Entrance

    Framing your entrance with lavender brings both beauty and fragrance. The soft purple tones and silvery-green leaves create a calming contrast against the black door. It’s a low-maintenance summer plant that adds elegance while also filling the air with a soothing scent.

    6. Grand Double Door Statement

    Double doors make a dramatic architectural statement and elevate the entire facade of your home. The symmetry adds balance, while the bold black finish enhances their grandeur. In summer, they also offer practical airflow and a wide, welcoming opening for guests.

    7. Sleek Minimal Entry Design

    A minimalist design focuses on clean lines and simple forms without decorative distractions. Often paired with a sleek handle, this style emphasizes modern architecture and simplicity. It creates a calm, uncluttered look that feels fresh and contemporary for summer.

    8. Warm Metallic Brass Contrast

    Brass hardware adds warmth and contrast to a black door, creating a classic and elegant pairing. The golden tones shine beautifully under summer sunlight, giving your entrance a refined, polished feel. This combination works especially well for traditional and transitional homes.

    9. Elegant Curved Arch Doorway

    An arched silhouette brings softness and architectural elegance to your entryway. Painted black, the curved shape becomes even more striking and sculptural. It works beautifully with climbing greenery or floral accents for a romantic summer look.

    10. Breezy Screen Door Layering

    A modern screen door allows you to enjoy fresh summer air without letting in insects. When paired with a black main door, it creates a layered, cohesive look. This practical addition enhances comfort while maintaining a clean, unified exterior style.

    11. Classic Black and White Frame Contrast

    Crisp white trim around a black door creates one of the most timeless and high-contrast combinations in home design. It frames the entryway beautifully and makes the door stand out as a focal point. This look feels fresh, clean, and especially vibrant in summer.

    12. Lush Green Entryway Planters

    Large potted plants instantly bring life and color to your entryway. Green foliage stands out dramatically against a black door, creating a lush and inviting look. Use tall planters like palms or topiaries to frame the entrance symmetrically for a polished finish.

    13. Retro Mid-Century Modern Door Style

    Mid-century designs often feature geometric window shapes and clean lines. Painted black, these details become more refined and modern while still honoring the retro style. This look pairs beautifully with minimalist landscaping and vintage-inspired outdoor furniture.

    14. High-Shine Gloss Finish Door

    A glossy finish creates a bold, reflective surface that feels luxurious and formal. It captures sunlight beautifully, giving the door depth and shine. Paired with metallic hardware, it creates a sophisticated, high-end entrance.

    15. Organic Wood and Black Harmony

    Wood accents soften the intensity of black and introduce natural warmth. Whether through framing, siding, or porch details, wood creates a balanced, organic feel. This pairing is especially beautiful in summer when surrounded by greenery.

    16. Expanded Light Sidelight Design

    Sidelights expand the visual presence of your entryway while allowing more natural light inside. When matched with a black frame, they create a cohesive architectural statement. This design enhances both elegance and functionality.

    17. Bold Contemporary Geometric Door

    Contemporary doors often feature bold geometric shapes and modern materials like vertical glass slits. Black enhances their sculptural quality, making them feel like functional art pieces. This style suits homes with clean, modern architecture.

    18. Ornate Victorian Heritage Door

    Victorian-style doors feature ornate detailing and classic craftsmanship. When painted black, the intricate moldings and panels become even more dramatic. This style is perfect for historic homes or those wanting a timeless, elegant look.

    19. Smooth Satin Finish Sophistication

    Satin finishes strike a perfect balance between matte and glossy. They offer a soft sheen that feels refined without being overpowering. This versatile finish works well in both modern and traditional settings.

    20. Sturdy Craftsman Style Entry

    Craftsman doors are known for their sturdy design and geometric window panes. A black finish modernizes this classic style while highlighting its strong lines. It pairs beautifully with stone porches and natural materials.

    21. Luxe Gold Detail Door Styling

    Gold accents add a touch of glamour and brightness to a black door. From handles to house numbers, these details shimmer in the sunlight and create a luxurious effect. It’s a perfect choice for a sophisticated summer entrance.

    22. Updated Farmhouse Front Entry

    Modern farmhouse style blends rustic charm with clean, contemporary lines. A black door anchors the look, making it feel fresh and updated. Paired with natural wood, metal accents, and seasonal flowers, it creates a warm and welcoming entrance.

    23. Elevated Transom Light Feature Door

    A transom window above the door enhances height and allows extra light into the entryway. When framed in black, it becomes a seamless architectural feature. This design adds elegance and a sense of spaciousness.

    24. Seasonal Summer Wreath Styling

    A seasonal wreath is one of the simplest ways to refresh your entry. Bright florals, greenery, or citrus-inspired designs stand out beautifully against a black backdrop. It’s an easy way to add personality and color for summer.

    25. Warm Evening Porch Lighting Glow

    Good lighting transforms a black front door at night, making it just as inviting after sunset. Warm-toned fixtures highlight textures and create a welcoming glow. Lantern-style sconces or modern fixtures both work beautifully depending on your home’s style.

    Conclusion

    A black front door brings timeless elegance and bold contrast to any home exterior. With the right mix of textures, finishes, and seasonal accents, it can shift from sleek and modern to warm and welcoming with ease. These ideas show just how versatile and impactful a simple black door can be for summer curb appeal.

  • 20 Barbie Room Ideas for Girls’ Dream Bedroom Decor

    A Barbie-inspired bedroom is more than a color scheme—it’s a full experience built around imagination, glamour, and playful elegance. While pink is often the starting point, the real magic comes from layering textures, lighting, furniture, and personalized details that reflect Barbie’s iconic world.

    Whether you’re designing a playful kids’ room or a chic, nostalgic space for older fans, these ideas help you create a balanced look that feels both dreamy and functional.

    1. Pink Paradise Walls

    Soft blush, bubblegum pink, or pastel rose walls instantly set the tone for a Barbie-inspired room. To elevate the look, add ombre gradients, subtle stripes, or metallic accents like rose gold decals. A touch of shimmer wallpaper can also bring depth without overwhelming the space. This foundation makes every other design element feel cohesive and intentional.

    2. Barbie Dreamhouse-Inspired Furniture

    Furniture plays a huge role in achieving the Barbie aesthetic. Think canopy beds, tufted chairs, acrylic tables, and vanity sets in soft pastel tones. Multi-functional furniture, like beds with built-in storage or playful shelving units, helps maintain a clean yet whimsical environment while keeping the Dreamhouse vibe alive.

    3. Sparkling Statement Chandelier

    A chandelier instantly transforms the room into a glamorous Barbie retreat. Crystal designs, floral shapes, or star-inspired fixtures add a touch of fantasy. Pairing it with warm dimmable lighting enhances the cozy-glam atmosphere, perfect for both playtime and relaxation.

    4. Fashion Showcase Corner

    Create a mini fashion zone dedicated to Barbie’s world of style. Use open shelving or display racks for dolls, outfits, and accessories. Clear containers or pastel storage boxes help keep everything organized while still making the collection visually exciting and easy to access.

    5. Barbie Art Gallery Wall

    Turn one wall into a curated gallery featuring Barbie prints, fashion illustrations, and inspirational quotes. You can mix framed artwork with DIY pieces like painted silhouettes or collage designs. This adds personality and makes the room feel like a creative exhibition space.

    6. Soft & Playful Rugs

    Layering rugs in soft textures enhances both comfort and style. Choose fluffy pink carpets, heart-shaped mats, or rugs with subtle Barbie-inspired patterns. For a more modern twist, pastel geometric designs or glitter-thread accents can bring in a stylish edge.

    7. Glam Barbie Vanity Station

    A vanity area is essential for a Barbie-inspired room. Choose a pastel or white table with a large mirror framed by LED lights. Add decorative organizers, pretend makeup sets, or themed accessories to complete the glamorous setup that doubles as a play and styling zone.

    8. Doll Display Feature Wall

    Showcase Barbie dolls like collectibles by dedicating a full wall with floating shelves or shadow boxes. Organize them by theme, color, or collection era to create a visually striking arrangement that also keeps everything safe and tidy.

    9. DIY Accessory Craft Station

    Encourage creativity with a small crafting area where kids can design Barbie accessories. Include storage for beads, ribbons, fabric scraps, and small tools. Finished crafts can be displayed on mini shelves, turning the space into an interactive creative studio.

    10. Customized Barbie Bedding Set

    Bedding helps anchor the room’s theme. Choose sets featuring Barbie logos, silhouettes, or soft pastel patterns. Layer with plush throws and decorative pillows shaped like hearts, stars, or bows to create a cozy and inviting sleep space.

    11. Barbie Wall Decals

    Wall decals are an easy way to transform the space without permanent changes. Choose designs like Barbie silhouettes, bows, hearts, and stars. They can be arranged creatively across walls or furniture for a cohesive and playful look.

    12. Fashion-Forward Closet Design

    Turn the closet into a mini Barbie wardrobe. Use pastel hangers, labeled storage bins, and glittery organizers. A small mannequin or display section for favorite outfits adds a boutique-style touch that enhances the fashion-forward theme.

    13. Signature Barbie Logo Headboard

    A statement headboard featuring the Barbie logo becomes a striking focal point. Whether upholstered, painted, or DIY-stenciled, it adds instant personality and ties the entire room together with a bold design anchor.

    14. Glitter Curtain Elegance

    Curtains with shimmer, sequins, or soft glitter effects bring movement and sparkle to the room. Layer them with sheer panels to allow natural light while maintaining a dreamy, floating aesthetic.

    15. Barbie Memory & Photo Wall

    Create a collage wall filled with Barbie posters, magazine cutouts, or personal photos styled in creative shapes like hearts or stars. Add fairy lights or decorative frames to make it feel warm, nostalgic, and visually dynamic.

    16. Cozy Barbie Movie Corner

    Design a small entertainment nook with bean bags, soft blankets, and a projector or screen. This space is perfect for Barbie movie nights, creating a cozy and immersive viewing experience within the room.

    17. Barbie Playhouse or Dollhouse Zone

    A dedicated playhouse or dollhouse area enhances imaginative play. Add colorful storage bins nearby to keep dolls and accessories organized while maintaining a visually balanced and clutter-free corner.

    18. Barbie-Inspired Study Desk

    A study or creative desk can still match the Barbie theme. Use pastel tones, glitter stationery, and stylish organizers. Add inspirational quotes or fashion sketches to make studying or drawing more enjoyable and stylish.

    19. Starry Glow Ceiling Design

    Transform the ceiling into a magical night sky with glow-in-the-dark stars or LED string lights. Subtle Barbie-themed decals or a sparkling centerpiece light fixture complete the dreamy overhead effect.

    20. Decorative Furniture Accents

    Instead of replacing furniture, enhance existing pieces with Barbie-inspired details. Add pastel cushions, sparkly knobs, patterned covers, or decorative trims. These small upgrades create a cohesive theme without a full renovation.

    Conclusion

    A Barbie-inspired room blends imagination, elegance, and playful charm into one cohesive design. By combining statement furniture, soft textures, creative zones, and sparkling details, you can transform any space into a dreamy retreat. The key is balance—mixing fun elements with functional design so the room feels both magical and livable.