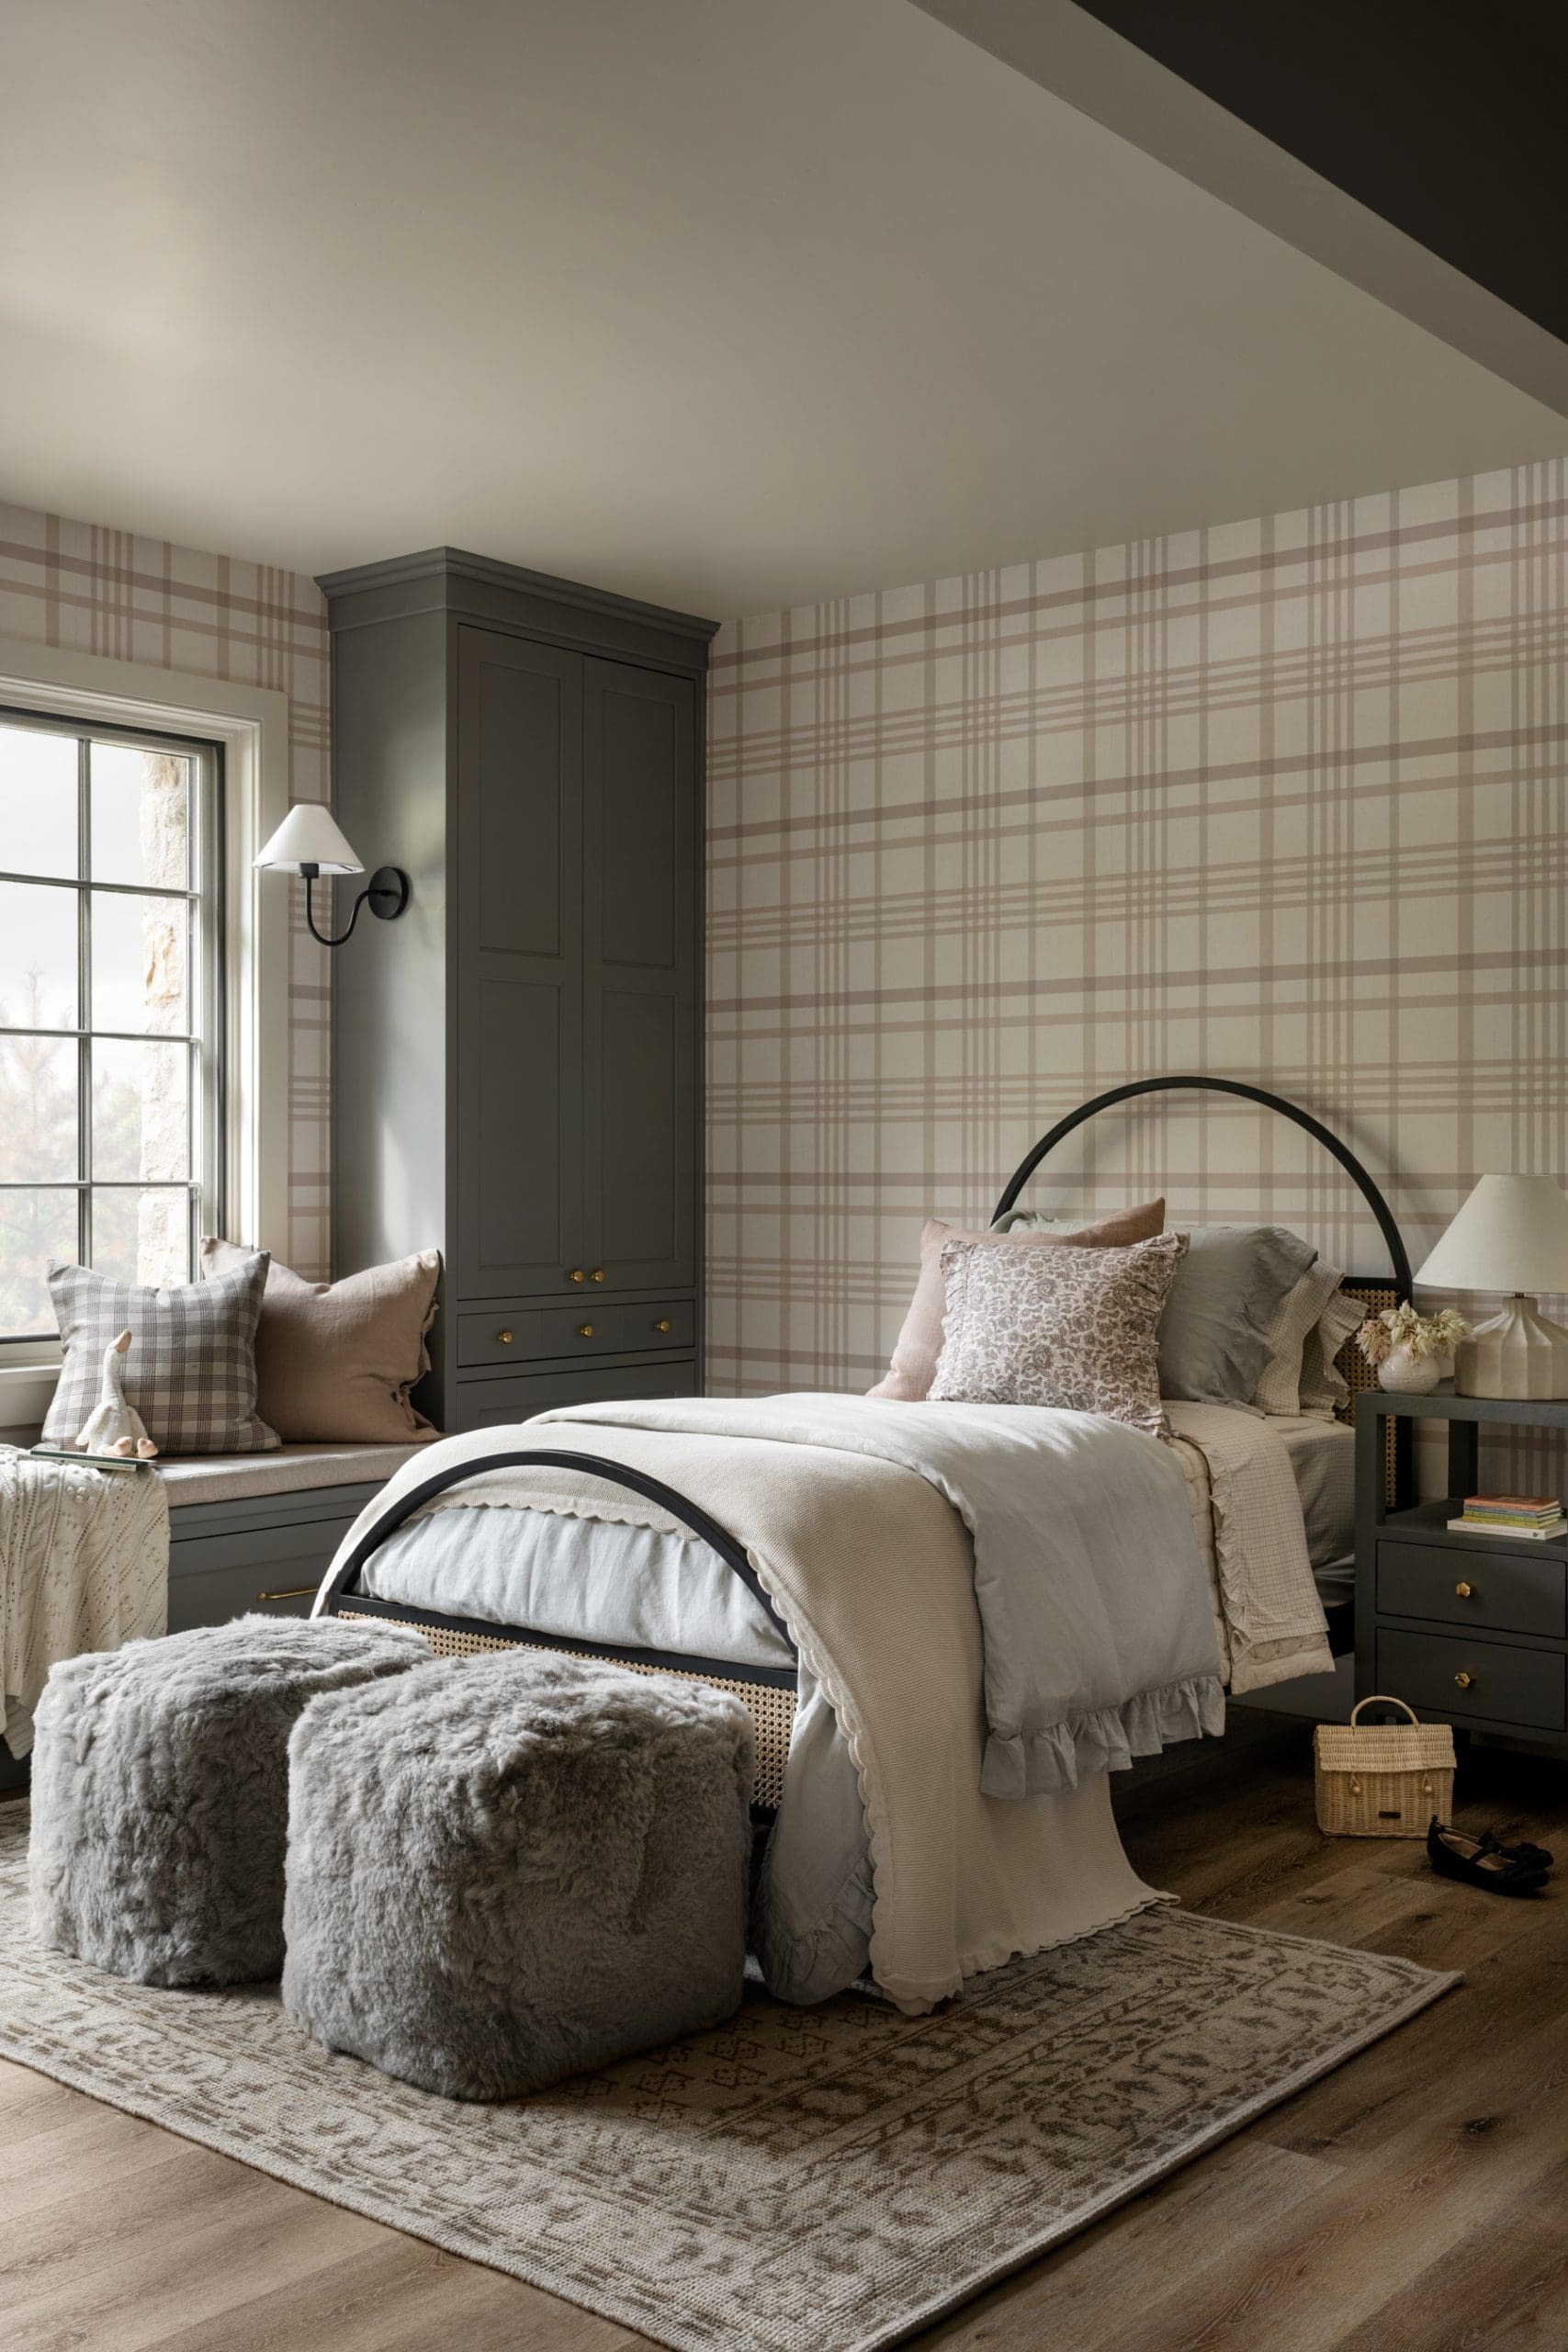
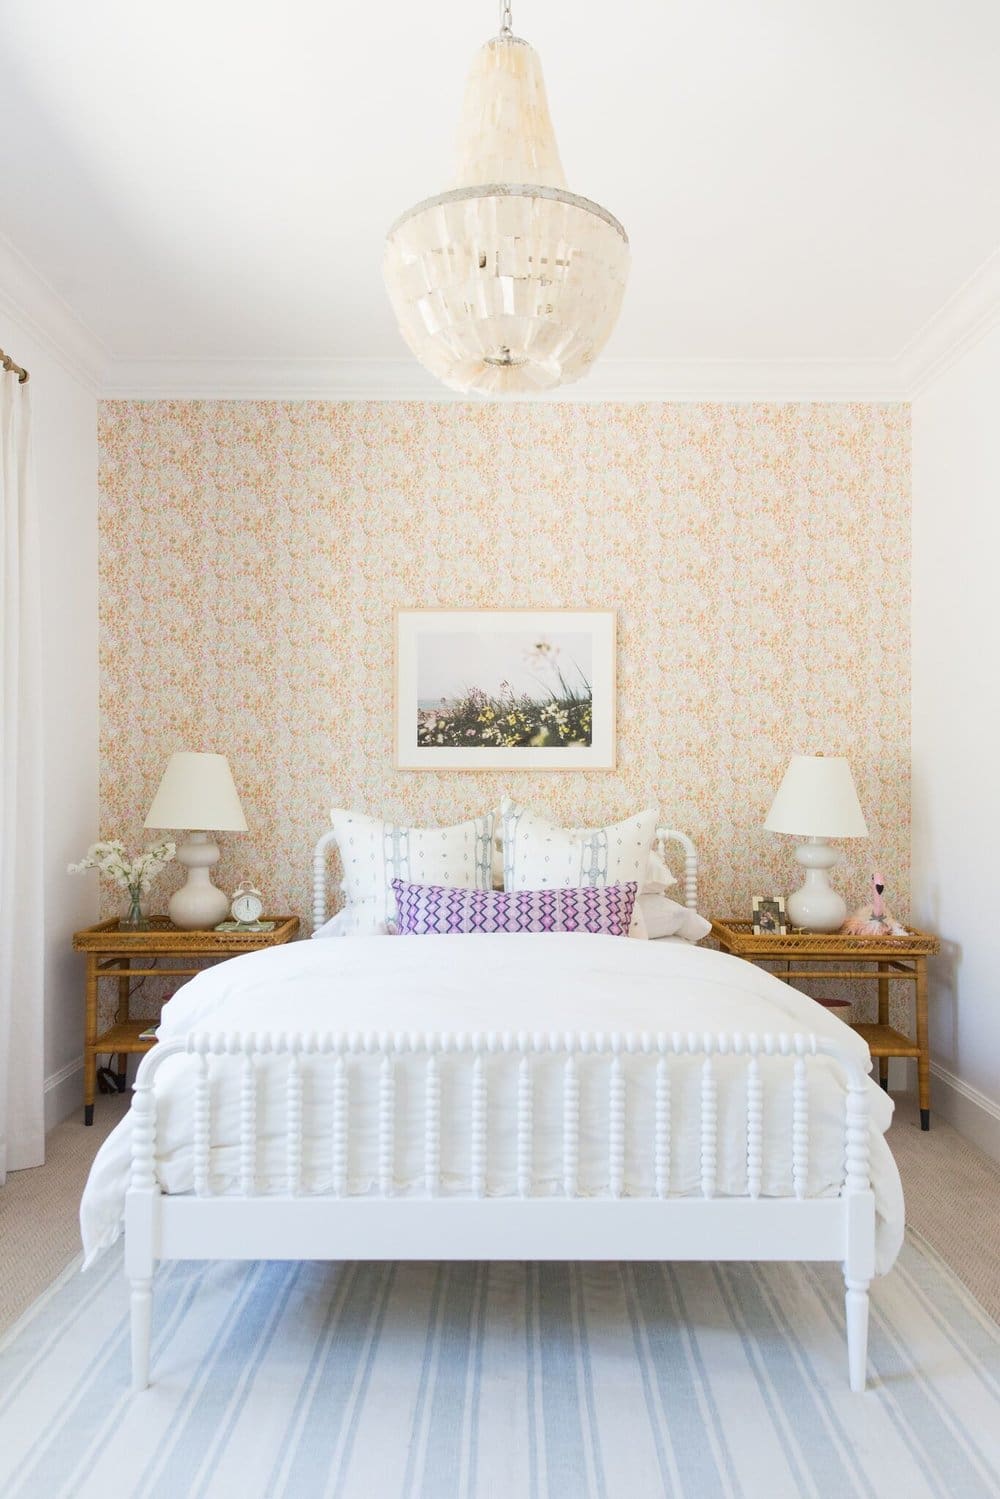
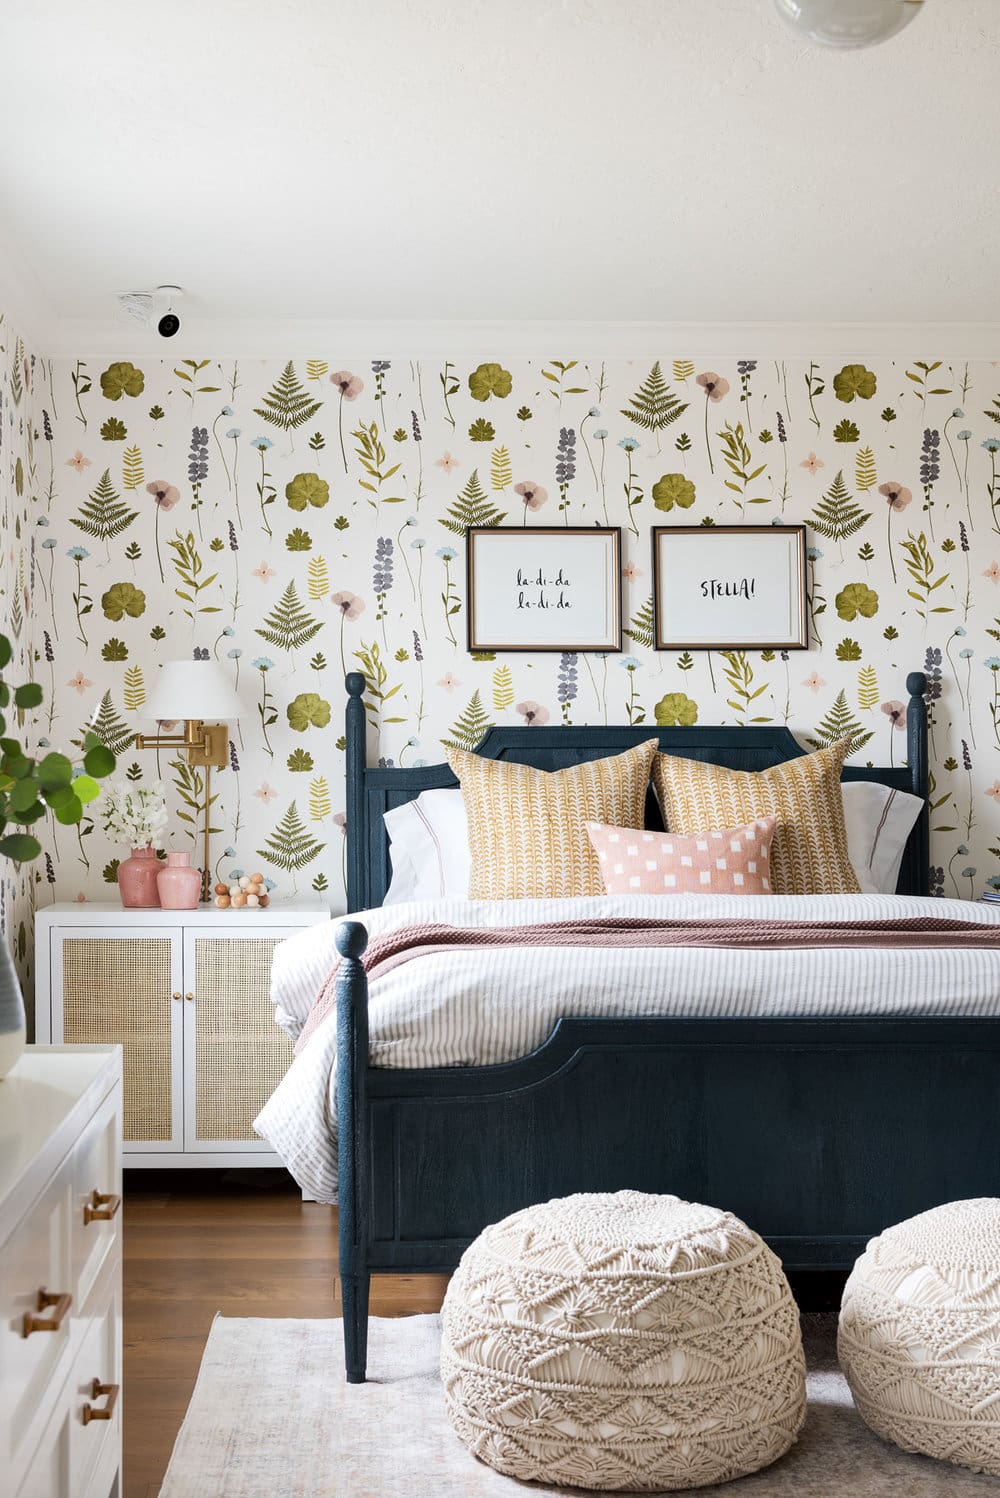
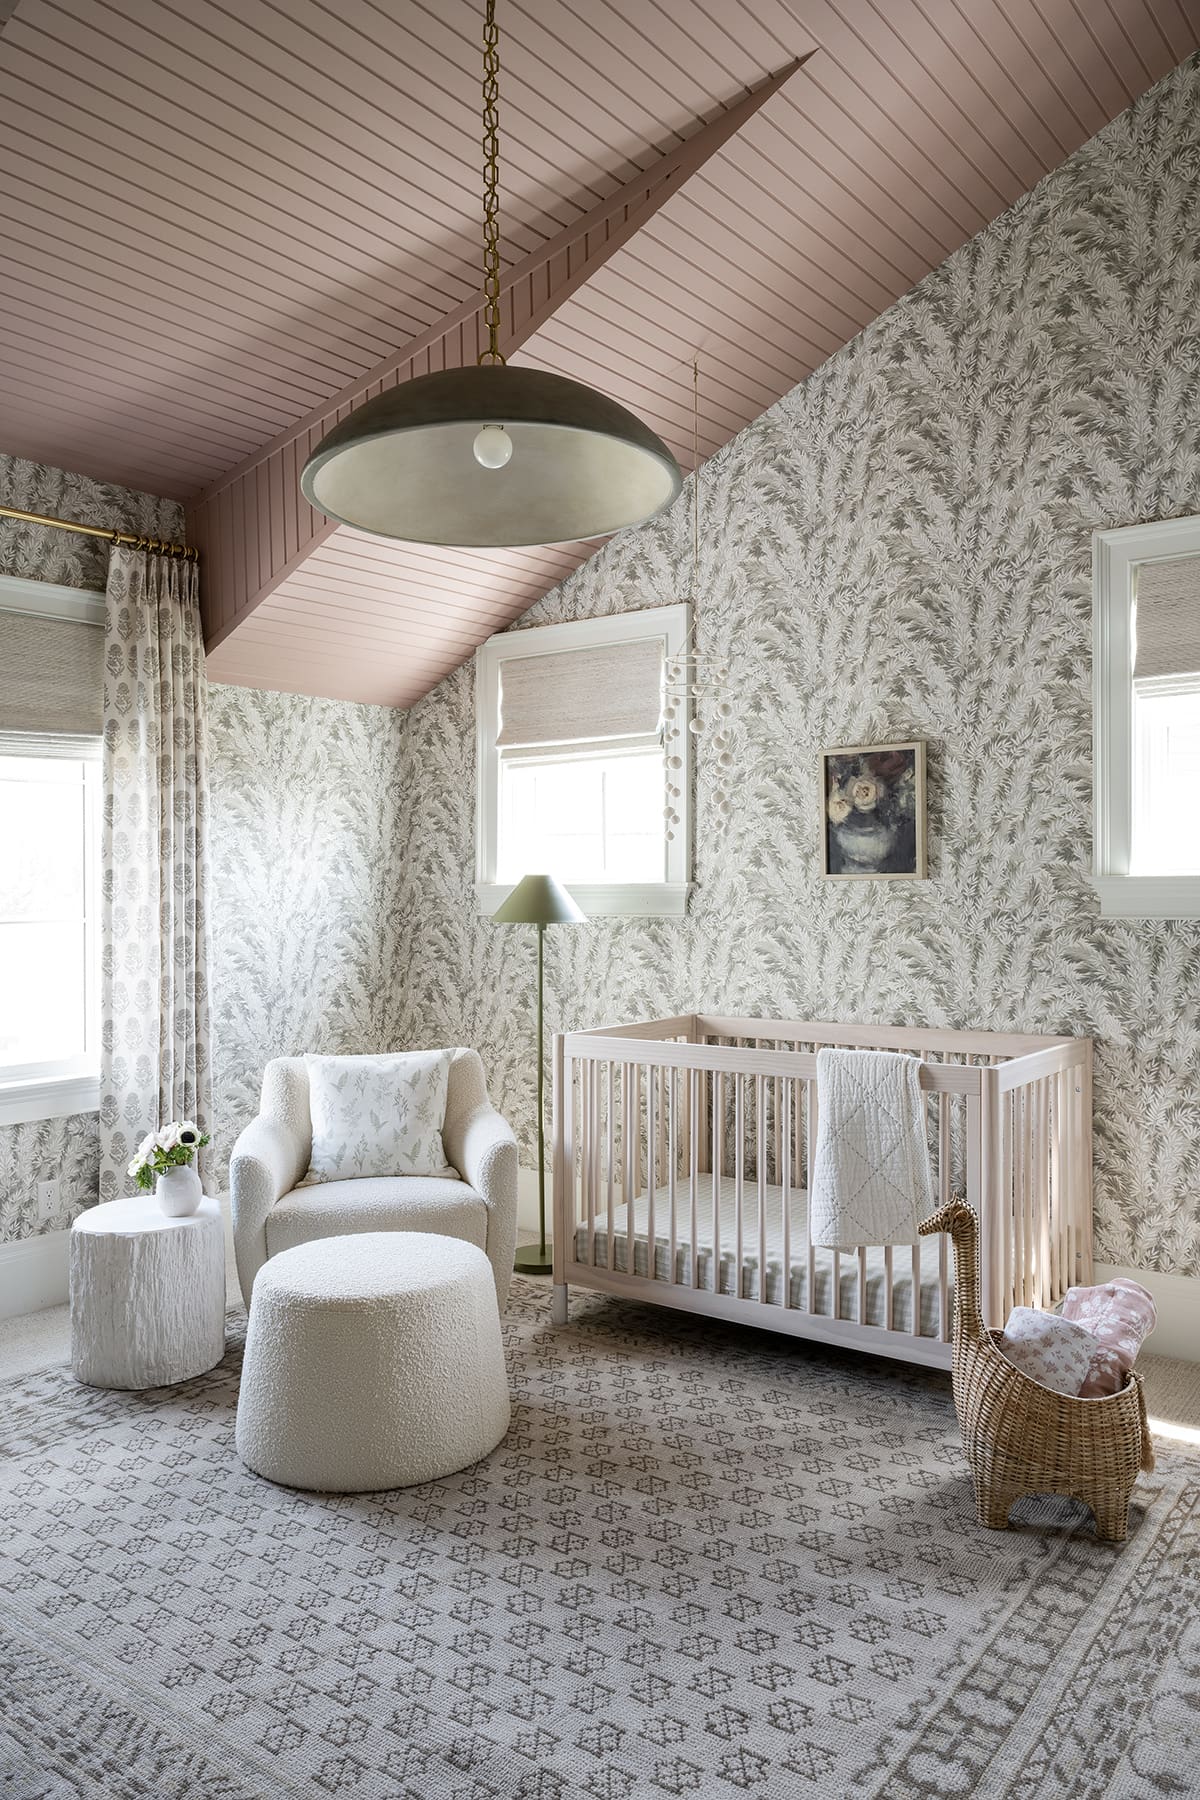
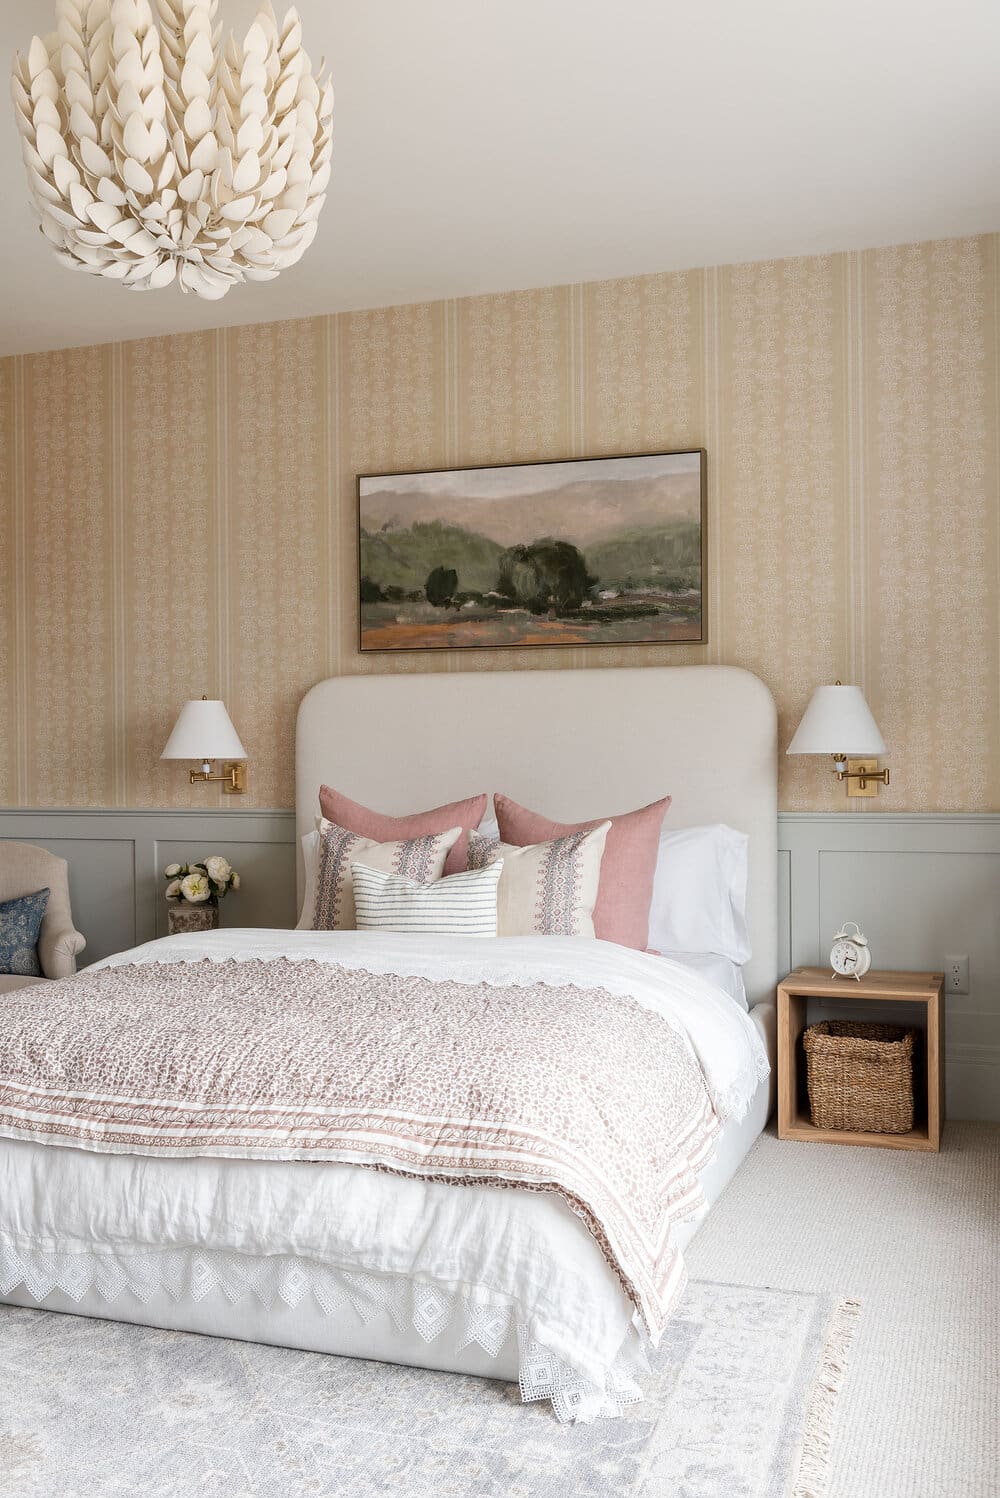
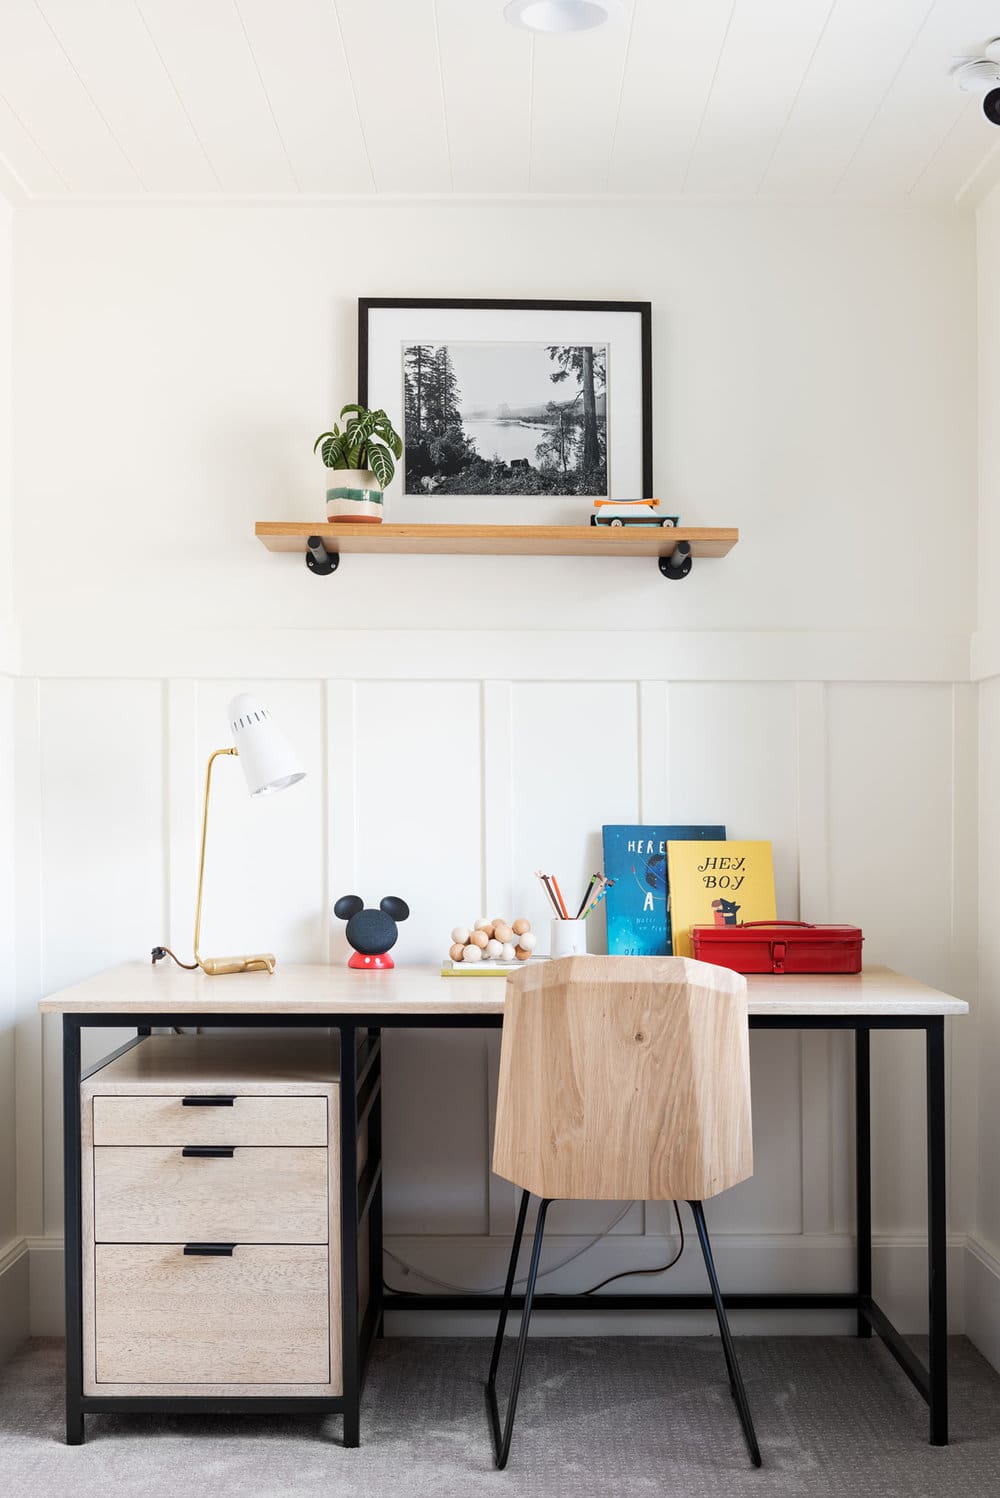
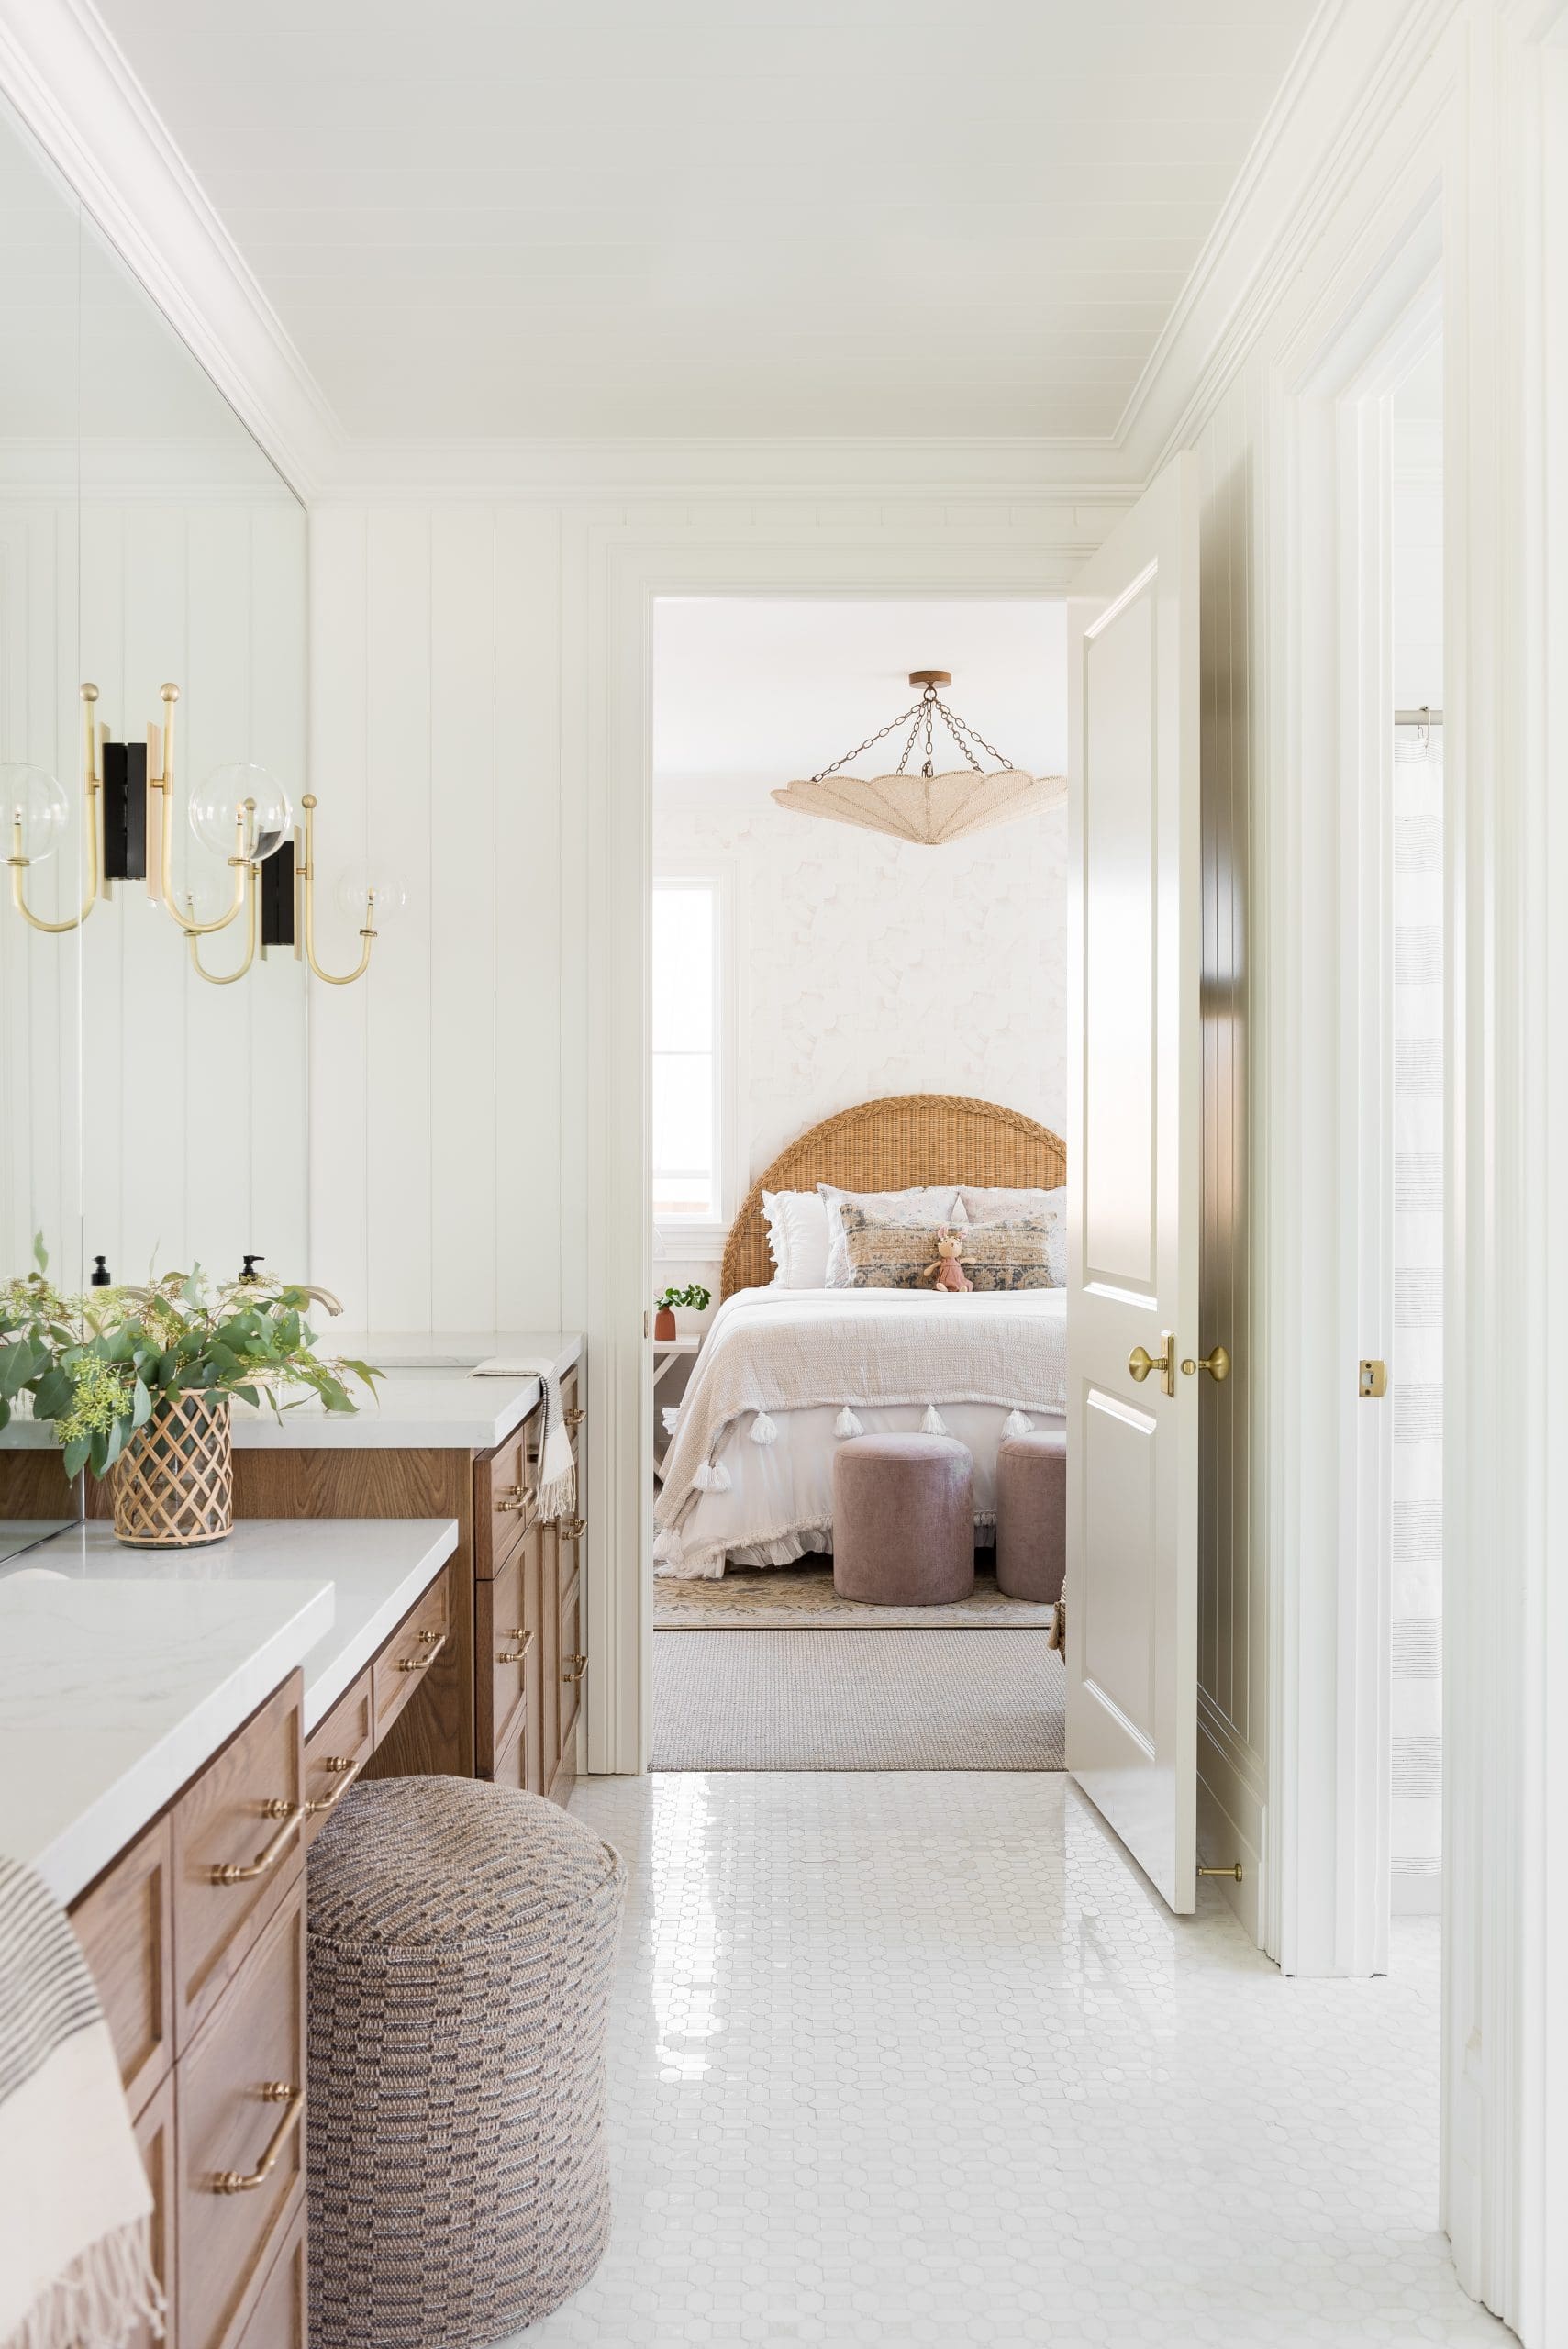
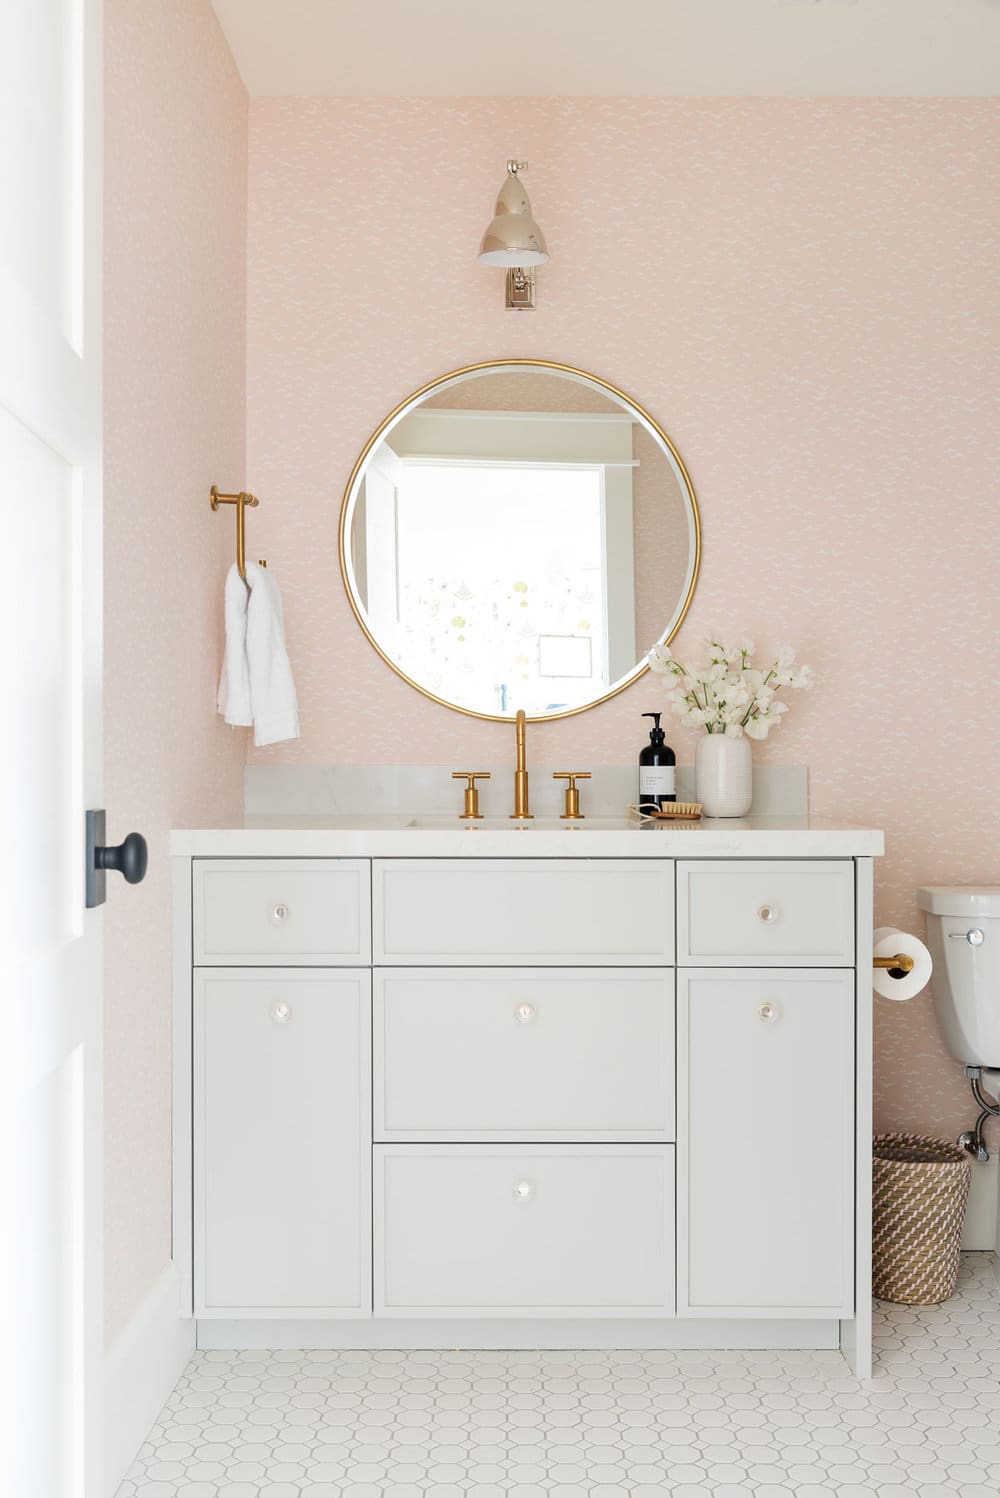
Since its founding in 2014 by the dynamic duo Shea and Syd McGee, Studio McGee has become synonymous with elevated, thoughtful design that balances timeless elegance and approachable comfort. Known for their transformative touch, the team brings a refined yet inviting aesthetic to every project, turning even ordinary rooms into stunning sanctuaries. Their expertise extends beyond high-end residential spaces, inspiring countless families through their popular Netflix series, Dream Home Makeover.
When it comes to designing kids’ rooms, Studio McGee’s approach is both practical and inspired. Crafting a space that feels personal and playful while standing the test of time can seem daunting, but with the right balance of style, function, and personality, it’s entirely achievable. By thoughtfully considering your child’s preferences, developmental needs, and a design that grows alongside them, you can create a bedroom that’s as charming as it is enduring—a true reflection of your little one’s world.
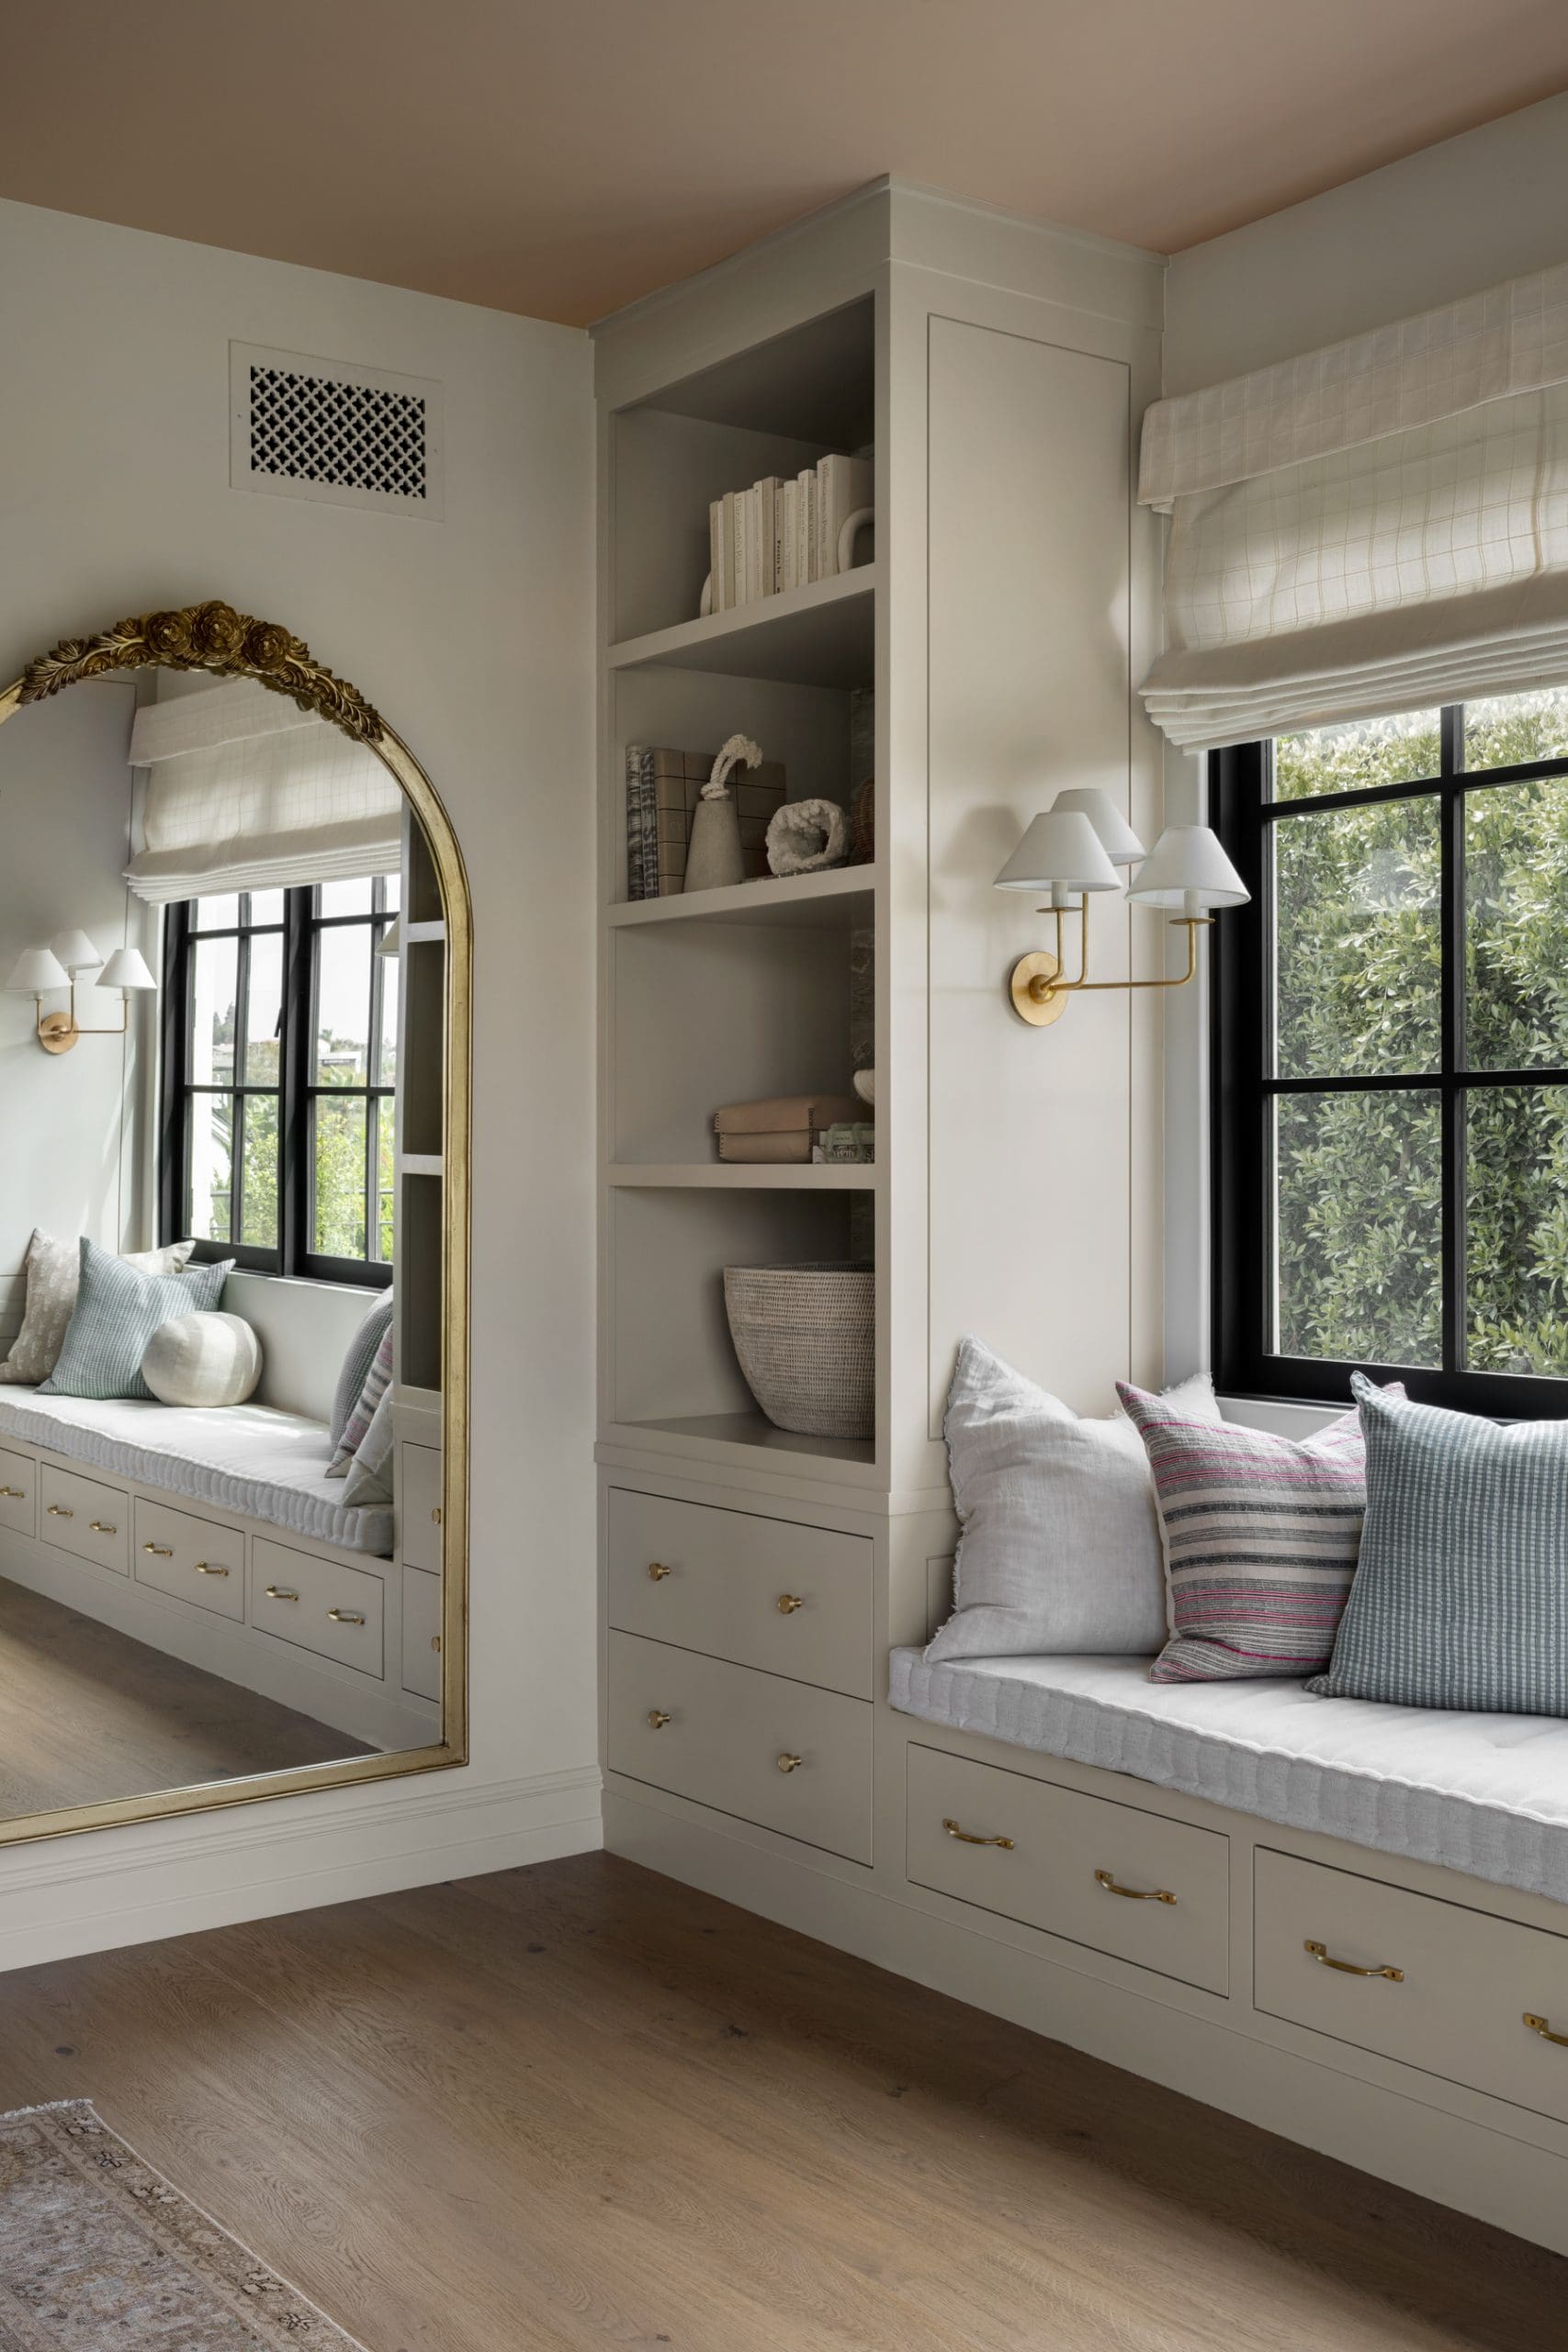
1. Stylish Mirrors to Brighten Up Your Child’s Room
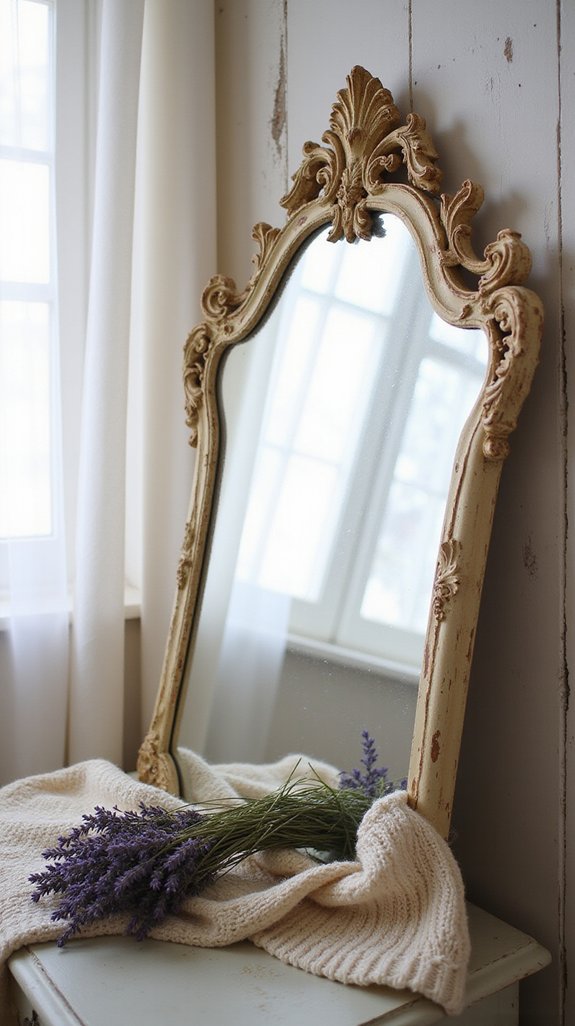
Elevate your child’s bedroom with the timeless charm of a gold-framed arched mirror, bringing a hint of sophistication and warmth. Mirrors naturally amplify light and create an airy, open feel, perfect for making the room seem larger and brighter. Just be sure to install it securely on the wall to keep your little one safe and sound.
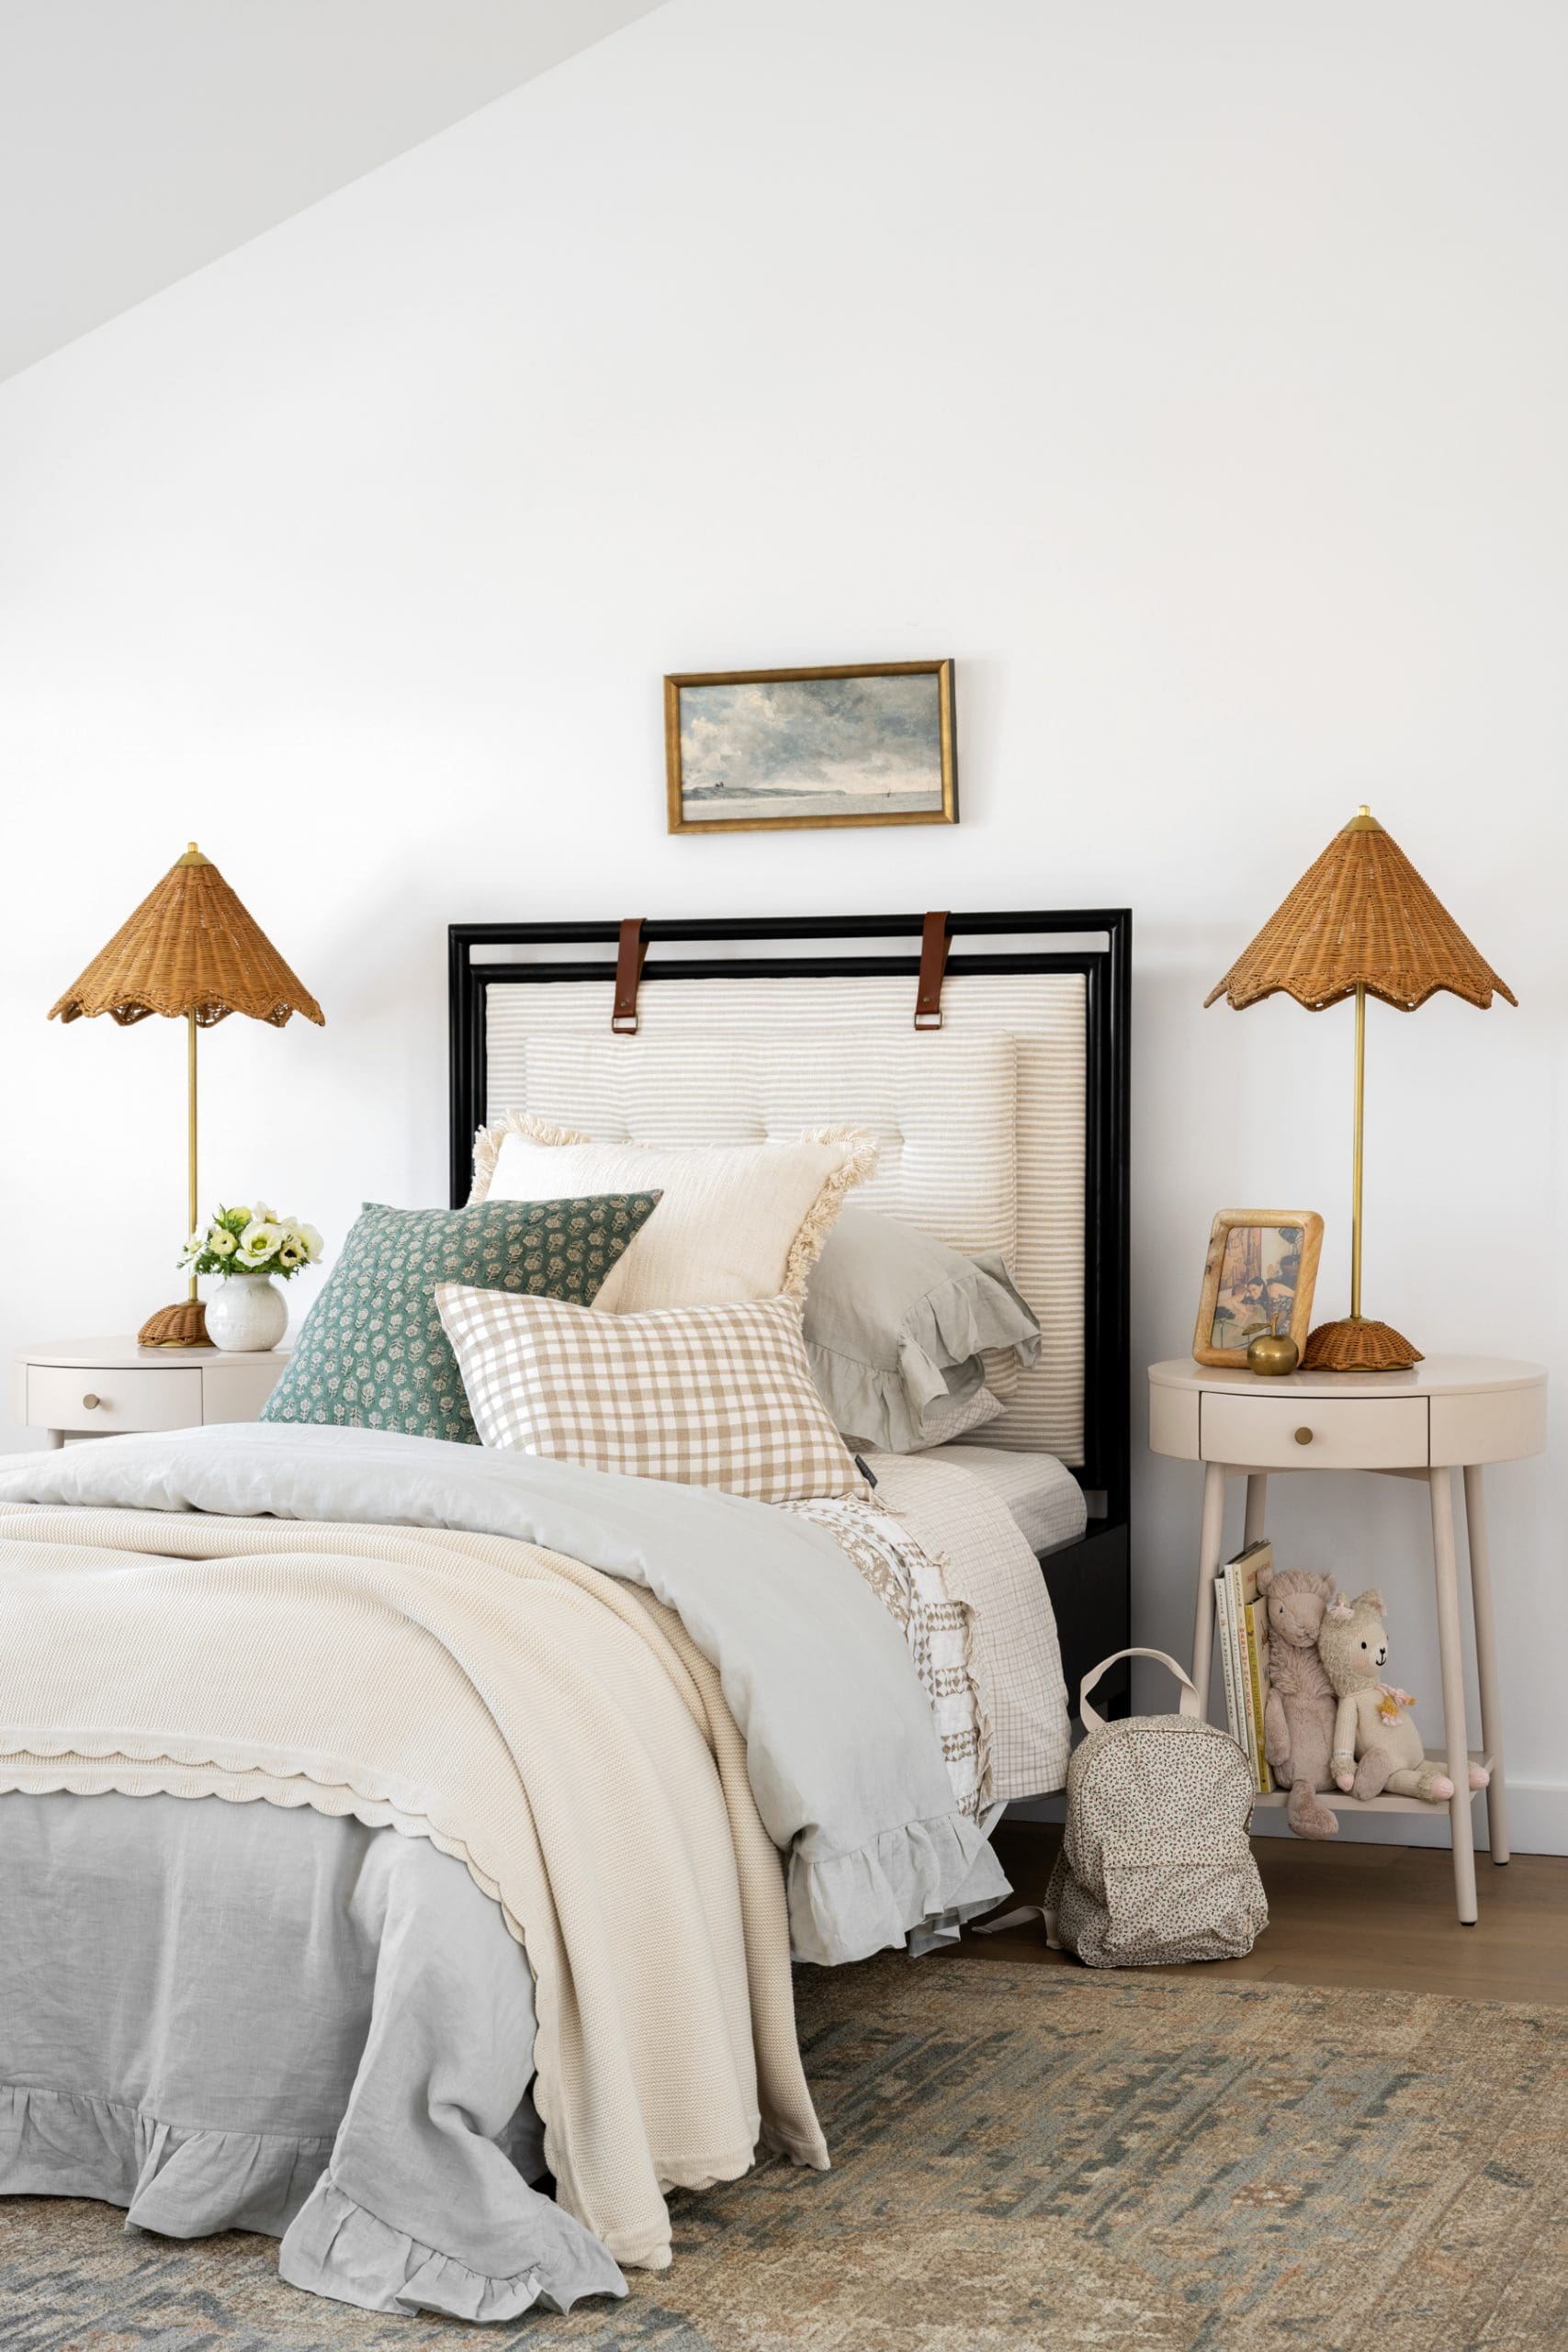
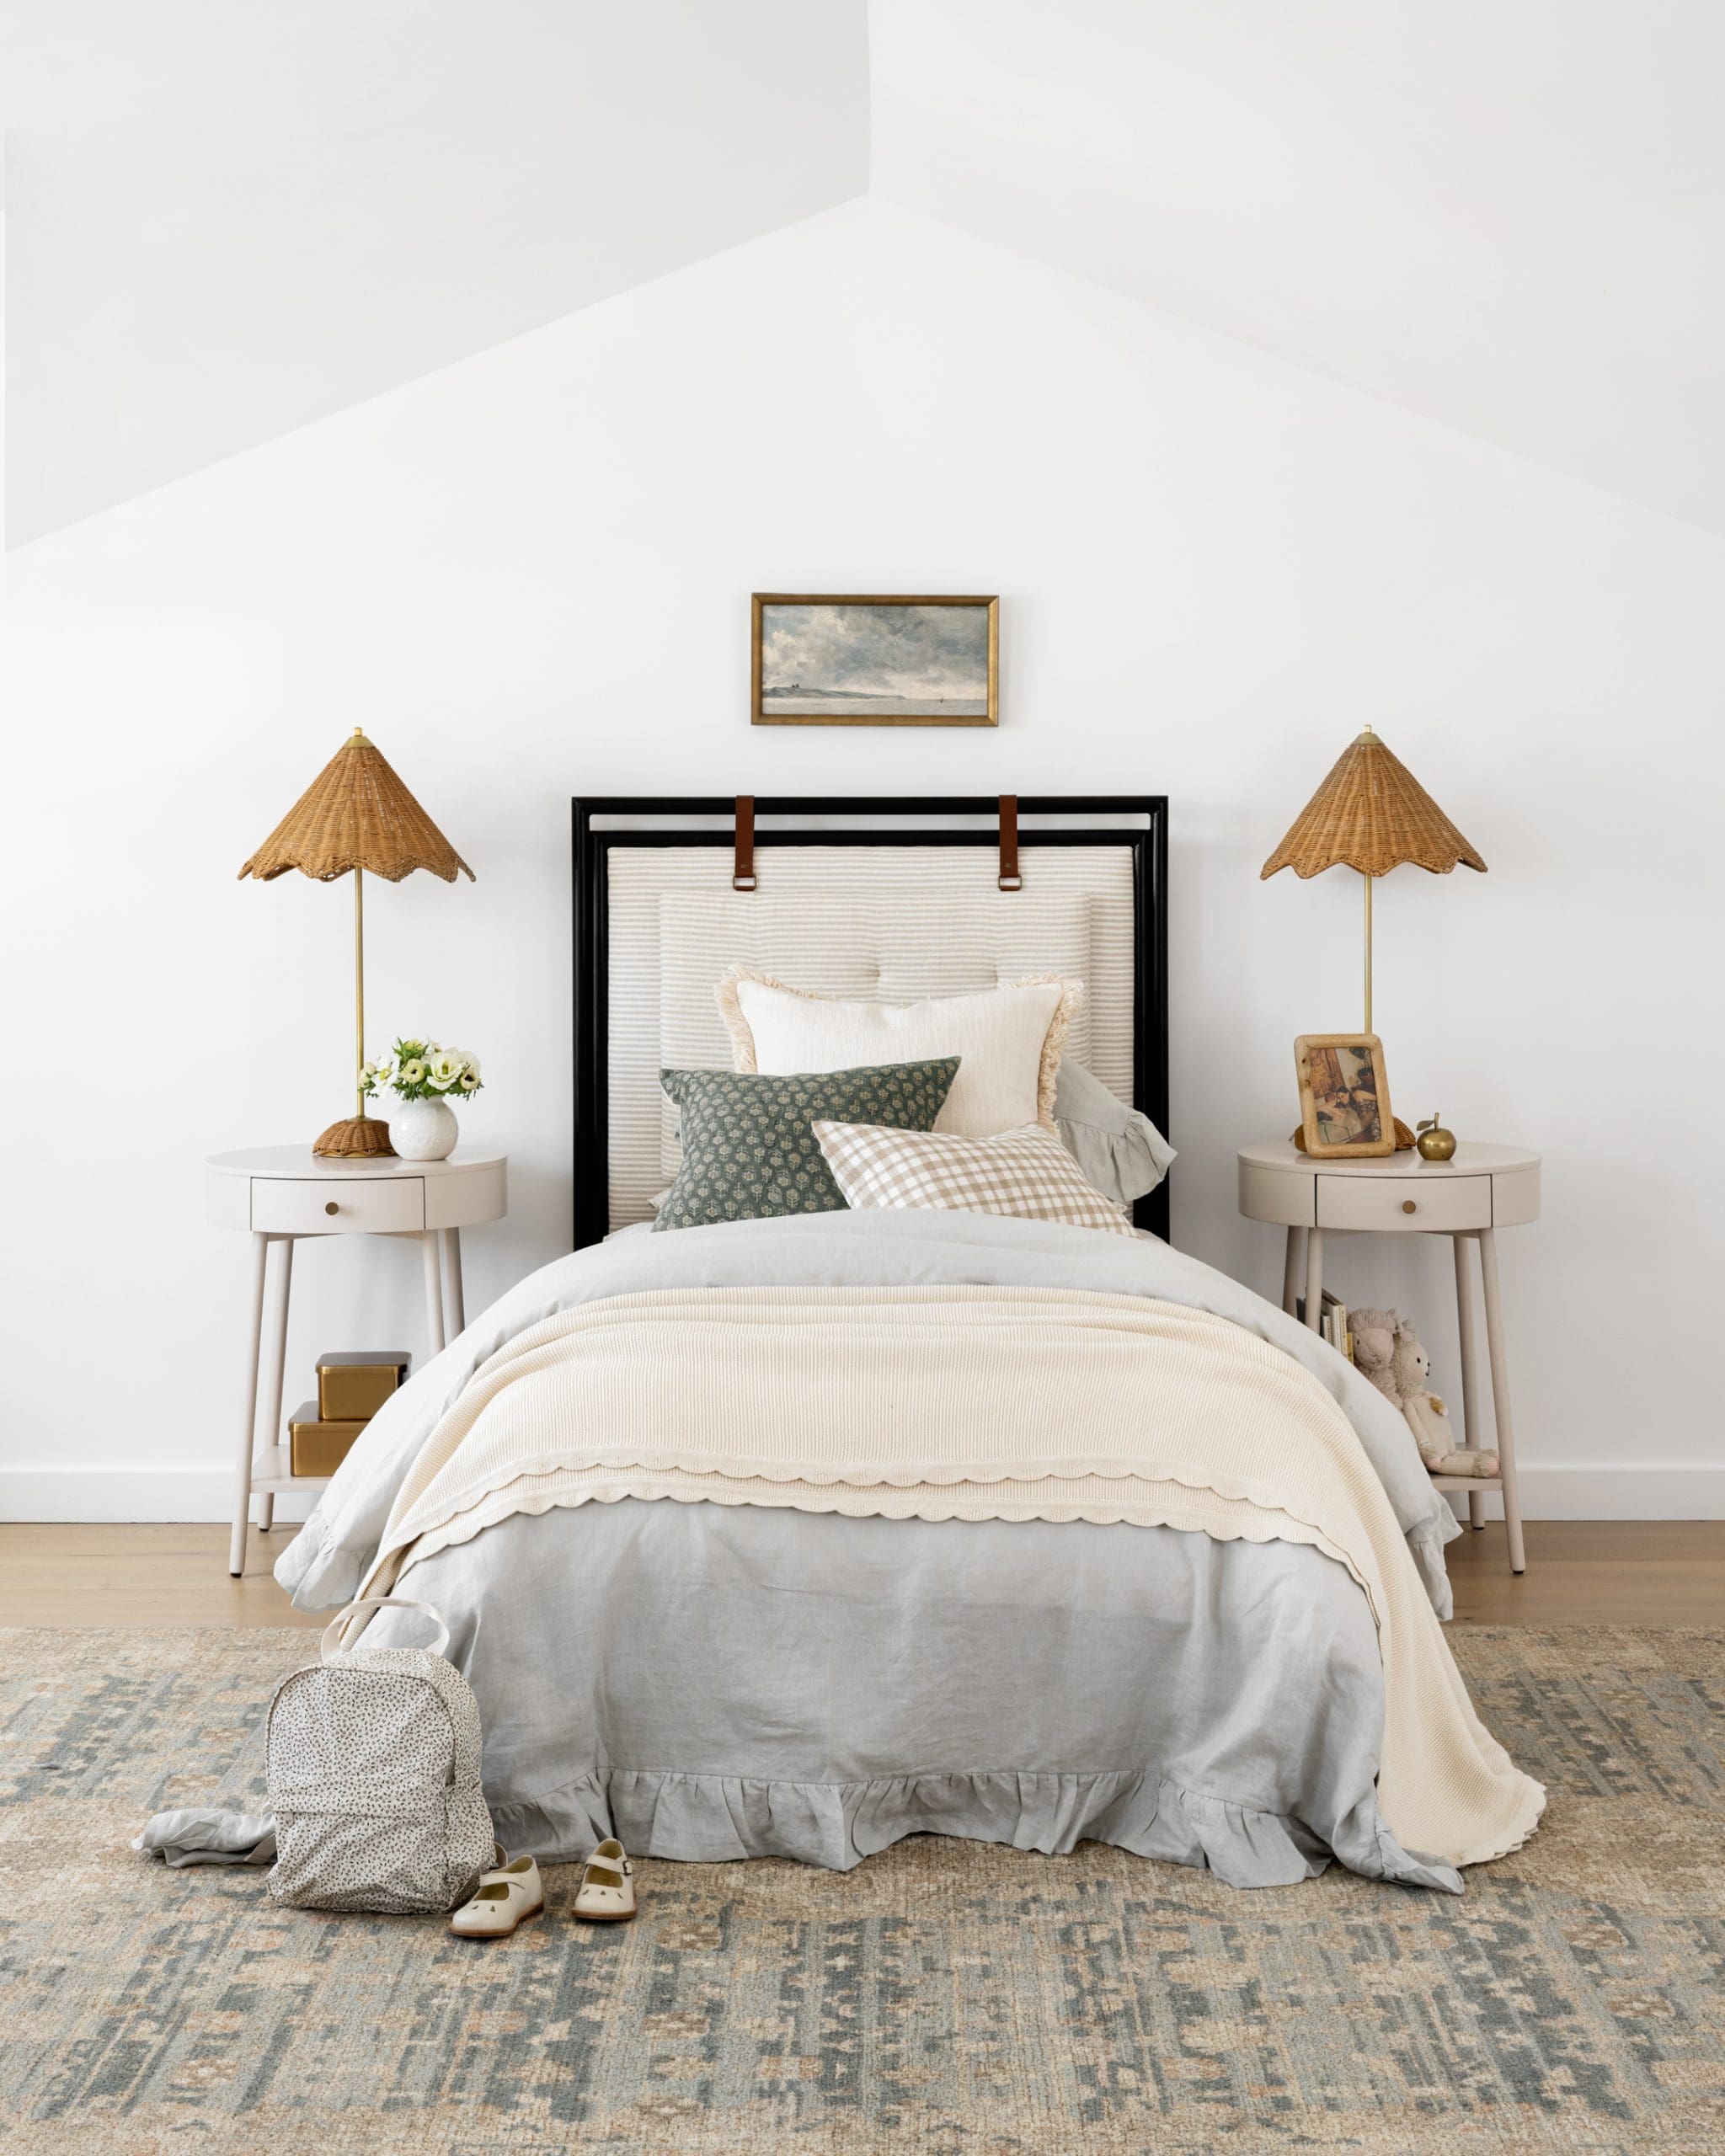
2. Snuggle-Worthy Bedding Ideas for Your Child’s Room
Brighten your child’s bedroom instantly by choosing plush, eye-catching bedding that combines comfort with style. Opt for soft, premium fabrics that not only look inviting but also wrap them in gentle warmth, creating a cozy haven where they can unwind and recharge.
3. Studio McGee’s Chic and Simple Kids’ Room Design
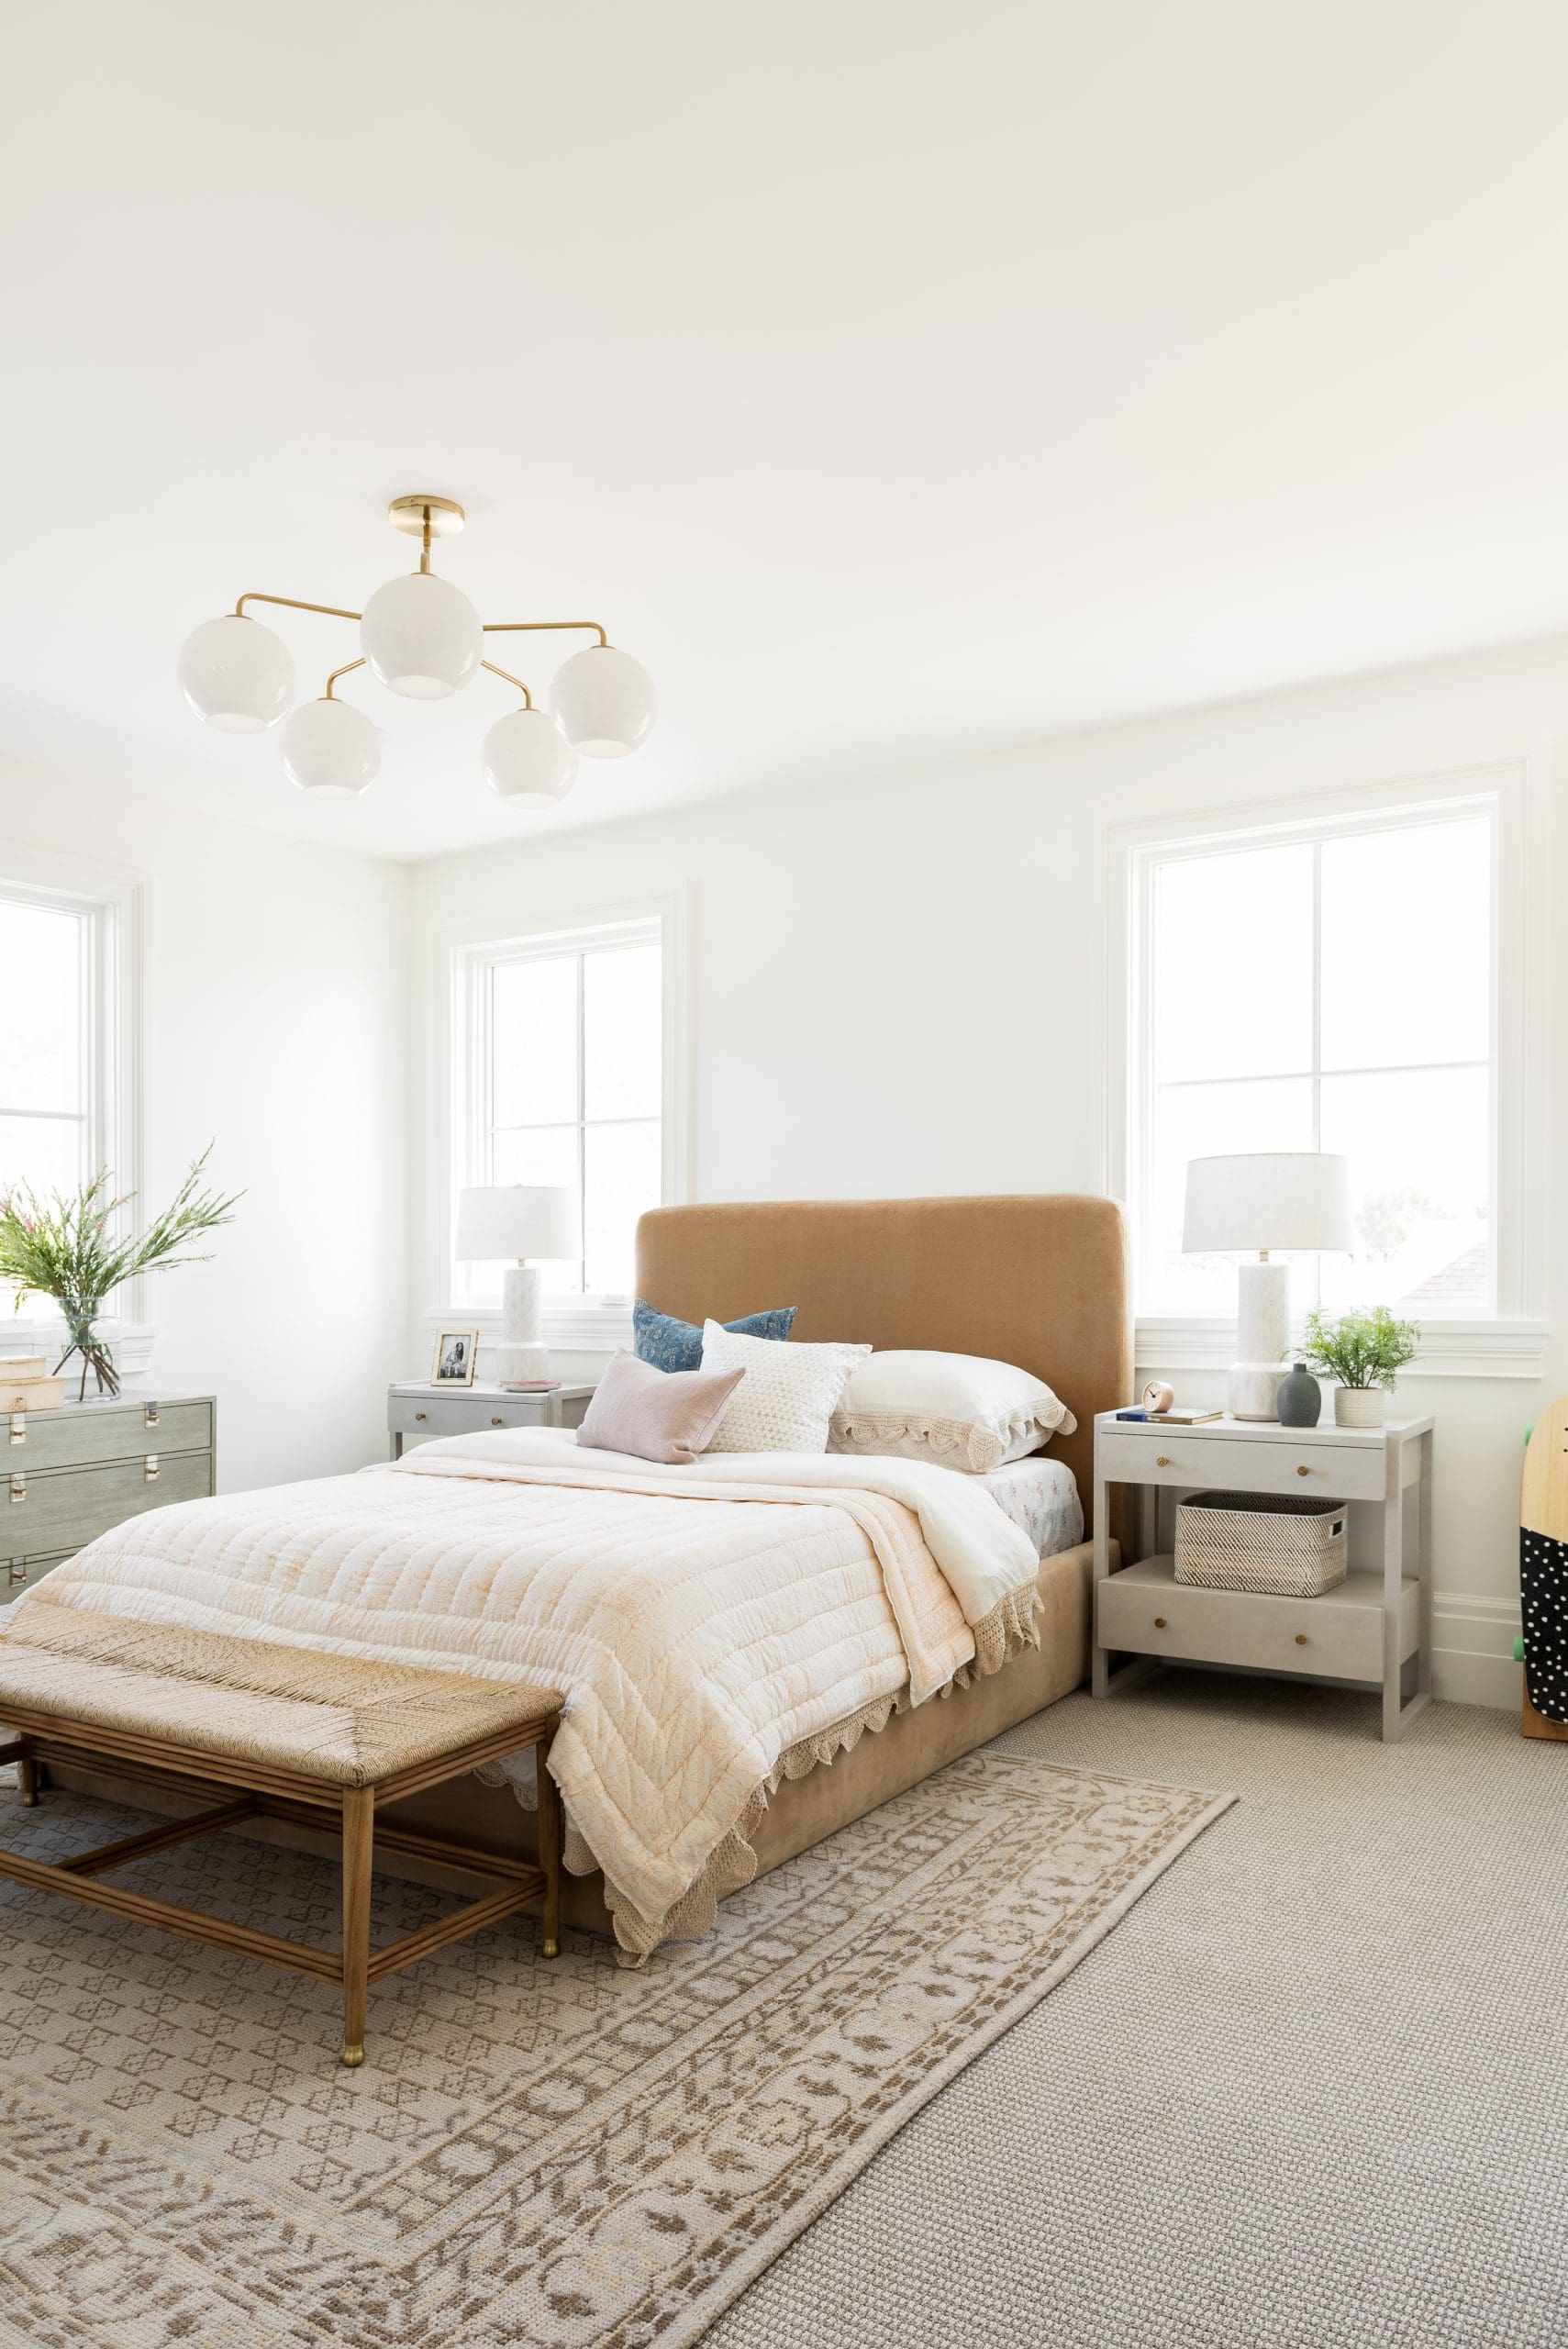
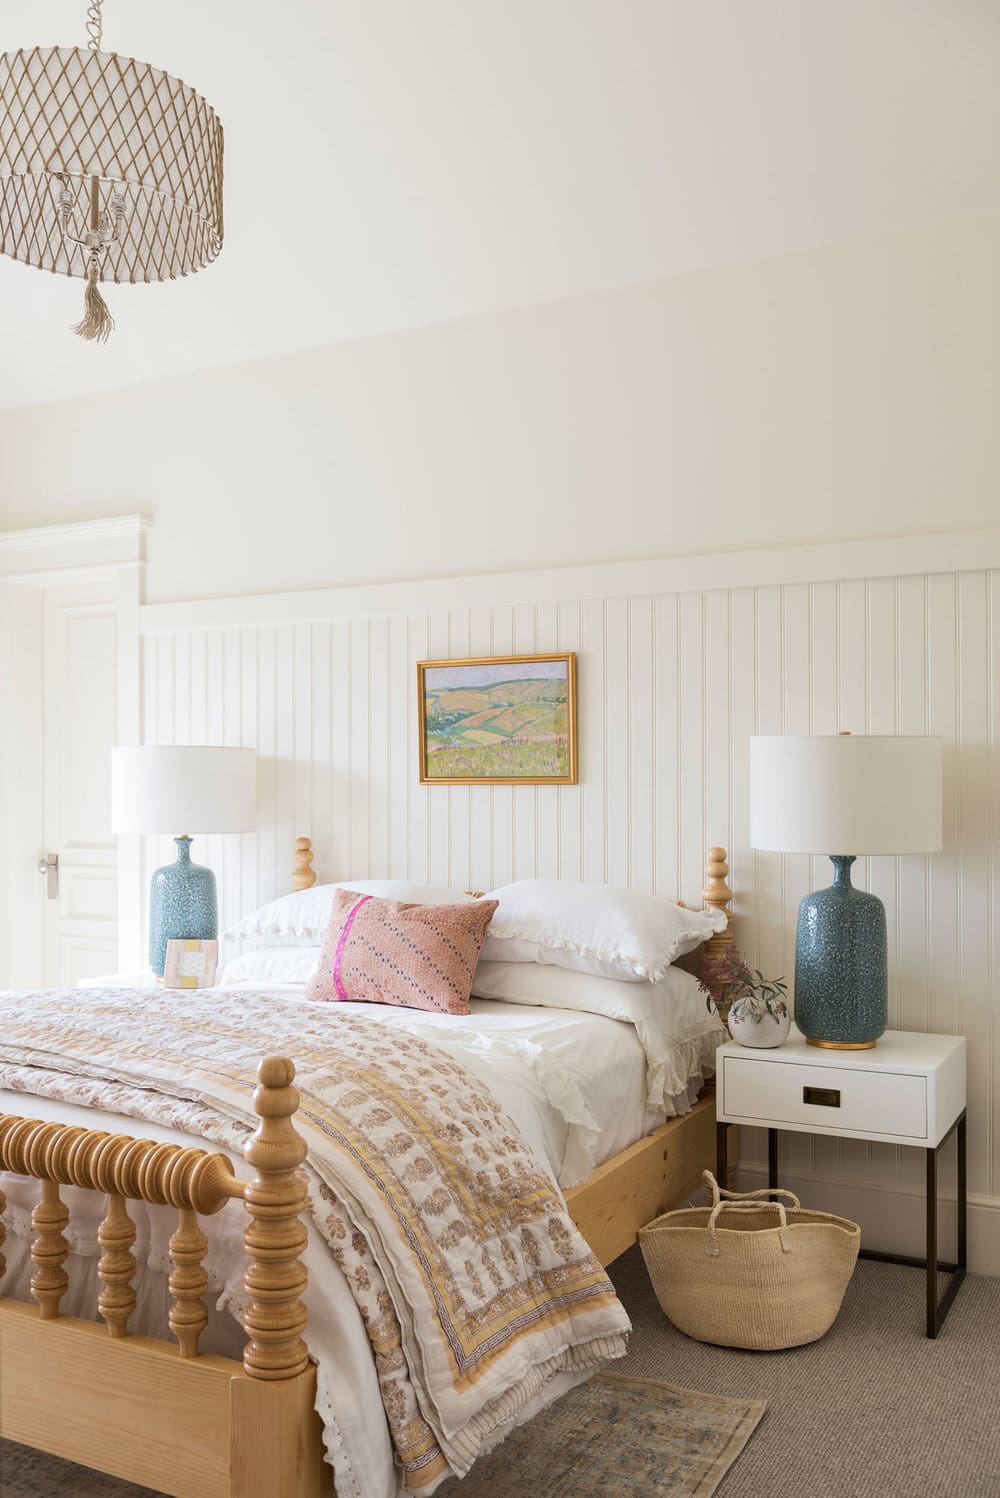
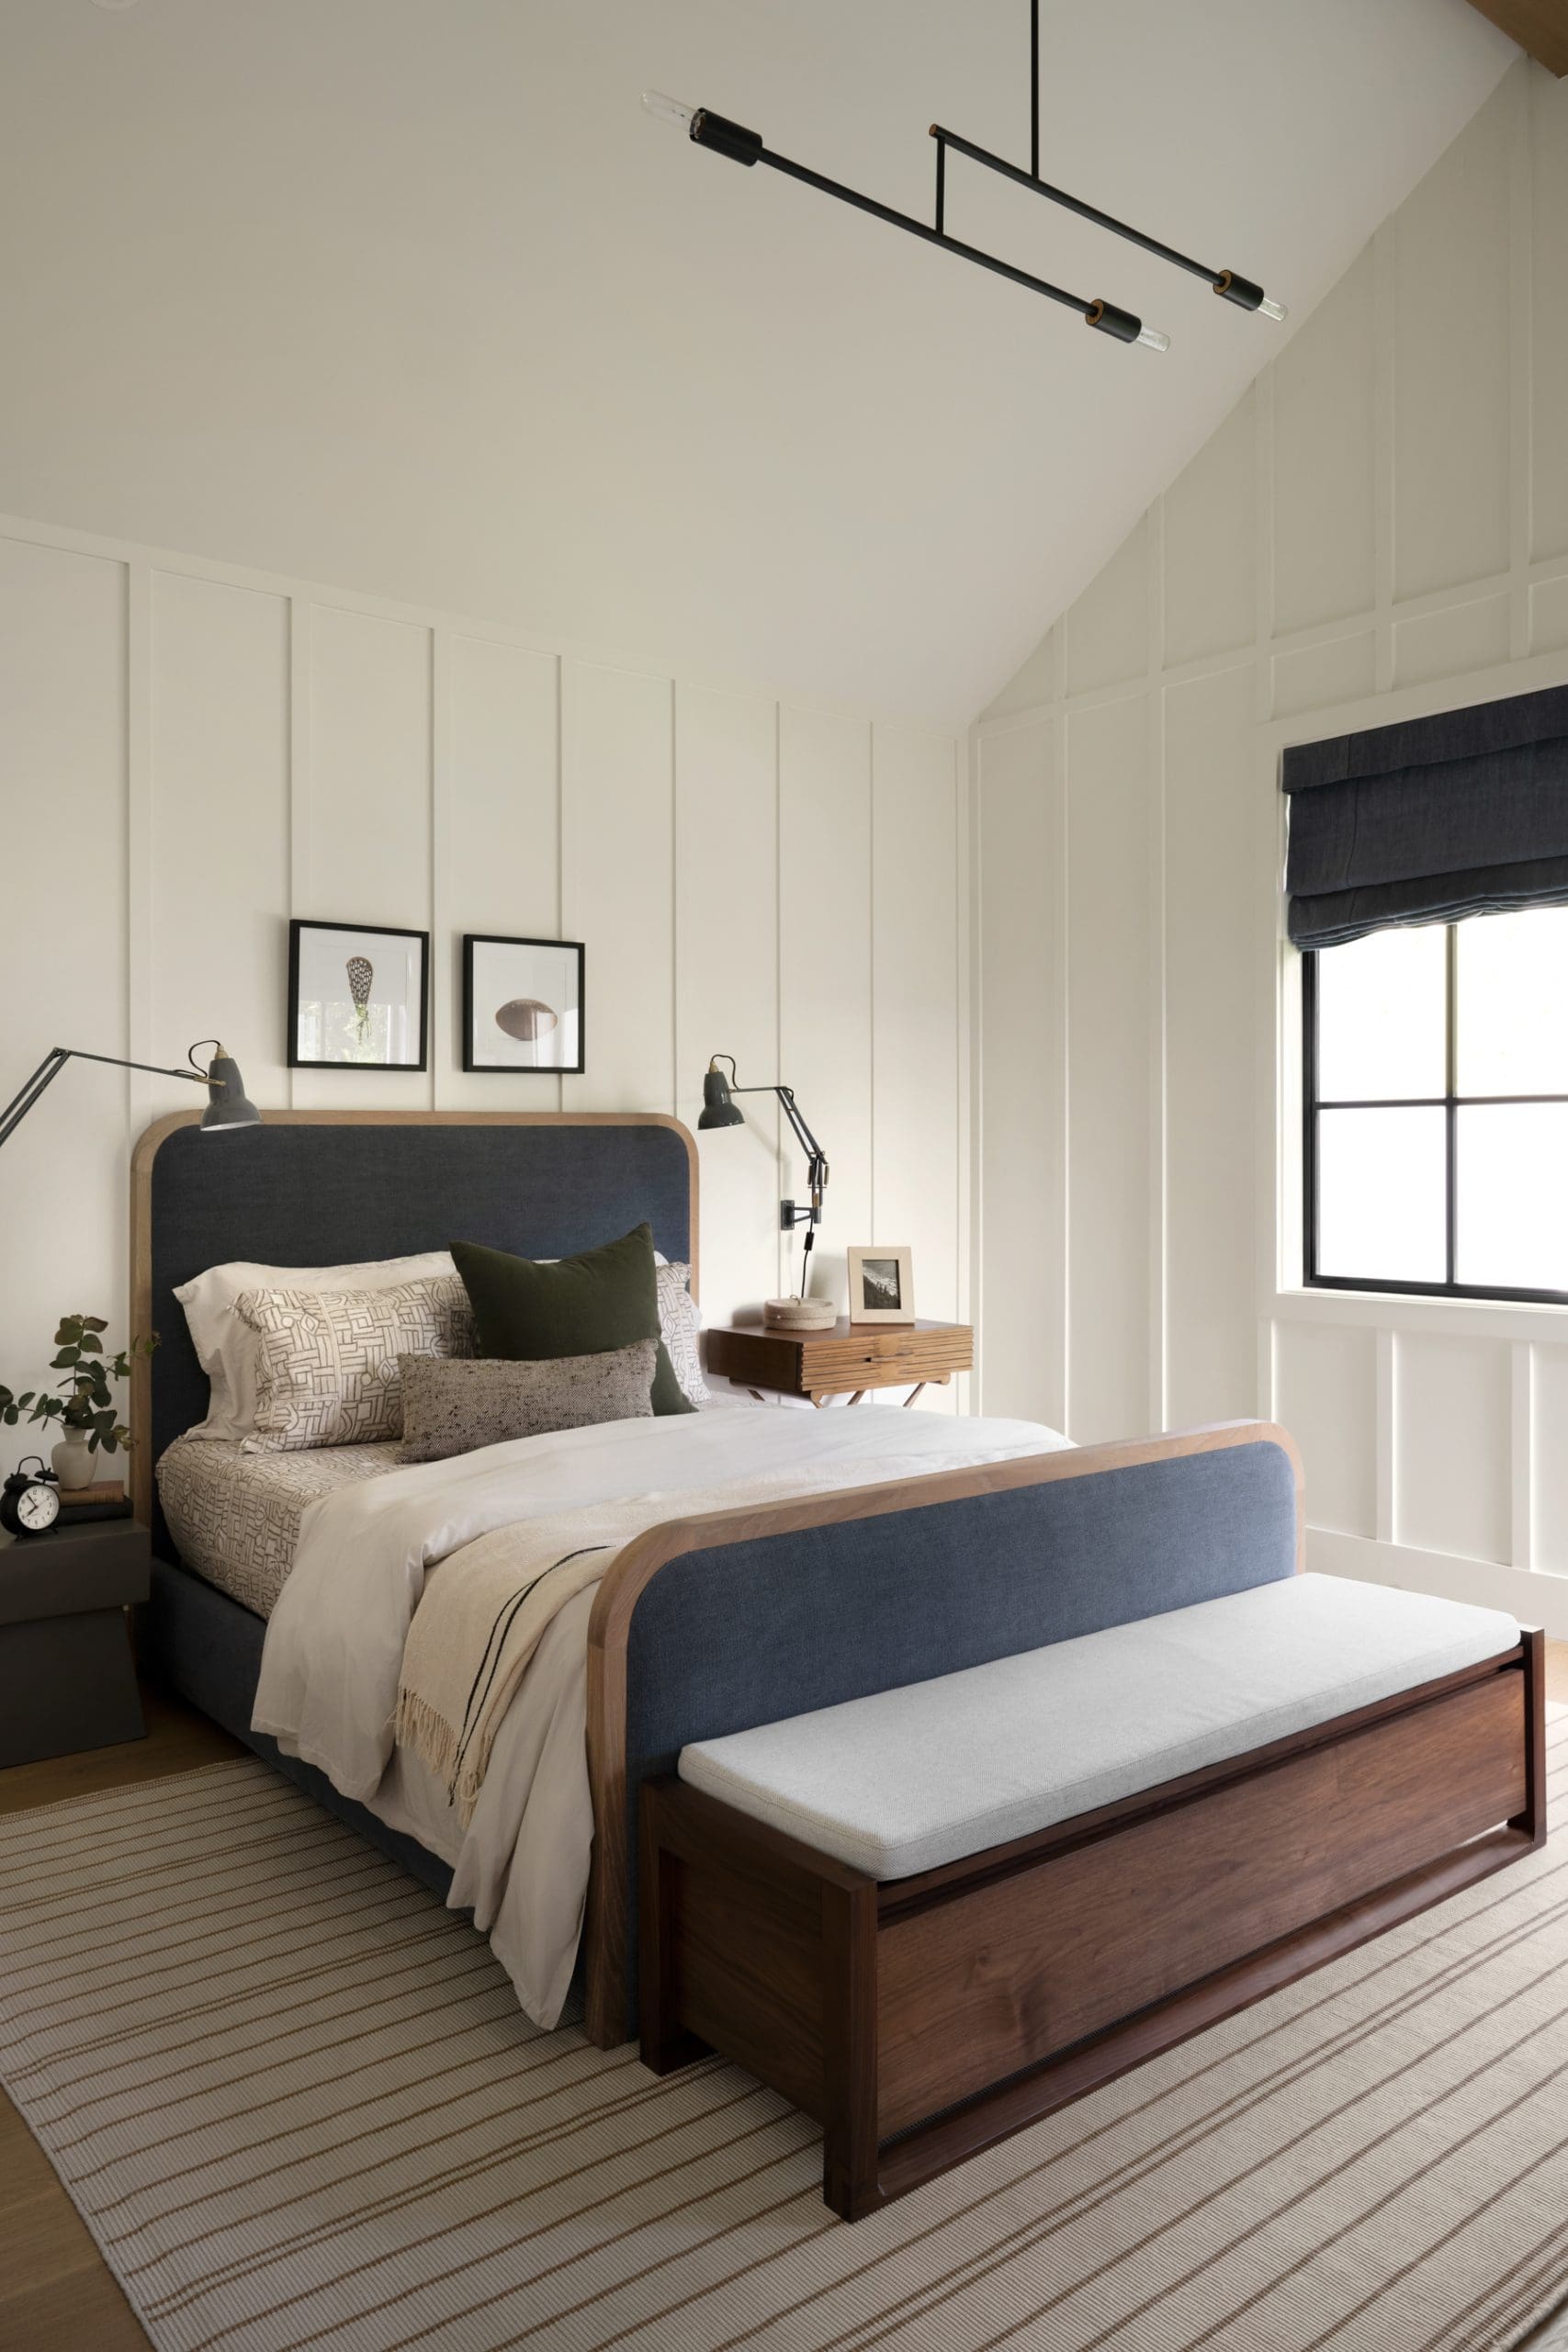
Creating a kids’ bedroom with simplicity in mind allows the space to evolve effortlessly alongside their changing preferences. Rather than relying on traditional gender colors, opt for gentle, calming neutrals as a versatile backdrop. Then, add pops of their favorite hues through accessories like bedding, art, or rugs—easy updates that keep the room feeling fresh and personal.
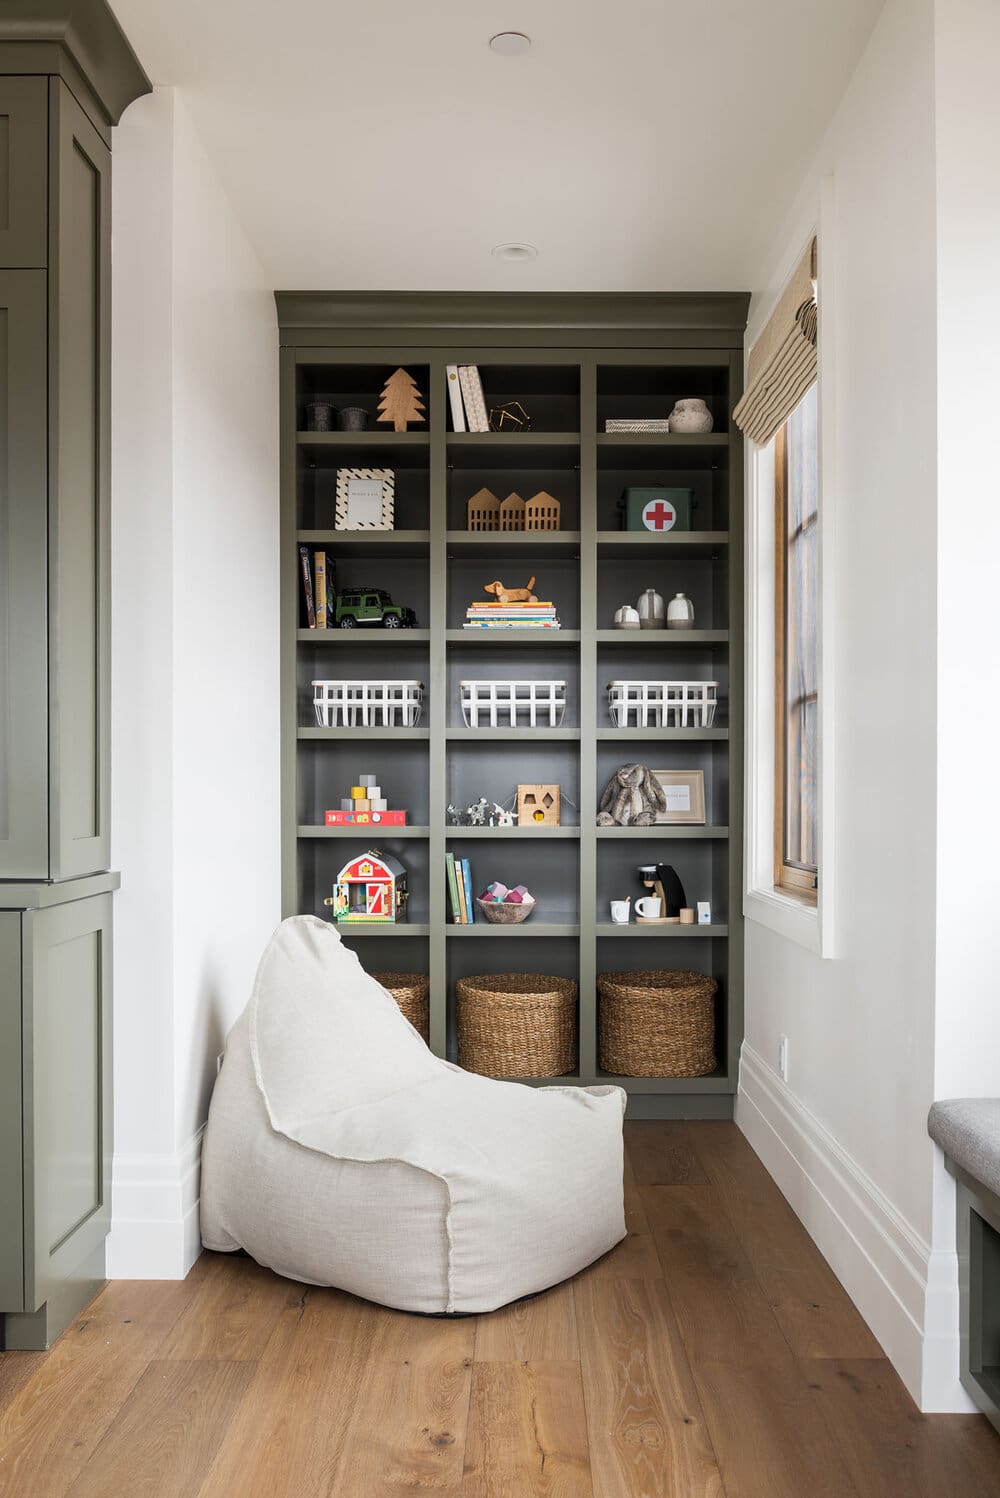
4. Creative Toy Storage Solutions for Kids’ Rooms
Toys don’t always need to be tucked away—take inspiration from this Studio McGee kids’ room where a toy cabinet becomes a charming centerpiece. The secret to a tidy, inviting display lies in keeping it thoughtfully arranged without overfilling. To tie everything together beautifully, try sticking to a consistent color palette for the toys on show.
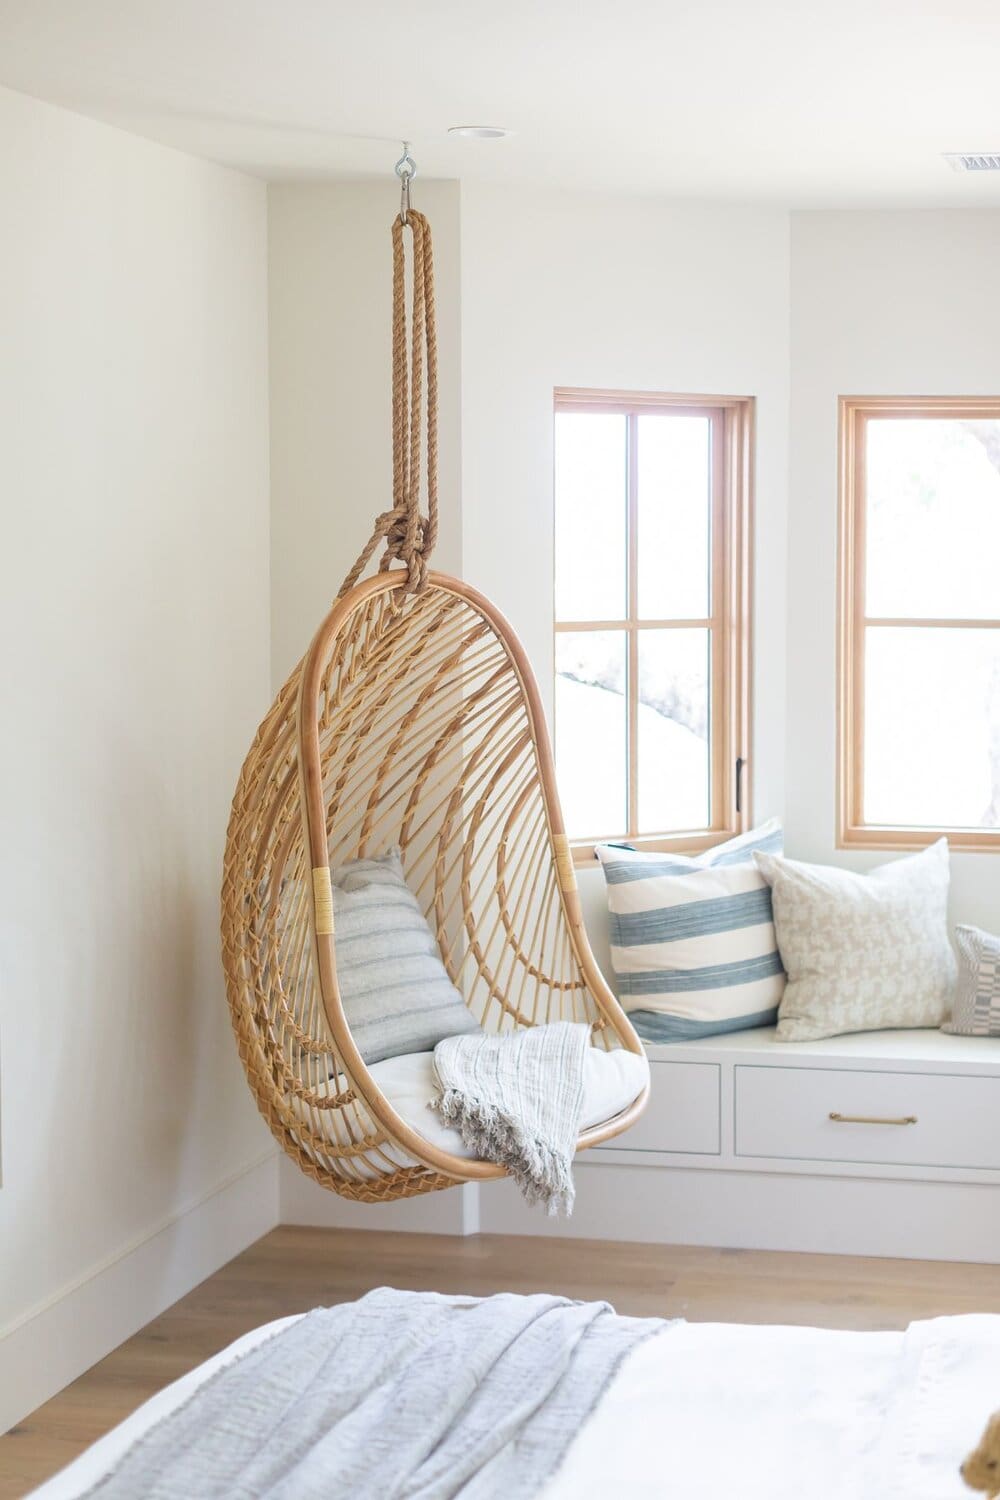
5. Whimsical Rattan Swing Chair for Playful Kids’ Rooms
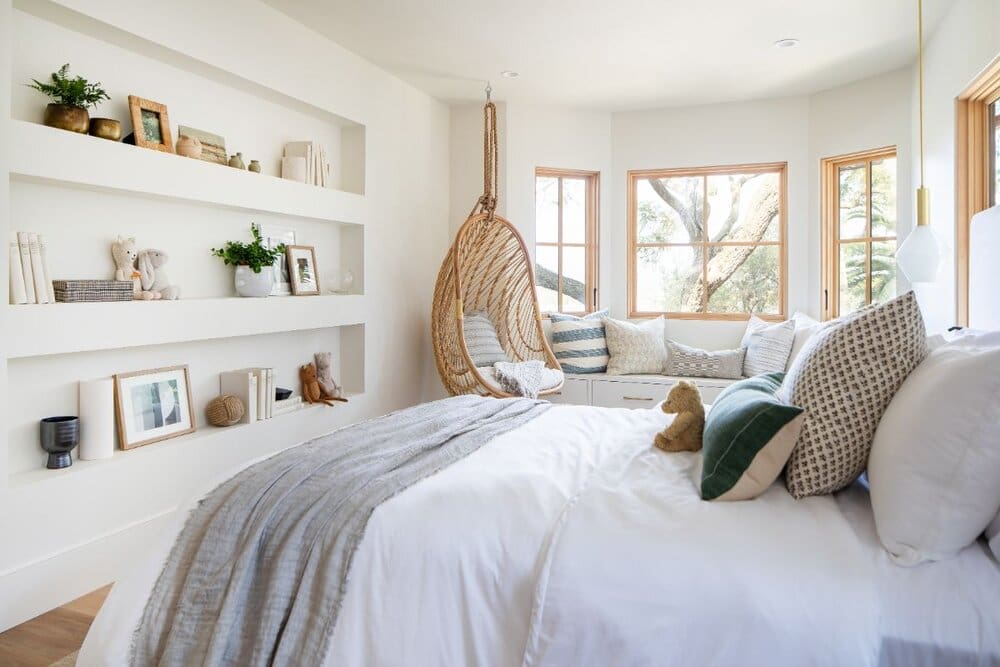
When there’s room to spare, adding a cozy swing chair can transform a child’s space into a lively retreat. Not only does it bring joyful moments of swinging fun, but it also supports key developmental skills like balance, coordination, and rhythm. It’s a playful yet purposeful feature that makes the room feel inviting and vibrant.
6. Studio McGee’s Cozy Kids’ Retreat
Designing a snug and inviting space for your child is simpler than you might think. Opt for calming hues that encourage restfulness, and incorporate soft, natural textures such as wood, wicker, linen, flannel, and rattan to infuse the room with gentle warmth and comfort.
7. Whimsical Glow: The Magic of Kid-Friendly Chandeliers
To create a kids’ room with the charm and style of Studio McGee, choose lighting that reflects the space’s personality. Thoughtfully selected fixtures not only brighten the room but also add a playful, decorative touch that brings the design to life.
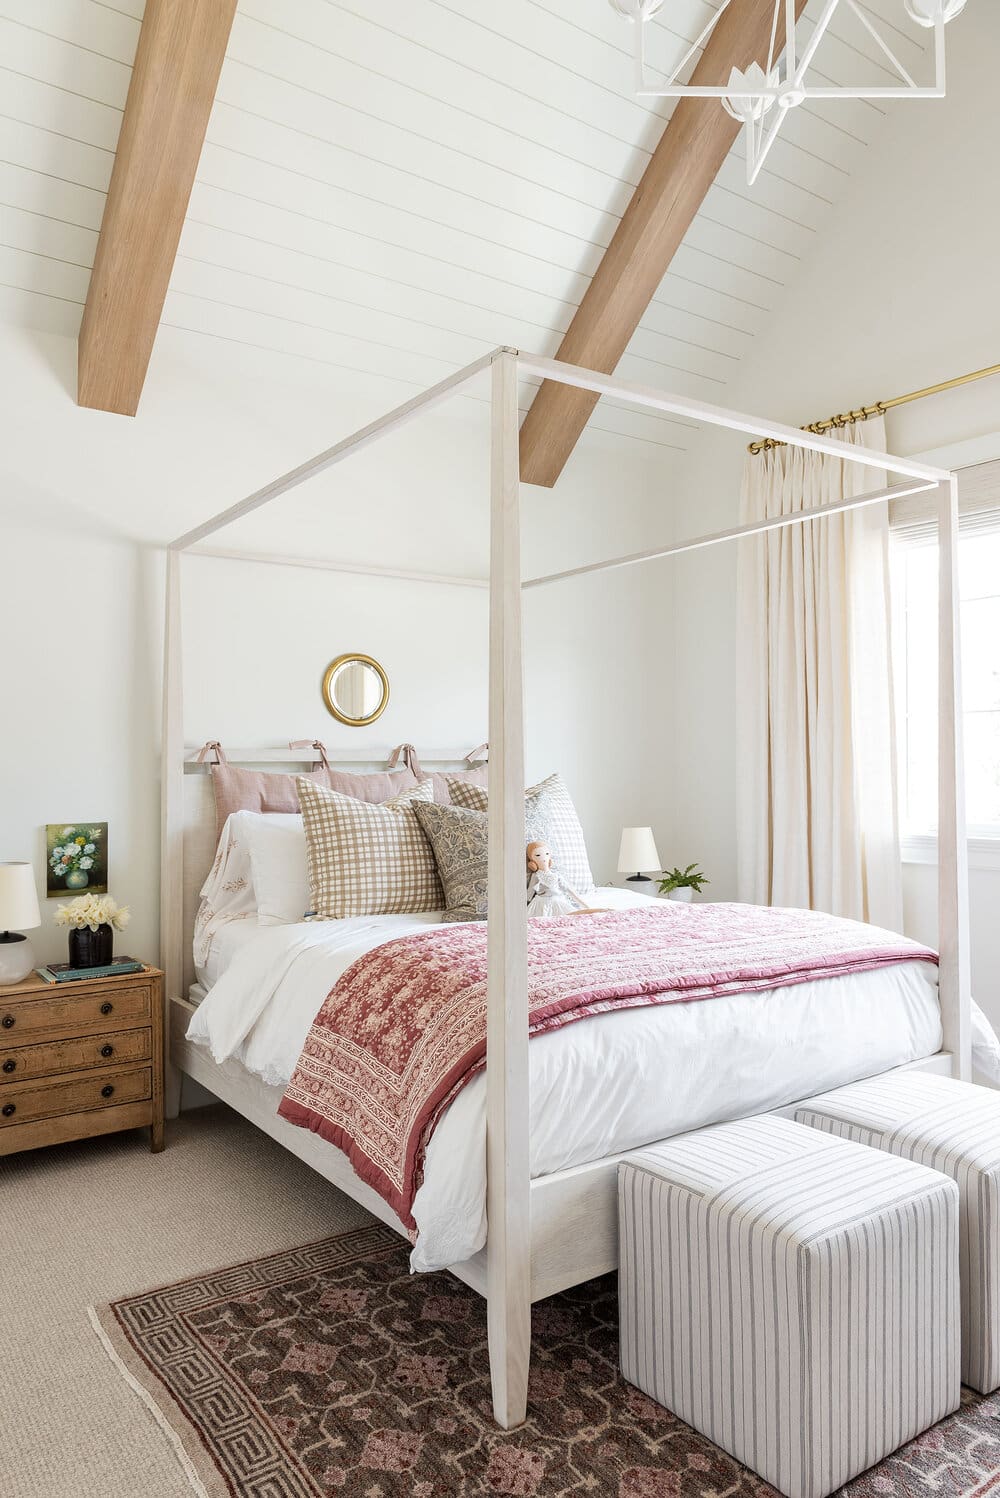
8. Whimsical Canopy Beds: Creating Dreamy Spaces for Kids
Canopy beds with flowing drapes captivate kids by transforming their space into a magical hideaway fit for a little prince or princess. The cozy enclosure creates a comforting nook that feels both special and secure. This enchanting design belongs to Ivy, one of the McGee daughters.
9. Eye-Catching Bedside Lighting for Kids’ Rooms
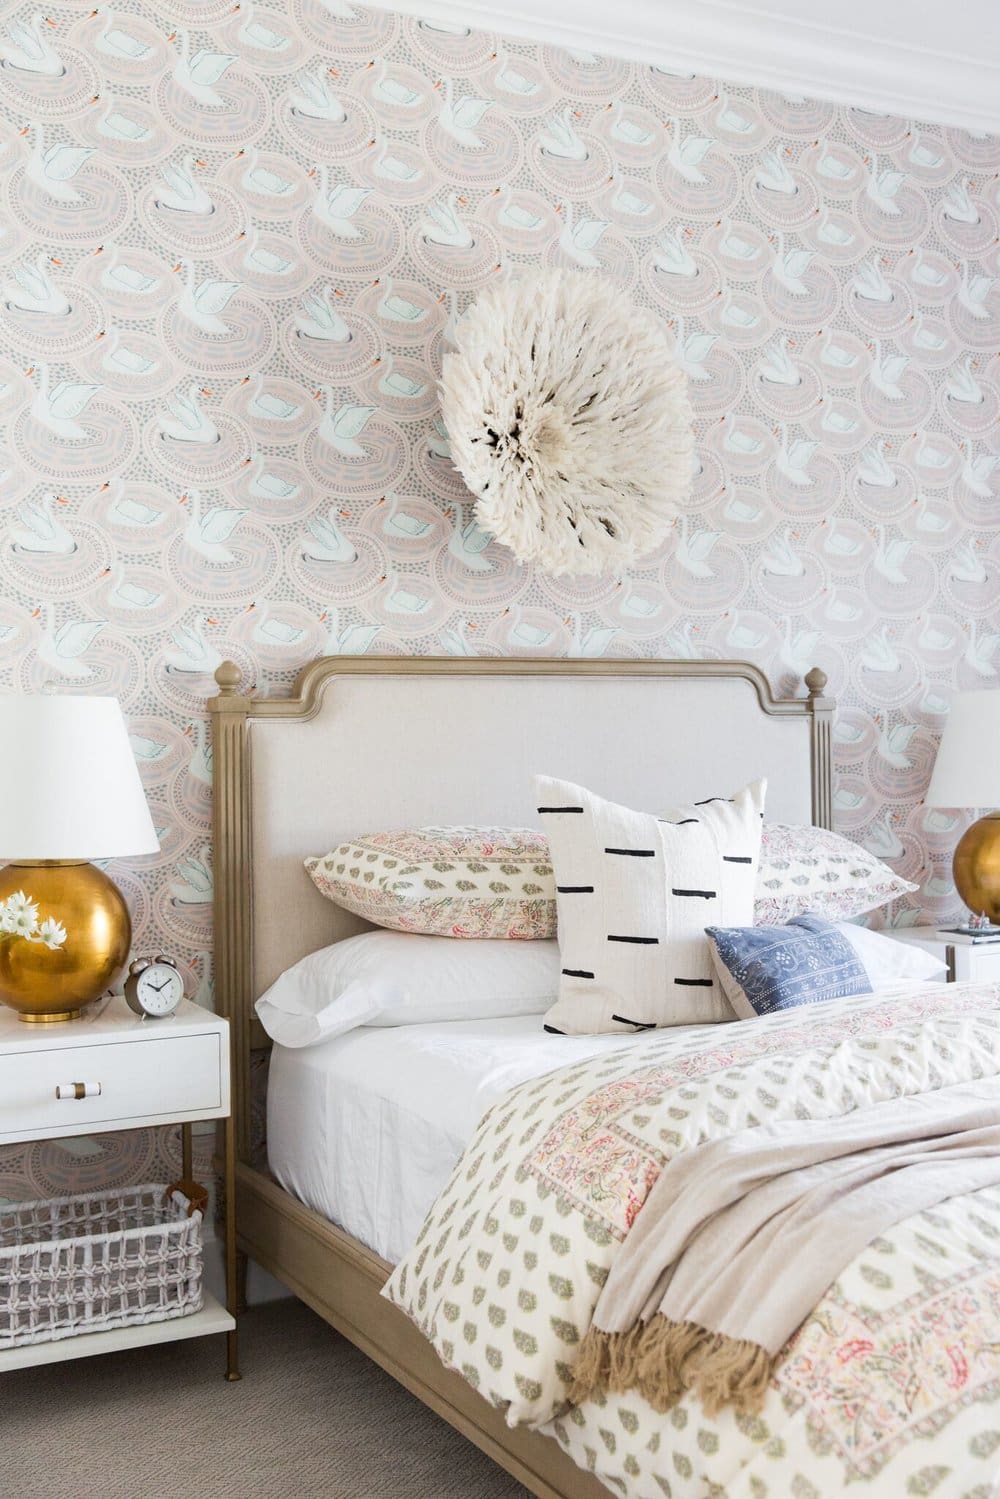
Creating a stylish kids’ space doesn’t mean overwhelming it with bright hues. Instead, introduce a standout piece that adds personality and charm—like a shiny gold lamp or a unique wall-hanging, such as a juju hat, to instantly lift the room’s vibe with subtle flair.
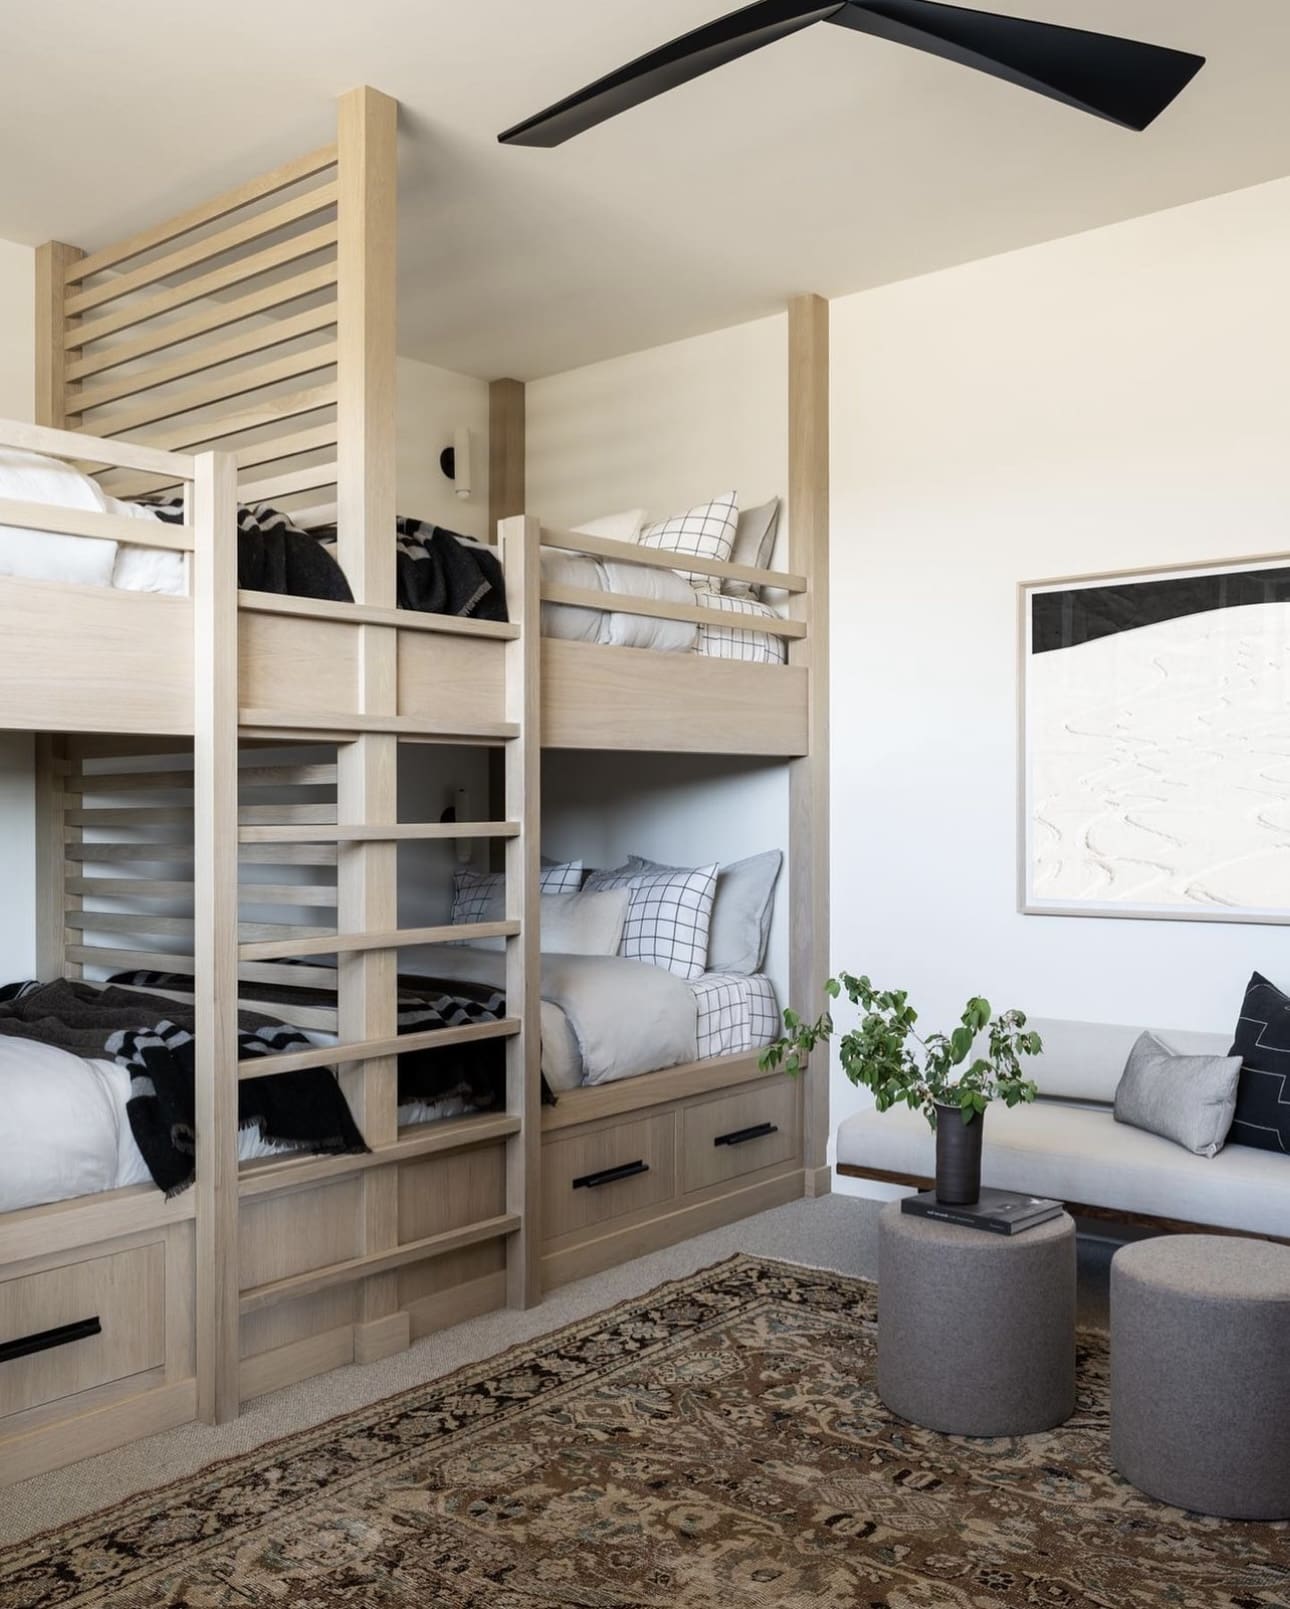
10. Studio McGee’s Cozy Rustic Storage Bed for Kids’ Rooms
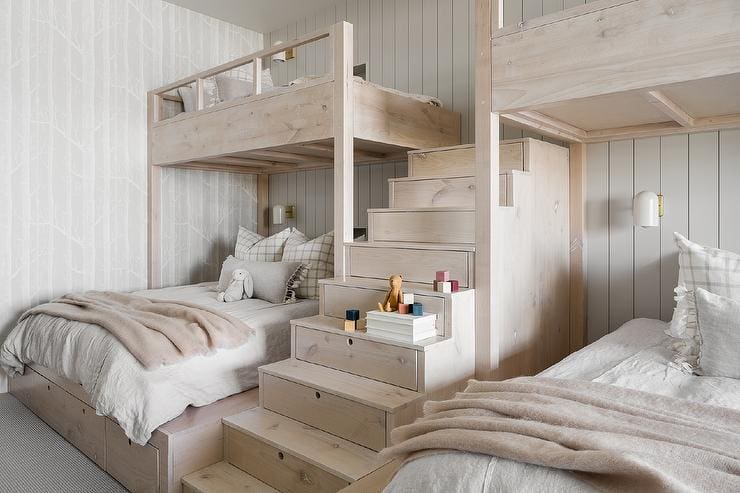
Children’s belongings often scatter across the room, creating a cluttered feel. A smart solution is a storage bed like the Studio McGee bunk bed, which doubles as both a staircase and a clever organizer. This design offers hidden compartments perfect for toys and clothes, helping keep the space tidy and potentially eliminating the need for an extra dresser.
11. Studio McGee’s Serene Blue-Sage Kids’ Room Delight
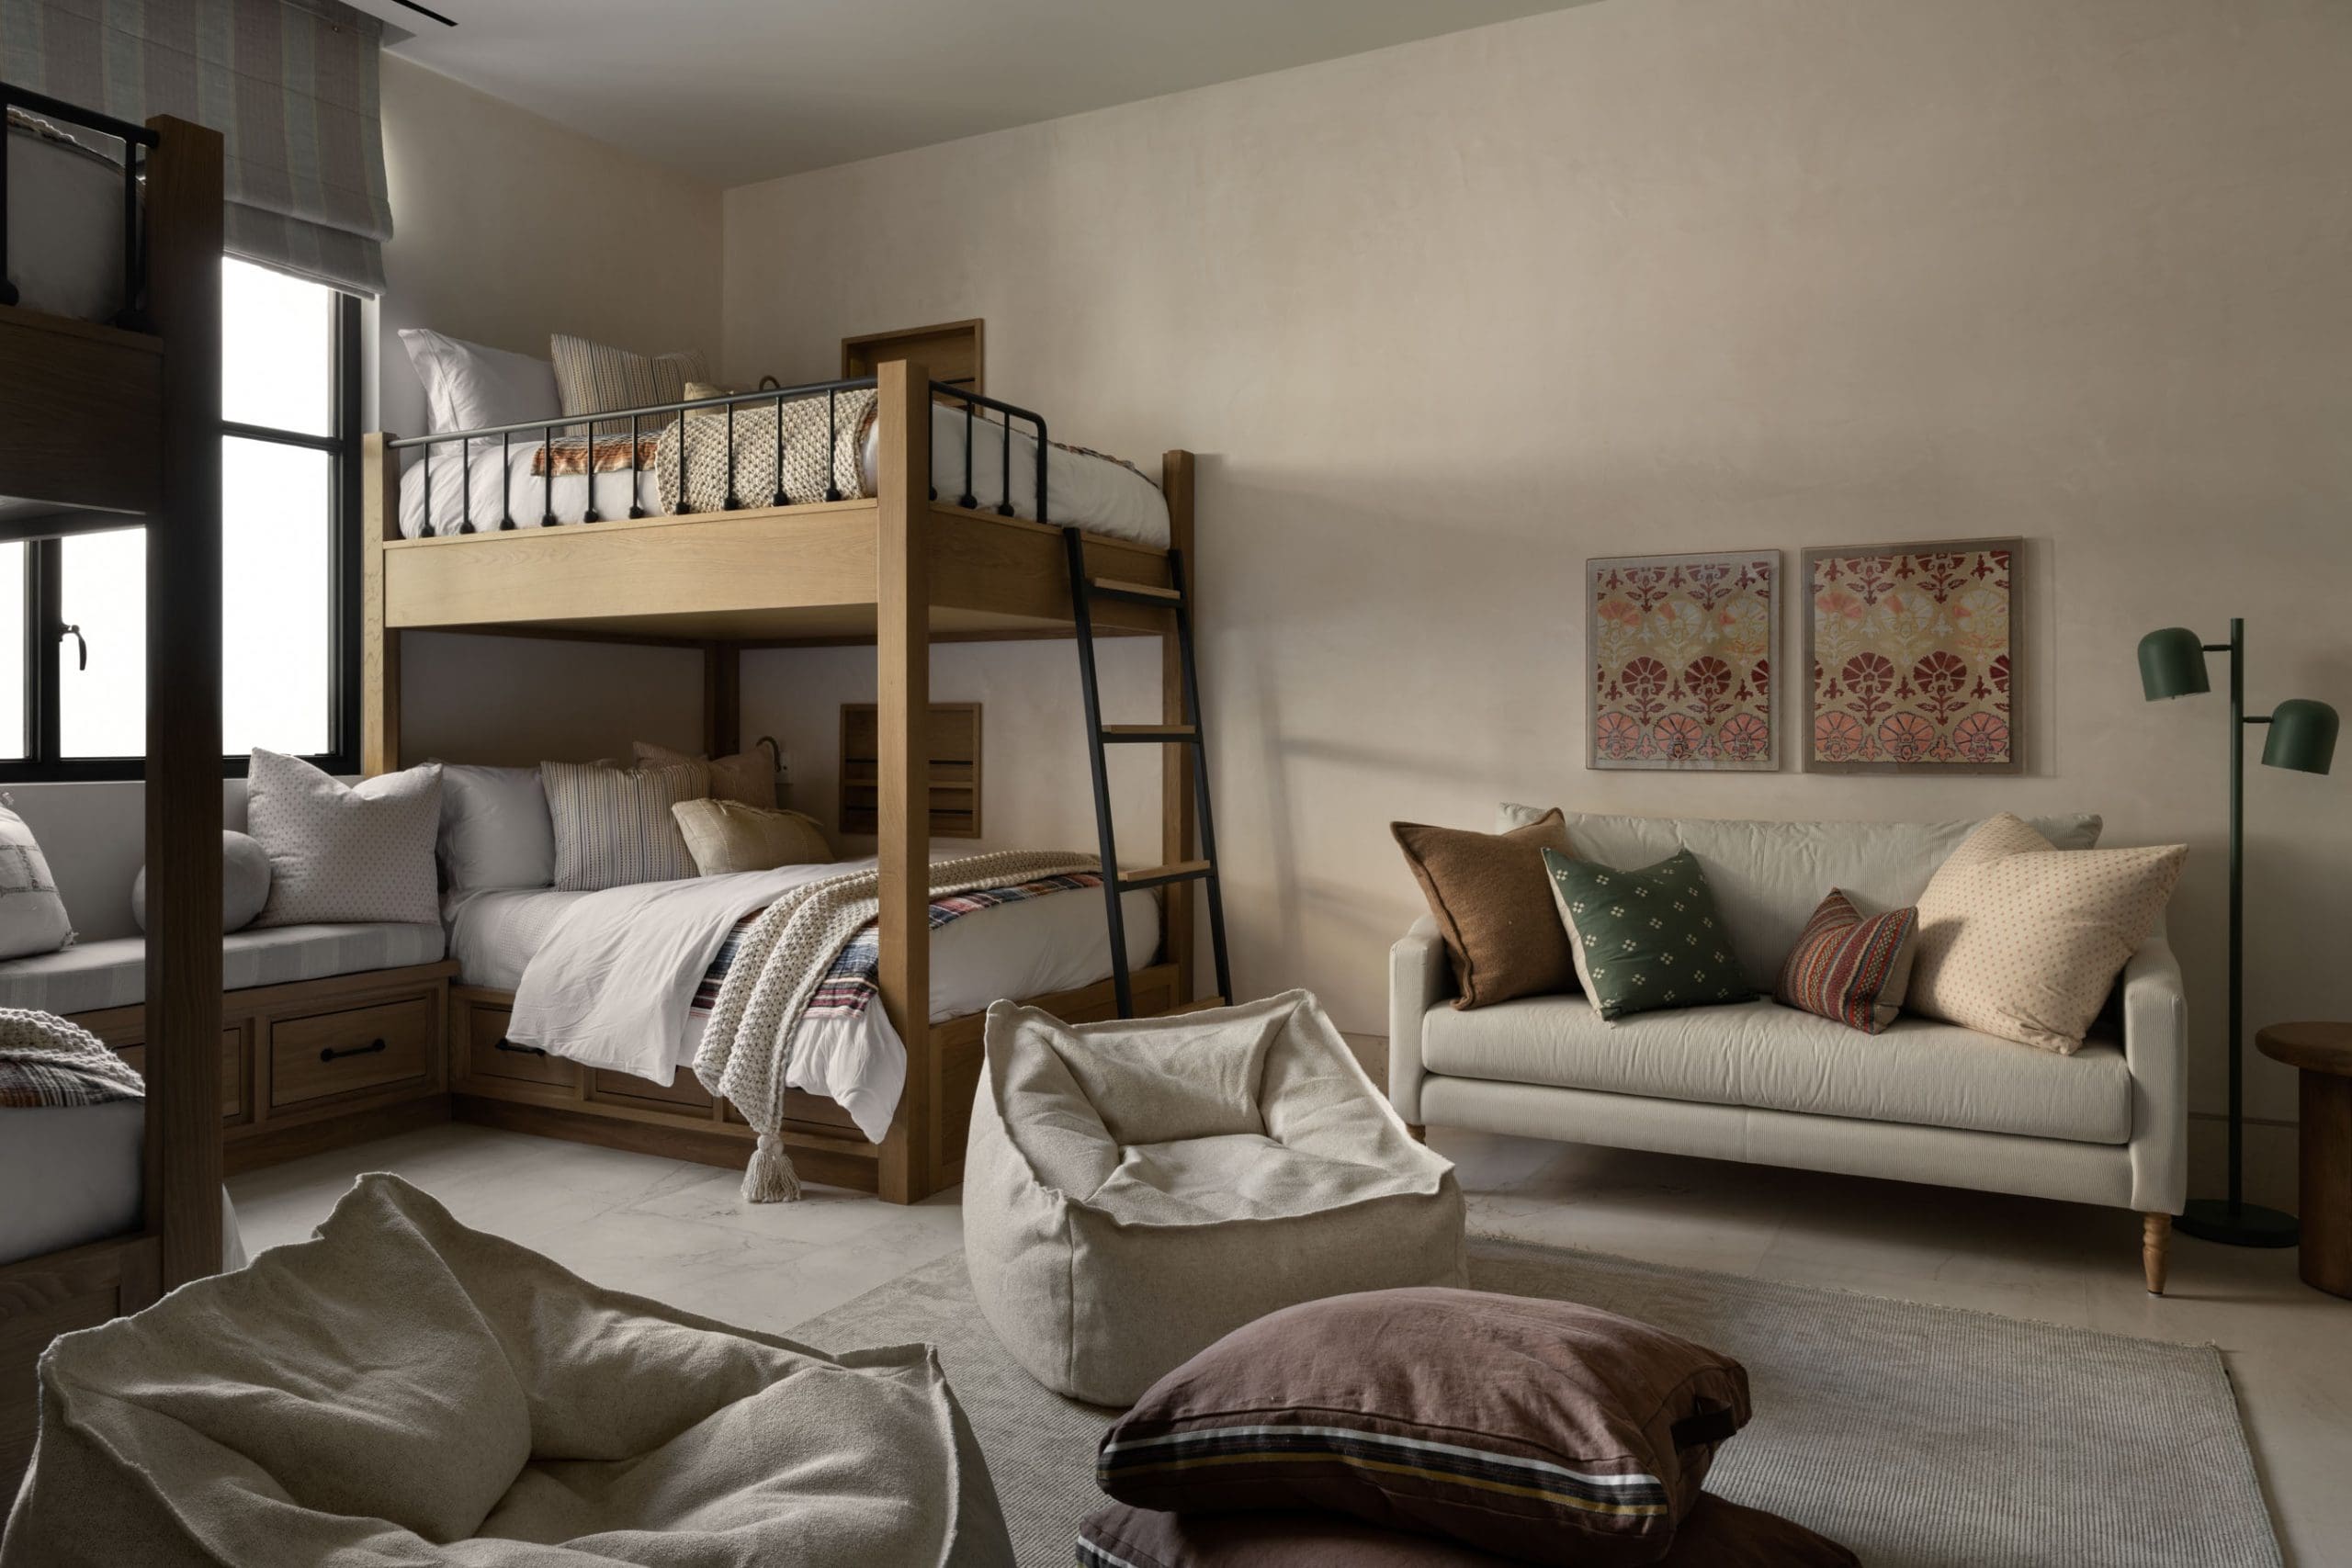
This kids’ bedroom radiates a cozy, natural vibe with its rich earthy tones and lively character. Shea highlights the standout feature: the custom ladders and sleek metal railings that add both charm and a playful edge to the beds.
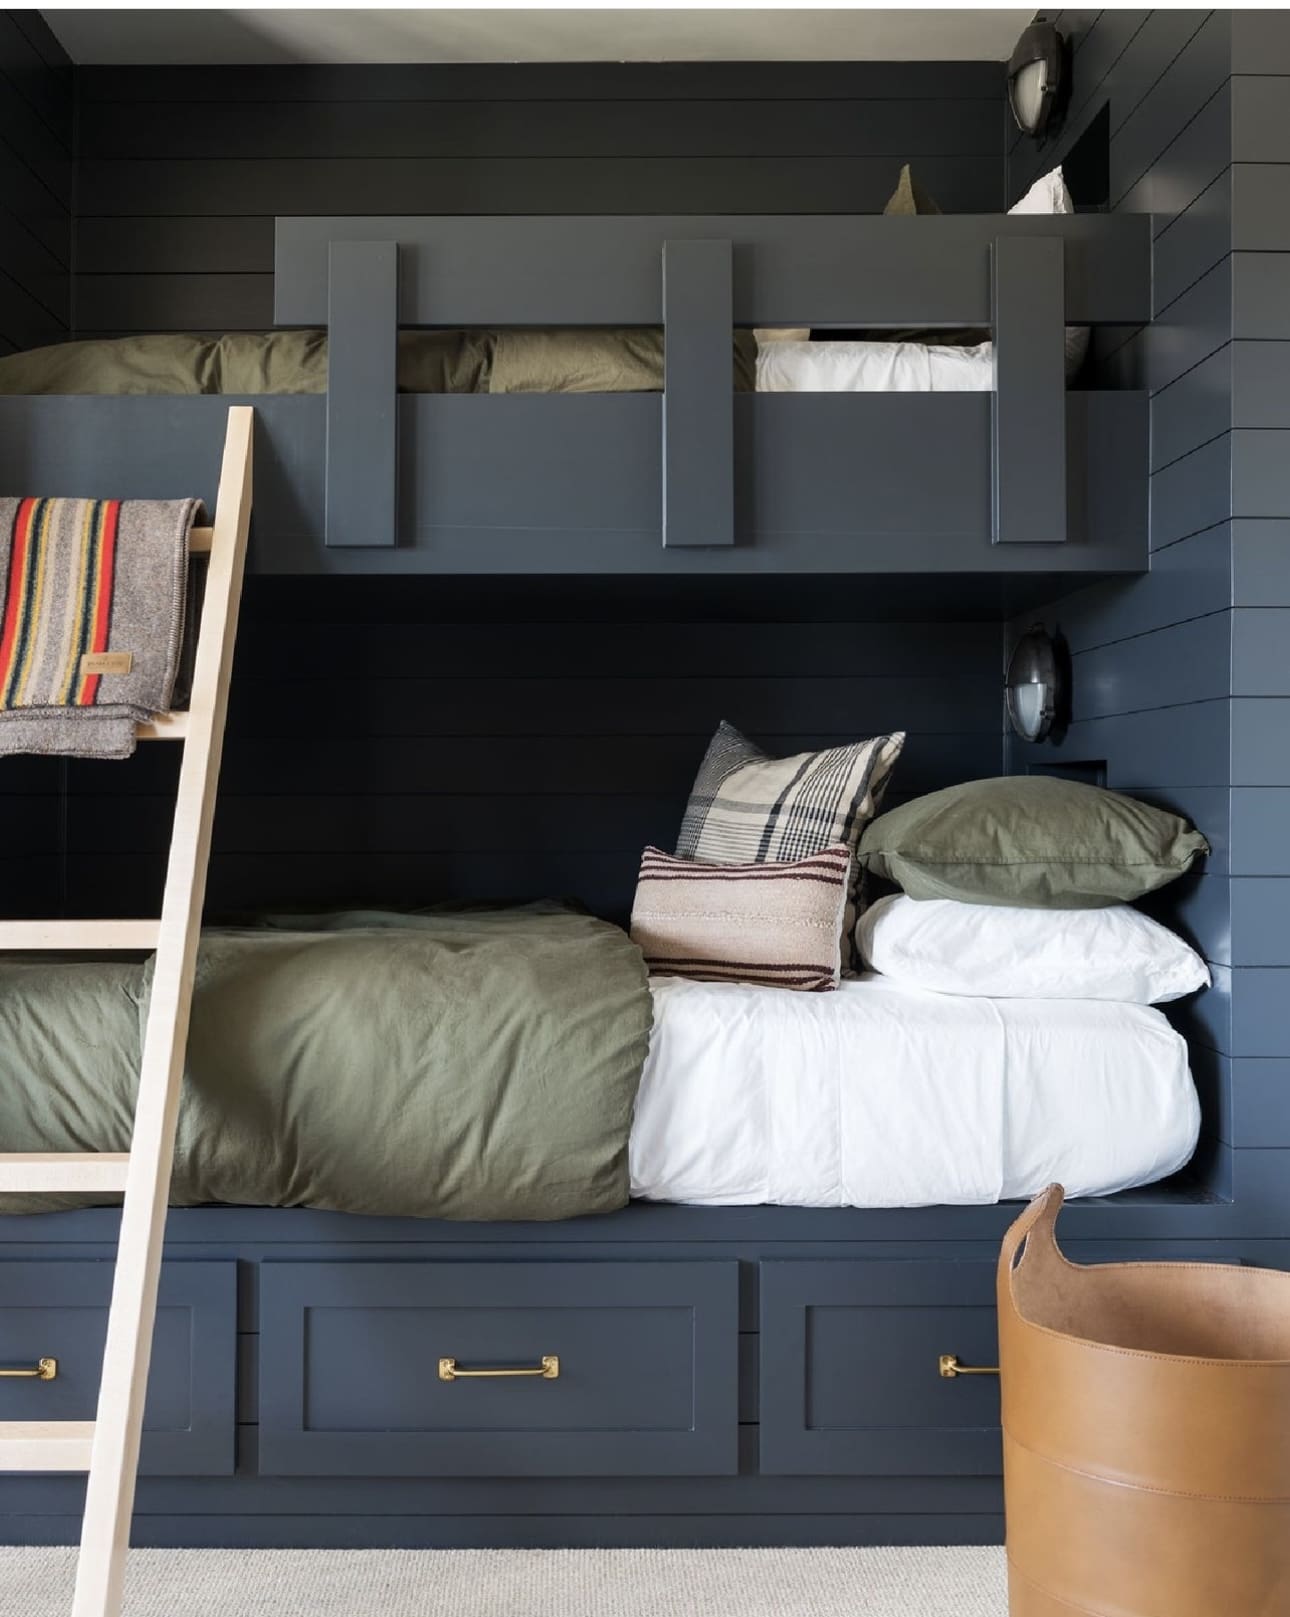
12. Vibrant Blue and Orange: A Playful Palette for Kids’ Rooms
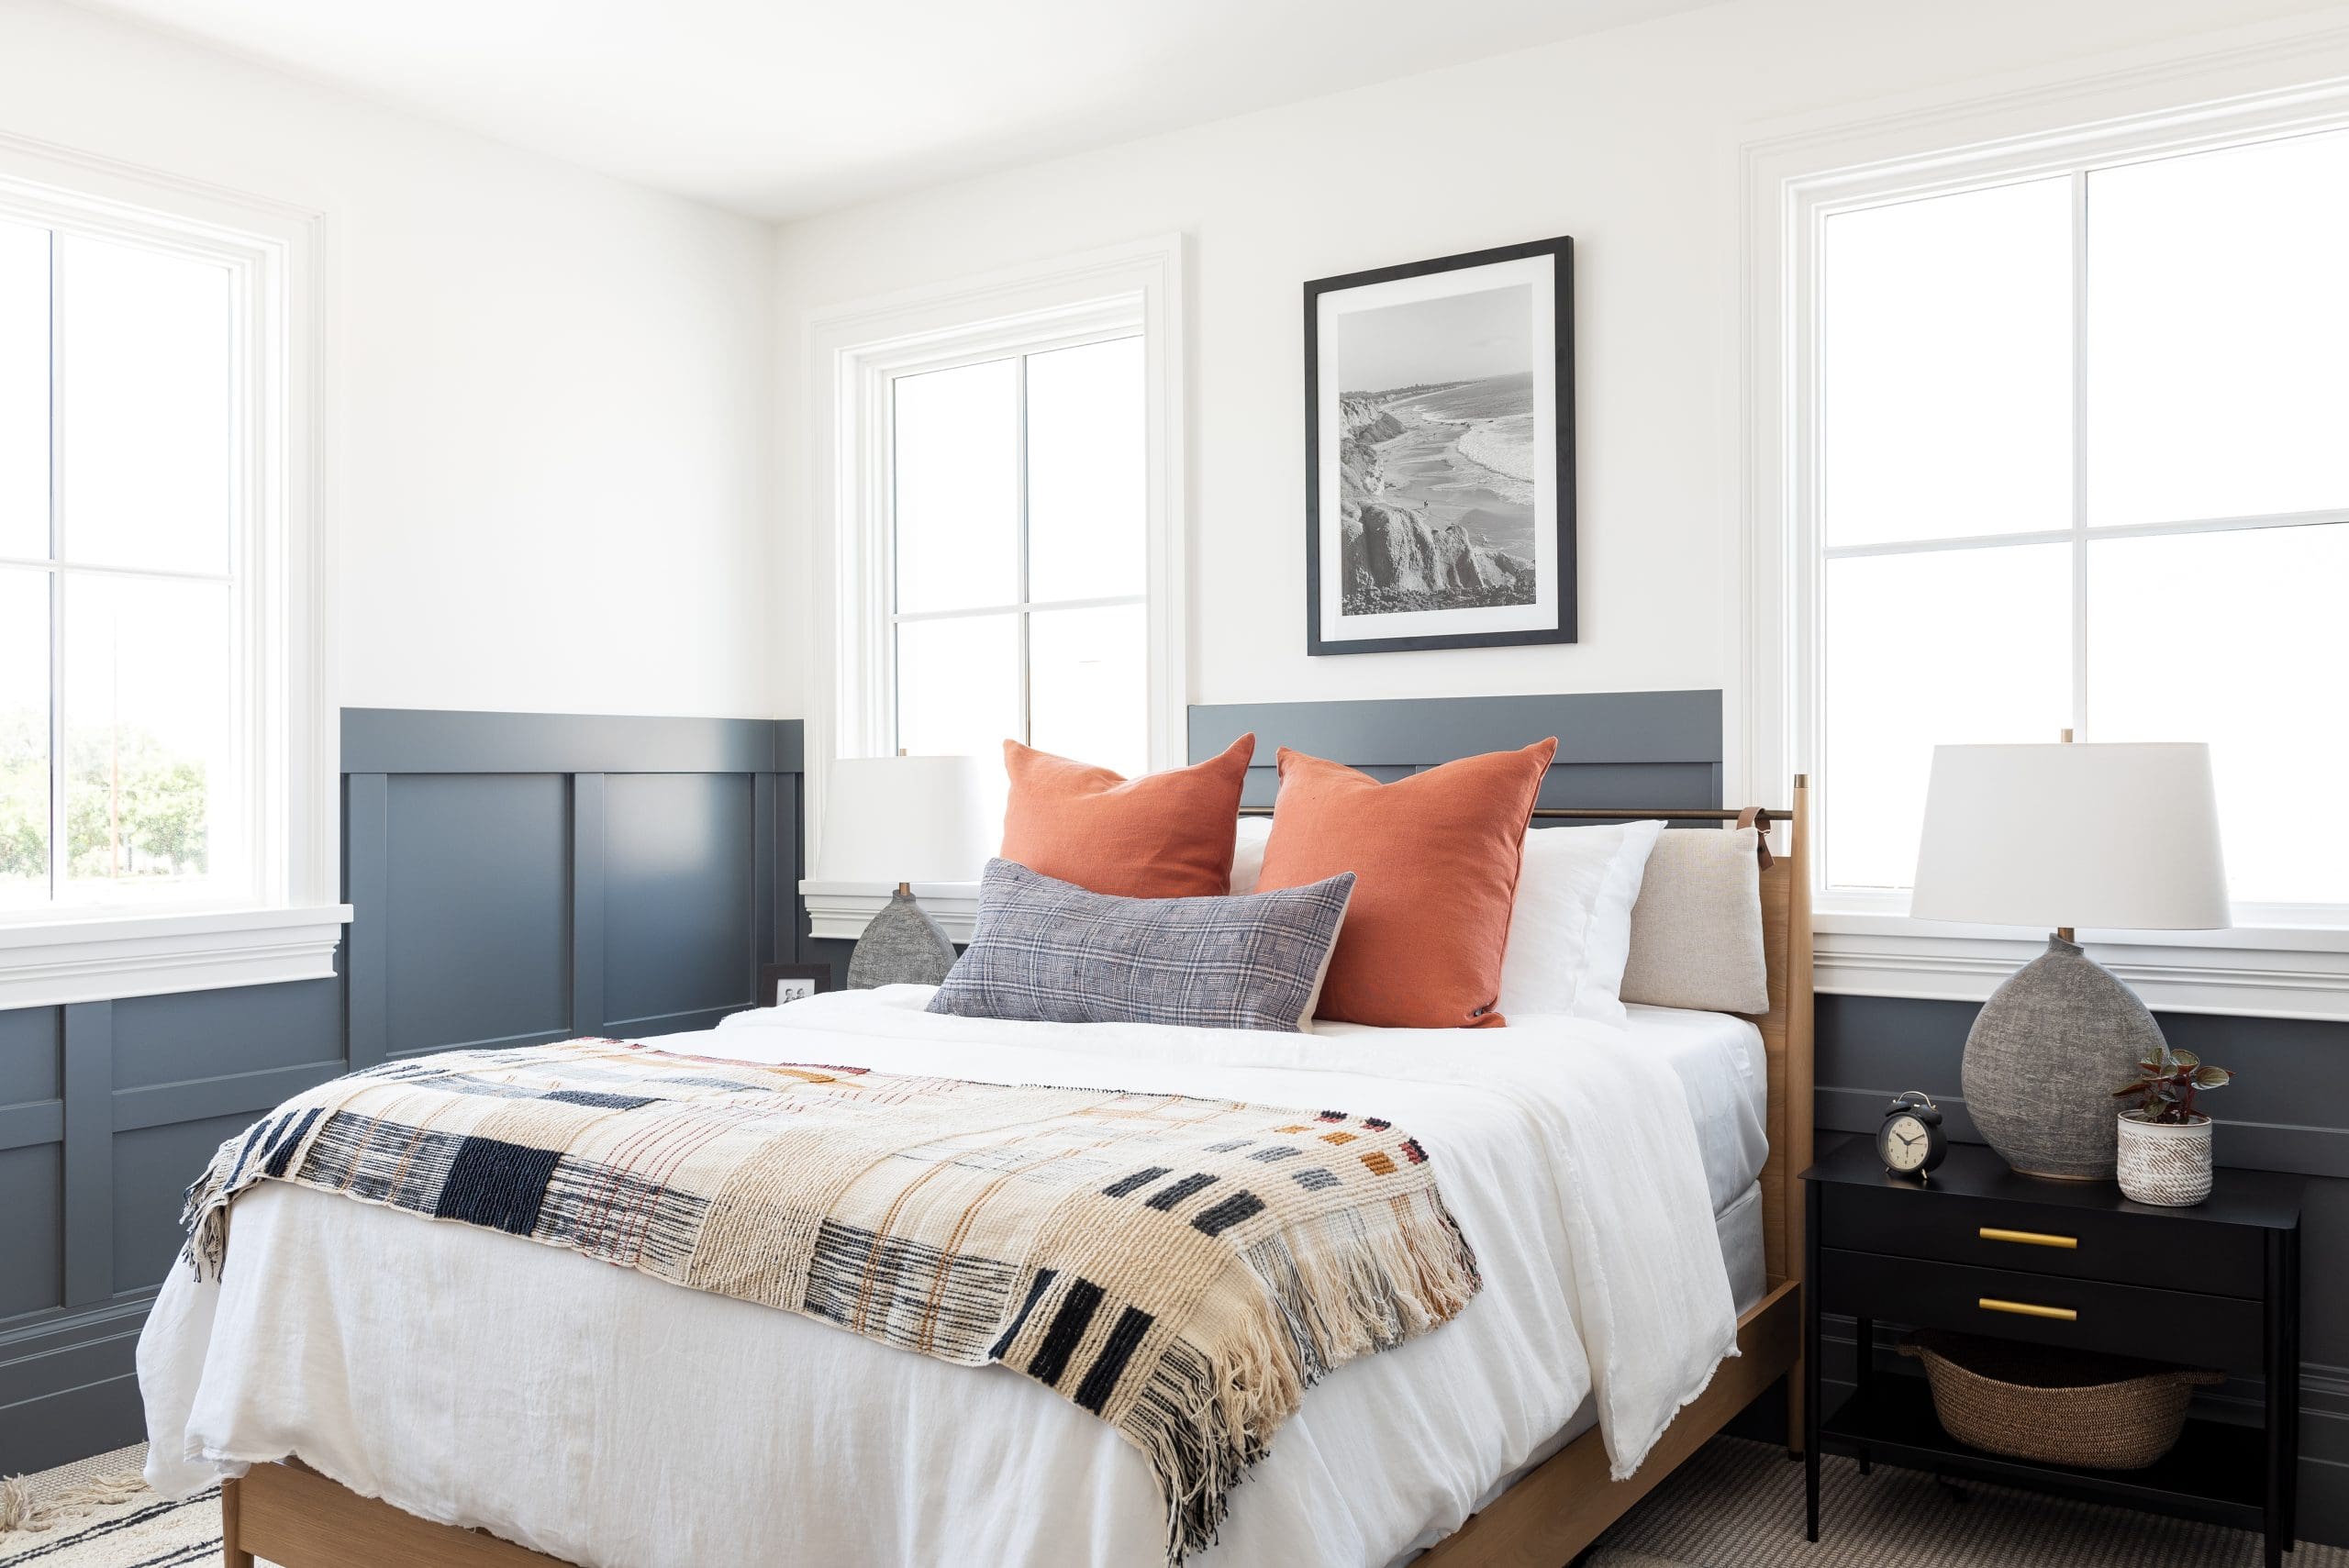
Deep navy hues offer incredible flexibility and effortlessly complement many color palettes. Pairing blue with vibrant orange adds a dynamic contrast, as these complementary colors naturally energize the space and captivate the eye. Together, they bring a lively and balanced charm to any kids’ room.
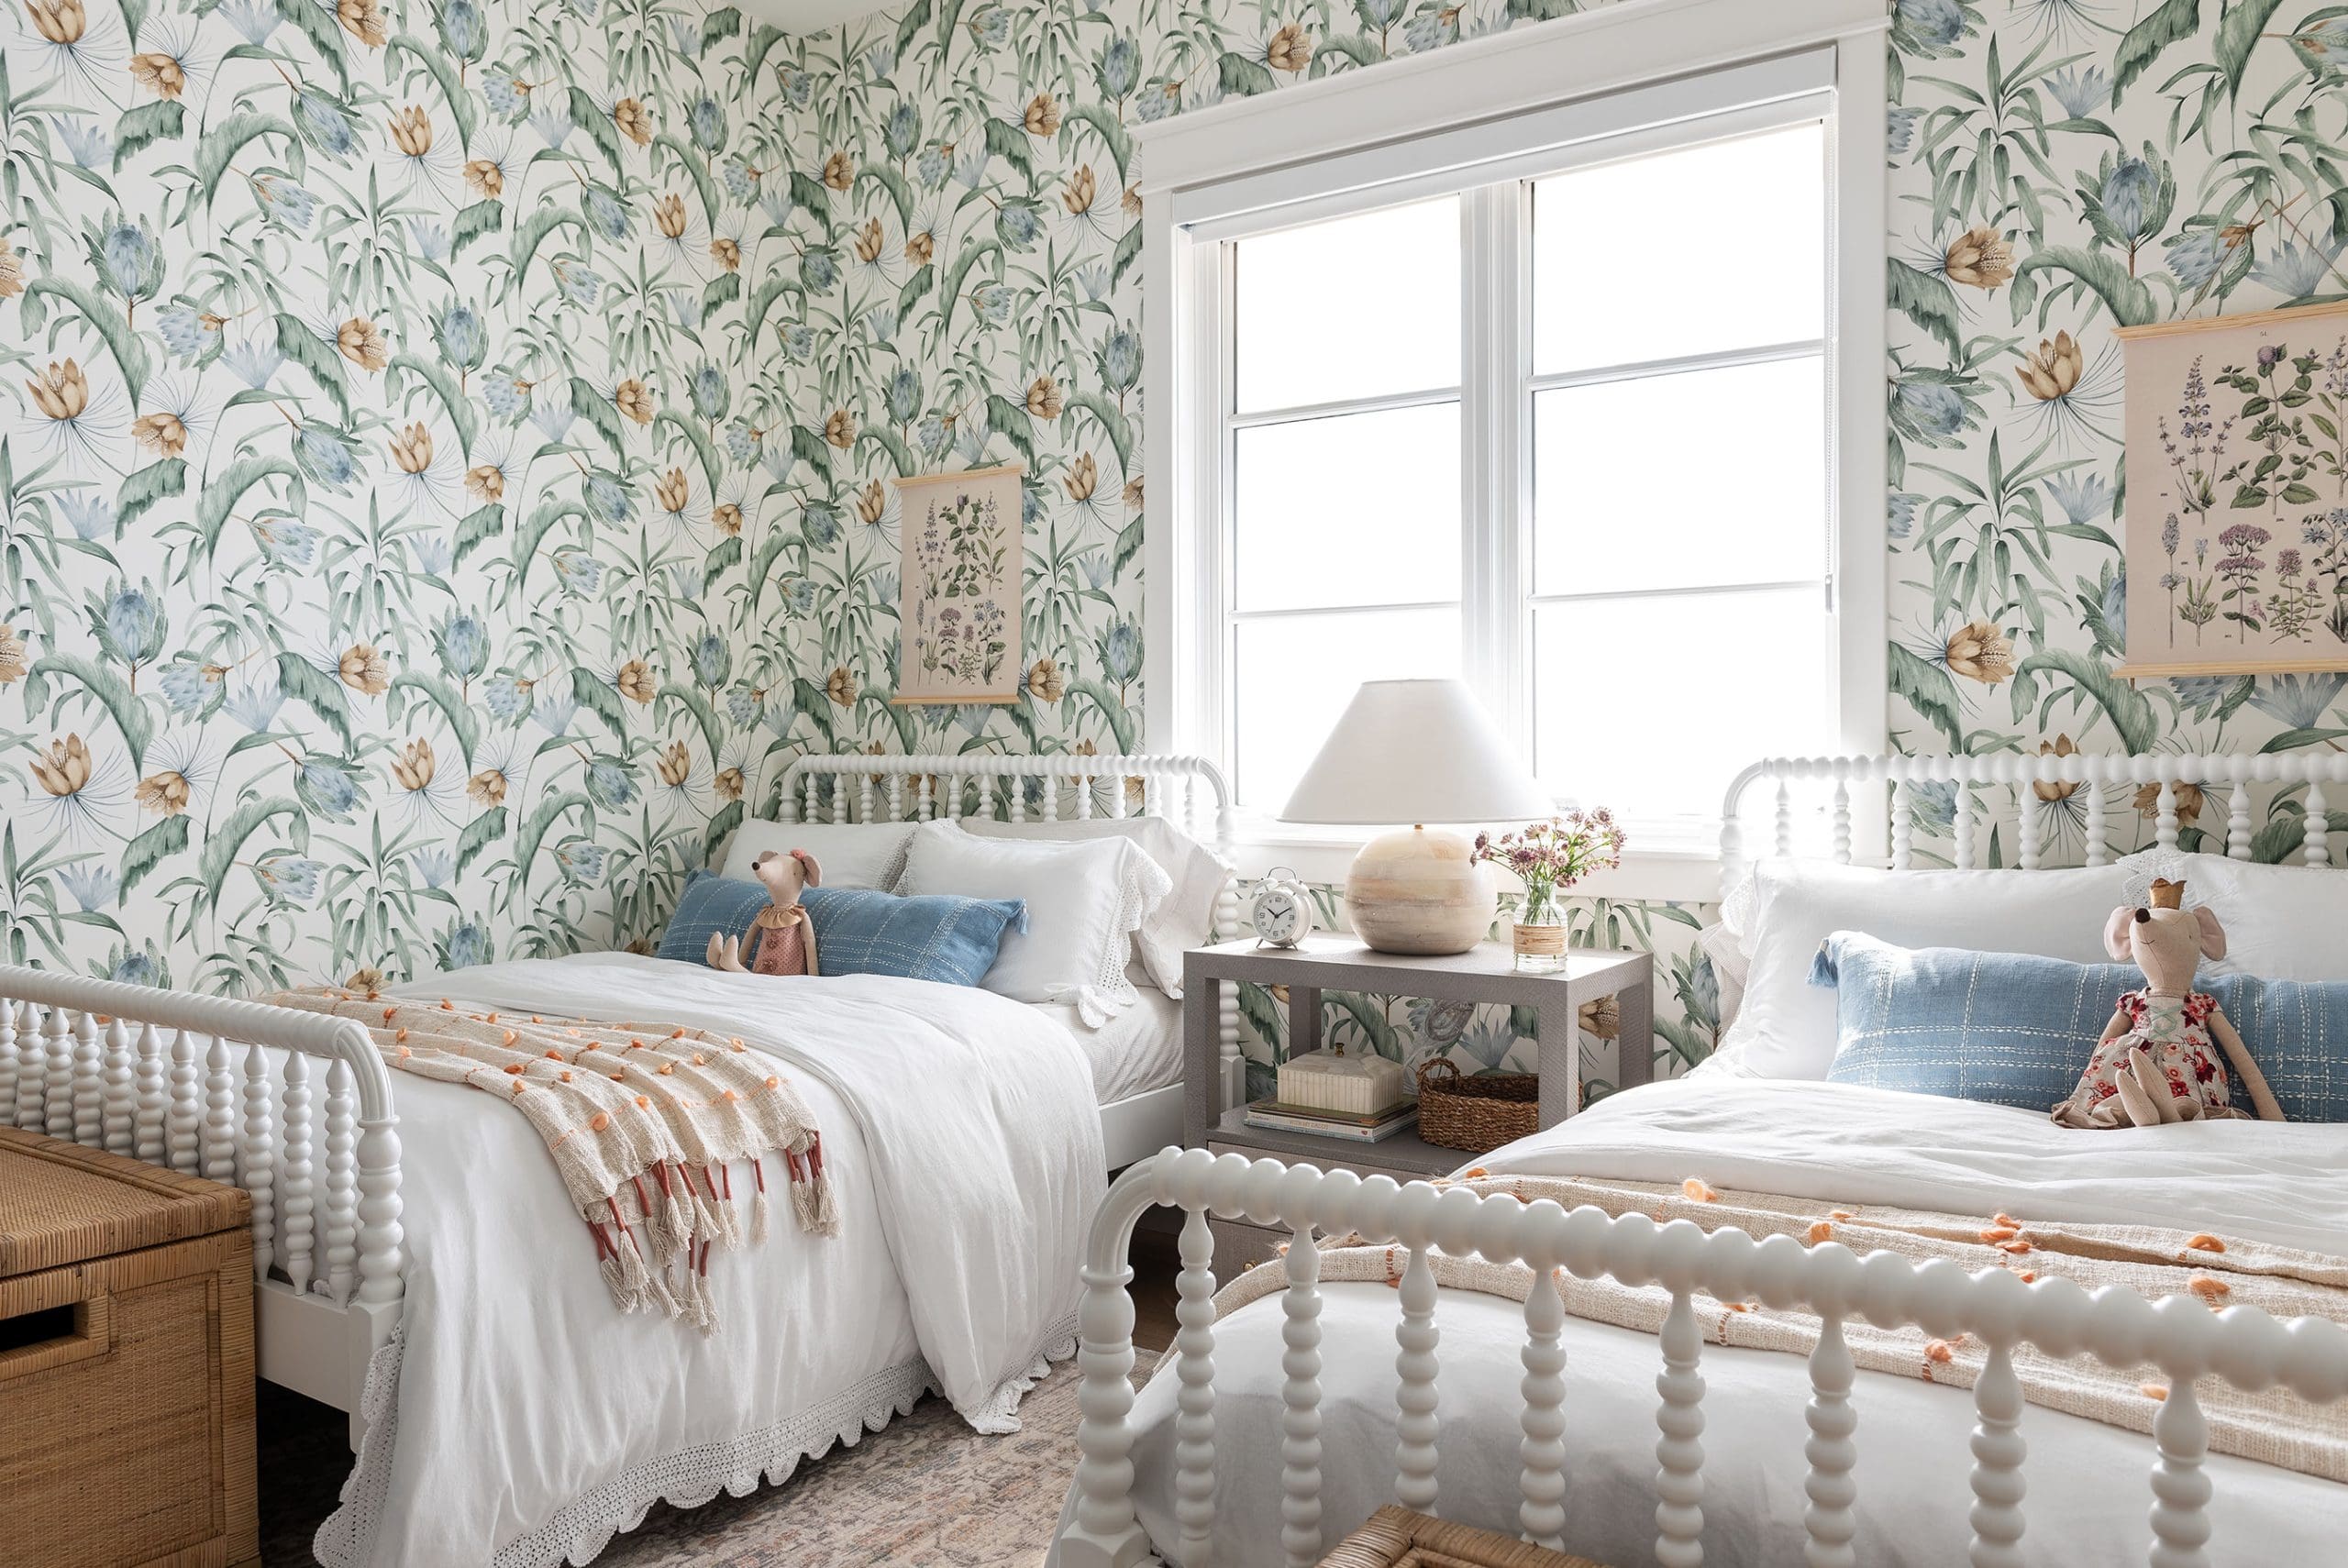
13. Blooming Charm: Floral Wallpaper Ideas for Twin Bedrooms
Most children are naturally drawn to rooms bursting with playful patterns, making a vibrant floral wallpaper a perfect choice. Timeless and full of life, this lively design brings a breath of fresh air and a touch of the outdoors indoors. Surrounding kids with nature-inspired elements creates a soothing atmosphere that nurtures creativity and focus.
14. Serene Blue Vibes for a Cozy Kids’ Retreat
Studio McGee’s kids’ room embraces deep, subdued tones that bring a sophisticated and polished atmosphere to the space. Rich, shadowy colors not only add drama but also elevate the room with a timeless, elegant charm.
15. Chic and Cozy Basement Bunk Haven for Kids
Studio McGee crafted this basement bunk room as a lively haven for family fun and connection. Designed with intentionality, it offers a cozy retreat where loved ones can gather, share laughter, and build lasting memories. This charming space truly feels like a welcoming home away from home.
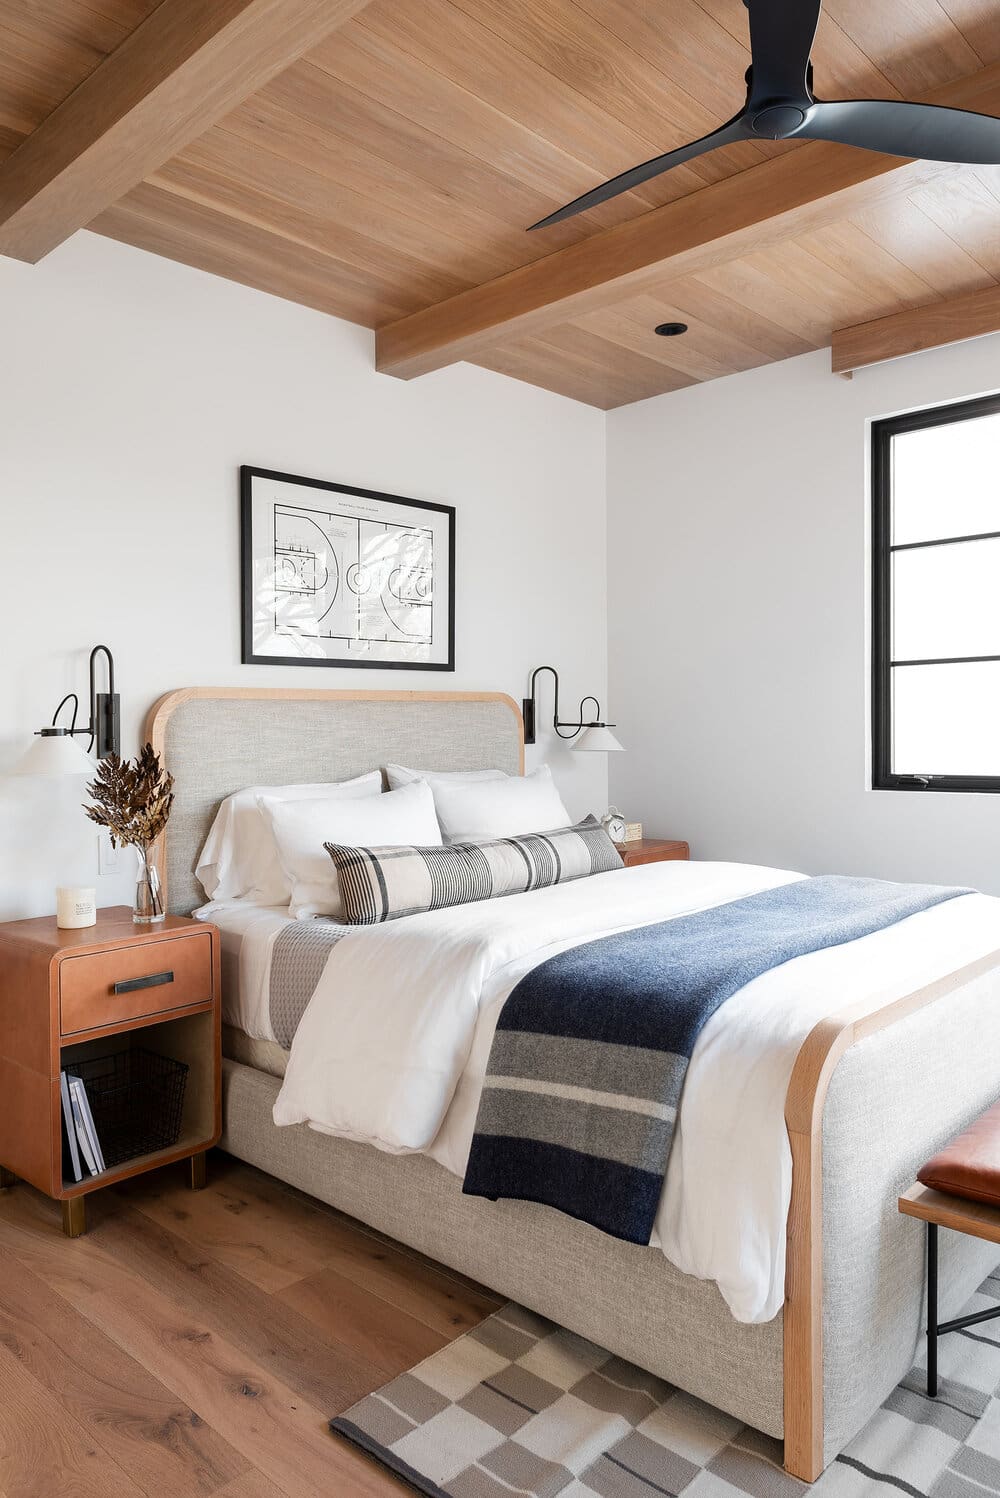
16. A Stylish Upgrade for Your Little Guy’s Space
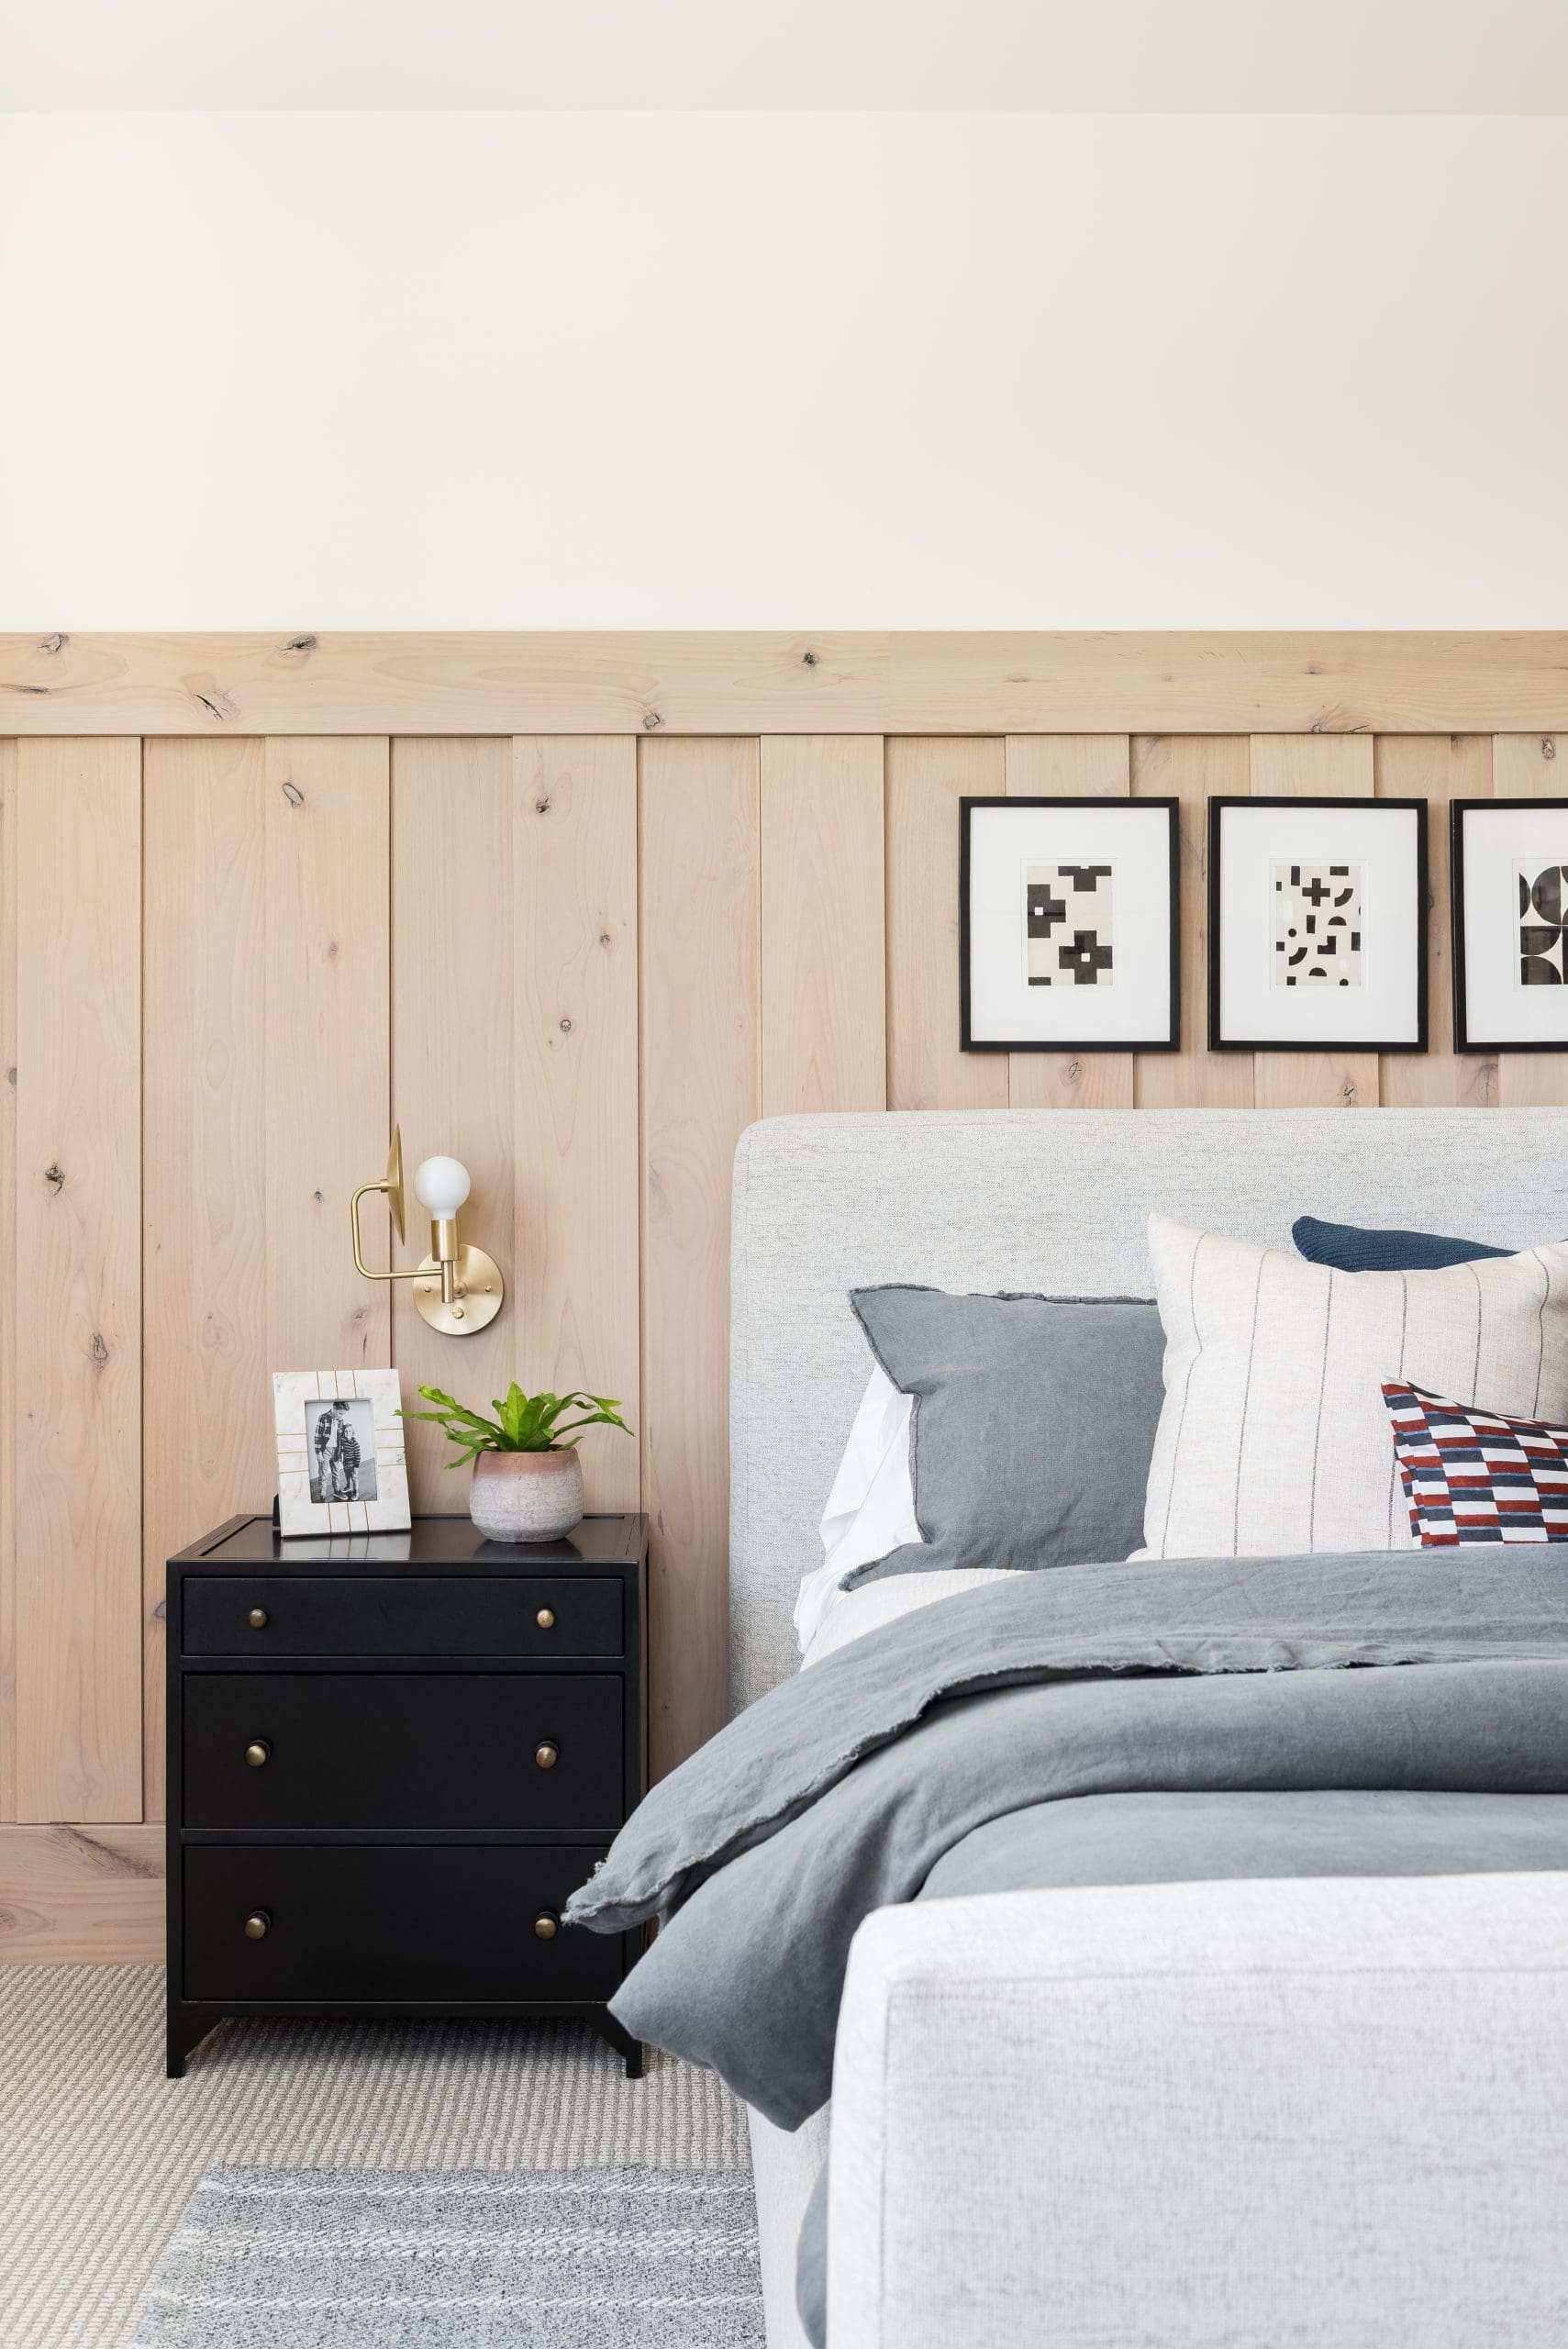
This boy’s room effortlessly blends simplicity with rustic elegance, creating a space that feels both inviting and enduring. The rich, stained ceiling and exposed beams introduce a bold, grounded element that adds character and warmth to the design.
17. Stylish and Cozy Twin Bedroom for Kids
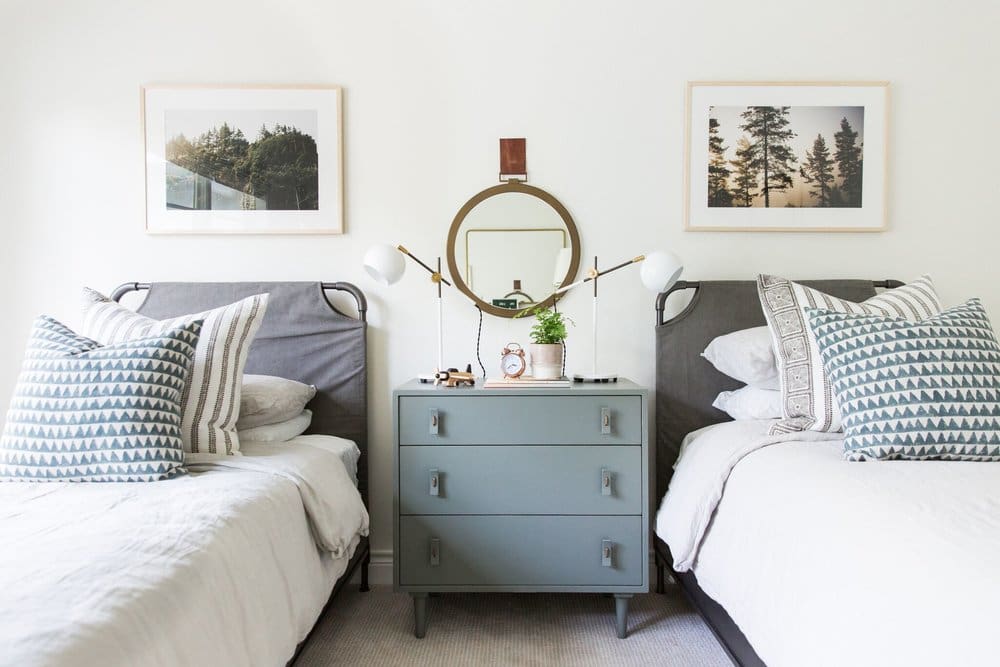
For this Studio McGee project, the client envisioned a playful yet timeless space for her twins. Shea and her team selected versatile furniture pieces that grow with the children, while a soft, neutral palette paired with calming nature-inspired artwork creates a serene and inviting atmosphere.
18. Climbing into Creativity: Styling the Ladder Bookshelf
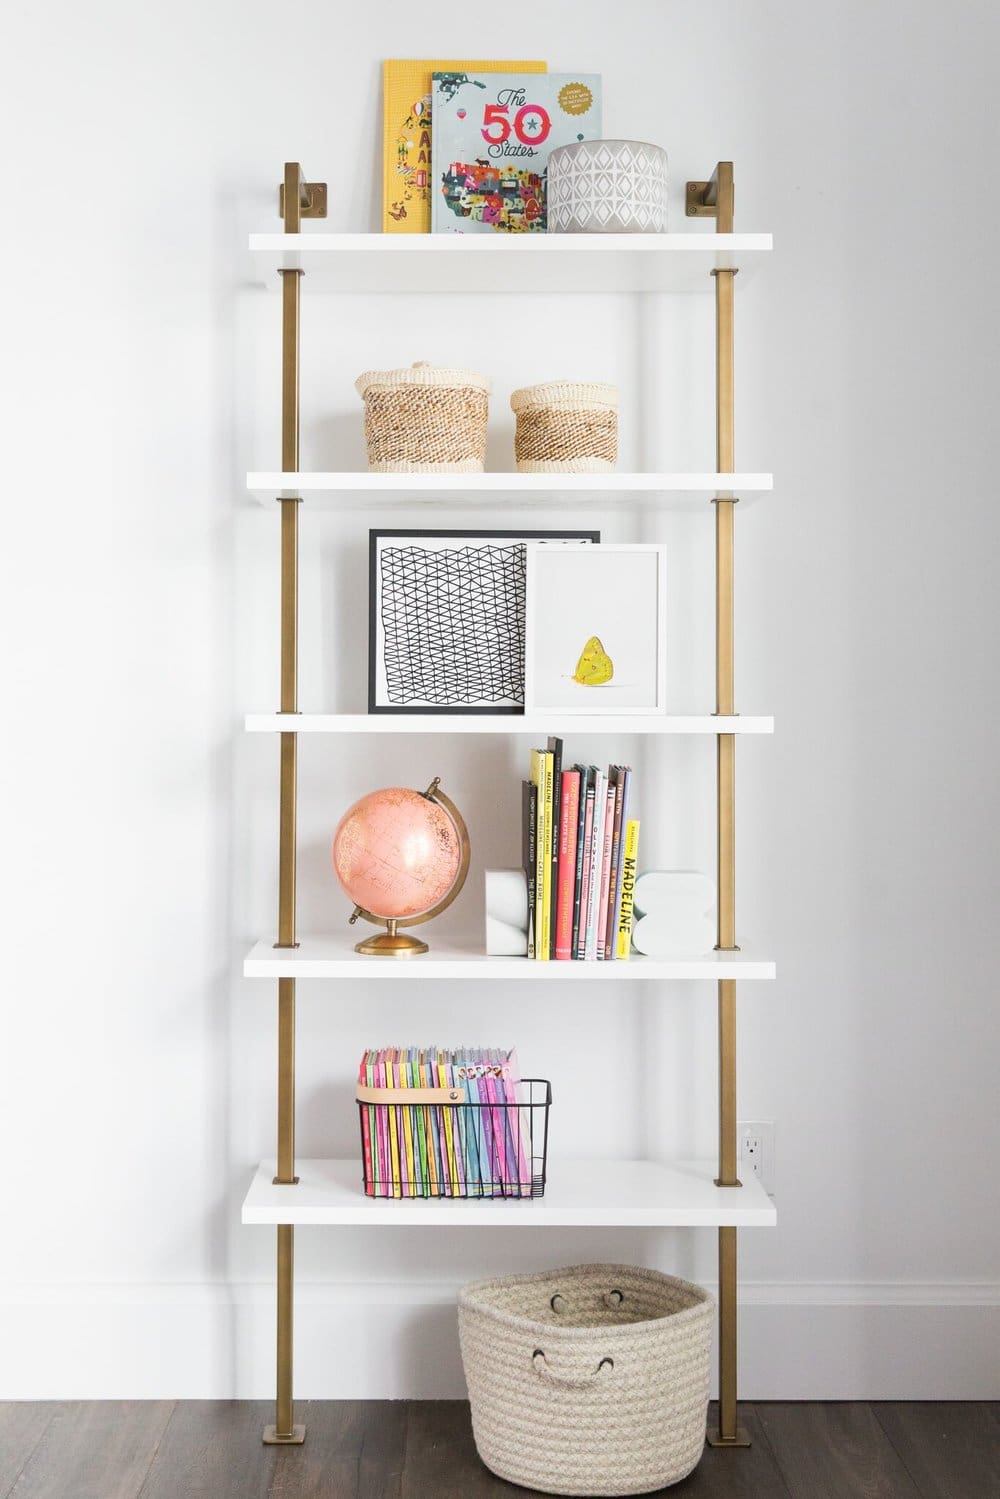
Ladder-style bookcases offer a charming blend of lightweight convenience and stylish appeal, making them a great choice for kids’ rooms. To keep little ones safe, opt for a wall-mounted version that stays securely in place while showcasing their favorite books and treasures. This way, you get both functionality and peace of mind.
19. Vibrant and Cheerful Spaces for Kids
Create a cheerful and airy kids’ space by blending soft, neutral tones with pops of brightness. Choose light-colored furniture, incorporate multiple light sources, and keep the room tidy to maintain an open feel. Adding greenery and a strategically placed mirror will enhance natural light and bring a lively touch to the room.
20. Cozy Cabin Vibes for Your Little Explorer’s Room
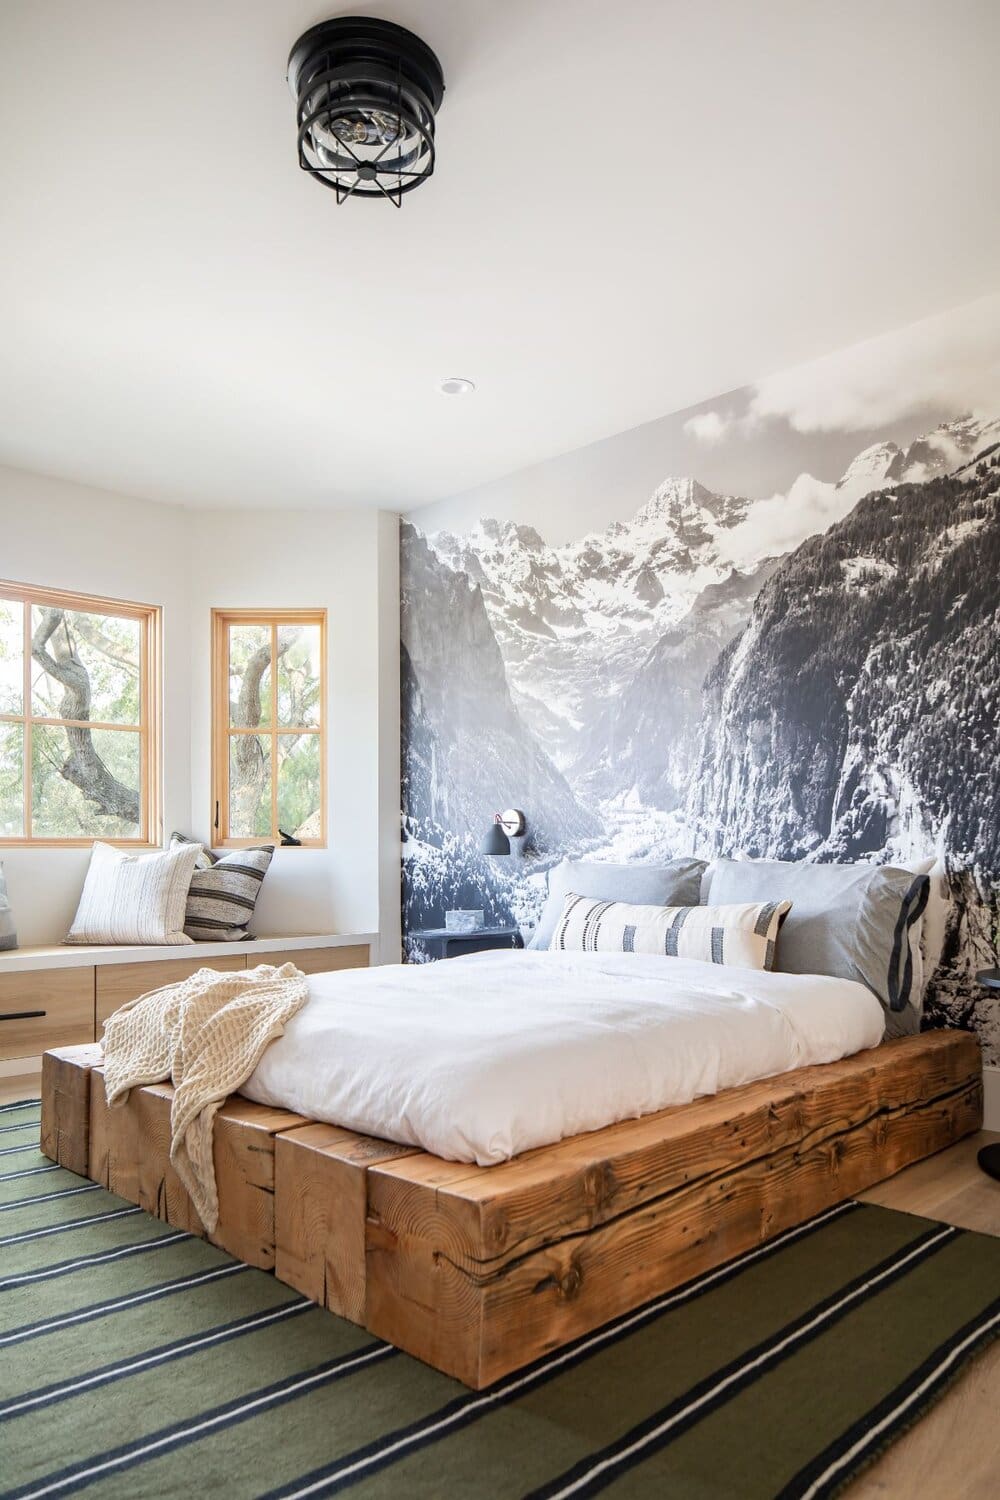
Let your surroundings inspire the design to preserve the home’s authentic character. In this Studio McGee kids’ bedroom nestled in a mountain retreat, Shea and her team seamlessly blended nature indoors, from the sturdy wooden bed to the sweeping mountain mural. The result is a space that feels perfectly connected to its wild, scenic setting.
21. Whimsical Rattan Arch Bed for a Cozy Kids’ Retreat
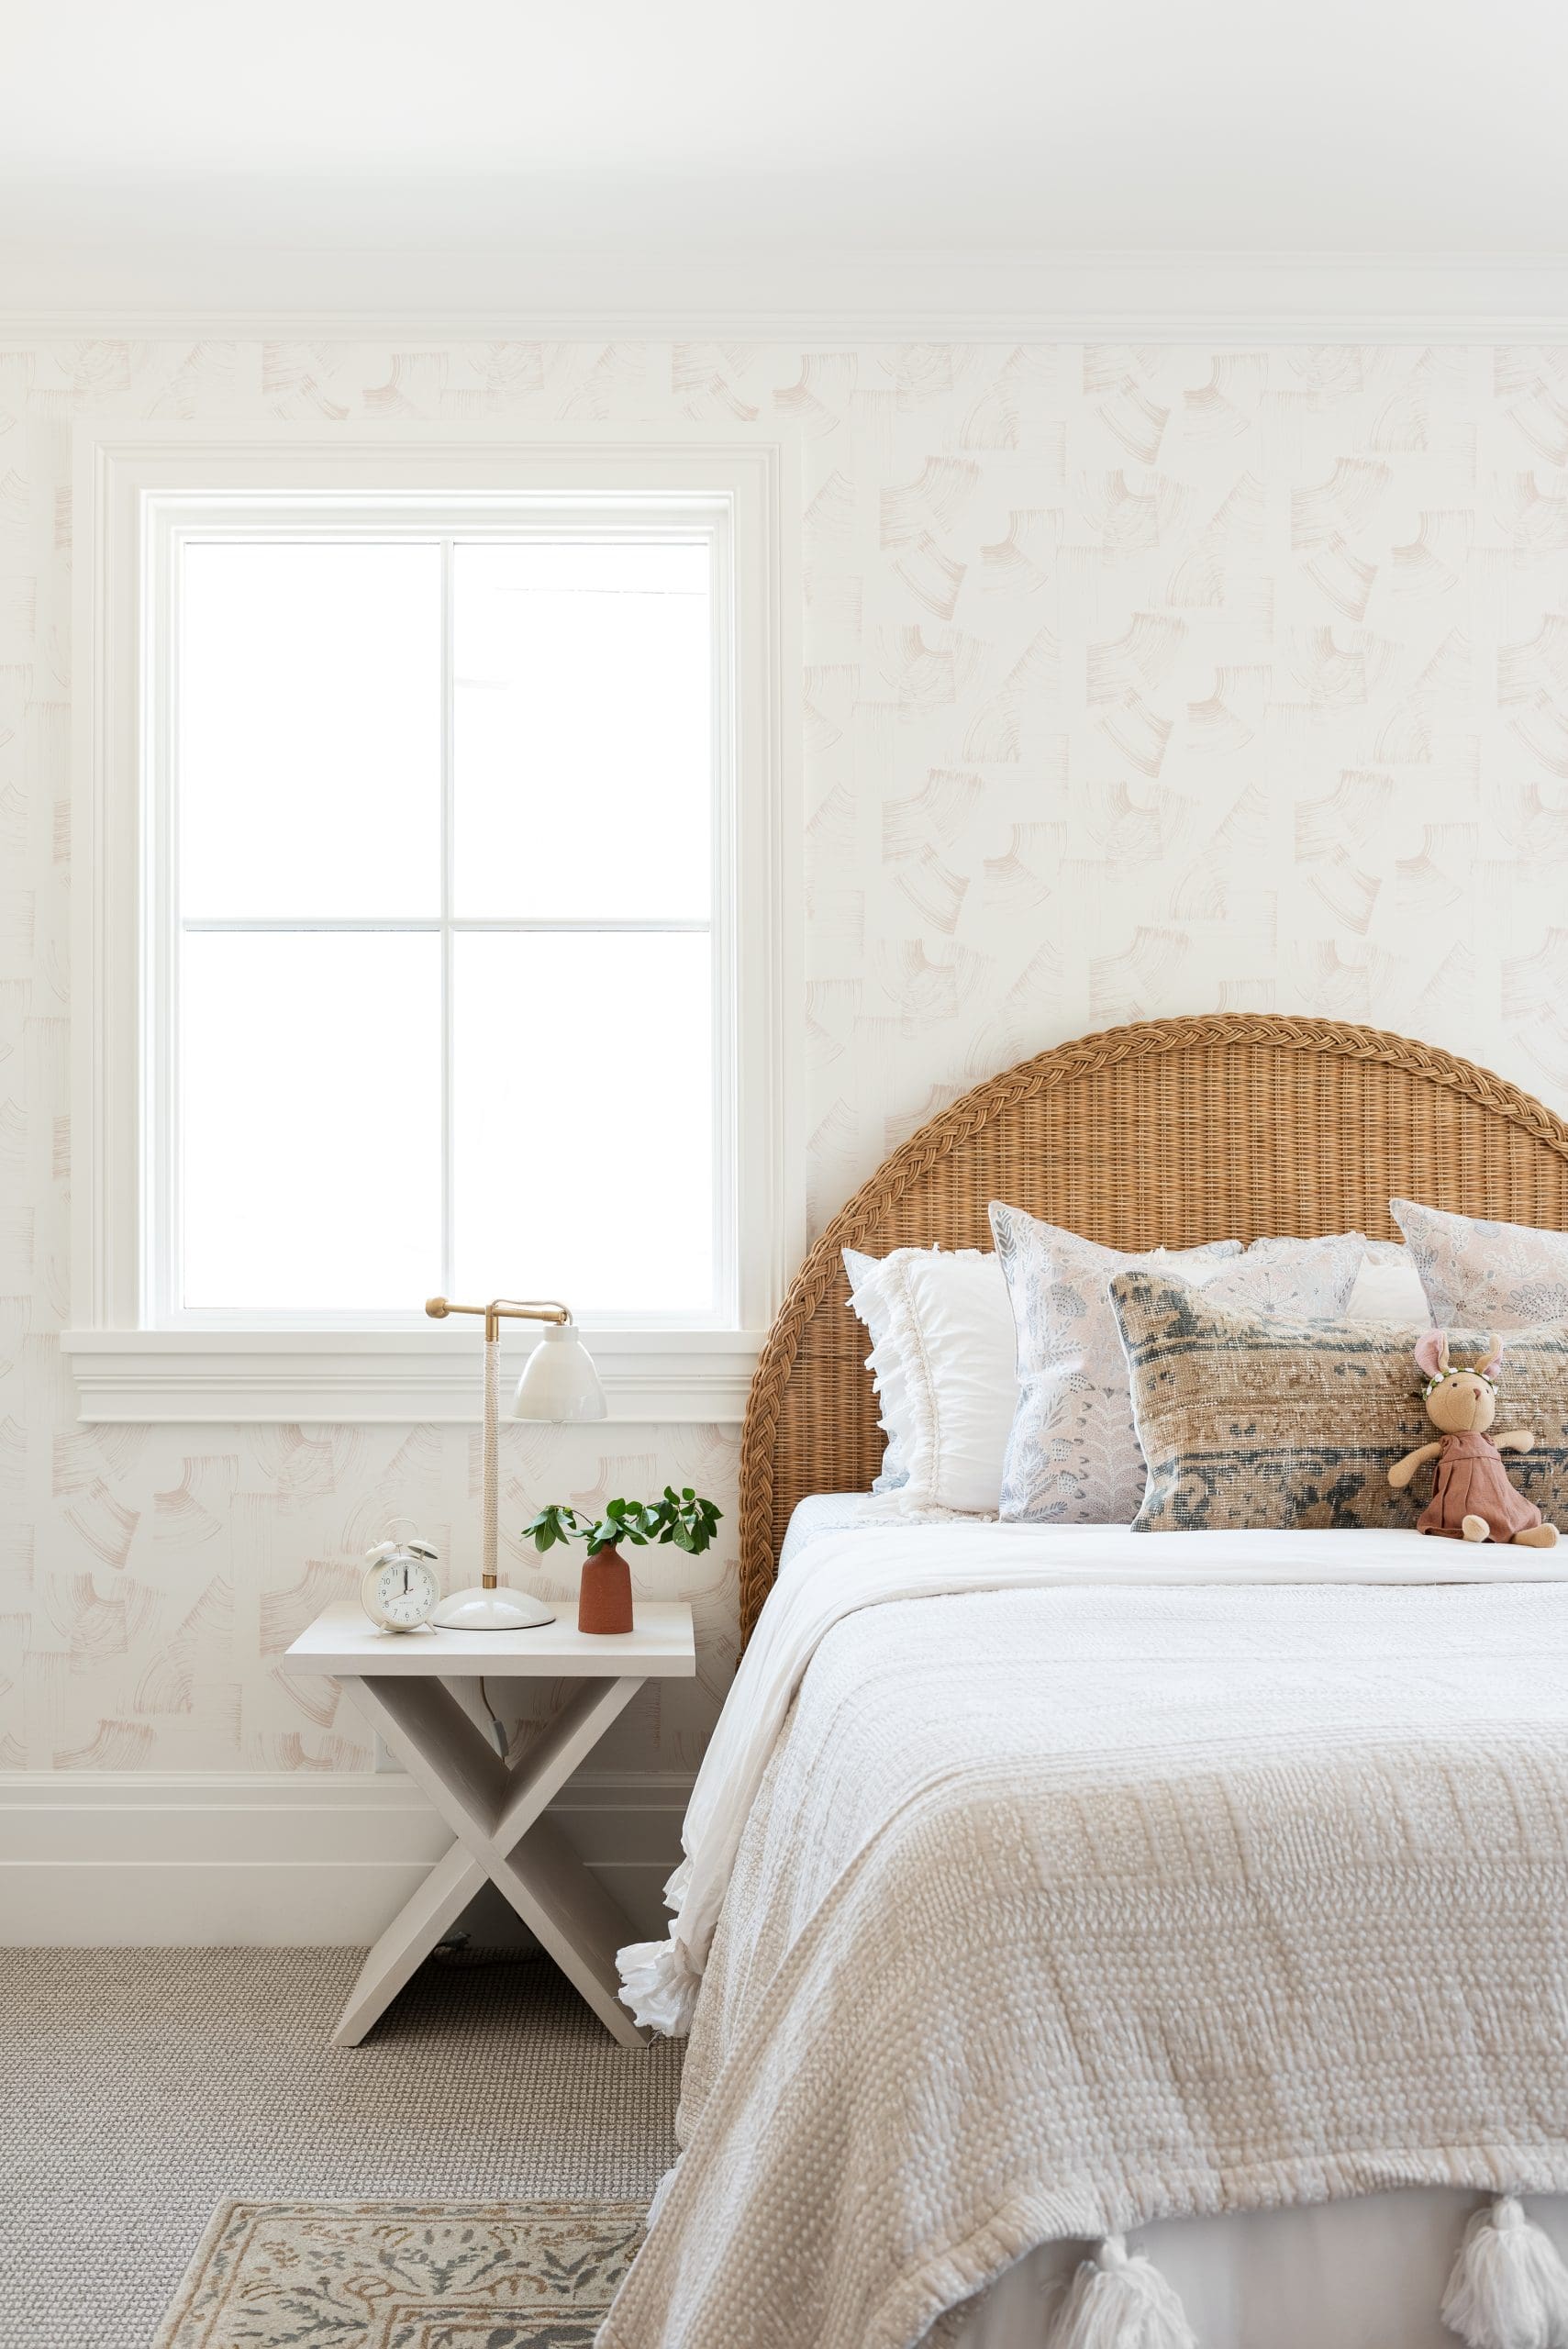
A rattan bed frame is a fantastic choice for a child’s room, combining eco-friendly qualities with practical benefits. Harvested from a fast-growing plant, rattan is sustainable, lightweight, and durable, making it easy to move and built to last. Plus, its natural texture brings a charming, cozy vibe that enriches the room’s atmosphere.
22. Charming Wainscoting Ideas for Playful Kids’ Spaces
Wainscoting adds both charm and durability to a child’s room by shielding walls from scuffs while instantly enhancing their look. This timeless wood paneling has stood the test of time and remains a popular choice for creating stylish, inviting spaces. If you’re aiming to transform a kids’ room with lasting appeal, wainscoting is definitely worth considering.
23. Cozy Window Seats: Studio McGee’s Charming Kids’ Room Feature
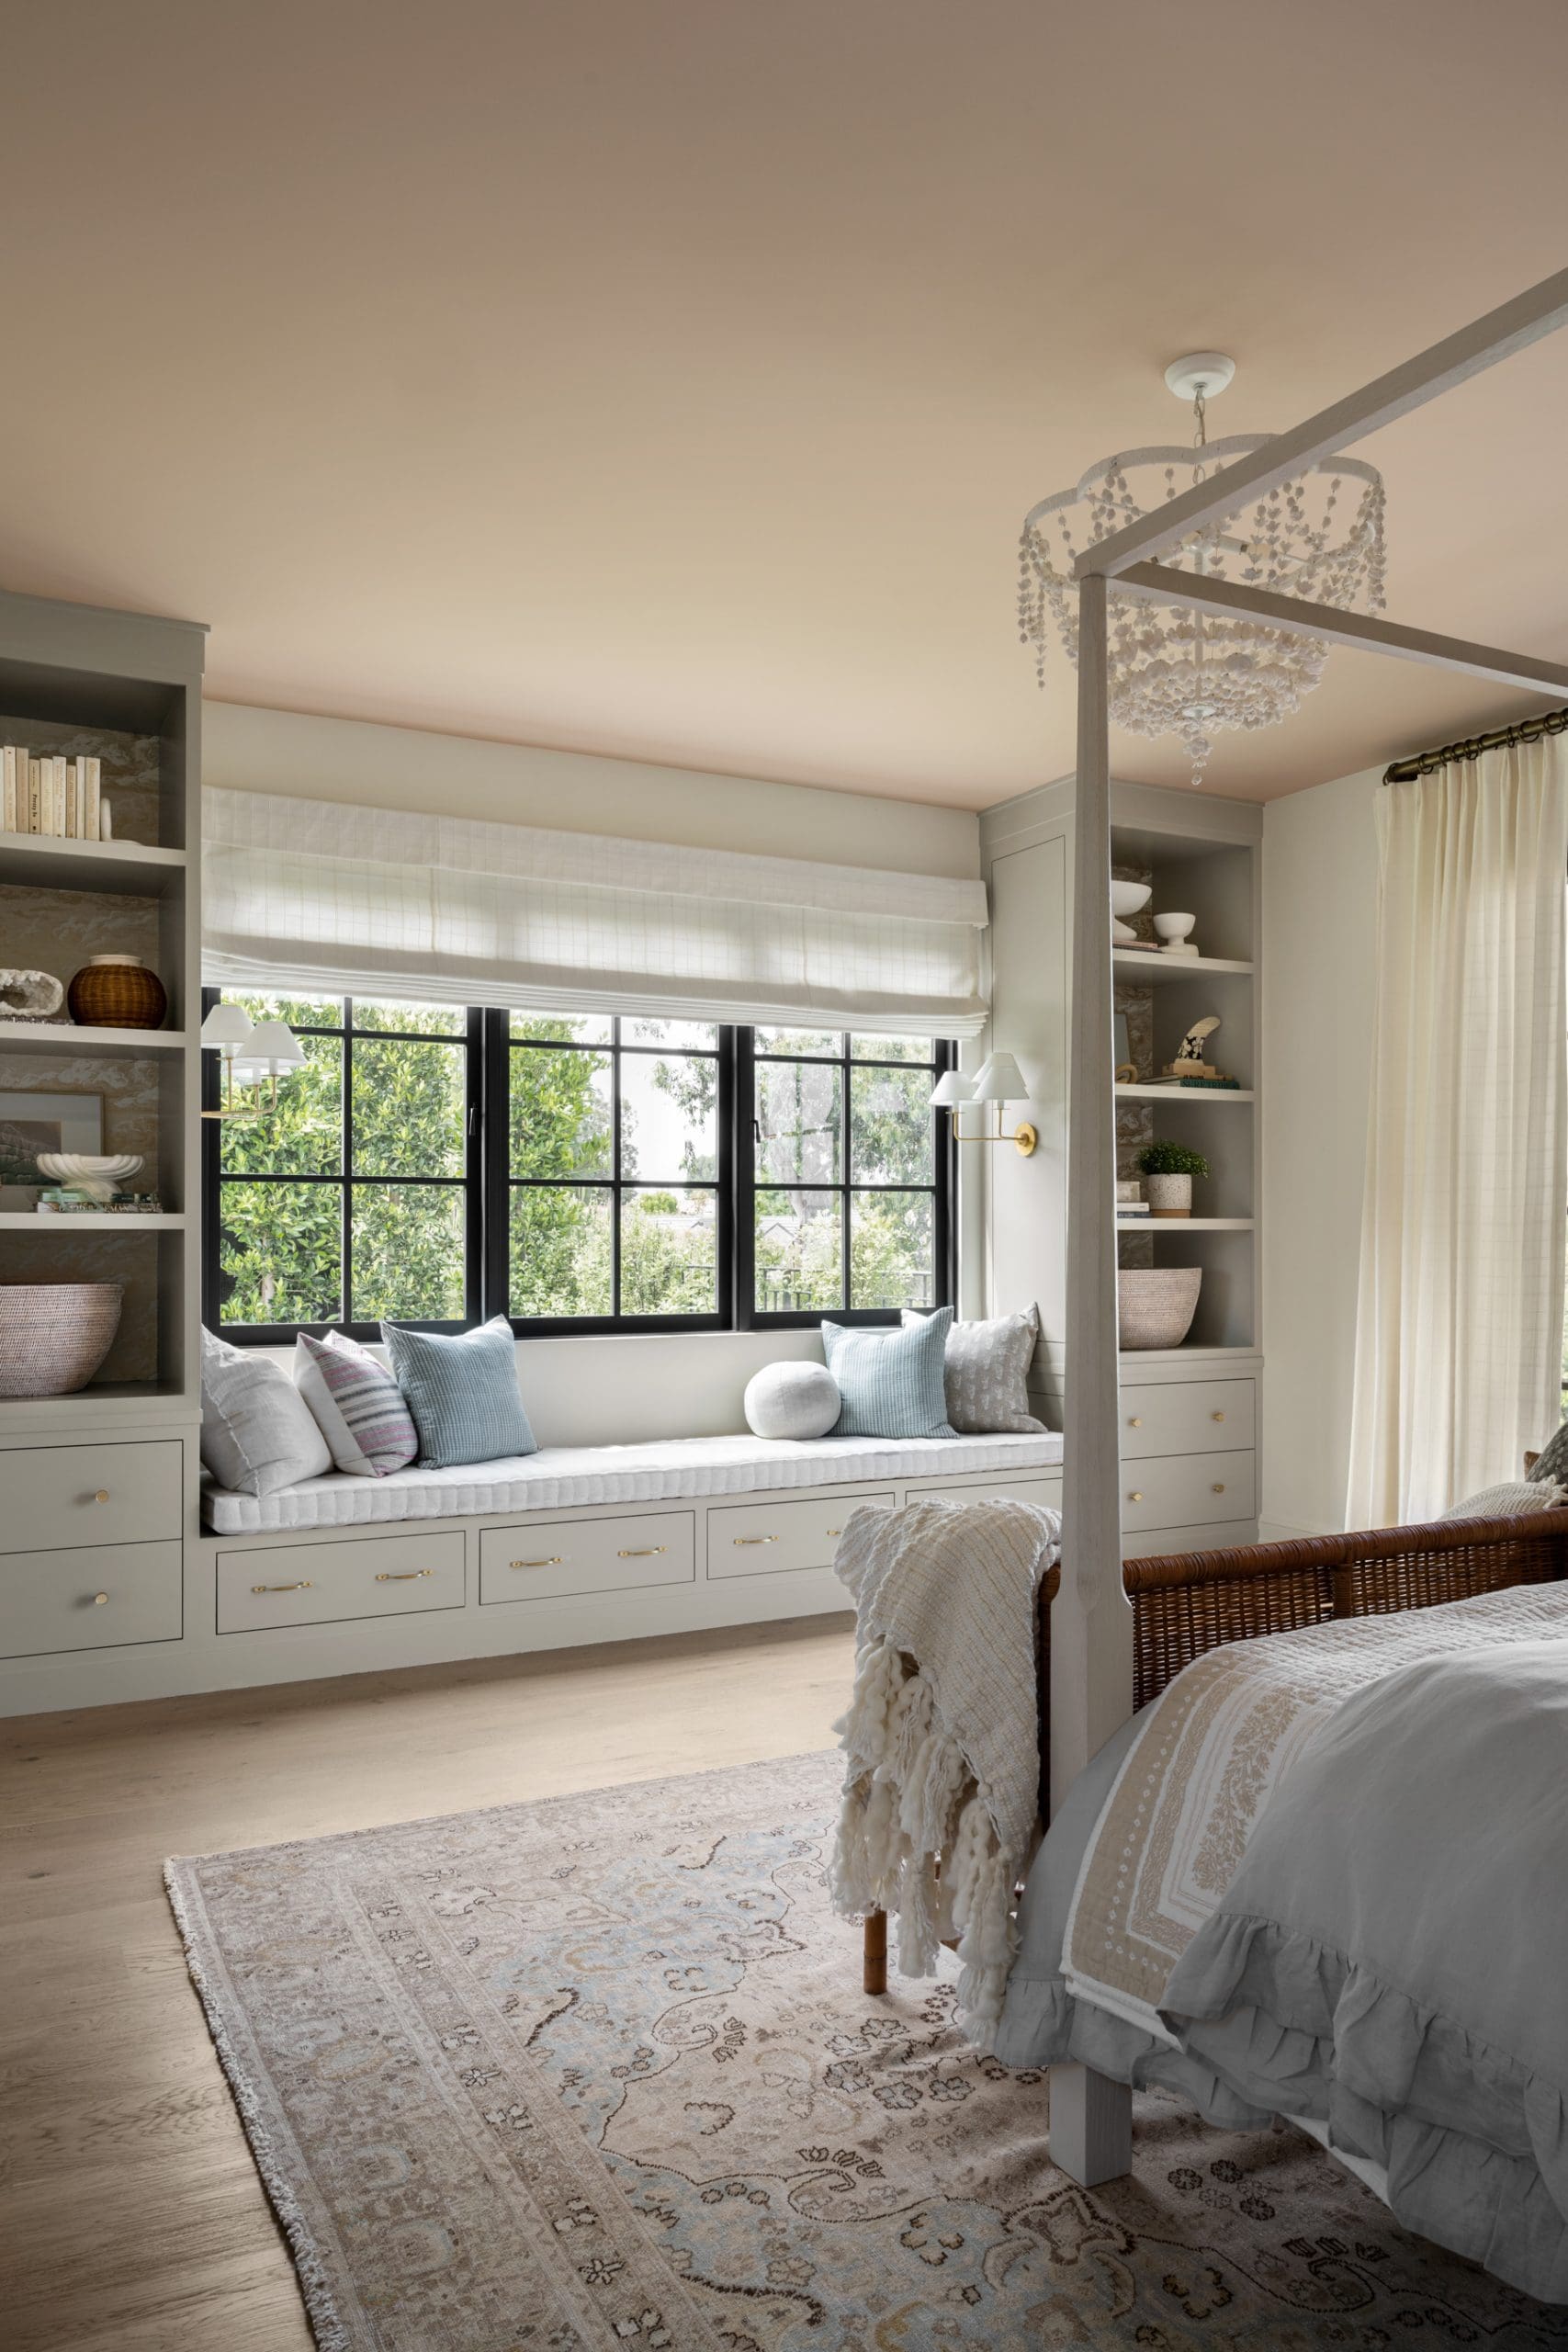
Adding a cozy window nook filled with soft cushions creates a perfect little hideaway that children adore. It becomes their special spot to dive into a book or simply daydream while gazing outside, making the room feel both inviting and personal.
24. Whimsical Boho Haven for Kids
Boho style offers a wonderfully open canvas for creativity, blending vibrant colors, playful patterns, and rich textures in a way that truly sparks a child’s imagination. Its carefree, eclectic nature makes it the perfect choice for a kids’ room where individuality can shine.
25. Cozy and Calm: Designing a Kids’ Room with Dark Blue and Beige Hues
Choosing the right color scheme is key to creating a cozy and stylish kids’ bedroom. Take inspiration from this Studio McGee design, where deep blue paired with soft beige brings a calm, elegant vibe. This subtle duo offers a classic and enduring backdrop that grows with your child.
26. Clever Shelving That Grows with Them
Built-in shelving is a smart way to maximize floor space while adding personality to a child’s room. It offers a perfect stage to showcase cherished books, playful toys, and colorful photos, turning storage into a captivating centerpiece. This approach keeps the room organized and full of charm all at once.
27. Studio McGee’s Chic and Simple Nursery Design for Kids
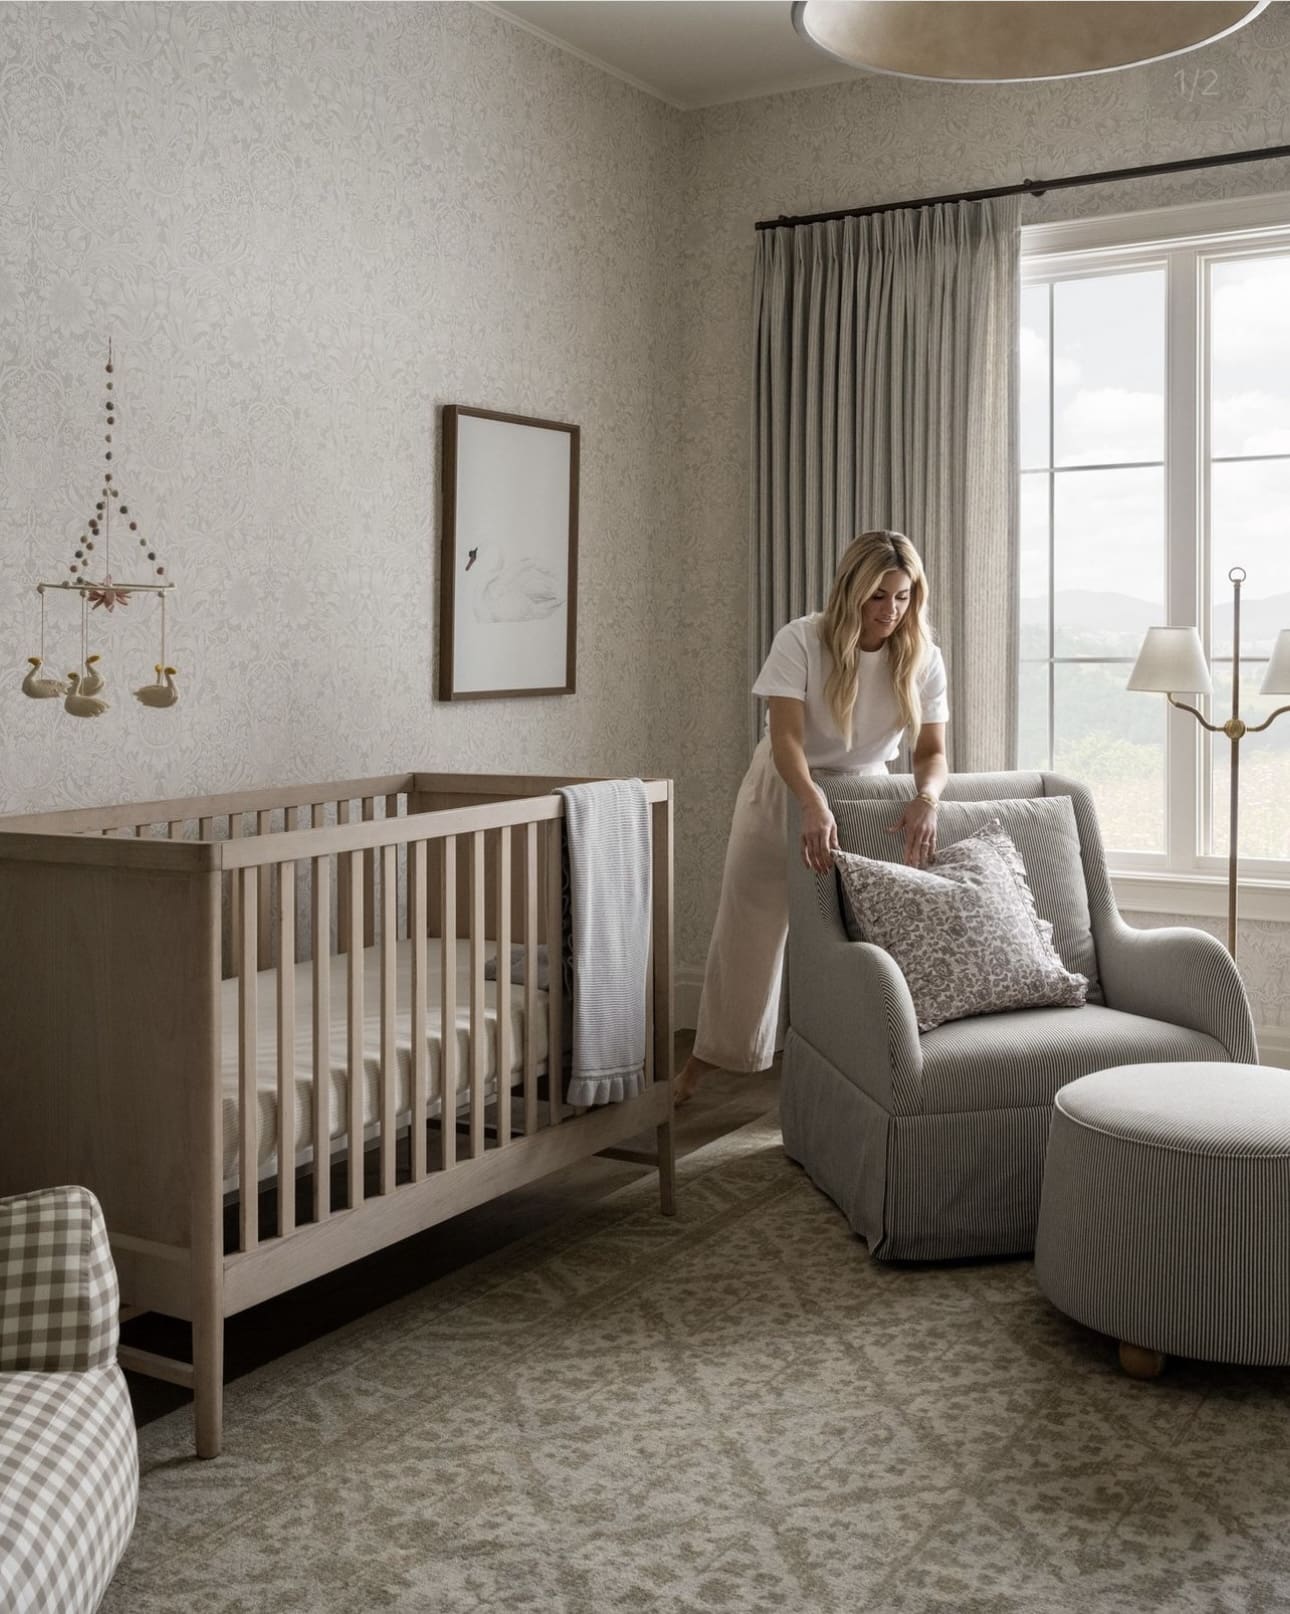
Designing a nursery is all about embracing simplicity, allowing the space to feel calm and timeless. Since little ones outgrow their rooms quickly, opting for a clean, minimalist style not only keeps things elegant but also makes future updates easier and budget-friendly.
28. Cozy Ottomans Perfect for Playful Spaces
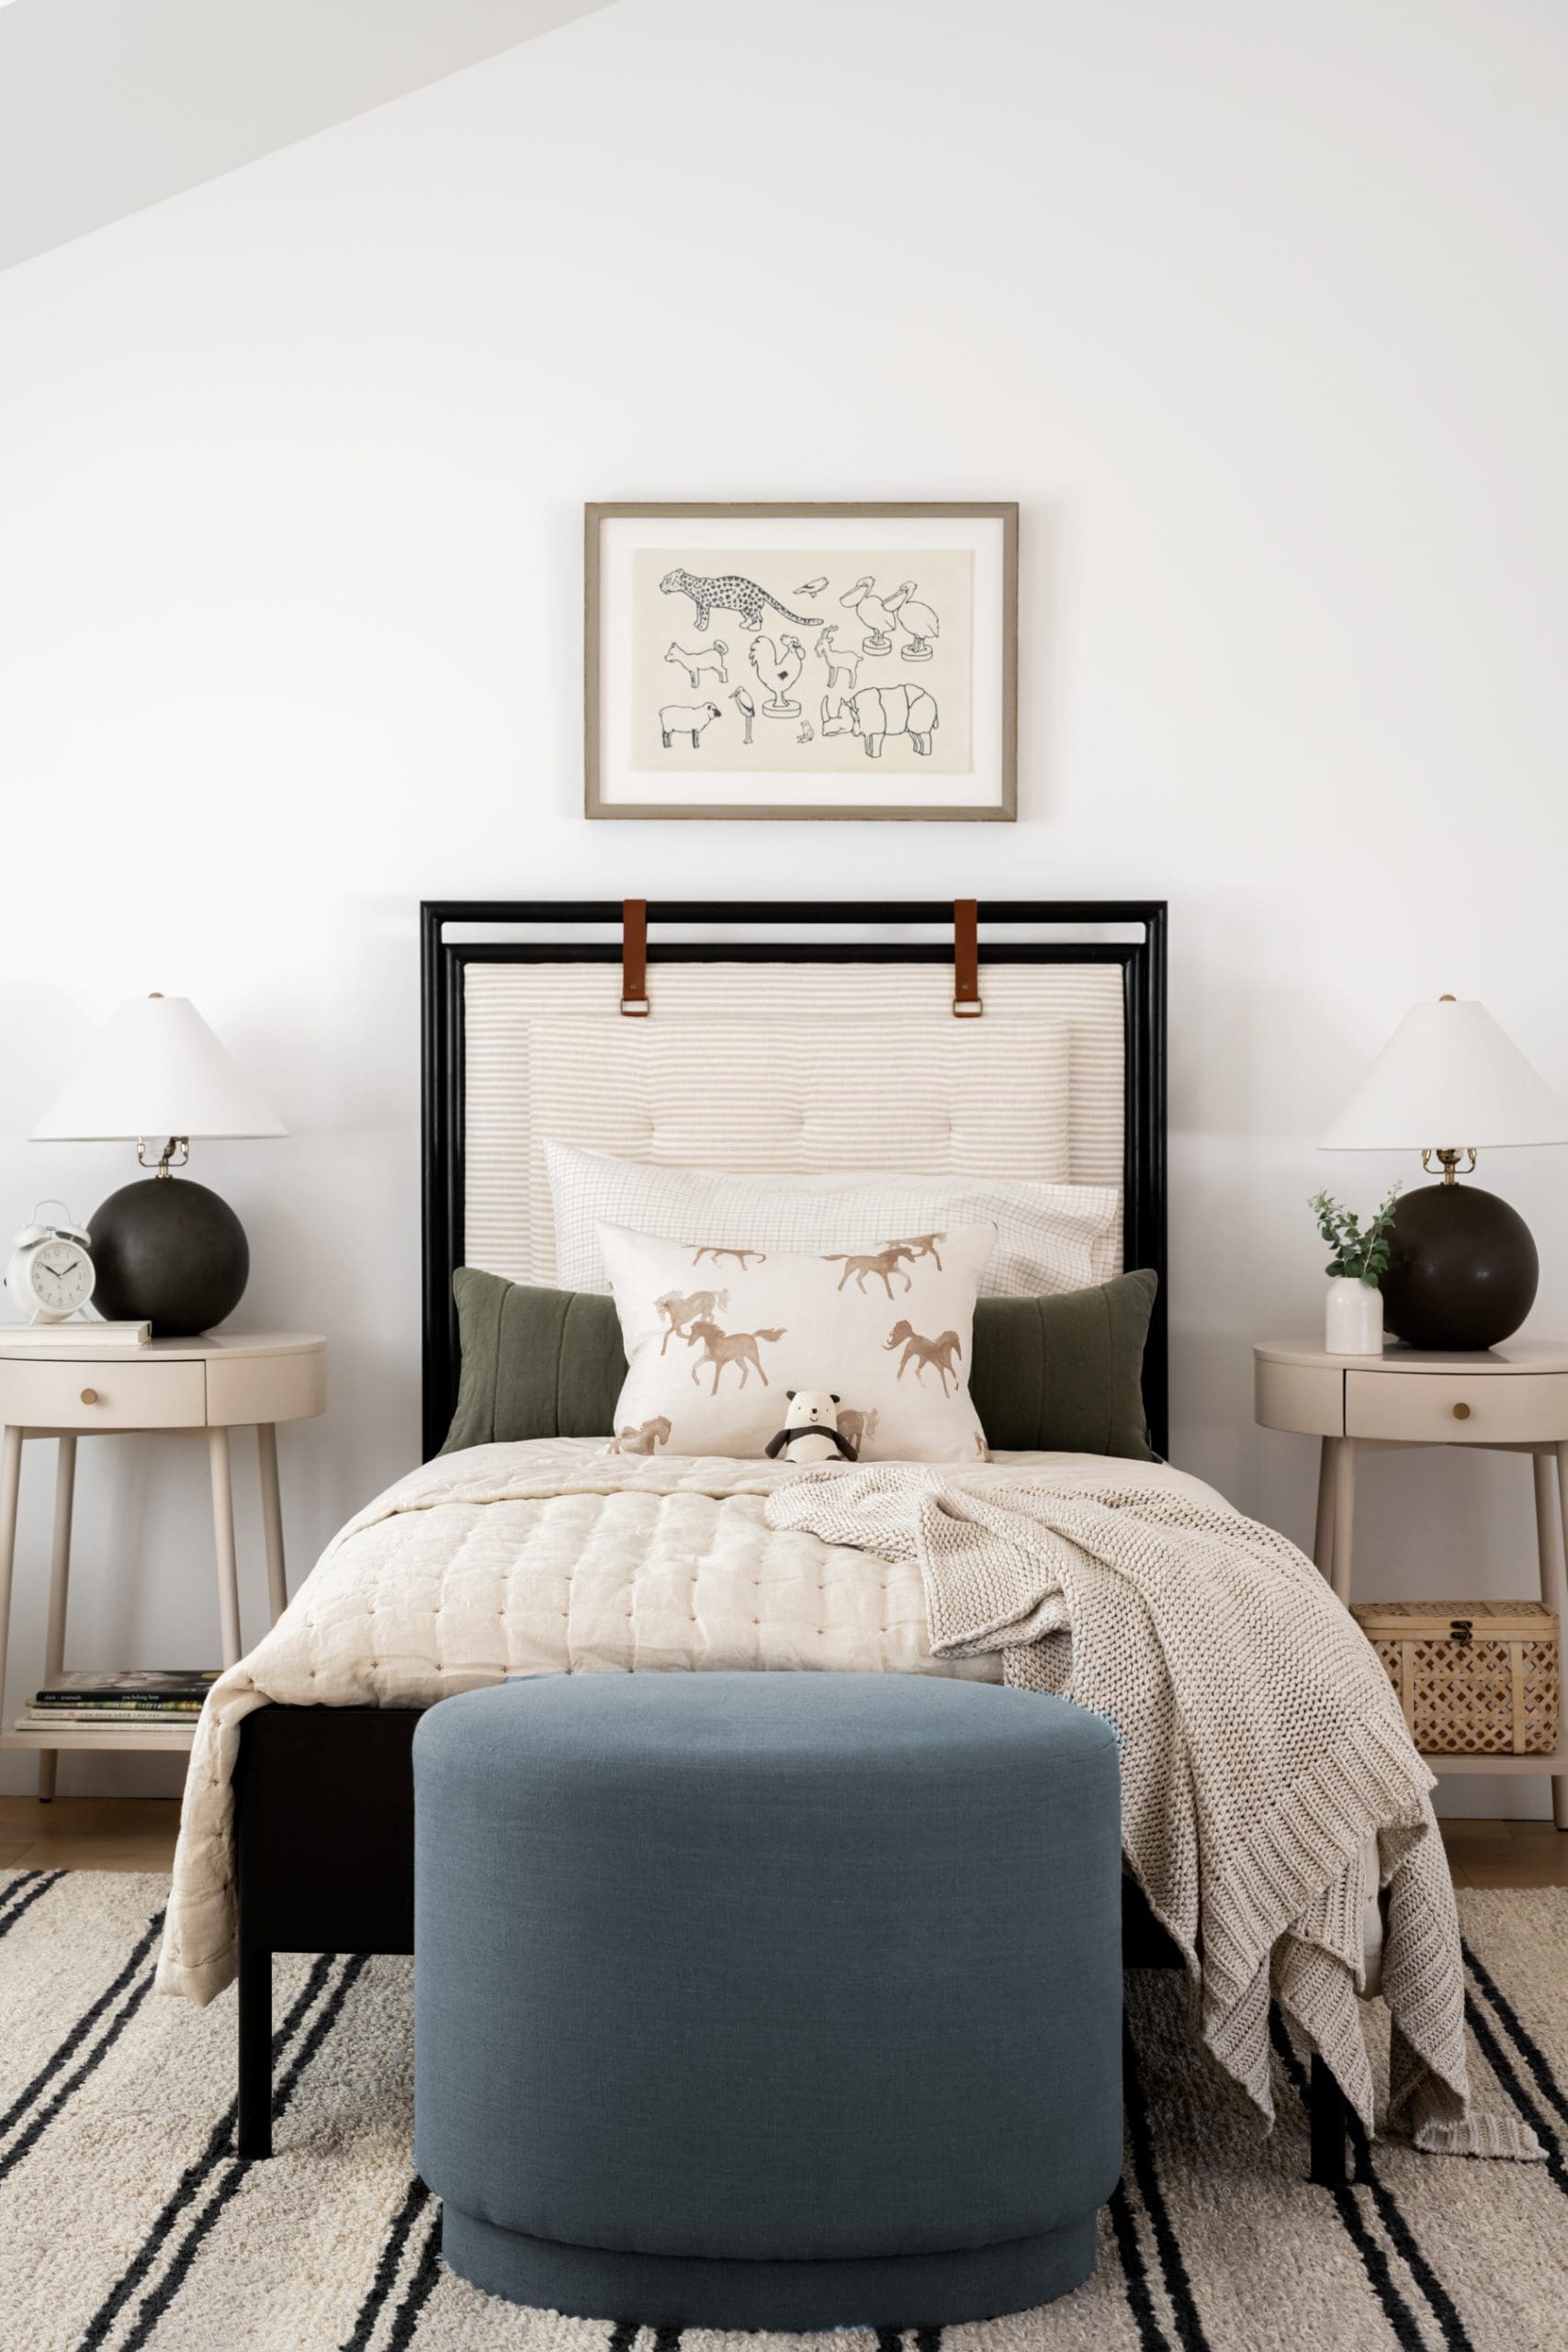
Ottomans in a child’s bedroom offer versatile functionality — perfect for extra seating, a cozy footrest, or clever storage for toys, blankets, and bedding. Beyond their practicality, they also bring a playful splash of color and texture, effortlessly enhancing the room’s overall charm and personality.
29. Effortless Wall Art Ideas for Kids’ Bedrooms
Bold patterns and vibrant colors can bring energy to a child’s room, but too much can feel overwhelming. To balance the space, choose simple, understated wall art that provides a calm backdrop. Remember, children’s preferences evolve quickly, so selecting versatile pieces allows the room to grow with them without feeling stagnant.
30. Whimsical Painted Wood Ceilings for Kids’ Rooms
For Margot, Shea and Syd’s youngest daughter, the nursery features a delicate ceiling painted in Benjamin Moore’s Just Beige—a soft, understated pink that adds warmth without overwhelming the space. By thoughtfully blending an array of patterns and textures, Shea and her design team crafted a timeless yet inviting atmosphere perfect for welcoming their little one.
31. Calm and Cozy: Crafting a Neutral Haven for Kids
For a kids’ room that stays timeless and inviting, opt for a soft, neutral palette—think shades like cream, gray, beige, or warm browns. If you love the classic pink or blue, choose gentle, muted tones to keep the space calm and adaptable. Another great approach is to keep walls and furniture in neutral hues while bringing in playful pops of color through accessories and décor.
32. Inside the McGee Daughter’s Delightful Bedroom
Created by the McGees for their little girl, Wren, this space shines with a delicate blend of white and soft powder blue hues. The shimmering gold wallpaper adds a touch of whimsy, while the mix of patterns weaves in a distinctive and charming personality throughout the room.
33. Creative Study Spaces for Your Child’s Room
Designate a cozy nook with a study desk to inspire your child’s love for reading and learning. Having a special spot just for homework and books can really boost their ability to focus and dive deep into their studies.
34. Studio McGee’s Charming Dresser for Kids’ Rooms
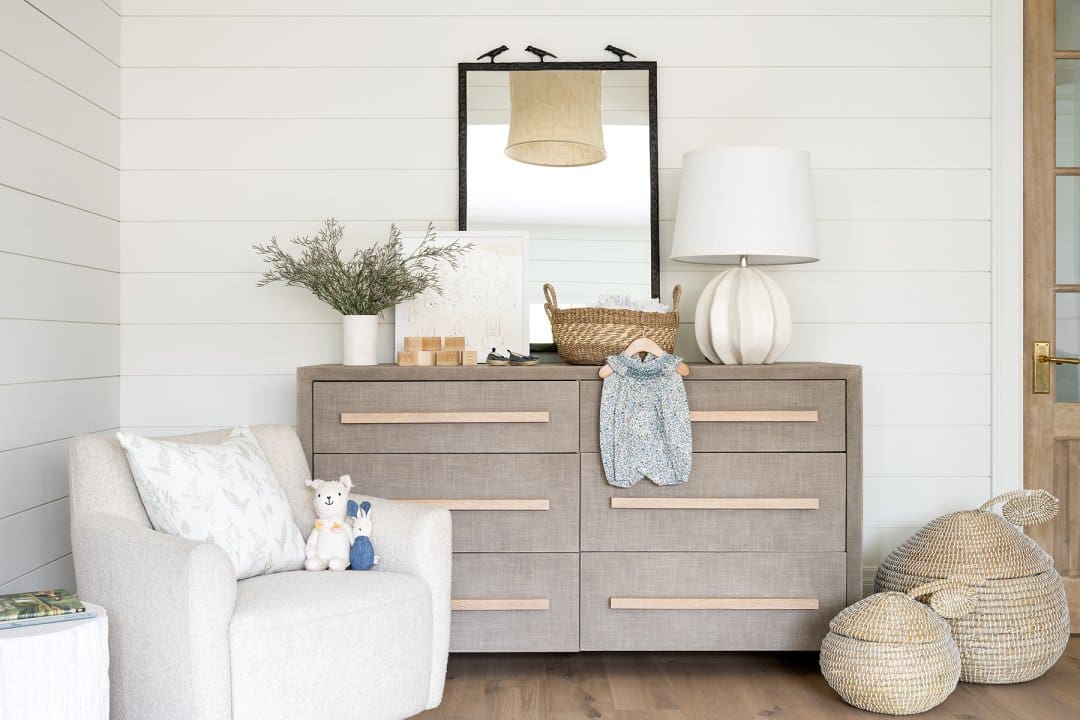
The dresser in this Studio McGee nursery radiates natural charm and understated elegance. Soft, breathable hues combined with playful yet subtle decor come together to craft a serene and inviting environment that soothes the senses.
35. Charming Details to Complete Your Child’s Room Perfectly
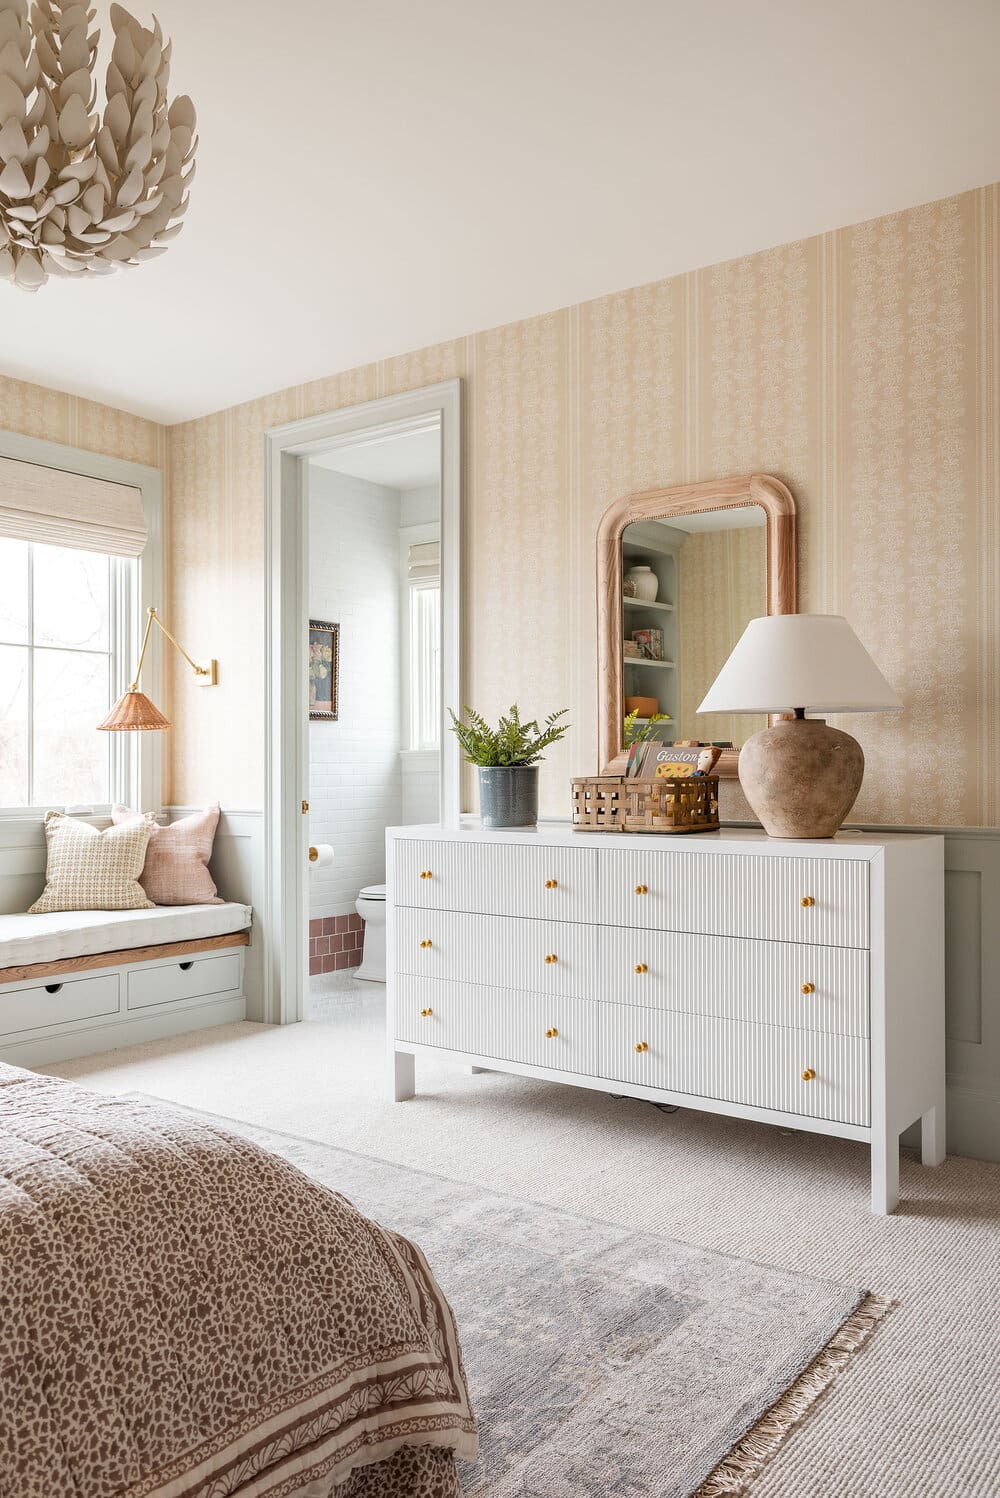
Here’s a glimpse of Wren’s bedroom from a new perspective, highlighting the thoughtful details that complete the space. The custom window seat, draped in soft pin-tucked fabric, invites cozy moments, while the sleek white dresser with a gold accent, graceful wall sconce, and large mirror add a polished, sophisticated touch that feels perfectly curated.
36. Extra Fun: Kid-Friendly Bathroom #1
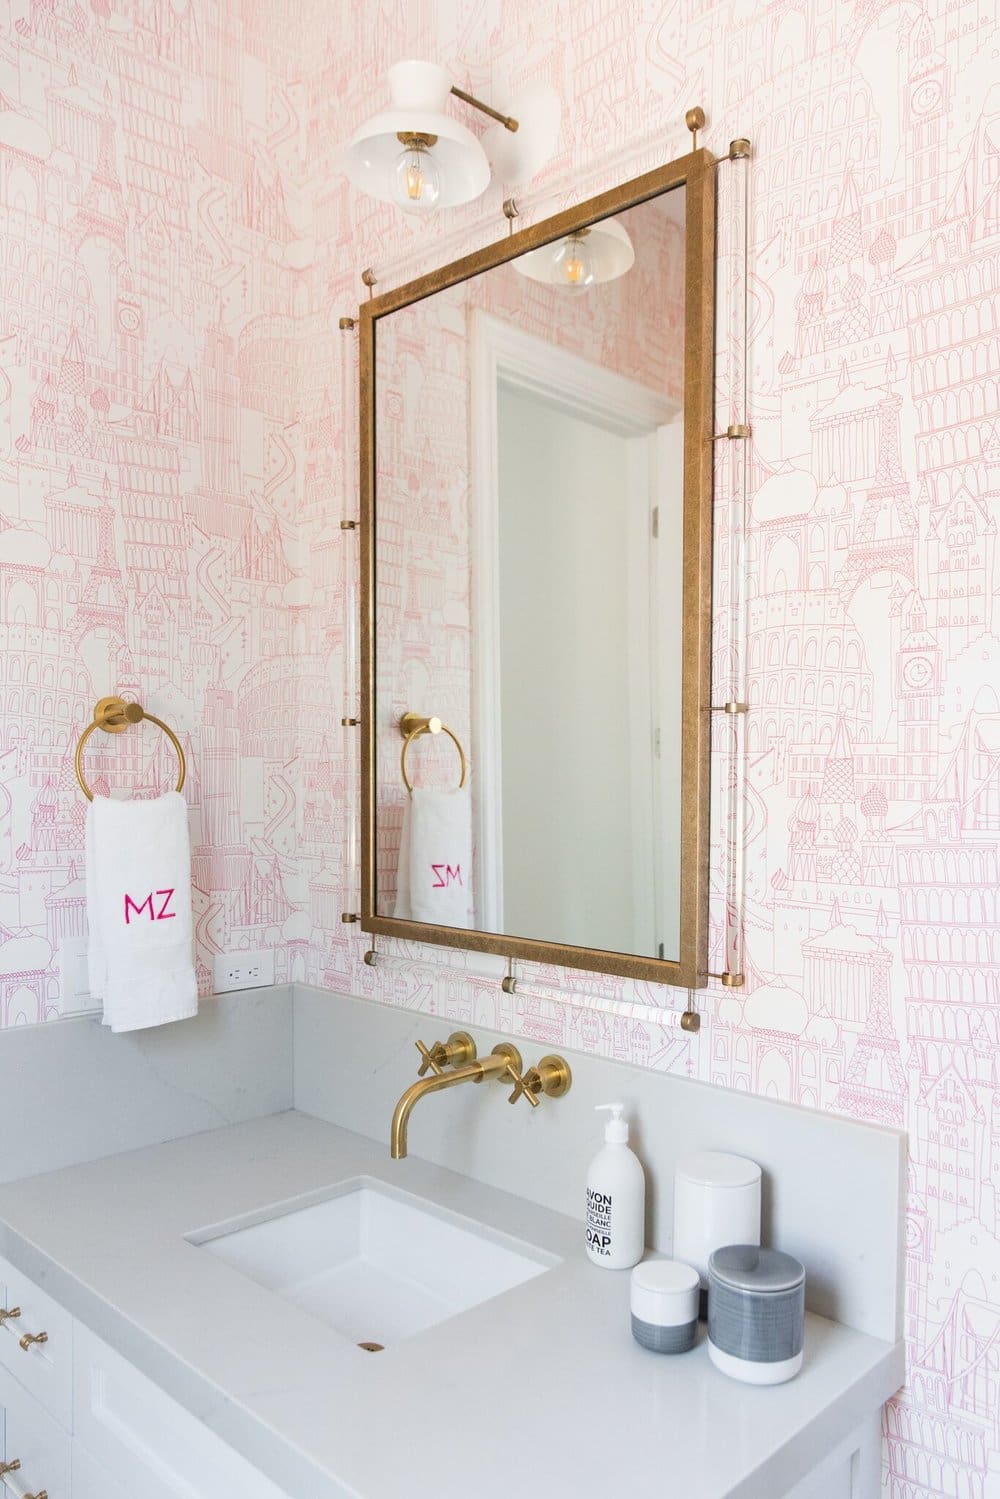
Studio McGee treats kids’ bathrooms with the same elegant touch as their bedrooms, blending sleek simplicity with fun, vibrant tiles. Clever storage solutions keep everything organized, creating spaces that are as practical as they are charming.
37. Extra Fun: The Second Kids’ Bathroom Delight
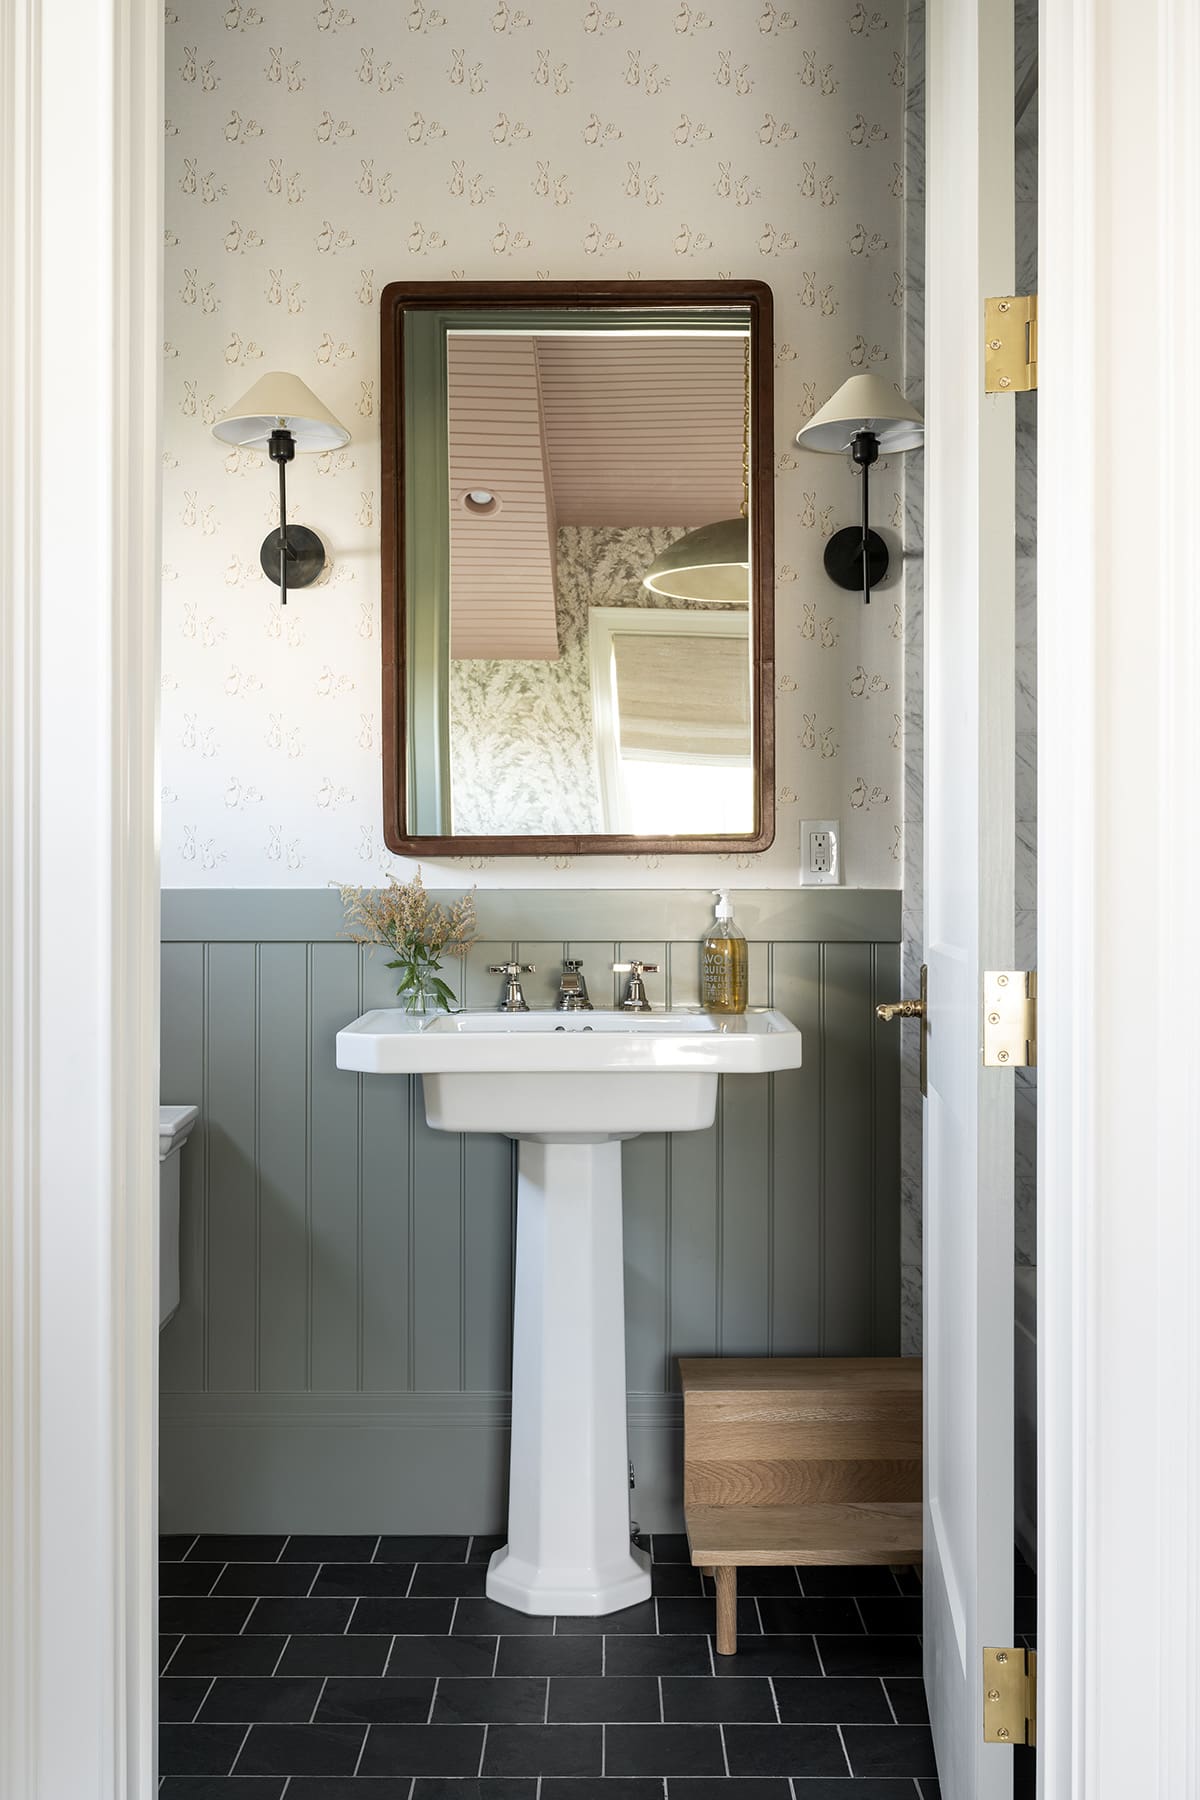
Step into a beautiful Studio McGee kids’ bathroom that blends chic fixtures with a classic color scheme, creating a space that evolves seamlessly as your little one grows. This design strikes the perfect balance between playful charm and enduring style.
38. Extra Delight: Kids’ Bathroom #3 Makeover
This Studio McGee kids’ bathroom proves that with intentional design, even the coziest corners can radiate warmth and elegance. It’s a perfect example of turning a compact space into a charming, welcoming retreat.
39. Extra Fun: Kids’ Bathroom #4 Reveal
Studio McGee’s bonus bathroom effortlessly combines elegant style with everyday functionality, creating a space that’s both charming and kid-friendly. It’s the ideal spot where thoughtful design meets youthful energy.
Conclusion
Embracing the essence of Studio McGee’s approach to kids’ room design invites us to envision spaces where creativity and comfort harmoniously coexist. By thoughtfully blending timeless elements with personal touches, you create more than just a room—you craft a joyful sanctuary that grows alongside your child. Whether you lean into soft neutrals or playful accents, the ultimate goal remains the same: designing a space that sparks imagination, nurtures confidence, and feels like home every single day. Let your child’s room be a canvas for memories, wonder, and endless possibilities.
Midcentury modern kitchens continue to captivate homeowners with their perfect balance of simplicity, warmth, and timeless appeal. Defined by clean lines, organic materials, and functional layouts, this design style proves that beautiful spaces don’t need unnecessary excess. Whether you’re planning a complete renovation or looking for subtle ways to refresh your cooking area, incorporating midcentury-inspired elements can instantly elevate your home.
From eye-catching lighting to practical multi-purpose layouts, these inspiring ideas showcase how classic design principles can work beautifully in today’s kitchens.
1. Showcase Personality with Open Shelving
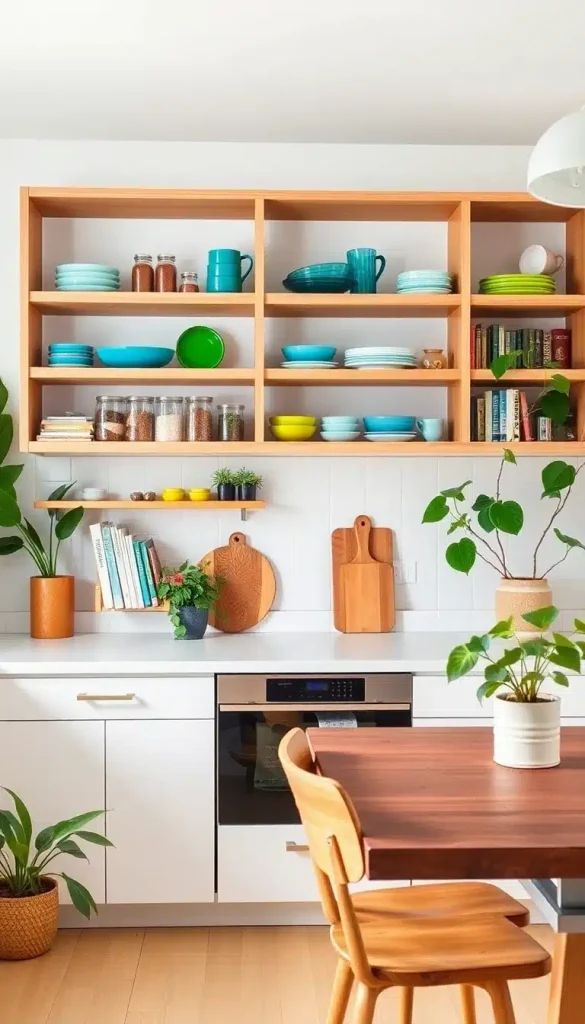
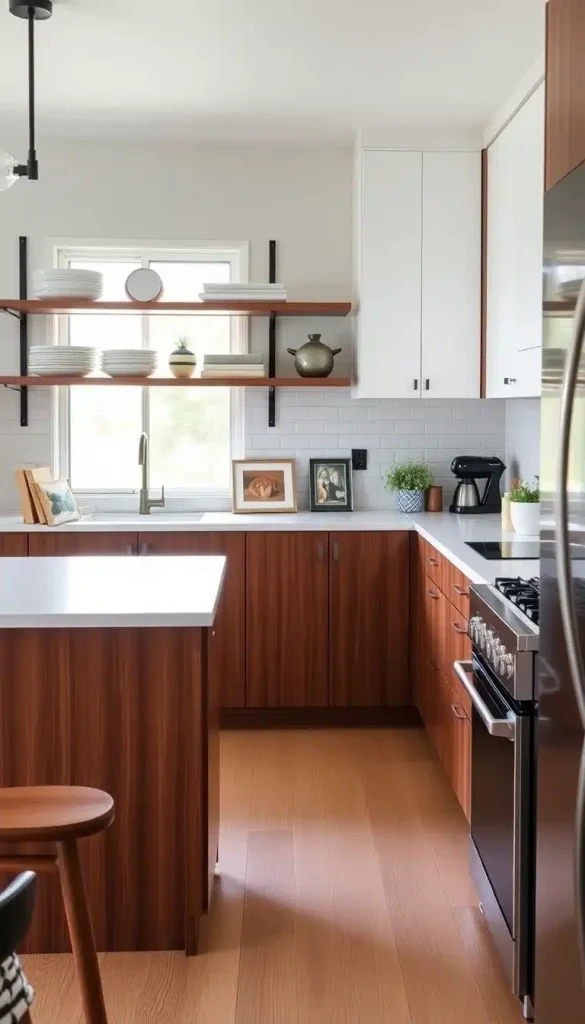
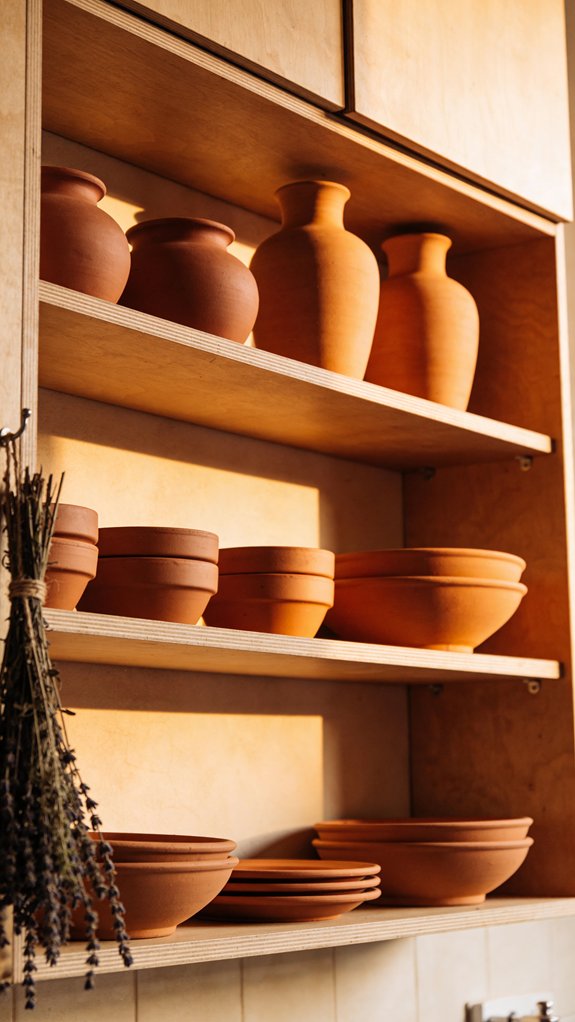
Swap out some upper cabinets for floating shelves to create an open and airy atmosphere. Display handcrafted pottery, favorite cookbooks, glassware, or vintage accessories to make the kitchen feel curated rather than cluttered. Open shelving also encourages organization while adding visual depth to the room.
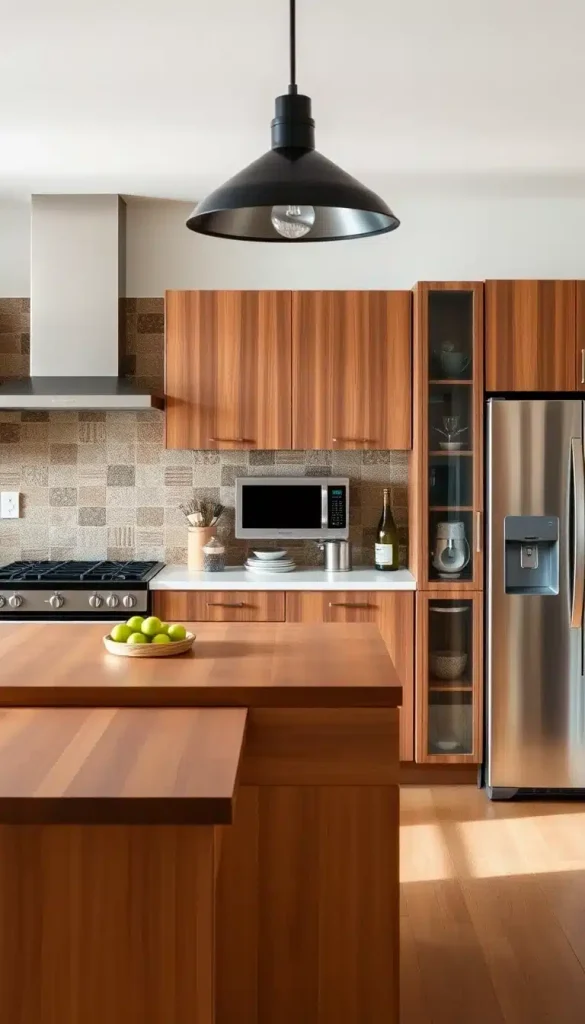
2. Bring Warmth with Natural Wood Cabinetry
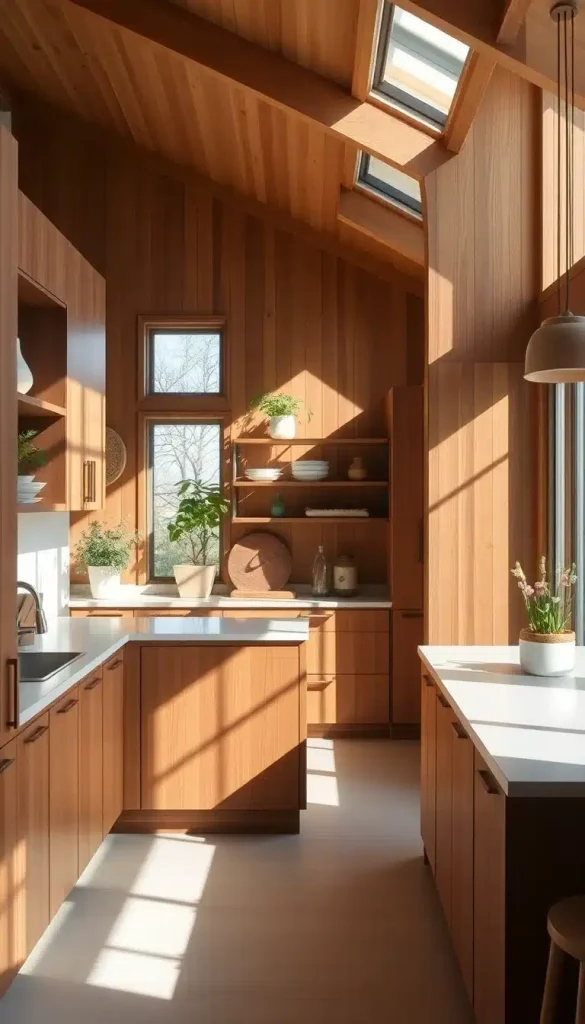
Nothing defines midcentury style quite like beautiful wood finishes. Walnut, teak, and white oak cabinetry introduce rich textures that soften modern surfaces while maintaining a clean aesthetic. Pairing wood with minimalist hardware creates a timeless look that feels sophisticated without being overly formal.
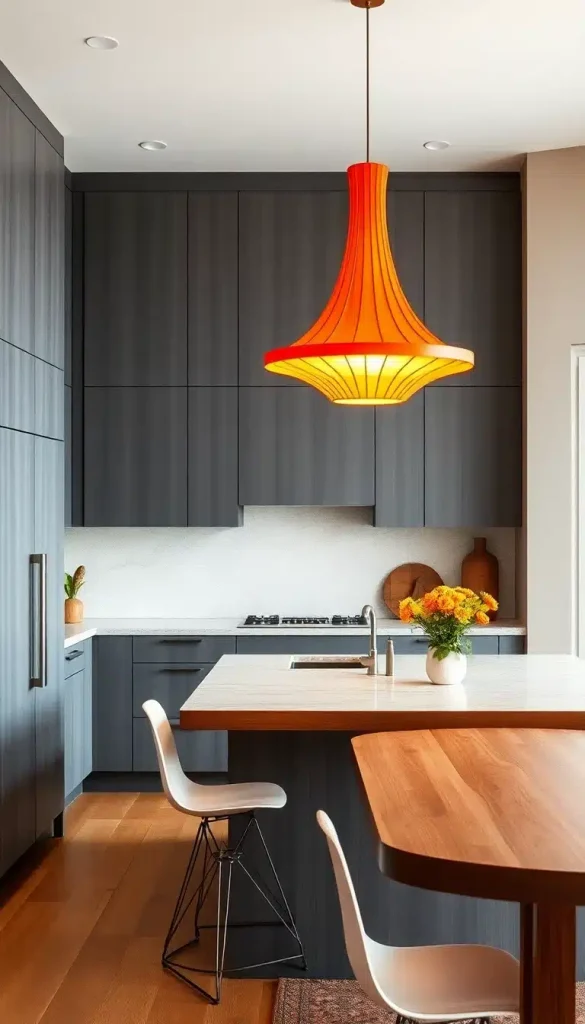
3. Make a Statement with Sculptural Lighting
Pendant lights featuring globe shades, cone silhouettes, or brass finishes instantly capture the spirit of midcentury design. Position dramatic fixtures above islands or dining areas to create visual interest while providing practical task lighting.
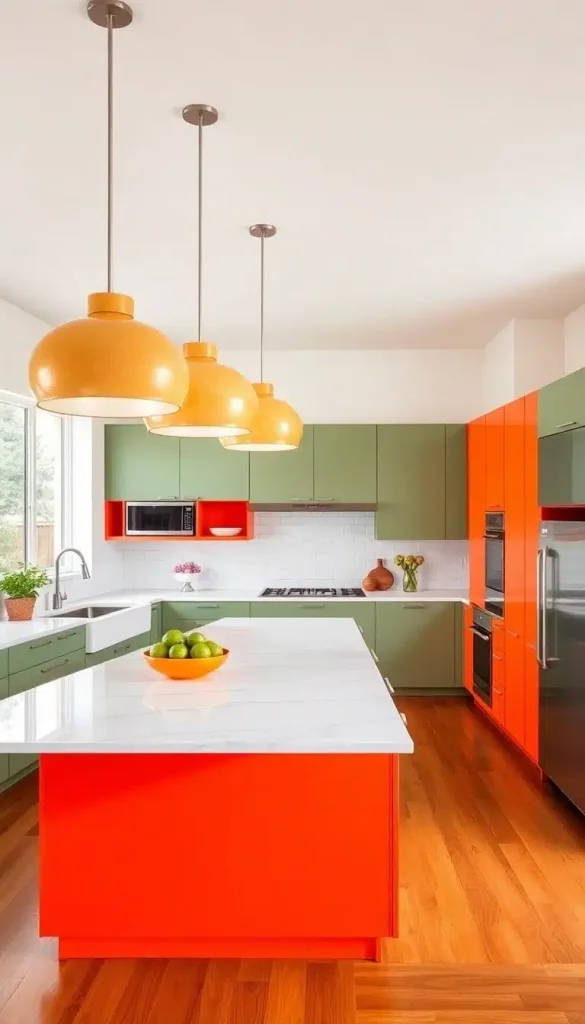
4. Introduce Vibrant Retro-Inspired Colors
While many modern kitchens lean neutral, midcentury interiors celebrate bold color. Consider cabinetry in olive green, mustard yellow, burnt orange, or deep teal to create focal points that energize the space. Balance these tones with white walls or natural wood to prevent the room from feeling overwhelming.
5. Mix Materials for Added Dimension
Combining wood, metal, stone, and ceramic surfaces gives the kitchen greater visual richness. A walnut island paired with quartz countertops and stainless steel appliances creates contrast while maintaining harmony through simple lines and restrained detailing.
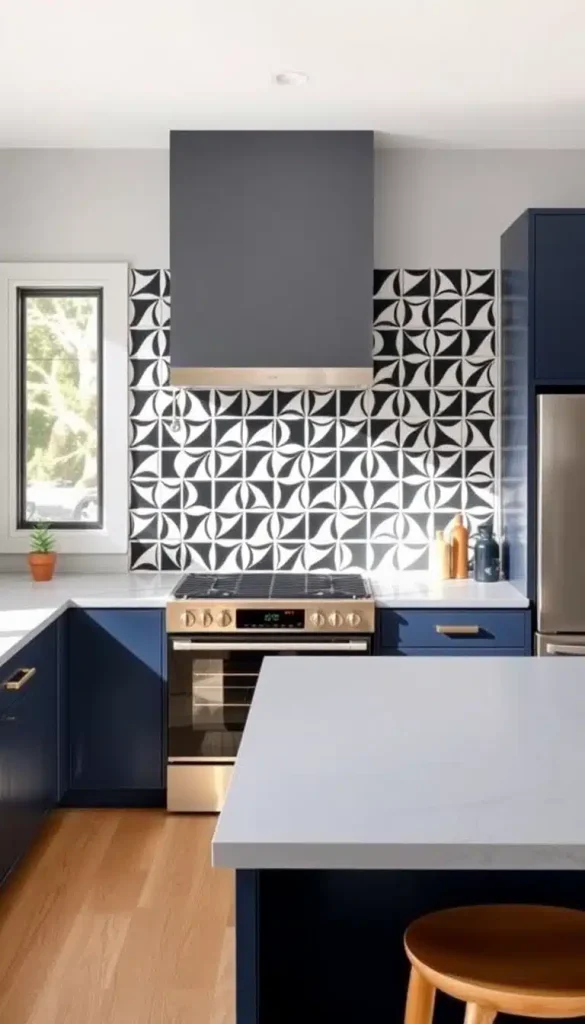
6. Install a Distinctive Geometric Backsplash
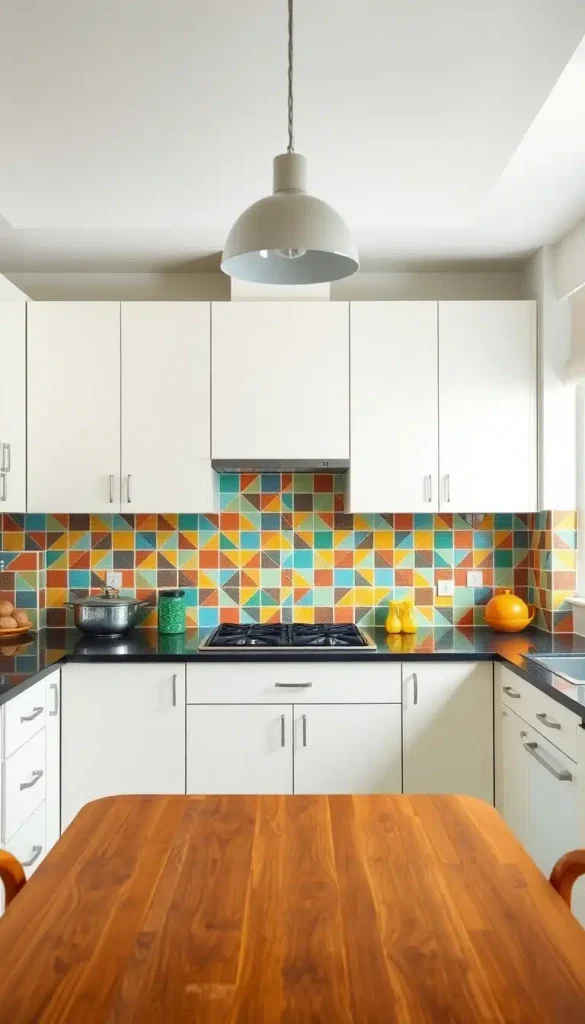
Geometric tiles featuring hexagons, diamonds, or abstract patterns can become an artistic centerpiece. Whether using subtle monochromatic designs or colorful mosaics, these patterns reinforce the playful spirit that helped define the midcentury era.
7. Choose Retro-Style Appliances
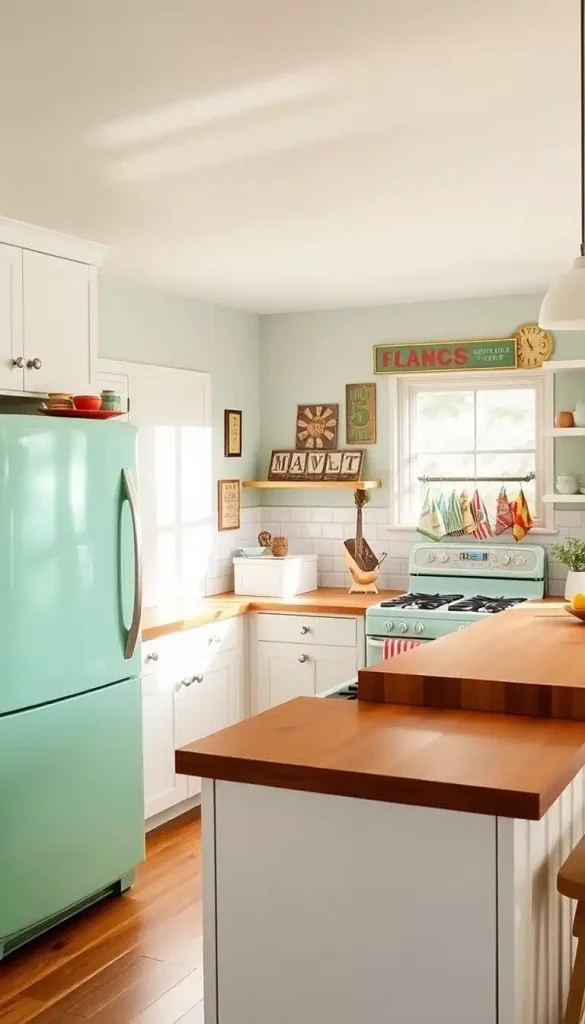
Vintage-inspired refrigerators, ovens, and small appliances combine nostalgic styling with modern performance. Rounded corners, chrome accents, and pastel finishes evoke the charm of the 1950s while offering the convenience expected from today’s technology.
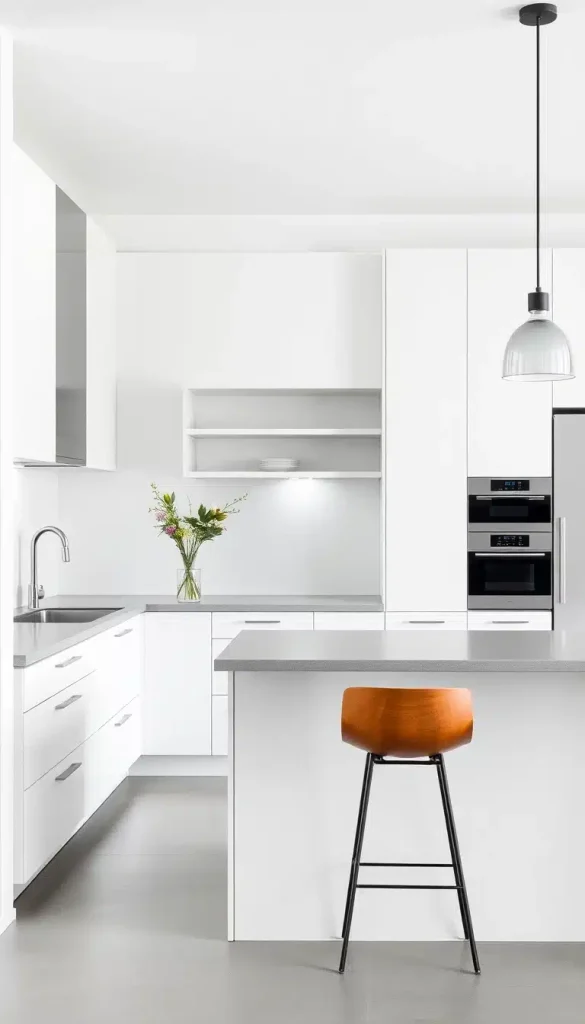
8. Keep the Design Clean and Minimal
Midcentury modern kitchens prioritize purposeful design over excess decoration. Flat-panel cabinetry, hidden storage, and uncluttered countertops create an environment that feels calm, efficient, and welcoming for everyday living.
9. Incorporate Smart Technology Seamlessly
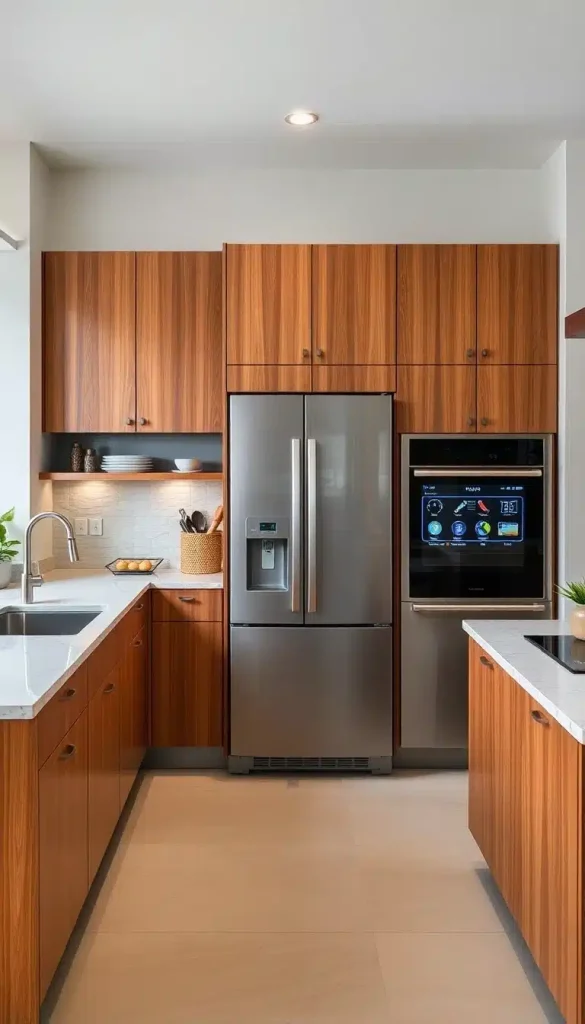
Modern innovations can coexist beautifully with vintage-inspired aesthetics. Built-in charging stations, touch-operated faucets, smart ovens, and concealed appliances preserve clean lines while making daily tasks more convenient.
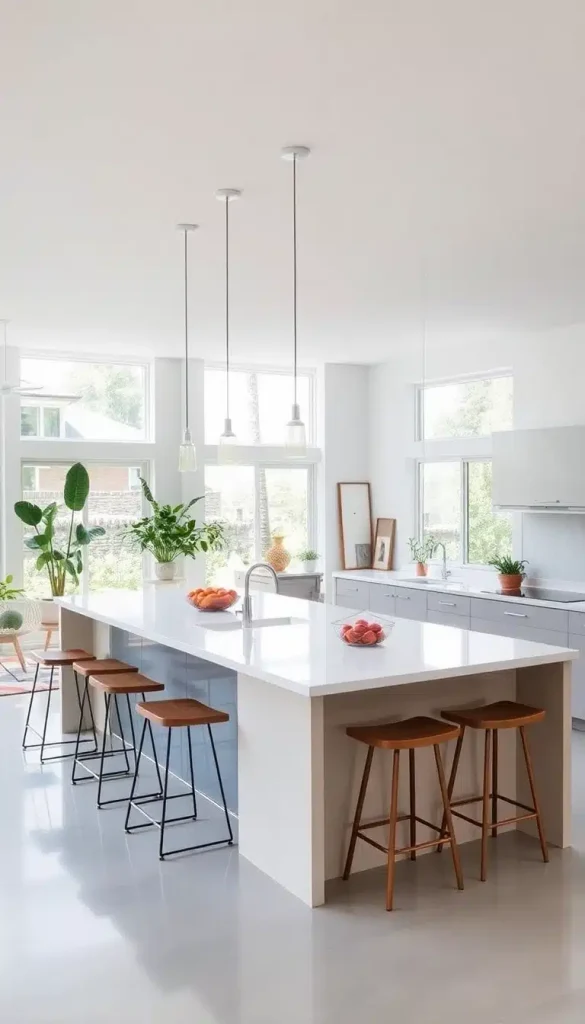
10. Design a Flexible Multi-Use Island
Kitchen islands can function as prep stations, breakfast bars, homework spaces, or gathering spots for entertaining. Choosing an island with integrated storage and seating maximizes functionality without compromising style.
11. Decorate with Carefully Chosen Vintage Accents
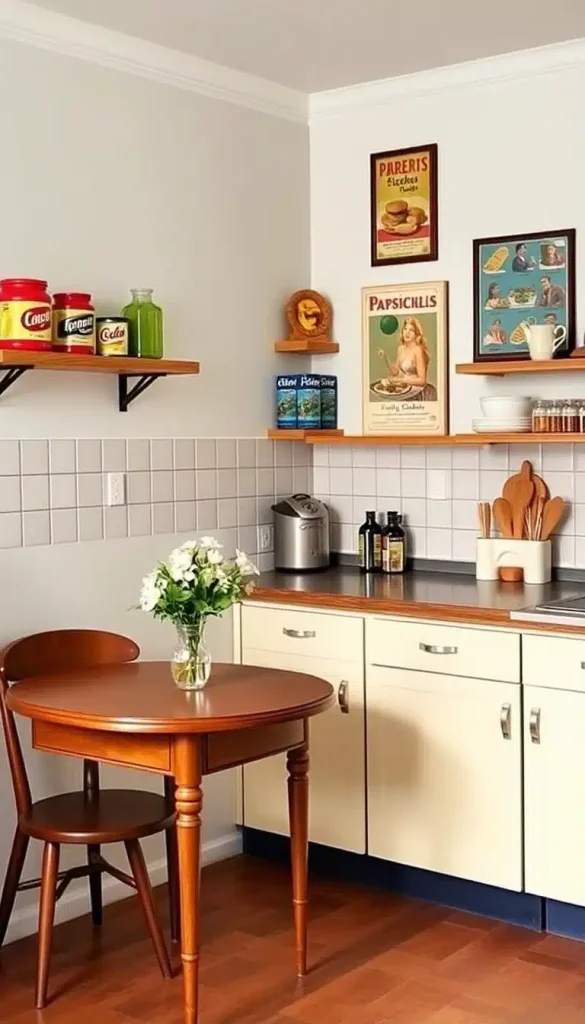
Authentic or reproduction midcentury accessories such as ceramic canisters, classic clocks, framed prints, or antique utensils add personality without overpowering the space. A few thoughtfully selected pieces can make the kitchen feel collected and lived-in.
12. Add Greenery for Organic Balance
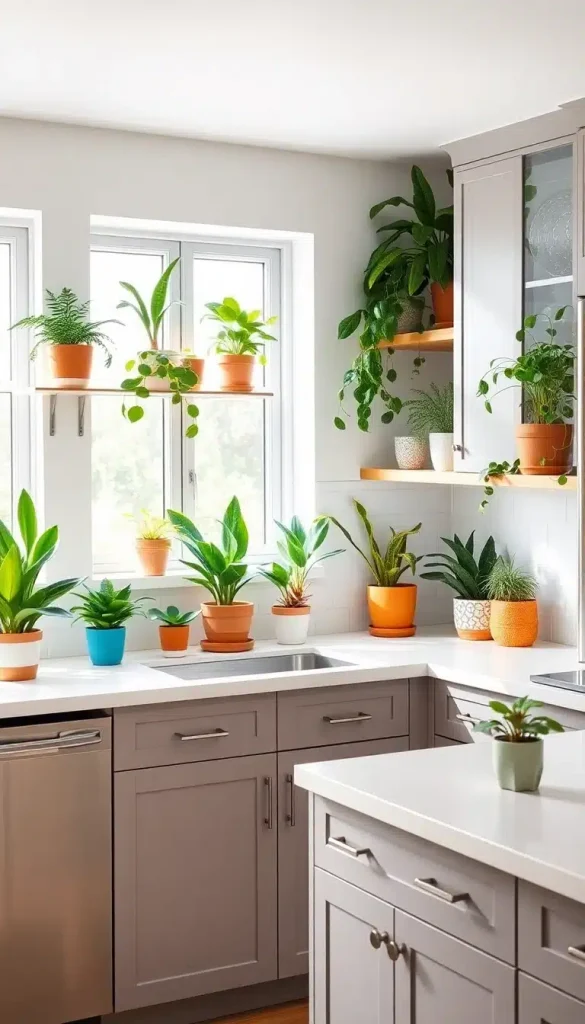
Houseplants soften the crisp architectural lines common in midcentury interiors. Herbs on windowsills, hanging planters, or sculptural potted plants introduce freshness while reinforcing the style’s connection to nature.
13. Create Impact with Bold Feature Surfaces
Beyond backsplashes, consider statement countertops, textured wall panels, or colorful accent walls that introduce visual excitement. Strategic use of standout materials ensures the kitchen remains memorable while preserving overall balance.
14. Prioritize Custom Storage Solutions
Adaptable storage keeps the kitchen both beautiful and practical. Pull-out organizers, adjustable shelving, hidden pantry systems, and movable workstations allow homeowners to personalize their layout while maintaining the streamlined appearance central to midcentury modern design.
Conclusion
Midcentury modern kitchens continue to stand the test of time because they effortlessly combine beauty with functionality. By embracing natural materials, thoughtful layouts, bold accents, and timeless craftsmanship, you can create a space that feels both nostalgic and refreshingly current. Whether you incorporate just one of these ideas or several, the result is a kitchen that invites gathering, creativity, and everyday enjoyment for years to come.
A camper may have a limited footprint, but with thoughtful design choices, it can feel just as inviting and functional as a traditional home. Whether you’re renovating an older RV or updating a recently purchased travel trailer, the right interior improvements can maximize storage, brighten the space, and make everyday living more enjoyable.
From clever furniture solutions to decorative upgrades that add warmth and personality, these camper remodel ideas prove that every square inch counts. Here are 16 inspiring ways to transform your camper into a stylish and practical retreat.
1. Install Multifunctional Furniture to Maximize Every Inch
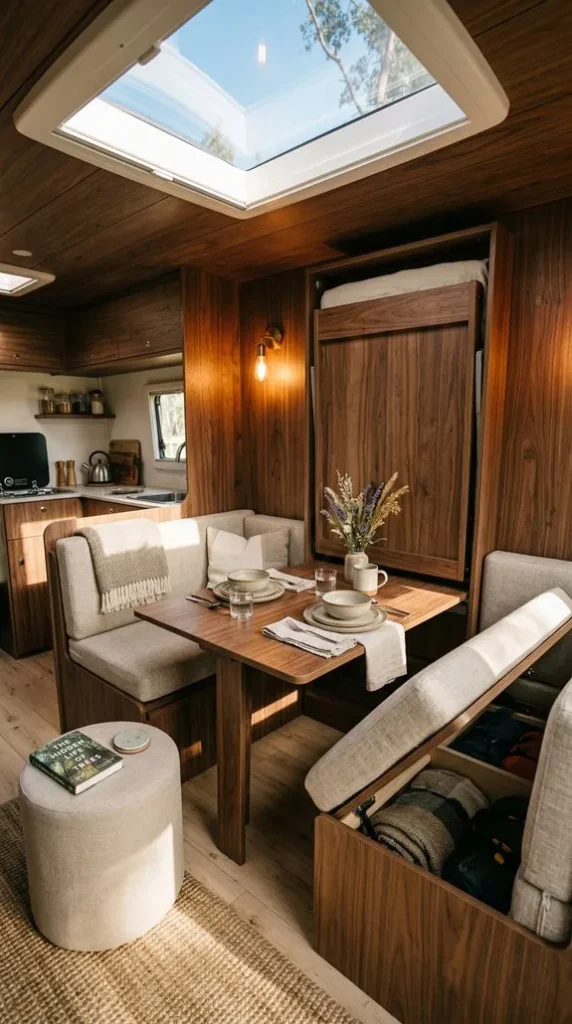
One of the best ways to improve a camper interior is by replacing oversized furniture with pieces that serve multiple purposes. Consider Murphy beds, nesting tables, benches with hidden storage, or ottomans that double as seating and storage bins. Multipurpose furniture helps keep your layout open while increasing functionality without adding clutter.
2. Brighten the Interior with Light-Colored Paint
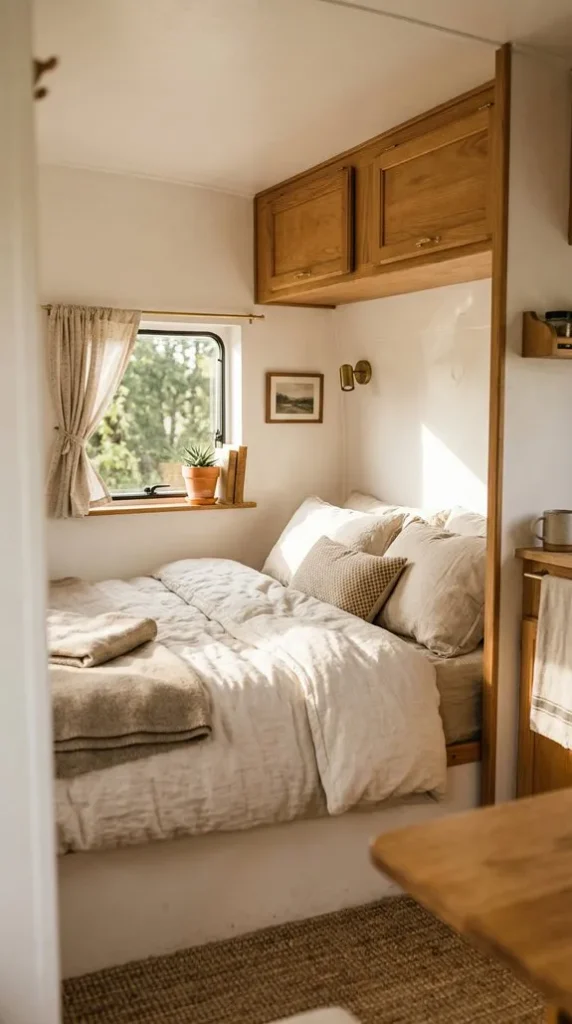
A fresh coat of paint can dramatically change the feel of a camper. Soft whites, warm creams, and pale neutral shades reflect natural light and make compact spaces appear larger. Painting the ceiling slightly lighter than the walls also creates the illusion of extra height, giving the interior a more spacious atmosphere.
3. Upgrade to Durable Vinyl Plank Flooring
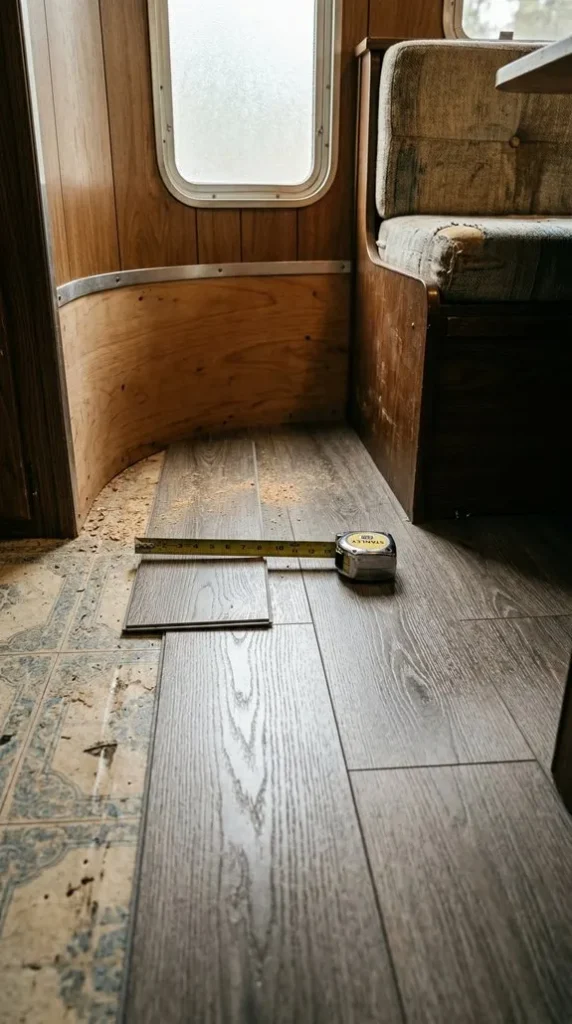
Replacing worn flooring with modern vinyl plank instantly refreshes the entire camper. Besides its attractive appearance, vinyl plank flooring is moisture-resistant, easy to clean, and durable enough to withstand heavy travel. Installing it before other renovations creates a solid foundation for the rest of the remodel.
4. Add Fold-Down Surfaces for Flexible Functionality
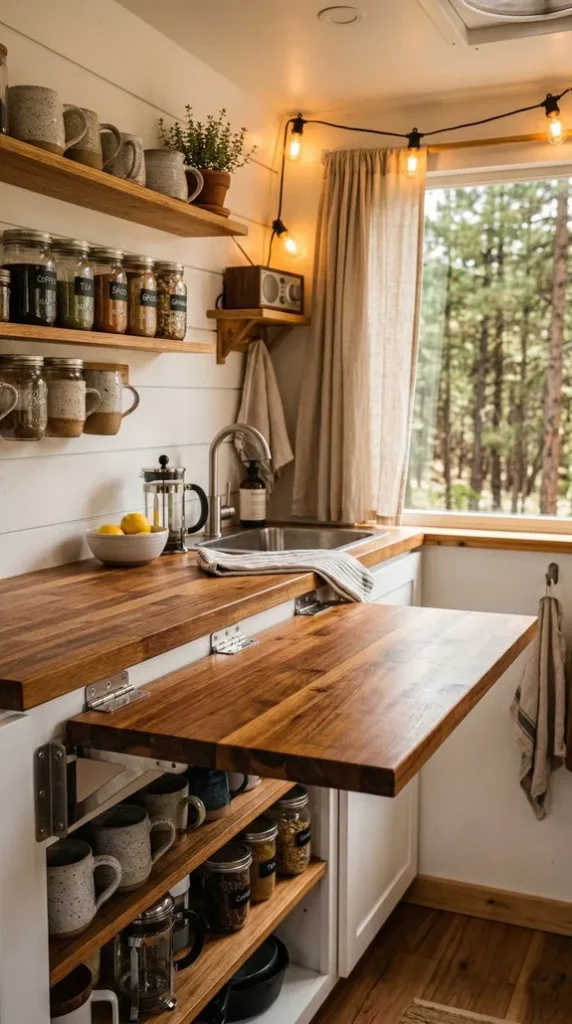
Space-saving fold-down countertops, desks, or tables provide extra workspace only when you need it. In small kitchens, a hinged extension can double prep space, while a fold-down desk creates a temporary office without permanently occupying valuable floor area.
5. Create Hidden Storage with a Raised Bed Platform
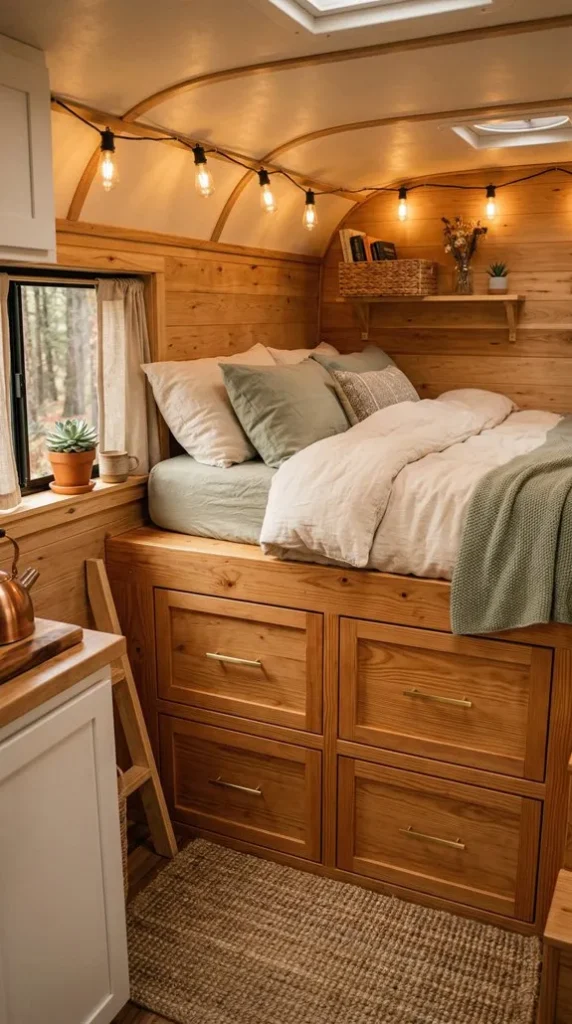
Instead of wasting the area beneath your mattress, build a raised platform with integrated drawers or lift-up compartments. This hidden storage is perfect for bedding, seasonal clothing, camping gear, or tools while keeping the living area organized and clutter-free.
6. Replace Traditional Lighting with Recessed LEDs
Bulky light fixtures can make a camper feel cramped. Recessed LED lighting provides bright illumination while preserving headroom and creating a cleaner, more modern look. Installing dimmable fixtures also lets you adjust the mood from functional task lighting to cozy evening ambiance.
7. Transform the Dinette into a Convertible Sleeping Area
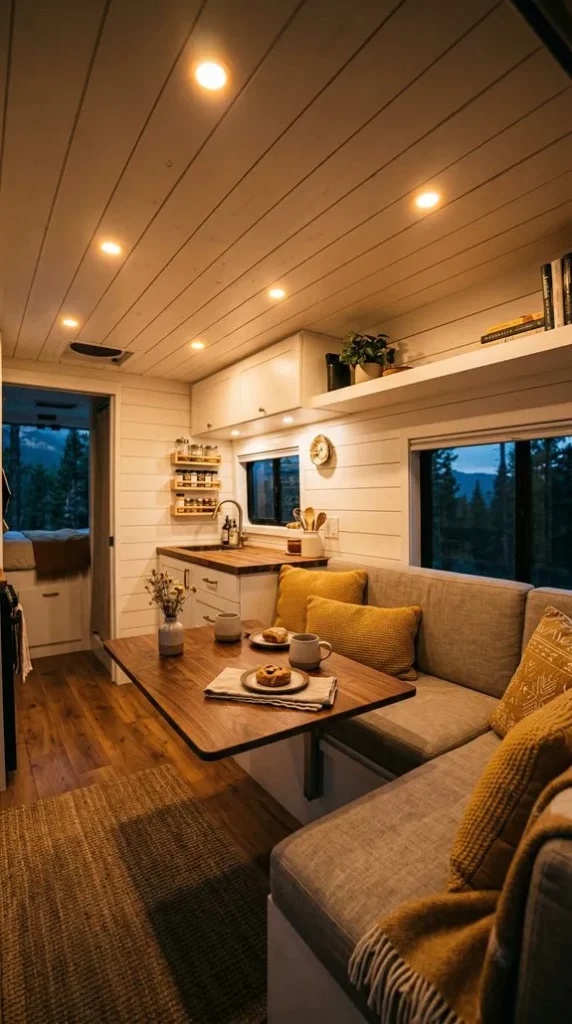
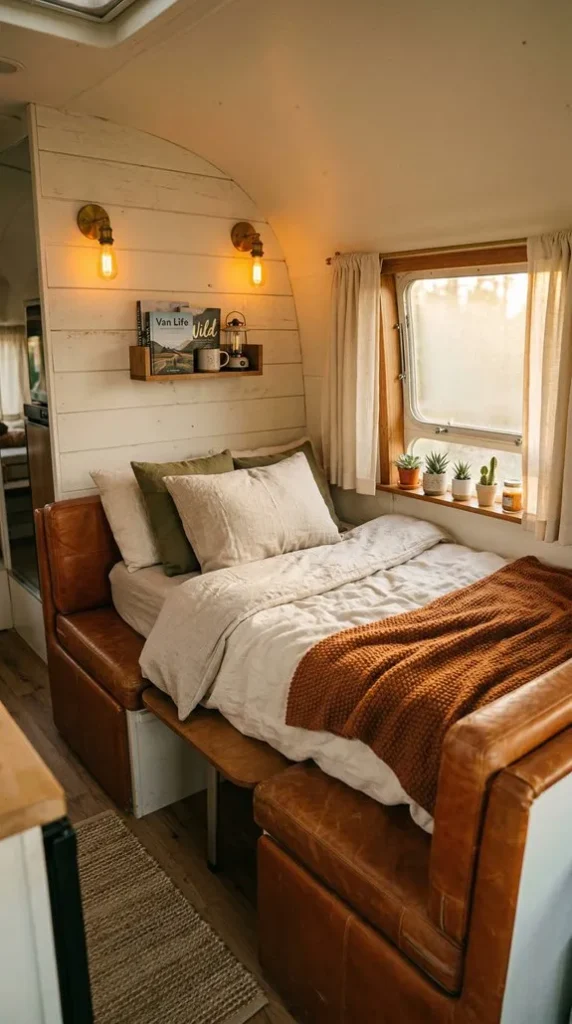
A convertible dinette is one of the smartest upgrades for campers that regularly host guests or family members. By lowering the tabletop between the benches, you create an additional sleeping area without sacrificing daytime seating, maximizing both comfort and efficiency.
8. Take Advantage of Vertical Storage Solutions
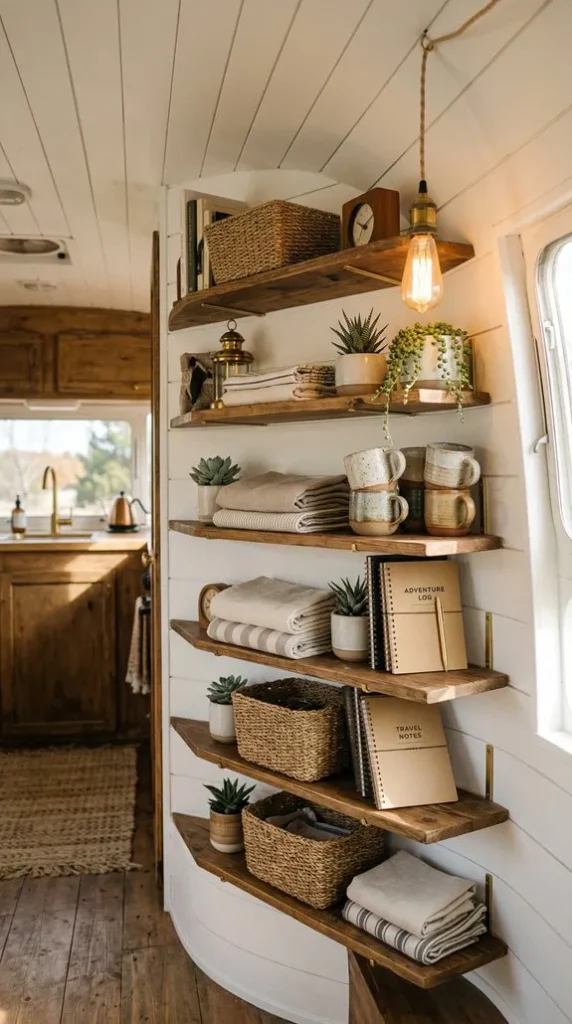
When floor space is limited, think vertically. Floating shelves, pegboards, hanging organizers, and wall-mounted baskets make excellent use of empty walls while keeping essentials within easy reach. Vertical storage also helps reduce countertop clutter and keeps small spaces feeling tidy.
9. Introduce Character with Peel-and-Stick Wallpaper
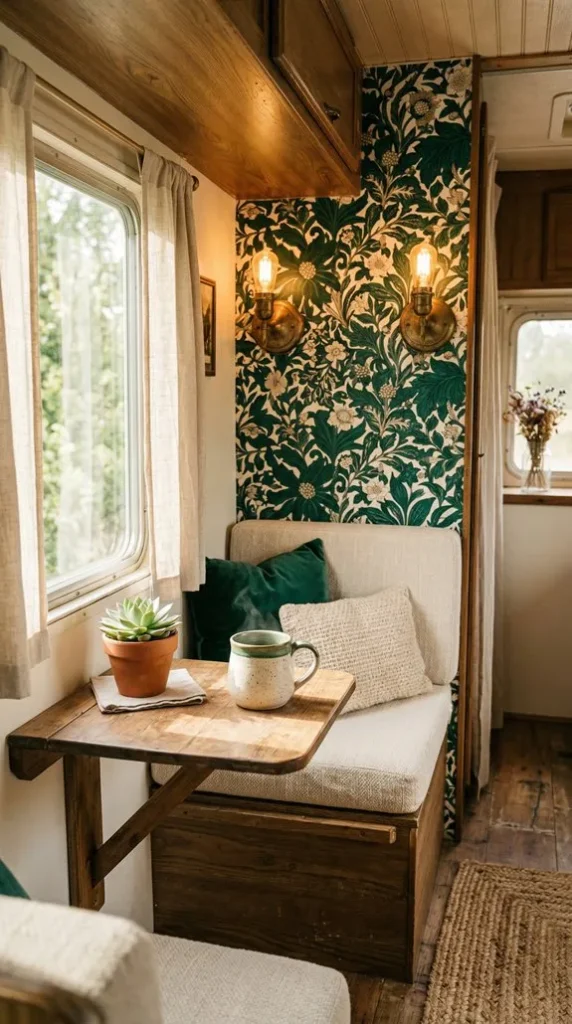
Temporary wallpaper is an easy way to personalize your camper without permanent modifications. Apply it to accent walls, cabinet fronts, or backsplashes to introduce texture, color, or patterns that reflect your style while remaining removable if your tastes change.
10. Install a Wood Accent Wall for Rustic Charm
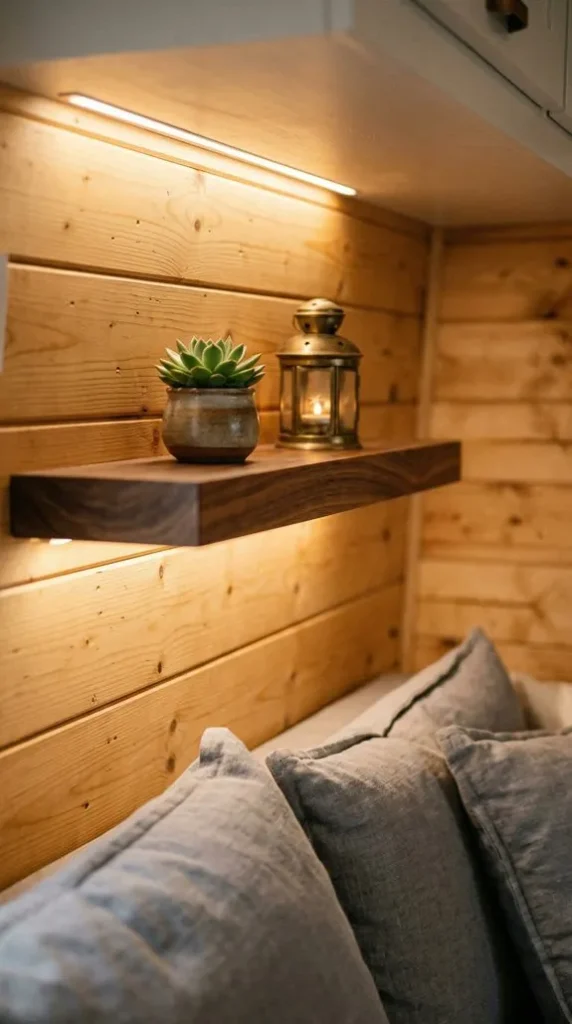
A lightweight shiplap or wood slat accent wall adds texture and warmth, instantly giving your camper a custom-built appearance. Pair it with subtle lighting to highlight the natural grain and create a cozy cabin-inspired atmosphere.
11. Swap Cabinet Doors for Soft Fabric Curtains
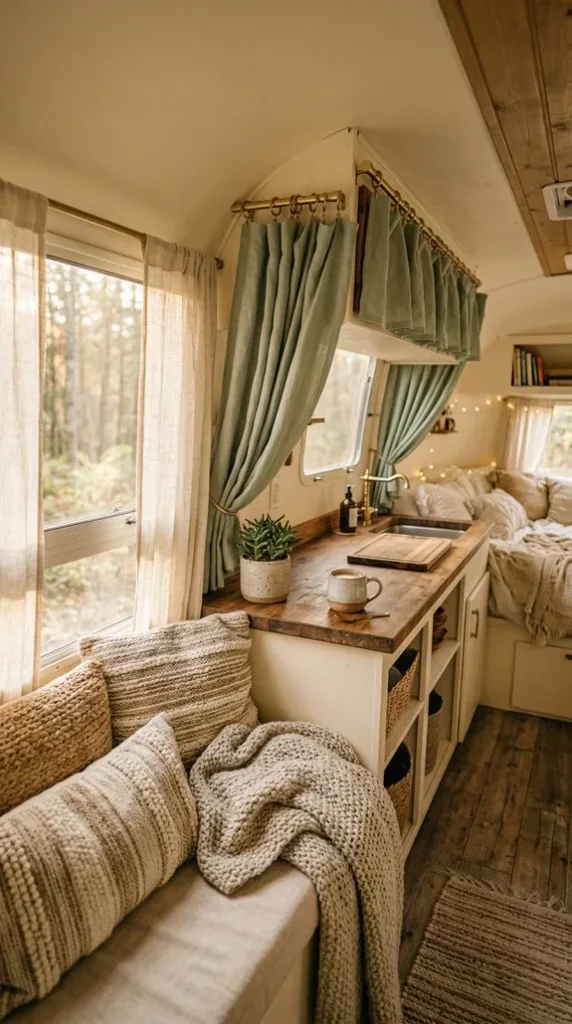
Replacing selected cabinet doors with curtains softens the interior and creates a more relaxed, cottage-inspired look. This approach also reduces weight, allows easier access to stored items, and offers an inexpensive way to introduce color or pattern into the design.
12. Modernize the Electrical System During Renovations
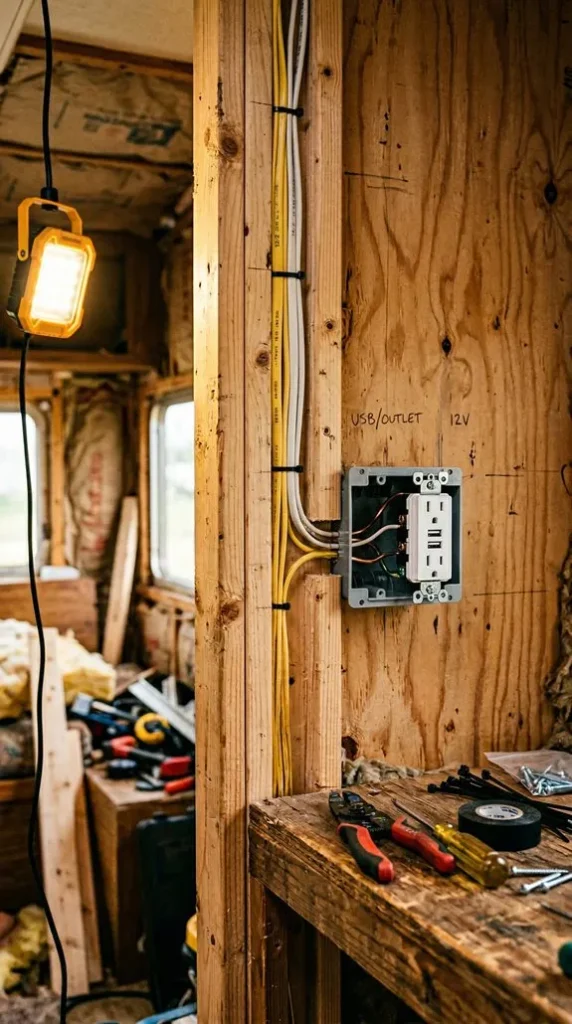
If you’re already opening walls or cabinetry, it’s the perfect opportunity to upgrade wiring, install USB charging ports, add GFCI outlets where appropriate, and improve overall electrical safety. Planning these improvements early avoids costly modifications later.
13. Make Small Bathrooms Feel Larger with Smart Design
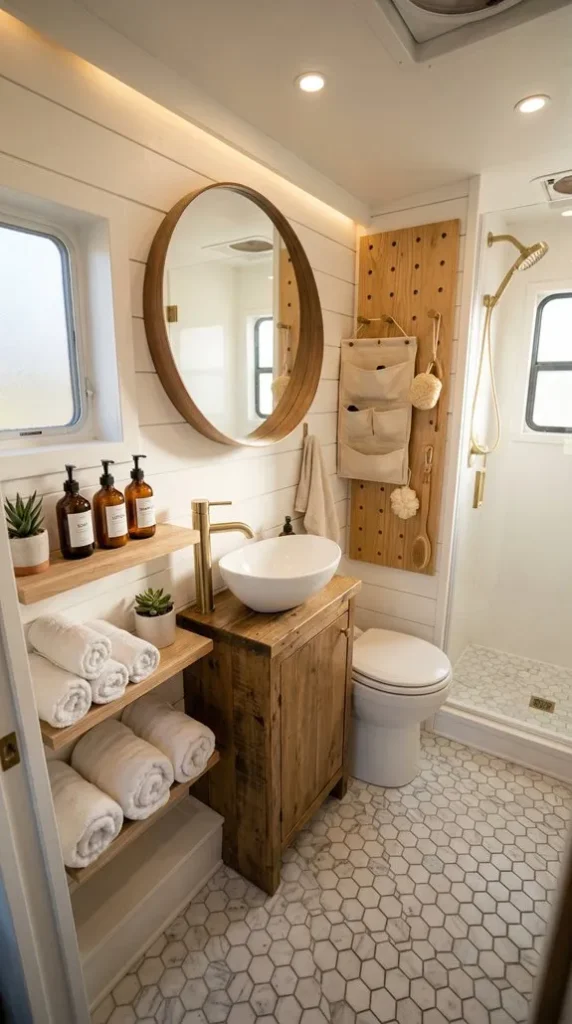
Camper bathrooms benefit from minimalist fixtures, wall-mounted storage, and efficient layouts that prioritize vertical organization. Slim shelving, compact sinks, and magnetic organizers help maximize every available inch while maintaining a clean appearance.
14. Strategically Place Mirrors to Expand the Space
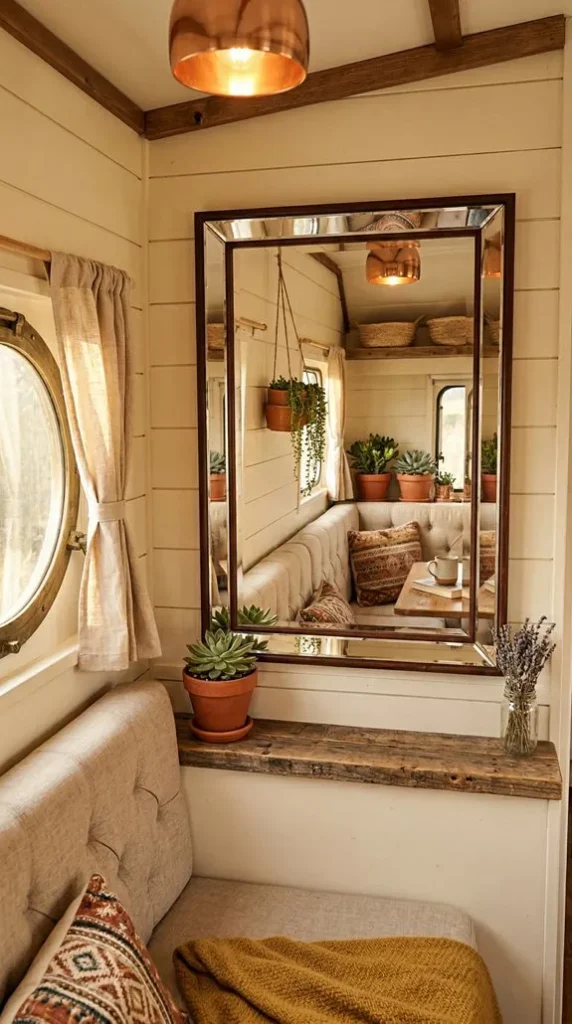
Mirrors create the illusion of depth by reflecting both natural and artificial light throughout the camper. A well-positioned mirror opposite a window or integrated into cabinet doors can make even the smallest areas feel brighter and more open.
15. Bring Nature Indoors with Plants and Organic Materials
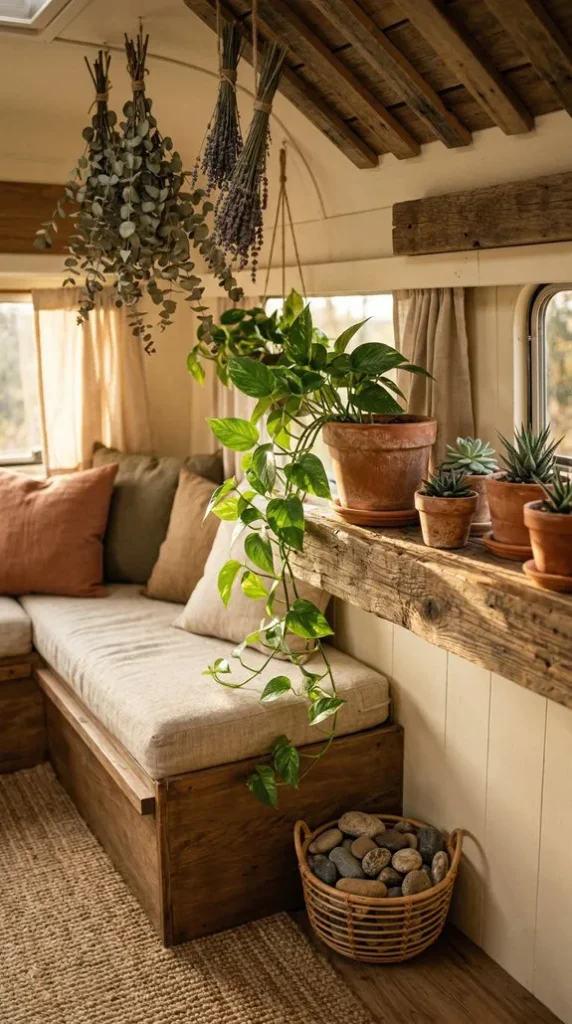
Adding small plants, wooden accents, woven baskets, or natural textures helps soften the interior and create a welcoming environment. Low-maintenance greenery like pothos or snake plants can thrive in camper conditions while adding life and freshness.
16. Finish with Cozy Textiles and Decorative Layers
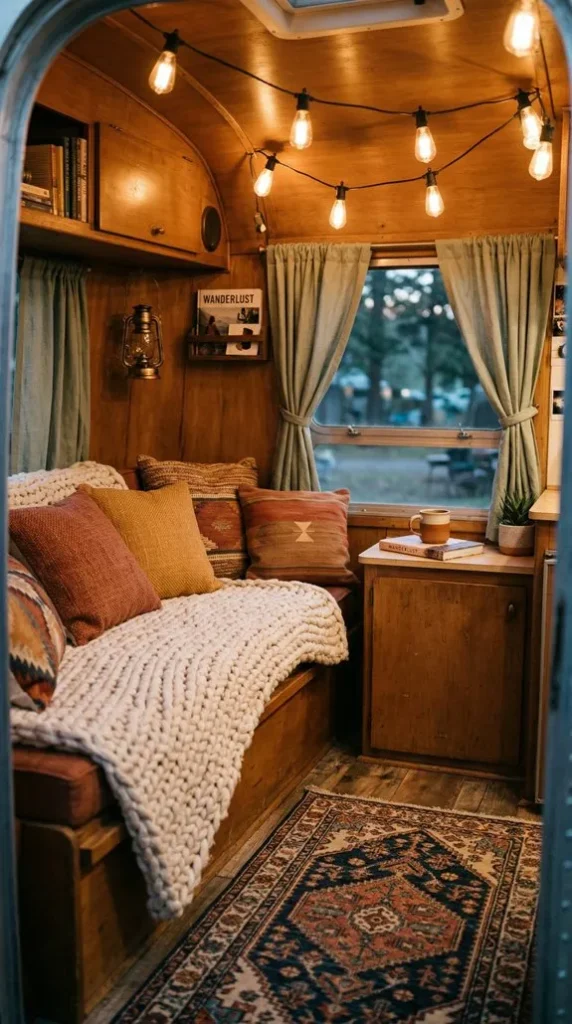
Complete your remodel with area rugs, throw blankets, cushions, and coordinated fabrics that tie the entire design together. These finishing touches add warmth, reduce echoes, and make the camper feel less like a vehicle and more like a comfortable home.
Conclusion
A successful camper remodel isn’t about making dramatic structural changes—it’s about making thoughtful improvements that maximize comfort, storage, and visual appeal. By combining practical upgrades like multifunctional furniture and hidden storage with decorative elements such as warm lighting, textiles, and natural materials, you can transform even the smallest camper into a welcoming retreat. Whether you’re preparing for weekend getaways or embracing full-time RV living, these ideas will help you create a space that’s both beautiful and highly functional.
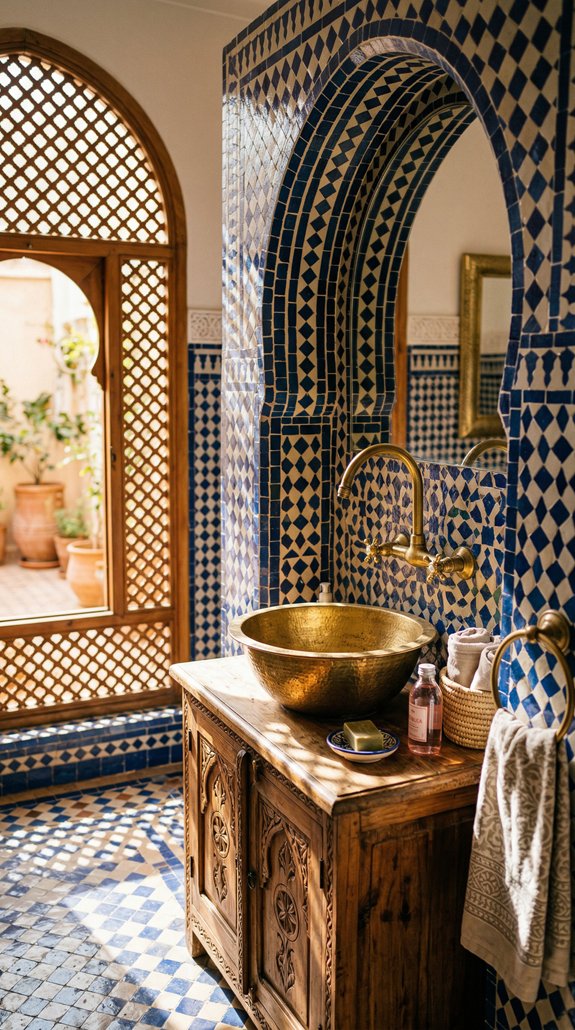
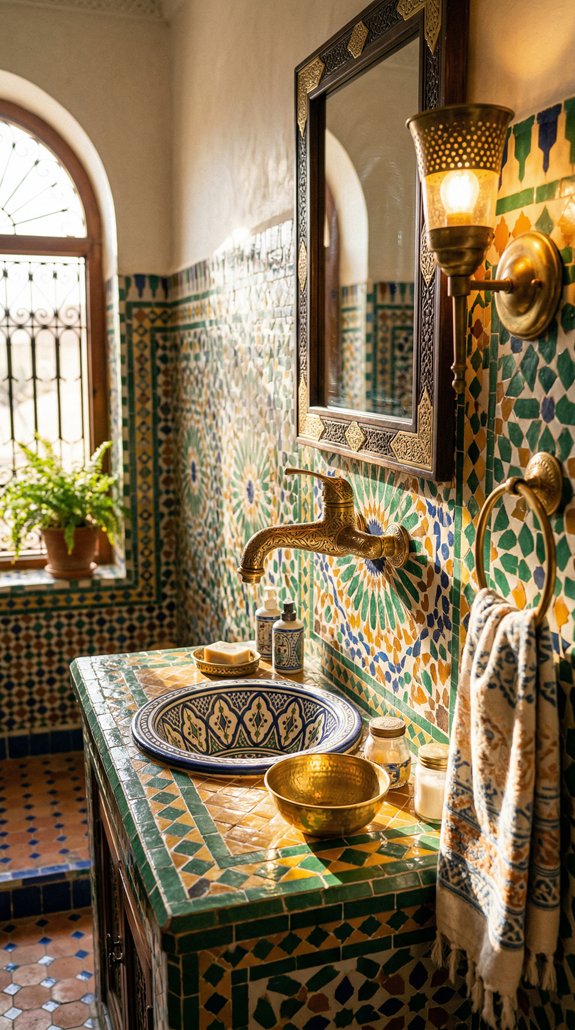
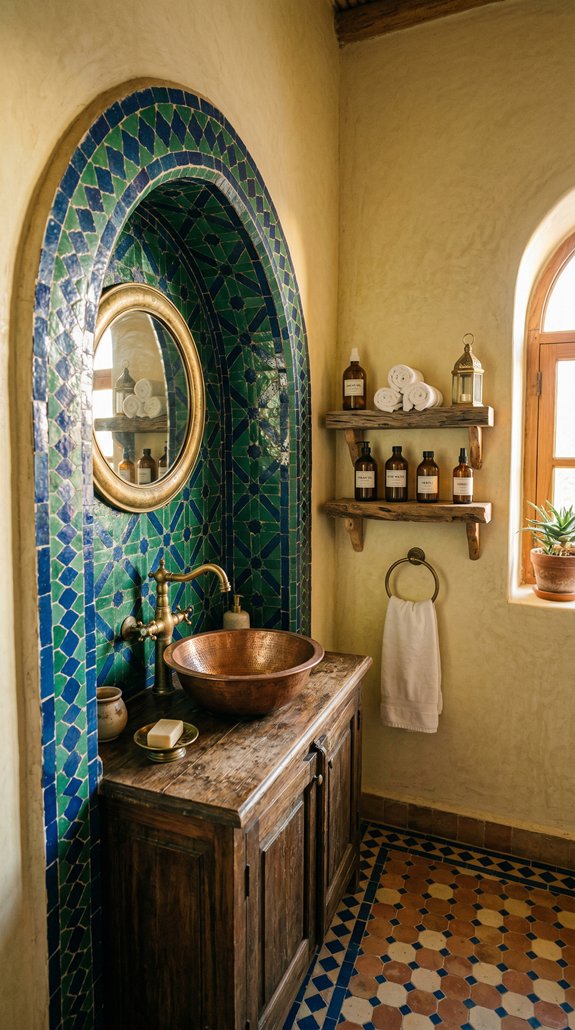
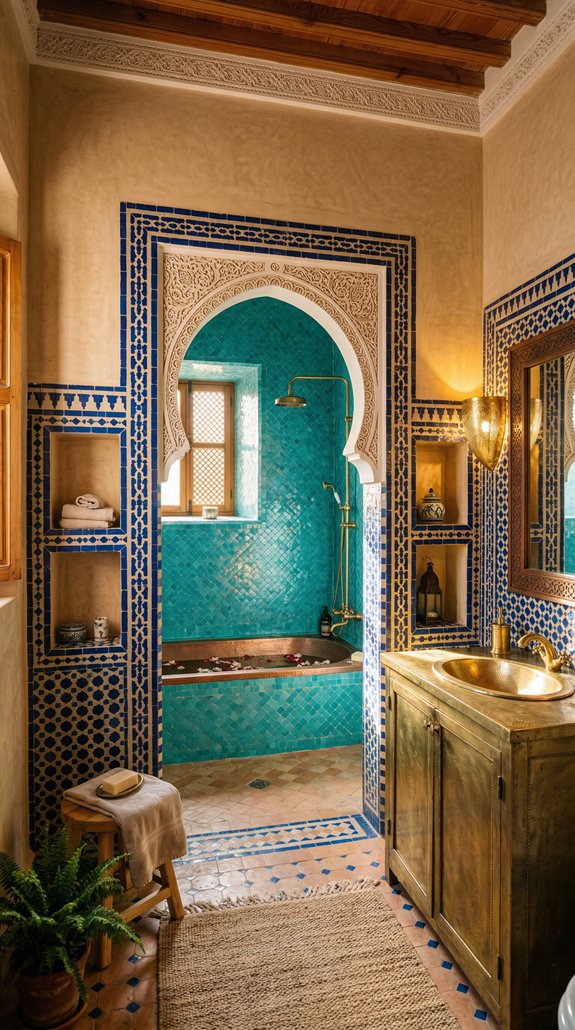
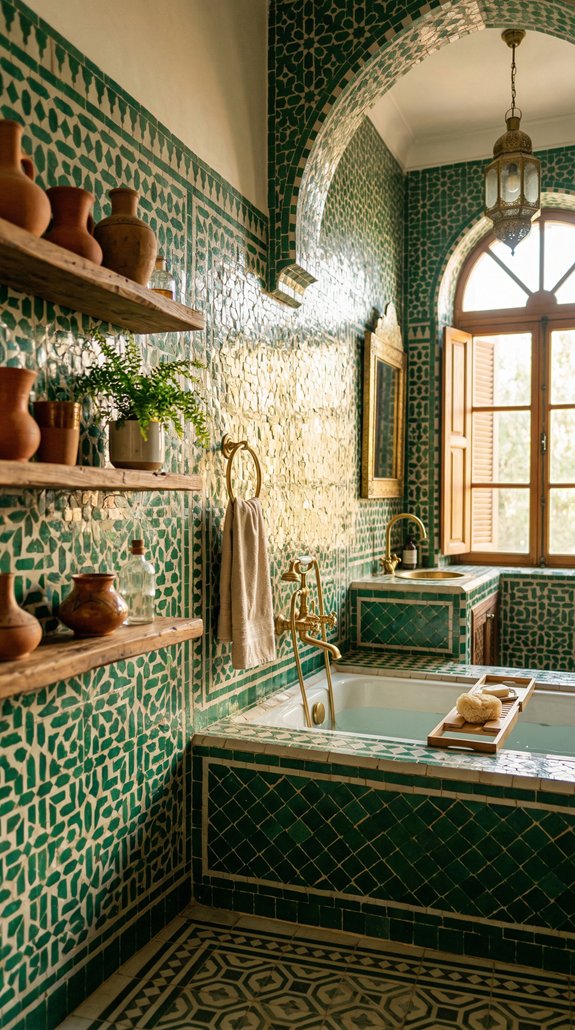
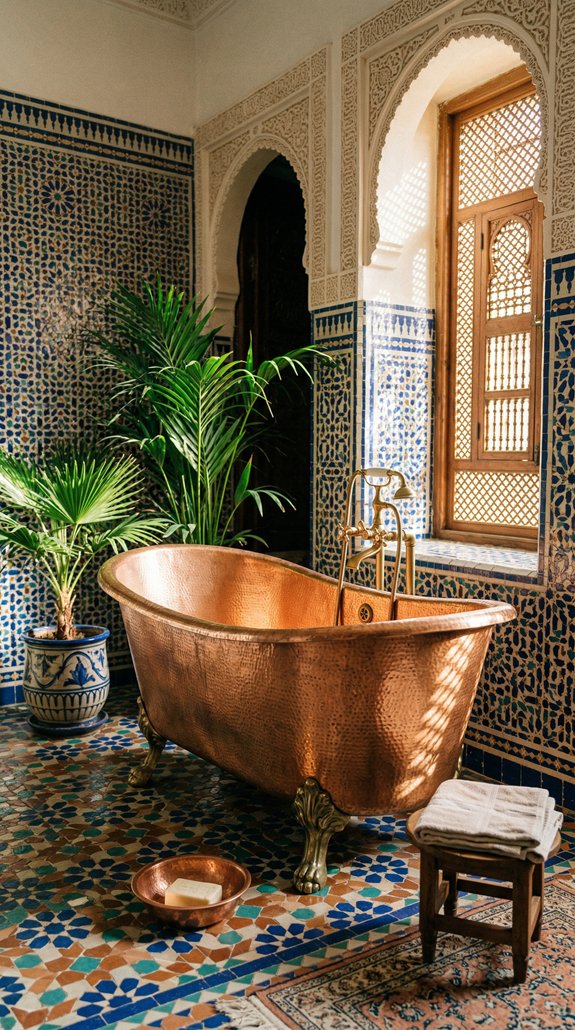
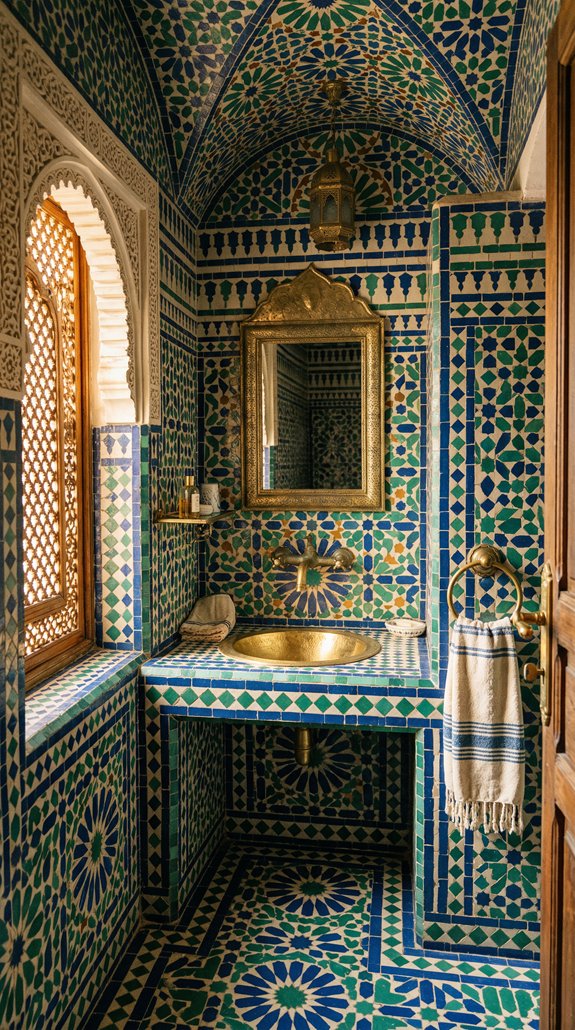
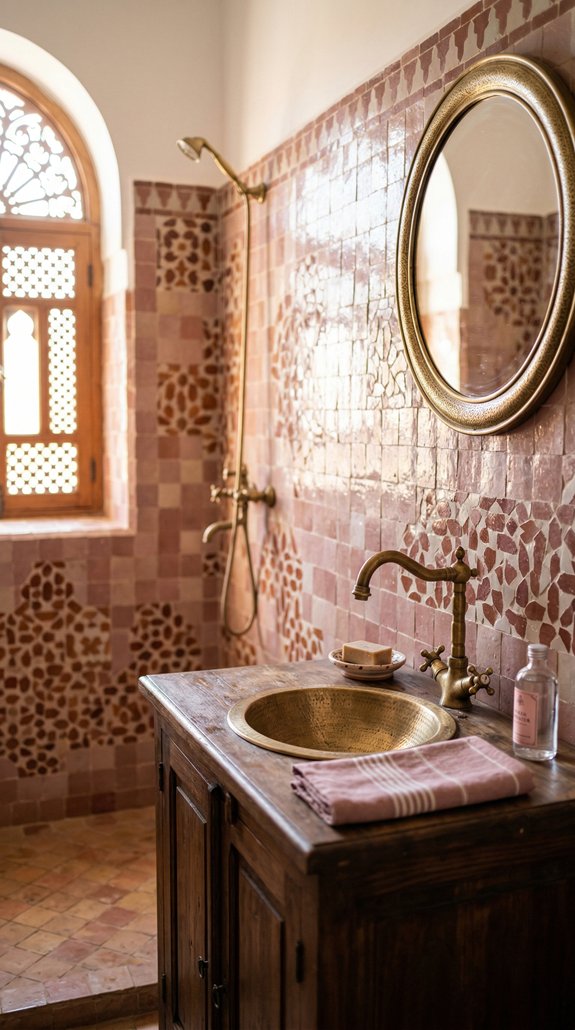
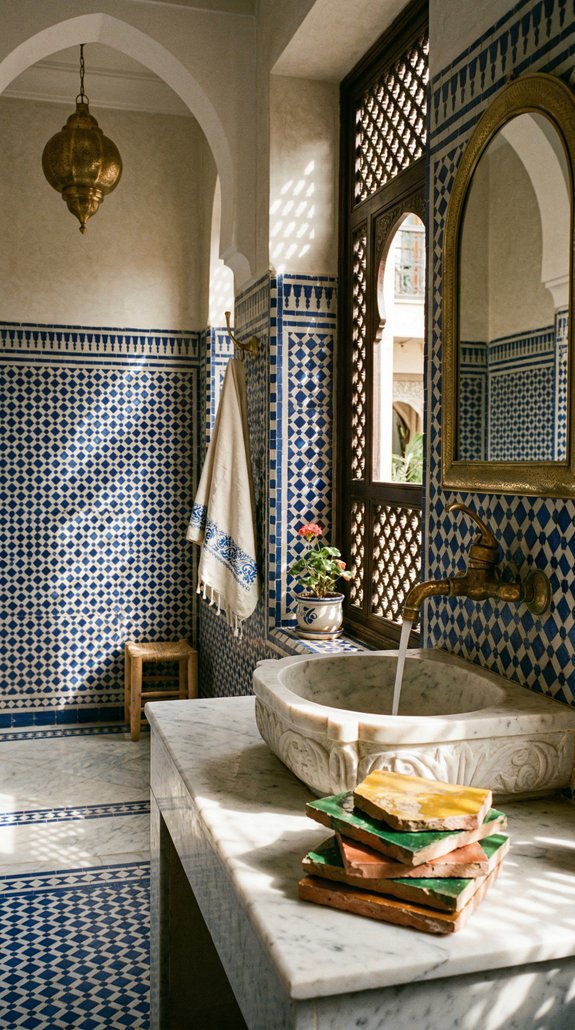
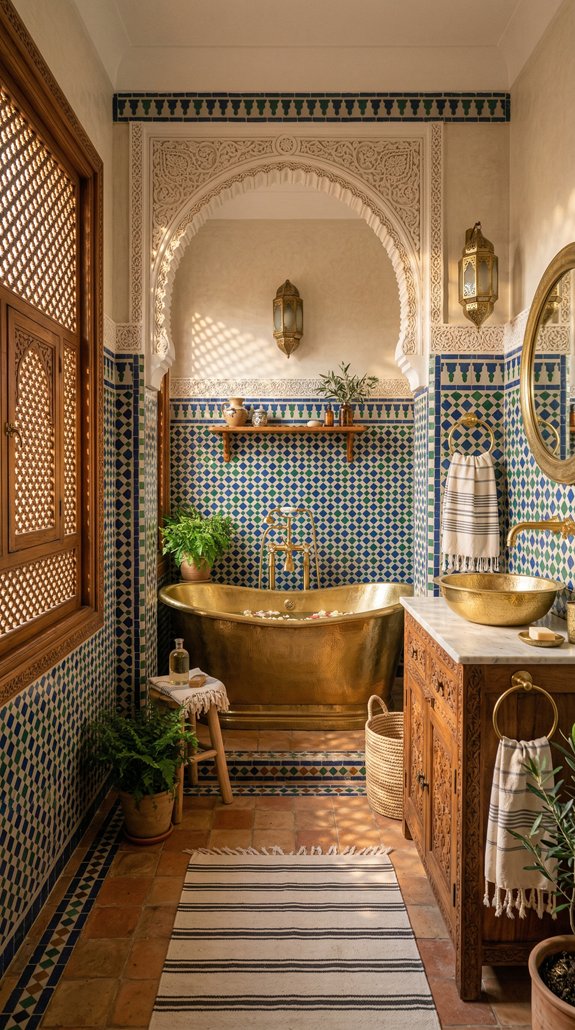
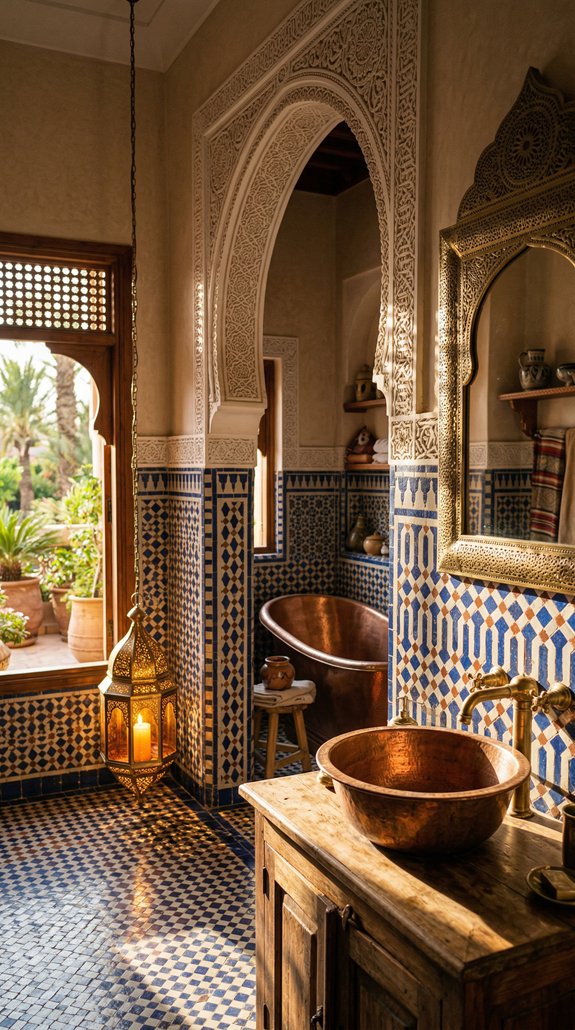
Step into a world where vibrant colors meet timeless craftsmanship, and your bathroom transforms from a simple space into an oasis of elegance and warmth. Moroccan design, with its rich textures and intricate details, offers a unique way to infuse personality and artistry into your home. By incorporating zellige tiles—those mesmerizing, hand-cut glazed ceramics—and pairing them with the luxurious glow of brass accents, you’re not just choosing materials; you’re curating an experience that celebrates tradition and modern sophistication.
Imagine your bathroom walls adorned with the vibrant, geometric patterns of zellige, each tile reflecting light in a way that brings depth and movement to the room. Complemented by brass fixtures that add a touch of opulence and warmth, the space becomes both inviting and strikingly beautiful. Whether you’re starting from scratch or seeking inspiration to elevate your current design, embracing these Moroccan elements offers endless possibilities to create a bathroom that feels uniquely yours—where culture, craftsmanship, and contemporary style come together seamlessly.
1. Why Zellige Tiles and Brass Fixtures Are a Designer Favorite for Bathrooms
When it comes to creating a timeless Moroccan-inspired bathroom, zellige tiles combined with brass hardware are a pairing interior designers return to time and time again. The handcrafted nature of zellige introduces subtle, uneven textures that catch the light, enhancing the natural warmth and luster of brass fixtures.
Leading design firms frequently showcase deep emerald or vibrant cobalt zellige walls alongside unlacquered brass fittings, allowing both elements to gracefully develop their unique patinas over time. This aging process creates a sophisticated visual dialogue between the two materials, elevating the space with an effortlessly luxurious feel.
To maximize impact, select zellige tiles that feature natural color shifts. This nuanced variation provides a dynamic backdrop that makes the warm tones of brass truly stand out, ensuring your bathroom exudes a rich, authentic character.
Key Design Elements
Opt for emerald or cobalt zellige paired with unlacquered brass for a refined, designer-approved look
Allow brass and zellige to age naturally together—this evolving patina adds depth and luxury
Select zellige tiles with subtle color differences to make the brass hardware pop visually
Embrace the beauty of material aging instead of maintaining a polished, brand-new appearance
Pro Tip: Combine emerald or cobalt zellige with unlacquered brass and let their patinas develop naturally—the evolving texture is what truly elevates the design.
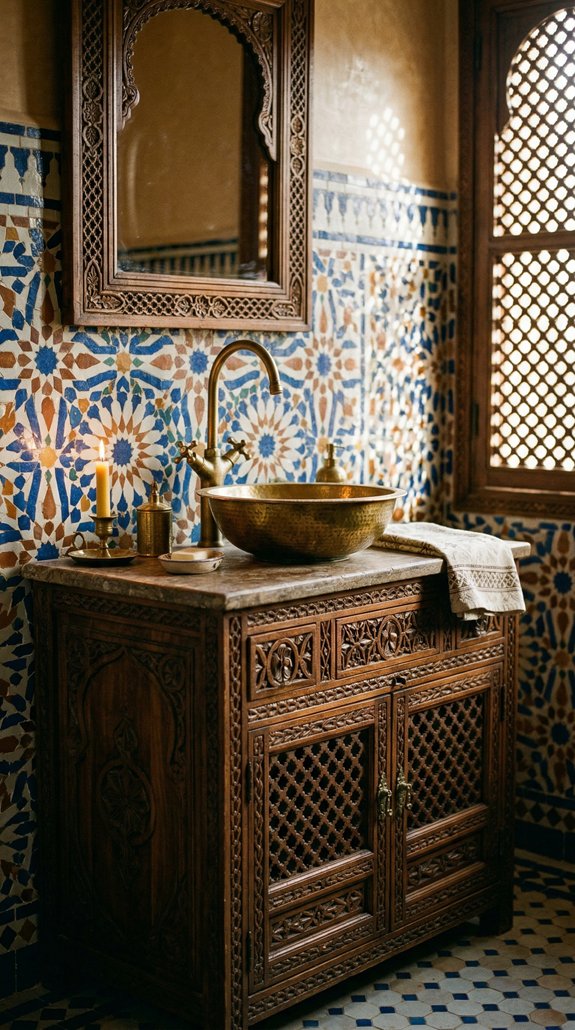
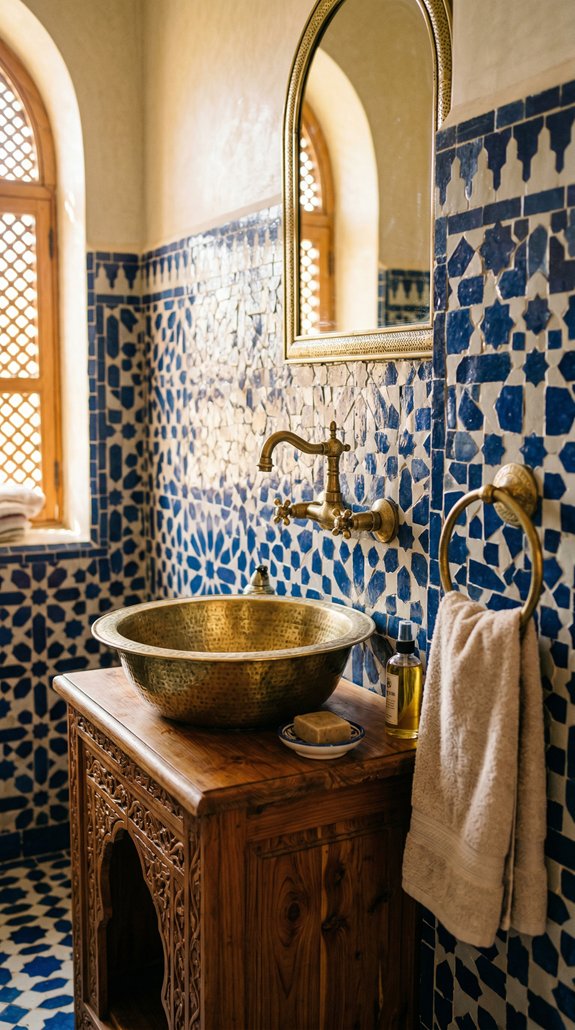
Incorporating a vanity with detailed Moroccan wood carvings instantly elevates your bathroom’s aesthetic, blending warmth, texture, and artisan heritage into one stunning centerpiece. These vanities serve as more than just functional pieces—they bring a timeless, handcrafted quality that enriches the entire space.
When you select a vanity adorned with traditional Moroccan patterns—such as intricate geometric designs, arabesques, or floral elements—you’re introducing a captivating visual rhythm reminiscent of classic riad architecture. Brands like Uttermost and Hooker Furniture excel at offering these richly detailed fronts, which interact with natural light to cast beautiful, shifting shadows throughout the day.
To complete the look, consider pairing the carved wood vanity with a sleek vessel sink and a brass faucet. This combination creates a compelling focal point that ensures your bathroom feels both sophisticated and memorable.
Key Design Elements
Choose vanities that showcase detailed geometric and arabesque woodwork inspired by Moroccan heritage
Explore collections from Uttermost and Hooker Furniture for authentic carved panel designs
Combine your carved vanity with a vessel sink and brass fixtures to create a striking centerpiece
Notice how changing daylight highlights the carved surfaces, producing dynamic shadow effects
Pro Tip: Enhance your carved vanity’s impact by pairing it with a vessel sink and an unlacquered brass faucet for a truly unforgettable bathroom feature.
3. Mastering Zellige Backsplashes: Achieving Impact Without Overwhelm
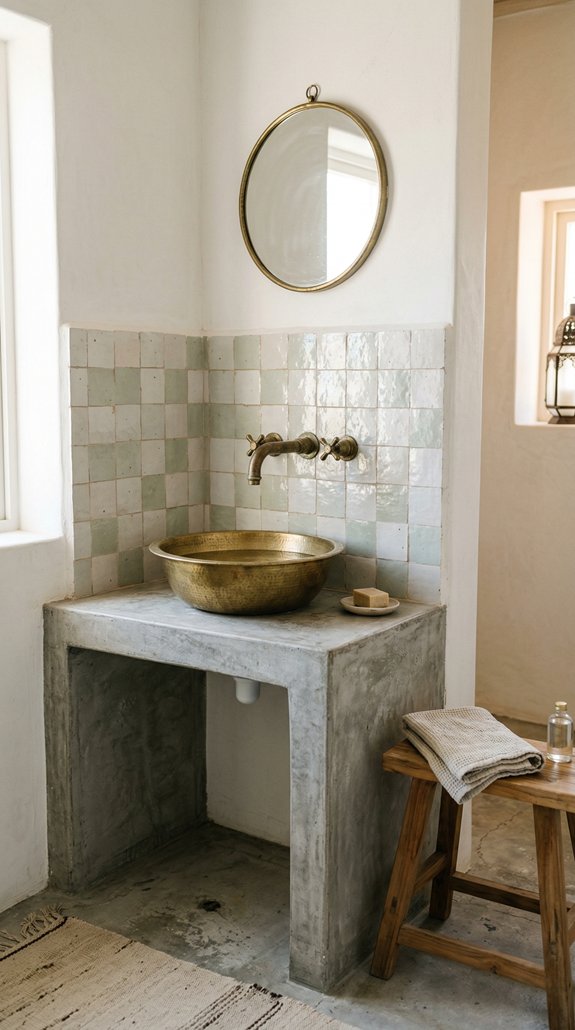
When incorporating zellige tiles into your bathroom, the key is to create a singular statement rather than multiple competing elements. Focus your zellige application on one standout area, such as the vanity backsplash or inside the shower alcove, allowing the rest of the space to remain calm and uncluttered. This approach helps maintain a balanced and refined atmosphere.
Strategically place your accent tiles where natural light can highlight their distinctive, uneven glaze, bringing out their unique character. Opt for a close-set tile layout with minimal grout lines to showcase the artisanal texture of zellige without breaking the visual flow. Pairing this with matte plaster walls, sleek brass hardware, and streamlined design details will support a cohesive, elegant look free from visual chaos.
Key Design Elements
Reserve zellige for a single, impactful area like the vanity backsplash or shower recess
Place accent tiles in spots where sunlight enhances their textured, glossy finish
Choose tight grout spacing to keep grout lines subtle and highlight tile craftsmanship
Combine the backsplash with matte plaster surfaces to create spaciousness and calm
Pro Tip: Focusing on one bold zellige feature creates a stronger impression than scattering multiple accents—restraint elevates design.
4. Timeless Brass Elements for an Authentic Moroccan Bathroom
Incorporating brass fixtures is essential to achieving the rich, layered ambiance of a Moroccan bathroom. These hardware elements serve as a bridge, harmonizing handcrafted zellige tiles, ornate plasterwork, and textured fabrics into a seamless design narrative. When selecting brass fittings, aim for pieces that echo traditional craftsmanship and cultural motifs to elevate the space’s authenticity.
Focus on fixtures that showcase artisanal details and embrace the natural aging process of brass. This approach not only enhances the tactile experience but also introduces a sense of history and character. Embrace a mix of warm brass tones across different fixtures to build visual interest and depth, steering away from overly matched sets in favor of a thoughtfully curated, inviting environment.
Key Design Elements
Opt for vintage-style brass faucets with elegantly curved spouts reminiscent of classic hammam aesthetics
Choose handles adorned with geometric textures or patterns inspired by Arabic art for a rich tactile feel
Incorporate unlacquered brass towel rings that gracefully develop a unique patina as they age
Select brass shower heads designed for a wide, gentle rainfall effect combining beauty with comfort
Pro Tip: Blend various warm brass finishes instead of uniform matches to achieve a more genuine and layered Moroccan look.
5. Create a Striking Moroccan-Inspired Bathroom on a Budget Under $500
You don’t need to splurge on expensive materials to evoke the rich, vibrant essence of Moroccan design in your bathroom. With thoughtful choices and a few well-placed accents, you can craft an inviting space that captures authentic charm and warmth. By focusing your budget on key statement pieces and subtle textural details, the transformation becomes both achievable and impactful.
Start by choosing standout elements that immediately redefine the room’s character, then layer in accessories that amplify the ambiance without overwhelming costs. This balanced approach ensures your bathroom feels carefully curated and culturally inspired, all while staying comfortably within a modest budget.
Key Design Elements
Upgrade plain mirrors by opting for decorative brass-framed versions available at HomeGoods
Trade ordinary towel racks for rustic hammered copper hooks to introduce a handcrafted touch
Incorporate a Moroccan-inspired patterned bath rug to add rich color and texture underfoot
Arrange amber-toned glass lanterns along your vanity to create a cozy, inviting glow
Pro Tip: Start your makeover by replacing the basic builder mirror with a detailed brass-framed one—it offers the greatest style boost for the least expense.
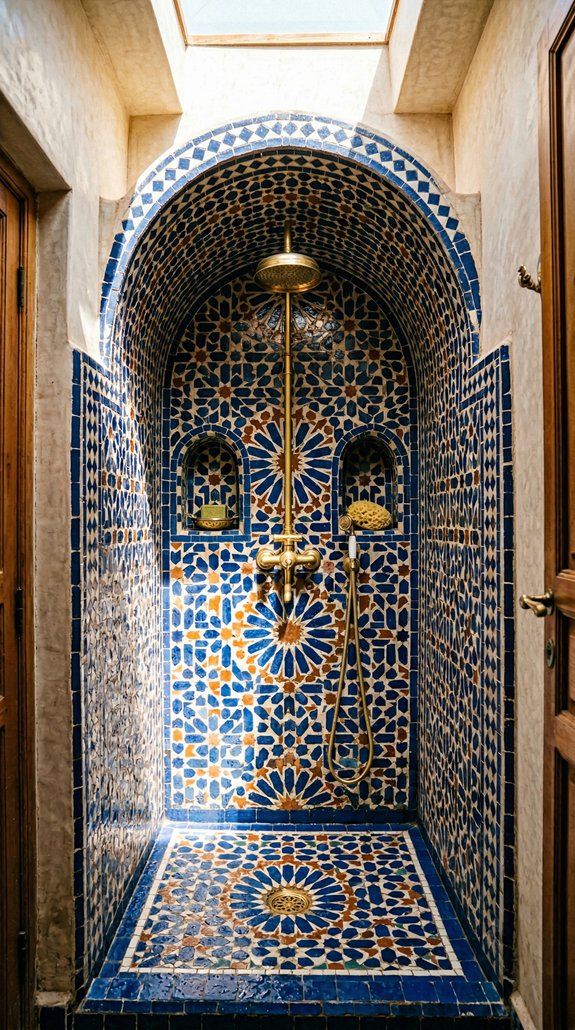
6. Incorporating Arches and Niches to Enhance Your Moroccan Bathroom Design
In Moroccan interiors, arches and recessed niches do far more than decorate — they define the rhythm and flow of your bathroom’s architecture. These elements play a crucial role in directing light, shaping the room’s ambiance, and harmonizing various design features into a cohesive whole. When thoughtfully integrated, arches and niches bring a sense of intentionality and cultural richness to your space.
To capture this authentic feel, consider how these curved structures can frame key areas and offer practical yet stylish solutions. Their presence adds both functional storage and visual intrigue, transforming even compact bathrooms into spaces that feel both curated and inviting. By layering textures and lighting within these features, you create dynamic points of interest that celebrate traditional Moroccan aesthetics without overwhelming the room.
Key Design Elements
Create a striking entrance by installing a classic horseshoe arch at the bathroom doorway
Incorporate curved alcoves next to the sink area to provide elegant, built-in storage
Enhance wall recesses with subtle lighting to highlight their form and add mood
Use zellige tiles to line niches, introducing intricate texture and a sense of depth
Pro Tip: For an authentic touch, tile the inner surfaces of your arched niches with zellige—its rich texture adds a captivating dimensionality that paint alone can’t achieve.
7. Incorporating Moroccan Flair into Your Contemporary Bathroom
Integrating Moroccan-inspired elements into a sleek, modern bathroom doesn’t mean overhauling your space or embracing an overly ornate style. Instead, it’s about thoughtfully layering distinctive touches that highlight cultural charm while respecting your current design’s simplicity. Imagine a space where subtle Moroccan details enhance rather than compete with minimalism, creating a harmonious balance.
Start by focusing on a single standout feature, such as a vibrant zellige tile wall, which brings texture and color without dominating the room. Complement this with streamlined fixtures and carefully chosen accessories that nod to Moroccan artistry, allowing those influences to blend gracefully into your bathroom’s modern foundation.
By selecting just a few meaningful accents—like a unique mirror frame or artisanal textile—you’ll infuse warmth and personality without sacrificing the clean, calming atmosphere you love. This approach invites Moroccan character to coexist naturally within your contemporary aesthetic, making your bathroom both inviting and visually intriguing.
Key Design Elements
Combine modern, streamlined surfaces with one eye-catching zellige tile wall for a subtle yet impactful Moroccan touch
Incorporate a mashrabiya-inspired mirror frame as a singular piece that brings cultural depth without clutter
Use brushed brass hardware paired with crisp white walls to fuse contemporary style with Moroccan influences effortlessly
Introduce warmth and texture by placing a carefully selected handwoven fabric near the sink area without overdecorating
Pro Tip: Begin by installing a zellige accent wall alongside brushed brass hardware—this duo instantly imparts a Moroccan vibe within a modern bathroom setting.
8. Stunning Freestanding Tubs Perfect for a Moroccan-Inspired Bathroom
To complement the rich allure of brass hardware, select a freestanding tub that serves as a bold focal point with a sculptural presence. Consider designs that bring a blend of traditional charm and contemporary flair, enhancing the Moroccan aesthetic you’re aiming for. Options like gracefully curved slipper tubs, clawfoot models finished in matte black or antique brass, smooth oval soaking tubs crafted from stone resin, and artisanal hand-hammered copper tubs each offer distinct character and elegance.
Elevating your bathing experience begins with thoughtful placement—install your tub atop heated flooring to provide comforting warmth beneath your feet, turning each soak into a truly indulgent ritual. Situate it adjacent to a wall adorned with intricate zellige tiles, so the vibrant geometric patterns act as a beautiful backdrop. Interior designer Leila Haidari suggests maintaining a clean, uncluttered space around the tub, ensuring its form remains the centerpiece of your room’s design.
Key Design Elements
Opt for slipper tubs with smooth curves to evoke timeless Moroccan sophistication
Select clawfoot tubs in matte black or vintage brass for a refined, elegant statement
Add heated floors beneath the tub to elevate your bathing ritual with soothing warmth
Incorporate hand-hammered copper tubs to bring authentic Moroccan craftsmanship into your space
Pro Tip: Situate your freestanding tub beside a zellige tile feature wall and keep the surrounding décor simple to let the tub’s shape shine as the room’s focal point.
9. Elevate Your Bathroom with Floor-to-Ceiling Zellige Tiles
Covering your bathroom walls from floor to ceiling with zellige tiles instantly adds a layer of architectural sophistication, transforming the space into a stunning visual experience. The handmade, glossy finish of each tile creates a captivating texture that draws the eye upward, enhancing the perception of height and openness.
By maintaining an unbroken vertical surface, you create a seamless flow that avoids any visual interruptions that can make a room feel confined. This continuous expanse of tile not only highlights the craftsmanship but also amplifies natural and artificial light, contributing to an airy and expansive atmosphere. Selecting a light-hued, reflective zellige like Glacier White ensures the room feels bright and inviting throughout.
Key Design Elements
Install tiles continuously from the floor all the way up to the ceiling for a cohesive vertical effect
Opt for Glacier White zellige to enhance light play across the uneven tile surfaces
Avoid dividing the wall with borders or trims that can visually compress the space
Let the uninterrupted tile surface serve as a standout architectural element in your bathroom
Pro Tip: For smaller bathrooms, Glacier White zellige is ideal to boost light reflection and make the space appear larger.
10. Mastering Color Harmony When Combining Zellige Tiles
To create a visually appealing zellige tile arrangement, focus on the interplay of tones rather than mixing colors arbitrarily. When colors are thoughtfully selected based on their tonal connections, the result is a layered and sophisticated look instead of visual clutter. Start by choosing hues that share a common color family, then elevate the design with a single standout shade for interest and contrast.
Begin with a strong neutral foundation that anchors the space, then build your palette with complementary mid-tones that echo similar undertones. Finally, introduce one striking accent color to energize the composition. This balanced approach ensures your design feels cohesive and intentional, with plenty of moments for the eye to rest, avoiding overwhelming complexity.
Key Design Elements
Begin with a solid neutral shade as your primary foundation
Incorporate mid-range tones that align with the same underlying hues
Select one vivid accent color to create purposeful contrast
Keep the overall color scheme to no more than three hues for harmony
Pro Tip: Stick to a maximum of three zellige colors to achieve elegant depth without overcrowding the design.
11. Finding Genuine Zellige Tiles for Your Moroccan-Inspired Bathroom
Tracking down authentic zellige tiles requires a bit of research, but the payoff is evident when you witness the unique charm of hand-crafted tiles versus their mass-produced counterparts. Genuine zellige stands out with its distinctive, imperfect textures and vibrant, variegated colors that machines simply cannot duplicate.
Specialized retailers such as Mosaic House and Tile Bar source their collections directly from Morocco, ensuring that each tile boasts the irregularities and rich glazes typical of traditional craftsmanship. If you’re looking for an even closer connection to the source, online vendors like Zellige Direct and Clé Tile import tiles straight from artisans in Fez, allowing you to tap into authentic Moroccan hues and tailor sizes to your project’s needs.
Before making a final purchase, always ask for physical tile samples. Photographs often miss the subtle nuances and depth these tiles add to your bathroom’s ambiance, so seeing them firsthand will give you a better sense of their true beauty.
Key Design Elements
Mosaic House and Tile Bar offer hand-imported Moroccan zellige featuring authentic, irregular surface textures
Zellige Direct and Clé Tile provide direct shipping from Fez workshops, showcasing traditional color schemes and custom sizing options
Request physical samples in advance—images rarely capture the full dimension and luster of these tiles
Look for slight glaze variations and minor imperfections as indicators of genuine handcrafted artistry
Pro Tip: Always secure physical samples before ordering—while zellige looks stunning in photos, its tactile depth and color vibrancy are best appreciated in person.
To create an authentic Moroccan-inspired bathroom, it’s essential to approach the project with a well-structured plan that balances timing, materials, and craftsmanship. Begin sourcing your signature zellige tiles well in advance—ideally six weeks or more—to ensure availability and avoid delays. Reputable vendors like Mosaic House and Clayhaus offer a stunning range of options that will elevate your space.
When scheduling your renovation, focus first on establishing a waterproof foundation to protect your investment. Follow this by carefully laying your tiles, paying close attention to precision and alignment. Only once the grout has fully set should you move on to installing your fixtures, such as brass hardware from trusted brands like Rocky Mountain Hardware. Save the lighting installation, especially decorative lanterns, for last to guarantee walls are completely cured and sealed before mounting any delicate pieces. This disciplined sequence is key to achieving a flawless Moroccan bathroom retreat.
Key Design Elements
Secure zellige tiles from Mosaic House or Clayhaus at least six weeks prior to starting installation
Begin with waterproofing, proceed to tile placement, then move on to fixture setup in a deliberate order
Attach brass hardware from Rocky Mountain Hardware only after grout has thoroughly dried
Install lanterns at the very end, ensuring walls have fully cured and sealed beforehand
Pro Tip: Carefully plan each step and never rush grout curing—this is the most frequent cause of ruined Moroccan bathroom finishes.
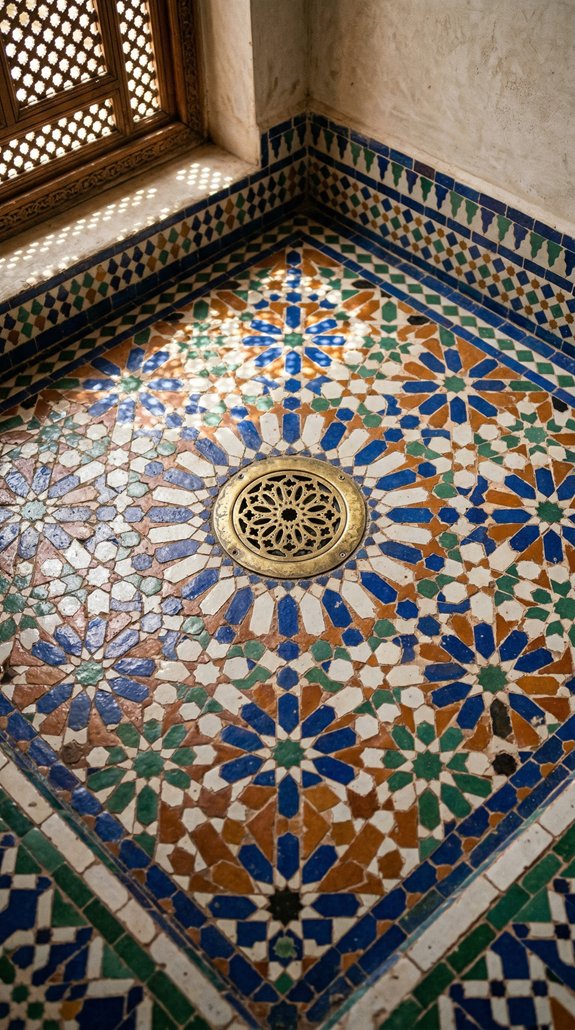
13. Artistic Zellige Tiles: Elevate Your Moroccan Bathroom Flooring
Incorporating zellige tile flooring can elevate your bathroom from merely practical to an inspiring space that captivates each time you enter. These meticulously handcrafted mosaics weave intricate visual narratives beneath your feet, transforming simple flooring into a true masterpiece. The play of glazed surfaces adds dynamic shifts in texture and light, moving from subtle matte finishes to vibrant gleams as the day unfolds. By choosing zellige, you bring a timeless Moroccan craft into your home, creating a bathroom experience rich with cultural depth and artistic charm.
Key Design Elements
Opt for geometric star patterns to make a striking and classic Moroccan impression
Select flowing arabesque motifs to introduce gentle, organic movement across the floor
Feature a medallion design at the center to serve as a captivating visual anchor
Surround field tile patterns with a distinct border to define and enhance the room’s layout
Pro Tip: Apply a penetrating sealant to your zellige tiles prior to grouting to safeguard against stains and maintain their natural beauty.
14. Enchanting Illumination: Crafting the Perfect Moroccan Ambiance
In Moroccan interiors, lighting serves as more than just a practical necessity—it shapes the entire atmosphere, turning your bathroom into a serene retreat. By thoughtfully combining various light sources, you can highlight the intricate beauty of zellige tiles and the textured charm of plaster walls with captivating shadow plays. The key is to build layers of light that invite warmth and depth rather than relying on harsh overhead fixtures.
Consider suspending a delicately perforated brass lantern just above your freestanding tub. This creates a mesmerizing dance of patterned light and shadow across surrounding surfaces, elevating the space’s mood instantly. Incorporating dimmer controls allows you to adjust the illumination effortlessly, tailoring each moment from bright and lively to soft and intimate. Complement this setup with strategically placed wall sconces near mirrors to maintain practical lighting without disrupting the carefully curated ambiance.
Key Design Elements
Combine traditional Moroccan lanterns with softer ambient pendants to achieve a multi-dimensional lighting effect
Position a brass lantern with intricate cutouts low above the bathtub to cast decorative light patterns
Equip all lighting fixtures with dimmer switches to flexibly manage the room’s brightness and vibe
Place wall sconces beside mirrors to provide essential task lighting while preserving the overall atmosphere
Pro Tip: Suspend a brass lantern with detailed perforations just above your freestanding tub to enjoy stunning geometric shadows playing on your zellige walls.
15. Transform Your Shower with Vibrant Zellige Tiles
Step into a bathroom dominated by zellige tiles, and your eyes will naturally be drawn to the shower area. These handcrafted Moroccan tiles, with their unique irregularities and glossy finish, bring a richness and texture that mass-produced ceramics simply can’t match. Installing zellige from floor to ceiling creates a stunning backdrop that feels both artisanal and timeless.
For a striking look, arrange the tiles in a running bond pattern, alternating hues like deep teal, creamy ivory, and warm burnt sienna. Complement this vivid palette with privacy glass panels that subtly diffuse light, enhancing the ambiance without overshadowing the beautiful tile work. To ensure longevity, opt for frost-resistant zellige designed to withstand the temperature changes typical in showers, and meticulously seal every grout line to maintain durability and beauty over time.
Key Design Elements
Select frost-resistant zellige tiles to avoid damage from sudden temperature shifts in the shower environment
Lay tiles in a running bond style, mixing rich teal, soft ivory, and earthy burnt sienna for dynamic contrast
Thoroughly seal each grout seam to safeguard the installation’s integrity for many years
Use privacy glass panels to gently diffuse the space while showcasing the tile’s handcrafted details
Pro Tip: Always pick frost-resistant zellige specifically engineered for the humid, temperature-fluctuating conditions of showers.
16. Choosing the Perfect Grout Shade for Your Moroccan Zellige Tiles
After selecting the ideal color scheme for your zellige tiles, the grout shade becomes a subtle yet vital element that can enhance or detract from the overall look. When working with warm, earthy tones, opting for a soft gray grout helps blend the tiles together smoothly, highlighting their artisanal texture without overshadowing it. For more vibrant palettes featuring rich blues or lush greens, a deep charcoal grout adds definition, emphasizing each tile’s shape and lending a striking, mosaic-inspired appearance.
Many professionals trust Laticrete Permacolor Select for its consistent performance and beautiful finish, making it a go-to choice for zellige installations. It’s best to steer clear of stark white grout, as it tends to highlight inconsistencies, turning the natural, handcrafted qualities of the tiles into unwanted distractions rather than celebrated details.
Key Design Elements
Pair warm gray grout with earthy zellige shades to create a cohesive, harmonious look
Use dark charcoal grout to accentuate bold blue and green tiles for a sharp, graphic effect
Consider Laticrete Permacolor Select, a trusted grout favored by experienced installers
Avoid bright white grout since it can exaggerate natural variations and appear as flaws
Pro Tip: Bright white grout can make handcrafted nuances seem like imperfections—always choose a softer tone to preserve zellige’s authentic charm.
Conclusion
Now that you’ve explored these 12 stunning Moroccan bathroom designs, it’s time to let your imagination run wild and bring a touch of that enchanting elegance into your own space. With the vibrant charm of zellige tiles and the timeless sophistication of brass accents, your bathroom can become a serene sanctuary that tells a story of artistry and culture. Don’t hesitate to mix bold patterns, rich textures, and warm metals—you have everything you need to create a space that’s uniquely yours.
Embrace the journey of transformation with confidence and joy, knowing that every small detail adds to a bigger, beautiful vision. Your Moroccan-inspired bathroom awaits, ready to envelop you in warmth and wonder every day. So go ahead—start your transformation today and watch your dream oasis come to life right before your eyes.
Step into any home, and the entryway sets the tone for what lies beyond—a first impression that welcomes guests with warmth and style while reflecting the homeowner’s personality. Studio McGee, the acclaimed interior design firm founded by Shea and Syd McGee, has mastered the art of creating entryways that blend timeless charm with modern functionality. Their signature Modern Farmhouse and Modern Rustic aesthetic transforms these transitional spaces into inviting gateways that perfectly balance comfort and sophistication.
Why do entryways matter so much? Beyond being the literal threshold, they serve as a visual conversation starter, a place for practical storage, and an opportunity to showcase thoughtful design. In this post, we’ll explore Studio McGee-inspired entryway ideas that embrace natural textures, clean lines, and subtle layering—proving that a beautifully designed entry can elevate your entire home’s ambiance. Whether you’re dreaming of a cozy nook for dropping keys or an elegant setting that invites guests in style, these tips will inspire you to create an entryway that’s as functional as it is unforgettable.
1. Add a Personal Touch
When it comes to designing your entryway, the most impactful approach is to infuse it with elements that truly reflect who you are. Rather than copying trendy looks you’ve seen online or in magazines, focus on what speaks to your personal story and style. Professional designers often begin their process by learning about their clients’ passions, favorite colors, and meaningful memories—an approach that you can easily adopt in your own space. This thoughtful foundation helps create an entryway that feels authentic and welcoming from the moment you step inside.
Start by incorporating items that resonate deeply with you and your family. Whether it’s framed photos capturing special moments, cherished heirlooms, or artwork that evokes emotion, these pieces serve as visual storytellers that make your entryway unique. Handmade touches—like a woven basket, a painted sign, or a crafted planter—also add a layer of personality and warmth. By curating a blend of treasured objects and creative expressions, your entryway becomes more than just a passageway; it transforms into a meaningful introduction to your home’s character.
2. Place an Entryway Rug
A well-chosen rug in your entryway does more than just protect your floors—it sets the tone for your entire home. Since this area endures constant foot traffic, opting for a durable, easy-to-clean rug will safeguard your surfaces from dirt and scuffs brought in on shoes. Beyond practicality, an entryway rug acts as a welcoming statement piece, introducing texture, pattern, or a splash of color that instantly enlivens the space.
Think of the rug as the foundation of your entryway’s design. It can anchor your furniture, create a defined zone, and offer a cozy touch underfoot. Whether you prefer bold, vibrant hues or subtle, neutral tones, the right rug can elevate the ambiance while handling everyday wear with grace. By investing in a stylish, functional rug, you transform your entryway from a simple passage into a polished and inviting introduction to your home.
3. Add Interest by Combining Textures
An entryway sets the tone for your entire home, and layering different textures is a powerful way to create an inviting and dynamic first impression. When you thoughtfully blend materials like weathered wood, smooth ceramics, reflective glass, and sleek metals, you introduce a tactile richness that elevates even the simplest spaces. This interplay of surfaces adds depth and character, making your foyer feel both sophisticated and welcoming.
Textures don’t just appeal to the eye—they engage the senses and invite touch, which makes an entryway truly memorable. Imagine the contrast of a polished brass handle against a rustic wooden bench, or the gleam of a ceramic vase perched next to a matte stone bowl. Such combinations break up the visual monotony and help different elements harmonize, resulting in a curated yet effortless aesthetic that draws visitors inward with genuine warmth.
4. Go for a Round Table
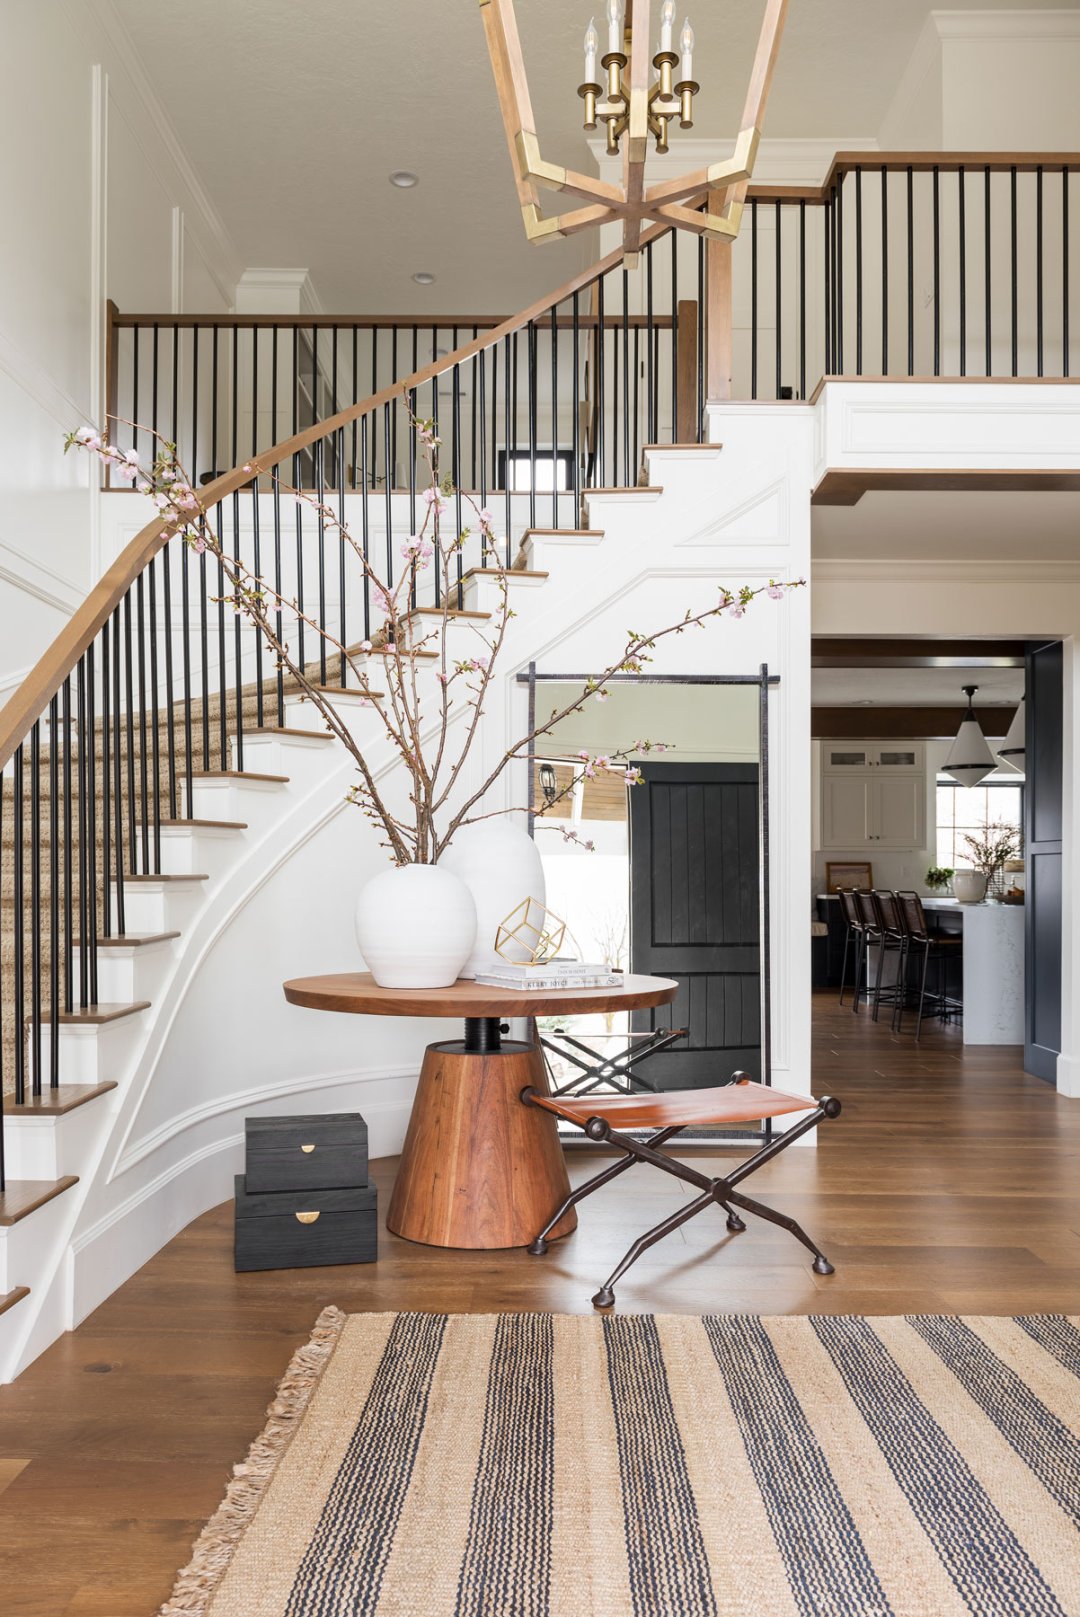
When you have the luxury of ample square footage near your entryway, consider introducing a round table to anchor the space. This simple addition not only provides a stylish focal point but also transforms the area into a welcoming spot for casual gatherings or impromptu meals. The circular shape naturally encourages flow and conversation, breaking away from the rigid lines often found in traditional hallways.
In one standout design, a sweeping curved staircase is artfully balanced by a round table that invites warmth and elegance into the room. Accentuating the table with an arrangement of twisting branches injects an organic touch, blending nature with the architecture. This unexpected detail adds texture and character, making the entry feel vibrant and alive, while subtly setting the tone for the rest of the home.
5. Invest in a Statement-Making Table
Choosing a bold, eye-catching piece of furniture can instantly elevate the atmosphere of your entryway, turning a simple passage into a captivating introduction to your home. Instead of relying on numerous decorative elements, a standout console or table can serve as the centerpiece, anchoring the space with personality and charm. When thoughtfully selected, this key item does most of the heavy lifting, setting the tone for the rest of your décor without overwhelming the senses.
Take, for instance, a sleek, naturally finished console that combines clean lines with organic textures—this kind of furniture not only adds visual interest but also invites a sense of warmth and approachability. By placing such a piece near the doorway, you create an inviting spot that immediately draws the eye, encouraging guests to pause and appreciate the thoughtful design. With just one statement piece, your entryway becomes a memorable gateway, blending function and style with effortless grace.
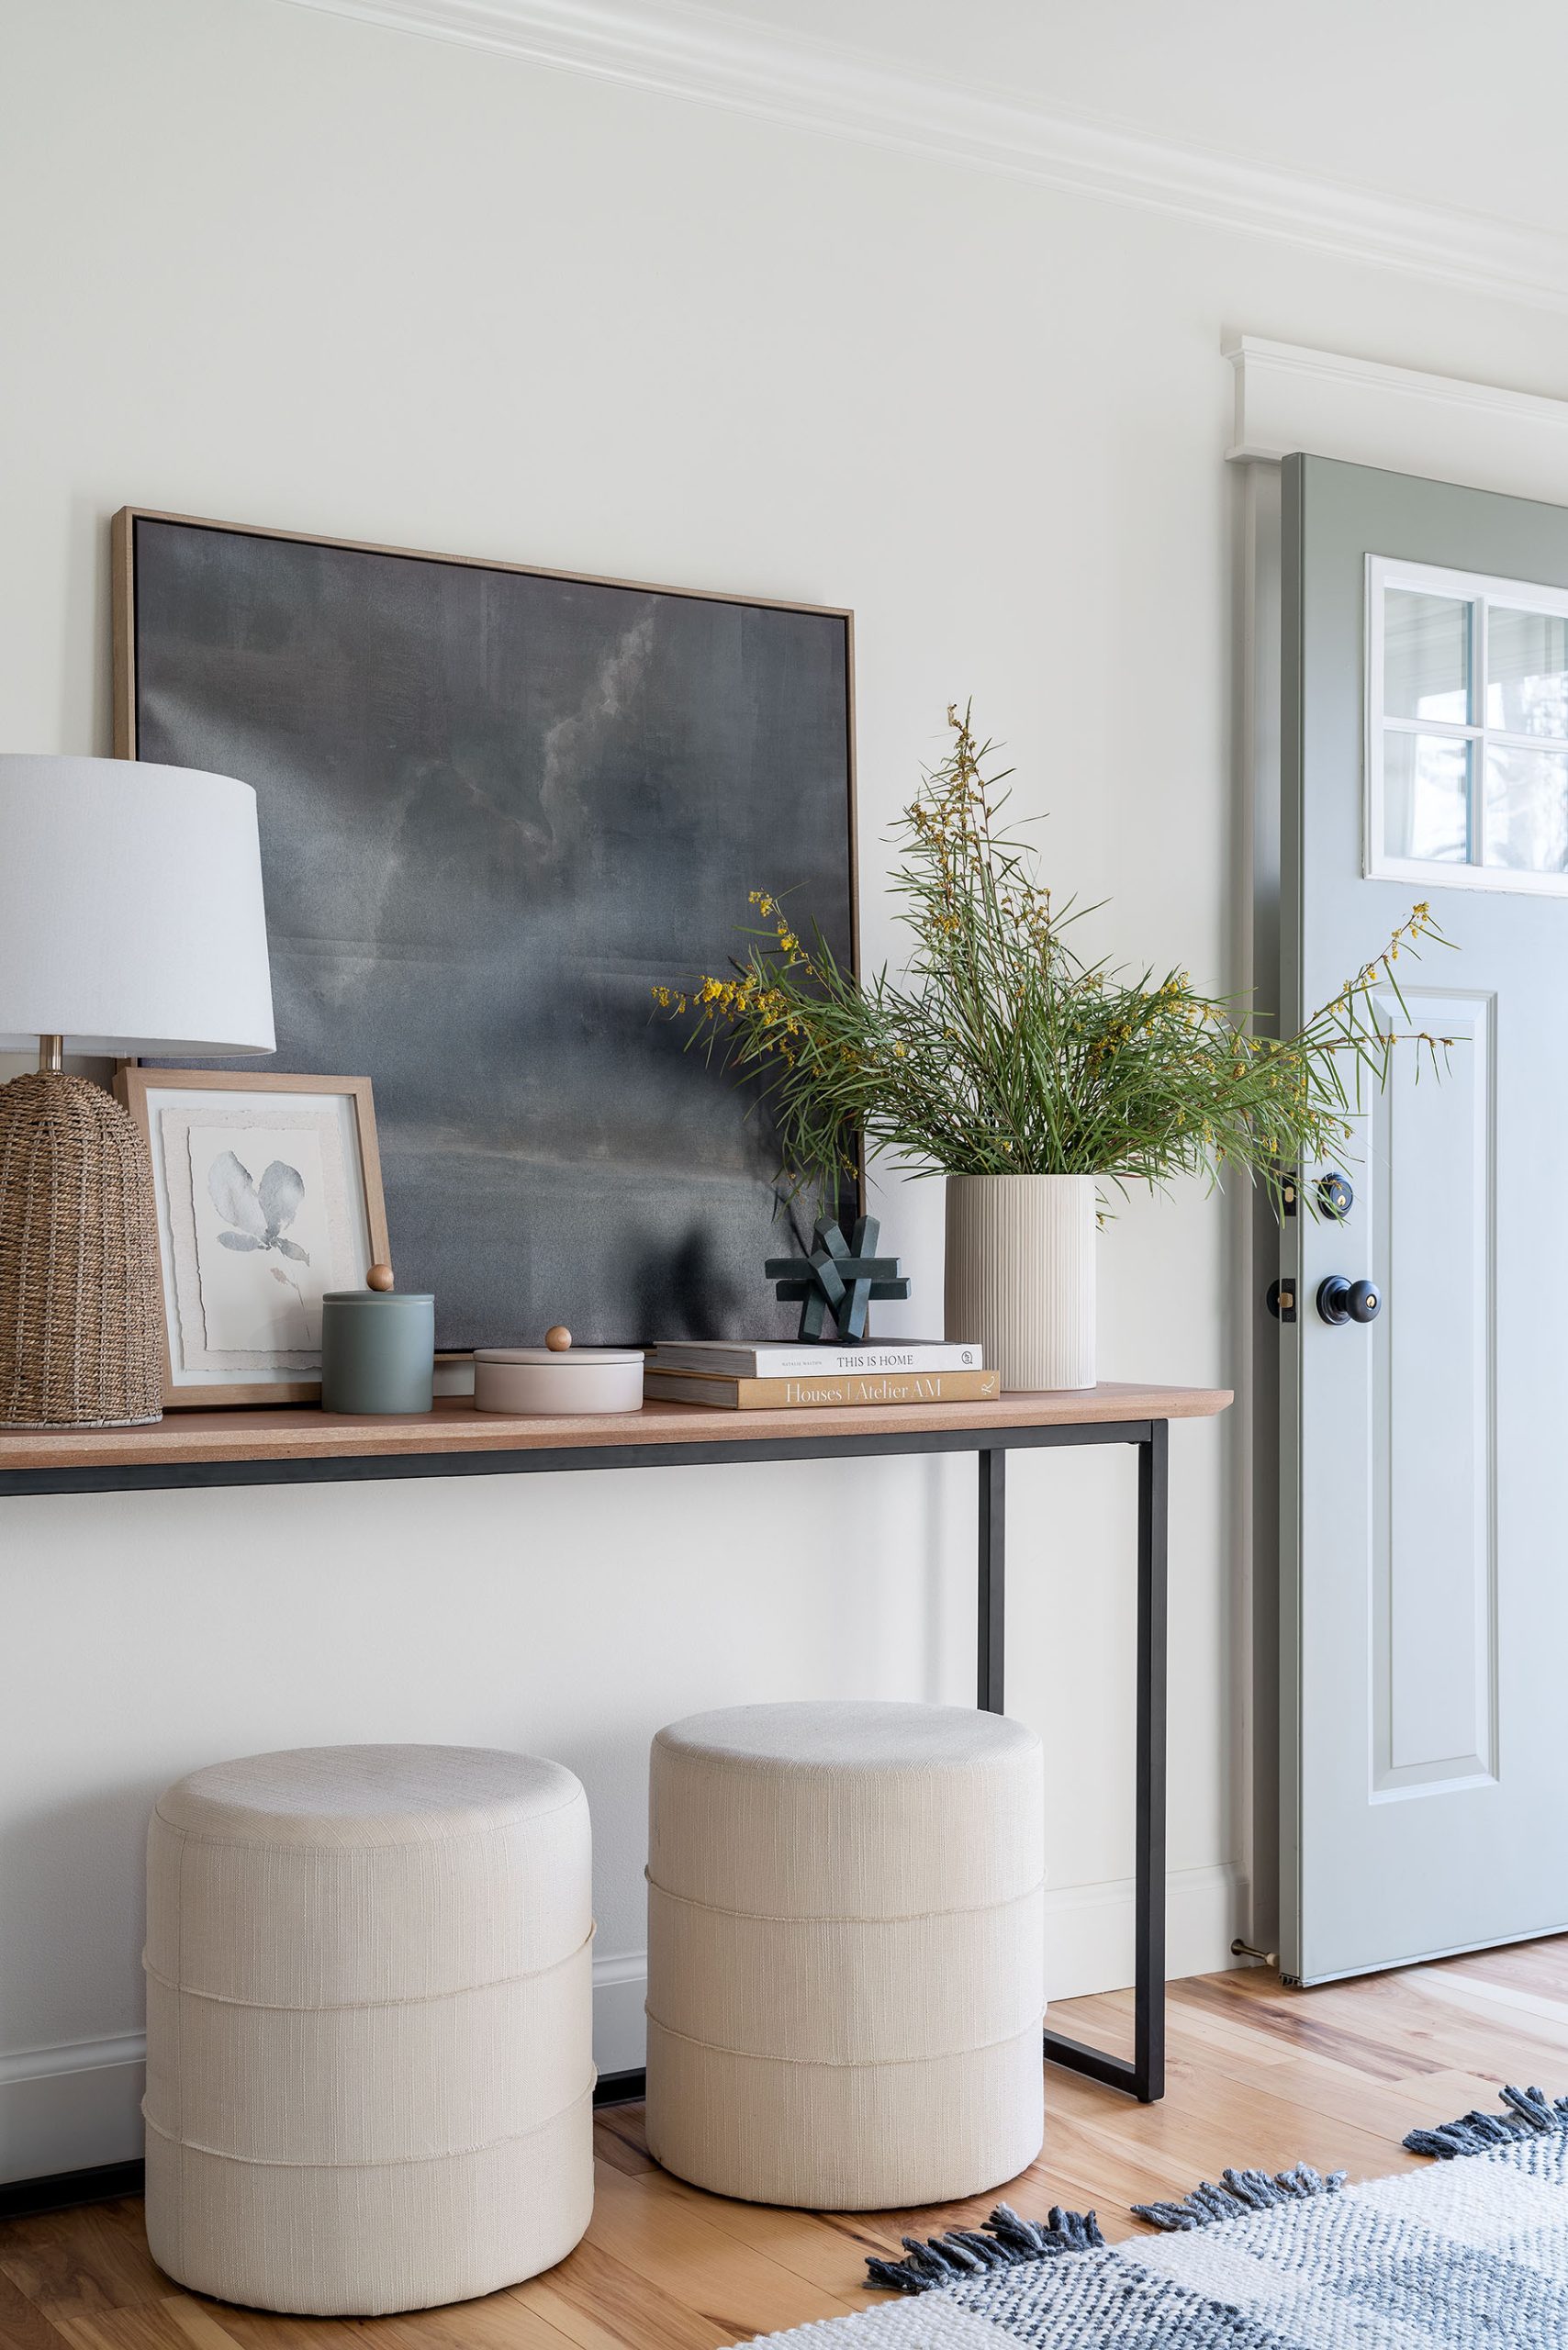
6. Invest in the Storage Ottoman
Adding a storage ottoman to your entryway is a smart way to blend functionality with flair. These versatile pieces not only offer a cozy spot to sit while putting on or taking off shoes but also provide concealed compartments perfect for stashing everything from scarves to pet leashes. By keeping everyday essentials tucked away, storage ottomans help maintain a neat and welcoming space right at your doorstep.
Beyond their practical benefits, ottomans can serve as a stylish anchor that elevates your entryway’s overall aesthetic. Whether you choose one upholstered in plush velvet, classic leather, or a textured fabric, the right ottoman can add a touch of warmth and sophistication. This simple yet impactful addition transforms a high-traffic area into a seamless blend of comfort and chic organization, making your home’s first impression effortlessly inviting.
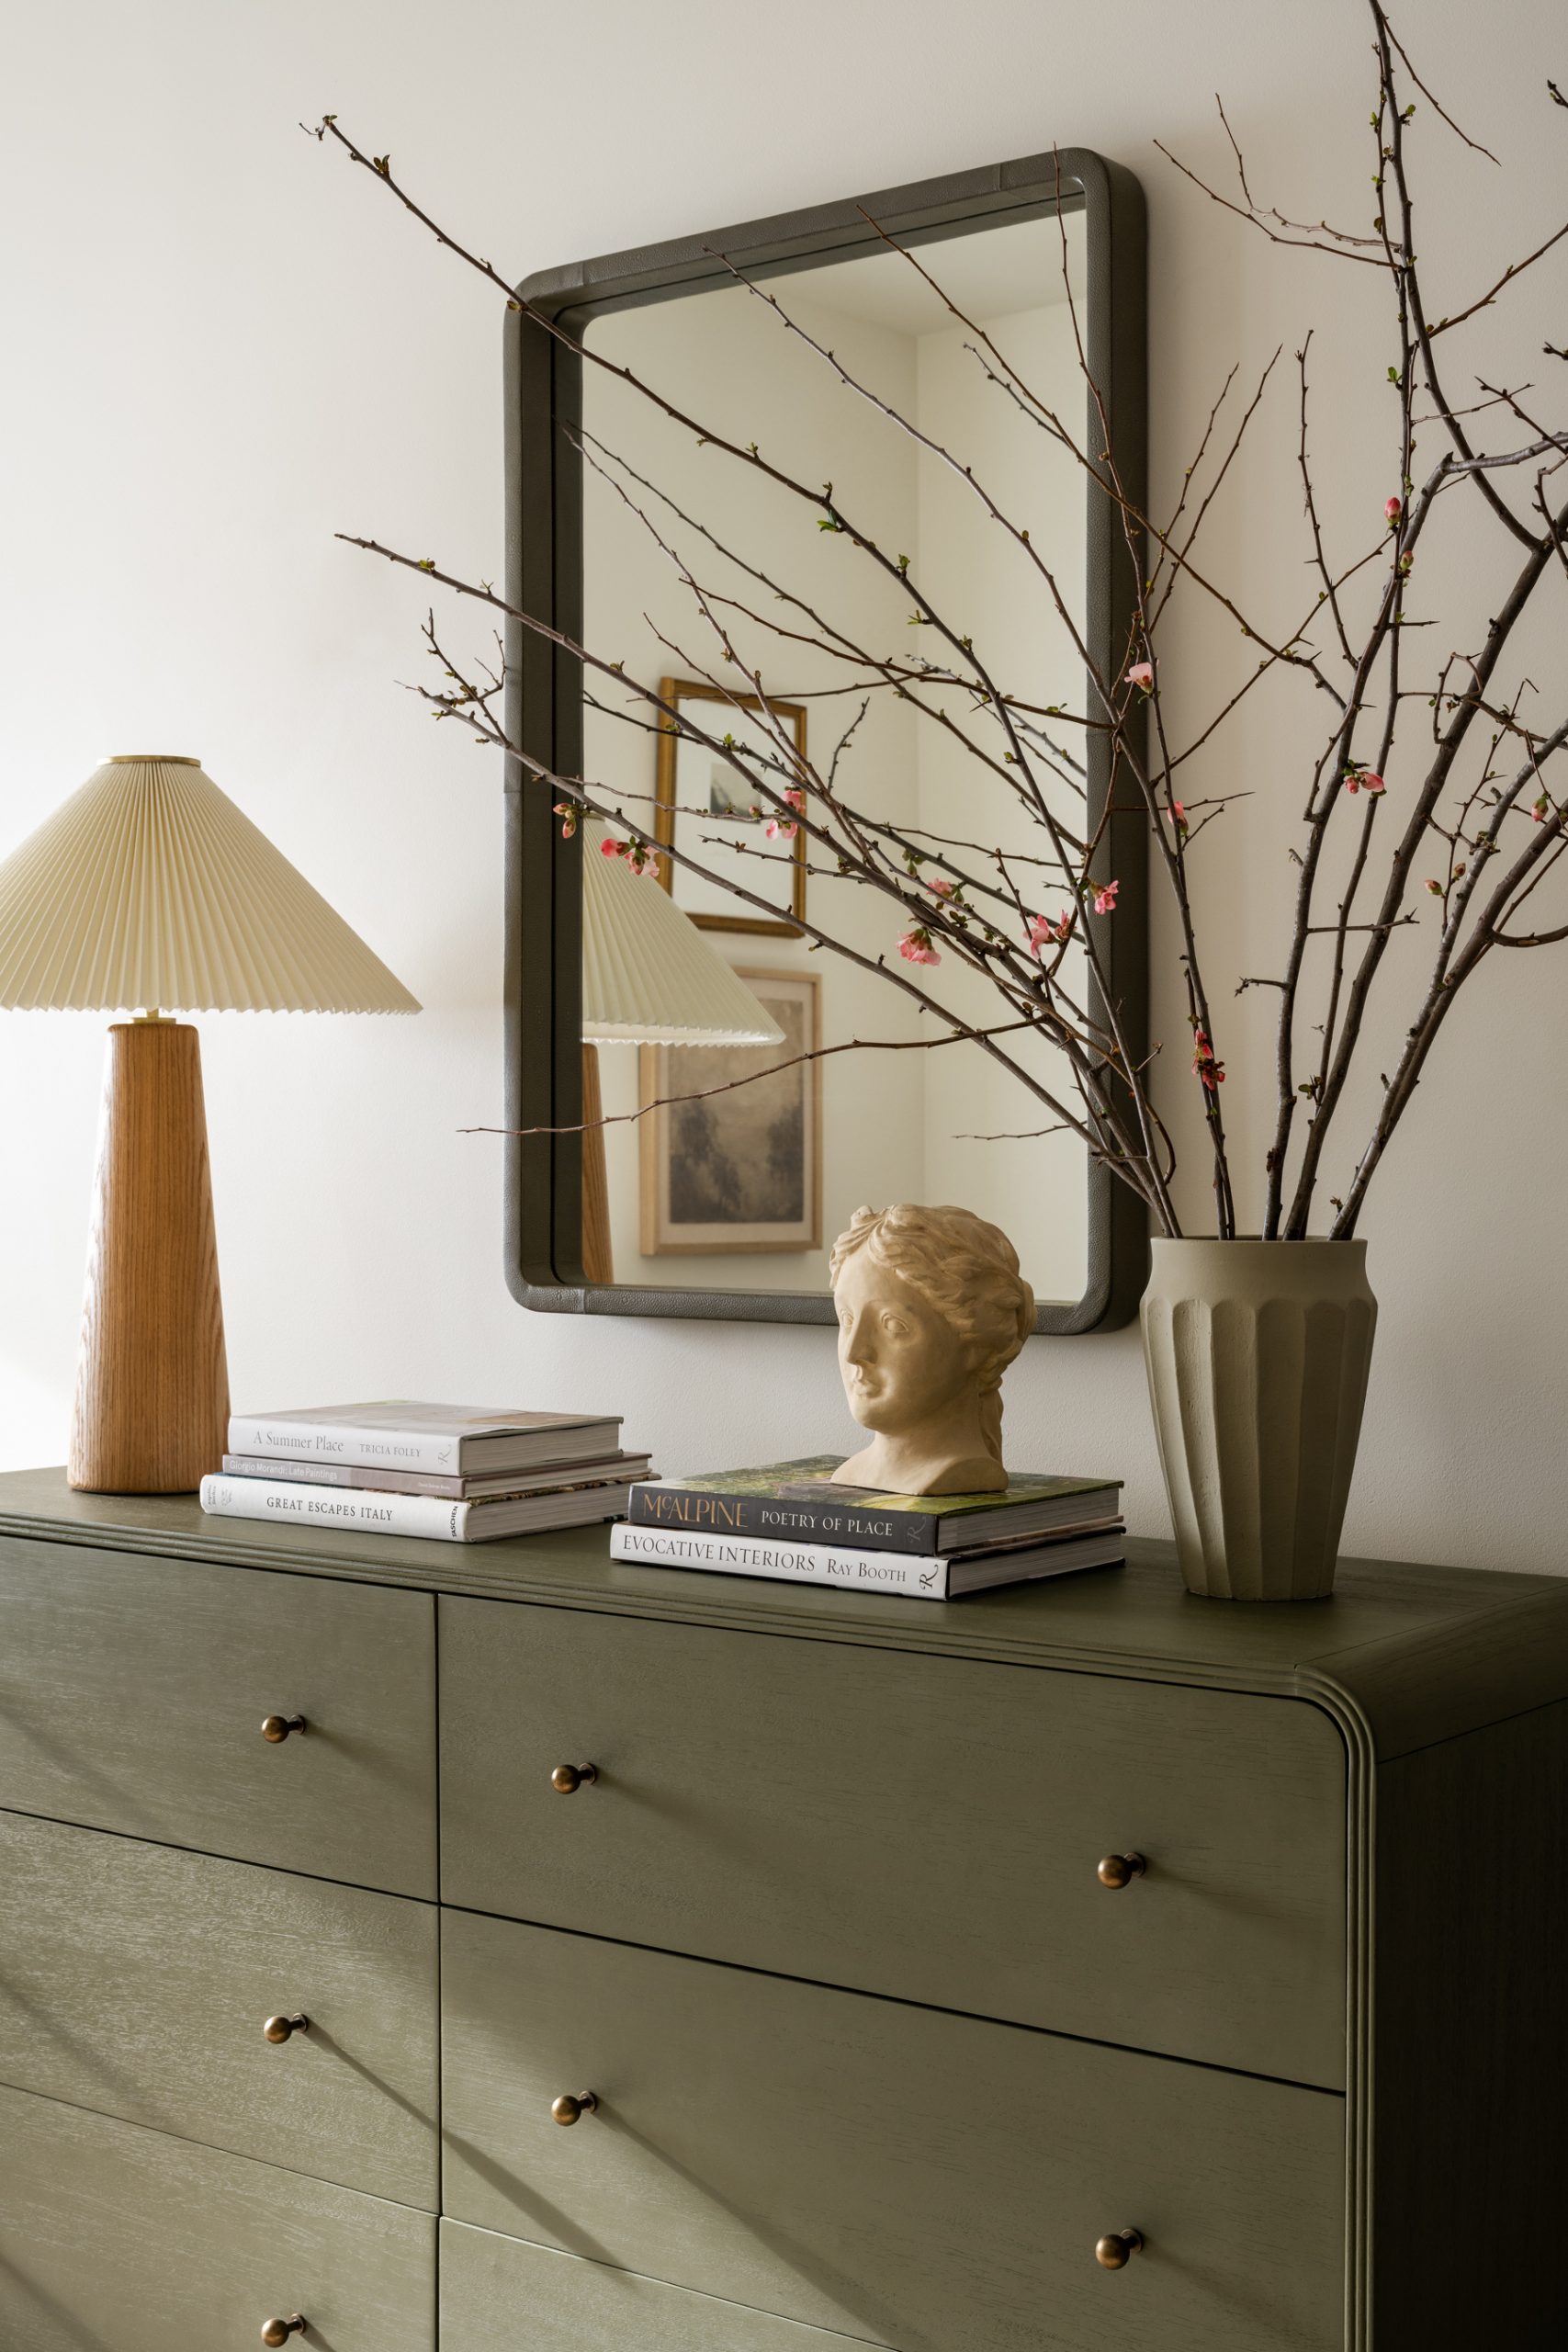
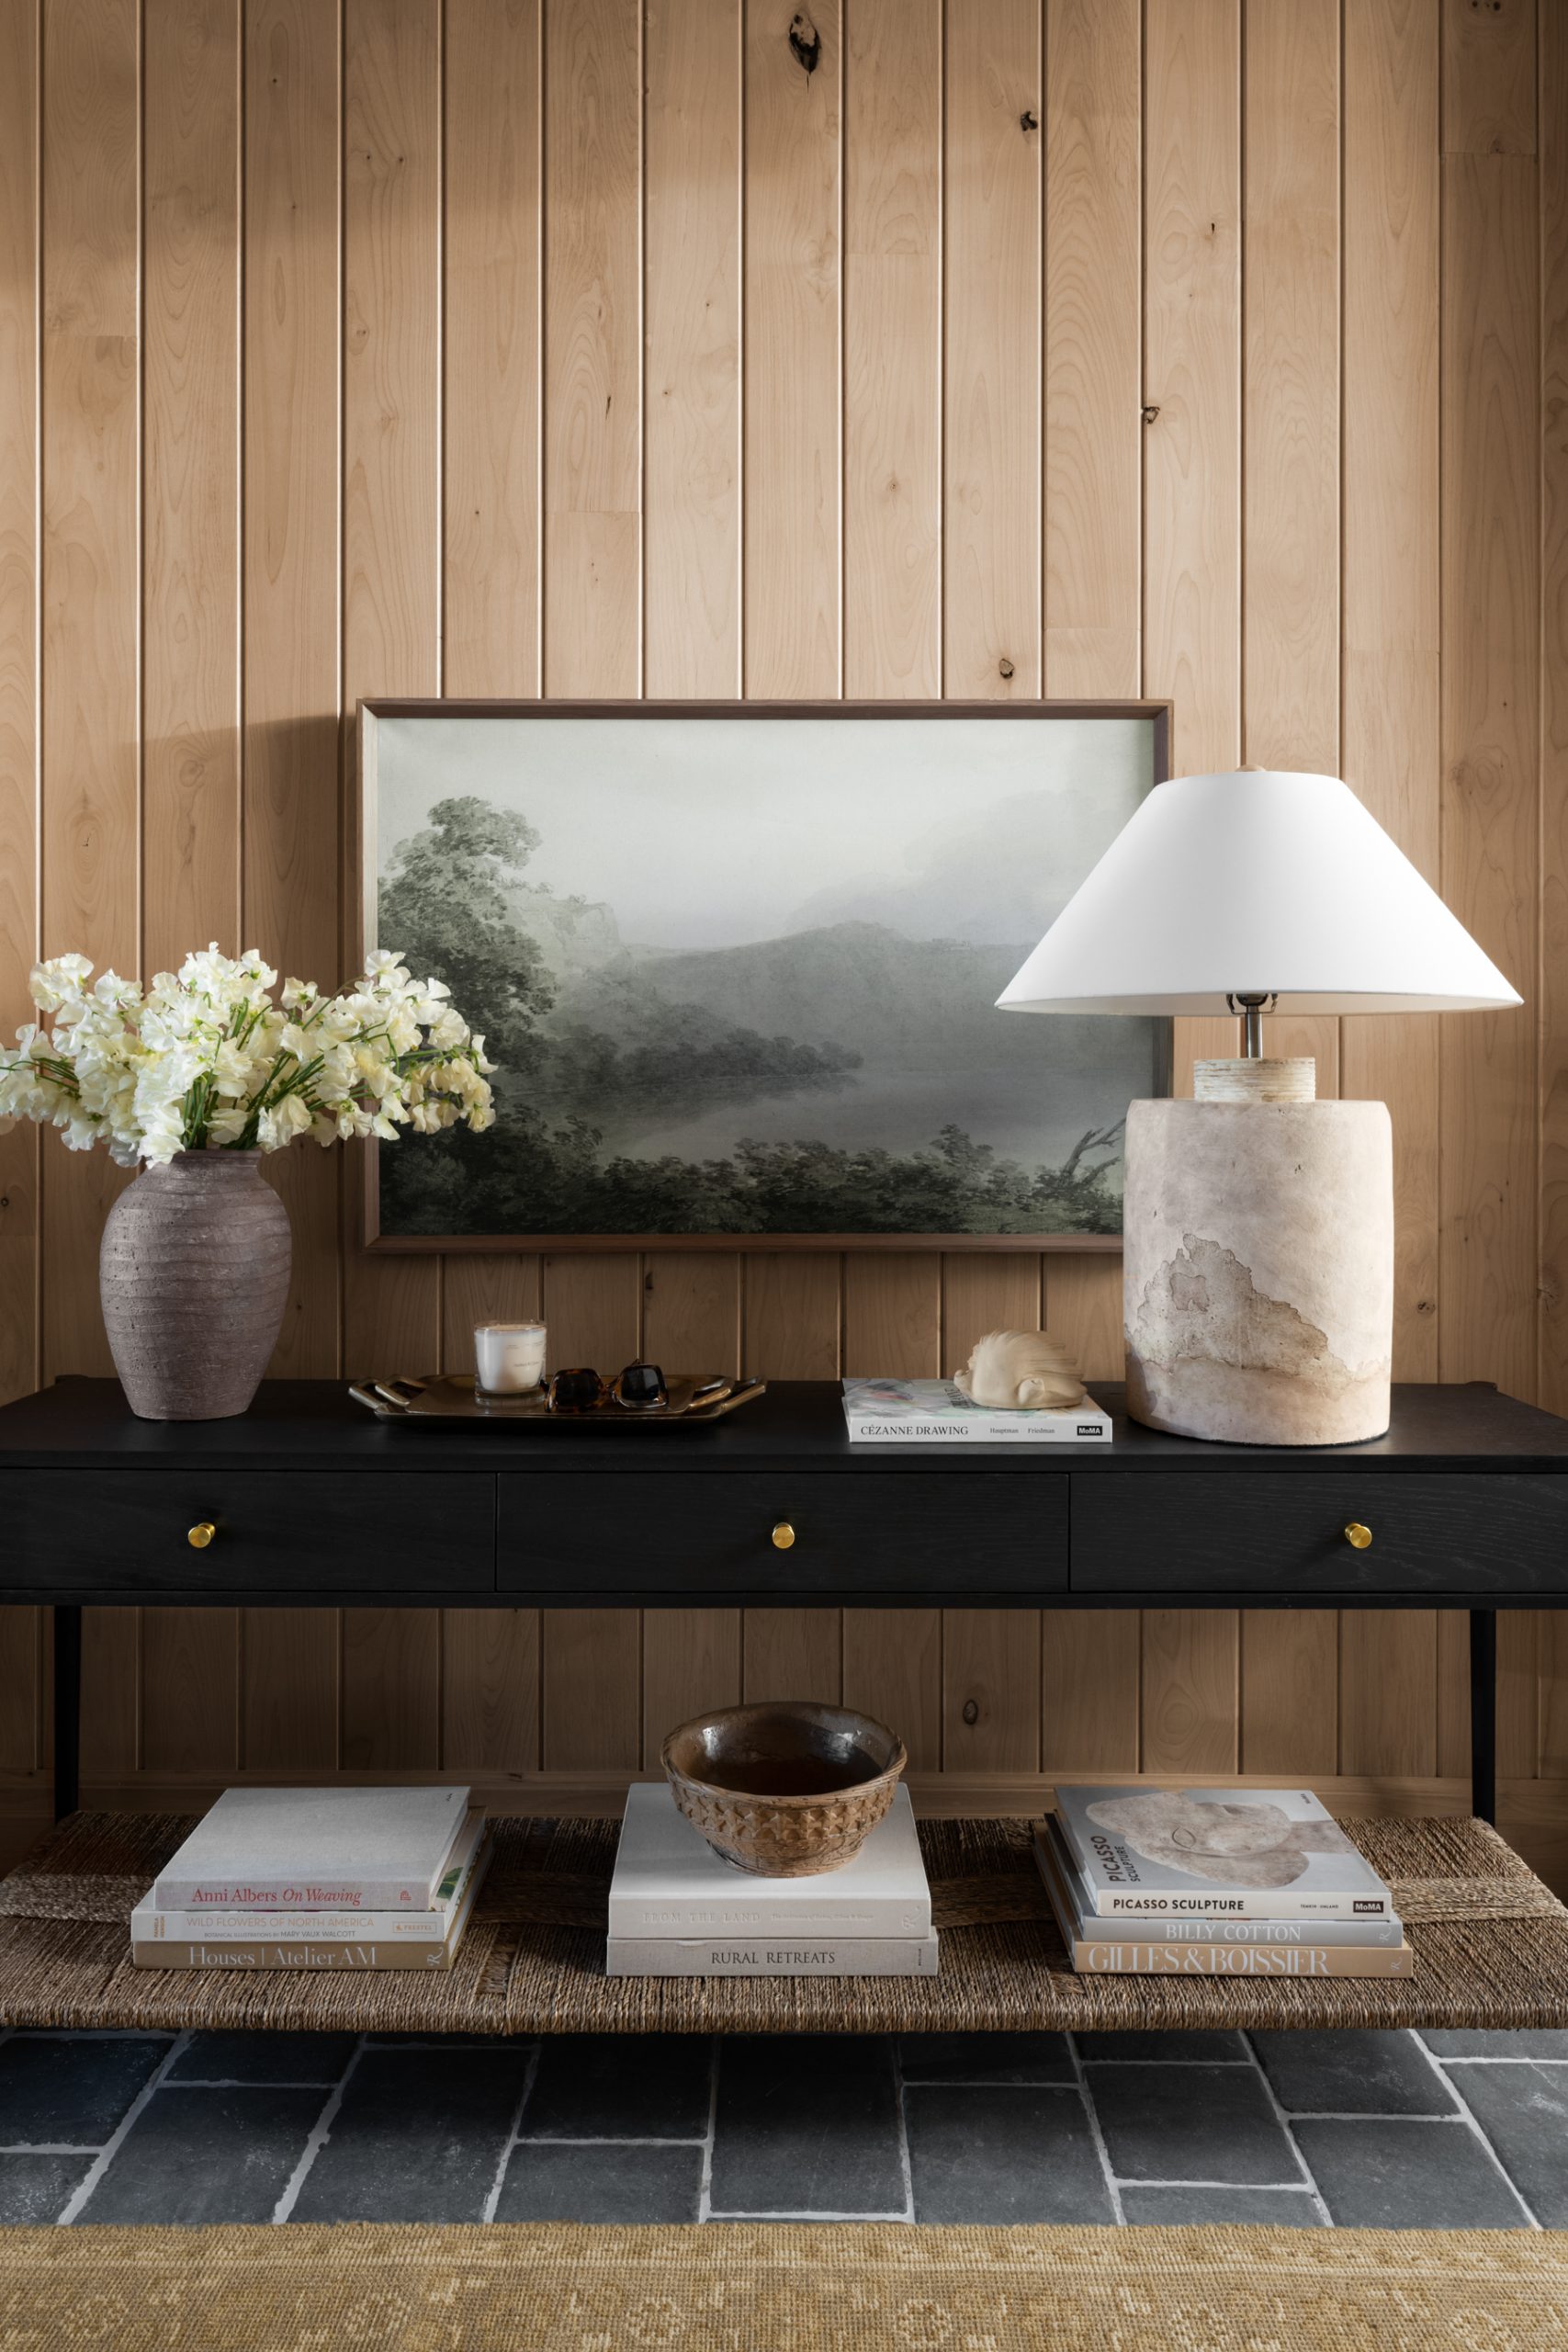
7. Display Aesthetic Books
Incorporating carefully selected books into your entryway setup can transform the space from ordinary to effortlessly polished. Beyond their traditional role as reading material, books serve as chic decorative elements that introduce texture and subtle personality to the room. Choosing volumes with subdued color palettes and simple, elegant covers ensures they complement rather than clash with your existing décor, creating a harmonious visual flow.
When arranged thoughtfully—whether stacked on a console table, nestled beside a vase, or layered under a stylish tray—books become more than just objects; they act as conversation starters and style amplifiers. This understated approach reflects a curated lifestyle, where each piece, including these literary accents, contributes to an inviting and sophisticated welcome for guests.
8. Complement Your Existing Interior Style
Creating a seamless flow from your entryway into the rest of your home is key to designing a welcoming and harmonious space. Think of your entry as the opening note of a song—it sets the tone for what follows. By echoing the colors, textures, and overall vibe of your main living areas, your entryway naturally feels connected rather than isolated. Whether your home leans towards modern minimalism, rustic charm, or something eclectic, allowing those influences to shine through right at the door ensures visitors experience a true preview of your style.
What makes a thoughtfully designed entry stand out is its ability to honor the home’s original spirit instead of overpowering it. Designers like those at Studio McGee often emphasize this approach, selecting pieces and finishes that enhance the existing architectural character rather than clash with it. This mindful curating creates an inviting threshold that nods to the past while still feeling fresh and intentional. In essence, your entryway should feel like a warm handshake—reflective of the personality found throughout your home.
9. Draw Interest with Shapes
Incorporating distinctive shapes into your entryway design offers a powerful way to infuse personality and visual intrigue into the space. Rather than relying solely on color or texture, bold geometric forms or unexpected curves can create dynamic focal points that immediately capture attention. Whether it’s an eye-catching mirror with an unconventional contour, a sculptural lamp, or a basket with an asymmetrical design, these elements break up monotony and breathe life into an otherwise understated area.
When thoughtfully selected, shapes can transform a minimalist entryway from feeling cold or bland into a welcoming atmosphere full of subtle flair. The key lies in blending these shapes harmoniously with the overall aesthetic while allowing each piece to stand out on its own merit. By integrating furniture or accessories with unique silhouettes, you add layers of complexity and sophistication, ensuring guests are impressed from the moment they walk through the door.
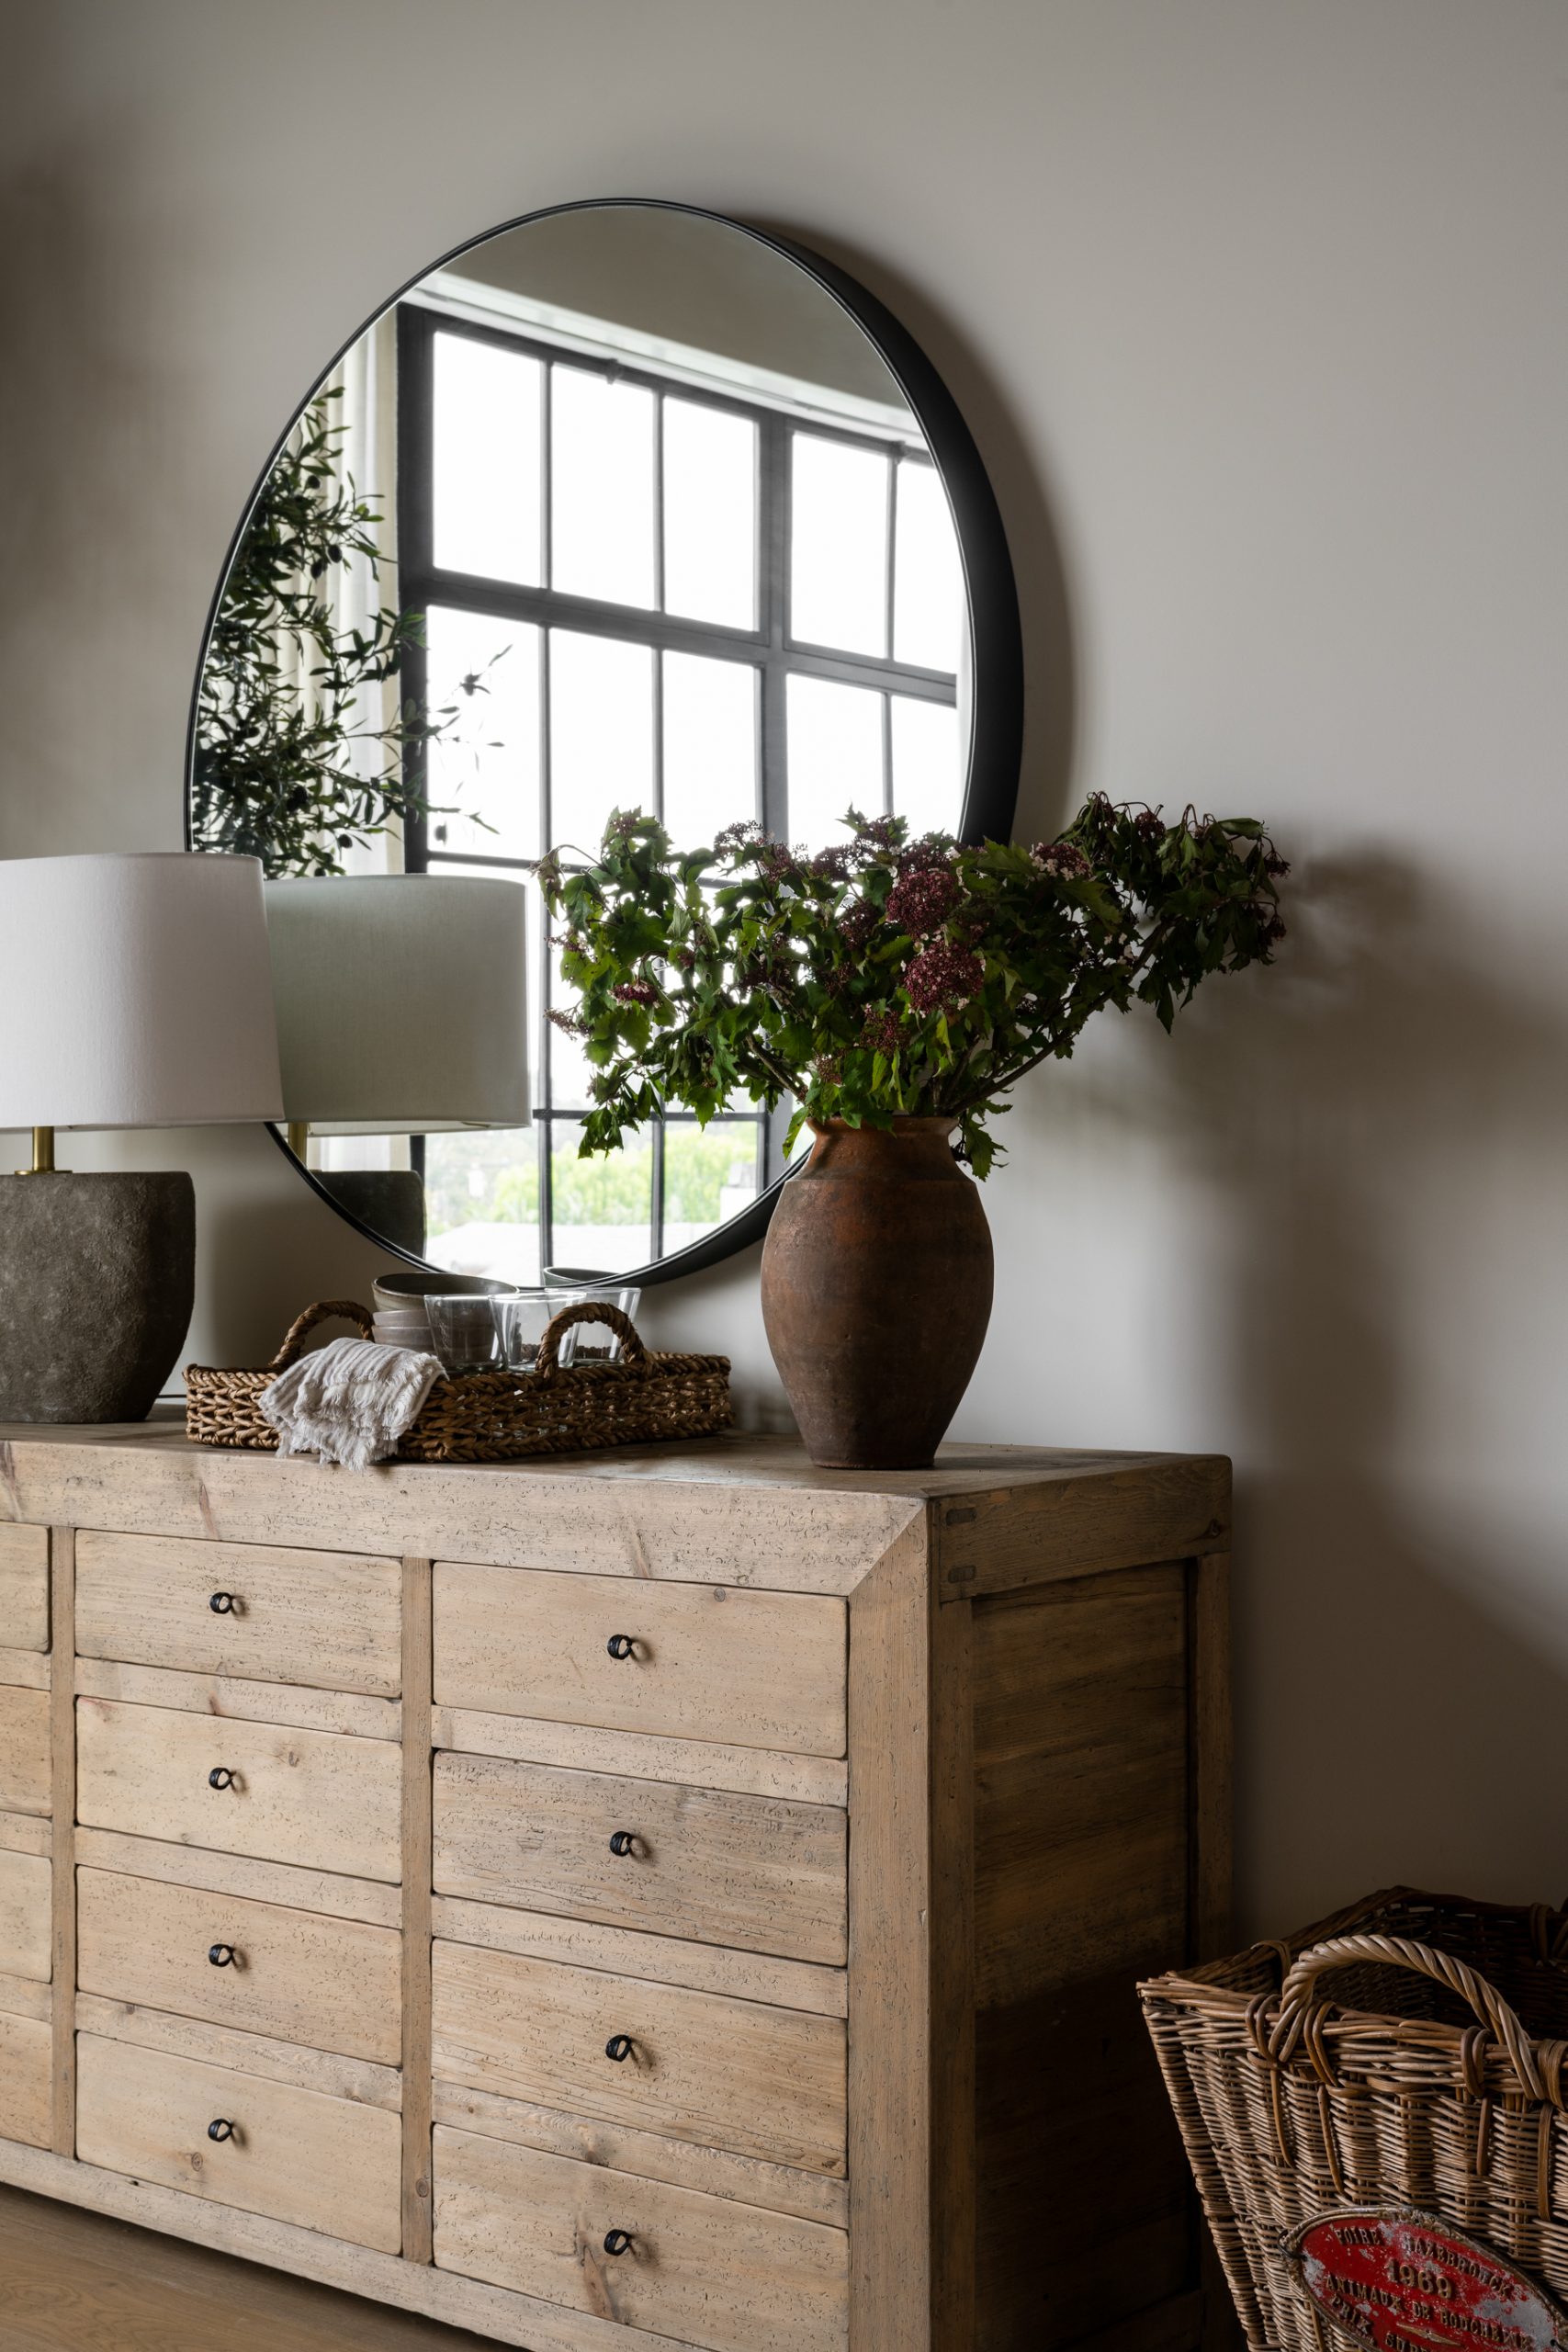
10. Consider a Reclaimed Drawer Chest
When you’re working with a spacious entryway, introducing a drawer chest crafted from reclaimed wood can be a game-changer. These pieces infuse the area with a warm, earthy vibe while offering practical storage that keeps clutter at bay. The beauty of reclaimed wood lies in its unique patina and storytelling grain—each scratch and knot adds depth and personality that new furniture simply can’t replicate. This approach is especially effective for those who lean toward rustic or vintage-inspired interiors, where authenticity and texture take center stage.
Incorporating a drawer chest made from salvaged materials also encourages sustainability, giving new life to wood that might otherwise be discarded. When paired with carefully curated accents—think timeworn ceramics, textured textiles, or softly glowing lanterns—the ensemble transforms the entrance into a welcoming vignette that feels both grounded and inviting. Such thoughtfully layered decor invites guests to pause and appreciate the subtle charm of an entryway that’s equal parts functional and artful.
11. Use a Layering Technique
When designing an entryway, think of it as a stage where each piece plays a unique role, contributing to a dynamic and inviting atmosphere. Rather than lining up items in perfectly matched pairs, experiment with an eclectic mix of objects that differ in size, shape, and height. This approach invites the eye to explore and discover, transforming a simple passage into a lively, personality-filled space.
Mixing textures and forms in unexpected ways can bring depth and richness to the area, making the entry more than just functional—it becomes an artistic statement. By thoughtfully layering these elements, you give each piece room to breathe while allowing the overall composition to feel cohesive and balanced, striking the perfect harmony between order and spontaneity.
12. Place a Bench Instead of a Table
Ditch the traditional entryway table and introduce a sleek, backless bench for a more inviting and functional focal point. This setup not only offers a cozy spot for slipping on shoes but also adds a subtle layer of texture and warmth when upholstered in soft fabrics. Elevate the vibe by layering a couple of decorative cushions in complementary hues or patterns, turning the bench into a stylish perch that doubles as practical seating.
To breathe life into the space, incorporate a tall, leafy plant nearby—its natural greenery bringing freshness and a calming presence to the entryway. Balance the arrangement by hanging striking artwork above the bench, opting for pieces that captivate without overwhelming. Together, these thoughtful elements create a welcoming, polished area that effortlessly combines elegance with everyday utility.
13. Use a Minimalist Artwork
When designing an entryway, simplicity often creates the most lasting impression. Rather than overwhelming the space with bold hues or intricate patterns, select artwork that offers calm and balance. A piece with clean lines, subtle tones, and uncluttered forms can provide a sophisticated focal point without competing with other elements in the room.
Choosing a minimalist approach allows the entryway to feel open and inviting, setting a welcoming tone for the rest of your home. Art that embraces restraint and elegance lends an effortless chicness, making the area feel thoughtfully curated yet refreshingly serene. This refined simplicity ensures your entryway remains timeless and adaptable, no matter how your style evolves over time.
14. Use an Oversized Lamp
One of the most effective ways to elevate your entryway is by introducing a statement lamp that breaks away from typical proportions. Opting for a generously sized table lamp instantly injects personality and sophistication into the space, creating a focal point that draws the eye and sets an inviting tone. This bold lighting choice transforms a simple nook into a stylish vignette that feels carefully curated rather than ordinary.
Beyond its striking aesthetic, a large lamp offers practical benefits by casting warm, welcoming light that enhances the mood during evening hours. The scale helps balance other elements in the entryway, preventing the space from feeling cramped or underwhelming. When thoughtfully selected with unique textures or finishes, an oversized lamp not only brightens the room but also becomes an artful accessory that reflects your design sensibility.
15. Paint Your Existing Console Table
If you want to give your entryway a fresh update without spending a fortune, consider transforming your current console table with a splash of paint. A simple change in color can completely redefine the feel of the space, turning a tired piece into a bold statement. Whether you opt for a trendy matte finish or a glossy lacquer, the right paint job can breathe new life into the surface and instantly uplift the entire area.
Alternatively, sourcing a secondhand console table from thrift shops or online marketplaces offers a budget-friendly opportunity to personalize your foyer. Once in hand, customize it with hues that match your style and complement your home’s palette. Don’t forget to give attention to the hardware too—repainting or swapping out knobs and handles can amplify the transformation, ensuring your entryway looks thoughtfully curated and uniquely yours.
16. Keep It Clean and Bright
Entryways often serve as compact transition zones, which can sometimes feel cramped or dim when natural light is limited. To transform this area into a welcoming and airy space, focus on incorporating light-reflecting surfaces and a soft color palette. Shades like soft whites, pale grays, and warm creams can instantly open up the area, making it feel more expansive and inviting.
A strategically placed mirror can work wonders, bouncing available light around the room and giving the impression of depth where there is little. Complement this with pops of vibrant hues in your accessories—think bright cushions, colorful rugs, or lively artwork—to inject personality without overwhelming the space. By balancing brightness with thoughtful accents, your entryway will become a cheerful introduction to the rest of your home.
17. Add Seasonal Touches
Transforming your entryway with the rhythm of the seasons is a delightful way to welcome guests and brighten your home’s first impression. Imagine swapping out heavy winter accents for airy spring blooms, or trading vibrant autumn leaves for crisp summer greenery. These subtle shifts not only keep the space feeling fresh and inviting but also create an ever-changing backdrop that celebrates the beauty of nature’s cycles.
In winter, think beyond standard holiday decorations by introducing cozy textures and rich, deep colors paired with twinkling lights or elegant ornaments. As spring rolls around, embrace the season’s renewal with cheerful bunches of tulips, daffodils, or hyacinths, nestled in simple, understated vases that highlight their natural charm. This thoughtful rotation of seasonal elements can turn your entryway into a constantly evolving vignette, showcasing your personal style while harmonizing with the changing world outside.
18. Create a Gallery Wall
Transforming an empty entryway wall into a captivating visual story can elevate the entire atmosphere of your home’s entrance. Curating a collection of artwork, photographs, or meaningful prints puts personality front and center, turning an otherwise overlooked space into a vibrant showcase. This thoughtful arrangement not only injects life and color but also offers guests an immediate sense of your unique style and interests the moment they walk in.
A well-designed gallery wall acts as a dynamic focal point, guiding the eye naturally while providing depth and texture to your entryway. Mixing various frame shapes, sizes, and finishes can add an eclectic charm or a polished uniformity, depending on your preference. More than just decoration, it creates an inviting dialogue that balances creativity with warmth — welcoming visitors with a glimpse into your world right at the doorstep.
19. Opt for Low Maintenance Plants
Bringing greenery into your entryway instantly breathes life and warmth into the space, creating a welcoming atmosphere for both residents and guests. Beyond their decorative appeal, certain plants work quietly behind the scenes to cleanse the air and promote a calming environment, making your home’s first impression not just beautiful but healthful as well. The trick is selecting greenery that thrives with minimal fuss, ensuring it remains vibrant without demanding constant attention.
To strike the perfect balance between style and simplicity, consider hardy, resilient plants known for their durability and air-purifying qualities. Varieties like the sculptural ZZ plant, elegant orchids, or hearty spider plants excel in brightening corners while requiring little upkeep. Their enduring nature means you get to enjoy lush foliage and subtle pops of color without worrying about daily care, allowing your entryway to shine as a refreshing gateway that effortlessly combines aesthetics with wellness.
20. Keep it Clutter-Free
Your entryway is the first impression guests have of your home, so it’s important to maintain a sense of order and calm in this space. Resist the urge to let everyday essentials—like keys, sunglasses, or loose change—pile up on the console. Instead, designate a hidden spot such as a drawer or a small tray to keep these items tucked away, ensuring the surface stays clean and visually inviting.
When it comes to décor, choose a few carefully curated elements that reflect your personal style without overwhelming the area. This might be a stylish vase, a statement mirror, or a piece of artwork that sets the tone for the rest of your home. Additionally, avoid scattering shoes or outerwear directly under the table unless they’re neatly contained in a decorative basket, which helps keep the entryway looking polished and intentional rather than chaotic.
21. Choose a Neutral Color Palette
Opting for a neutral color scheme in your entryway sets the stage for a harmonious and inviting atmosphere. Shades like soft beiges, warm taupes, and gentle greys offer a sophisticated backdrop that feels both modern and enduring. These understated hues not only simplify coordination but also allow natural textures and subtle accents to shine without overwhelming the space.
Incorporating elements like wooden furniture with rich grain patterns or accessories in muted earth tones can add depth and warmth to the entryway. Pairing a natural wood console table with artisanal lighting or a collection of neutral-toned books creates an effortless, curated look. This approach fosters a serene environment that welcomes guests while maintaining a refreshed and timeless vibe.
22. Swap Out Fresh Plants and Flowers for Dried Branches
Incorporating dried branches into your entryway décor offers a unique blend of durability and natural beauty that fresh plants often can’t match. Unlike fresh flowers, which require ongoing care and have a limited lifespan, dried branches maintain their form and charm effortlessly for years. This longevity makes them an ideal choice for busy households or anyone looking to create a lasting impact without regular upkeep.
Beyond their practicality, dried branches introduce a warm, earthy texture that can enhance the character of your space. Their subtle brown and muted tones bring a rustic elegance to your entryway, making it feel both welcoming and grounded. Whether placed in a sleek modern vase or a vintage container, dried branches serve as a low-maintenance statement piece that adds depth and personality to the first area guests encounter in your home.
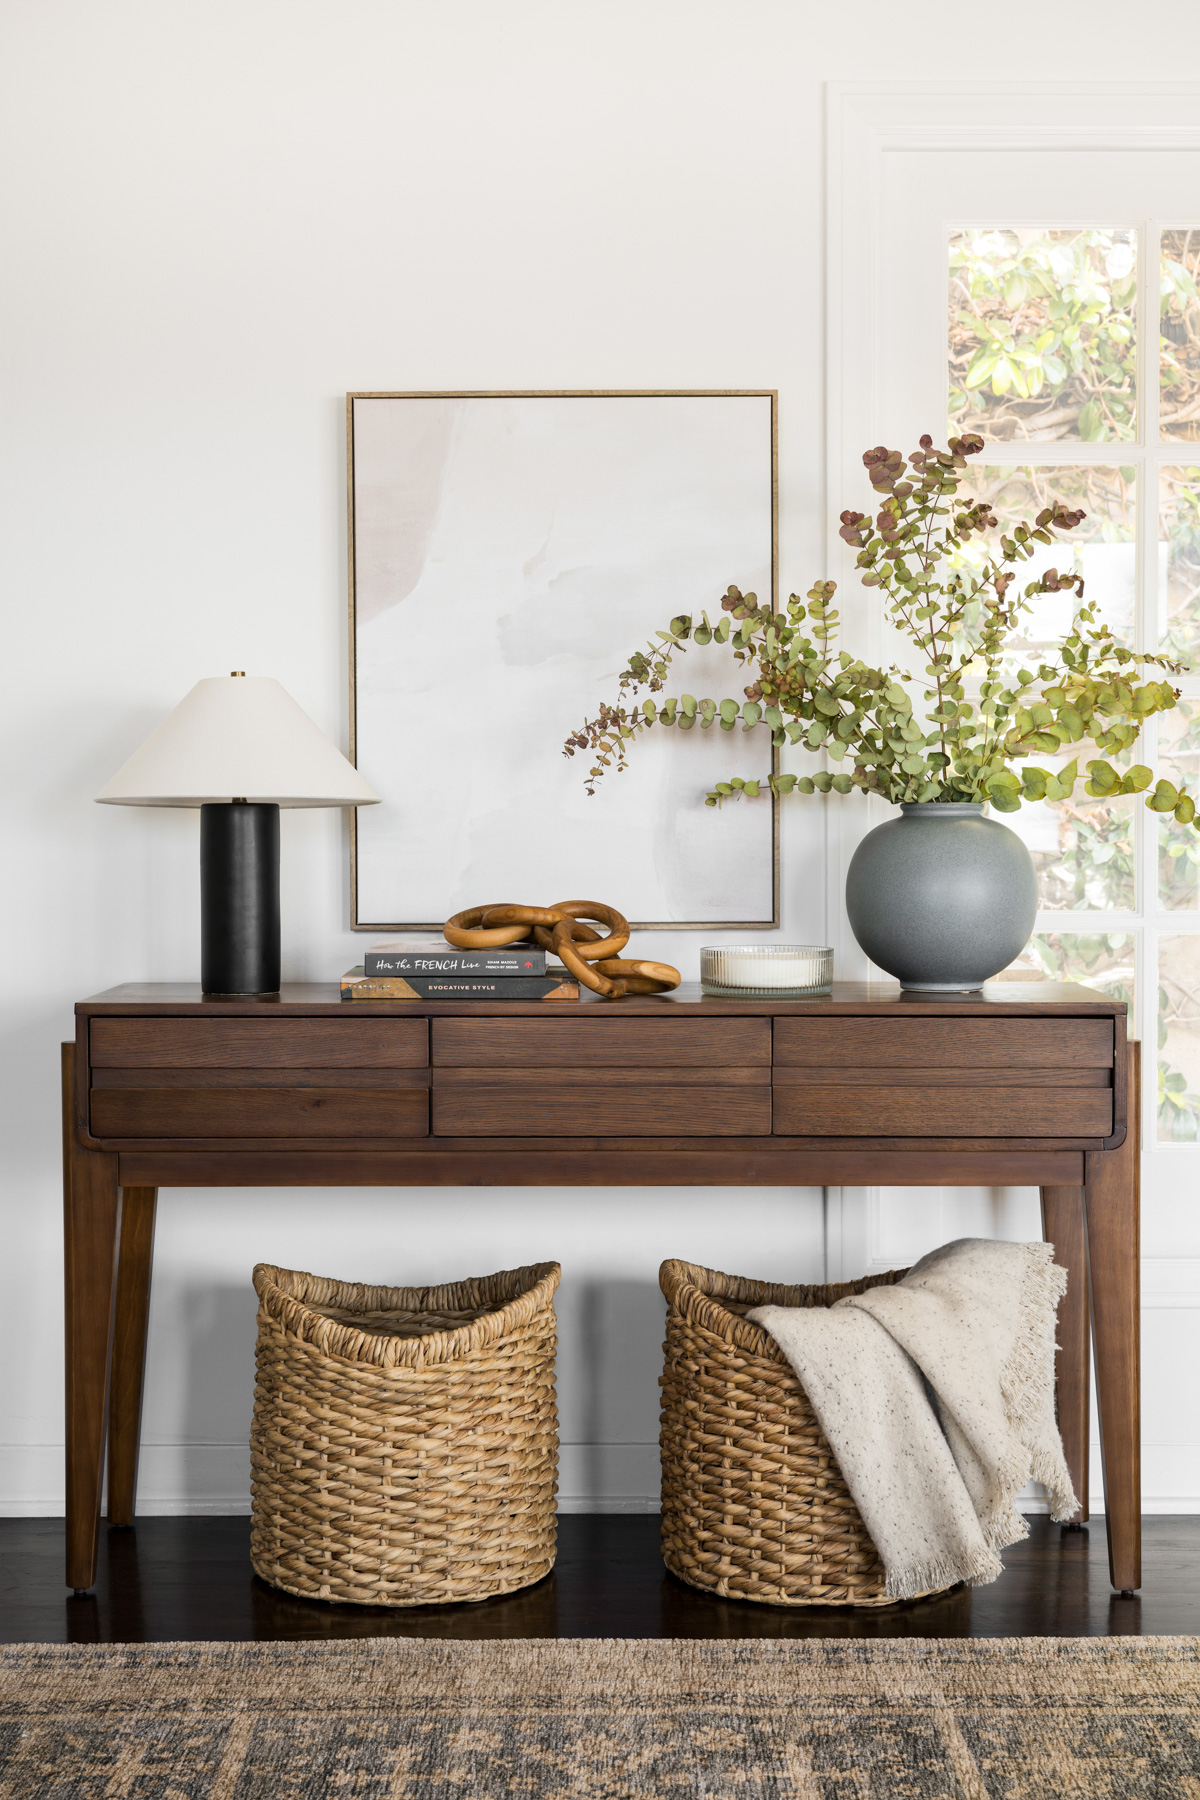
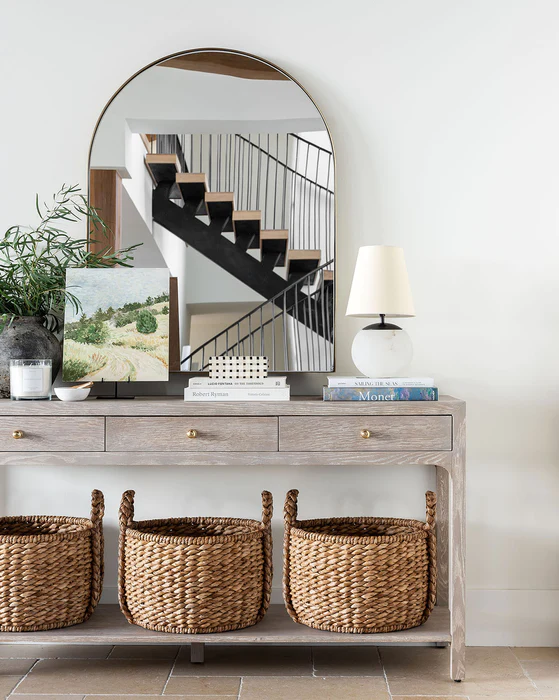
23. Place Woven Baskets Underneath the Table
Incorporating woven baskets beneath your entryway table is a timeless strategy that blends function with inviting flair. These natural fiber containers bring an organic touch to the space, introducing tactile interest and a cozy, earthy vibe that instantly softens the area. The warm tones of woven materials contrast beautifully with sleek furniture, making the entryway feel more approachable and thoughtfully curated.
Beyond their aesthetic appeal, baskets serve as practical helpers in keeping your entryway organized. They offer a discreet spot to stash everyday items like scarves, gloves, pet accessories, or mail, preventing clutter from taking over. This clever storage hack ensures your entry remains tidy without sacrificing style, transforming a simple corner into a multifunctional haven that welcomes both residents and guests alike.
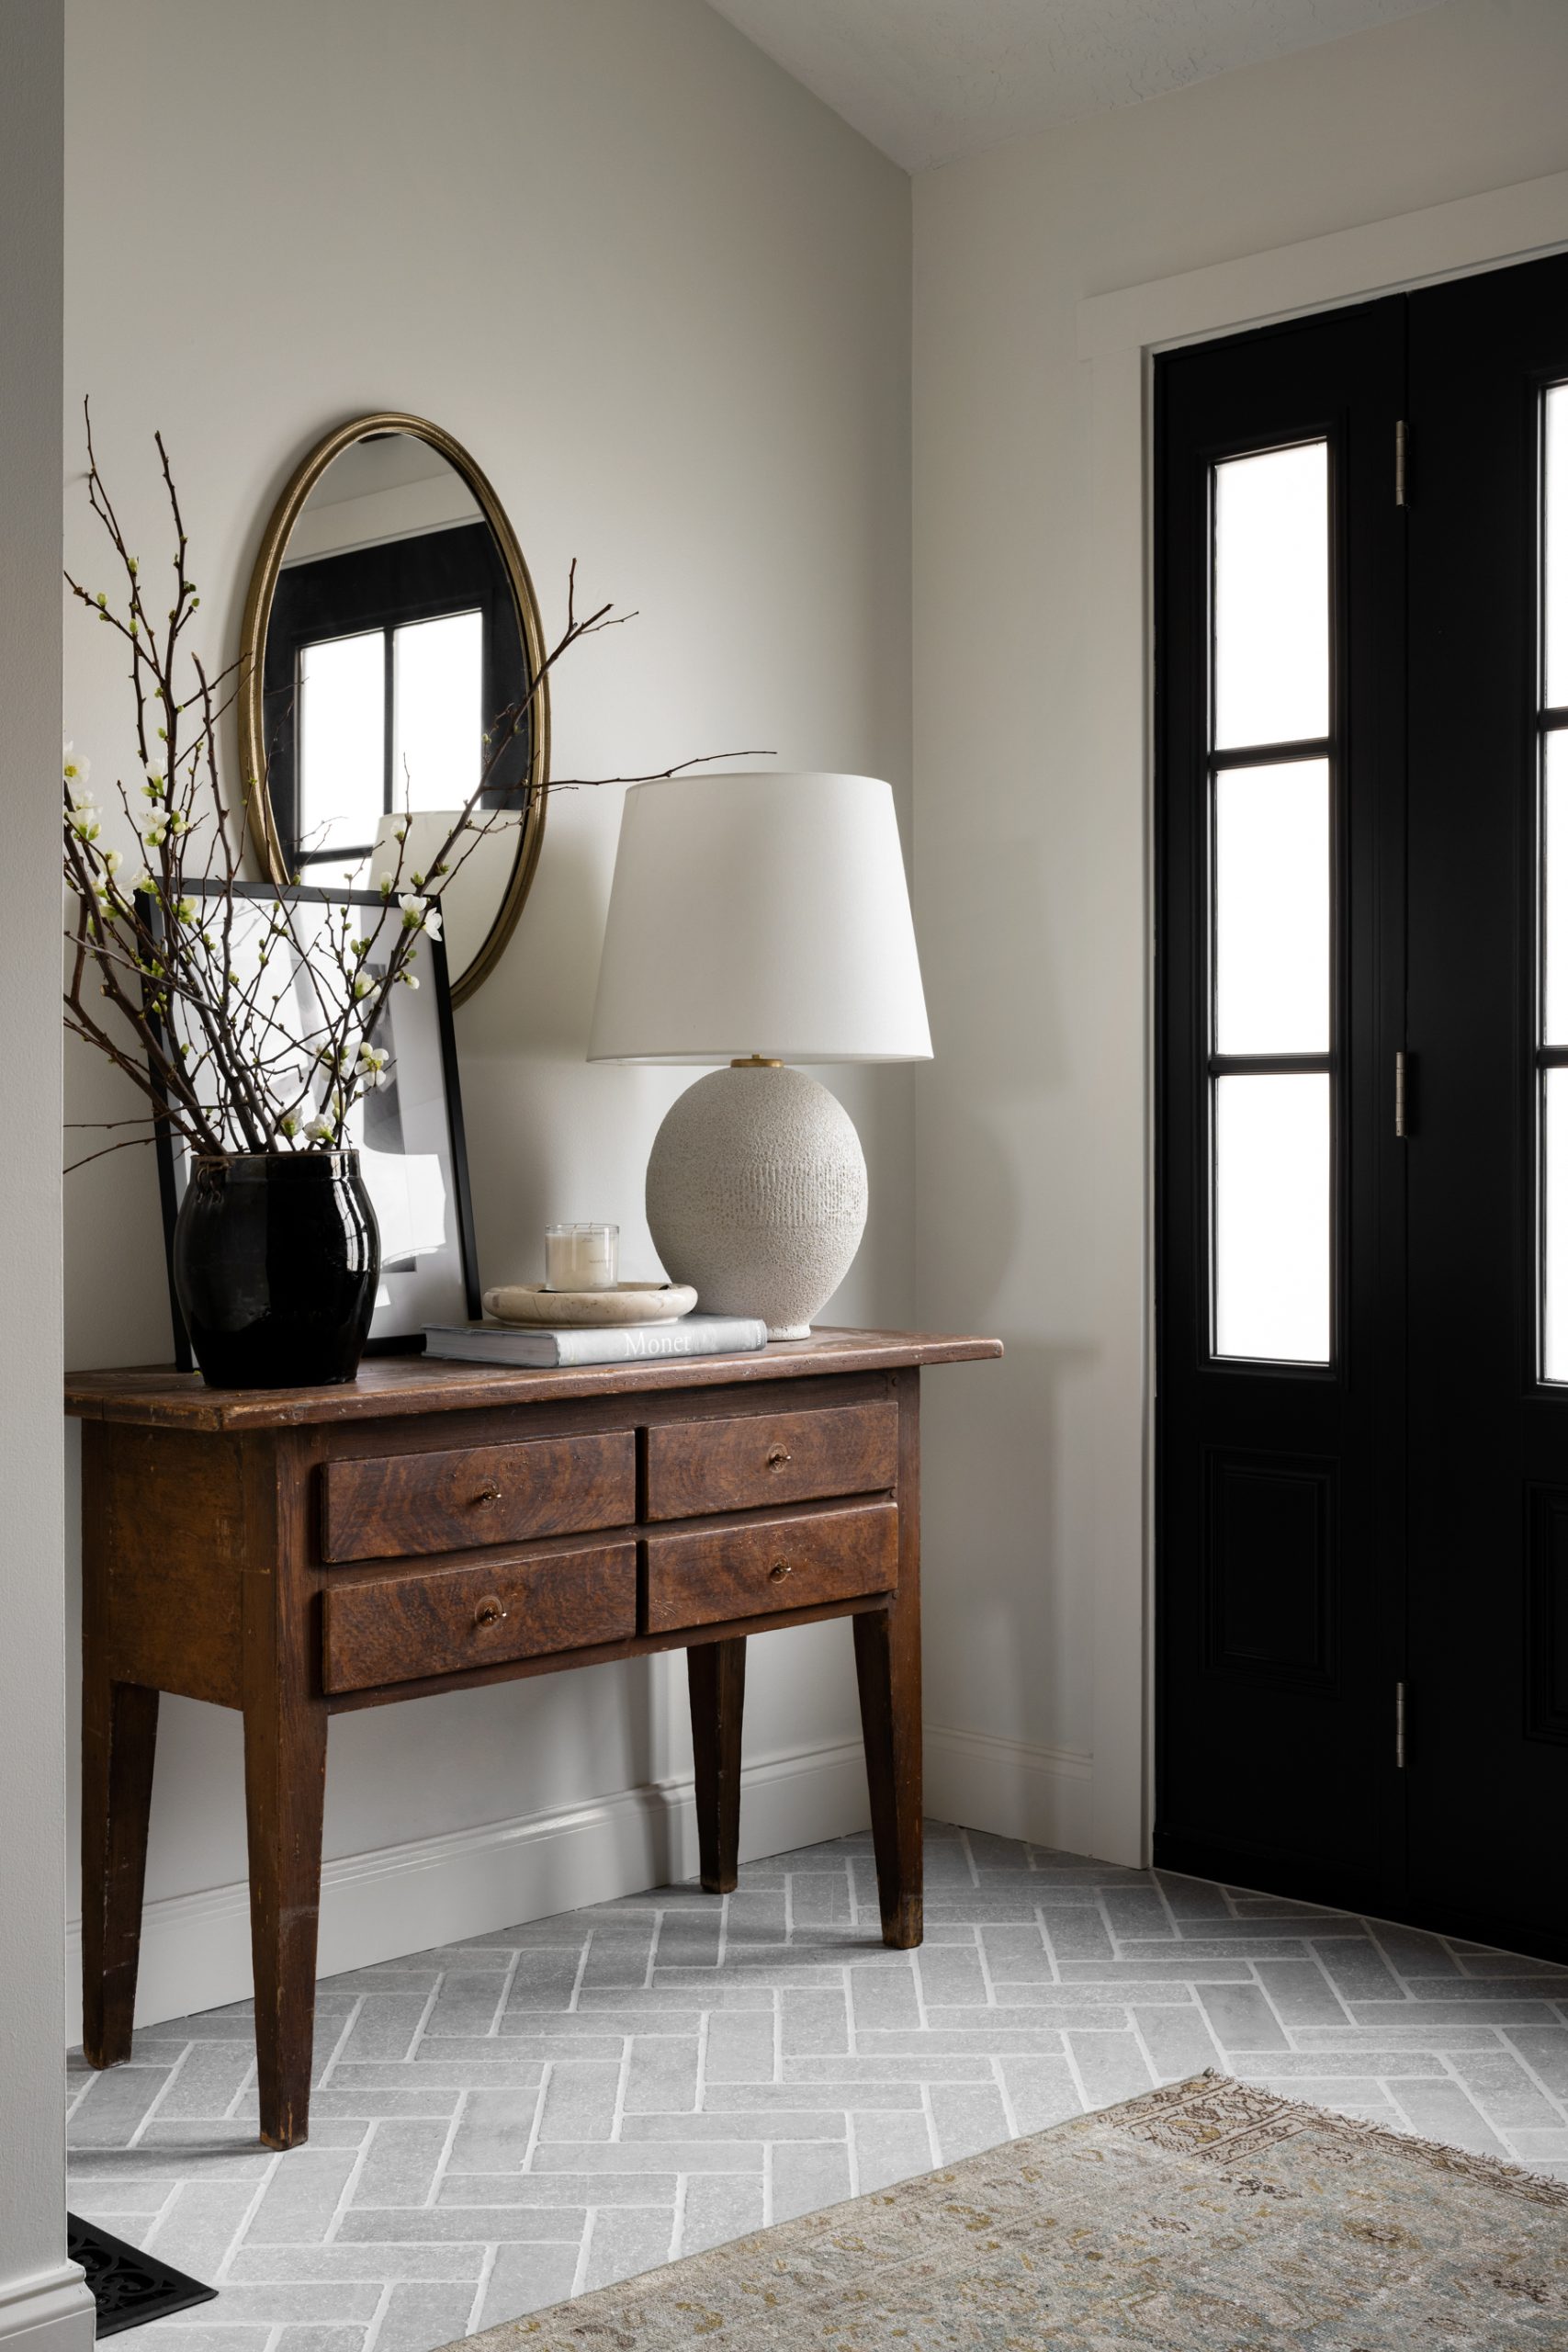
24. Mirror, Mirror, Mirror on the Wall
Incorporating a mirror into your entryway design serves both functional and aesthetic purposes, transforming this transitional space in remarkable ways. By bouncing natural light throughout the area, a well-placed mirror can instantly brighten the entry, making it feel airy and inviting even if the space itself is on the smaller side. This clever visual trick not only enhances the overall ambiance but also creates a sense of openness that welcomes guests from the moment they step inside.
Beyond their decorative impact, mirrors are practical companions in any foyer. They offer a quick spot to check your outfit or freshen up before heading out the door, adding a layer of convenience to your daily routine. Whether framed in sleek metal, rustic wood, or bold colors, mirrors can effortlessly reflect your personal style while elevating the functionality of your entryway. Essentially, they act as a stylish gateway to both light and space, making them an indispensable element in thoughtful entryway design.
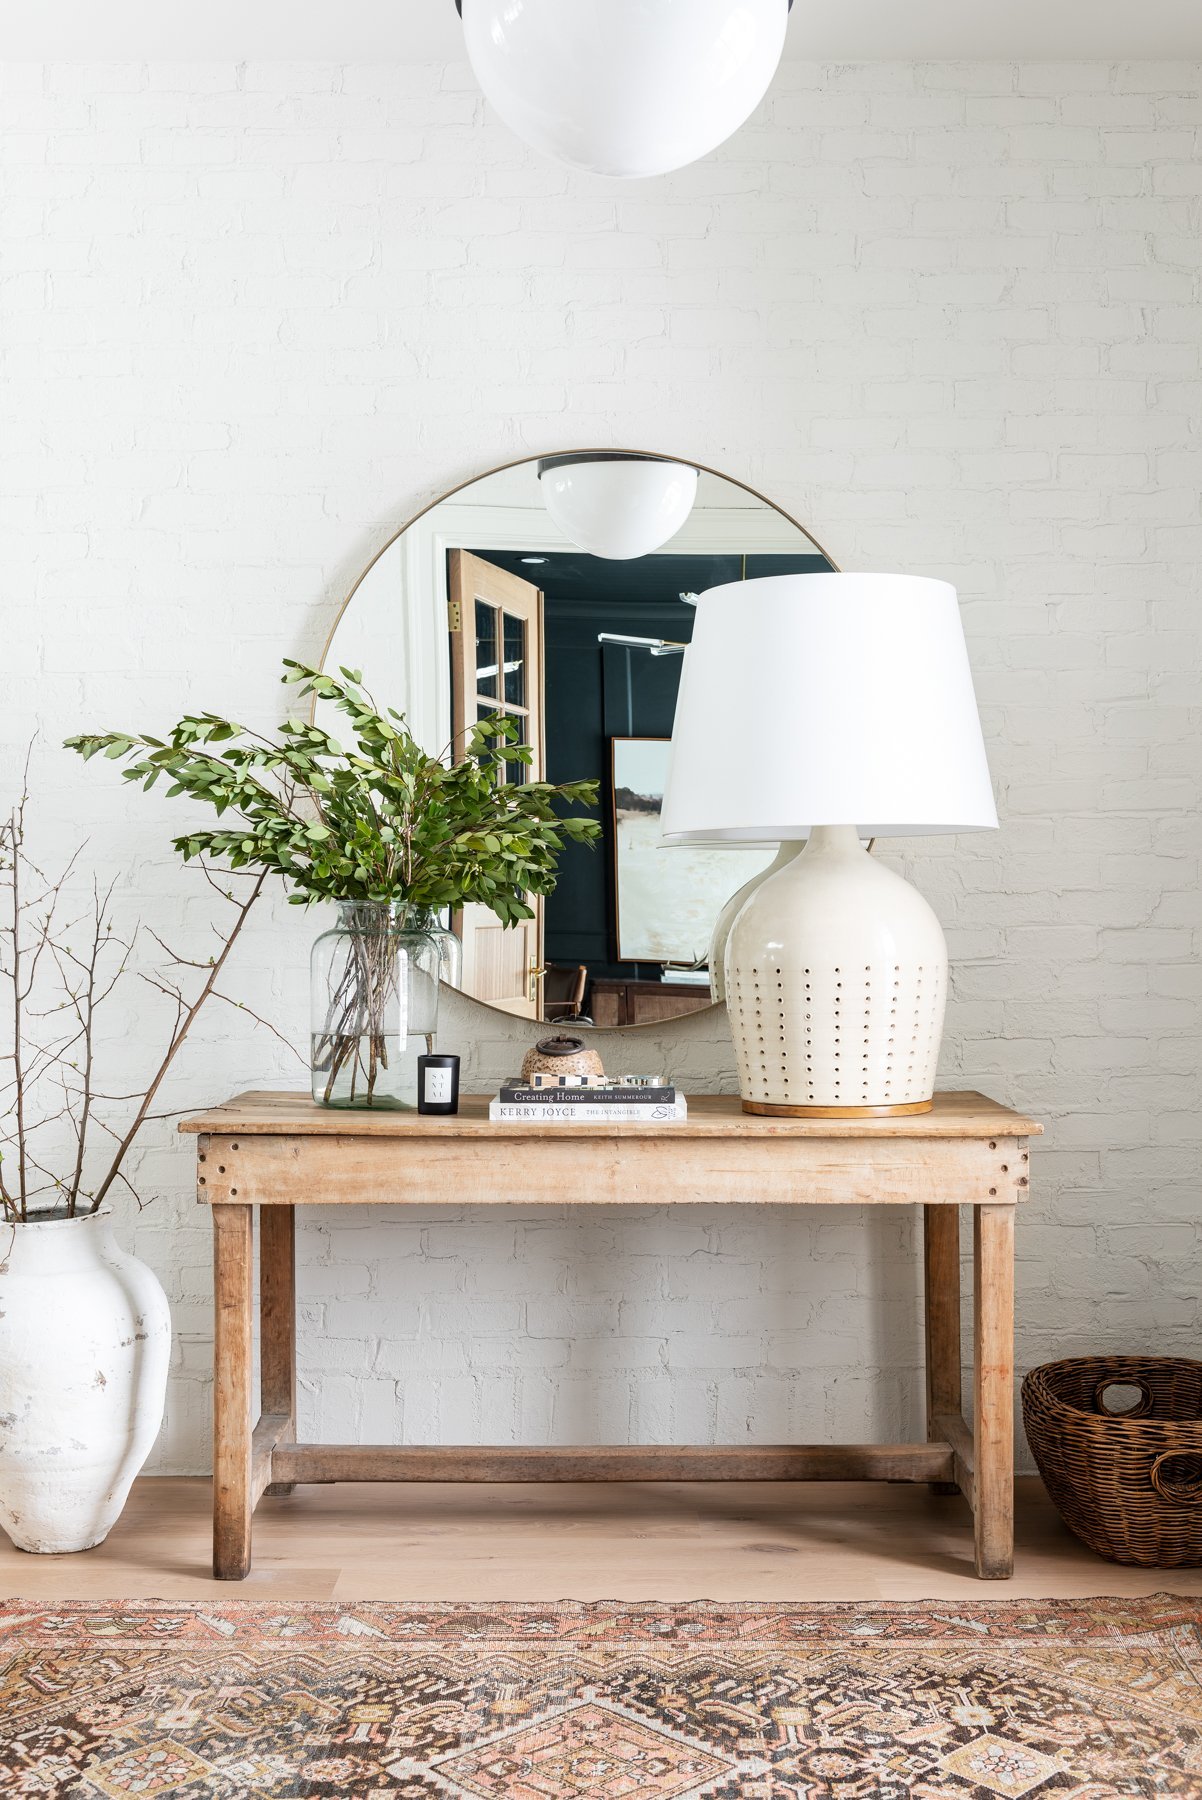
25. Buy a Round Mirror with a Gold Frame
Introducing a round mirror framed in gold instantly elevates any entryway, infusing it with a sense of sophistication and warmth. The circular shape softens the overall aesthetic, creating a gentle focal point that invites the eye without overwhelming the space. Meanwhile, the golden border adds a subtle glow, reflecting ambient light and enhancing the room’s natural elegance.
This combination is a perfect balance of modern simplicity and timeless glamour. It pairs effortlessly with other metallic accents, such as gold picture frames or decorative objects, weaving a cohesive and polished look throughout the area. Whether your style leans toward minimalist chic or refined classic, a gold-framed round mirror will bring a touch of understated luxury to your home’s first impression.
Conclusion
Your entryway is the first impression of your home—a space that sets the tone for all who enter. With Studio McGee’s thoughtful design ideas, you have the power to transform this often overlooked area into a welcoming and stylish haven that reflects your unique personality. Whether you’re drawn to clean lines, cozy textures, or timeless elegance, let these inspirations spark your creativity and motivate you to reimagine your entryway as a space that truly feels like home. Now is the perfect moment to roll up your sleeves, gather your favorite pieces, and create an entryway that not only invites warmth and comfort but also inspires joy every time you walk through the door. Your dream entryway is within reach—start transforming it today and watch how it brightens every arrival.
Terracotta is emerging as a standout trend in kitchen design, bringing warmth and earthiness to the heart of the home. This rich, sun-kissed shade is transforming spaces by adding depth and character, whether it’s featured on cabinet fronts, backsplashes, or subtle accents. Its natural, grounded tones harmonize beautifully with materials like brass fixtures, reclaimed wood, and artisanal ceramics, creating an inviting atmosphere that encourages mindful cooking and gathering.
As designers and homeowners explore terracotta’s versatility, its presence ranges from bold floor tiles to understated earthenware accessories. Embracing this color palette infuses kitchens with a sense of authenticity and timelessness, making every culinary moment feel intentional and connected to nature. Whether you’re ready to fully embrace terracotta or simply want to introduce hints of it, this trend promises to add unexpected warmth and charm to your kitchen space.
1. Natural Greenery for Terracotta Kitchens: Potted Herbs and Plants
Bringing potted herbs and plants into a terracotta kitchen adds a vibrant, living element that feels both authentic and inviting. Position a rosemary plant on a sunny window ledge where its fragrant, woodsy aroma pairs perfectly with the warm, earthy tones of terracotta. For a softer, more flowing look, let trailing ivy cascade along open shelves, providing a natural contrast to the kitchen’s structured lines.
When selecting containers, opt for terracotta pots equipped with drainage holes to maintain healthy soil moisture—keeping the soil slightly dry helps avoid root rot. Arrange your plants in groups of odd numbers, mixing different heights and leaf textures to create visual interest. Incorporate herbs like sage, thyme, and basil, which not only enhance the kitchen’s appearance but also offer fresh flavors for cooking, making the space feel lively and genuinely rooted in nature.
2. Essential Terracotta Cookware to Showcase on Your Kitchen Counter
A seasoned terracotta pot resting on your countertop serves more than just a utilitarian purpose—it embodies a philosophy of slow, mindful cooking. Renowned makers such as La Chamba and Romertopf produce clay cookware that ensures even heat distribution, resulting in deeply developed flavors that are difficult to achieve with conventional pans. Complement your cookware with handcrafted pitchers to introduce an artistic yet practical element to your kitchen display.
Proper maintenance is key to preserving these clay pieces. Applying natural sealants like beeswax or linseed oil helps protect their porous surfaces, significantly prolonging their durability. Keeping your favorite terracotta pots in plain sight not only enhances the aesthetic of your kitchen but also encourages a more intentional and thoughtful approach to meal preparation.
Pro Tip: Displaying terracotta cookware is more than decoration—it’s a subtle encouragement to embrace patience and care in cooking.
3. The Perfect Pairing of Terracotta and Sage Green
Combining terracotta with sage green creates a beautifully grounded yet refreshing palette inspired by nature’s contrasts. The warm, earthy tone of terracotta brings a cozy, clay-like richness to any space, while sage green offers a subtle, cool balance that feels calm and understated. Together, these colors evoke a sense of natural calm and timelessness.
To incorporate this duo, consider styling open shelves with natural elements like ceramic pots, soft linen kitchen towels, and trailing herbs for an organic touch. For example, pairing a soft sage paint, such as Farrow & Ball’s ‘Mizzle’, with terracotta tiles softens the intensity of the clay hues without dulling their impact. This combination channels the essence of a Mediterranean kitchen, infusing your cooking area with warmth, simplicity, and life.
4. Elevating Terracotta in a Modern Farmhouse Kitchen
Farmhouse kitchens often fall into predictable patterns, especially when terracotta elements start to feel overused and cliché. Instead of crowding the space with multiple rustic details, focus on incorporating a single, thoughtfully chosen terracotta piece to create a subtle yet impactful statement. For example, opt for enamelware in warm clay shades from brands like Crow Canyon Home, and balance it with sleek matte black fixtures and soft linen fabrics rather than typical gingham patterns. This blend brings a contemporary earthiness that keeps the kitchen feeling fresh and intentional without relying on tired motifs.
Avoid the temptation to fill your space with distressed signs or too many rustic accents. Instead, let a terracotta pot, perhaps placed casually on an open shelf and filled with fresh herbs, serve as a quiet focal point. This simple touch offers a refined, understated charm that communicates warmth and authenticity without overwhelming the room’s aesthetic.
5. Terracotta Kitchen Decor Inspired by Mediterranean Coastal Charm
Small, thoughtful changes can lay the groundwork for a kitchen that feels warm and inviting. Drawing from Mediterranean coastal aesthetics, you can create a space that blends earthy textures with vibrant pops of color, evoking the sun-drenched shores and rich cultural heritage of the region. This style emphasizes the interplay between natural materials and bold hues to produce a look that is both layered and lively.
By incorporating sun-warmed terracotta elements alongside striking cobalt blue accents, your kitchen gains a sense of intentional contrast that is both dynamic and welcoming. The combination of tactile fabrics, rustic pottery, and fresh herbs brings depth and authenticity, capturing the essence of Mediterranean living in a modern context.
Key Design Elements
Place terracotta tagines next to vivid cobalt blue ceramic dishes for a striking visual pairing
Suspend woven esparto grass baskets above open shelves to add texture and coastal character
Introduce coarse linen fabrics in rich ochre and burnt sienna shades for warmth and texture
Group rosemary and thyme plants in natural terracotta pots to bring fresh greenery and earthiness
Pro Tip: Embrace the boldness of Mediterranean design by layering rugged terracotta textures with vibrant cobalt accents, creating a balanced contrast that feels both intentional and evocative of sunlit coastal landscapes.
6. Balancing Terracotta and White for a Cozy Kitchen Ambiance
Combining terracotta with white might seem straightforward, but achieving the perfect harmony is key to creating a kitchen that feels inviting rather than cold. Opt for warm white shades instead of bright, clinical whites that can diminish the earthy depth of terracotta. Colors like Benjamin Moore’s ‘White Dove’ or Sherwin-Williams’ ‘Alabaster’ work beautifully, maintaining a subtle warmth that complements the clay tones.
Incorporate terracotta as accent details, such as trim around cabinets or window casings, to provide structure and grounding to the room. This gentle contrast creates an airy atmosphere without making the space feel too stark. To unify the look, add small terracotta-inspired elements like ceramic knobs, pottery on open shelves, or textiles in natural fiber, spreading the warmth evenly without overwhelming any single area.
7. Creative Terracotta Backsplash Inspirations to Remember
Terracotta backsplashes offer an incredibly adaptable foundation for adding color, texture, and pattern to your kitchen design. You can make a striking statement by using handcrafted mosaic tiles, piecing together uneven clay shapes into eye-catching geometric designs that beautifully reflect natural light throughout the day. Another effective approach is combining matte terracotta with glossy ceramic elements, which introduces contrast and visual interest without overpowering the space.
For a balance of rustic charm and modern simplicity, consider subway-style terracotta tiles from brands like Fireclay Tile. Their warm, earthy tones paired with clean, straight lines bring a welcoming and polished feel to your kitchen. Don’t shy away from letting your backsplash take center stage; a bold terracotta installation can instantly redefine the ambiance and character of your entire cooking area.
8. Artisan Ceramic Pieces Perfect for Open Shelf Displays
Ceramic items crafted by hand add a unique, tactile charm to open shelving that factory-made dishes simply can’t match. When selecting handmade platters, look for those featuring irregular glazes, natural, uneven edges, and subtle terracotta hues. These small imperfections add deliberate character and depth, making each piece visually captivating.
To create an appealing display, consider grouping bowls from artisan makers such as East Fork Pottery or Jono Pandolfi by color instead of size. This approach results in a harmonious, layered look. For arrangement tips, try stacking shallow bowls in sets of two, placing platters leaning vertically against the shelf’s back, and maintaining plenty of empty space around each object to avoid a cluttered feel. Giving each piece room to breathe helps highlight their craftsmanship and makes the display genuinely eye-catching.
9. Showcasing Terracotta on Shelves Without Overcrowding
After you’ve nailed the right color combinations, the next step is to display your terracotta pieces thoughtfully so your shelves don’t end up looking chaotic or overfilled. Creating intentional groupings and leaving space around your items helps each piece stand out and prevents the display from feeling overwhelming. Curated clusters add visual interest while maintaining an airy and organized vibe.
By arranging your terracotta objects in small, balanced collections rather than scattering them randomly, you can achieve a polished look. Incorporating elements with varying heights and textures enhances the overall composition and brings harmony to the shelf styling. Remember, less is more when it comes to keeping your terracotta arrangements neat and appealing.
Key Design Elements
Keep no more than three terracotta items per shelf to avoid clutter
Combine pieces of different heights, such as a tall pitcher, a medium planter, and a small dish
Create intentional gaps between groups to give each item room to breathe
Balance terracotta clusters by including a neutral accent like a wooden bowl or soft fabric
10. Warm Terracotta Kitchen Linens in Linen and Cotton to Elevate Your Space
A handful of thoughtfully selected kitchen linens can transform the atmosphere of your cooking area, especially when they feature the cozy hues of terracotta. Incorporating earthy towels and napkins in shades like burnt sienna, clay, and muted amber helps ground your kitchen’s palette without overpowering it. By layering these textiles with intention—such as hanging dish towels over oven handles or placing folded napkins next to your ceramic dinnerware—you create a space that feels inviting and intentional.
These small yet purposeful details contribute to a kitchen environment that is both warm and authentically lived-in. Choosing pieces made from natural fibers like linen and cotton not only adds texture but ensures durability and comfort in daily use. Embrace these warm, nature-inspired tones to subtly infuse your kitchen with personality and charm.
Key Design Elements
Rust-colored linen towels from Fog Linen Work
Terracotta-hued cotton kitchen cloths by Tekla
Amber-dyed organic napkin sets from Coyuchi
Clay-toned washed linen textiles by Society Limonta
11. Harmonizing Terracotta with Rich Wood Hues
Terracotta and warm wood shades naturally complement each other, both drawing from earthy tones that create a welcoming kitchen atmosphere. When terracotta walls meet walnut cabinets with artisanal joinery, the interplay between the textured, rugged wood and the smooth, clay-like plaster adds subtle depth and interest without overwhelming the space. Alternatively, lighter woods like oak can balance the richness of terracotta by introducing a softer, airier feel.
Interior designer Sarah Sherman Samuel suggests opting for warm metallic finishes, such as brushed brass, for hardware to keep the overall look cohesive and inviting. This approach embraces a palette inspired by nature, where every material contributes to a harmonious, thoughtful design that feels both grounded and warm.
12. Mastering Terracotta Layers for a Balanced Look
To create a harmonious terracotta palette, think of the hues as a smooth transition rather than a single flat color. Begin by painting your walls in a soft, muted terracotta shade—something close to a pale blush with warm undertones. Gradually build depth by incorporating medium terracotta elements like linen kitchen towels, handwoven placemats, and handcrafted pottery, which add texture and variation without overpowering the room.
For the final touch, ground your space with richer terracotta accents such as ceramic tiles or a bold backsplash. Use crisp neutrals like off-whites and creamy shades as breathing space between these deeper hues to maintain balance and prevent the colors from feeling too heavy. This gradual layering technique ensures that each terracotta element complements the others, creating a cohesive and inviting atmosphere.
Pro Tip: Choose terracotta shades that differ by at least two tones to build dimension and avoid overwhelming the senses.
13. Terracotta Touches Perfect for Renters with No Hassle
Just because you rent your space doesn’t mean you have to compromise on style. Incorporating terracotta elements is an excellent way to infuse warmth and a natural vibe without making permanent changes. These earthy tones can be introduced effortlessly, enhancing your home’s ambiance while keeping everything completely move-in and move-out friendly.
Think about gathering terracotta pottery and arranging it thoughtfully on countertops, shelves, or windowsills to create a harmonious, grounded aesthetic. The best part? These updates don’t require drilling, painting, or permission from your landlord, so you can enjoy them stress-free during your tenancy and leave without any worries when it’s time to relocate.
Key Design Elements
Replace drawer or cabinet handles with terracotta-colored knobs or pulls
Apply removable peel-and-stick terracotta patterns to backsplash areas
Showcase stacked terracotta bowls as decorative, usable pieces
Incorporate woven terracotta placemats to add rich, tactile layers
14. Embracing Terracotta: Plates, Platters, and Table Rituals to Inspire
Serving meals in terracotta cookware elevates everyday dining into a mindful and earthy experience. When you begin incorporating pieces like the Emile Henry Burgundy Tagine or La Chamba bowls, you naturally attune to the unique qualities of earthenware, such as its excellent heat retention, which influences the rhythm of your meal. This encourages a thoughtful pace that enhances both flavor and enjoyment.
Consider the order in which you present your dishes—carefully moving proteins, grains, and vegetables from the kitchen to the table in a sequence that honors temperature and visual appeal. Complement terracotta with wooden boards to add contrasting textures and anchor the centerpiece, creating a tactile element your guests will remember long after the meal is over. This blend of materials encourages a more connected and intentional dining atmosphere.
15. Incorporating Jute, Rattan, and Linen to Enhance Terracotta Hues
Incorporate natural materials like jute, rattan, and linen to enrich the warm tones of terracotta, creating a kitchen space that feels earthy and harmonious. Place jute runners along shelves or counters to introduce a tactile, woven element that resonates with terracotta’s organic warmth. These runners add subtle texture while maintaining a grounded, natural vibe.
Use rattan baskets beneath your counters for practical storage of fruits, linens, or miscellaneous items. Their warm, honey-like colors add depth and neutral layers that complement terracotta’s rustic charm. For a simple yet effective touch, hang linen towels on oven handles. Their soft, breathable fabric brings an understated texture that ties the whole kitchen’s natural aesthetic together, merging function with style effortlessly.
Pro Tip: When working with terracotta, layering natural textures like jute, rattan, and linen creates an inviting atmosphere that feels thoughtfully put together rather than overly styled.
16. Collecting Timeless Terracotta Treasures at Flea Markets and Estate Sales
Exploring thrift shops, estate auctions, and weekend flea markets can uncover terracotta items rich with unique aging and charm that modern pieces often lack. Focus your search on antique terracotta crocks, hand-crafted Mexican bean pots, and vintage Italian baking dishes that still have their original glaze. These authentic finds bring a depth and warmth that mass-produced replicas seldom capture.
Look out for Spanish cazuelas, Portuguese serving bowls, and mid-century Bunzlauer pottery from Germany to add genuine character to your collection. When examining older terracotta, be mindful of hairline cracks, ensure lids fit snugly, and if possible, verify that the glaze is free from harmful lead. Patience and a keen eye will usually lead to rewarding and distinctive acquisitions.
17. Affordable Methods to Evaluate Terracotta Before Fully Committing
Before embarking on a complete kitchen makeover featuring terracotta, taking some careful, budget-conscious steps to test your options can help you avoid costly errors. Start by ordering paint samples from brands like Sherwin-Williams or Benjamin Moore and place them on your current cabinets, countertops, and backsplash to see how the colors interact with your existing elements. Additionally, obtaining tile samples from companies such as Fireclay Tile or Cle allows you to experience the true texture, absorbency, and subtle color shifts that can occur in your own kitchen environment.
Spend several days living with these samples in place, paying close attention to how natural morning light and artificial evening lighting affect the tones and ambiance. This hands-on approach ensures you understand how terracotta will truly look throughout the day. Investing in these small trial steps up front can save you from expensive mistakes and provide peace of mind as you move forward with confidence into your warm, earthy terracotta kitchen design.
18. Essential Terracotta Containers and Stylish Countertop Organizers
The items you keep on your kitchen countertops can reveal as much personality as the artwork you choose to display. Terracotta containers provide a charming and practical solution for storing staples like coffee, salt, and flour, while adding a natural, warm touch that factory-made jars often lack. These handcrafted pieces bring character and a sense of craftsmanship to your space.
To maintain a tidy yet inviting countertop, use simple, low-profile trays to gather frequently used objects. This helps create deliberate groupings that look thoughtfully arranged instead of chaotic. The combination of rustic terracotta and minimalist organizers strikes a balance between functionality and aesthetic appeal.
Key Design Elements
Opt for unglazed terracotta containers to allow air circulation around dry ingredients
Combine lids with a matte finish and textured terracotta bases to create an appealing contrast
Arrange an odd number of containers together to achieve an eye-pleasing display
Utilize shallow trays to neatly hold oil bottles and kitchen tools in place
19. How Terracotta Floors Bring Warmth and Depth to Your Kitchen
Installing terracotta tiles in your kitchen elevates the space from purely utilitarian to genuinely inviting and full of character. This natural material, crafted by sun-drying clay, offers a sturdy and substantial base that harmonizes every element above it, from cabinets to countertops and fixtures. For spacious kitchens, consider opting for larger tiles to enhance openness, or add a decorative patterned section near the island to introduce subtle visual intrigue without overpowering the design.
To maintain the rich, earthy hues and protect the porous surface, apply a quality penetrating sealer such as Miracle Sealants 511. This type of finish safeguards your floor while allowing its natural warmth and texture to shine through. Ultimately, the terracotta flooring sets the tone for the entire kitchen, creating a grounded and comforting atmosphere that welcomes you before you even begin cooking.
Pro Tip: Terracotta flooring does more than just provide a surface; it infuses your kitchen with an ageless warmth and vitality that you can feel beneath your feet.
20. Pendant Lighting Ideas to Brighten a Terracotta Kitchen
The right lighting can elevate a terracotta kitchen from cozy to brilliantly inviting, and pendant lights offer a stylish and effective way to achieve this. Opt for fixtures with matte finishes in natural hues like earthy browns, black wrought iron, or antique brass to complement the rich tones of terracotta surfaces. Position these pendants low above kitchen islands or workstations to provide targeted illumination that enhances both function and ambiance.
To maintain the warmth characteristic of terracotta, use bulbs with a color temperature around 2700K. This warm glow avoids the harshness of cool white lighting, preserving the kitchen’s inviting atmosphere. Thoughtfully selected pendants can serve as both practical lighting solutions and decorative accents that reinforce the kitchen’s organic and rustic charm.
Key Design Elements
Woven rattan pendants introduce a natural, tactile element that harmonizes with clay-inspired colors.
Fixtures in black iron offer striking visual contrast that highlights terracotta walls.
Brass fixtures with an aged patina bring a timeless, cohesive feel to the space.
Arranging multiple smaller pendants creates a gentle, even light distribution compared to a single large lamp.
21. Seasonal Refresh Ideas for Your Terracotta Kitchen Accents
The natural tones of terracotta make it a versatile choice that can easily transition through the year, offering your kitchen an updated vibe without the need for drastic changes. By simply switching out your seasonal textiles—such as linen towels, woven placemats, and cotton table runners—you can mirror the ambiance of each season with ease. Additionally, consider adjusting your herb garden indoors, highlighting heartier varieties like rosemary and thyme during colder months, and switching to fresher options like basil and mint when the weather warms up.
Embracing these small swaps allows your terracotta pieces to shine in different ways throughout the year, enhancing the welcoming and earthy feel of your kitchen space. This approach keeps your decor feeling intentional and harmonious with the changing seasons.
Key Design Elements
Place cozy amber-toned candles beside your terracotta pots during autumn for a warm glow
Add dried orange or lemon slices near clay containers to evoke a crisp winter atmosphere
Incorporate fresh eucalyptus sprigs into your springtime floral displays for a refreshing touch
Arrange bundles of sun-dried lavender around your kitchen in summer for a fragrant, rustic look
22. Striking Terracotta Cabinets as the Kitchen’s Anchor
Opt for muted, lighter walls around your kitchen to allow terracotta cabinetry to truly stand out without overwhelming the space. The rich, warm tones of terracotta serve as an immediate eye-catcher and provide a solid visual foundation for the overall kitchen design. This approach ensures the cabinets take center stage while maintaining a balanced atmosphere.
To enhance the natural warmth, complement your cabinets with brushed brass pulls and knobs, adding a touch of subtle elegance. Incorporate countertops made from natural stone materials like marble or granite to reinforce the organic, grounded feel of the room. Together, these elements create a harmonious and inviting environment that feels both sophisticated and earthy.
23. Add Warmth with Removable Terracotta Wallpaper for Kitchen Walls
If you’ve mastered incorporating terracotta hues through pottery and fabrics but hesitate to commit to painting your walls, removable terracotta wallpaper offers an easy alternative. This option brings a cozy, earthy vibe to your kitchen without the permanence of paint. Before you fully decorate, order some sample pieces to see how the color shifts in natural light and fits your overall style.
Many peel-and-stick wallpapers from companies like Chasing Paper and Tempaper can be applied and removed with minimal effort, making them ideal for renters or anyone wanting a temporary update. These wallpapers also work well as accent backdrops inside open shelves, adding depth and texture to your kitchen design without any damage to surfaces.
Key Design Elements
Temporary wallpaper murals offer bold accent walls without leaving a trace
Peel-and-stick sheets can be installed quickly and removed cleanly whenever needed
Testing sample swatches helps you gauge true color tones before full installation
Removable wallpaper enhances open shelving areas with subtle warmth and pattern
Pro Tip: Removable terracotta wallpaper is a hassle-free way to infuse warmth—just peel, apply, and when you’re ready for a change, peel it right off without any paint or fuss.
24. The Appeal of a Terracotta Kitchen Island
The kitchen island often serves as the busiest and most multifunctional spot in your kitchen, so giving it a striking look with terracotta hues can enhance both its practicality and aesthetic appeal. A handcrafted island finished in rich, earthy shades offers a warm centerpiece that naturally anchors the room’s design. This creates a welcoming atmosphere that immediately attracts attention and adds depth to your kitchen space.
To complement the warm tones of terracotta, consider pairing your island with sleek stainless steel sinks that don’t have apron fronts. The minimalist style of these sinks maintains a clean silhouette, allowing the vibrant clay-inspired color to stand out without distraction. The combination of the warm, natural terracotta with the cool, polished metal elements brings a thoughtful contrast that feels both elegant and harmonious, blending seamlessly with various cabinetry and countertop styles.
25. Terracotta Wall Paints That Enhance Your Space
Extending terracotta hues from kitchen islands to entire walls allows you to fully embrace its inviting warmth. Selecting the right shade is key to creating a vibrant atmosphere rather than one dominated by harsh orange tones. Softer, earthy reds like Benjamin Moore’s ‘Roasted Sesame’ add richness and complexity without overpowering cabinetry or other design elements. Meanwhile, subtler ochre-inspired colors such as Sherwin-Williams’ ‘Antique White’ introduce gentle warmth with a refined, muted feel.
To get the best result, try out paint samples under different lighting conditions—both natural sunlight and indoor lighting—since terracotta tones can look quite different throughout the day. This shifting quality brings out deeper, more grounded shades that bring character and authenticity, far surpassing the flatness of inexpensive orange paints.
26. Incorporating Terracotta into Sleek Modern Kitchens
While terracotta may initially seem at odds with the clean lines of modern minimalist kitchens, it can actually introduce a warm, tactile dimension when used thoughtfully. Against a backdrop of crisp white cabinetry, a single terracotta piece adds subtle texture and depth, standing out without creating visual clutter. The key is to treat terracotta elements as sculptural highlights rather than as part of a larger assortment.
Embracing simplicity ensures that each terracotta accent feels purposeful and refined. By balancing scale and spacing carefully, these earthy tones can soften the sleekness of contemporary surfaces, lending a grounded yet sophisticated vibe to the room. Minimalism thrives on intentionality, and a well-chosen terracotta object can be both an artful statement and a harmonious complement.
Key Design Elements
Opt for one bold terracotta item instead of grouping multiple smaller pieces
Combine terracotta with concrete countertops to create an appealing interplay of textures
Allow ample empty space around terracotta objects to maintain a clean aesthetic
Select terracotta with a matte finish to harmonize with smooth, flat kitchen cabinetry
Pro Tip: A lone terracotta vessel nestled against white cabinets can communicate more visual interest than an entire collection ever might.
27. The Impact of Natural Light on Terracotta Colors in Your Kitchen
The way natural light interacts with terracotta elements in your kitchen can significantly influence their appearance throughout the day. In the early hours, sunlight enhances the warm, earthy tones of terracotta, making surfaces like tiles and walls radiate a vibrant, amber glow that energizes the room and creates a welcoming ambiance. As the day progresses, the light softens and shadows deepen, causing the terracotta shades to take on richer, more muted clay hues that contribute to a cozy and intimate environment.
Understanding the direction your kitchen faces is crucial when selecting terracotta colors. North-facing kitchens tend to receive cooler, less direct light, which can make terracotta tones appear more subdued. To counteract this effect and preserve the warmth and depth characteristic of terracotta, consider choosing warmer shades to brighten the space and maintain its inviting feel. Observing your kitchen’s natural lighting patterns at various times can help you make an informed decision and achieve the perfect balance in your color palette.
28. Choosing the Ideal Grout Shade for Terracotta Floors
The color of grout can significantly influence the overall appearance of terracotta tile flooring, often playing a more crucial role than homeowners might expect. Selecting a grout tone that harmonizes with the warm, earthy reds and oranges of terracotta helps create a cohesive and natural-looking surface that feels thoughtfully designed. Shades like warm browns or muted golds work beautifully to blend the tiles into a unified pattern without drawing attention away from their rustic charm.
On the other hand, opting for cooler grout colors introduces contrast, making each tile stand out individually and adding a sense of definition to the floor. This approach can be useful if you want to highlight the shape and layout of the tiles, but it may disrupt the warm, organic feel typically associated with terracotta. Ultimately, deciding between warm or cool grout depends on whether you prefer a seamless flow or clear separation between tiles. It’s always wise to try out grout samples directly on your tiles before making a final choice to see how the colors interact in your space.
Pro Tip: Interior designer Joanna Gaines famously said that grout acts like the punctuation marks of your flooring, giving it structure and meaning.
29. Five Subtle Terracotta Updates to Elevate Your Kitchen Hardware and Accessories
Incorporating small terracotta elements can make a significant impact on your kitchen’s overall aesthetic, especially when paired with complementary materials and colors. Consider updating your cabinet handles to brass ones with warm tones that harmonize beautifully with the earthy matte finish of terracotta. Adding rope hooks near your cooking area not only provides practical hanging space but also introduces natural texture that enhances the space’s intentional design.
Place clay trivets on your countertops to protect surfaces while contributing to an organic, grounded feel. Swapping out a standard dish soap dispenser for a terracotta ceramic version brings a subtle yet impactful touch of warmth. Finally, replace plain storage containers with unglazed clay canisters to add rustic charm. These thoughtful changes accumulate warmth and character over time, refreshing your kitchen without the need for extensive renovations or major commitments.
Conclusion
Transforming your kitchen into a space that radiates warmth and thoughtful design doesn’t require an extensive overhaul. Incorporating terracotta elements—whether it’s a single handcrafted clay jar, a subtle matte tile backsplash, or a softly worn linen runner—can instantly infuse your kitchen with a rich, inviting character. These carefully chosen accents create a foundation that gently shifts the atmosphere, making the space feel both timeless and personal.
Approach your design journey with patience and intention: experiment with colors under various lighting, introduce natural materials gradually, and allow your kitchen to evolve organically. By embracing terracotta’s earthy hues and textures, you cultivate not just a beautiful environment, but a welcoming retreat where moments are savored and memories made.
Imagine stepping into a space that feels like a warm embrace, where every corner carries a whisper of history and charm. Shabby chic decorating invites you to blend the beauty of timeworn details with soft, soothing colors, crafting a home that feels effortlessly cozy and full of personality. It’s about celebrating imperfections and pairing delicate pastels with pieces that have a story to tell.
This style transforms your rooms into welcoming retreats, where faded finishes meet plush touches to create a harmonious balance between vintage allure and modern comfort. By thoughtfully combining the old with the new, shabby chic creates an atmosphere that feels both graceful and lived-in, making your home a true reflection of your heart and style.
1. Blend Vintage Silver and Bronze Metal Details
Incorporating metallic elements with worn surfaces adds depth and authenticity to shabby chic interiors. Embrace the charm of aged finishes by layering weathered metal pieces throughout your space. Distressed silver knobs pair effortlessly with bronze curtain rods, lending a genuine antique feel. The secret lies in welcoming irregularities instead of striving for perfect matches. Combining different metal tones with their naturally aged textures generates visual intrigue while keeping a harmonious look. For instance, place matte bronze candle holders alongside pewter photo frames on your fireplace shelf. Resist the urge to shine these metals; their subdued patina enriches their personality.
Integrate tarnished silver, bronze, and pewter accents within one area
Match silver drawer handles with bronze curtain rods for an eclectic metallic mix
Display matte bronze candlesticks next to pewter frames on the mantelpiece
Preserve the natural patina—those weathered spots bring unforgettable character
💡 Pro Tip: To give new metal hardware an aged appearance, lightly coat it with dark wax and buff gently—this technique instantly imparts a vintage look.
2. Incorporate Furniture with Soft, Feminine Curves
Introduce furniture pieces that showcase gentle, flowing lines to bring a delicate softness to your interiors. Loveseats featuring smooth, rounded shapes serve as warm gathering spots and enhance cozy living areas or quiet reading corners. Seek out items that boast curved backs and subtly rolled armrests. Armchairs designed with elegant, sweeping contours bring a touch of sophistication without appearing overly formal, making them perfect for placement near windows or beside a hearth. Opt for furnishings with cabriole-style legs to inject an added layer of vintage charm. Steer clear of harsh angles and boxy forms, as these conflict with the gentle, relaxed nature of shabby chic décor. Curved furniture cultivates a space that feels inviting and effortlessly comfortable.
Select loveseats and sofas featuring softly rounded backs paired with rolled arms
Incorporate chairs and accent tables with cabriole legs to boost refined appeal
Situate gracefully curved armchairs close to windows or fireplaces to create striking focal points
Avoid furniture with rigid lines or angular shapes that disrupt the mellow vibe
💡 Pro Tip: A single loveseat with flowing curves has the power to redefine a room — its tender form instantly radiates warmth and charm.
3. Combine Whitewashed and Chalk Paint Finishes for Depth
Whitewashing offers a gentle, ethereal backdrop ideal for shabby chic interiors. It brightens dark timber while preserving the natural grain’s character. For best results, apply thin coats using a moist cloth to maintain control and subtlety. When seeking additional texture, chalk paint complements whitewashed surfaces beautifully. Experiment with soft shades like blush pink or muted sage layered atop the whitewashed base, then gently distress the edges to expose the underlying whitewash. This approach replicates the charm of naturally aged surfaces. Matte limewash is another excellent choice, lending authentic European country cottage vibes to walls and large furniture pieces. To complete the look, use antique glaze in recesses to deepen contrasts and impart a timeless, weathered feel.
Use a damp cloth to spread whitewash in delicate, thin coats for a translucent effect
Apply chalk paint in gentle hues such as pale pink or sage over whitewashed areas to build visual interest
Lightly sand edges after layering to uncover the whitewashed layer underneath
Enhance crevices with antique glaze to accentuate shadows and convey aged character
💡 Pro Tip: Always brush whitewash along the wood grain’s direction to achieve a natural, deliberate finish.
4. Incorporate Repurposed Vintage Suitcases into Your Decor
Arrange vintage suitcases in unused corners to add both storage and a touch of character to your space. These classic pieces serve not only as practical storage solutions but also as captivating design elements throughout your home. When stacked, they can double as quaint side tables next to sofas or beds, cleverly hiding blankets and linens inside. Using a suitcase-based sideboard in the dining area introduces a rustic charm while offering extra surface area for serving. Seek out leather bags that showcase natural aging with faded finishes and brass clasps to achieve an authentic shabby chic vibe. Open suitcases can be styled with books, plants, or personal treasures to enhance your interior.
Create functional and attractive side tables by stacking suitcases in room corners
Transform a large trunk into a coffee table with concealed storage for throws
Select leather suitcases featuring aged surfaces and vintage brass fittings
Display books, greenery, or favorite collectibles inside open suitcases
💡 Pro Tip: Add a layer of charm by lining the interiors of open suitcases with decorative fabric or scraps of wallpaper, turning simple storage into an eye-catching showcase.
5. Craft Warm Retreats Using Antique Quilts
Antique quilts infuse any overlooked spot in your home with a sense of nostalgia and comfort. Toss these treasured textiles over a favorite reading chair to fashion a welcoming hideaway. Such touches convert unused corners into snug sanctuaries perfect for curling up with your favorite novel. Layering quilts at the base of your bed keeps them within reach on cool nights while enhancing your bedroom’s aesthetic appeal. Pairing these quilts with plush cushions and cozy throws adds dimension and softness, capturing the essence of shabby chic charm. Opt for quilts showcasing softened floral prints or gently worn designs to emphasize timeless appeal.
Place quilts across reading chairs to form cozy and inviting alcoves
Keep a folded quilt at your bed’s foot for warmth and decorative flair
Mix quilts with soft throw pillows and blankets to build layered comfort
Select quilts featuring faded florals or vintage patchwork for genuine character
💡 Pro Tip: Positioning a quilt ladder near your armchair not only makes quilts easy to grab but also turns them into an appealing visual element.
6. Incorporate Soft Floral Details Throughout Your Space
Delicate floral designs play a key role in defining the shabby chic style, infusing your home with a gentle, romantic vibe. Aim to feature blossoms like roses, peonies, and wildflowers on various textures and surfaces. Handcrafted linens are perfect for adding elegance to cushions and table settings. To create a charming focal point, try applying botanical wallpaper on a single wall in bedrooms or dining rooms. Pair floral drapes with solid-toned furniture to keep the look harmonious. Opt for smaller, vintage-inspired floral patterns that subtly enhance your decor rather than dominating it, lending an understated authenticity to your rooms.
Feature motifs of roses, peonies, and wildflowers on pillows, curtains, and linens
Apply botanical wallpaper on one accent wall to create a romantic highlight
Combine floral curtains with solid furniture pieces to preserve visual harmony
Select petite, vintage-style floral prints instead of large contemporary patterns
💡 Pro Tip: Restrict bold floral designs to just one or two standout elements per area — too many busy patterns can disrupt the cozy, inviting atmosphere.
7. Showcase Antique Books with Distressed Covers
Incorporate timeworn antique books into your living spaces to effortlessly evoke shabby chic elegance. Place them on coffee tables, bedside stands, or vacant shelving to introduce warmth and personality. Their faded spines bring a nostalgic feel, enriching the ambiance of any room. For an engaging display, arrange the books both upright and stacked flat. Seek out volumes adorned with soft pastel hues or gentle earthy tones, which harmonize beautifully with shabby chic interiors. Books marked by aged bookmarks hint at cherished histories and add a heartfelt touch. Organize your collection by hue or dimension to craft visually appealing groupings.
Place antique books in stacks or standing positions on tables, nightstands, and shelves
Mix vertical and horizontal displays to create dynamic visual appeal
Select books featuring worn covers in gentle pastels or subdued earth tones
Arrange collections by color or size to achieve a thoughtfully styled look
💡 Pro Tip: Take off the dust jackets from vintage books to reveal the lovely, authentically aged cloth-bound covers underneath.
8. Showcase Antique China and Teacups as Decorative Accents
Incorporating antique china and teacups into your shabby chic décor instantly elevates the ambiance with a touch of timeless charm. Arrange these treasures on open shelving units or within cabinets featuring glass doors to let their beauty shine. Combine various floral motifs to achieve that effortlessly gathered-over-the-years feel, or organize them by color to create a cohesive visual flow. Consider placing a vintage tea caddy on your countertop, blending practicality with style. For added depth, stack teacups on their matching saucers using tiered display stands. Don’t shy away from minor chips or cracks—these subtle imperfections lend authenticity and character. Grouping items in odd numbers and refreshing your arrangements with the seasons will keep your collection engaging and lively.
Place antique china on open shelves or behind glass cabinet doors
Blend assorted floral designs for an inviting, collected-over-time vibe
Use tiered stands to layer teacups and saucers, adding visual interest
Celebrate small chips and cracks as marks of genuine vintage flair
💡 Pro Tip: Keep a vintage tea caddy on your kitchen counter to serve as a functional yet stylish everyday accent that fits seamlessly into your shabby chic theme.
9. Select Lighting and Chandeliers for a Shabby Chic Ambiance
The right lighting is essential to bring your shabby chic space to life, complementing your furniture perfectly. Opt for chandeliers adorned with hanging crystals and finishes that show a weathered or worn patina. Incorporating vintage-style filament bulbs infuses warmth and genuine charm into any light fixture, casting a gentle, inviting glow. Wall sconces in soft brass tones add elegance when positioned next to mirrors or artwork. Additionally, table lamps featuring fabric shades in soft ivory or delicate blush enhance the layered, soothing illumination throughout your room.
Select chandeliers embellished with crystal accents and distressed or whitewashed surfaces
Incorporate vintage filament bulbs to achieve a cozy amber light
Place soft brass-finished sconces alongside mirrors and art pieces
Combine table lamps with fabric shades in cream or subtle pink hues
💡 Pro Tip: Add a dimmer switch to your chandelier to effortlessly toggle between bright, airy lighting and a soft, romantic atmosphere.
10. Celebrate Worn Paint and Weathered Details
In shabby chic decor, the charm lies in surfaces that show the passage of time. Instead of pristine finishes, look for pieces where paint has naturally chipped away, revealing layers underneath. These distressed touches lend a genuine sense of history and personality. Begin your hunt at vintage stores for dressers and chairs that wear their age gracefully. Avoid sanding or repainting furniture that already showcases this lovely aged appeal. Hardware with subtle rust or patina enhances the nostalgic feel. For newer items, you can create this effect by lightly sanding edges and corners to mimic years of use.
Look for furniture displaying authentic chipped or flaking paint in vintage shops
Avoid refinishing items that already have a charming aged appearance
Retain hardware showing rust or tarnish to preserve its vintage character
Lightly sand edges and corners of modern pieces to replicate natural wear
💡 Pro Tip: When distressing wood yourself, always sand along the grain and concentrate on corners and edges, as these areas typically experience the most wear over time.
11. Incorporate Wicker Baskets for Delightful Storage Solutions
Wicker baskets blend practicality with timeless charm, making them ideal additions to shabby chic interiors. They offer a stylish way to tidy up blankets, reading materials, and everyday items, while introducing natural texture to your space. Light-hued, beach-inspired wicker fits perfectly in breezy, open rooms, lending a laid-back and organic vibe. Tuck baskets beneath entryway tables or next to seating areas for convenient reach. For a neater, more contemporary shabby chic aesthetic, choose Scandinavian-style wicker, known for its sleek and orderly design. Combine baskets in varying heights and widths to create an engaging layered effect, or enhance them by lining with delicate linen cloth. These adaptable baskets keep clutter at bay without sacrificing the inviting warmth of your decor.
Store blankets, magazines, and daily essentials in wicker baskets for a stylish, practical solution
Position baskets under console tables or beside couches to keep necessities within easy reach
Arrange baskets of assorted sizes to build visual depth and textured layering
Add a refined touch by lining baskets with soft linen fabric for softness and elegance
💡 Pro Tip: Attach small, handwritten labels inside the lids of wicker baskets to maintain order while infusing a quaint, personalized charm.
12. Showcase Vintage Treasures on Open Shelves
Open shelves offer an ideal setting to highlight your cherished vintage pieces. Arrange items with similar characteristics together to create a cohesive and eye-catching display. For instance, grouping white ironstone pitchers in sets of three or five forms a striking focal point. Blend aged books alongside delicate teacups and porcelain statuettes to add texture and charm. Be mindful not to overcrowd your shelves; allowing space between groups introduces balance and visual ease. Refresh your arrangements with the seasons by swapping out heavier objects for lighter ones, ensuring your décor stays inviting and effortlessly shabby chic year-round.
Arrange vintage items in odd-numbered clusters to enhance visual appeal
Combine ironstone pitchers, antique books, teacups, and figurines on open shelving
Incorporate ample negative space between groups to maintain an airy look
Update displays seasonally to preserve a fresh and engaging aesthetic
💡 Pro Tip: Apply the rule of three by grouping objects in threes at varied heights for a naturally curated feel.
13. Adorn Your Windows with Elegant Lace Drapes and Sheer Fabrics
Lace drapes gently soften sunlight while preserving your privacy all day long. When rays of light pass through the intricate lace motifs, they lend a whimsical and romantic quality to your space. Opt for shades like ivory or soft white to naturally illuminate your interiors. Pairing lace panels with airy cotton sheers behind them creates a layered look that lets you control brightness and privacy with ease. Choose modest curtain rods that enhance your shabby chic décor without overshadowing the fragile textures. For budget-friendly options, explore vintage lace finds at estate sales or secondhand shops.
Select ivory or white lace curtains to gently diffuse light and brighten rooms
Layer lace over fine cotton sheers for customizable light and privacy levels
Pick simple curtain rods that complement rather than compete with delicate materials
Discover charming vintage lace curtains affordably at thrift stores and estate sales
💡 Pro Tip: Mount your lace curtains just above the window trim — this subtle trick draws the gaze upward and creates the illusion of higher ceilings.
14. Opt for Weathered Wood Furnishings to Capture Shabby Chic Essence
Incorporating weathered wood furniture adds an immediate sense of personality to any shabby chic space. Select items that showcase natural distressing and charming imperfections. You can also achieve this effect at home by using paint distressing methods: coat the furniture with white or cream paint, then lightly sand the edges to expose the underlying wood. This technique creates a beloved, timeworn look that embodies shabby chic aesthetics. Additionally, applying light wood stains on raw pieces enhances that authentic vintage feel. Combining both painted and stained furniture throughout your room will help you craft a beautifully imperfect vibe.
Choose pieces exhibiting genuine signs of wear, such as chips and pronounced wood grain
Create a DIY distressed finish by painting with white or cream and lightly sanding edges
Apply soft-hued wood stains to unfinished furniture for a warm, vintage-inspired touch
Blend painted and stained furnishings within the same area for layered shabby chic appeal
💡 Pro Tip: Concentrate sanding efforts on corners and frequently handled spots to mimic natural aging for the most convincing effect.
15. Combine Soft Rugs with Distressed Prints
Incorporating softly hued rugs featuring worn, vintage-inspired motifs brings warmth and dimension to shabby chic interiors. Seek out classic Persian or Oriental rugs showcasing faded shades of blush, sky blue, and cream. Subtle geometric patterns blend effortlessly with floral designs, adding layered charm. Enhance the effect by placing smaller rugs atop larger ones—for instance, a timeworn runner layered over a simple jute rug enriches the space with depth and texture. Embracing rugs with frayed hems or gentle wear adds authentic shabby chic appeal, making your rooms feel cozy and comfortably lived-in.
Choose vintage Persian or Oriental rugs in soft blush, blue, and cream tones
Stack a smaller patterned rug on top of a larger neutral jute rug for layered interest
Opt for rugs showing frayed edges or slight wear to boost authentic shabby character
Combine floral and geometric motifs within the same area for a balanced look
💡 Pro Tip: Use a rug pad beneath layered rugs to keep them securely in place while adding plush cushioning for extra comfort.
16. Opt for Luxurious Floral Upholstered Seating
After adorning your walls with cozy cottage-inspired touches, select furniture that amplifies the aesthetic. Seek out sofas and armchairs upholstered in soft floral fabrics, showcasing delicate rose patterns in gentle hues like blush pink and creamy ivory. These subtle prints infuse a romantic vibe without overpowering your room, harmonizing effortlessly with weathered wooden elements. Incorporate tufted ottomans to enhance both comfort and seating options. Favor pieces with gracefully curved silhouettes and elegantly turned legs to truly capture the shabby chic spirit. Combine varying floral sizes—pairing tiny blossoms with larger motifs—to build depth and charm. This method adds a layered allure while preserving the warm, inviting atmosphere central to this style.
Select sofas adorned with delicate floral designs in shades of pink, cream, and muted greens
Incorporate tufted ottomans featuring curved legs to evoke classic vintage elegance
Blend small-scale and large-scale floral patterns to achieve a dynamic, layered look
Match your upholstery choices with distressed wood furniture to enhance the cohesive shabby chic feel
💡 Pro Tip: If full floral upholstery feels overwhelming, begin with a single floral accent chair to serve as a focal point and gradually expand your floral elements throughout the space.
17. Incorporate Fresh Blooms in Antique Containers
Enhance your shabby chic decor by displaying fresh flowers in antique or worn vessels. Explore thrift shops for vintage mason jars, cracked teacups, and rustic pitchers that bring a unique, timeworn appeal unattainable with modern vases. Select flowers that are in season, whether picked from your own garden or purchased at a nearby farmers market, to maintain an authentic and natural feel. Blooms like roses, peonies, and wildflowers complement the aesthetic perfectly. Additionally, preserve petals by pressing them between book pages to craft delicate wall decorations. Refresh your floral displays each week to keep your space lively and welcoming.
Repurpose mason jars, chipped teacups, and aged pitchers as charming flower holders
Opt for roses, peonies, and wildflowers to evoke genuine cottage-style beauty
Gather seasonal flowers from your garden or a local farmers market for authenticity
Preserve petals by pressing them in books to create subtle, framed artwork
💡 Pro Tip: Combine flowers of varying lengths in a small grouping of mismatched containers; arranging three different vessels together is more enchanting than one large bouquet.
18. Incorporate Vintage Mirrors with Elaborate Frames
Decorative mirrors featuring intricate frames can elevate blank walls into eye-catching statements. Seek out vintage finds at flea markets, estate sales, or antique stores. Mercury glass with an aged, slightly foggy finish brings an authentic shabby chic vibe. Mirrors with beveled edges enhance the play of light, casting gentle reflections that add depth to any room. Refresh timeworn frames by painting them in gentle whites or muted pastels to maintain their charm while giving them new life. Position mirrors above fireplaces, dressers, or sofas to amplify brightness and create the illusion of more space. Combining various sizes and frame styles contributes to a curated, collected-over-years atmosphere.
Explore flea markets, estate sales, and antique shops in search of ornate mirror frames
Choose antique mercury glass for a naturally aged, softly clouded look
Revitalize worn frames with soft white or pastel paint, preserving their vintage appeal
Blend assorted frame sizes and designs to achieve a layered, gathered-over-time aesthetic
💡 Pro Tip: Place a large, intricate mirror opposite a window to reflect sunlight and visually expand even the coziest rooms.
19. Combine Vintage Lace with Ruffled Fabrics for a Romantic Look
Incorporating multiple soft fabrics brings a sense of depth and timeless romance to shabby chic interiors. Consider placing antique lace over furniture surfaces to immediately infuse your room with nostalgic elegance. Seek out lace with detailed, delicate designs from vintage stores. Adding curtains with gentle ruffles can lend a tender, airy feel to your windows, while pillows featuring subtle ruching offer charming texture without dominating the space. Blend a variety of materials such as cotton, linen, and crochet to create a warm and welcoming atmosphere. For an extra touch, layer lace runners atop plain tablecloths to enhance visual richness.
Place vintage lace over tables, dressers, and chair backs for classic accents
Opt for softly ruffled curtains to gently romanticize your windows
Combine cotton, linen, and crochet textiles to build tactile layers
Use lace runners layered on solid tablecloths to add texture and dimension
💡 Pro Tip: Avoid hot water when cleaning vintage lace; instead, use cold water with a mild detergent to protect the delicate threads and preserve intricate patterns.
20. Begin With a Gentle Shabby Chic Color Scheme
The color scheme you select lays the foundation for a shabby chic interior, shaping the ambiance of the entire room. Opt for soft, worn-in shades that evoke a sense of coziness and timelessness. Base your palette on hues like off-whites, creamy tones, and delicate blush pinks to establish a soothing environment. Introduce subtle pastel variations through elements such as cushions, drapes, and artwork to add gentle contrast without overpowering the space. To bring warmth and dimension, incorporate understated terracotta accents found in ceramics or fabric pieces. Together, these muted tones blend harmoniously to create an inviting and effortlessly relaxed atmosphere.
Choose off-white, cream, and soft blush shades as your foundational colors
Bring in pastel variations with textiles and wall decorations
Use subdued terracotta to add warmth through pottery or fabric accents
Build layers of color gradually for an authentic, aged appearance
💡 Pro Tip: Always sample paint colors under natural morning light—shabby chic hues reveal their true charm in gentle daylight.
21. Incorporate Beadboard or Shiplap for Cozy Cottage Walls
Adding vertical paneling instantly elevates plain walls, giving them a charming cottage vibe that is central to shabby chic decor. Beadboard offers slender, grooved panels ideal for subtle texture, while shiplap features broader, horizontal boards that create a rustic feel. Beadboard is especially suited for areas like bathrooms, bedrooms, and dining spaces where a warm and inviting atmosphere is desired. Opt for soft white or creamy paint shades to enhance light and openness. The grooves cast gentle shadows that bring dimension and personality to your walls. These panels also cleverly mask flaws and contribute to a relaxed, well-loved look.
Select beadboard for fine grooves or shiplap for broader, horizontal planks
Use soft white or creamy hues to brighten the room naturally
Determine locations for sconces and light fixtures before putting up panels
Mount floating shelves above paneling to showcase vintage treasures
💡 Pro Tip: For a timeless cottage feel, install beadboard halfway up the wall and top it with a simple chair rail for classic wainscoting charm.
22. Design Eye-Catching Gallery Walls Using Decorative Frames
Give bare walls new life by creating gallery displays with decorative, vintage-inspired frames. This approach adds character and highlights your unique style by showcasing a variety of antique frames. Combine frames in shades of gold, white, and weathered finishes to capture the essence of shabby chic décor. Begin your layout with the largest frame to serve as a centerpiece, then expand outward with an informal, uneven arrangement that feels effortlessly curated. There’s no need for uniformity in frame styles or dimensions. Position frames tightly together to evoke a sense of items gathered over time. Enhance the gallery by incorporating mirrors, vintage illustrations, and botanical prints within the ornate frames.
Combine gold, white, and worn frames for a diverse, charming gallery display
Use your biggest frame as a focal point and arrange others around it in an asymmetrical fashion
Feature mirrors, antique prints, and botanical designs to enrich the collection
Cluster frames closely for a look that feels organically assembled over years
💡 Pro Tip: Arrange your frames on the floor to determine the perfect layout and snap a photo before making any holes, ensuring a flawless wall installation.
Final Thoughts
Now is the perfect moment to begin turning your home into a charming shabby chic sanctuary. Begin with a single space and let your imagination run free, blending gentle hues with timeworn pieces that tell a story. Embrace the quirks and imperfections—they add character and warmth that no flawless finish could replicate. Surround yourself with nostalgic finds and plush fabrics, and soon your home will radiate the cozy, whimsical ambiance you’ve always envisioned.
A well-designed home office is about more than choosing the right desk or comfortable chair—it’s also about creating a space where you can focus without distractions while reflecting your personal style. One often-overlooked feature that can dramatically influence both aesthetics and functionality is the office door. The right door can improve privacy during meetings, maximize natural light, save valuable floor space, and become a striking design element in your home.
Whether your style leans modern, rustic, traditional, or minimalist, these creative home office door ideas can help transform your workspace into an inspiring retreat.
1. Frosted Glass Doors for Bright Yet Private Spaces
If you want sunlight without sacrificing privacy, frosted glass doors strike an ideal balance. The translucent finish softens visibility while allowing daylight to brighten your office, creating a more open and welcoming atmosphere. Pair them with black metal frames for a contemporary feel or natural wood for warmth.
2. Sliding Barn Doors with Rustic Appeal
Sliding barn doors remain a favorite thanks to their space-saving design and undeniable charm. Mounted on an exposed track, they slide effortlessly instead of swinging open, making them perfect for smaller offices. From reclaimed wood finishes to sleek painted panels, they fit a variety of decorating styles.
3. Classic French Doors That Open Up the Room
French doors instantly make a home office feel elegant and inviting. Their multiple glass panes allow light to flow between rooms while still defining the workspace. For additional privacy, consider curtains or textured glass inserts that can be closed during meetings.
4. Hidden Doors for a Seamless Look
A concealed door disguised as built-in shelving or wall paneling creates a sophisticated and unexpected feature. Hidden doors are especially appealing if you want your office tucked away from the rest of the home while maintaining a clean, uninterrupted interior design.
5. Pocket Doors That Disappear into the Wall
Pocket doors slide neatly inside the wall cavity when opened, eliminating the need for swing clearance. This clever solution works especially well in compact homes where maximizing every square foot matters. Their streamlined appearance also contributes to a minimalist aesthetic.
6. Steel-Framed Glass Doors for Industrial Style
Steel-framed doors combine slim metal profiles with expansive glass panels, creating a striking industrial-inspired look. They let natural light travel throughout the home while adding architectural character. This style pairs beautifully with modern furniture and neutral color palettes.
7. Bi-Fold Doors for Flexible Layouts
Bi-fold doors fold neatly to one side, allowing you to fully open your office or close it off whenever privacy is needed. Their versatility makes them an excellent option for multipurpose spaces where adaptability is important.
8. Glass Barn Doors That Blend Old and New
Combining the familiar sliding mechanism of a barn door with glass inserts creates a design that feels both rustic and contemporary. The transparent or frosted panels soften the heavier wood appearance while maintaining visual connection between adjoining spaces.
9. Pivot Doors with Architectural Impact
Unlike traditional hinged doors, pivot doors rotate on a central pivot point, creating a bold and luxurious entrance. Their oversized appearance makes a dramatic statement and works especially well in spacious, modern homes with open floor plans.
10. Chalkboard or Whiteboard Doors for Productivity
Turn your office door into a creative planning surface by choosing a chalkboard or whiteboard finish. Use it to write reminders, brainstorm ideas, map out projects, or leave notes for family members—all while adding an interactive design feature.
11. Louvered Doors for Better Airflow
Louvered doors feature angled slats that encourage ventilation while still providing separation between rooms. This makes them particularly useful in offices that tend to become warm or stuffy. Painted or stained finishes can easily coordinate with your existing décor.
12. Sleek Glass Sliding Doors
For homeowners seeking a contemporary aesthetic, glass sliding doors offer a refined solution. They preserve openness and daylight while creating a physical boundary for work. Frosted, tinted, or clear options allow you to customize the level of privacy you prefer.
13. Charming Dutch Doors with Versatile Function
Dutch doors split horizontally so the top and bottom halves operate independently. Open the upper section to encourage airflow and conversation while keeping pets or young children out of your workspace. They add personality and cottage-inspired charm to any office.
14. Timeless Shaker-Style Doors
Simple recessed panels and clean lines make Shaker doors one of the most versatile choices available. Their understated elegance complements farmhouse, transitional, traditional, and modern interiors alike, ensuring they remain stylish for years to come.
15. Accordion Doors for Compact Workspaces
Accordion doors fold into narrow sections, making them ideal for small offices or temporary work zones. Lightweight and available in numerous materials and finishes, they offer a practical way to separate spaces without requiring extensive renovations.
Conclusion
Your home office door is more than a simple entryway—it’s an opportunity to enhance both productivity and design. From space-saving pocket doors and modern pivot styles to cozy Dutch doors and elegant French doors, every option offers unique advantages depending on your needs and aesthetic preferences.
When choosing the perfect door, think about privacy requirements, available floor space, natural light, and the overall style of your home. With the right selection, your office can become a more comfortable, functional, and visually impressive place to work every day.
A well-designed laundry closet can make one of the most routine household chores feel far more organized and enjoyable. Whether you’re working with a tiny apartment nook or a dedicated closet hidden behind folding doors, smart planning can transform the space into an efficient and attractive utility zone. By combining practical storage, thoughtful layouts, and decorative touches, you can create a laundry closet that works harder while looking better. Here are 20 inspiring ideas to help you make the most of every square inch.
1. Install Stackable Appliances to Free Up Floor Space
One of the easiest ways to maximize a compact laundry closet is by choosing a stackable washer and dryer. Vertical arrangements leave extra room for cabinets, shelving, or storage baskets while making the entire space feel less cramped. This layout is especially beneficial in apartments and small homes where every inch matters.
2. Add Floating Shelves for Flexible Storage
Floating shelves provide accessible storage without making the closet feel heavy or overcrowded. Use them to display neatly folded towels, decorative containers, detergent, or small baskets. Their open design also keeps the space feeling airy and modern.
3. Build a Convenient Folding Counter
A countertop installed directly above front-loading machines creates an instant folding station. Instead of carrying clothes elsewhere, you can sort, fold, and organize everything in one place. Choose durable materials like butcher block or quartz for long-lasting functionality.
4. Use Pull-Out Hamper Drawers to Hide Laundry
Integrated hamper drawers keep dirty clothes out of sight while making sorting easier. Separate compartments for whites, colors, and delicates simplify laundry day and maintain a cleaner appearance throughout the closet.
5. Brighten the Space with LED Lighting
Many laundry closets suffer from poor lighting, making it difficult to identify stains or sort fabrics. Installing LED strip lights beneath shelves or recessed ceiling fixtures instantly brightens the room while consuming very little energy.
6. Install Sliding Barn Doors for Character
Traditional swinging doors can waste valuable clearance space. Sliding barn doors eliminate that problem while adding architectural interest and rustic charm. They also create an attractive focal point when the laundry closet is visible from nearby rooms.
7. Maximize Vertical Storage with Overhead Cabinets
Take advantage of unused wall height by adding cabinets above the appliances. These upper compartments are ideal for storing extra detergent, cleaning supplies, seasonal linens, or bulk purchases while keeping everyday clutter hidden.
8. Include Wall-Mounted Drying Racks
Foldable drying racks attached to the wall provide a practical place for delicate garments that shouldn’t go in the dryer. When not needed, they collapse neatly against the wall to preserve valuable floor space.
9. Organize Supplies in Decorative Baskets
Matching woven or fabric baskets instantly make open shelving feel polished and organized. They can neatly store dryer sheets, clothespins, stain removers, or miscellaneous accessories while contributing to the room’s overall design.
10. Install a Fold-Down Ironing Board
A built-in fold-away ironing board offers convenience without sacrificing storage. It folds out only when needed and tucks neatly into the wall or cabinetry afterward, making it perfect for compact laundry closets.
11. Create a Pegboard Organization Wall
Pegboards offer highly customizable storage for lint rollers, brushes, scissors, spray bottles, and other frequently used tools. Hooks and small bins can be rearranged whenever your storage needs change.
12. Add Door-Mounted Storage Solutions
The inside of closet doors often goes unused. Slim racks or hanging organizers mounted on the door can hold detergents, dryer sheets, stain sticks, or cleaning products while keeping shelves less crowded.
13. Introduce a Wallpaper Accent
A colorful wallpaper pattern transforms a purely functional closet into a cheerful space you’ll actually enjoy using. Whether you prefer florals, geometric prints, or subtle textures, wallpaper adds personality without requiring major renovations.
14. Keep Everything Visible with Glass Jars
Transfer laundry pods, clothespins, and powdered detergents into matching glass jars for a clean, organized appearance. Clear containers make inventory easy while reducing visual clutter from mismatched packaging.
15. Install Minimalist Hooks for Hanging Garments
Simple wall hooks provide an easy place to hang freshly ironed shirts, air-drying clothes, or empty hangers. They’re inexpensive to install yet add everyday convenience to your laundry routine.
16. Use Color-Coded Sorting Bins
Assign different bins for whites, darks, towels, and delicate items to eliminate time-consuming sorting later. Color coding encourages every family member to participate while keeping the closet consistently organized.
17. Incorporate a Compact Utility Sink
If plumbing allows, a small utility sink adds tremendous versatility. It provides the perfect spot for hand-washing delicate garments, soaking stained fabrics, rinsing cleaning tools, or filling buckets.
18. Label Every Basket and Container
Clearly labeled storage containers prevent confusion and help maintain organization over time. Whether storing cleaning cloths, detergent refills, or specialty laundry products, labels make locating items effortless.
19. Create a Chalkboard Reminder Station
A chalkboard wall or framed board offers space for reminders, stain treatment notes, laundry schedules, or household messages. It also adds a playful design element that can be updated whenever needed.
20. Conceal Venting for a Seamless Look
Hidden dryer vents and neatly integrated ductwork create a cleaner, more custom-built appearance. Concealing these functional components behind cabinetry or finished panels results in a polished laundry closet that blends beautifully with surrounding interiors.
Conclusion
A thoughtfully designed laundry closet proves that even the smallest utility spaces can be both beautiful and highly functional. By combining efficient storage solutions, clever organization techniques, and stylish design details, you can simplify your laundry routine while enhancing your home’s overall aesthetic. Whether you implement one idea or several, these upgrades can turn an overlooked closet into one of the hardest-working and most attractive spaces in your home.
A beige bathroom is anything but boring. This versatile neutral brings warmth, elegance, and a sense of tranquility that instantly makes any space feel more inviting. Whether your style leans toward modern minimalism, rustic charm, or luxurious sophistication, beige provides the perfect foundation for creating a bathroom that feels both stylish and relaxing.
From statement marble surfaces to cozy textiles and natural-inspired finishes, there are countless ways to incorporate this timeless hue into your design. If you’re planning a complete remodel or simply looking for easy updates, these beige bathroom ideas will inspire you to transform your space into a serene retreat.
1. Elevate the Space with Beige Marble Surfaces
Introduce beige marble on countertops, walls, or flooring to give your bathroom a refined and luxurious appearance. The natural veining adds visual interest while maintaining a soft, neutral palette. Pair marble with brass fixtures or matte black hardware to create a sophisticated contrast that never goes out of style.
2. Install Beige Floor Tiles for Lasting Appeal
Beige flooring creates a grounded foundation that complements almost any decorating style. Large-format porcelain tiles can make smaller bathrooms feel more spacious, while patterned tiles add personality without overwhelming the room. This practical color also disguises everyday dust and water spots better than brighter shades.
3. Pair Beige with Crisp White for Classic Contrast
Combining beige and white results in a timeless color palette that feels bright yet welcoming. White cabinetry or fixtures provide freshness, while beige walls or flooring introduce warmth and softness. Finish the look with natural wood accents or brushed brass details for extra character.
4. Make a Statement with a Beige Vanity
Swap traditional white cabinetry for a beige vanity to create a softer focal point. A marble or quartz countertop paired with warm-toned cabinetry delivers understated luxury while blending beautifully with both contemporary and traditional interiors.
5. Design a Spa-Inspired Shower with Beige Tiles
Cover your shower walls in beige tiles to create a seamless and calming environment. Neutral tones reflect light beautifully and provide a clean backdrop for glass enclosures, metallic fixtures, or decorative niches. Add textured tiles for subtle visual depth.
6. Warm Up the Room with Soft Beige Walls
Painting the walls in a creamy beige instantly creates a cozy atmosphere. Unlike stark white, beige introduces depth and comfort while remaining light enough to keep the room feeling open. It’s an ideal backdrop for artwork, mirrors, and decorative accessories.
7. Add Natural Texture with Beige Pebble Stone
Pebble flooring or shower accents introduce an organic element that evokes the feeling of a luxury spa. The textured surface adds visual interest while complementing wood, stone, and greenery for a nature-inspired retreat.
8. Frame Your Tub with a Beige Surround
Wrapping a bathtub in beige stone or tile softens modern lines and creates a relaxing focal point. Complete the spa aesthetic with wooden bath trays, candles, and lush plants to encourage long, restorative soaks.
9. Brighten the Bathroom with Beige Window Treatments
Linen curtains or woven shades in soft beige gently filter sunlight while maintaining privacy. The result is an airy, peaceful ambiance that enhances the room’s natural warmth without feeling heavy.
10. Incorporate Beige Mosaic Tile Details
Mosaic tiles provide texture and artistic flair while staying true to the neutral palette. Use them behind the vanity, inside shower niches, or as a decorative border to add dimension and elevate the overall design.
11. Introduce Gold Accents for a Luxe Finish
Pairing beige with brushed gold faucets, mirrors, and lighting creates an elegant combination that feels rich without being flashy. The metallic warmth enhances beige tones and gives the bathroom a polished appearance.
12. Style with Beige Towels and Accessories
One of the simplest updates is replacing colorful accessories with coordinated beige linens, baskets, and soap dispensers. These small changes instantly create a more cohesive and upscale look while maintaining a soothing atmosphere.
13. Install Floating Beige Shelves for Storage
Floating shelves in beige or light wood tones provide practical storage while blending seamlessly into neutral walls. Display folded towels, candles, and decorative objects to keep the room organized without sacrificing style.
14. Create an Accent Wall in Beige Textures
Rather than relying on bold colors, add visual interest through textured beige finishes such as shiplap, stone panels, or decorative tile. This subtle approach creates depth while preserving the room’s calm aesthetic.
15. Refresh the Space with a Beige Shower Curtain
A high-quality beige fabric shower curtain instantly softens the bathroom and ties together surrounding finishes. Textured linen or waffle-weave materials add elegance while maintaining the room’s understated palette.
16. Upgrade to a Beige Sink Basin
For a distinctive yet subtle design feature, consider a beige vessel or integrated sink. Its muted color blends naturally with neutral countertops while providing a fresh alternative to traditional white fixtures.
17. Soften Lighting with Warm Beige Fixtures
Light fixtures featuring cream or beige shades produce a gentle glow that makes the bathroom feel cozy and welcoming. Combined with dimmable bulbs, they help establish a relaxing environment perfect for unwinding.
18. Install a Beige Tile Backsplash
A backsplash in beige ceramic or porcelain protects walls while adding texture and refinement. Experiment with subway, stacked, or herringbone layouts to introduce personality without disrupting the soothing color scheme.
19. Paint the Ceiling Beige for Unexpected Warmth
While ceilings are often left white, extending beige overhead creates a cocooning effect that makes the room feel intentionally designed. This works particularly well in bathrooms with abundant natural light.
20. Finish with Timeless Beige Cabinetry
Beige cabinets offer enduring appeal that adapts easily to changing trends. Whether you choose sleek slab fronts or classic shaker doors, the neutral finish pairs effortlessly with marble, quartz, wood, and metal accents for years to come.
Conclusion
A thoughtfully designed beige bathroom proves that neutral doesn’t have to mean plain. By layering warm tones with natural materials, elegant finishes, and subtle textures, you can create a space that feels sophisticated, relaxing, and effortlessly timeless. Whether you embrace beige through flooring, cabinetry, accessories, or statement surfaces, these ideas demonstrate how this versatile color can transform any bathroom into a welcoming retreat that you’ll enjoy every day.