We keep seeing the same lighting error in renovated homes and new builds: choosing pendant lights OR recessed lighting as if they’re mutually exclusive statements about good design. In 2026 the tools, bulbs, and fixture styles have evolved, but the mistake hasn’t. The truth is simpler and more useful, lighting is about layers, intent, and proportion, not a binary choice.
In this text we’ll explain why designers and homeowners keep repeating this mistake, break down the real strengths and limitations of pendant lights and recessed downlights, and show the practical, room-by-room specs that let you get it right. Whether you’re planning a kitchen overhaul or just swapping fixtures, we’ll give clear rules for placement, bulb selection, beam angles, and spacing so your lighting looks intentional and performs well. Read on to stop guessing and start lighting like you mean it.
Why Designers And Homeowners Keep Making The Same Lighting Mistake
We see three recurring causes behind the pendant-versus-recessed mistake.
First: aesthetic fixation. Pendant lights are photogenic, striking silhouettes, decorative shades, and dramatic drops photograph well on social media and in magazines. That visual appeal pushes people to prioritize pendants as the room’s signature element, then try to make them do everything: ambient, task, and accent lighting. But pendants excel at shaping zones and creating focal points: they’re not automatically sufficient for even general illumination.
Second: cost and retrofit constraints. Recessed lighting feels like a large, invasive upgrade, cutting ceilings, running wiring, and meeting insulation or IC-rated requirements. Homeowners often opt for pendants because they’re cheaper and easier to install. That practical decision becomes a design decision when the pendants are expected to replace a full lighting plan.
Third: misunderstanding of light layering. We still meet many clients who think a single fixture type equals a complete solution. The result is underlit work zones, harsh shadows, or dead spots. Good lighting design uses ambient, task, and accent layers. Choosing pendants OR recessed lights instead of combining them is the core misstep, we’ll unpack why each fixture type belongs in a layered plan and how to do that without overcomplicating the ceiling.
Throughout the rest of this guide we’ll use clear placement rules, fixture choices, and practical specs so you can avoid these pitfalls in your own projects.
Pendant Lights: Strengths, Limitations, And When They Shine
Pendants are about presence. They define zones, kitchen islands, dining tables, reading nooks, and create visual hierarchy. Their strengths include directional lighting, decorative impact, and the ability to hang at precise heights for task illumination.
Where pendants shine:
- Zone definition: A trio above an island anchors the space: a single pendant over a bedside table makes a statement and frees up surface area.
- Task emphasis: With the right shade and bulb they provide focused light for chopping, reading, or grooming.
- Aesthetic flexibility: Materials, shapes, and finishes let us tailor pendants to any style, from industrial to minimalist.
Limitations to account for:
- Coverage: One or several pendants won’t evenly light a whole room. They create pools of light and shadows between fixtures.
- Glare and sightlines: Improper height or transparent shades cause uncomfortable glare, especially when seated across a table.
- Scale mistakes: Too-large pendants overwhelm: too-small ones look lost.
When to choose pendants: we recommend them whenever you need a focal point, localized task light, or a stylistic accent. But they should rarely be the only source of general light.
Pendant Placement And Scale Rules That Designers Use
- Height rules: Over dining tables or islands, hang pendants 28–34 inches above the surface for standard ceiling heights (8–9 ft). For taller ceilings, add 3 inches per extra foot. If multiple pendants are used, keep consistent height for rhythm.
- Spacing: Center pendants evenly across the zone. For islands, allow 12–18 inches from the island edge to the nearest pendant edge, and 24–30 inches between multiple pendants depending on diameter.
- Proportion: A quick rule is that a pendant’s diameter should be about one-third the width of the table or island it serves. In open-plan rooms, scale pendants to the furniture, not just the ceiling.
Light Quality, Bulbs, And Shade Choices For Pendant Fixtures
- Bulb type: Choose LEDs with CRI 90+ for accurate color and 2700–3000K for warm, flattering light in living/dining spaces: 3000–3500K for kitchens where clarity matters.
- Diffusion: Opaque or lined shades provide soft downward light and reduce glare. Clear glass or exposed bulbs work for decorative effect but need careful positioning or frosted bulbs to avoid eye strain.
- Beam control: Use directional inserts, reflectors, or internal baffles if you need concentrated task light. Avoid wide, shallow shades over tasks that require even illumination.
Pendants are powerful tools. When we treat them as part of a layered plan, paired with ambient sources and accent lights, they transform both the look and function of a space.
Recessed Lighting: Strengths, Limitations, And Best Uses
Recessed downlights are the stealth players of a lighting scheme: they disappear into the ceiling yet deliver broad ambient light. Their low visual impact makes them ideal when we want the architecture, art, or furniture to stand out instead of the fixtures.
Strengths:
- Even ambient illumination: Properly spaced, recessed fixtures eliminate shadows and provide consistent baseline light across a room.
- Minimalist aesthetic: No hanging fixtures, clean lines, and flexibility for orientation and dimming.
- Layering compatibility: They pair well with pendants and wall sconces to build depth without visual clutter.
Limitations:
- “Hospital” feel risk: Too many downlights or the wrong color temperature make spaces feel flat and clinical.
- Installation complexity: New construction is straightforward: retrofits require ceiling access, IC-rated fixtures near insulation, and sometimes insulation contact considerations.
- Glare and beam overlap: Incorrect spacing or narrow beam angles produce bright hotspots and uneven light.
Best uses: Recessed lights are ideal for uniform ambient lighting in living rooms, kitchens (general illumination), hallways, and basements. They’re also excellent for highlighting artwork when used with adjustable trims.
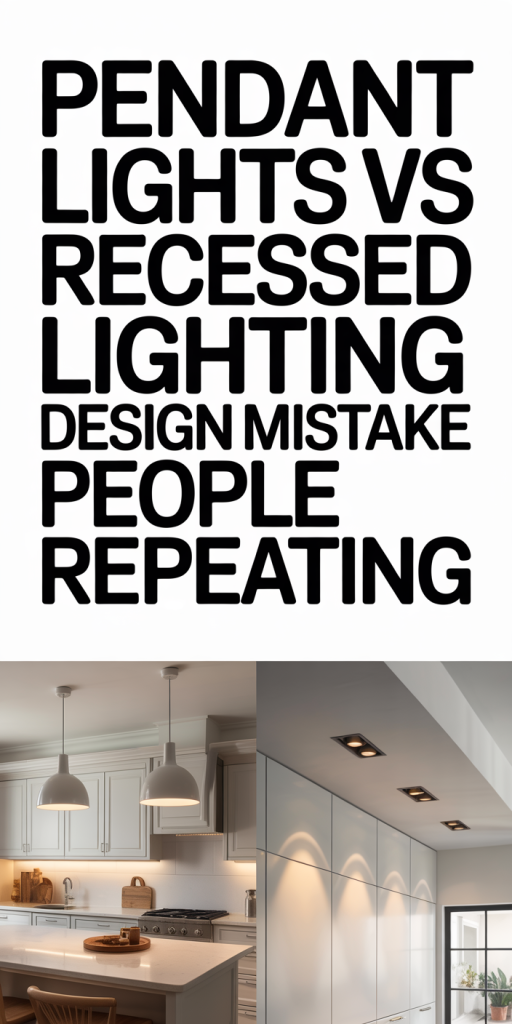
Layout, Beam Angle, And Spacing Considerations For Recessed Downlights
- Spacing rule of thumb: For general ambient light, divide the ceiling height by two to get the spacing (for a 9-foot ceiling, aim for 4.5 feet between fixtures). This is a quick-start rule: adjust based on lumens and beam angles.
- Beam angles: Use 60°–90° trims for ambient lighting to avoid hot spots. For accenting art or pendant-mixed schemes, 24°–36° directional trims work well.
- Lumens per fixture: For kitchens and active spaces aim for 700–1,000 lumens per downlight if they’re the primary ambient source: reduce to 400–600 lumens when combined with other layers.
- Dimming and controls: Put recessed lighting on a dimmer or zone control so we can tune overall brightness without altering pendant mood lighting.
When planned thoughtfully, recessed lighting gives us a neutral, reliable backdrop that lets targeted fixtures, pendants, sconces, track heads, do the expressive work.
The Core Design Mistake: Choosing One Fixture Type Instead Of Layering
This is the hard lesson: treating pendant lights and recessed downlights as either/or makes the lighting do less than it could, and often leads to a room that looks great in photos but feels wrong in daily life.
Why layering matters:
- Functionality: Tasks require directed light: ambient layers reduce contrast and eye strain: accent layers add depth and drama. No single fixture covers all three well.
- Flexibility: Layered systems let us change mood and function, bright for cooking, dimmed for dinner, and accent lighting for a movie, without rewiring or swapping fixtures.
- Visual comfort: Combining diffuse recessed light with targeted pendants prevents harsh shadows and keeps faces well-lit during conversation.
Common mistakes we encounter:
- Relying solely on pendants: Islands with three pendant fixtures but no ambient lighting create dark perimeters and require high wattage bulbs that glare.
- Overcrowding the ceiling with recessed cans: When every square foot has a can light, the room loses texture and personality: plus, costs balloon and insulation performance can be impacted.
- Mismatched color temperatures: Mixing warm pendants with cool recessed lights without coordination creates visual dissonance. Always plan CCT (correlated color temperature) and CRI together.
How we fix it: start by defining the room’s primary activities. Specify a baseline ambient level (recessed or uplighting), add focused task lighting (pendants, under-cabinet, sconces), and sprinkle accents (wall washers, picture lights). Keep color temperature and dimming compatibility consistent across layers so everything blends. Layering isn’t indulgent, it’s how we make spaces usable and beautiful.
Room-By-Room Fixes: Practical Specs For Kitchen, Living Areas, And Bedrooms
Here are practical, plug-and-play specs we use on projects to get lighting right quickly.
Kitchen
- Ambient: Recessed downlights spaced using the ceiling-height/2 rule. Aim for total kitchen lumens of 5,000–7,000 depending on size and finishes.
- Task: Pendants above islands, hang 30–32 inches above the countertop (for 8–9 ft ceilings): choose 3000–3500K, CRI 90+, 400–700 lumens per pendant for targeted work.
- Under-cabinet: Continuous LED strips or puck lights at 3000K for countertop illumination: 200–400 lumens per linear foot.
- Controls: Two circuits, one for recessed ambient (dimmable), one for pendants/task lights, let us set bright cooking scenes and cozy dining scenes.
Living / Dining Areas
- Ambient: Recessed lights with wide trims or a central ceiling fixture if the room is small. Target 1,500–3,000 lumens total for living rooms, higher for open-plan spaces.
- Accent: Pendant over dining table at 28–34 inches above the surface: consider a dimmer to shift from dinner to ambient mood.
- Layer: Add wall washers or picture lights for art: table/floor lamps for reading nooks. Match CCT across all fixtures, 2700–3000K for warm, relaxing spaces.
Bedrooms
- Ambient: Fewer recessed fixtures or a central semi-flush fixture to avoid a ‘lit like an exam room’ feel, target 1,000–1,500 lumens total.
- Task: Pendant or wall-mounted swing arms beside the bed. Position pendants about 28–30 inches above nightstand surfaces to clear sightlines when seated.
- Accent: Low-level night lighting (step lights, LED strips) for wayfinding at 2–10% of main lighting: use warm 2700K to preserve sleep-friendly atmosphere.
We also recommend specifying dimmable, high-CRI LEDs and keeping all layers on compatible control systems (preferably with scene presets). That allows us to change a room’s function without swapping fixtures.
Conclusion: A Simple Checklist To Avoid The Pendant Vs Recessed Trap
Here’s a compact checklist to help us stop treating pendant lights and recessed lighting as rivals and start using them as partners:
- Define activities first: list tasks, focal points, and mood for the room.
- Establish an ambient baseline: use recessed or central fixtures to remove dark spots.
- Add targeted task pendants where focused light is needed, follow placement and scale rules.
- Coordinate CCT and CRI across all fixtures (2700–3500K: CRI 90+ for true color).
- Put major layers on separate circuits and dimmers for flexible scenes.
- Avoid over- or under-lighting: use lumens/room-size guidelines above and adjust for finishes.
When we design with layers in mind, pendant lights and recessed downlights stop competing and start complementing each other. The result is a room that looks intentional, photographs well, and, most importantly, works for how we actually live in it.
Leave a Reply