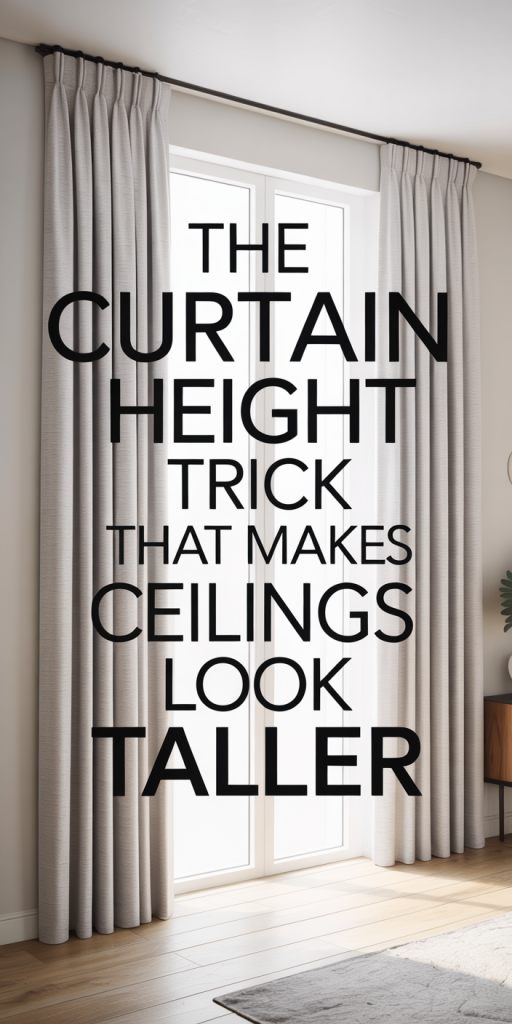
Ceiling height is one of those room features people notice, even if they can’t name why a space feels cramped. We’ve learned a simple visual hack interior designers use again and again: raising curtain hardware and lengthening drapery to create a powerful vertical illusion. In this guide we’ll explain why the curtain height trick works, show exactly where to place rods (including ceiling-mount options), give practical measurements so the result looks natural, and recommend fabrics, rods, and styling choices that amplify height. We’ll also cover variations for low ceilings, vaulted rooms, and irregular layouts so you can use the trick in almost any home. By the end, you’ll have the confidence to reposition or replace your curtains in a way that lifts the whole room, without construction or renovating the ceiling.
How The Curtain Height Trick Creates The Illusion Of Taller Ceilings
Perception is everything. When we look at a room, our eyes naturally follow lines, walls, windows, and vertical elements, toward a vanishing point. The curtain height trick exploits that tendency: by extending fabric and hardware upward, we create continuous vertical lines that suggest the ceiling is farther away than it really is. There are a few visual principles at work here. First, the uninterrupted vertical line. A long panel, hung high, draws the eye upward and reduces the visual emphasis on the actual window edge, which often sits well below the ceiling. Second, scale and proportion. When curtains start closer to the ceiling, the window reads as part of the wall rather than a separate, limiting frame. That shifts perceived scale in favor of height.
Third, contrast and framing. Dark or clearly defined frames near the ceiling can either shorten a room or create drama, used correctly, a slim rod or discreet cornice close to the ceiling keeps attention moving up instead of stopping at the window. Finally, floor-to-ceiling continuity matters: when both the top and bottom of the drapery connect visual anchors (ceiling line and floor plane), the vertical dimension feels extended. We also see psychological effects: taller rooms feel airier and more elegant, and taller vertical cues give the impression of grandeur even in modest spaces.
In short, the trick isn’t about magic so much as redirecting how the eye reads architectural proportions. With selective hardware placement, panel length, and styling decisions, a room can feel feet taller without touching a single joist.
Where To Hang The Rod: Ceiling-Mount Versus High Wall-Mount
Choosing between a ceiling-mount or a high wall-mount rod is one of the most important decisions we make when applying the curtain height trick. Each option has strengths and constraints.
Ceiling-mount: This approach attaches the rod or track directly to the ceiling. It offers the strongest illusion because the rod sits at the absolute top of the room, eliminating any visual gap between the curtain and ceiling. Ceiling-mounts work particularly well with lightweight tracks, minimal hardware, or sheer panels that want to appear as though they’re flowing from the ceiling itself. They’re ideal when we want a seamless, airy look or when architectural details (like crown molding) are minimal. Installation typically requires anchors appropriate for the ceiling material: hollow-core or plaster ceilings may need toggle anchors or professional help.
High wall-mount: This method positions the rod on the wall several inches above the window frame, commonly 4–12 inches up, but sometimes more. High wall-mounts are less invasive to install and offer flexibility when the ceiling prevents a direct mount (for example, heavy crown molding or irregular surfaces). We recommend wall-mounts when hanging over windows with existing casings or when the ceiling is too complex for a safe ceiling attachment. The key with high wall-mounting is to keep the rod close enough to the ceiling line to preserve the illusion. Mounting too low defeats the effect.
Practical considerations: If insulation, HVAC, or crown molding gets in the way, a high wall-mount is often the pragmatic choice. For renters or those avoiding holes in the ceiling, use high wall-mounts and make sure to place them as high and discreet as structural constraints allow. For the most dramatic lift, we favor ceiling-mounted tracks for their uninterrupted verticality, but both methods can produce excellent results if installed thoughtfully.
How High To Hang Curtains: Practical Measurements That Always Look Natural
Measurements turn this trick from guesswork into a repeatable result. We use a few reliable rules of thumb depending on ceiling height and window placement.
Standard approach (most rooms): Hang the rod 2–4 inches below the ceiling line or crown molding. This keeps hardware close enough to read as part of the ceiling plane without risking scuffs. If your ceiling is 8 feet, placing the rod 2–4 inches from the ceiling still leaves enough fabric to reach the floor elegantly.
Rental-friendly approach: If you can’t touch the ceiling, mount the rod as high above the window casing as possible, ideally 6–12 inches above the frame. The higher the better within reason: avoid mounting so high it clashes with doorways or feels awkward. Even a 6–8 inch increase over traditional placement creates a noticeable lift.
Floor clearance: For the bottom, choose one of three looks: 1) floating (1/2″ clearance from the floor) for casual modern spaces, 2) grazing (1/8″–1/4″ clearance) for crisp, tailored rooms, or 3) puddling (2–6 inches on the floor) for romantic, layered interiors. We generally recommend grazing or half-inch clearance because both maintain vertical continuity without collecting dust.
Panel width and overlap: Each panel should be 1.5–2.5 times the width of the window for proper fullness when closed. That fullness helps maintain the vertical line: too narrow panels look skimpy and reveal the window frame, wasting the height illusion.
Measure twice: Start by marking the ceiling line and use a laser level for accuracy. If you’re unsure, mock up with inexpensive tension rods or clip-up fabric to test visual effect before committing to screw holes.
Fabric, Rods, And Hardware That Amplify Vertical Lines
Not all materials play equally well with vertical illusions. The right fabric, rod finish, and hardware design will either accentuate or undermine the effect.
Fabric: Choose fabrics with a vertical drape and medium to heavy weight for most rooms. Linen blends, cotton sateen, and wool-rich textiles create straight, uninterrupted lines. Sheers can work if we double-layer them with heavier panels: the sheer gives translucent height while the opaque panel provides the vertical continuity. Avoid overly textured, stiff fabrics (like heavy brocades) that bunch or disrupt vertical flow.
Pattern and color: Vertical stripes or subtle linear weaves enhance height. Solid, monochromatic panels reduce visual breaks and push the eye upward. For small rooms, lighter tones reflect light and amplify airiness: for grander statements, deep monochromes hung high add drama and still elongate.
Rods and tracks: Minimal, slim rods keep attention on the fabric rather than the hardware. Concealed tracks installed in the ceiling or slim metal rods painted to match the ceiling color become visually invisible and extend the curtain’s perceived start point. If using decorative rods, select ones with a modest profile, large finials can draw attention back toward the window and shorten the look.
Hardware placement and accessories: Use rings or gliders that allow the panel to fall evenly. Clip-top rings can create a casual ripple while sewn-in pockets create a staunched, vertical fall. We like curtain hooks that create soft, uniform folds. When using tiebacks, position them lower than mid-height: too-high tiebacks chop the vertical sweep. For a clean, column-like look, consider motorized ceiling tracks which maintain a perfectly straight header and are especially useful for very high installations.
Styling Tips To Reinforce The Vertical Illusion (Length, Pleats, And Panel Width)
Styling choices are where the trick starts to feel intentional rather than accidental. We focus on length, pleats, and panel width to keep lines pure and proportion right.
Length: As noted, panels should either graze or slightly brush the floor. If we’re after a modern, tailored effect, we measure for a 1/8″–1/2″ clearance. For a relaxed or luxurious look, add 2–6 inches of puddling. Whatever we choose, being consistent in all windows in a room preserves the vertical rhythm.
Pleats and headers: The type of header affects how the fabric falls. Pinch pleats create structured vertical folds that emphasize height. Pencil pleats and ripple folds create smooth, continuous lines, less formal but very effective for elongation. Avoid wide box pleats that create horizontal breaks near the header and can visually cut the room’s height.
Panel width and stacking: When curtains are open, they should stack neatly to the side without blocking light or creating visual clutter. For larger windows or sliding doors, consider three-panel systems where the center panel stacks between two side panels, this maintains verticality even when open. Overly narrow panels leave gaps and reveal window frames, which reduces the illusion.
Color blocking and borders: Resist horizontal contrast at the top or bottom of panels. Horizontal bands, bold hem details, or contrasting toppers interrupt the vertical read. If you want interest, add vertical trim or double panels of slightly different tones to keep the eye moving vertically.
Layering: A sheer underpanel plus an opaque outer panel creates depth without breaking vertical lines. We often use sheers hung from the same high track so they appear as one continuous layer from ceiling to floor.
Adapting The Trick For Different Ceiling Types
The curtain height trick needs tweaks depending on ceiling architecture. We break down the practical adaptations for low ceilings and for sloped, vaulted, or irregular ceilings so you can apply the approach in any room without losing style or function.
Low Ceilings: Small-Room Strategies
Low ceilings are where this trick can make the biggest psychological difference, if we avoid common mistakes. First, keep rods as close to the ceiling as possible. Even an extra 4–6 inches above a standard window makes a pronounced change. Use lighter fabrics that collect less bulk at the top: heavy pelmets or large valances defeat the purpose by creating horizontal weight near the ceiling.
We recommend choosing narrow vertical stripes or plain light-colored panels that blend with the wall color to reduce visual breaks. Avoid heavy crown molding or large decorative cornices above the rod, if those exist, mount the rod just under the molding and paint the molding and wall in a continuous tone to visually push the ceiling line upward.
Another handy trick is to run rods across multiple adjacent windows or across a wall to create a continuous band of fabric. That horizontal continuity across the top can paradoxically make the room read taller because the eye sees a unified vertical field rather than multiple cropped windows.
Finally, keep furniture low and avoid tall, chunky furniture against the window wall. Low-profile furnishings preserve the new vertical emphasis and prevent the room from feeling top-heavy.
Sloped, Vaulted, Or Irregular Ceilings: Placement Solutions
Sloped and vaulted ceilings present both opportunity and complexity. The dramatic height is naturally elongating, but windows under slopes can read oddly if curtains are hung in a conventional way. For vaulted spaces, ceiling-mounted tracks that follow the slope can look spectacular: they allow curtains to hang from the true ceiling line and maintain uninterrupted vertical flow along the wall plane. Motorized flexible tracks are particularly useful here because they handle curves cleanly.
For triangular or irregular-shaped window openings, we suggest framing the window with a straight horizontal rod placed at the visual apex of the wall (often where the wall meets the ceiling at the highest point). Then use full-length panels on the adjacent flat wall to continue the vertical rhythm. If the slope makes ceiling mounting impossible above the window, mount a continuous track at the highest practical point on either side of the window and let panels hang straight down, this creates the read of a taller vertical field beside the unusual window shape.
In rooms with exposed beams or complex architectural details, match hardware finish to the beams or ceiling elements so the rod recedes visually. This helps the curtains become the vertical canvas rather than a competing design element. Always test with sample drop cloths or temporary tension rods first: these spaces reward careful mockups before permanent installation.
Conclusion
The curtain height trick is one of the highest-return upgrades we can make to a room: minimal cost, reversible installation, and instant visual impact. By choosing the right mounting method, measuring precisely, selecting fabrics and hardware that support continuous vertical lines, and adapting the approach to ceiling type, we can make spaces feel taller, airier, and more composed. Try one change at a time, raise the rod, lengthen the panels, or swap a header style, and you’ll quickly see why this is a favorite tool among designers. In short: hang higher, measure carefully, and let the curtains do the lifting.
Leave a Reply