Author: Nick Garcia

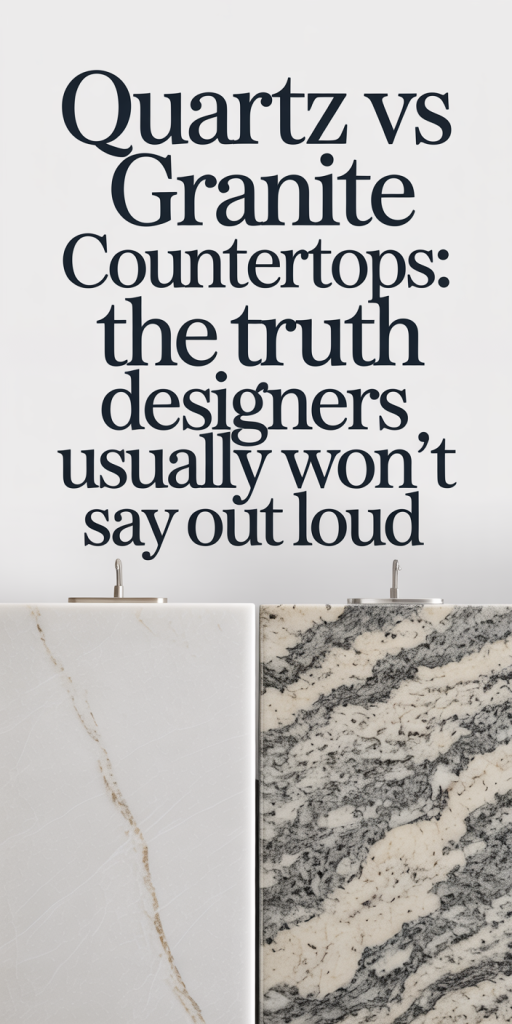
  • Quartz Vs Granite Countertops: The Truth Designers Usually Won’t Say Out Loud — What Every Homeowner Should Know In 2026

    We’re going to be blunt: choosing between quartz vs granite countertops isn’t just a design call, it’s a long-term lifestyle decision. Both materials dominate kitchens and bathrooms because they look great and promise durability, but the trade-offs are real and subtle. Designers often focus on appearance and ease of installation, then gloss over practical headaches like thermal tolerance, surface integrity over time, or how warranties actually work.

    In this piece we’ll explain the science, the myths, and the practical outcomes you’ll live with for a decade or more. We’ll cover how each material is made, what daily use really does to them, maintenance realities, true cost versus perceived value, and, most important, how to choose the right surface for your household habits and design goals. Read on if you want to pick a countertop that earns its place rather than becoming an expensive regret.

    The Hard Truth Designers Rarely Tell Clients

    Designers earn trust by showing beautiful photos and curated samples, but there are a few truths they often downplay, not out of malice, but because clients want to imagine perfection.

    First: no countertop is maintenance-free. We’re frequently told quartz is “maintenance-free” and granite is “high-maintenance,” which simplifies reality into a myth. Quartz does reduce the need for sealing, but it can show heat damage, seam visibility, and chip patterns that are harder to repair invisibly. Granite is natural and can be resealed, but it’s still porous to varying degrees depending on the slab, and some exotic granites are almost as low-maintenance as quartz.

    Second: warranties are marketing, not prophecy. Manufacturers and fabricators offer warranties that look robust on paper, but they rarely cover everyday issues like thermal cracking, discoloration from incidental chemical exposure, or labor costs for seam adjustments. We recommend reading warranty fine print and asking what’s excluded, thermal shock, improper care, and DIY modifications are common carve-outs.

    Third: installation and fabrication quality matter more than material choice in many cases. A perfectly installed granite countertop by a skilled fabricator will perform better than poorly templated quartz. Seams, edge profiles, and substrate flatness influence how the surface ages and how comfortable you’ll be using it.

    Finally: resale value is nuanced. Buyers like stone, but they care about style, cohesion, and condition more than whether a countertop is quartz or granite. We’ve seen homes with well-chosen, well-maintained quartz sell faster than those with damaged natural stone.

    Knowing these realities upfront changes how you approach the selection process: think performance, not prestige.

    What Quartz And Granite Really Are — Materials, Origins, And Myths

    Understanding origin stories helps us predict long-term behavior.

    Quartz is an engineered product: ground natural quartz (a very hard mineral), resins, pigments, and sometimes recycled glass or mirror are combined under heat and pressure to create slabs. Because the mix is manufactured, color consistency and pattern control are excellent. But that resin matrix is what changes the performance profile: quartz is not as heat-resistant as stone, and prolonged UV exposure can cause subtle discoloration. The engineered nature is a benefit in terms of uniformity and an issue if you want a truly natural, unique surface.

    Granite is a natural igneous rock formed from cooled magma. Its visual character, flecks, veins, and color variations, is the result of mineral composition and cooling conditions over millions of years. That variability is what people love, but it adds unpredictability: different slabs from the same quarry can have different porosity, fracture lines, and mineral hardness. Granite can resist scratches and heat much better than resin-heavy materials, but it can also contain veins or fissures that need stabilization during fabrication.

    Myths we hear constantly:

    • Myth: “Granite is maintenance-heavy.” Reality: some granites take sealant well and need little more than annual resealing, while others require more attention. – Myth: “Quartz is indestructible.” Reality: quartz is strong but can chip, scorch, or stain if exposed to concentrated heat or harsh chemicals. – Myth: “Granite is always more valuable.” Reality: resale value depends on style, color trends, and condition, not simply “naturalness.”

    With that baseline, we’ll jump into how engineered quartz is made and how natural granite forms, because those processes directly influence lifetime performance.

    How Engineered Quartz Is Made (And Why That Matters)

    Engineered quartz starts as about 90–95% ground quartz crystals mixed with polymers (usually polyester resins) and pigments, then compacted using a process called vibro-compression under vacuum and cured with heat. Manufacturers may add recycled content or glass chips for visual effects.

    Why the manufacture matters:

    • Consistency: Because it’s mixed, color and pattern repeatability across slabs and batches is high. If you need matching countertops in different rooms, quartz simplifies that. – Resin binder: That gives quartz strength and non-porous qualities, great for stain resistance, but it also lowers the surface’s tolerance to direct, concentrated heat. A hot pan can scorch the resin or cause thermal stress. – Repairability: Chips typically reveal resin and aggregate beneath, making invisible repairs difficult. Polishing can help, but matching color and reflectivity is never guaranteed. – Environmental note: some brands use recycled content and low-VOC resins: others don’t. If sustainability matters, ask for product transparency and certifications.

    Knowing the manufacturing trade-offs helps us predict behaviors: excellent stain resistance and color uniformity versus a vulnerability to heat and harder-to-hide repairs.

    How Natural Granite Forms (And The Implications For Buyers)

    Granite is a coarse-grained igneous rock composed principally of quartz, feldspar, and mica. It forms deep underground as magma cools slowly, allowing crystals to grow. Because the growth environment changes, slabs have natural variations, veins, and sometimes micro-fractures.

    Why that formation matters for buyers:

    • Unique character: no two slabs are identical. That’s a selling point but also a procurement challenge, you must choose your slab, not just a sample. – Porosity varies: although granite is generally less porous than many surfaces, porosity ranges by quarry and even within a single slab. Some granites take sealer well and become nearly impervious to stains: others accept liquids more readily and demand more care. – Natural fissures: some granites contain veins or hairline fractures that fabricators reinforce with resin or stainless-steel pins during fabrication. Reinforcement is normal: a good installer will explain what was done. – Heat resistance: generally excellent. Granite tolerates hot pans better than resin-based products, but extreme thermal shock (like a red-hot pan on a cold, wet slab) can still cause cracks.

    For buyers, the main takeaways are: insist on slab selection, ask about porosity and recommended sealants, and expect visual uniqueness.

    Durability, Heat Resistance, And Everyday Wear

    Durability is where pros and homeowners often disagree. We’ll break this into scratch resistance, heat tolerance, chips and cracks, and impact resilience.

    Scratch resistance: Quartz and granite both score high. Quartz is harder than many household items because of its high quartz content, but the resin matrix reduces pure mineral hardness. Granite’s mineral mix (quartz + feldspar) is naturally hard: while granite can scratch, visible scratches are uncommon with normal kitchen use. Cutting on the surface will damage either, always use a board.

    Heat resistance: Granite wins. Natural stone handles localized heat better: a hot pan is unlikely to scorch granite. Quartz resins are sensitive to sudden, concentrated heat. An exposed bottom of a cast-iron skillet can discolor or fracture quartz, and heat marks can be permanent.

    Chips and cracks: Quartz chips often reveal a different texture and color in the repair, making them more visible. Granite chips can be filled and polished with less obvious results if the color and pattern allow. Cracks from thermal shock are rarer in granite but do occur if underlying substrates trap moisture or if there’s severe temperature differential.

    Impact resilience: Both materials can suffer chips from heavy falls (think a cast-iron pot dropped on an overhang). Edge profile choice affects vulnerability: thinner overhangs chip more easily. Installation: a level, well-supported substrate reduces stress concentrations that cause cracking.

    In short: quartz offers predictable performance with some heat and repair liabilities: granite provides superior heat resistance and natural variability that can hide minor wear if chosen carefully.
    Maintenance, Stains, Sealing, And Warranty Reality

    Maintenance requirements are a major deciding factor for busy households. Here’s the practical guide we give clients.

    Quartz maintenance: Cleaning is simple, mild soap and water or pH-balanced cleaners. Avoid bleach-based or abrasive cleaners and never use strong solvents like paint stripper. No routine sealing is required because the resin matrix is non-porous. For stubborn spots, manufacturers recommend specific cleaners: follow their guidance to keep warranties valid.

    Granite maintenance: Most granites benefit from periodic sealing. High-quality impregnating sealers penetrate pores and improve stain resistance: we usually recommend annual checks rather than a hard timeline. If water beads, the sealer is likely still effective: if it darkens or stains, reseal. For oil-based stains the right poultice or professional treatment is often necessary.

    Stains and chemical resistance: Quartz resists wine, coffee, and most household stains well. It does, but, react badly to prolonged exposure to strong acids, alkalis, or solvents, leaving dull patches or discoloration. Granite resists many chemicals better, but some acidic substances (like lemon juice) can etch sealant or certain mineral compositions over long exposure.

    Warranty reality: Warranties are typically limited to manufacturing defects: delamination, resin bonding issues, or color defects beyond tolerance. They rarely cover install-related problems, thermal damage, or improper maintenance. We advise keeping the purchase invoice, installation notes, and a photo record. If you intend to keep countertops long-term, a robust care plan and documented professional installation are your true insurance.

    Practical tip: always request manufacturer care instructions and the fabricator’s workmanship warranty in writing. The two may differ: know both.

    Cost, Value Perception, And Resale Impact

    Upfront cost and perceived value diverge markedly between quartz and granite.

    Initial cost: Quartz generally sits in a predictable price band because production controls color and pattern. Mid-range quartz competes with mid-range granite: high-end quartz with unique patterns can match or exceed premium natural stones. Granite pricing varies widely by rarity, quarry, and slab size: exotic granites can be pricier than entry-level quartz.

    Long-term value: Granite’s “natural” cachet appeals to many buyers, but trends shift. We’ve watched some colors (very busy, highly veined patterns) fall out of favor, while subtle, consistent quarts remain hot because they match many design languages. The critical driver of resale is condition and cohesion: a well-chosen quartz that complements cabinetry and lighting often adds more perceived value than a mis-matched, damaged granite.

    Replacement and repair costs: Repairs on quartz (color-matching resin fills) can be more complicated and costly, and fabrication to replace a section may be pricey because of color matching. Granite repairs are often less visible if the pattern hides fillers: but, sourcing a matching slab for a replacement panel can be nearly impossible if the slab was unique.

    Return on investment (ROI): If your local market favors natural stone, granite may edge quartz. In markets where clean, contemporary kitchens sell faster, quartz may deliver better ROI. We recommend checking comparable listings in your neighborhood and asking local realtors which look buyers are searching for now.

    Eventually, cost decisions should factor in maintenance willingness, cooking habits, and how long you intend to keep the counters.

    How To Choose Based On Your Household, Cooking Habits, And Design Goals

    Choosing the right surface depends less on marketing and more on observable behavior and goals. We use a few quick diagnostics with clients to steer them.

    Household profile:

    • Heavy cooks and bakers: Choose granite if you regularly put hot pans on the counter or create large thermal shifts. The stone’s heat tolerance and toughness make it forgiving. – Busy family with kids: Quartz’s stain resistance and consistent look make it attractive. If you want low fuss and predictable color that hides sticky fingers, quartz is a good pick. – Entertainers and hosts: Consider edge profiles, seam placement, and continuity between kitchen and bar. Quartz offers repeatable slabs for islands and bars: granite’s uniqueness can be a focal point if you plan to center design around it.

    Cooking habits and cleaning tolerance:

    • If you routinely use strong cleaners, degreasers, or acidic marinades, understand the manufacturer’s guidance, quartz can be sensitive to certain chemicals. Granite sealed well tolerates many household substances but needs reseal attention. – If cutting directly on counters is common (we hope you won’t.), both materials will suffer. Factor in repair budgets.

    Design goals and aesthetic:

    • Desired look: For consistent color and modern minimalism, quartz shines. For rustic, organic, or dramatic natural statements, granite provides depth and uniqueness. – Lighting and cabinet pairings: Busy granite patterns can compete with patterned cabinetry: quartz can act as a calm counterpoint. We advise laying multiple full-size slabs or mockups next to your cabinets and lighting at different times of day.

    Practical selection steps we recommend:

    1. Define lifestyle priorities, stain resistance, heat tolerance, or visual uniqueness. 2. Visit slab yards, not just showrooms. Select the actual slab if you choose granite. 3. Ask fabricators about reinforcement, seam placement, and substrate requirements. 4. Get written care instructions and both material and workmanship warranties. 5. Consider a small, inconspicuous test: leave a hot pan on a scrap piece (with permission) or test with lemon juice for a few hours to see reaction.

    Following this process reduces surprises and helps you choose a countertop that actually works for the way you live.

    Conclusion

    Our bottom line: there’s no universal “better” between quartz vs granite countertops, only the better choice for your home. Quartz offers predictable appearance, low routine maintenance, and consistency across installations. Granite delivers natural beauty, superior heat tolerance, and a one-of-a-kind surface that can hide character and minor wear.

    We encourage you to prioritize how you use the space, insist on slab selection or consistent batch numbers, and demand clear written guidance from your fabricator and manufacturer. When we approach countertop selection this way, the decision becomes less emotional and more practical, and you end up with a surface that earns its place for years, not one that becomes a costly regret.
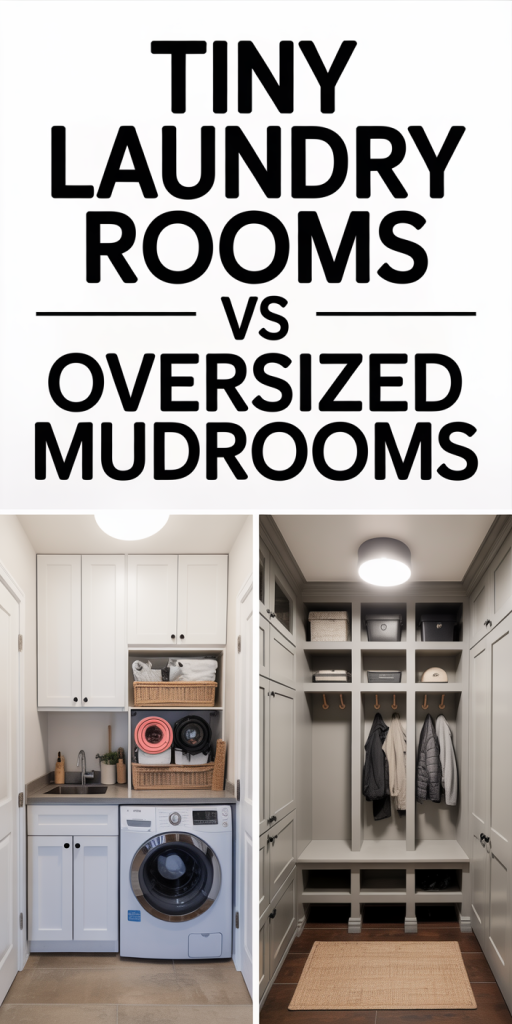
  • Tiny Laundry Rooms vs Oversized Mudrooms: Which Space Matters More — How To Choose The Right Utility Zone For Your Home In 2026

    In 2026, home priorities have shifted: family flow, flexible spaces, and value-for-square-foot matter as much as aesthetics. When we rethink utility zones, the debate often narrows to two contenders, the compact, efficient tiny laundry room and the generous, multifunctional oversized mudroom. Both solve the same core problem, managing dirt, gear, and chores, but they do so in very different ways. Choosing the right one isn’t just about square footage: it’s about daily routines, climate, household size, and long-term resale strategy. In this text we’ll compare performance, design trade-offs, costs, and practical solutions so you can decide which space matters more for your home. We’ll share examples, layout ideas, and criteria to prioritize, helping you match function to lifestyle rather than following the latest trend.

    Why This Comparison Matters For Modern Homes

    Homes today are under competing pressures: smaller footprints in cities, growing demand for adaptable rooms in suburbs, and buyers who expect both convenience and durability. Utility spaces, laundry rooms and mudrooms, sit at the intersection of those pressures. They’re not glamorous, but they’re heavily used, and their design affects daily efficiency, cleanliness, and long-term home value.

    We often hear homeowners ask whether they should sacrifice living space for a larger mudroom or compress laundry functions into a tiny footprint to free square footage for bedrooms or an open plan. That question matters because the wrong choice can create daily friction: bottlenecks when everyone returns from school or sports, damp clothes lingering in poorly ventilated spaces, or inefficient circulation that forces people to track dirt through the house.

    Beyond user experience, there’s a ripple effect on resale. Buyers increasingly look for purposeful utility spaces, some want a dedicated laundry suite, others prize a mudroom that handles shoes, pets, and outdoor gear. Local climate plays a role, too: in rainy, snowy regions, a robust mudroom becomes almost essential: in milder climates, a compact laundry can be prioritized. We’ll weigh those situational factors and give a framework so you can make an intentional choice rather than react to trends.

    How Tiny Laundry Rooms Perform: Benefits, Limits, And Use Cases

    Tiny laundry rooms, think closet-style setups or narrow alcoves, are a strategic response to space constraints. When executed well they punch above their weight, but they require careful decisions.

    Benefits

    • Space efficiency: A stacked washer-dryer and vertical storage free up floor area for other priorities. We can reclaim square footage for living rooms, home offices, or an extra closet.
    • Lower construction cost: Smaller footprints usually mean less finish material and lower HVAC or plumbing adjustments when located near existing utility lines.
    • Shortcut to convenience: Placing a tiny laundry adjacent to bedrooms or bathrooms reduces carrying loads across the house: a compact solution can improve routines more than a distant, oversized room ever would.

    Limits

    • Limited staging area: Folding and sorting require counter space: narrow rooms make those tasks awkward. If we do a laundry chute or hamper system, the tiny footprint can handle it, but otherwise clutter accumulates.
    • Ventilation and moisture risks: Small rooms that lack proper airflow can trap humidity and lead to mildew if we don’t integrate exhaust or a dehumidifier.
    • Restricted versatility: A tiny laundry typically can’t double as a pet wash, craft station, or storage for seasonal gear.

    Best Use Cases

    • Urban condos and small houses where every square foot is at a premium.
    • Households that do frequent small loads, singles or couples, or have a second laundry elsewhere (for example, a basement set for heavy items).
    • Renovations with plumbing access constraints. When the laundry must sit near existing stack lines, compact designs minimize rework.

    Design tips for tiny laundries we recommend: stack where possible, use pull-out counters for folding, install a shallow sink (or a retractable faucet), choose front-loading machines with flat tops for staging, and prioritize ventilation, either a dedicated exhaust fan or a passive vent plus a moisture-sensing dehumidifier. With those measures, a tiny laundry can deliver surprisingly big returns in convenience.

    How Oversized Mudrooms Perform: Benefits, Limits, And Use Cases

    Oversized mudrooms are the opposite end of the spectrum: generous spaces designed to absorb the chaos of daily entry and exit, storing everything from coats and boots to backpacks, sports gear, and pet supplies. They act as a buffer between outdoors and interior, and when done right they streamline the entire household’s flow.

    Benefits

    • Multifunctionality: We can use a mudroom as a laundry drop-off, pet area, pantry overflow, or hobby zone. Built-in benches, cubbies, and durable flooring make it a staging hub for the whole family.
    • Better organization and containment: With ample storage, we can create dedicated zones, shoe racks, wet-clothing racks, seasonal bins, reducing clutter in living areas.
    • Resilience to weather and mess: A well-specified mudroom includes durable finishes, proper drainage or floor slopes, and sometimes a dog-wash station or utility sink.

    Limits

    • Higher cost and space trade-off: Allocating 80–150+ square feet to a mudroom may not be feasible in smaller homes. The finishes and built-ins add up.
    • Underutilization risk: If the household doesn’t need extensive storage, the extra space can sit unused or become a catchall for “stuff.”
    • Zoning and location constraints: To be effective, a mudroom should sit at a primary entry (garage or rear door). Placing it awkwardly reduces its utility.

    Best Use Cases

    • Families with kids, active households, or multi-pet homes where gear management is continuous.
    • Homes in climates with frequent rain, snow, or muddy seasons.
    • Buyers who value mudroom-style organization as a resale amenity, especially suburban markets where garage-to-home transitions are routine.

    Design strategies we favor for oversized mudrooms: create distinct vertical zones for shoes, coats, and equipment: use washable wall finishes and a durable tile or sealed concrete floor: include a sink or hose bib for quick rinses: and plan lighting and seating so the space feels purposeful rather than purely utilitarian. When integrated into circulation thoughtfully, an oversized mudroom can reduce cleaning workload and protect interior finishes.

    Key Design Criteria To Prioritize: Flow, Storage, Ventilation, And Accessibility

    Choosing between a tiny laundry and an oversized mudroom comes down to how each option meets essential design criteria. We rank the following as non-negotiable factors.

    Flow

    • Location matters: Place the utility zone along natural circulation paths, near the garage, back door, or bedrooms. A poorly located room forces users to carry wet or dirty items through clean spaces.
    • Entry sequencing: We recommend a transition sequence: outer gear (coats/boots) → containment (bench/cubby) → cleaning (sink/wash) → laundering or storage. That sequence minimizes cross-contamination.

    Storage

    • Vertical thinking: Floor area is precious: go tall. Open cubbies, closed cabinets, and overhead shelving balance quick access with hidden storage.
    • Purpose-built storage: Design compartments for shoes, sports gear, pet items, and seasonal bins. Adjustable shelving extends long-term usefulness.
    • Temporary staging: Include a dedicated folding counter or bench that doubles as a sorting station.

    Ventilation & Moisture Control

    • Mechanical exhaust: For small laundry rooms, a dedicated exhaust fan is essential: for mudrooms, consider operable windows plus mechanical ventilation if the space is enclosed.
    • Drying options: Add a retractable drying rack, heated towel bar, or small dehumidifier when indoor drying is necessary.
    • Waterproofing: Use water-resistant materials at lower heights, tile, sealed plywood, or PVC trim, and slope floors slightly toward a drain if the mudroom will handle large amounts of water.

    Accessibility

    • Universal design principles: Install lower hooks and pull-out shelves to accommodate children and older adults. Keep pathways at least 36 inches wide where possible.
    • Clear sightlines: Good lighting and uncluttered surfaces make it easy to find essentials in a rush.
    • Hardware & thresholds: Choose low-profile thresholds and non-slip finishes: lever handles and accessible storage reduce friction for everyone.

    When we evaluate a renovation or new build, we score each option against these criteria. Often the “right” answer isn’t purely spatial, it’s about which space best satisfies flow, storage, ventilation, and accessibility for our household’s rhythms.

    Cost, Value, And Resale Implications Of Each Space

    Costs fluctuate by region, finishes, and whether plumbing or structural changes are required, but we can outline general trends and resale considerations.

    Upfront Cost

    • Tiny laundry: Lower baseline cost. If the laundry fits near existing plumbing and uses basic finishes, expect modest spend, appliances and cabinetry will dominate the budget. Stacking units and simpler counters keep costs down.
    • Oversized mudroom: Higher initial outlay. Built-ins, durable flooring, and plumbing fixtures (if adding sinks or dog-wash stations) raise costs. If the mudroom requires expanding the footprint or moving the garage entry, structural work pushes the price further.

    Operational Cost

    • Energy and ventilation: Tiny laundry rooms need proper venting and possibly a dehumidifier, minor ongoing costs. Mudrooms with heated floors or extensive lighting can have higher operating expenses, but durable finishes reduce maintenance costs long-term.

    Resale Value & Market Perception

    • Market fit: In many suburban markets, a well-appointed mudroom is a visible selling point, buyers envision easy gear management and a cleaner home. Conversely, urban buyers often prize efficient use of space: a compact, functional laundry close to bedrooms can be a deciding amenity.
    • ROI considerations: A clean, functional tiny laundry that solves daily needs can add perceived value without large investment. A high-quality mudroom can increase sale appeal and justify a premium in neighborhoods where outdoor activity is common.
    • Avoid overbuilding: Don’t oversize or over-spec for your neighborhood. An expansive mudroom with luxury finishes in a modest market may not return its full cost at sale.

    Timing and phasing

    We recommend phasing improvements when budgets are tight: start with functional storage and ventilation upgrades that deliver immediate quality-of-life gains. If later you have more space or funds, expand or reconfigure, many teams convert underused garages or porches into mudrooms with good ROI when tailored to local buyer expectations.

    Choosing Based On Lifestyle, Household Size, And Home Type

    No one-size-fits-all answer exists. We use lifestyle mapping, matching how a household lives to the space’s capabilities, to guide decisions.

    Household Size & Composition

    • Singles/couples: A tiny laundry often suffices. If we’re two people who do frequent small loads, a compact setup adjacent to sleeping areas is efficient.
    • Families with children: We lean toward oversized mudrooms. Kids generate gear, athletic equipment, muddy shoes, wet outerwear, so a larger containment zone greatly reduces chaos.
    • Multi-generational households: Accessibility and storage for a range of ages favor mudrooms with adjustable storage and seating.

    Activity Level & Hobbies

    • Active/outdoor lifestyles: If hiking, biking, or sports are central, a mudroom handles equipment transitions and protects interiors. A pet-heavy household similarly benefits from the extra space for washing and feeding.
    • Low-activity or travel-heavy households: If laundry is outsourced or done in a basement with low daily traffic, a compact laundry near sleeping quarters can be adequate.

    Home Type & Layout

    • Urban condos/townhomes: Tiny laundries make sense, vertical solutions and efficient staging preserve living area.
    • Suburban detached homes: We often recommend mudrooms, especially when there’s a direct garage or side entry. The floor area is more available, and buyers in these markets expect transitional spaces.
    • Older homes: Conversion choices depend on existing circulation. Converting a formal entry to a mudroom may harm curb appeal: instead, repurposing a back hall or part of a garage is usually smarter.

    Weighing Compromises

    If we can’t have both, compromise solutions exist: locate a compact laundry within an enlarged entry hall, or design a narrow mudroom that borrows key mudroom features, bench, hooks, waterproof floor, without the full footprint. The best choice reflects how often gear and dirt enter the house, who’s responsible for maintenance, and what buyers in your market expect.

    Layout Examples And Practical Space‑Saving Solutions

    Below are real-world layouts and practical tactics we’ve used that make either option work better, many are hybrids that capture strengths of both tiny laundries and oversized mudrooms.

    Layouts

    • The Vertical Closet Laundry (8–12 sq ft): Stack washer/dryer in a closet with bi-fold doors. Add a pull-out counter above the dryer, a wall-mounted drying rack, and a shallow recessed cabinet for detergents. Best for condos and secondary suites.
    • The Corridor Laundry (20–30 sq ft): Locate a shallow laundry along a hallway between bedrooms. Countertop over front-loaders serves as an uninterrupted folding surface. Include a bank of cabinets above and a slim sink if plumbing allows.
    • The Transitional Mud Hall (30–50 sq ft): A narrow mudroom between garage and kitchen with bench seating, vertical cubbies, and a wipe-clean wall surface. Add an under-bench shoe drawer and wall-mounted hooks. This layout works when footprint is limited but a functional buffer is needed.
    • The Full-Service Mudroom (80–150+ sq ft): Zoned for shoes, coats, sports gear, and pet care. Include built-in lockers, a bench with storage, a utility sink, and space for a laundry drop or secondary washer. Durable floor, targeted lighting, and a dedicated exhaust complete the scheme.

    Space-Saving Solutions & Details

    • Fold-down surfaces: A hinged counter that folds away when not in use gives ample staging without permanent footprint.
    • Pull-out hampers and sliding drawers: Keep sorting organized and accessible without occupying floor area.
    • Multifunctional furniture: Benches with hidden compartments and stackable bins help convert a small hall into a mudroom-lite.
    • Machine placement: Front-loaders under counters or stacked units in closets maximize utility. Leave a 1–2 inch service gap for vibration and airflow.
    • Durable yet attractive finishes: Porcelain plank tile or sealed concrete offers easy cleaning without looking industrial. Water-resistant paint and PVC trim reduce long-term maintenance.
    • Plumbing negotiation: If adding a sink to a mudroom or laundry, route plumbing along existing lines where possible: consider utility cabinets that conceal plumbing to keep the space tidy.

    These approaches let us tailor solutions to tight budgets and tricky layouts while preserving daily functionality. We prefer test-fitting a mock layout with cardboard or painter’s tape on the floor to confirm circulation before committing to built-ins.

    Conclusion

    Deciding between a tiny laundry room and an oversized mudroom comes down to prioritized needs. If conserving square footage and proximity to bedrooms matter most, a well-designed tiny laundry, stacked appliances, strong ventilation, and smart staging, will serve you efficiently. If you need a high-capacity transition zone for kids, pets, and outdoor gear, an oversized mudroom with intentional zoning and durable finishes will pay daily dividends.

    Our recommendation: map your household routines, evaluate climate and resale expectations in your market, and choose the option that solves your biggest pain points. When possible, aim for hybrid features, a folding surface, a bench, and moisture control, that capture the best of both worlds. That way, whatever you pick, the space will feel like it truly works for how you live.

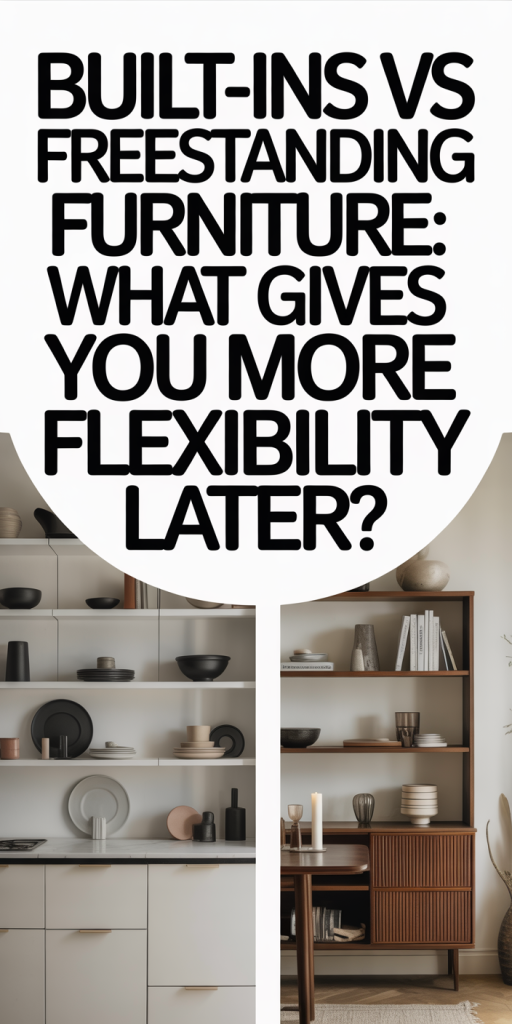
  • Built-Ins vs Freestanding Furniture: The 2026 Guide To Future-Proof Flexibility

    Homes change, family size, work habits, and design tastes shift faster than ever. When we decide between built-ins and freestanding furniture, we’re not just picking a look: we’re making a bet on how our space will serve us in five, ten, or twenty years. This guide cuts through the jargon and emotion to give practical, long-term thinking about flexibility. We’ll compare built-ins and freestanding pieces side-by-side, examine real-world trade-offs for mobility, adaptability, and longevity, and give a checklist to help you choose the right approach for each room. Whether you’re renovating, buying a new home, or simply planning for life’s inevitable changes, we’ll help you make choices that stay smart longer, without sacrificing style today.

    Built-Ins Vs Freestanding: A Quick Side-By-Side Comparison

    Built-ins

    • Permanence: Attached to walls or floors: often custom-sized for a specific wall or window.
    • Strengths: Seamless look, optimized use of awkward spaces, and often increased storage capacity per square foot.
    • Weaknesses: Difficult and costly to move or repurpose: can date a room’s style.

    Freestanding Furniture

    • Permanence: Portable and relatively easy to replace or rearrange.
    • Strengths: Versatility across rooms, lower upfront commitment, and easier style updates.
    • Weaknesses: Usually less tailored to tight spaces and may underutilize irregular corners.

    At a glance, built-ins buy space efficiency and cohesion: freestanding furniture buys adaptability. But this headline comparison misses nuance. For example, a modular freestanding system can approach the utility of a built-in, and some built-ins can be designed to be partially demountable. The rest of this guide unpacks those nuances so we can match decisions to real homeowner needs rather than design dogma.

    What Flexibility Really Means For Homeowners (Mobility, Adaptability, And Longevity)

    When we talk about “flexibility,” we mean three distinct, measurable things: mobility, adaptability, and longevity.

    • Mobility: The physical ability to move or remove a piece. Freestanding pieces score high, think recliners, dressers, and bookcases. Built-ins score low unless they’re specifically designed for disassembly.
    • Adaptability: How easily a piece supports new functions. A freestanding dining table can become a desk: a built-in banquette is harder to repurpose. But adaptability also includes reconfigurability, modular systems, adjustable shelving, and movable partitions increase adaptability whether they’re built-in or freestanding.
    • Longevity: How long the piece remains useful and desirable. Built-ins can last decades structurally, but tastes and household needs can outpace them. Freestanding pieces are easier to replace as needs evolve, but they may wear out sooner physically.

    We should assess flexibility through the lens of life changes: kids, aging in place, remote work, shifting storage needs, and resale. For example, if we expect to downsize in five years, freestanding furniture that’s easy to move and sell becomes more valuable. If we’re planning to age in place, built-ins that minimize bending and provide integrated storage might be wiser. Flexibility also has an emotional component, do we prefer a consistent, curated look or the freedom to experiment?

    Finally, flexibility is co-created with floorplan and budget. A small urban apartment emphasizes mobility and space optimization: a suburban home with extra square footage can afford more permanence. That context will guide whether we lean into built-ins, freestanding pieces, or a hybrid approach.

    Advantages Of Built-Ins: Space, Function, And Cohesive Design

    Built-ins excel when we want to extract every inch of usable space and create a unified aesthetic. Here are the principal advantages we can expect.

    Optimized Use of Space

    Custom shelving, window seats with hidden storage, and wall-to-wall cabinetry can reclaim awkward nooks and sloped ceilings. For small homes, built-ins can increase usable storage by 10–20% compared with off-the-shelf pieces, simply because they’re made to the wall and floor dimensions.

    Integrated Functionality

    Built-ins allow us to integrate wiring, lighting, and appliances in ways freestanding pieces can’t. Think recessed media cabinets with ventilated panels for electronics, built-in desks with cable management, or concealed drawers beneath stair treads. Those solutions reduce clutter and improve ergonomics.

    Cohesive, High-End Finish

    Because built-ins are usually custom- or semi-custom, they offer a finish continuity that’s hard to achieve with freestanding items. We can match millwork, paint, and hardware across a room for a designer-caliber result that reads as intentional and permanent.

    Perceived Value

    Thoughtfully executed built-ins often feel like a home’s bones rather than merely furniture. That perception can translate to stronger emotional appeal for homeowners and buyers who appreciate craftsmanship and integrated design.

    Durability and Structure

    When installed correctly, built-ins can be more robust than typical freestanding furniture. Anchored shelving and fixed cabinetry are less likely to tip, shift, or sag over time, an advantage for heavy-object storage or long-term installations.

    Design Control

    Custom built-ins let us address specific functional requirements, like a hidden laundry chute, a pet nook, or a built-in bar, without compromise. That precision can dramatically improve daily convenience and spatial efficiency.

    The Drawbacks And Long-Term Risks Of Built-Ins

    Even though the upsides, built-ins carry real long-term risks we can’t ignore.

    High Upfront Cost and Installation Disruption

    Custom cabinetry and millwork typically cost more than comparable freestanding pieces. Installation can also be invasive, cutting, painting, electrical updates, so renovation timelines and budgets expand.

    Reduced Flexibility

    Once installed, built-ins constrain future layout changes. If we later decide to enlarge a room, remove a wall, or repurpose a space, the built-in can become an obstacle rather than an asset. Removing or relocating built-ins is often costly and can damage surrounding finishes.

    Style Aging and Buyer Preferences

    Built-ins reflect a stylistic moment. While some classic millwork ages gracefully, trendy built-ins, think ornate shelving with specific niche sizes, can date a home. For resale, a buyer may view a custom solution as limiting if it doesn’t match their needs.

    Potential for Over-Commitment

    Homeowners sometimes overbuild, filling a space with permanent solutions for short-term needs (e.g., a niche entertainment center designed around current TV sizes). That over-commitment reduces future adaptability.

    Maintenance and Repair Complexity

    Integrated systems can hide mechanical or electrical components. When something fails, ventilation, wiring, or a mechanical drawer slide, repairs can be more complicated than swapping out a freestanding unit. We should plan for access panels or removable modules to mitigate this risk.

    Environmental and Lifecycle Considerations

    Because built-ins are harder to repurpose, they can contribute to waste if removed. But, high-quality built-ins can outlast several generations of furniture if maintained, so impact varies with material choices and craftsmanship.

    In short, built-ins reward us with optimized function and aesthetics but penalize with reduced adaptability and higher initial investment. We have to ask whether the immediate gains justify the future constraints.

    Advantages Of Freestanding Furniture: Versatility, Portability, And Style Updates

    Freestanding furniture is the default option for good reason: it offers flexibility we can leverage across changing life stages.

    Mobility and Ease of Reconfiguration

    We can move sofas, beds, and cabinets between rooms, into storage, or to a new house. That mobility simplifies remodeling, seasonal rearrangements, and the logistics of life events, like moving for work or accommodating a growing family.

    Lower Upfront Cost and Reduced Installation Time

    Off-the-shelf and custom freestanding pieces often cost less than built-ins for comparable storage or finish quality. There’s no major installation, so we can own a functional room the same day a piece arrives.

    Style Agility

    If we like to refresh decor with trends or evolving tastes, freestanding furniture lets us swap finishes, fabrics, and silhouettes without a contractor. This is a major value for homeowners who enjoy frequent updates or want to experiment before committing.

    Resale Liquidity

    Because freestanding items are movable, they’re simpler to sell, donate, or trade-in. That liquidity reduces the cost of style changes over time: a well-maintained sofa can fetch resale value, offsetting replacement costs.

    Compatibility With Small-Batch or Modular Systems

    Modern modular furniture blurs the line: modular sofas, shelving cubes, and stackable storage offer near-built-in performance while remaining portable. These solutions combine the benefits of both approaches and often at a lower total investment.

    Fewer Structural Requirements

    Freestanding pieces don’t rely on wall studs or specialized mounting, useful in rental units or older homes with uncertain wall conditions. For renters, this is often the only practical option.

    Taken together, freestanding furniture gives us the freedom to experiment, adapt, and move, making it the safer bet when our future plans are uncertain.

    How Each Option Affects Resale Value, Remodeling, And Future Buyers

    Real estate value responds not just to features but to perceived flexibility. Here’s how built-ins and freestanding furniture influence resale, remodeling choices, and buyer reactions.

    Resale Value

    • Built-ins: Tasteful, high-quality built-ins, especially those that improve storage or flow, can boost a home’s appeal and sometimes its market value. But, extremely customized solutions that tightly match one owner’s needs can limit buyer interest. Buyers often prefer neutral, adaptable features.
    • Freestanding: Because it’s removable, freestanding furniture rarely impacts home value directly. But the presence of thoughtful, well-proportioned furniture in listing photos can improve perceived space and lifestyle, indirectly supporting value.

    Remodeling Flexibility

    • Built-ins: They complicate major remodels. Removing or altering built-ins adds cost and time. If we foresee structural changes (knocking down walls, reconfiguring layouts), freestanding solutions reduce friction.
    • Freestanding: Remodeling is easier when furniture can be moved out of the way or stored. We can experiment with layout changes without demolition.

    Buyer Preferences and Marketability

    Buyer demographics matter. In urban markets with smaller units, built-ins that maximize storage and function can be a selling point. In suburban or luxury markets, buyers may expect high-end built-ins in kitchens and master closets, and they judge quality closely.

    Neutrality and Emotional Appeal

    The best built-ins are neutral in style and flexible in function, think adjustable shelving, integrated lighting that’s not overly decorative, and universal-sized cabinetry. These features allow buyers to project their own preferences onto the space.

    Staging and Visual Impact

    For resale, we can use freestanding furniture strategically to demonstrate a room’s possible layouts. Well-staged homes sell faster. If we choose built-ins, maintain flexible staging options (e.g., removable shelves, replaceable hardware) to appeal broadly.

    In practice, our strategy should reflect market realities. If we plan to sell within a few years, we should favor solutions that most buyers in our market find useful. If we expect to stay long-term, personal preference and functionality can take precedence.

    Cost, Installation, And Maintenance Trade-Offs Over Time

    Understanding lifecycle costs, not just upfront price, helps us avoid surprises.

    Upfront Costs

    • Built-ins: Higher material and labor costs. Custom cabinetry, integrated lighting, and built-in appliances raise the initial spend. Expect to pay a premium for on-site labor and finishing.
    • Freestanding: Generally lower immediate cost. Even high-quality freestanding pieces usually cost less than equivalent custom built-in solutions.

    Installation and Time Costs

    • Built-ins: Installation can take days to weeks, with potential for dust and disruption. We should budget time for finishing work (paint touch-ups, trim adjustments).
    • Freestanding: Quick delivery and placement: minimal disruption.

    Maintenance and Repair

    • Built-ins: Lower tendency to move reduces wear from handling, but integrated systems can be costly to repair if electrical or mechanical systems are enclosed. Plan for accessible panels and service points.
    • Freestanding: Easier and cheaper to repair or replace individual pieces. But, lower-quality items may require replacement sooner.

    Depreciation and Replacement Costs

    • Built-ins: Depreciation varies. High-quality millwork can last decades and may not need replacement, reducing cost over time. But if tastes change, cosmetic alterations (refacing, repainting) are more involved.
    • Freestanding: Easier to refresh incrementally. Reupholstery, refinishing, or part replacements are common and cost-effective.

    Hidden Costs

    • Built-ins: Potential for unseen expenses, structural reinforcement, electrical rewiring, or mold/insulation work exposed during installation.
    • Freestanding: Shipping, assembly fees, and fastening hardware (for safety anchoring) are small but real costs.

    Tax and Insurance Considerations

    In some jurisdictions, permanent built-ins can be classified as real property improvements and treated differently for tax or insurance purposes. We should check local rules, especially for major renovations.

    Balancing these factors, we find that built-ins are an investment in permanence and efficiency: freestanding is an investment in flexibility and lower short-term cost. Our decision should reflect projected time in the home, tolerance for disruption, and willingness to absorb potential future alteration costs.

    Hybrid Strategies And A Practical Decision Checklist For Choosing What’s Right

    We rarely need to choose exclusively between built-ins and freestanding pieces. A hybrid approach often delivers the best long-term value. Below are practical strategies and a checklist to guide decisions.

    Hybrid Strategies

    • Anchor + Modular: Install a modest built-in ‘anchor’, a fireplace surround, window seat, or low cabinetry, then complement with modular freestanding storage. This gives permanence where it counts and flexibility elsewhere.
    • Demountable Built-Ins: Work with a millworker to design built-ins that can be disassembled into modular panels for future removal. Use knock-down fasteners and standardized dimensions so pieces can be repurposed.
    • Standardized Openings: If you want custom cabinetry but worry about changing tech (TV sizes, speaker systems), design openings with adjustable shelves and ventilation. Avoid overspecific niches.
    • Mix High and Low: Invest in built-ins in high-use, hard-to-outsource areas (kitchen, mudroom), and choose freestanding furniture for living rooms and bedrooms where tastes shift more.

    Decision Checklist (use before major purchases)

    1. How long do we plan to stay? If under five years, favor freestanding or demountable built-ins.
    2. Do we need to maximize every inch? For tiny spaces, built-ins often win.
    3. Will the space need multiple future uses? Prioritize modular and freestanding solutions.
    4. What’s our renovation budget? Built-ins cost more upfront and can create hidden expenses.
    5. Are there safety or stability concerns (kids, pets)? Built-ins or properly anchored furniture preferred.
    6. Is resale a near-term priority? Choose neutral, flexible built-ins or primarily freestanding pieces.
    7. Can we design for serviceability? Ensure access panels and removable components for built-ins.
    8. Do we value frequent style changes? Favor freestanding or easily upgradable modular systems.
    9. Are there structural or mechanical constraints? Older walls or rental rules may force freestanding choices.
    10. Can we combine both? Identify one or two anchor built-ins where they’ll deliver the most value and leave the rest flexible.

    Applying the checklist lets us make room-by-room decisions rather than an all-or-nothing commitment. For example, in a small condo we might invest in a built-in media wall with ventilated panels and keep the rest freestanding. In a family home, we might opt for built-in kitchen cabinetry and freestanding living room furniture to stay nimble.

    Conclusion

    Built-ins and freestanding furniture each have clear roles in a flexible, future-ready home. Built-ins give us optimized space, cohesion, and permanence, but they require higher upfront cost and limit later changes. Freestanding furniture offers mobility, lower initial investment, and easier style updates, though it can use space less efficiently.

    Our best strategy is pragmatic: evaluate each room on its own merits, favor hybrid solutions where possible, and design built-ins to be as demountable and serviceable as practical. Using the checklist above, we can make decisions that protect our options, so our home adapts to life’s changes rather than locking us into a single moment in time.

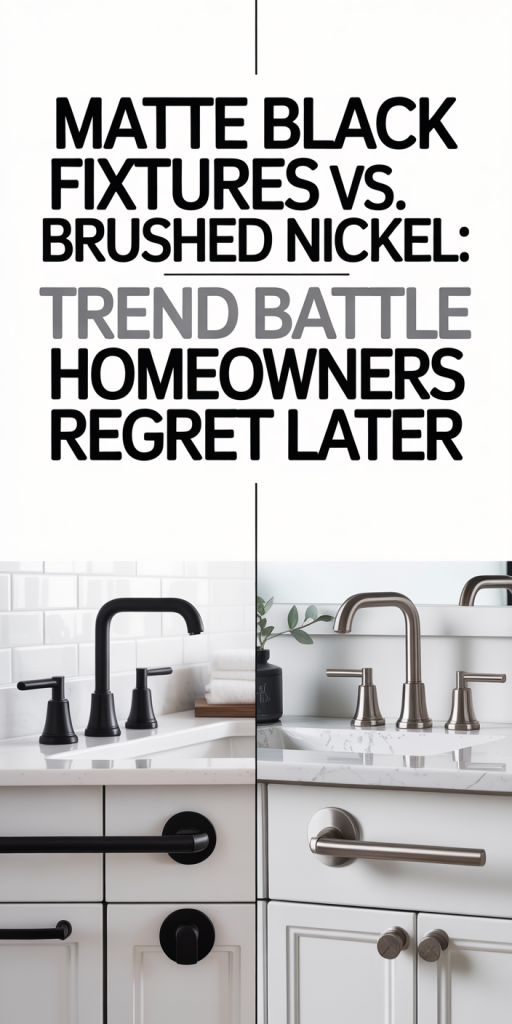
  • Matte Black Vs Brushed Nickel: Which Finish Will You Regret Choosing In Your Remodel? (2026 Buyer’s Guide)

    Choosing finishes is one of those remodel decisions that feels small until it haunts every photo, every guest comment, and every resale listing. Today we’re looking squarely at one of the most debated pairs in kitchens and bathrooms: matte black fixtures vs brushed nickel. Both finishes have legions of fans and strong resale arguments, yet they wear, coordinate, and age very differently.

    We’ll walk through not just how each finish looks, but how it performs over time, maintenance, durability, installation traps, cost, and the effect on resale. Our goal is practical: help you decide before paint goes on the walls and your plumber bolts anything down. By the end you’ll have a checklist and a simple flow to pick the finish you won’t regret when the honeymoon phase is over.

    Why Your Fixture Finish Choice Actually Matters

    Deciding between matte black fixtures vs brushed nickel isn’t just about current trends or what looks good on an inspiration board. Your finish choice influences four tangible things we live with every day:

    • Visual cohesion: Fixtures are among the few permanent accents in a room. They anchor the design and set the tone for other finishes, from cabinet hardware to light fixtures and faucets.
    • Wear and aging: Finishes differ in how they show fingerprints, water spots, and scratches. That affects how long the room feels fresh before needing frequent cleaning or touch-ups.
    • Maintenance and lifecycle cost: Some finishes demand specific cleaning routines or replacement parts that aren’t interchangeable. That can translate to time and money over a decade of ownership.
    • Resale perception: Real estate photos and listing descriptions call out finishes. A finish that dates quickly or clashes with popular staging styles can subtly lower buyer enthusiasm.

    When we evaluate finishes, we think in lifespan rather than style alone. Trends matter, but longevity, ease of care, and how a finish plays with light and texture are the things you’ll thank yourself for six months, and six years, later. With that framework, let’s examine each finish on look, benefits, and the trade-offs that are easy to miss.

    Matte Black Fixtures: The Look, Benefits, And Hidden Drawbacks

    Matte black is the poster child of contemporary kitchens and baths over the last decade. Its flat, non-reflective surface reads modern, dramatic, and intentionally curated. When done well, matte black creates crisp silhouettes, provides contrast in light rooms, and feels unexpectedly timeless in a moody scheme.

    Benefits we appreciate:

    • High-contrast drama: Matte black reads bold against white or light stone and can ground a pale palette without adding warmth.
    • Versatility across styles: From industrial lofts to minimalist moderns to some transitional schemes, black can bridge disparate elements if paired thoughtfully.
    • Accessory coordination: It often pairs well with matte cabinet hardware, black-framed shower doors, and dark lighting fixtures for a cohesive, editorial look.

    But the drawbacks are real and frequently glossed over in glossy magazine spreads. Matte black can show dust and soap residue more obviously than warmer metals. Scratches that remove the coating reveal lighter underlayers. And unless a fixture uses a high-quality PVD (physical vapor deposition) coating or baked enamel, the finish can fade at points of high contact.

    Aesthetic risks: Because matte black is bold, it reduces visual nuance, it’s less forgiving when other finishes or materials in the room clash. If your cabinets, lighting, or plumbing trim don’t coordinate perfectly, matte black tends to amplify those mistakes instead of masking them. We’ve seen beautiful remodels compromised by a single mismatched black tone between faucet and cabinet pulls: black isn’t a universal neutral the way some warm metals are.

    Durability, Maintenance, And Real-World Wear Of Matte Black

    Durability for matte black depends on the underlying process. Lower-cost fixtures often use powder coat or painted finishes that are prone to chipping if subject to daily scrubbing or impacts. Higher-end options use PVD or electroplated finishes that resist corrosion and abrasion much better. We recommend checking the finish specification and warranty, a 5–10 year finish warranty is a solid indicator of quality.

    Maintenance habits:

    • Daily: Matte black resists fingerprints better than chrome, but mineral spots from hard water are more visible. We wipe down with a soft microfiber after heavy use.
    • Weekly: Mild soap and water, followed by drying, keeps the finish consistent. Avoid acidic cleaners or bleach, they can dull or etch some matte coatings.
    • Long term: If your fixture chips, refinishing is possible but often costly. Replacing a single mismatched black fixture later can be surprisingly hard if the manufacturer discontinues that exact tone.

    Real-world wear we’ve noted: Sink areas with heavy handwashing or toddler use show early signs of wear. Shower fixtures exposed to continual wet/dry cycles need PVD or stainless-base construction to avoid flaking. In short: choose matte black for daily-use fixtures only if you’re buying quality or willing to accept higher maintenance.

    Installation, Coordination, And Design Pitfalls With Matte Black

    Matte black often requires tighter coordination during the selection and installation phases. Small oversights create visual friction quickly:

    • Tone mismatch: “Matte black” varies between manufacturers, some skew charcoal, some near-flat true black. We always recommend ordering finish samples or visiting showrooms to compare across all proposed fixtures and hardware.
    • Accessory inconsistency: If you pair matte black faucets with brushed nickel cabinet knobs, the kitchen will look disjointed. Keep finish families consistent, or intentionally layer metals with a clear plan (for example, matte black primary fixtures with brass accents in lighting only).
    • Visibility of installation flaws: Matte finishes accentuate tool marks, uneven caulk lines, and scratches during installation. Installers need to handle parts carefully: otherwise, the finish can be compromised before the room is used.

    Practical tip: Lock down all fixture selections early. That includes cabinet hardware, towel bars, faucets, and lighting finishes. Once the project starts, swapping a single item is often more trouble than it’s worth because of the visual prominence of black.

    Brushed Nickel: Timeless Appeal, Benefits, And Common Limitations

    Brushed nickel has been the safe, go-to finish for two decades, and for good reason. Its soft luster and warm-gray tone sit comfortably between chrome and brass, making it an easy match for many styles. In practice, brushed nickel is the ‘invisible’ finish: it blends rather than commands attention, which is exactly what many homeowners want when they prefer cabinetry, countertops, or tile to take center stage.

    Benefits we value:

    • Forgiving appearance: Brushed nickel hides fingerprints, water spots, and minor scratches better than polished metals and most matte finishes.
    • Timelessness: It rarely dates a space: buyers often expect to see it in staged homes because it photographs neutrally under varied lighting.
    • Broader compatibility: It pairs well with both warm and cool palettes, think white quartz, warm wood tones, or gray cabinetry.

    Common limitations:

    • Perceived blandness: For homeowners aiming for a standout, editorial look, brushed nickel can feel safe to the point of boring.
    • Variation in tone: Like matte black, brushed nickel ranges from warm champagne to cool steel. Without verifying samples, mixing tones can produce subtle disharmony.
    • Less dramatic contrast: In a very light or very dark scheme, brushed nickel won’t provide the graphic punch matte black does. If contrast is central to your design, nickel might underdeliver.

    Overall, brushed nickel is a practical, lower-risk choice that ages gracefully. It’s particularly smart when your priority is resale or creating a neutral backdrop for poppable accents.

    Durability, Maintenance, And Longevity Of Brushed Nickel

    Brushed nickel is typically built on solid brass or stainless hardware with a brushed surface treatment. That construction delivers excellent longevity when manufactured to quality standards. Even mid-range fixtures tend to hold up well for years.

    Maintenance is straightforward:

    • Daily: Wipe with a damp cloth. Drying prevents mineral rings when you have hard water.
    • Weekly: Mild dish soap or a specialty metal cleaner for more stubborn grime. Avoid bleach or chloride-based cleaners that can damage the protective layer.
    • Long term: Brushed nickel won’t generally chip like painted finishes. Scratches blend into the brushed texture rather than standing out. If a finish does wear, replacing individual pieces is usually seamless because nickel finishes are widely available.

    Longevity note: Well-made brushed nickel fixtures can remain functional and attractive for 15–20 years. That durability makes them a strong value choice when factoring purchase price, maintenance, and expected replacement cycles.

    Cost, Availability, And Resale Impact For Brushed Nickel

    Cost-wise, brushed nickel sits in the broad middle. You can find very inexpensive options that perform decently and premium lines with superior valves and ceramic cartridges. Because the finish is common, availability of replacement parts is high, an advantage at resale or when fixtures need servicing.

    Resale implications:

    • Neutral appeal: Stagers and agents often prefer nickel because it photographs well and blends with most buyer tastes, reducing the chance of a polarized reaction.
    • Market-specific preferences: In some urban markets where bold design is prized, matte black or brass might attract more attention. But in the majority of suburban resale markets, brushed nickel remains safe.

    Budget planning tip: If you expect to sell in the next 3–7 years, brushed nickel reduces perceived risk for buyers. If you plan to stay long-term and want a signature aesthetic, the value equation changes, matte black might reward your personal enjoyment even if it’s slightly riskier on resale.

    Side-By-Side Comparison: Performance, Cost, Maintenance, And Style

    We’ll compare matte black and brushed nickel across key homeowner concerns so you can weigh trade-offs quickly.

    Performance

    • Scratch resistance: Brushed nickel tends to hide scratches better due to texture. Matte black can show chips and reveal lighter substrate unless it’s high-quality PVD.
    • Corrosion resistance: High-grade brushed nickel and PVD matte black both resist corrosion well. Cheaper painted black finishes do not.

    Cost

    • Initial price: Comparable across finish tiers. Matte black at lower price points may use inferior coatings: high-end matte black often costs more than mainstream brushed nickel.
    • Long-term cost: Matte black may incur refinishing or earlier replacement if finish fails. Brushed nickel’s widespread availability keeps replacement costs lower.

    Maintenance

    • Daily care: Brushed nickel is lower-effort. Matte black demands more frequent gentle wiping to prevent mineral buildup and maintain consistent appearance.
    • Cleaning products: Both prefer mild cleaners: avoid harsh abrasives. Matte black is more sensitive to chemicals that alter sheen.

    Style and design

    • Visual impact: Matte black delivers bold contrast and contemporary drama. Brushed nickel offers subtlety and broad compatibility.
    • Coordination: Matte black forces coordinated planning: brushed nickel is more forgiving when mixing metals or layered textures.

    Which wins? It depends on priorities. If we want a dramatic, modern statement and commit to higher-quality fixtures and coordination, matte black can be worth the investment. If we prioritize low maintenance, longevity, and neutral resale appeal, brushed nickel is the safer bet.

    How To Decide: A Practical Checklist And Decision Flow For Homeowners

    To make a decision we can live with, run through this checklist and flow. It’s practical, not aesthetic theater.

    Step 1, Define your timeline

    • Staying 0–7 years? Prioritize resale-friendly choices like brushed nickel.
    • Staying 8+ years? Personal preference can dominate: lean into matte black if you love the look.

    Step 2, Evaluate household use

    • High-traffic homes with kids or heavy cooking: Favor brushed nickel for its forgiveness.
    • Homes with careful use or owners who enjoy maintenance: Matte black is viable if you buy quality.

    Step 3, Budget and quality

    • Low budget: Brushed nickel gives the best durability-to-cost ratio.
    • Mid-to-high budget: Invest in PVD matte black or premium brushed nickel to avoid early wear.

    Step 4, Coordination map

    • Make a one-sheet with all finish choices (faucet, cabinet pulls, lighting, shower hardware). If all agree on either black or nickel, proceed. If mixed, create an intentional layering plan: choose a dominant metal and one accent.

    Step 5, Sample and test

    • Order finish samples and photograph them in your lighting at different times of day. Bring a sample to the showroom and compare with the actual fixtures when possible.

    Step 6, Installer and warranty check

    • Confirm the manufacturer’s finish warranty and ask your installer about handling protocols for delicate finishes. For matte black, insist on protective packaging and careful mounting to avoid scuffs.

    Decision flow (short):

    • Want drama + will maintain = consider high-quality matte black.
    • Want low maintenance + resale safety = pick brushed nickel.
    • Mixed desires = choose brushed nickel as primary, introduce black as controlled accents (lighting or statement hardware) with careful coordination.

    We’ve used this checklist on dozens of remodels: it prevents the regret that comes from choosing strictly by what looks good on a Pinterest board.

    Conclusion

    Matte black fixtures vs brushed nickel isn’t a battle with a universal winner, it’s a question of priorities. Matte black rewards commitment, coordination, and investment in quality: when done right it’s striking. Brushed nickel rewards practicality, longevity, and broad appeal: it’s the low-regret option for most families and resale-focused sellers.

    Our recommendation: be intentional. If you choose matte black, buy premium finishes, lock down all related hardware early, and plan for a little extra upkeep. If you choose brushed nickel, enjoy the flexibility and peace of mind it provides. Either way, run the quick checklist above before you sign off, it’s the single best way to avoid making a finish choice you’ll regret.

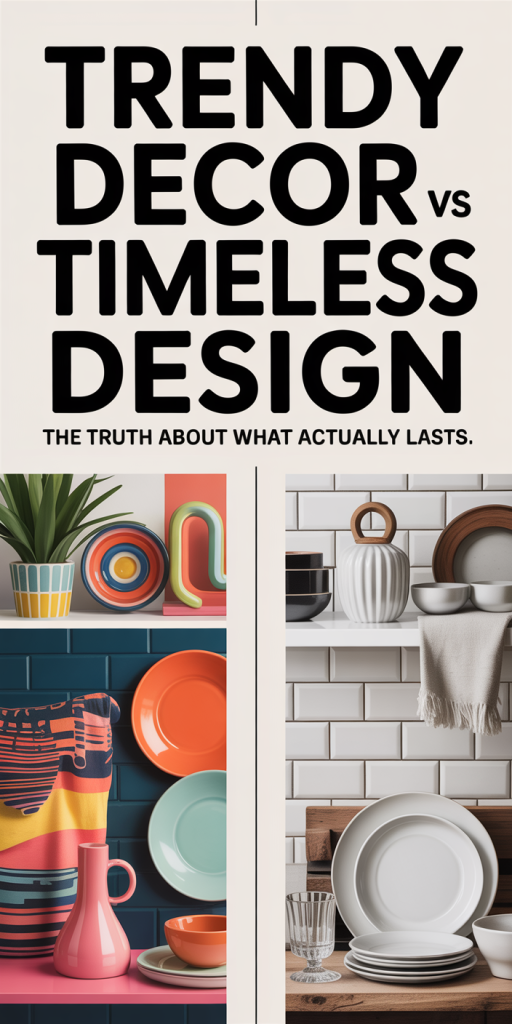
  • Trendy Decor vs Timeless Design: How To Build Rooms That Still Look Great In 10 Years

    Trendy decor vs timeless design is a debate we encounter every time a new color, material, or furniture silhouette dominates Instagram feeds and showrooms. We love the excitement of fresh ideas, but we also hate wasting money on something that will look dated in a few seasons. In this text we’ll cut through the noise and give practical guidance so your rooms feel current now and confident a decade from today. We’ll explain why trends spread, outline the core principles that make design endure, and offer a reliable method for deciding which trends are worth adopting. Along the way we’ll show how to mix a few spirited, trendy accents with a durable, classic foundation, where to invest your budget, and how to source more sustainably. If you want interiors that age gracefully without being boring, you’re in the right place.

    Why Trends Catch On—and Why They Fade

    Trends move fast because they answer short-term cultural or technological needs, new materials, celebrity or influencer endorsement, and a collective desire for novelty. Think about the explosion of terrazzo after influencers started showing it in kitchens and bathrooms: it felt fresh, photogenic, and accessible. That combination, visual appeal plus easy adoption, fuels rapid spread.

    But trends also fade for predictable reasons. First, overexposure breeds fatigue. When everyone has the same vase, it stops signaling individuality. Second, many trends are stylistic reactions: they’re born from a reaction to what came before and will swing back when preferences shift. Third, practical shortcomings surface, cheap materials yellow, finishes scratch, or a trendy silhouette proves uncomfortable. Those failures accelerate decline.

    We should also consider the role of media cycles. Fast fashion and fast interiors amplify ephemeral ideas: when retailers and influencers push a look, demand spikes, inventory floods the market, and the trend collapses as the novelty disappears. That’s not inherently bad, trends can inject energy into design, but recognizing this lifecycle helps us decide whether to commit our time and money. If the appeal is purely visual and tied to a moment, it’s probably a short-lived trend. If it responds to deeper cultural shifts, like sustainability, wellbeing, or new ways of living, it has a better chance of lasting.

    Core Principles Of Timeless Design

    Timeless design isn’t about avoiding style: it’s about building a resilient foundation that supports style changes without feeling wrong. Here are the principles we return to again and again:

    • Proportion and Scale: Furniture and architectural elements need to fit the room’s size and sightlines. Well-proportioned pieces look intentional across eras. A too-small sofa in a large living room screams trend-driven mistake.
    • Quality of Materials: Natural materials, wood, stone, wool, linen, metal, age with dignity. We prefer materials that develop patina instead of those that show rapid wear or cheap coatings that peel.
    • Neutral Frameworks: Walls, floors, and major built-ins in neutral or restrained palettes create a backdrop for changing accents. Neutrals don’t mean bland: they’re simply more adaptable.
    • Simplicity of Form: Clean silhouettes and restrained detailing are less likely to date. A simple round dining table can carry an accent-heavy era or a minimal one.
    • Functional Comfort: Timeless pieces meet human needs, supportive seating, sensible lighting, storage that actually works. Comfort isn’t negotiable if something is supposed to last.
    • Subtle Ornamentation: Small, well-crafted details, moulding, a thoughtful joinery, quality hardware, add character without shouting a trendy motif.

    These principles give us permission to layer bolder choices (art, textiles, lighting) and change them without overhauling the whole space.

    How To Tell If A Trend Will Last

    Not every trend is fleeting. We can evaluate a trend’s longevity by looking at several indicators: cultural relevance, production infrastructure, and design adaptability. Apply this checklist before investing.

    • Cultural Relevance: Does the trend connect to broad, long-term shifts, demographics, work patterns, sustainability, or technology? Trends aligned with these deeper shifts often persist. For instance, the need for home offices has durable roots after widespread remote work adoption.
    • Production and Craftsmanship: Is the trend supported by quality makers or only fast, disposable producers? When skilled artisans or established manufacturers embrace a look, it gains staying power because the pieces are made to last.
    • Versatility: Can the trend be expressed in both subtle and bold ways? A motif that reads as both accent and core element is more adaptable and hence likelier to endure.
    • Price and Perceived Value: Higher price doesn’t automatically equal longevity, but when a trend translates into investments that hold value, well-made furniture, timeless rugs, it’s less likely to be written off quickly.
    • Cross-Cultural Appeal: Trends with appeal across regions and generations tend to survive. Fads tied to a narrow niche or platform often fade as that niche moves on.
    • Historical Precedence: Look back. Some trends resurface cyclically: if a current idea resembles a previous era but with meaningful updates, it may return as a longer-term revival rather than a one-season craze.

    By scanning these signals, we can assign a practical probability of longevity and then decide whether to scale our commitment up (buy an investment piece) or keep it small (try a pillow or lamp).

    Smart Ways To Mix Trendy Accents With Timeless Pieces

    Blending trendy accents with timeless bases is the easiest path to interiors that feel alive without being transient. Our approach is to treat the room like a wardrobe: invest in classics, and rotate accessories as seasons and tastes change. Here are rules we follow:

    • Start with the Big Three: floors, fixed millwork, and main upholstery. Keep these durable and neutral. Trends should play out in rugs, cushions, artwork, and lighting.
    • Limit Trend Volume: Use the 80/20 rule, about 80% classic elements, 20% trendy accents. That’s flexible, but it prevents trends from overwhelming the room’s identity.
    • Choose Exchangeable Trends: Opt for items that are easy and affordable to swap: slipcovers, throw pillows, area rugs, lamps, and small side tables.
    • Cohesive Color Story: Even when introducing bold, trendy colors, we anchor them with neutrals or recurring accent tones across the room so swaps feel intentional.
    • Use Statement Pieces Sparingly: A single striking lamp or sculptural chair can read as both modern and timeless if its form is strong. Avoid an entire room built around one trendy material.
    • Layer Textures: Mixing classic textures (wool, linen, leather) with trend-forward materials (lucite, terrazzo, neon finishes) keeps interest while balancing risk.
    • Test Before Commit: Borrow, rent, or buy secondhand to trial a trendy item. If it still feels right after a season, consider upgrading to a higher-quality version.

    Following these tactics lets us refresh a space frequently without major expense or waste. Trends become playful accents, not expensive obligations.

    Room-By-Room Practical Examples For Balancing Trend And Classic

    Living Room:

    • Classic foundation: neutral sofa in a durable fabric, hardwood floors, simple built-ins.
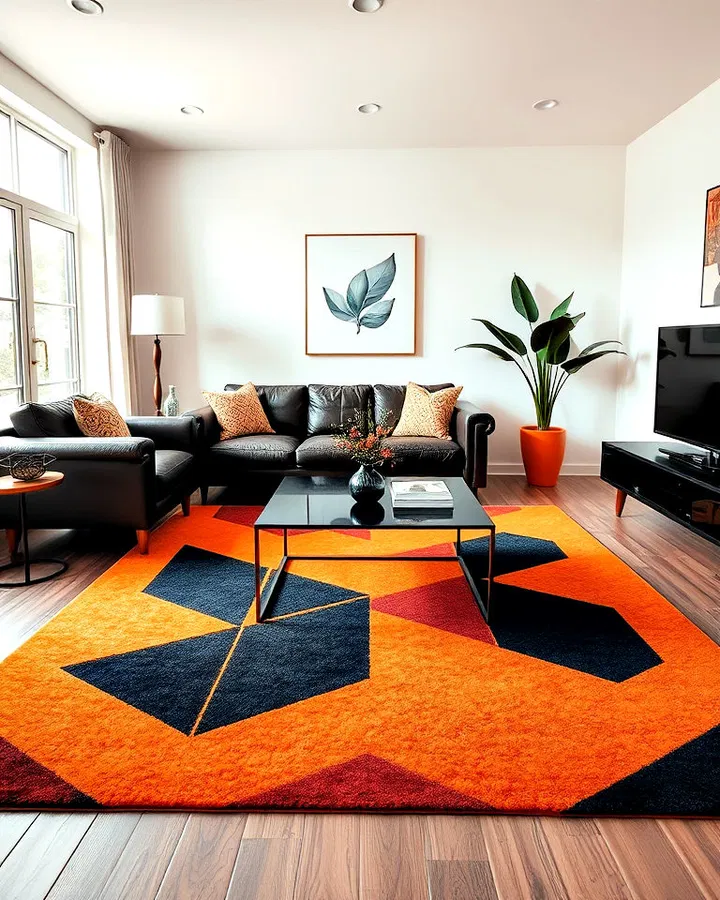
    • Trendy accents: a bold geometric rug, a sculptural accent chair in a daring color, seasonal pillows. If the chair ages poorly, it’s replaceable without touching the sofa.

    Kitchen:

    • Classic foundation: quality cabinetry, timeless hardware finishes (matte black, brass, or chrome), stone countertops.
    • Trendy accents: patterned wallpaper on a single wall, open shelving with curated ceramics, colored small appliances. Keep countertops and cabinets durable so the kitchen’s core integrity stays intact.

    Bedroom:

    • Classic foundation: a well-made bed frame, neutral bedding base, blackout curtains for function.
    • Trendy accents: throw blankets, luminescent bedside lamps, graphic headboard panels that can be swapped.

    Bathroom:

    • Classic foundation: reliable plumbing fixtures, neutral tile field, good ventilation.
    • Trendy accents: statement mirrors, colored grout, decorative lighting. Because bathrooms face moisture, prioritize durable finishes for the core and use trend pieces where moisture exposure is minimal.

    Home Office:

    • Classic foundation: ergonomic chair, adjustable desk, smart storage.
    • Trendy accents: colorful task lighting, patterned rug, inspirational prints. This balance keeps the workspace functional while letting personality show.

    We aim for one to three trend-led objects per room. That number keeps the conversation lively without dominating the space’s DNA.

    Where To Invest, How To Maintain, And Sustainable Sourcing For Longevity

    When planning a room that should last, we focus investment on items that are used daily and hard to replace. Here’s our prioritized list and maintenance advice:

    Where to Invest:

    • Seating: Sofas, lounge chairs, and dining chairs should be well-made. Good frames, quality suspension, and replaceable cushions extend usable life.
    • Beds and Mattresses: These affect health and wear constantly: investing here pays off.
    • Durable Flooring: Real wood, high-quality stone, or well-specified engineered floors age better and can be refinished.
    • Custom or Built-In Storage: Well-designed storage prevents clutter and reduces the need for frequent replacements.

    How to Maintain:

    • Follow Manufacturer Care: Use recommended cleaners and maintenance intervals: it prolongs warranties and material life.
    • Rotate and Refinish: Rotate rugs and cushions to even out wear: refinish wood surfaces periodically instead of replacing.
    • Repair Before Replace: We prioritize repairs, reupholstering a beloved sofa or replacing hardware is usually cheaper and more sustainable than buying new.

    Sustainable Sourcing:

    • Buy Secondhand or Vintage: High-quality older pieces often outperform new mass-market furniture. We search consignment stores, auction sites, and local marketplaces.
    • Choose Reputable Makers: Support brands with transparent supply chains and ethical manufacturing. Certifications and clear material disclosures matter.
    • Prefer Natural, Recyclable Materials: Solid wood, metal, natural fibre rugs, and stone have clearer end-of-life options. Avoid composite materials with unknown recycling pathways.

    Making conscious sourcing decisions reduces waste and often lands us with better-made items that continue to look great. That’s both economically and environmentally smarter in the long run.

    Conclusion

    We don’t need to treat trends as threats, when handled thoughtfully they enliven our homes without turning them into short-lived stages. By building a neutral, well-crafted foundation and allocating a small, playful portion of each room to trends, we get the best of both worlds: rooms that feel alive today and still look intentional in ten years. Prioritize proportion, material quality, and repairability: test trends cheaply before upgrading: and favor sustainable sourcing whenever possible. Do that, and the next time a flashy new look appears on feeds, we’ll be ready to try it without panic, or buyer’s remorse.

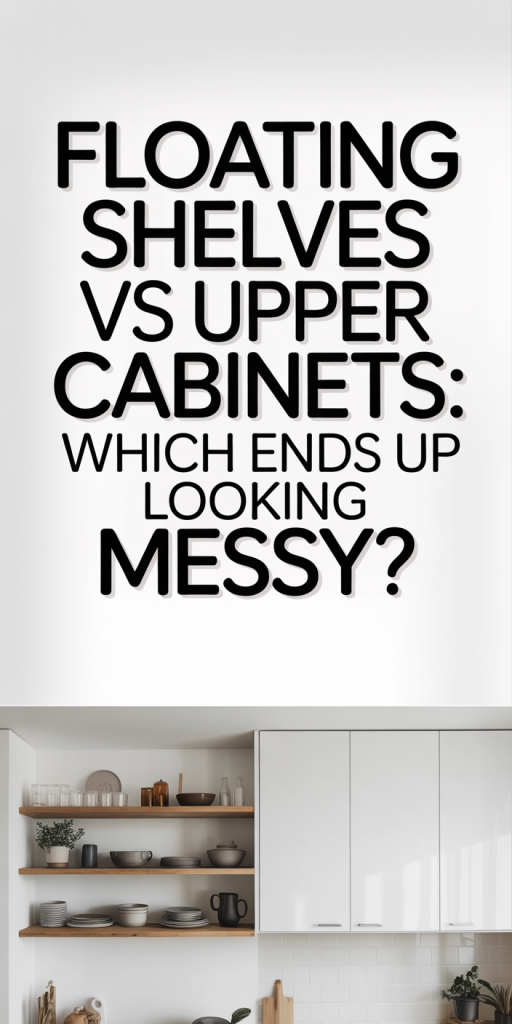
  • Floating Shelves Vs Upper Cabinets: Which One Looks Messy Faster — And How To Prevent It In 2026

    We’ve all stood in a kitchen or living room and felt a subtle judgment from the room: is this tidy or chaotic? The debate between floating shelves and upper cabinets isn’t just about aesthetics or storage capacity, it’s about perceived messiness, daily maintenance, and how our habits interact with the built environment. In 2026, design trends emphasize minimalism and multifunctional spaces, but the question remains: which solution tends to look messy faster, and what practical steps can we take to prevent that? In this text we’ll break down the visual dynamics of open shelving and closed cabinetry, inspect common failure modes, compare real‑world scenarios, and give actionable recommendations so you can pick the option that stays looking intentional, not cluttered.

    How Floating Shelves Affect Perceived Messiness

    Open systems like floating shelves change the rules of visual organization. Because they put objects on display, everything stored becomes part of the room’s composition. That can be a strength, well‑styled shelves create personality, but it’s also a liability: any misaligned mug, unsorted stack of mail, or tall jar will immediately register as visual noise. We want to make clear that perceived messiness is not just about the number of items: it’s about contrast, rhythm, and hierarchy. Floating shelves demand curation. Without it, they show every lapse in habit.

    Floating shelves also expose maintenance issues that closed storage hides. Dust collects on top of items, oils from cooking cling to ceramic, and fingerprints mar glassware. In small apartments or open‑plan homes, the shelf becomes an accidental display of our daily life, and our lapses in tidiness. Because the shelves sit at eye level, irregularities are amplified: a crooked frame or mismatched bowl pulls more attention than it would inside a cabinet.

    That said, shelves can be deliberately designed to minimize that “messy” look. Choosing a consistent material palette, limiting the number of objects per linear foot, and creating deliberate negative space all reduce visual clutter. We’ll dig into practical styling methods in the next sub‑section, but the key takeaway here is simple: floating shelves make messiness visible: they don’t necessarily cause it. Our habits and the styling framework we apply determine how quickly they look unkempt.

    How Upper Cabinets Affect Perceived Messiness

    Upper cabinets operate on a different psychological principle: concealment. Because doors hide contents, they act as a buffer between our habits and the room’s visual impression. From across the room, a wall of cabinets reads as neat if the faces are clean, regardless of what’s inside. That’s a major advantage for anyone who values a tidy aesthetic with minimal daily upkeep.

    But, cabinets introduce other messiness risks. Closed storage can encourage a “out of sight, out of mind” mentality. If we shove things in without systems, interiors become chaotic over time: mismatched containers, expired food, and tangled kitchen tools accumulate. The result is a different kind of messiness, functional messiness, that may not show immediately but increases time and friction when we search for things.

    There’s also the issue of cabinet facades. Scuffed doors, sticky handles, and misaligned hinges are visible cues of neglect. Where floating shelves broadcast item-level disorder, cabinets broadcast surface‑level wear. Choosing durable finishes, easy‑to‑clean hardware, and consistent door styles reduces the chance that cabinets look messy from a distance.

    In short, upper cabinets trade visible clutter for hidden chaos risks. If we’re disciplined about interior organization and regular purging, cabinets can preserve a calm room aesthetic. But without systems, they quietly accumulate inefficiency and frustration.

    Head-To-Head Scenarios: Which Option Looks Messy Faster In Real Life

    Let’s walk through three realistic scenarios to see which option tends to look messy faster.

    Scenario 1, Daily routine kitchen in a busy family home: With kids and fast mornings, items are frequently handled. Floating shelves here show disorder quickly: cereal boxes, lunchboxes, and school art appear on display. Upper cabinets, by contrast, maintain a tidy look because doors hide the detritus. Winner for appearance: upper cabinets, but only if interiors are organized to prevent functional chaos.

    Scenario 2, Small urban apartment with one tidy occupant: Someone who values design and practices daily tidying can make floating shelves look intentionally curated. Because the occupant is disciplined, shelves rarely get overloaded and become a deliberate stylistic feature. Upper cabinets would also appear tidy, but they sacrifice the personality that shelves provide. Winner for appearance: floating shelves, when habits are strong.

    Scenario 3, Open‑plan kitchen living space used for entertaining: Floating shelves create a dynamic focal point but also amplify any lapse during hosting. Guests notice mismatched glasses or a stack of plates. Upper cabinets keep the social space visually calm, although host stress might lead to hidden mess inside. Winner for appearance: upper cabinets generally, unless the host commits to styling rules for shelves.

    Across these scenarios, floating shelves generally look messy faster when daily habits are inconsistent or when many people use the space. Upper cabinets look tidy faster from a distance but can hide compounding internal disorder. So the real determinant is behavior: how we use the space and the routines we create.

    Design, Use, And Maintenance Factors That Tip The Balance

    Several design, use, and maintenance factors nudge the messy‑faster scale toward one option or the other. Recognizing which of these apply to our home helps us make a better choice.

    Design factors:

    • Material and finish: Dark glossy shelves show dust and fingerprints more than light matte cabinets. Easy‑clean finishes (laminate, sealed wood) reduce surface maintenance.
    • Shelf depth and height: Deep, high shelves invite item stacking and forgotten objects. Shallow, eye‑level shelves encourage curated displays.
    • Integration of storage: Built‑in drawers, pull‑outs, and concealed bins reduce clutter in either system.

    Use factors:

    • Household habits: Multi‑user households with different standards of tidiness favor closed cabinets. Single, organized occupants can leverage shelves for expression.
    • Frequency of access: Items used daily benefit from open storage for convenience: infrequently used items belong behind doors.
    • Entertaining style: If we entertain often, a visually calm backdrop matters: cabinets win unless shelves are consistently styled.

    Maintenance factors:

    • Cleaning cadence: Shelves demand more frequent surface cleaning: cabinets require periodic interior audits.
    • Systems in place: Labeling, standardized containers, and containment baskets tip the scale toward cabinetry success: simple styling rules and a quick daily tidy favor shelves.

    When we evaluate these factors honestly, the best choice becomes clearer: it’s not universal. Instead, it’s a function of design choices, how we live, and how often we’re willing to maintain the chosen system.

    Practical Recommendations: Choose Based On Lifestyle, Space, And Habits

    We recommend making a decision matrix based on three questions: Who uses the space, how is it used, and how much time will we commit to upkeep? Below are practical, actionable recommendations matched to common lifestyles.

    • For busy families: Prioritize upper cabinets. They preserve a tidy visual field with minimal daily effort. Invest in interior organizers (pull‑out shelves, clear bins) and schedule quarterly purges. Use lower open shelving for a limited set of kid‑friendly items in labeled baskets.
    • For design‑minded singles or couples: Choose floating shelves if you’re willing to commit to styling rules. Keep 2–3 curated vignettes, limit color variety, and adopt a 5‑minute nightly tidy. Use one closed cabinet for overflow and less attractive items.
    • For small kitchens / studio apartments: Mix both. Use upper cabinets for pantry and utility storage and floating shelves for a curated selection of dishes or cookbooks. This hybrid approach maximizes both aesthetic and function in tight spaces.
    • For avid entertainers: Lean toward cabinets for the bulk of storage to maintain calm during gatherings: dedicate a single open shelf with high‑quality glassware or decorative objects for personality.
    • For rental properties or resale considerations: Cabinets are safer for broad appeal because potential buyers or renters often prefer low‑maintenance aesthetics. Floating shelves can be a selling point for the right market but require buyer appreciation for styling.

    Implementation tips regardless of choice:

    • Create 1–2 household rules: e.g., “no mail or keys on shelves” or “shelf items must be in groups of three.”
    • Use shallow baskets and clear labeling inside cabinets.
    • Keep a donation bin handy to remove seldom‑used items.
    • Schedule brief weekly maintenance windows rather than occasional deep cleans.

    These recommendations are about aligning design with behavior. When we pick storage that matches our habits and commit to small recurring actions, neither shelves nor cabinets need to devolve into mess.

    Conclusion: Choosing The Right Solution To Minimize Mess Over Time

    Both floating shelves and upper cabinets have predictable strengths and weaknesses. Shelves make every object part of the room’s visual story and hence show mess quickly without consistent curation. Upper cabinets protect the room’s appearance but can hide functional disorder unless we carry out organizational systems. Our recommendation: don’t pick purely on aesthetics, pick based on how you live. If you want the personality of open shelving, build simple containment and micro‑maintenance habits. If you crave a calm visual field, choose cabinets but invest in interior organization and periodic audits. Either way, a small set of rules and regular, bite‑sized maintenance will keep your space looking intentional rather than messy well into 2026 and beyond.

  • Smart Homes vs Simple Homes: The Hidden Stress Nobody Mentions — How To Choose Without Losing Your Peace In 2026

    The phrase “smart homes vs simple homes” has become shorthand for a deeper lifestyle choice, and in 2026 the line between convenience and constant connection is sharper than ever. We want homes that save time, keep us comfortable, and feel like a refuge. Yet many of us rush toward gadgets and automation without pausing to consider the emotional, financial, and privacy costs that come bundled with them. This article unpacks the hidden stress nobody mentions when comparing smart homes and simple homes, and gives us a practical framework to decide based on our values, budgets, and tolerance for complexity. By the end, we should have a clearer sense of where peace lives: behind seamless automation or in uncluttered simplicity.

    The Emotional Cost: Why This Debate Really Matters

    We often frame the smart homes vs simple homes debate as a list of features, voice assistants, automated lights, or artisan ceramic mugs, but underneath those features sit real emotions: anxiety, relief, pride, and regret. Choosing a home style is a values decision dressed up as a tech decision. For some of us, the idea of a thermostat that learns our schedule feels like freedom: for others, it feels like surrendering a small domain of control.

    Emotional cost shows up in ways we rarely quantify. There’s the “on-call” feeling when a device alerts at 2 a.m., the guilt when we can’t fix a connectivity issue, and the subtle erosion of boundaries when devices collect data about our daily habits. Conversely, simple homes carry their own emotional burdens, feeling behind on trends, missing the perceived status that comes with an automated kitchen, or the nagging thought that we could be optimizing our lives with technology.

    We must also account for cognitive load. Modern life already fragments attention: adding dozens of device apps, firmware updates, and routines amplifies mental overhead. Even small interruptions, an app notification about a firmware update or a smart lock asking for a code, accumulate into stress. On the flip side, well-implemented automation can reduce decision fatigue: imagine lights that just know when to dim for sleep or thermostats that adjust without thinking.

    Eventually, this debate matters because our homes are where we recharge. A mismatch between our chosen home style and our temperament creates low-level, persistent stress. When we choose, we’re choosing the emotional climate we’ll inhabit every day. That makes the decision worth a careful, honest assessment rather than a headline-driven impulse buy.

    What Makes A Home “Smart”: Benefits, Everyday Wins, And Hidden Stressors

    A “smart” home blends connected devices, automation, and data to make everyday tasks easier. The wins are obvious and often immediate: energy savings from optimized heating, convenience from voice-controlled lighting, or safety gains from remote monitoring. For many of us, the promise of a smart home is that it buys back time, minutes reclaimed from adjusting temperature, finding keys, or remembering to turn off appliances.

    Benefits and everyday wins

    • Convenience: Automations reduce repetitive tasks, morning routines can boot up coffee, heat, and lights without a thought.
    • Efficiency: Smart thermostats, lighting, and appliances often reduce energy use, lowering bills and environmental impact.
    • Accessibility & safety: For older adults or people with mobility challenges, voice control and remote monitoring add independence.
    • Integration: When devices talk to each other, small frustrations vanish, your door unlocks when your car arrives and the lights adjust to your arrival scene.

    Hidden stressors

    But smart homes introduce stressors that aren’t always visible at purchase:

    • Fragmentation: Different brands, competing standards, and multiple apps create a patchwork system. We spend hours integrating rather than enjoying.
    • Dependency: When cloud services fail, essential functions can stop working. That dependency can make us anxious and helpless.
    • Complexity creep: Routines that seem nifty at first need tweaking. Over time, we collect “tech debt”, legacy devices that need updates or replacements.
    • Cost unpredictability: Initial purchase is just the start. Subscription fees, replacement devices, and professional setup add ongoing costs.

    We can balance these stressors by designing for graceful degradation, ensuring essential functions still work without the cloud or relying on simple manual overrides, but many of us only learn this the hard way. Recognizing both the wins and hidden costs up front helps us plan for resilience rather than regret.

    Privacy, Data, And Surveillance Concerns In Smart Homes

    Privacy is the most talked-about downside of smart tech for a reason. Devices collect a surprising amount of personal data: motion patterns, sleep habits, voice snippets, and even who visits our home. That data often flows to cloud servers owned by corporations, which may analyze, store, or monetize it.

    Key concerns include:

    • Scope creep: A device purchased for convenience can become a sensor network. A smart speaker that listens for commands may also capture ambient conversations.
    • Third-party access: Data can be shared with advertisers, analytics firms, or law enforcement under certain conditions. Our data footprint grows beyond what we expect.
    • Security vs convenience tradeoffs: Auto-update features may patch security holes but also change privacy settings or behavior without our explicit consent.

    Mitigation strategies we recommend:

    • Prefer local-first devices or hubs that store data on-premise when possible.
    • Read privacy policies selectively: focus on data retention, sharing, and opt-out options.
    • Segment networks, use a guest or IoT VLAN for devices to limit lateral movement if a device is compromised.

    If privacy weighs heavily for us, the smart route requires intentional choices and some technical literacy. Otherwise, we risk living in a home that’s quietly surveilling our habits in exchange for convenience.

    Maintenance, Updates, And Tech Debt That Creeps Up Over Time

    Tech debt is a term made popular in software development, but it applies perfectly to smart homes. We accumulate devices that require firmware updates, companion apps, and occasional troubleshooting. What begins as a pleasant novelty can turn into a maintenance chore.

    Typical maintenance burdens:

    • Firmware and app updates: These can introduce bugs or change features. We must decide whether to update immediately or wait, both choices carry risk.
    • Replacements and compatibility: Manufacturers discontinue products. An obsolete hub can strand dozens of devices.
    • Troubleshooting sprawl: Problems often cross cutting areas, Wi-Fi, power, cloud services, making diagnosis time-consuming.

    Budgeting for maintenance is as important as budgeting for purchase. Think of ongoing costs: replacement bulbs, batteries, subscriptions, and possibly professional support. To minimize tech debt, we suggest:

    • Choosing devices with strong update histories and reputable support.
    • Favoring open standards (Matter, Thread) to reduce vendor lock-in.
    • Designing fallback manual controls for core functions like lighting and locks.

    Accepting a level of maintenance is fine if the gains outweigh the effort. But we should be honest: if we’re not willing to log into apps, manage firmware, or occasionally reset a hub, the smart route may cost more in stress than it saves in convenience.

    What Makes A Home “Simple”: Benefits, Comforts, And Overlooked Stressors

    A simple home emphasizes low-tech solutions, tactile comfort, and systems that don’t demand constant attention. Simplicity is often synonymous with intentionality: fewer devices, clearer rituals, and boundaries between home and work. For many of us, simple homes restore a sense of control and reduce cognitive friction.

    Benefits and comforts

    • Predictability: Manual switches, analog thermostats, and straightforward appliances rarely surprise us with updates or outages.
    • Lower ongoing costs: We avoid subscription fees and frequent hardware turnover.
    • Emotional clarity: Less noise from notifications means more mental space for relationships and creativity.
    • Easier maintenance: When something stops working, fixes are typically local and inexpensive.

    Overlooked stressors

    Simplicity isn’t stress-free. It brings its own set of trade-offs that we should recognize:

    • Reduced automation: We may spend more time on repetitive tasks, adjusting lights, preheating ovens, or remembering to lock doors.
    • Perceived social pressure: In a culture that celebrates the latest gadgets, others may view simple homes as out-of-date or less secure.
    • Accessibility limits: For households with mobility challenges, simple homes without assistive tech can be less accommodating.

    Sometimes the stress from simple living is situational: during a long trip, we may miss remote monitoring: in a busy week, manual routines feel like extra work. The key is distinguishing between stress that’s meaningful (we prefer to do things ourselves) and stress that’s avoidable (we’re forced into inefficiency because of habit). By being intentional, choosing which tasks to keep manual and which to simplify with low-tech supports, we can preserve the calm of a simple home while minimizing friction.

    How To Decide: A Practical Lifestyle, Budget, And Resilience Framework

    We propose a three-part framework to choose between smart and simple, Lifestyle fit, Budget math, and Resilience planning. Working through these steps helps us make a decision aligned with our values instead of marketing.

    1. Lifestyle fit
    • Ask: How do we spend our time at home? If most of our days are irregular, late-night work, caregiving, or variable schedules, automation may reduce friction.
    • Consider accessibility needs: Do any household members benefit from voice control, remote monitoring, or automated lighting?
    • Emotional preference: Do we enjoy tinkering and optimizing, or do we prefer fewer systems to manage?
    1. Budget math
    • Total cost of ownership: Add purchase price, expected replacements, and subscriptions over 3–5 years. Smart devices often have lower upfront friction but higher lifecycle costs.
    • Opportunity cost: Could the money go to experiences, better insulation, or a professional organizer that provides comparable stress relief?
    • Prioritize ROI: Invest in devices that solve high-frequency problems, e.g., a smart thermostat for a drafty home, rather than novelty gadgets.
    1. Resilience planning
    • Failure modes: Identify what must keep working during outages (locks, heating, lighting) and ensure those functions have manual or local fallbacks.
    • Security posture: If we opt for smart devices, plan for network segmentation, backups, and a basic incident response (how we’ll restore control if a vendor sunset occurs).
    • Scalability: Choose platforms and standards that allow growth without vendor lock-in. Favor open ecosystems and documented APIs.

    Decision checklist (quick)

    • We list our top 5 daily pain points at home.
    • For each pain point, we ask whether tech reduces it materially or introduces more maintenance.
    • We estimate 3-yr TCO for solutions that seem promising and compare to non-tech alternatives.

    Using this framework, our decision becomes a map rather than a guess. We balance convenience with long-term peace and choose options that match both our temperament and our tolerance for maintenance.

    Practical Ways To Reduce Stress Whether You Choose Smart Or Simple

    No matter which path we pick, there are practical steps to keep stress low and enjoyment high. These tactics are about control, reducing surprises and ensuring our home supports rather than sabotages our peace.

    For smart homes

    • Start small: Automate one high-frequency task (lighting, thermostat) and live with it for three months before adding more.
    • Centralize control: Use a single hub or app where possible to reduce context switching.
    • Set boundaries for notifications: Silence noncritical alerts during sleep and focus hours.
    • Build manual overrides: Ensure physical switches or backup keys exist for core systems.
    • Schedule maintenance: Block a recurring time each quarter to check firmware, review subscriptions, and test backups.

    For simple homes

    • Systematize rituals: Create simple routines (morning checklist, evening lock procedure) to reduce cognitive load.
    • Low-tech upgrades: Invest in reliable, energy-efficient appliances or analog timers for lights to get some automation without complexity.
    • Outsource selectively: Use a cleaning or lawn service to remove recurring friction points that sap our energy.
    • Accessibility boosts: Add non-tech aids, grab bars, lever handles, better lighting, to get benefits often attributed to smart tech.

    Universal practices

    • Clarify priorities: We should be able to name the three things we want our home to do for us, comfort, safety, creativity, and test decisions against them.
    • Budget for contingencies: Keep a small fund for replacements or professional help: unexpected expenses are a major source of stress.
    • Educate household members: Agree on who manages devices, passwords, and who to call if something breaks, shared responsibility reduces single-person burnout.

    These measures keep our homes resilient. Whether we lean into automation or embrace minimalism, reducing surprises and planning for failure preserves peace.

    Conclusion

    Choosing between smart homes vs simple homes isn’t a tech decision alone, it’s an emotional and practical pact with how we want to live. We’ve seen that both paths offer real benefits and hidden stressors. The smart route offers convenience and accessibility but demands maintenance, privacy vigilance, and ongoing costs. The simple route gives predictability and lower overhead but can require more manual effort and might miss accessibility gains.

    If we proceed with intention, using the lifestyle, budget, and resilience framework, we’re more likely to land in a home that supports our peace rather than eroding it. Start small, prioritize the problems that matter most, and plan for graceful failure. That way, whether our home is humming with automation or whisper-quiet in its simplicity, it will be a place where we can rest, not fret.

  • Kitchen Islands vs Dining Tables: Which Works Better for Real Life — A Practical 2026 Guide

    We keep hearing the debate: kitchen islands or dining tables, which one actually improves daily life? As kitchens become the heart of modern homes, that choice affects everything from how we cook and entertain to how kids do assignments or how we squeeze in a quick breakfast. In this guide we’ll cut through trends and design jargon to evaluate both options objectively. We’ll look at layout, workflow, seating, storage, social dynamics, accessibility, and cost so you can decide what makes sense for your home in 2026. Our aim is practical: not what looks best on a magazine spread, but what holds up during real meals, school projects, and hectic mornings.

    Why Layout, Lifestyle, And Household Dynamics Determine Your Best Choice

    The single most important piece of advice we give clients is simple: context matters. A kitchen island that dazzles in an open-plan loft can be a traffic jam in a compact apartment. A large dining table that seats eight might be perfect for a weekend family home but wasteful in a single-person city condo.

    Ask three questions about your home before you commit:

    • How much continuous floor space do you have? Islands need clearance on all sides: tables require a clear perimeter for chairs.
    • How do you use the kitchen daily? Is it primarily for cooking, casual dining, or socializing?
    • Who lives with you and what are their habits? Kids, pets, elderly family members, and frequent guests change the calculus.

    We also consider the flow between zones: cooking, prep, serving, and dining. If your open plan kitchen flows directly into your living area, an island can act as a natural transition and a visual anchor. If your kitchen is a distinct room, a dining table may better define the space and provide a dedicated place for seated meals.

    Another factor is the rhythm of your household. If you regularly prepare elaborate meals while guests congregate in the kitchen, an island becomes a staging area and social hub. If meals are more formal or involve sitting down together for longer periods, a table creates the proper posture and etiquette for conversation and focus.

    Finally, mobility and accessibility should guide us. Households with accessibility concerns benefit from tables that are easier to approach from multiple sides and permit adjustable seating. Islands sometimes introduce awkward corners and fixed-height counters that aren’t friendly to everyone.

    In short: the right choice is rarely aesthetic alone. It’s a synthesis of square footage, daily routines, and who uses the space, and that synthesis will look different for each household.

    The Case For Kitchen Islands: When They Truly Shine

    Kitchen islands have dominated remodel wishlists for years, and for good reasons. When designed and placed thoughtfully, islands deliver functional, social, and storage advantages that change how a kitchen performs.

    Functionality, Workflow, And Storage Benefits Of Islands

    Islands create a third plane in the kitchen that supports multiple simultaneous activities. We see islands serve as:

    • Prep stations with integrated sinks or cooktops that shorten the distance between ingredients, cleanup, and serving.
    • Dedicated baking zones with room for appliances like stand mixers and space to roll dough.
    • Storage centers, where deep drawers, trash sorting systems, and appliance garages live within easy reach.

    The workflow improvements are real: when the island provides a clear prep surface and storage for frequently used tools, the cook spends less time walking back and forth. In a well-designed triangle layout, the island reduces interruptions in traffic patterns and centralizes tasks. That’s especially valuable for households where multiple people cook or when a parent supervises assignments while preparing dinner.

    On the technical side, islands can support integrated power and ventilation solutions. In 2026, low-profile downdraft vents and induction cooktops make it practical to have cooking workstations on islands without overwhelming the sightlines.

    Seating, Materials, And Design Considerations For Everyday Use

    Islands often double as casual dining spaces. Bar-height or counter-height seating encourages quick meals and informal conversation. But there are trade-offs:

    • Comfort: Stools are less comfortable for long meals than chairs at a table. If your family eats at the counter every night, we recommend investing in ergonomically designed stools with backrests and footrests.
    • Materials: Islands take abuse. Choose scratch-resistant, repairable surfaces such as quartz or honed granite in high-use homes. Solid wood adds warmth but demands more maintenance and is more prone to dents and stains.
    • Edge conditions: Overhangs for seating must be deep enough and supported so knees aren’t banged and the structure isn’t underbuilt. We usually specify at least a 12″ overhang for counter seating, with supports when the overhang exceeds 15″.

    Practical electrical planning matters too: situate outlets where small appliances will live and consider integrated charging drawers for phones and tablets. Lighting should focus on both task and ambience: pendant clusters that dim are a durable choice.

    Finally, think about permanence. Islands are rooted structures: changing your mind later is expensive. If you’re renting or unsure about long-term layout, choose modular or movable islands that provide many of the same benefits without permanent reconfiguration.

    The Case For Dining Tables: Why They Still Matter

    Dining tables are more than a place to eat: they structure family life. Even in modern open-plan homes, a table anchors rituals that islands can’t always replicate: long dinners, assignments, crafts, and board games.

    Social Use, Flexibility, And Zoning Advantages Of Tables

    Tables create intimacy. When we sit around a table, eye lines are flatter and conversation flows differently than around an island where people might be staggered or standing. For households that value nightly sit-down dinners, a dining table supports comfort and sustained interaction.

    Tables also provide zoning. They clearly delineate a dining area, separating it from the kitchen’s messy, work-focused energy. That separation helps with hosting: dishes and prep activity don’t clutter the dining surface and guests feel more like they’re in a dedicated space.

    Flexibility is another strength. A rectangular table can be pushed against a wall when not in use: a round table fits awkward corners and promotes conversation. Extendable tables give us the ability to host larger groups without permanently dedicating floor space to seating for eight.

    Sizing, Accessibility, And Cost Practicalities Of Dining Tables

    From a sizing perspective, tables require clearances similar to islands: we like to leave at least 36″ from the table edge to walls or other furniture for comfortable chair movement (48″ is preferable in high-traffic areas). That planning often allows tables to fit in spaces where islands would obstruct flow.

    Accessibility is a practical advantage. Chairs with backs and armrests support older family members and people with mobility needs better than counter stools. The table height is universally approachable and adaptable with cushions or seat risers.

    Cost-wise, a good dining table is often less expensive than a built-in island, especially once you account for plumbing, electrical, or permitting if the island includes those features. Tables also represent a lower-commitment investment: swapping a table later is far cheaper than removing an island.

    Finally, tables can act as multi-use furniture: a simple table becomes a assignments desk, a craft station, a remote work spot, or an impromptu buffet. That malleability matters for households with shifting needs and limited square footage.

    How To Choose Based On Home Type, Household Size, And Habits

    Choosing between an island and a table becomes easier when we match the solution to three practical variables: home type, household size, and daily habits.

    • Small apartments and studios: A compact, movable island or a slim console can provide prep space and storage without stealing circulation. Foldable or drop-leaf tables offer dining flexibility and stow away when not needed.
    • Family homes with kids: Islands are excellent for supervised activities, assignments next to meal prep, morning cereal while a parent cooks. But we recommend pairing an island with a separate dining table in larger family homes so long dinners have the right seating. If space is tight, prioritize a durable table with stain-resistant finishes and chairs that can be wiped down easily.
    • Entertainers and frequent hosts: Islands with seating create an interactive staging area for cocktails and buffets. But if you host formal dinner parties, an extendable dining table will better support plated service and extended seating.
    • Multi-generational households and accessibility needs: Tables win here because they’re easier to approach and adapt. Choose chairs with arms and allow wider clearance for walkers or wheelchairs.
    • Empty-nesters and couples: We often recommend an island-first approach for these households: many prefer a counter-height island for casual meals and to reclaim a more open, less formal living area.

    We also consider lifestyle habits: do you eat at the kitchen counter most days, or do you value a designated dining ritual? Is food prep a hobby or a hurried task? Be honest with how you actually use the space, aspirational behaviors (we’ll have family dinners every night) don’t always match reality.

    Finally, get out a tape measure and draw to scale before you buy. We’ve rescued clients from buying islands that blocked dishwasher doors or tables that left no room to pull out chairs. Spatial planning tools and cardboard mockups are cheap, fast ways to test configurations in real life.

    Hybrid Solutions And Alternatives: Combining Island And Table Benefits

    We don’t see the choice as strictly binary. Many modern homes adopt hybrid solutions that capture the best of both worlds.

    • Island + small table: When space allows, pair a prep island with a compact dining table. This separation gives you a dedicated prep zone while maintaining a comfortable dining area. It’s ideal for families who need both quick breakfasts at the counter and longer dinners at a table.
    • Drop-leaf or extendable islands: These designs swell when needed. A counter-height island with one or two drop leaves can act as prep space most days and convert into a table for guests.
    • Movable islands and carts: On casters, a robust kitchen cart can provide prep surface and storage but be relocated to open floors for larger gatherings. Choose locking casters for stability during food prep.
    • Banquette seating with a narrow island: Installing banquette seating along a wall paired with a slim island preserves floor space while increasing seating. Banquettes are especially useful in smaller footprints, creating cozy dining nooks and storage below benches.
    • Integrated table islands: Some islands are designed with a lower dining tabletop extension that tucks beneath the counter when not in use. This layered approach gives seated dining with standard-height chairs while keeping the island’s prep height intact.
    • Multi-zone islands: We often specify islands with segmented functions: a prep zone, a seating ledge, and a storage bank. By intentionally zoning the island, we reduce the compromises each function would otherwise demand.

    When choosing a hybrid, be mindful of competing heights and sightlines. If you have both high seating and a lower table surface in the same footprint, the visual complexity can feel cluttered unless materials and proportions are carefully coordinated.

    Also, hybrids demand more thoughtful electrical and plumbing planning if utilities will serve different functions. But when done well, hybrids deliver flexibility that a single-purpose island or table can’t match.

    Conclusion

    In the island vs table debate, there’s no universal winner. We prioritize context: your floor plan, who lives with you, and how you actually use your kitchen. Islands shine when prep, storage, and casual socializing are priorities: dining tables endure when comfort, accessibility, and formal or sustained sitting matter most. Hybrid approaches give us the flexibility to have both without sacrificing flow.

    Our practical recommendation: measure, observe your habits for a week, and mock up layouts before committing. If you must pick one, choose the option that supports the majority of your daily routines, that’s what will make a space truly work for real life in 2026.

  • Walk-In Showers vs Bathtubs: The Ultimate Home Upgrade Debate — Which One Wins For Your Home In 2026?

    The choice between a walk-in shower and a bathtub is one of those home-improvement debates that sparks strong opinions, and with good reason. It affects daily routines, resale value, accessibility, design, and even how we relax after a long day. As we head into 2026, trends, materials, and buyer expectations have shifted enough that the right choice for one household can be the wrong choice for another. In this text we’ll cut through the noise. We’ll weigh practical pros and cons, compare costs and maintenance, and give a room-by-room checklist to help you decide when you’re renovating or staging a home to sell. By the end you’ll have a clear, evidence-based view of which option makes the most sense for your lifestyle, budget, and long-term goals.

    Why This Debate Matters For Homeowners And Buyers

    This debate isn’t just about personal preference, it’s about value, safety, and long-term utility. Walk-in showers and bathtubs influence several measurable outcomes: how a home performs on the market, who can comfortably use the bathroom, and how much upkeep we’ll face over time. For sellers, bathrooms are high-ROI areas: remodeling a bathroom often recoups a substantial portion of cost at resale, and the presence or absence of a tub can shift buyer interest depending on the market segment. For families and long-term homeowners, daily functionality and future-proofing matter more. Aging-in-place trends and multi-generational living are pushing accessibility higher on the priority list, while design-forward buyers seek a modern aesthetic that photos well for listings.

    We also need to account for lifestyle: do we soak to unwind, or are quick showers the norm? Do we have children or pets who need baths? And what about space constraints, small urban condos can’t always accommodate both options. In short, the decision affects comfort, convenience, cost, and resale. Framing the debate around these concrete stakes helps us make a choice that’s rational, not just fashionable.

    Pros Of Walk-In Showers

    Walk-in showers have surged in popularity, and for several practical reasons. They’re often seen as the default for contemporary bathrooms, but the appeal goes deeper than aesthetics. Below we break the biggest advantages into accessibility and design categories so we can evaluate them on their merits.

    Pros Of Bathtubs

    Even though the march of walk-in showers, bathtubs continue to hold important advantages we shouldn’t dismiss. They’re not merely decorative relics: tubs serve functional, emotional, and family-oriented needs. Below we separate the biggest benefits into wellness/relaxation and family-use categories to make the comparison straightforward.

    Cost, Installation, And Maintenance Comparison

    Cost and upkeep are pivotal. Let’s compare typical price ranges, installation complexity, and ongoing maintenance for both options so we can judge long-term value, not just initial sticker price.

    Initial costs: Basic prefabricated shower stalls often start lower than mid-range tub-and-shower combos, but high-end custom showers, zero-threshold pans, frameless glass, premium tile, and linear drains, can push well past the price of a standard tub installation. A mid-range bathtub (with surround) usually has predictable installation costs, but specialty tubs (freestanding soakers, whirlpools) can be expensive to plumb and support structurally.

    Installation complexity: Walk-in showers that require curb removal, subfloor adjustments, or concrete pans are more invasive and costly than drop-in tub installs in many cases. Conversely, if we’re converting a tub to a shower, we may incur demolition and waterproofing expenses. Timeframes differ too, custom showers typically take longer due to tile work and waterproofing.

    Maintenance: Showers generally demand more frequent grout and glass cleaning: soap scum and mineral buildup show quickly on glass. Bathtubs, especially acrylic or enameled models, can scratch or chip but are easier to wipe down for quick use. From a durability standpoint, tile showers depend on proper waterproofing, if that fails, repairs are costly. Overall, the cheapest upfront option isn’t always the most economical over a decade: we recommend estimating lifecycle costs (materials, potential repairs, and cleaning) when deciding.

    How To Decide: A Room-By-Room Checklist

    Choosing room-by-room helps reconcile competing needs. We suggest a practical checklist to assess each bathroom and make targeted decisions rather than a one-size-fits-all approach.

    Primary bathroom (master): Prioritize your daily habits. If we love long soaks and have space, keep or add a freestanding tub alongside a separate walk-in shower for best-of-both-worlds luxury, this configuration scores highly with buyers in many markets. If space or budget is constrained, decide based on who primarily uses the room: couples who prefer showers should lean toward a high-end walk-in: those who prioritize relaxation should retain a tub.

    Secondary bathrooms (hall baths): These should serve family and guests. If the household includes young children or frequent pet baths, keep at least one tub. Otherwise, a stylish shower can save space and modernize the home.

    Guest and powder rooms: Skip tubs here. These spaces benefit most from compact, well-appointed fixtures and a clean, accessible layout.

    Small apartments and condos: Space efficiency is king. A walk-in shower typically maximizes usable space and visual openness, improving perceived square footage, often a decisive selling point.

    Aging-in-place areas: If we think long-term, parents moving in, future mobility issues, installing at least one curbless shower with grab bars and a bench is wise. Consider installing reinforced walls for future grab-bar placement even if we don’t add them immediately.

    Practical tip: Don’t make the decision in a vacuum, consider regional resale expectations. In family-heavy suburbs, a tub can be a checklist item for buyers: in urban rentals or luxury condos, a large walk-in shower may be more attractive.

    Conclusion

    There’s no universal winner in the walk-in showers vs bathtubs debate, only the right choice for a given home and household. If accessibility, modern aesthetics, and space efficiency top our priorities, a walk-in shower is often the smarter upgrade. If relaxation, family needs, or therapeutic bathing matter, a bathtub remains indispensable. Our recommendation: evaluate each bathroom individually, factor in resale expectations for your neighborhood, and balance upfront cost against long-term maintenance and lifestyle value. When possible, include at least one of each in the home plan: that flexibility appeals to the widest range of buyers and ensures our home serves us well today and into the future.

  • 20 Black and Orange Living Room Ideas That Make a Bold Statement

    Black and orange may seem like an unexpected pairing, but together they create a living room that feels dramatic, stylish, and full of personality. Black adds sophistication and depth, while orange brings warmth, energy, and vibrancy. Whether you prefer modern interiors, cozy spaces, or eclectic designs, this striking color combination can work beautifully in many different ways. Here are 20 fresh black and orange living room ideas to inspire your next makeover.

    1. Pair a Black Accent Wall with a Bright Orange Sofa

    A matte black accent wall instantly creates depth and drama in your living room. Place a bold orange sofa against it to create a stunning focal point that grabs attention. To soften the contrast, add cream-colored pillows, textured throws, or a neutral area rug that balances the strong color combination.

    2. Add an Orange and Black Geometric Rug

    A geometric rug featuring black and orange tones can anchor your entire living room design. This type of rug introduces texture, movement, and modern energy to the space. It works especially well under sleek furniture like black leather sofas or minimalist coffee tables.

    3. Use Orange Throw Pillows on Black Furniture

    If you want to keep the look subtle, start with orange throw pillows on black seating. This simple update instantly brightens the room while maintaining a polished appearance. Mixing different fabrics like velvet, linen, or knit textures can make the setup feel even more layered and inviting.

    4. Style Black Shelves with Orange Decor

    Black bookshelves become much more eye-catching when decorated with orange accessories. Try adding orange vases, candles, books, or ceramic pieces to create contrast against the dark shelving. This idea adds personality without overwhelming the room with too much color.

    5. Create an Orange Feature Wall with Black Frames

    An orange accent wall can instantly energize your living space. Decorate it with black-framed artwork or family photos to create a gallery-inspired look. The dark frames stand out beautifully against the warm background, giving the room a clean and contemporary feel.

    6. Install Black and Orange Striped Curtains

    Striped curtains in black and orange bring visual drama and height to your living room. Vertical stripes can make ceilings appear taller, while horizontal patterns help widen the space visually. Keep the surrounding decor simple so the curtains become the statement piece.

    7. Try a Black Ceiling with Warm Orange Accents

    Painting the ceiling black creates a cozy and moody atmosphere that feels sophisticated and unique. Balance the darker ceiling with orange decor such as lamps, cushions, or throw blankets. This combination keeps the room from feeling too heavy while still maintaining a dramatic style.

    8. Combine an Orange Velvet Sofa with Black Tables

    An orange velvet sofa adds luxury, softness, and richness to the room. Pair it with sleek black side tables or a black coffee table for a chic modern contrast. The mix of plush fabric and dark finishes creates a balanced and stylish interior.

    9. Highlight a Fireplace with Black and Orange Details

    Turn your fireplace into the center of attention by painting the surround black and adding orange tile, brick, or stone accents nearby. The black adds elegance, while the orange introduces warmth and personality that makes the room feel more welcoming.

    10. Display Orange Artwork on Dark Walls

    Large-scale orange artwork looks incredibly striking against black or charcoal walls. Abstract paintings, bold prints, or textured wall art can create a gallery-inspired atmosphere. This idea works especially well in modern living rooms that need a strong focal point.

    11. Layer an Orange Rug Under a Black Leather Sofa

    A black leather sofa can sometimes feel cold or overly sleek. An orange area rug underneath instantly softens the look and adds warmth to the room. This combination creates a balanced space that feels both sophisticated and comfortable.

    12. Add Orange Accent Chairs Beside a Black Coffee Table

    Orange accent chairs can energize a neutral living room without requiring a full redesign. Pair them with a black coffee table to ground the look and maintain balance. This setup is ideal if you want bold color while keeping the overall room elegant.

    13. Design a Black and Orange Gallery Wall

    Mix black and orange frames to create a playful and artistic gallery wall. Combine photographs, abstract art, mirrors, and typography prints for added dimension. This approach introduces color creatively while allowing you to personalize the space.

    14. Use Orange Lighting Fixtures with Black Details

    Pendant lights, table lamps, or floor lamps in orange tones can warm up the room beautifully. Black metal finishes or black lamp bases help tie the design together and add a touch of industrial sophistication. The lighting itself becomes part of the decor.

    15. Install Black and Orange Abstract Wallpaper

    Abstract wallpaper featuring black and orange patterns instantly transforms a plain living room into a bold designer-inspired space. To avoid visual overload, pair it with simple furniture in neutral or dark tones so the walls remain the main attraction.

    16. Brighten Black Leather Furniture with Orange Cushions

    Orange cushions are an easy way to refresh black leather seating. The bright color softens the furniture’s darker appearance and adds a more welcoming feel. You can also switch out the cushions seasonally for an easy room update.

    17. Layer Orange Throws on Black Accent Chairs

    Drape soft orange throws over black accent chairs to create a cozy and stylish setup. The vibrant fabric introduces warmth and texture while making the seating area feel more relaxed and inviting.

    18. Mix in Orange and Black Patterned Cushions

    Patterned cushions featuring geometric, floral, or abstract designs can bring extra personality to your living room. Mixing prints with solid-colored furniture keeps the room visually dynamic without looking cluttered.

    19. Organize with Orange Baskets on Black Shelving

    Black shelving paired with orange woven baskets combines practicality with style. The baskets add warmth and color while providing useful storage for blankets, books, or everyday items. This idea works especially well in smaller living rooms that need functional decor.

    20. Decorate with Orange and Black Floral Curtains

    Floral curtains in orange and black soften the overall design while still maintaining a bold color palette. The floral patterns add movement and elegance, making the room feel lively yet balanced. Pair them with neutral furniture for a polished finish.